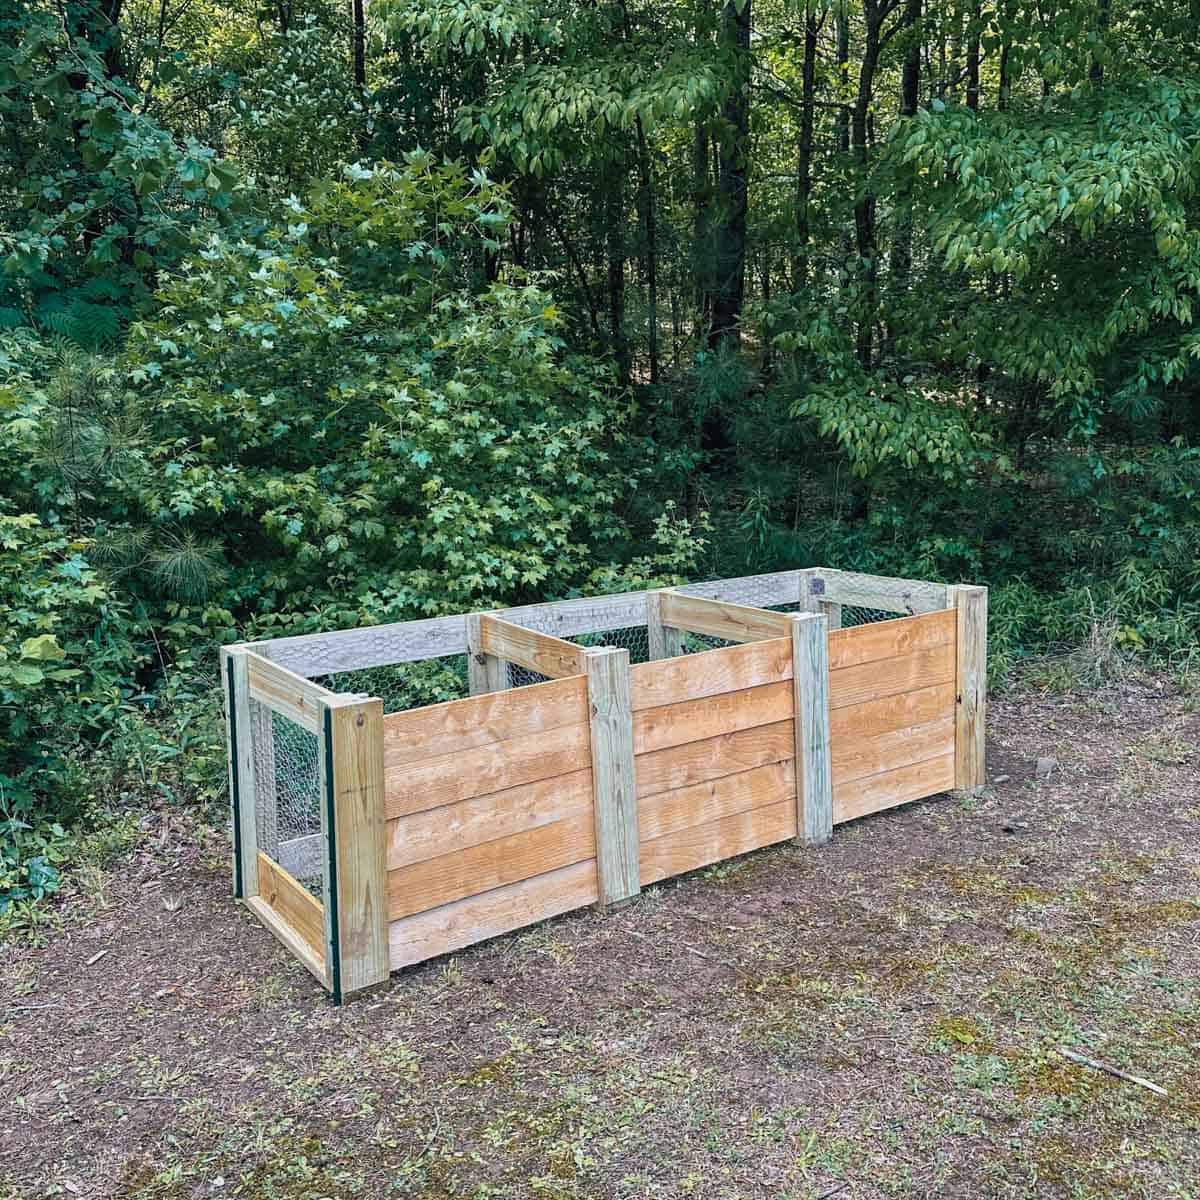
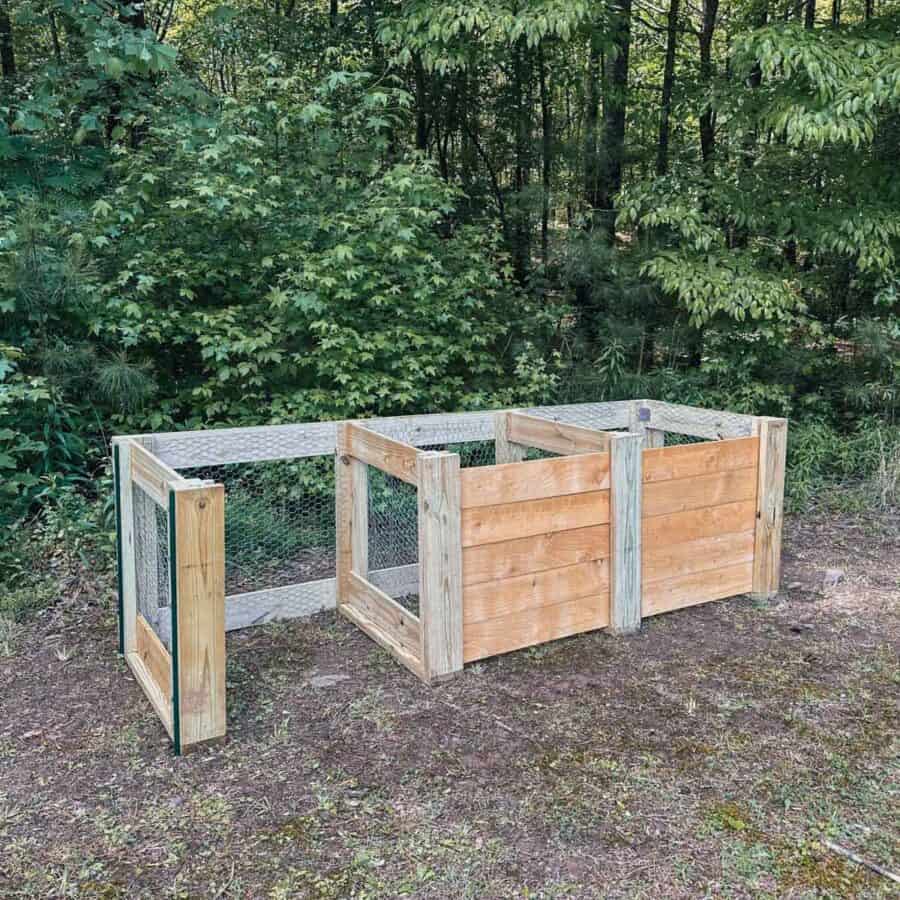
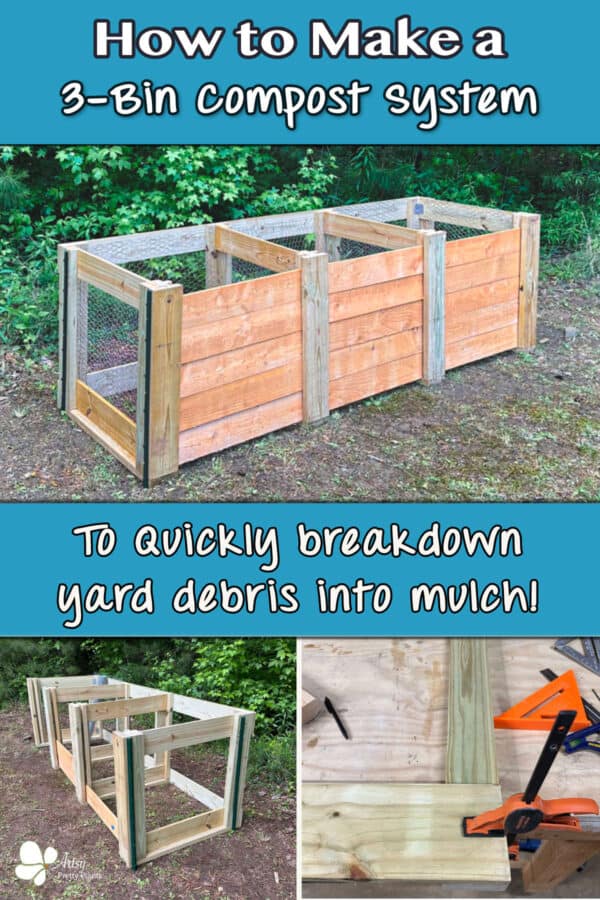
DIY Wire & Wood Compost Bins (3 Units for Fast Composting!)
Create your own wood and wire compost bins to reduce excess yard debris while producing free mulch with this handy three-unit system!
If you have an unruly yard and need a way to eliminate your yard debris, then composting it is a fantastic solution. Not only does it eliminate unsightly piles, but it also provides you with your own homegrown mulch –practically on demand!
DIY DIFFICULTY LEVEL | Moderate
How Do You Use A Three-Bin Compost System?
Yard debris breaks down the fastest when mixed at a 2:1 or 3:1 ratio of brown to green. Browns are anything brown, like branches, twigs, dead leaves, and dried grass. Green is fresh grass, green leaves, and weeds before they have died. For more information on composting weeds, refer to this article.
So to start, you’ll fill the first bin with the appropriate mix of browns and greens. Turn the debris in the bin after adding it. Once the material inside has been reduced by half, you will move the debris from this compartment to the 2nd one. It’s easiest to just start with the top layer and work your way down.
Now you can use the first bin to start a fresh batch. For the second one, let the remaining debris reduce by half again. At this point, it should resemble mulch. Move this to the third bin.
This third compartment is where you store the mulch that you can now spread onto your garden or areas where you want to tame weeds. If you’ve got your ratios correct, the yard debris should take approximately 3-5 months on average to break down into usable mulch.
You may be wondering where the best place is to put a compost bin. Sun or shade? Location makes a difference.
Are you ready to get started? Below is a detailed tutorial to help you create your three-bin system.
Some of the links on this page have been provided as a convenience for finding materials. These links may also be affiliate links. As an Amazon Associate I earn from qualifying purchases, at no extra cost to you.
I only recommend products I’ve used and loved, unless otherwise stated. Click here to read my full disclosure policy.
List Of Materials For A Three Unit Compost Bin
- Flat-head deck screws #8, 1 ¼”
- Flat-head deck screws #8, 1 ⅝”
- Flat-head deck screws #9, 2 ½”
- Simpson Strong Tie bracket, 1½” x 1⅜” x 2”
- Steel post 4′
- 1″ Wire mesh netting
- Pine and Cedar lumber (see below)
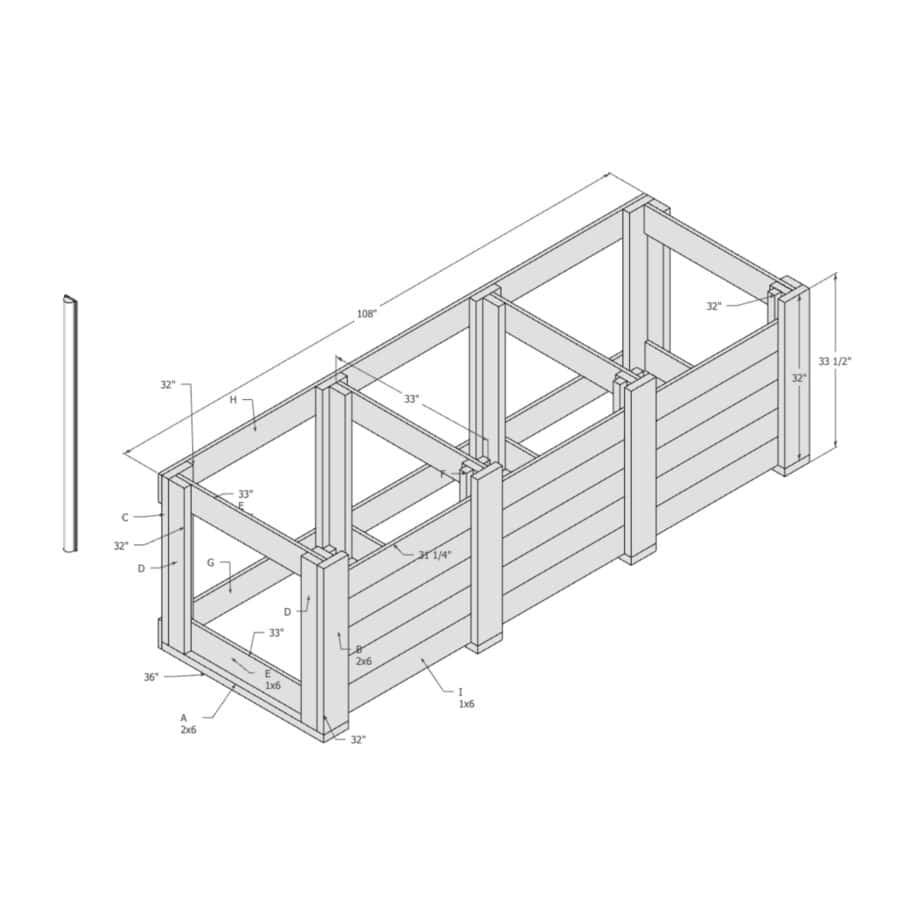
Wood Boards and Cuts
Note: These cut lengths, in many cases, are sized just under rounded whole inches to avoid coming short when cutting boards. For example, when you cut three boards at 32” from one 96” board, you will come up slightly short due to the saw blade width on the last board cut. To avoid this, and to save on buying extra pieces of lumber, I have chosen lengths at 31 ¾” (for example).
2×6 Boards
A Leg Bases: (4) 35 ¾”
B, C Vertical Frame Supports: (8) 31 ¾”
2×4 Boards
D Legs: (10) 31 ¾”
1×6 Boards
E Horizontal leg supports (8) 32 ¾”
G Long back supports (2) 108”
2×2 Boards
F Slat holders (6) 31 ¾”
1×6 Fence Picket Boards (cut these later- during Step)
H Door planks (15) 31 ¼”
Steps For Making Wood & Wire Compost Bins
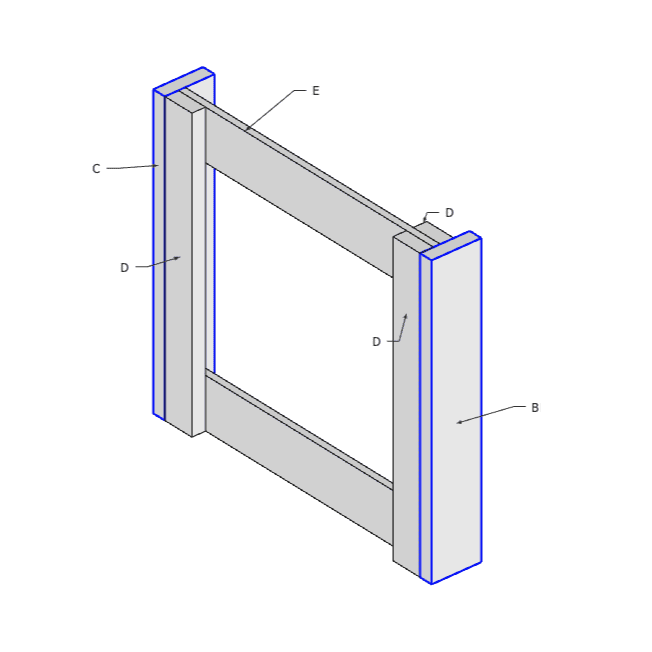
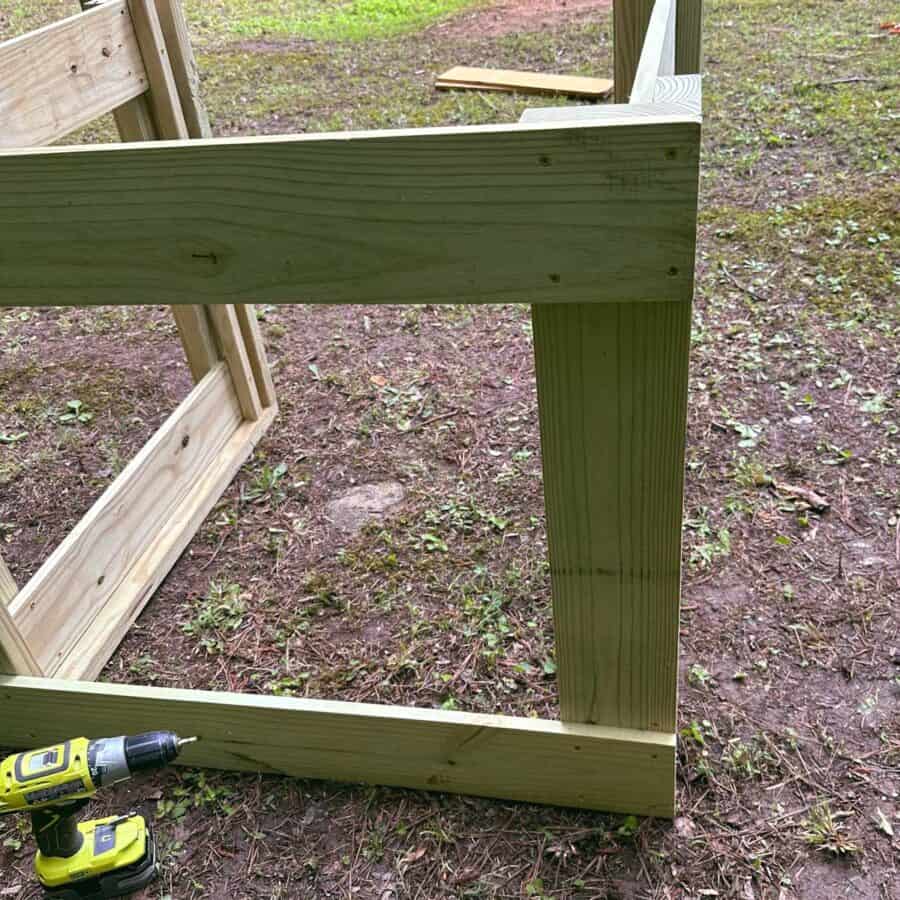
Step 1. Make The Frames For The Legs
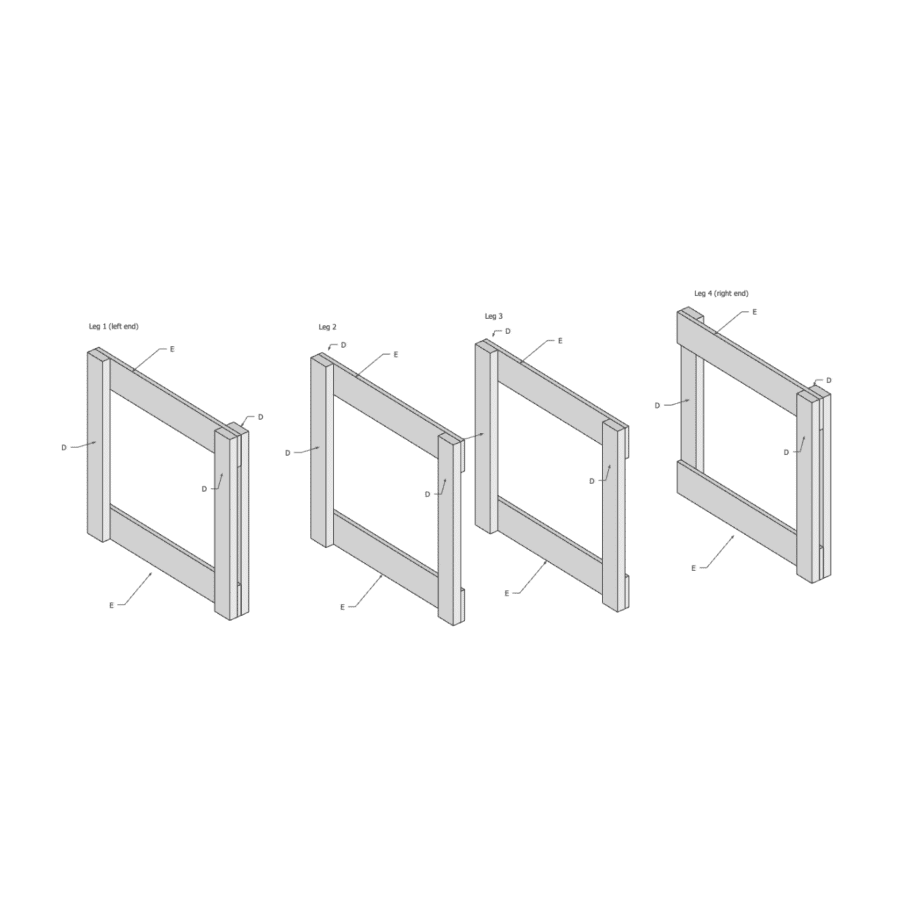
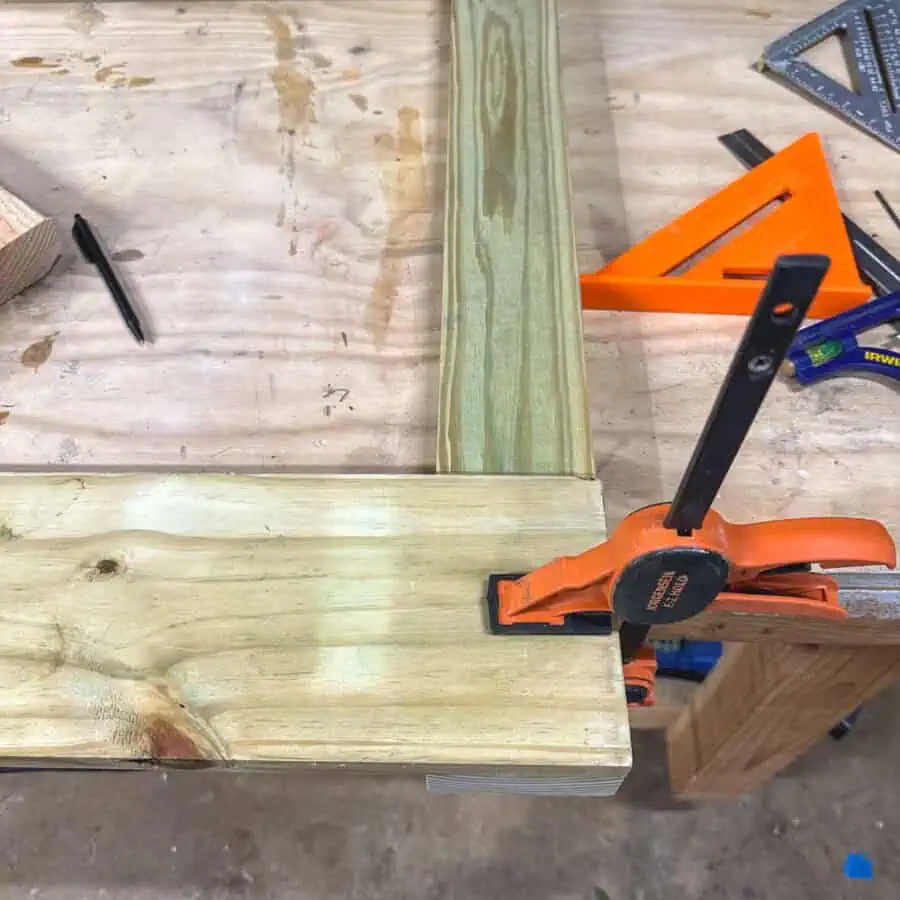
First, lay the horizontal frame supports (boards E) and the vertical supports (boards D) on your worktable and square all four corners with clamps.

Then using four 1 ⅜” screws at each corner, fasten the pieces together.
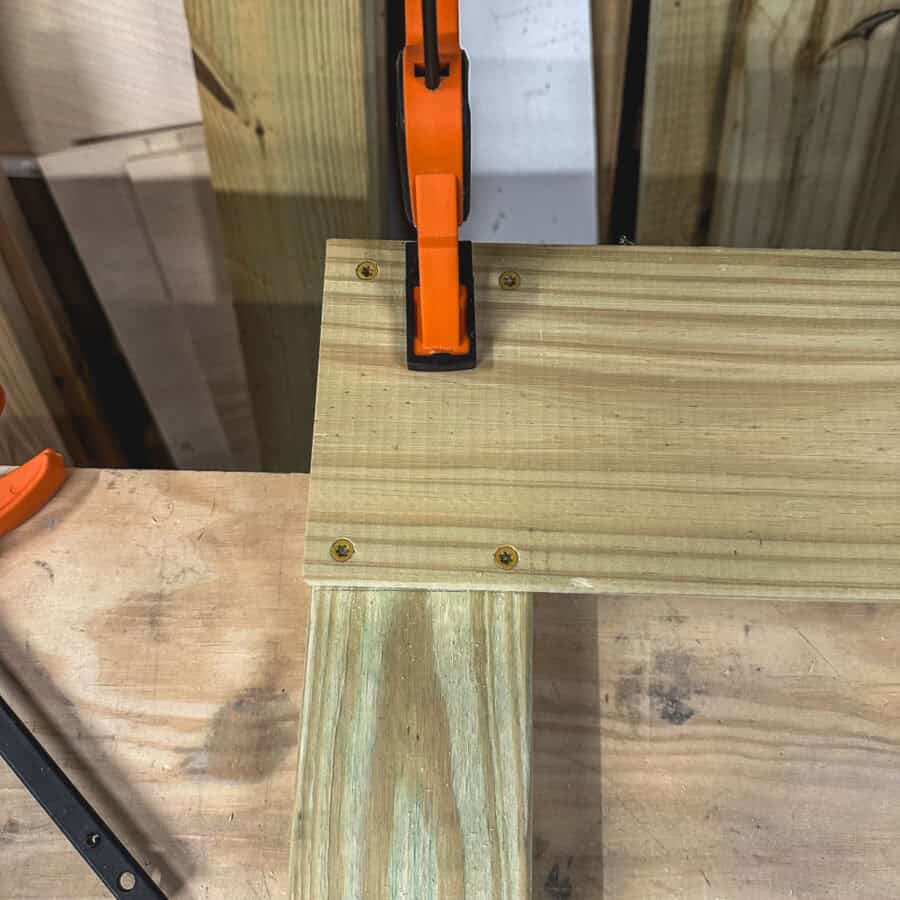
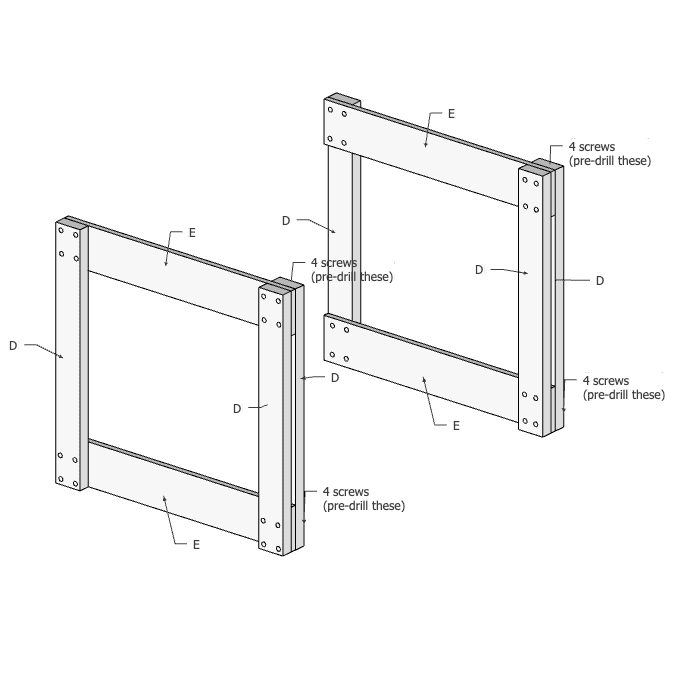
Repeat this for the two outer frame legs. Then, when finished, you will add an extra vertical support (board D).
They both get the vertical support added to the inside, front. Be sure to pre-drill these and use the 2 ½” screws.
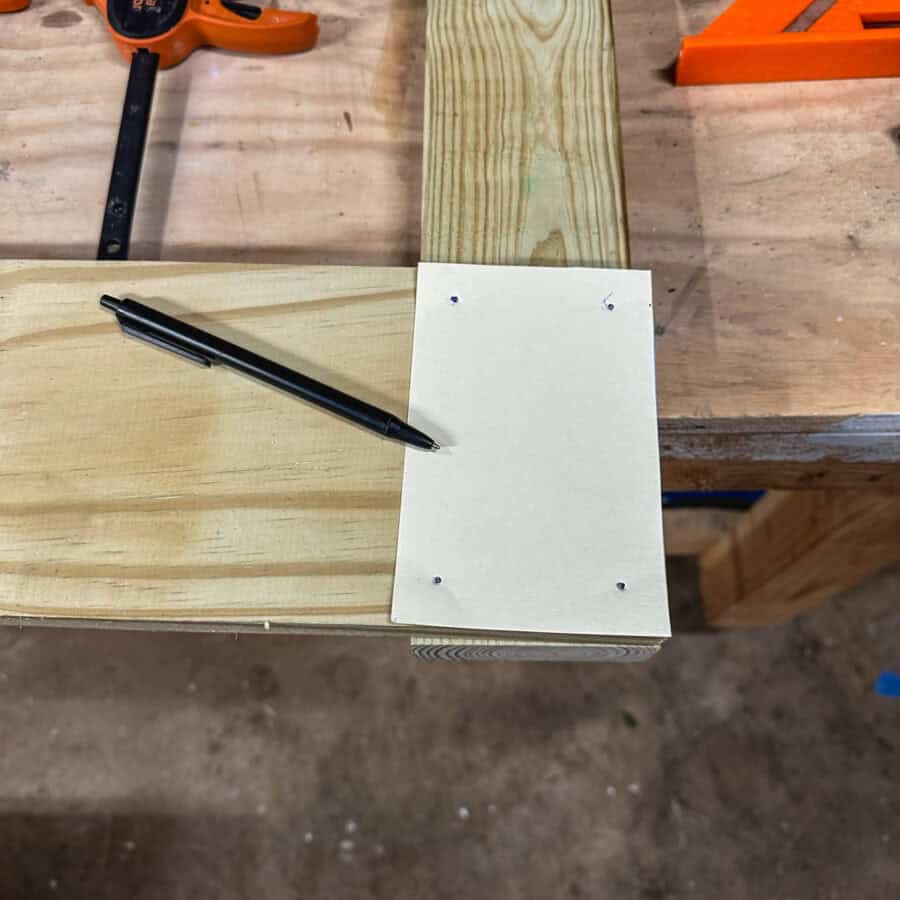
There were a lot of screws to drill. I found this went much faster by making a template for the holes.
When drilling the extra support legs for the outside frame legs, be sure to pre-drill them, and also ensure that you don’t screw into the exact spot where the other screws are already in the wood.
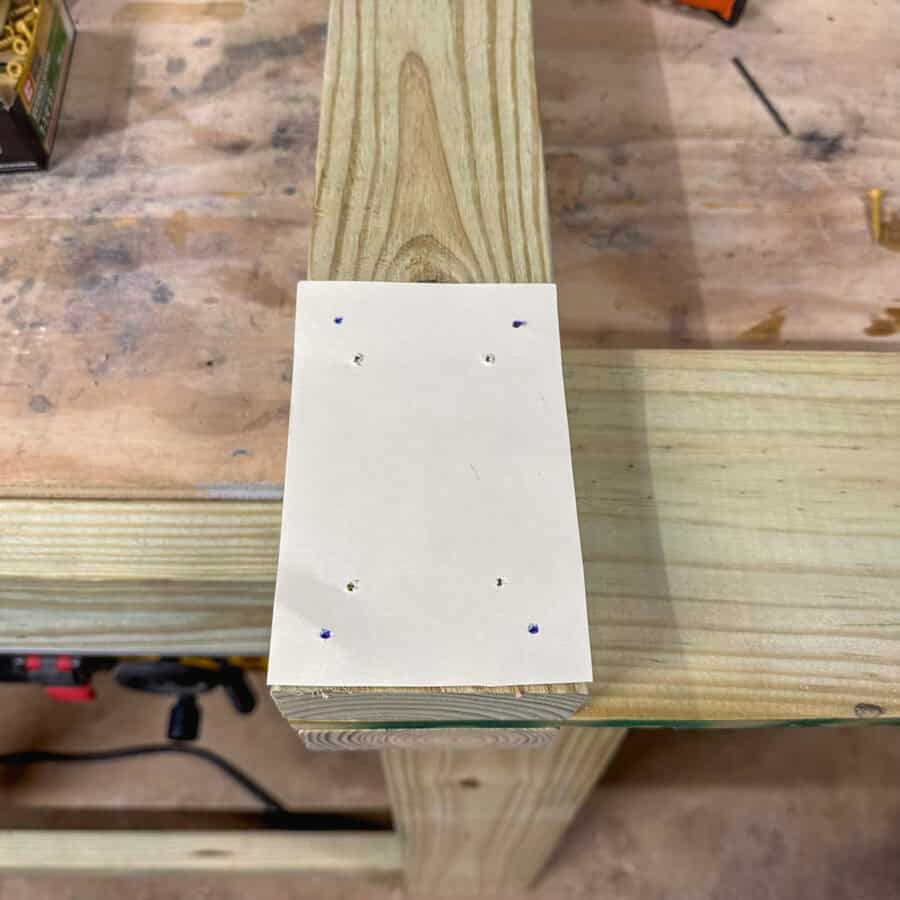
Again, using a template for this narrower screw position helps.
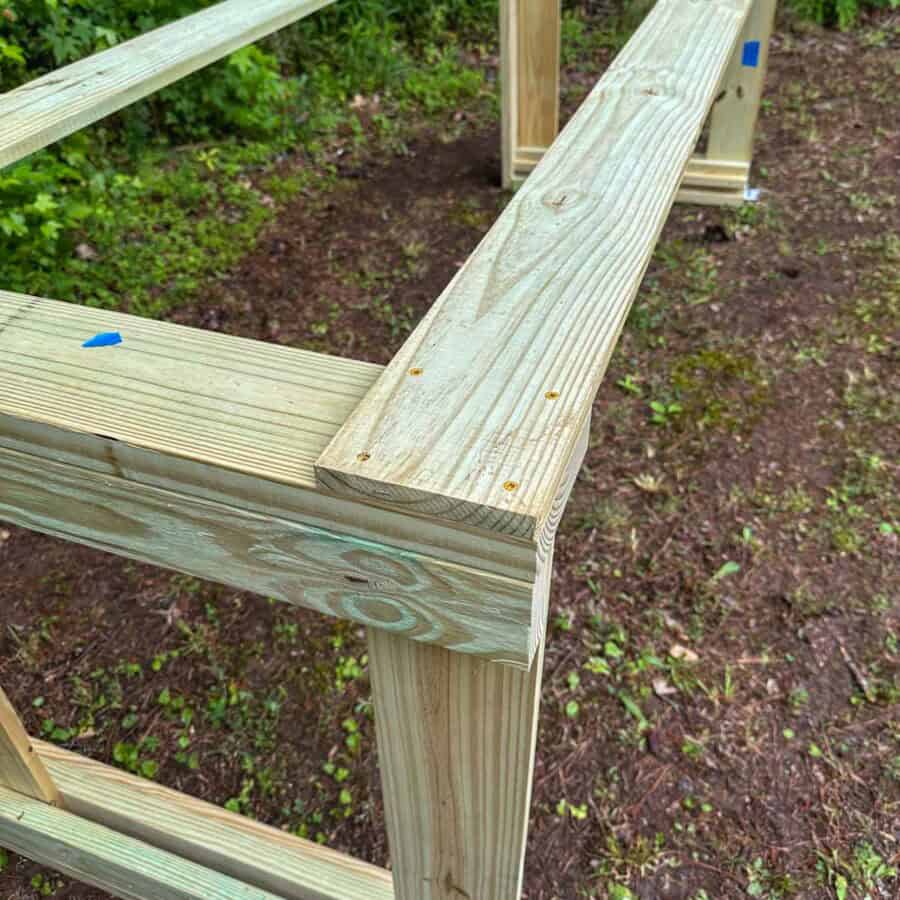
Step 2. Add The Fronts And Backs To The Legs
Using the 1 ⅝” screws, fasten the front and back vertical leg supports (B and C) for each frame.
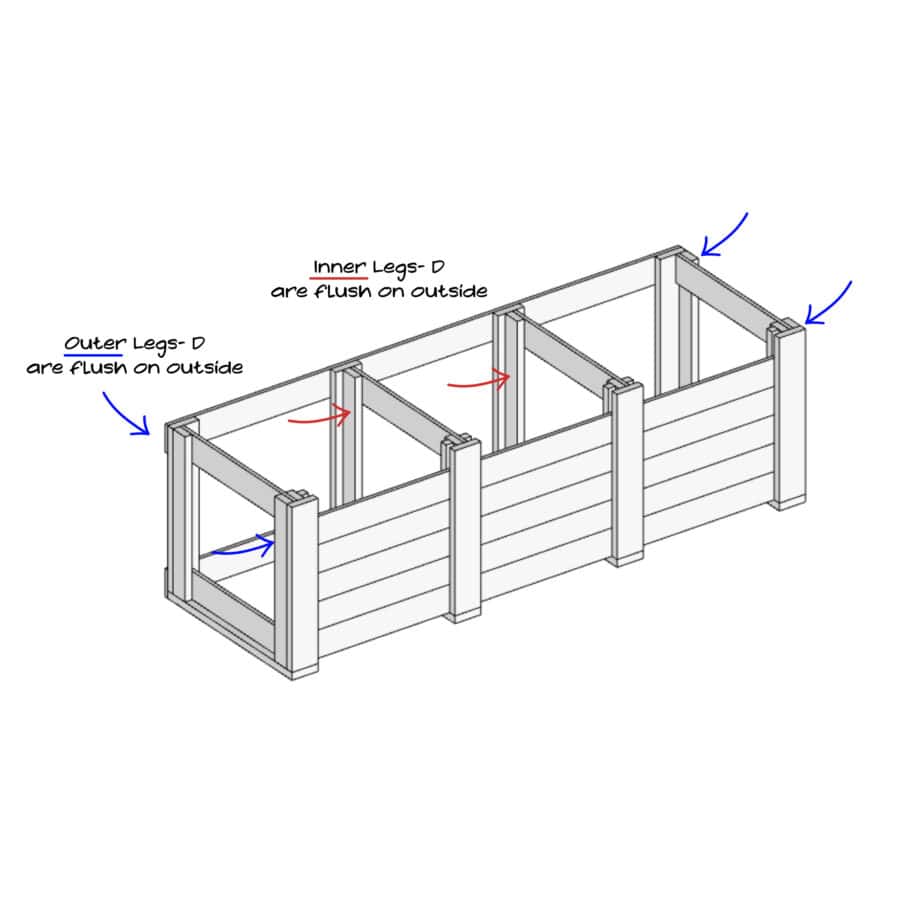
Please note that with the two outside ends, these pieces line up flush with the outer vertical supports (D). But the front and back supports for the two inner frame legs are not flush with the outer edge like the two outer frames, instead these line up in the center.
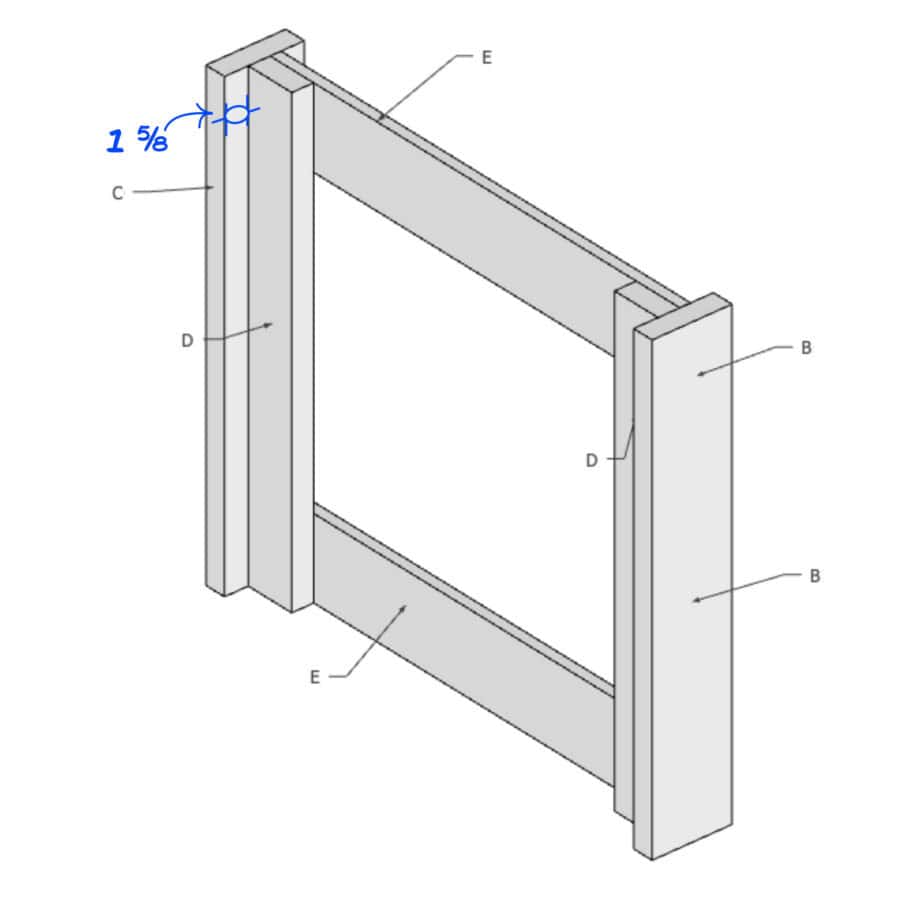
So measure 1 ⅝” from the edge of (B) and (C) to get your mark for where to align the side of the leg. This leaves 1 ⅝” on each side.
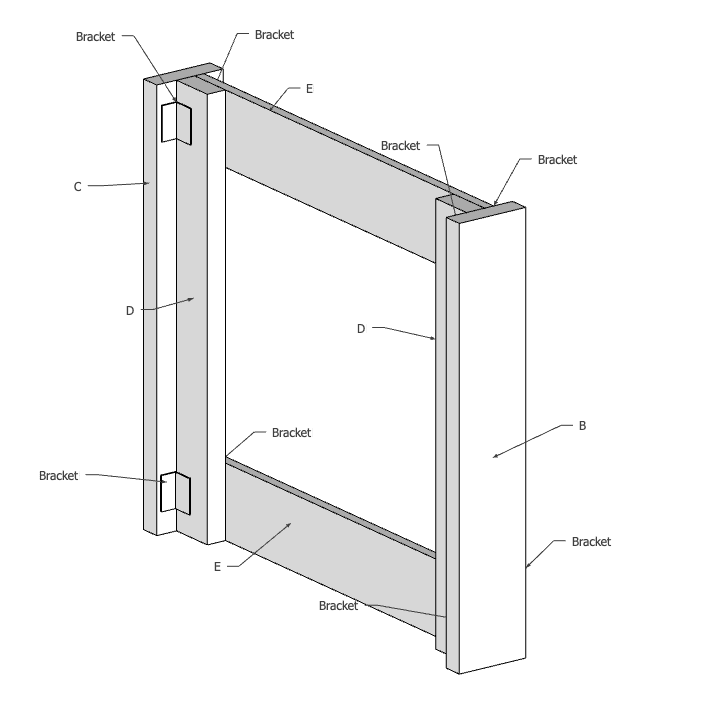
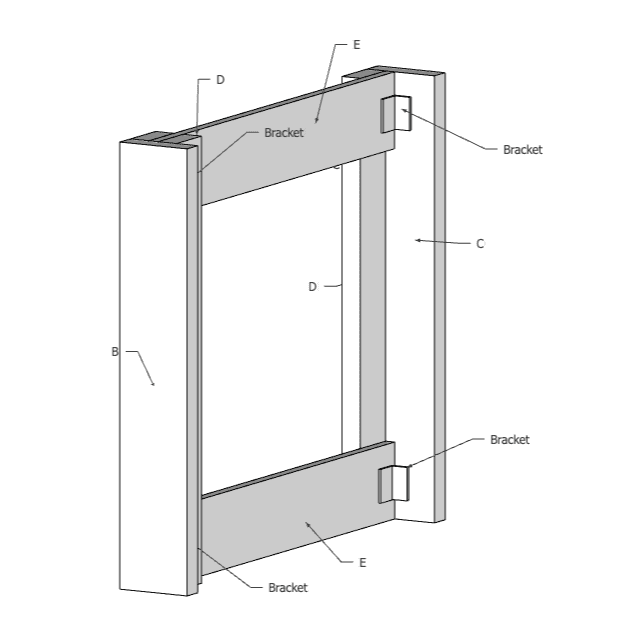
Now add four brackets inside to the outer legs, securing the horizontal boards (E) to the (B and C) boards. Do the same to the inner legs, except these get four on each side.
Step 3. Fasten The Feet To The Legs
Garden Planner!
Printable PDF Download
$2.99
Everything you need to plan your garden.


This will subscribe you to my newsletter where you’ll get updated when I have a new post, or tips and tricks. You are free unsubscribe at anytime.
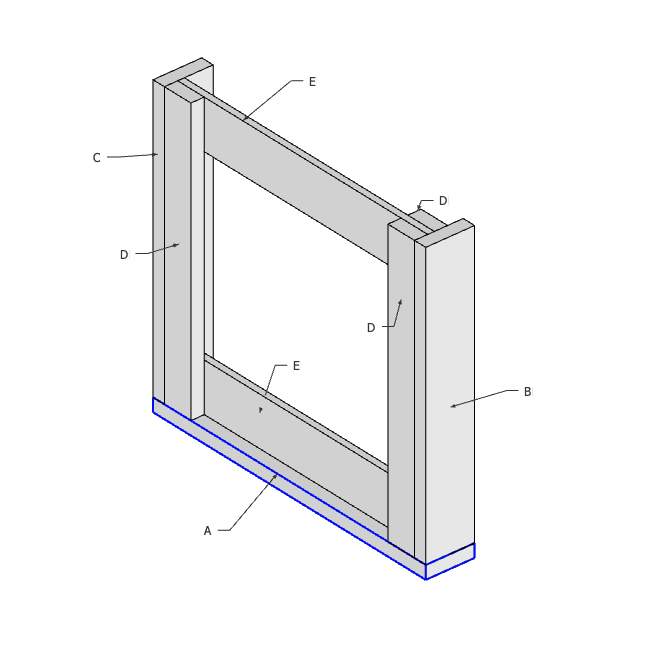
Screw the bottom of each frame (A) into the legs.
Step 4. Add The Slat Supports
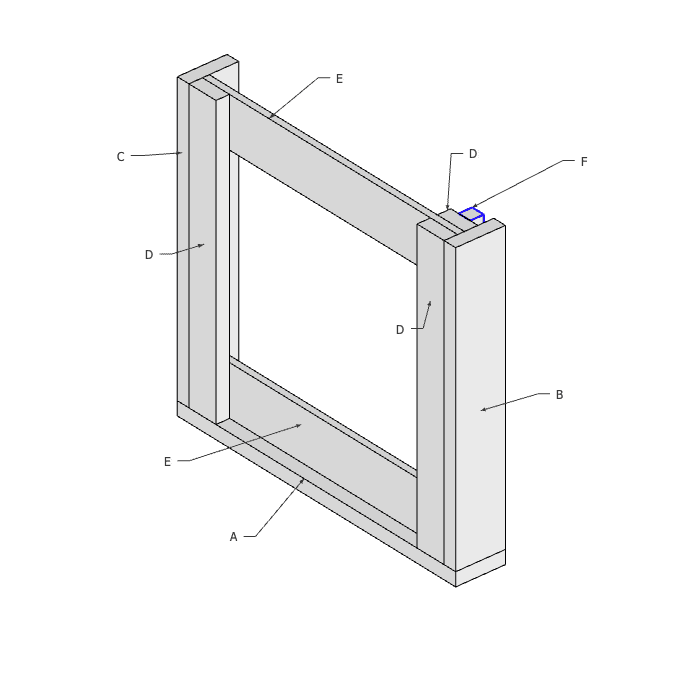
Now use the 1 ⅝” screws to add the slat holders. this is the piece that supports the back side of the removable door slats (F). Place this about an inch back from the front support.
The thickness of the slats is approximately ¾”, but the 1” spacing should allow for some warping of the slats over time and also enable them to slide easily up and down.
If any of your 1×6 boards that are being used for door slats are especially warped, you may need to allow for more than 1” space.
- Note: You will complete the remaining steps on site where you will be permanently keeping your compost bins.
Step 5. Fasten The Compost Bins Backs To The Frames
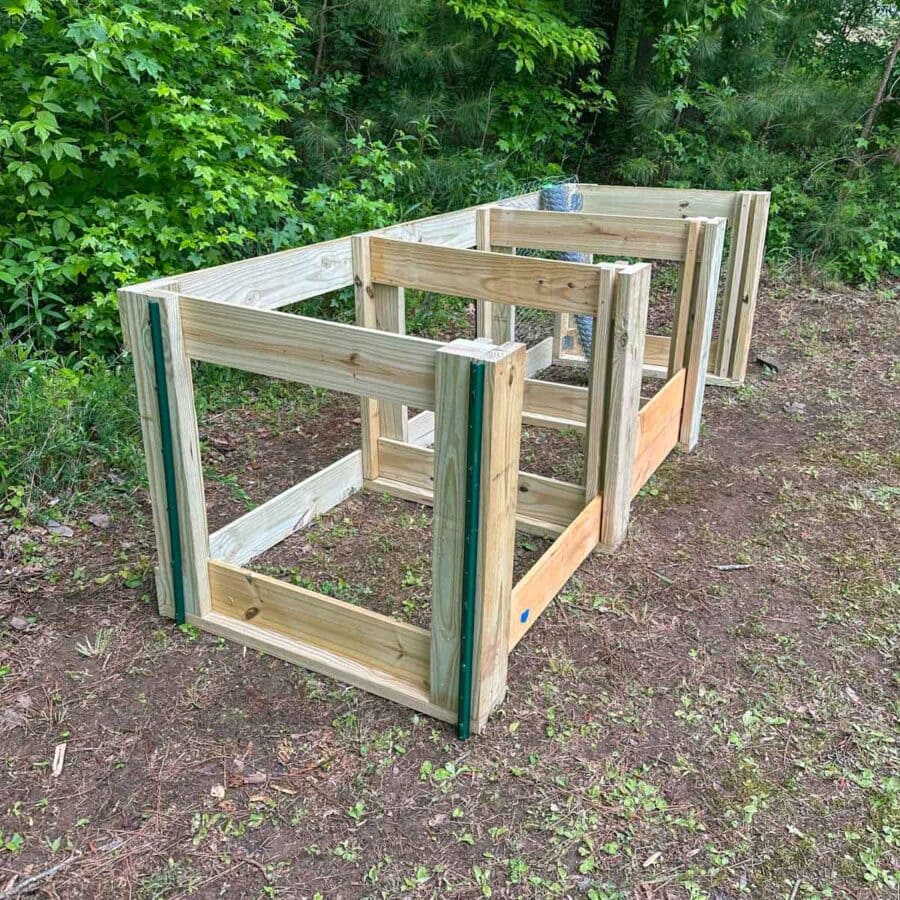
Position the outer ends so their outside edges are 108” apart and turn them on their sides so the backside is facing up, making it easier for you to work on.
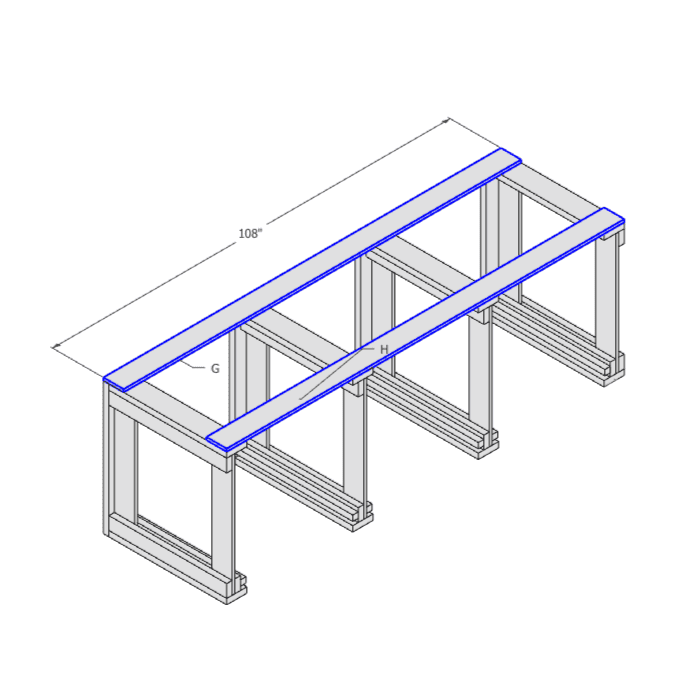
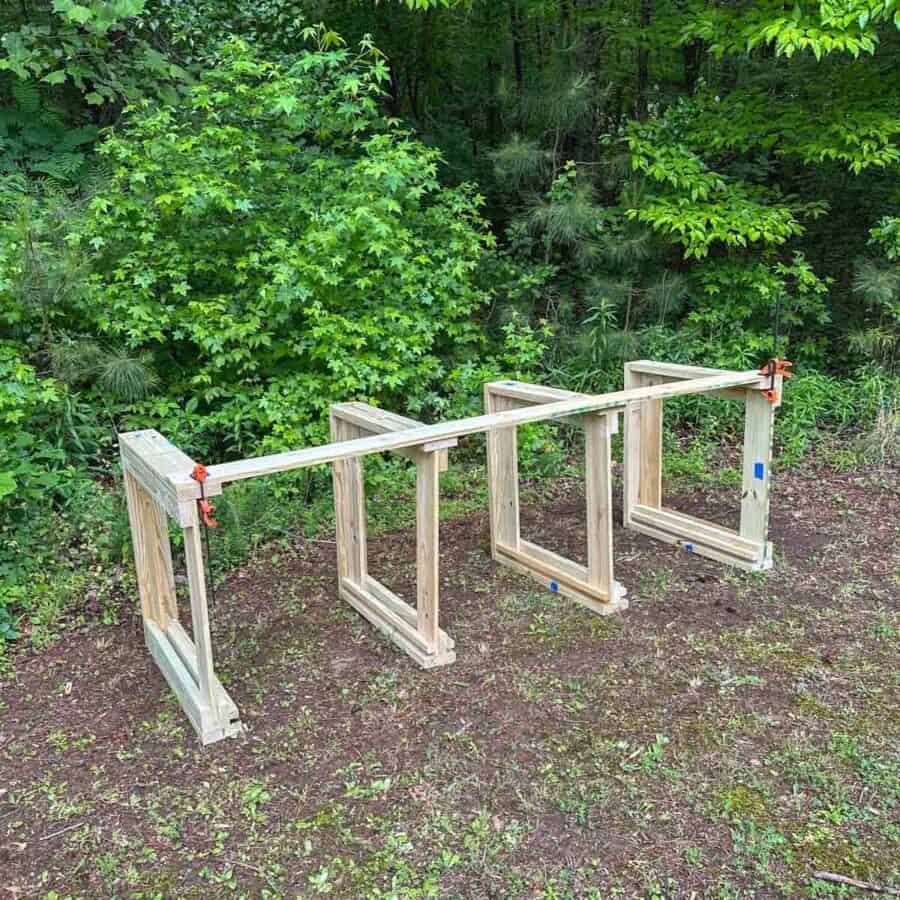
I placed the inner legs underneath as placeholders while doing this just to provide extra support to hold the long boards while fastening them into place. They do not need to spaced evenly at this step.
Now take the 108” (G) boards and clamp them to the back horizontal supports (C).
Screw the ends to the back supports using the 1 ⅝” screws. I used four to join each location.
Now flip the unit back up into its regular position, facing right side up.
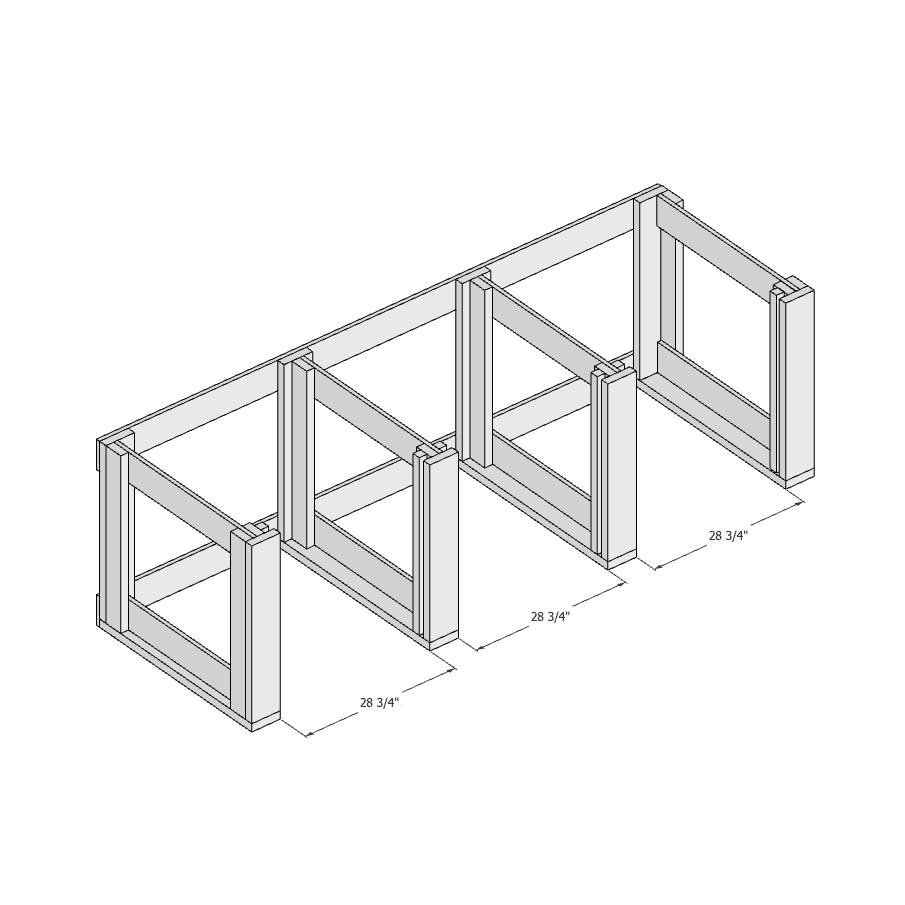
Position each inner leg 28 ¾” from each outside leg and clamp them to the back boards (G). these dimensions may vary slightly.
If they are not the exact same dimension for each unit, it is okay, but be sure to compensate when you cut your door slats to size. I believe one of my bins was off by a ¼”.
Step 6. Secure The Compost Bins To The Ground
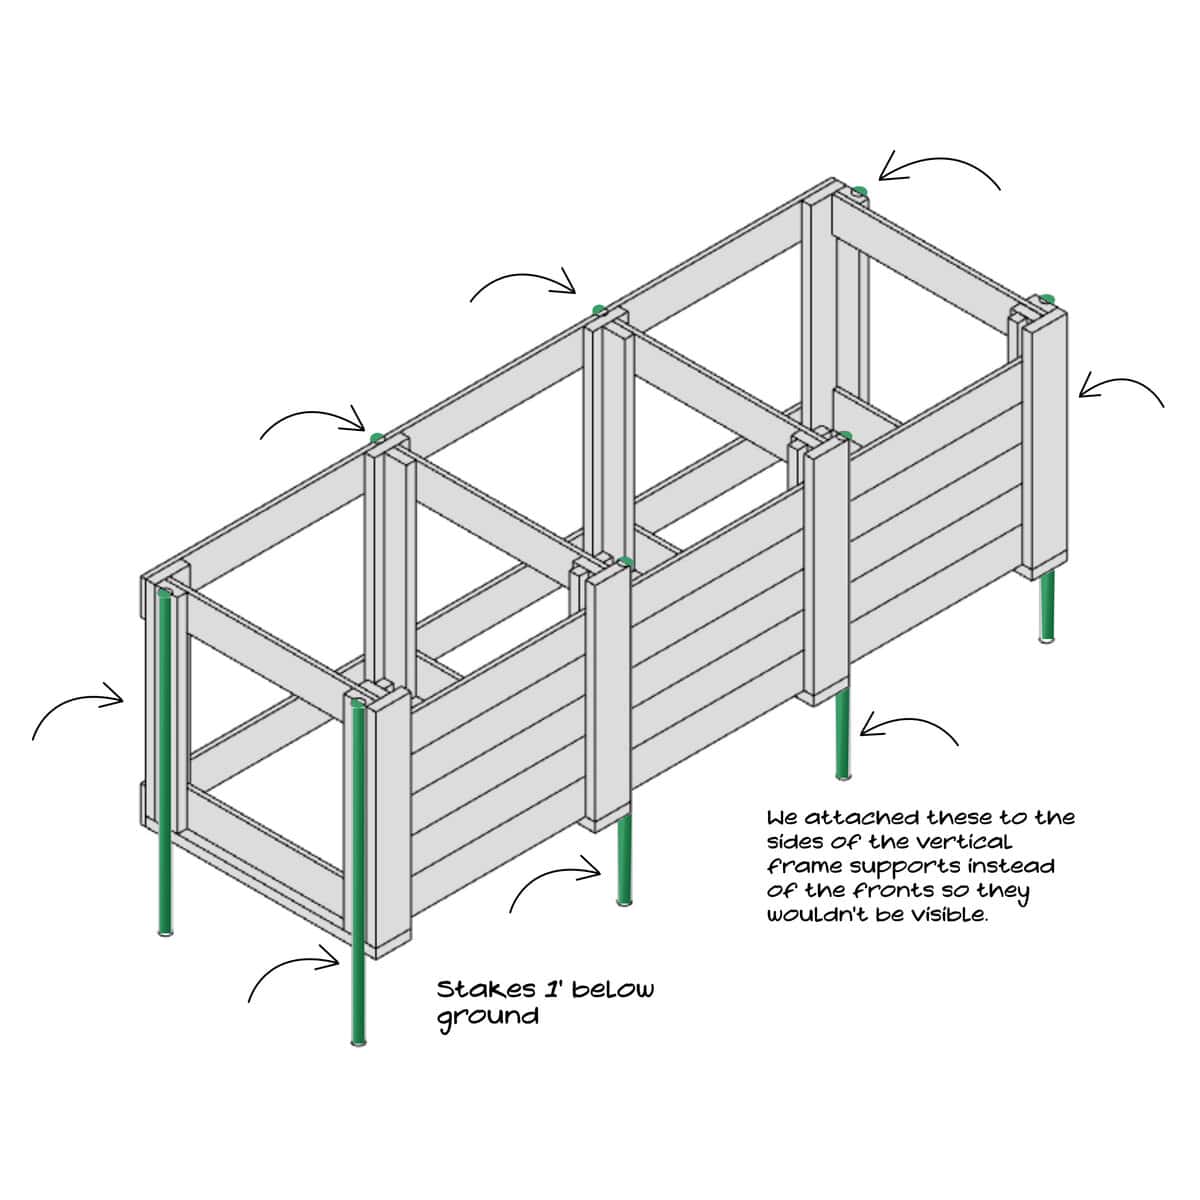
Raise the bins upright, and then use eight fence rail posts to secure them to the ground. Four will go at each outside corner where the 2x4s are (D), two at the back against each middle leg, and two at the front at each leg (vertical frame support).
I recommend securing the bin unit to the ground before cutting your door planks. The reason for this is that the openings may shift slightly based on how the posts are placed into the ground.
You also don’t want to be locked into fixed sizes if you have already cut the slats for the bins’ doors.
Your sides may be out of square at the top. If they aren’t straight and square, your front door slats won’t fit correctly.
However, affixing the compost bin unit to the ground can help straighten the legs. Just be mindful of which way you need the side legs to pull, and consider adding the post to that side.
If it’s leaning to the right, place the post on the left to push it to the right.

*Because our compost unit is visible from some of the windows inside the house, I was opposed to putting fence posts on the front, which is ideal.
If aesthetics don’t matter and yours aren’t leaning, you can fasten your posts to the faces of the 1×6’s.
To set the posts into the ground, use a mallet to drive them in. I used a piece of two by four between my mallet and the post since the mallet is rubber.
Bang it in so the post is set just below flush with the top of the bins, and then screw the posts to the 2x4s using the 1 ¼” screws.
Step 7. Measure And Cut The Bin’s Slats
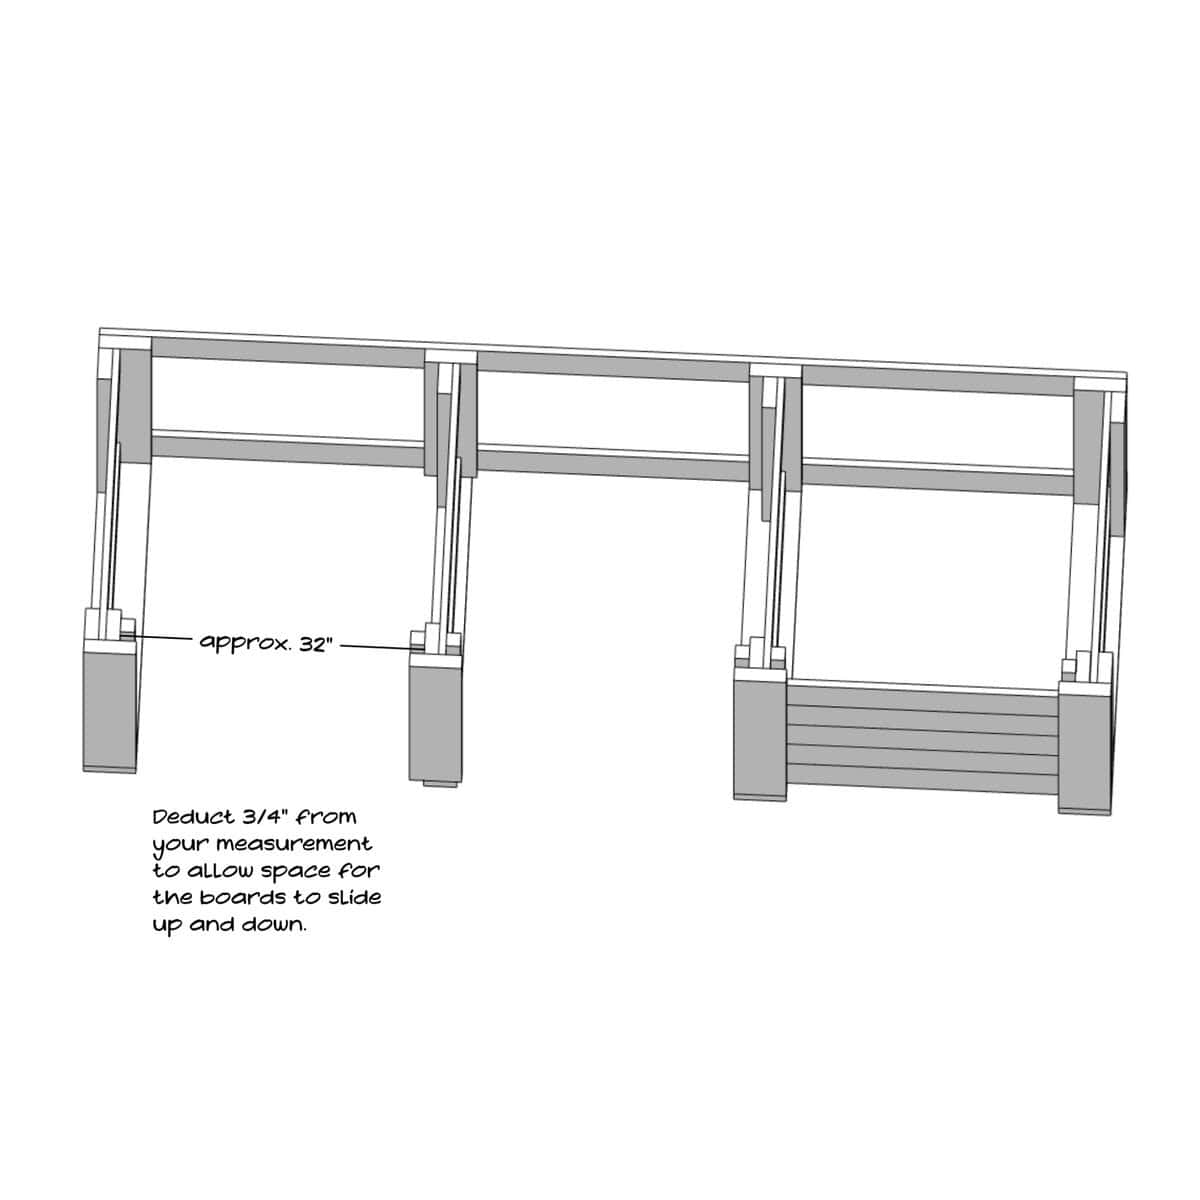
Measure the distance between each bin where the slats go. It should be about 32” or just under.
If you want to make the distance completely even, you can adjust the legs; otherwise, it’s probably easier to cut five boards per bin to the desired length.
Deduct approximately a total of ¾” for each measurement to allow for the slats to move up and down easily in the space.
For instance, if your space for the bin slats is 32”, then cut the slat boards at 31 ¼”. If your bin slat spaces are 31 ¾”, cut them at 31”.
* But before cutting all the boards, I recommend testing a slat for each bin, and if they comfortably slide up and down within the space and don’t come close to falling out, then go ahead and finish the rest of your cuts.
Step 8. Fasten The Wire Mesh To The Bin Compartments
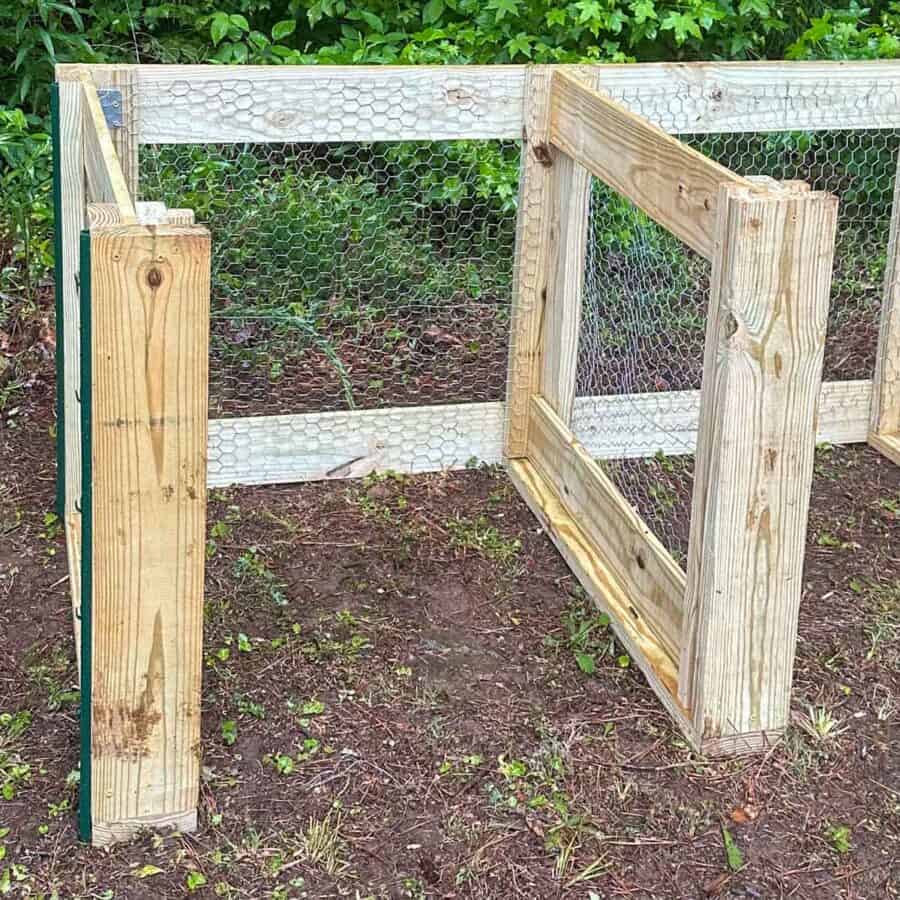

Remove the slats and attach the wire mesh netting to each compost compartment. Staple it to the inside corners and both the top and bottom of each side.
When finished, place the slats back into the bin compartment slots. Now your compost bins are ready for use with your yard debris.
Are you looking for more in-depth information on composting? Then take a look at this article on whether wood chips are good for compost and this one on the difference between compost and topsoil.
Don’t forget to Pin it for later!
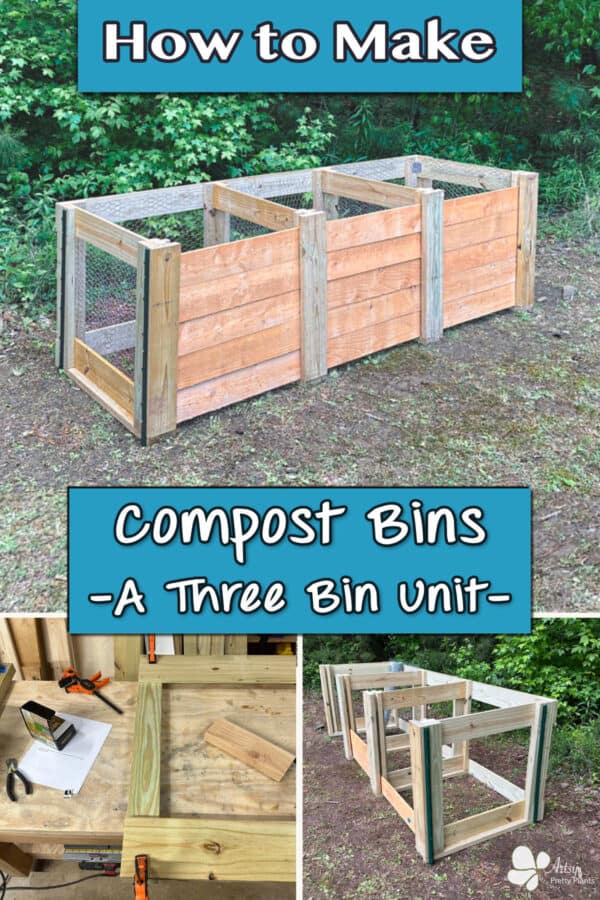
How To Make a Wood And Wire Compost Bin
Make a wood and wire compost bin 3-unit system to efficiently and quickly break down yard debris. And create your own free mulch!
Materials
- Flat-head deck screws #8, 1 ¼”
- Flat-head deck screws #8, 1 ⅝”
- Flat-head deck screws #9, 2 ½”
- Simpson Strong Tie bracket, 1½” x 1⅜” x 2”
- Steel post 4′
- 1″ Wire mesh netting
- Pine and Cedar lumber (see below)
Tools
- 2x6 Boards
- A Leg Bases: (4) 35 ¾”
- B, C Vertical Frame Supports: (10) 31 ¾”
- 2x4 Boards
- D Legs: (8) 31 ¾”
- 1x6 Boards
- E Horizontal leg supports (8) 32 ¾”
- G Long back supports (2) 108”
- 2x2 Boards
- F Slat holders (6) 31 ¾”
- 1x6 Fence Picket Boards (cut these later- during Step)
- H Door planks (15) 31 ¼”
Instructions
- Assemble the horizontal and vertical frame supports using screws, then add extra vertical supports to the outer frame legs.
- Fasten the front and back vertical leg supports to each frame, aligning them either flush with the outer supports or centered depending on the leg.
- Screw the bottom base of each frame into the legs to secure them.
- Add side pieces to support the removable slats, placing them about an inch back from the front support to allow for easy movement.
- Position the outer ends of the frames, clamp the long back support boards to them, and screw them in place before attaching the inner legs to the back boards.
- Raise the bins upright and use fence rail posts to secure them to the ground at various points, driving the posts in and screwing them to the wood.
- Measure the distance for the slats in each bin and cut the fence picket boards slightly shorter to allow for easy sliding, testing one slat before cutting the rest.
- Remove the slats, attach the wire mesh netting to the inside corners and top/bottom of each compartment using staples, then replace the slats.


I think the count of B/C vertical frame supports should be 8 instead of 10,
and the count of D legs should be 10 instead of 8.
Thank you Henry! You are right. I just edited the tutorial to reflects this. :0)