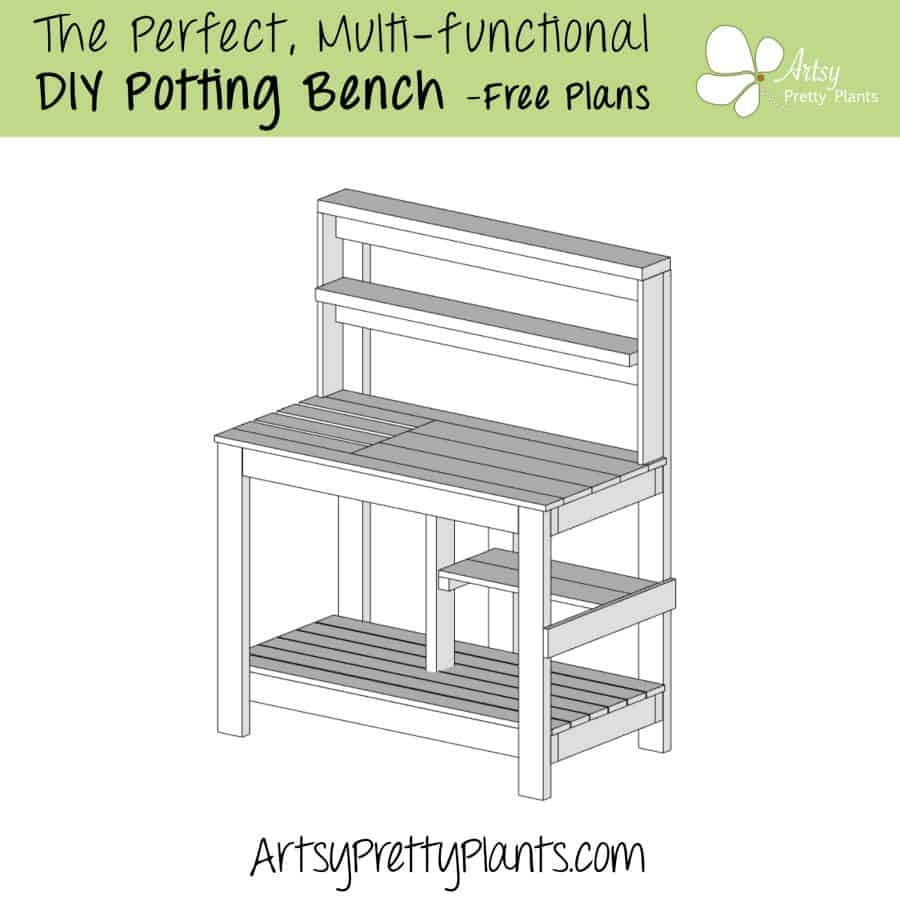
Make A DIY Potting Bench With Helpful Features (& Free Plans)
Here is a step-by-step potting bench tutorial (with free plans!) that will make your gardening experience a breeze!
DIY DIFFICULTY LEVEL | Moderate
Follow along with our easy instructions and create your very own multi-functional potting bench.
It’s time to make your gardening and potting work much easier. Make yourself a dream DIY potting bench.
It even comes with free plans so you can easily make your own bench.

I’ll walk you through the process with this detailed step-by-step tutorial.
I love gardening and surround myself with many indoor and outdoor plants. This means there’s lots of potting to do –always.
So I really needed a solution that allowed for easy access to my potting tools and a garden hose that wouldn’t break my back, give me easy clean up, plenty of storage area for soil, and lots of pots.
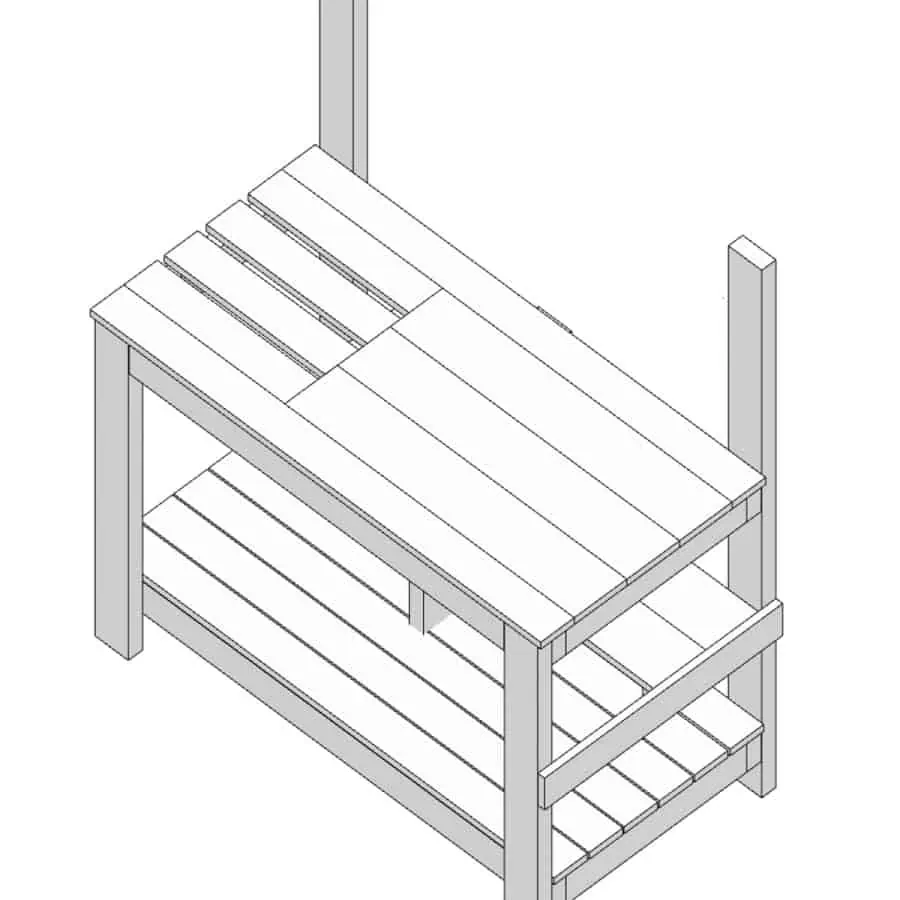
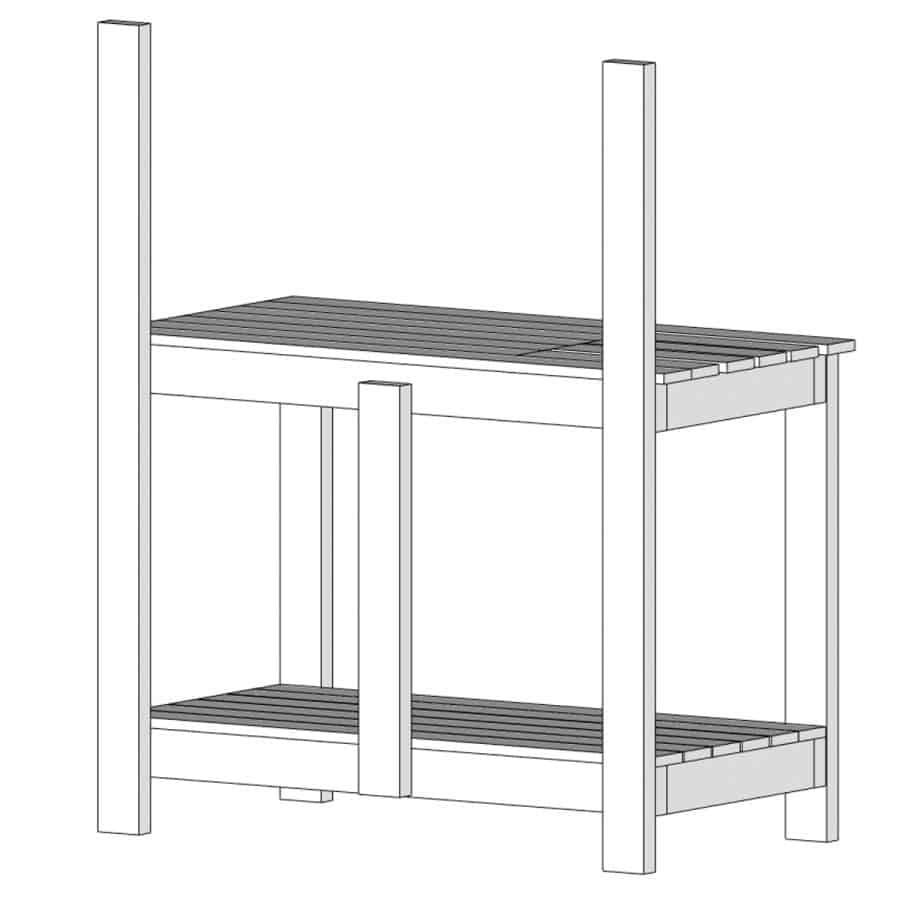
The DIY Potting Bench Design
Many potting benches are made just with 2x4s. I wanted shelves and a work surface that was more refined looking, which is why I opted for also using 1x6s and 1x4s.
Why did I get both 1x4s and 1x6s? The math worked out better by mixing the two.
This gave me the correct spacing for the area where the soil drops into the bin and correctly fits into the dimensions between the legs.
Features Included
Here are some other related outdoor DIY projects, this cinder block bench and an indoor/outdoor plant stand.
Some of the links on this page have been provided as a convenience for finding materials. These links may also be affiliate links. As an Amazon Associate I earn from qualifying purchases, at no extra cost to you.
I only recommend products I’ve used and loved, unless otherwise stated. Click here to read my full disclosure policy.
See the free plans at the bottom of the tutorial.
Potting Bench Materials List
All wood should be pressure-treated pine*
- (8) 2×4 – 8 foot
- (1) 2×6 – 8 foot
- (4) 1×4 – 8 foot
- (1) 1×4 – 12 foot*
- (1) 1×6 – 12 foot*
- (1) 2×6 – 8 foot
- (1) 2×2 – square baluster 36”
- Tape measure
- Framing square
- Small level
- Exterior screws 1 ¼” #8
- 2 ½” framing screws
- Wood screws 1 ¾” #10 (4 pack)
- Orbital sander
- 100 and 220 grit sandpaper
- Soil bin
- Soil bin lid
- Hanging hooks (black)*
Optional
- Wood stain
- Polyurethane top coat
- 3” foam brushes
- Cotton rags
- Lint-free cloths
Materials Note:
You might be wondering what the best material for a potting bench is, and that will depend on what region of the country you live in.
For instance, cedar is a wonderful, rot-resistant wood and is one of the best wood types to use. However, I’m on the east coast, where using cedar is cost-prohibitive.
On the west coast, it’s the perfect choice. My east coast friends, the best option is pressure-treated southern pine.
*You can substitute cedar boards and cedar fence pickets for the pressure treated pine if cedar is available in your area.
*You can have the 12 foot board cut to 65” in the big box store so it will fit in your car. This won’t get in the way of any cuts.
*The black hanging hooks wouldn’t fit my hand spade or hand hoe. They needed straight hooks so I used bathrobe-type hanging hooks and turned them upside down.
DIY Potting Bench Cut List
2x4s
(2) Legs: Front leg one piece at 35”, and Back leg one piece at 58”
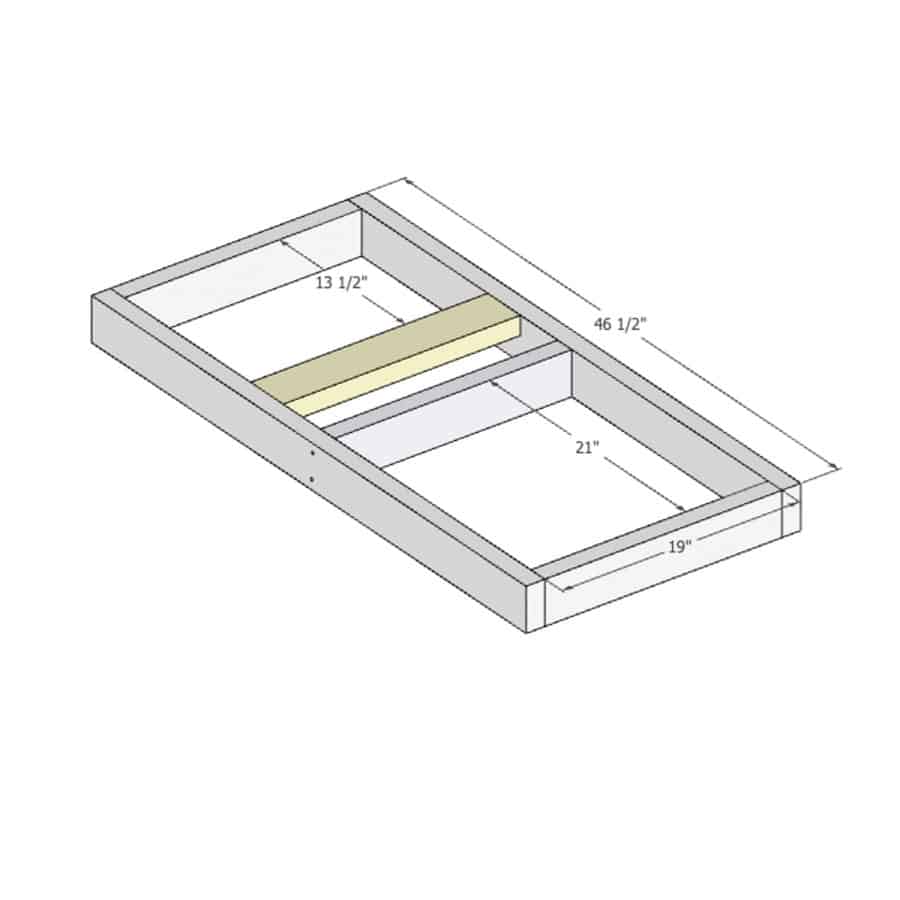
(1) Top frame: one Long side at 46 ½” and two Short sides (rails) at 19”
(1) Top frame: one Long side at 46 ½”, one Center support at 19”, and Countertop slat support at 19”
(1) Bottom frame: one Long side at 46 ½”, one Short side at 19”, and Half shelf
support at 29 ½”
(1) Bottom frame: one Long side at 46 ½”, one Short side at 19”, and Half shelf
support at 29 ½”
(1) Bottom frame: one Center support at 19”, and Front bib 39 ½”
(1) Top Shelf Supports: Cut to fit at the end- approximately 45”
Cut a 4” piece of scrap from any piece you have leftover. You will use this as a stop guide in Step 2.
8 foot 1x4s
Note: the top and bottom planks are calculated to allow for an extra ½” overhang on each end.
(3) Bottom shelf planks: 6 pieces at 46 ½”
(1) Outside top shelf planks: 2 pieces at 47 ½”
12 foot 1×4
Note: This is the piece you had cut to 65” at the store.
From the 65” length– Countertop slats: 4 pieces at 15”
From the remaining 79” length– Top shelf fins: 2 pieces at 22”, Half shelf side
cover: one piece at 25”
12 foot 1×6
Note: This is the piece you had cut to 50” at the store.
From the 50” length (1) Lower half shelf planks: 2 pieces at 24”
From the remaining 94” (1) Countertop planks: 3 pieces at 30 ½”
2×6
(2) Top shelf: Cut to fit at end– approximately 46 ½”
(2) Lower top shelf: Cut to fit at end– approximately 45”
2×2 square baluster
(2) Half shelf supports: 2 pieces at 11”
Step-By-Step Instructions For Making A Potting Bench
These are very detailed instructions, but I highly recommend you download the bench plans, which will make this much easier!
They are at the bottom of the tutorial, or you click here to jump to the free potting bench plan now.
Step 1. Sand All The Boards
Note: It will be much easier if you sand all the boards ahead of time than after you assemble the bench.
Staining the boards before assembling the pieces would also be a good idea.
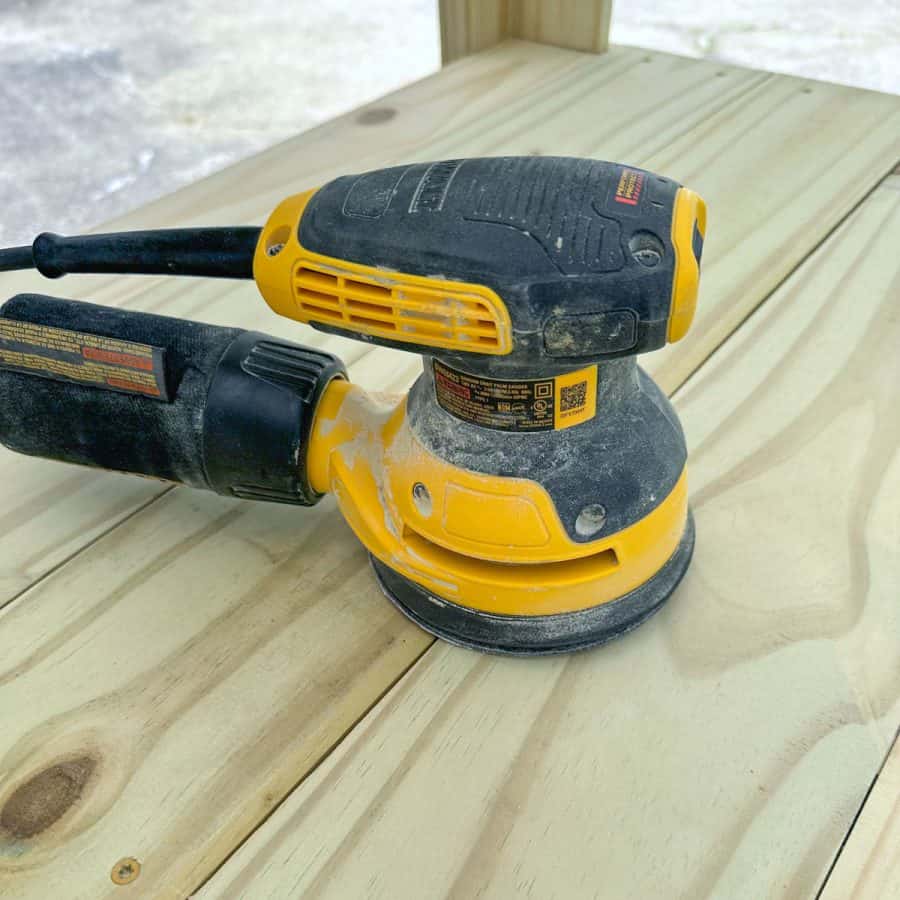
Use an orbital sander to sand all your boards. I used 100-grit sandpaper for the initial sanding. I recommend you do this in stages to save your muscles and bones from some torture. ;0)
If you stain the boards ahead of time, make a second pass at sanding with 220-grit sandpaper. See Step 9 for staining instructions.
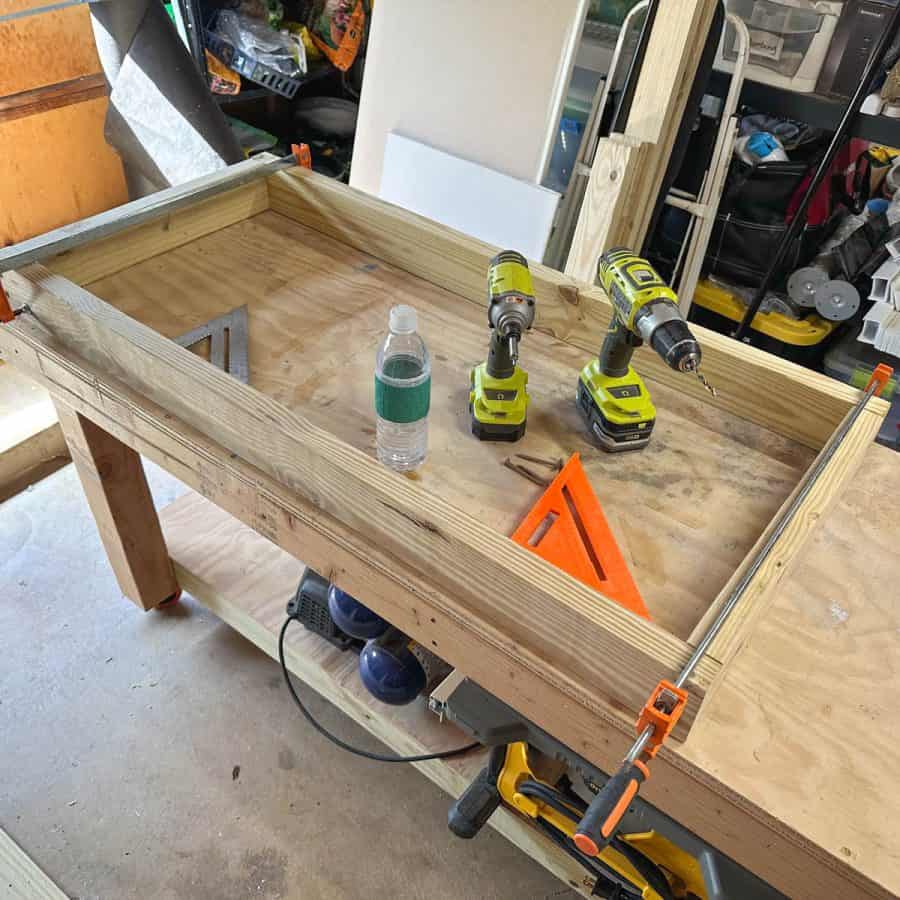
Step 2. Construct The Top And Bottom Frame

Note: Each screw should be pre-drilled. To keep the tutorial shorter, assume every time I write instructions to screw pieces together that you should pre-drill a pilot hole.
Also, for each step, you will screw almost every board using two screws, approximately 1″ from the edges.
Use the 2 ½” screws to connect all 2×4 and 2×6 boards.
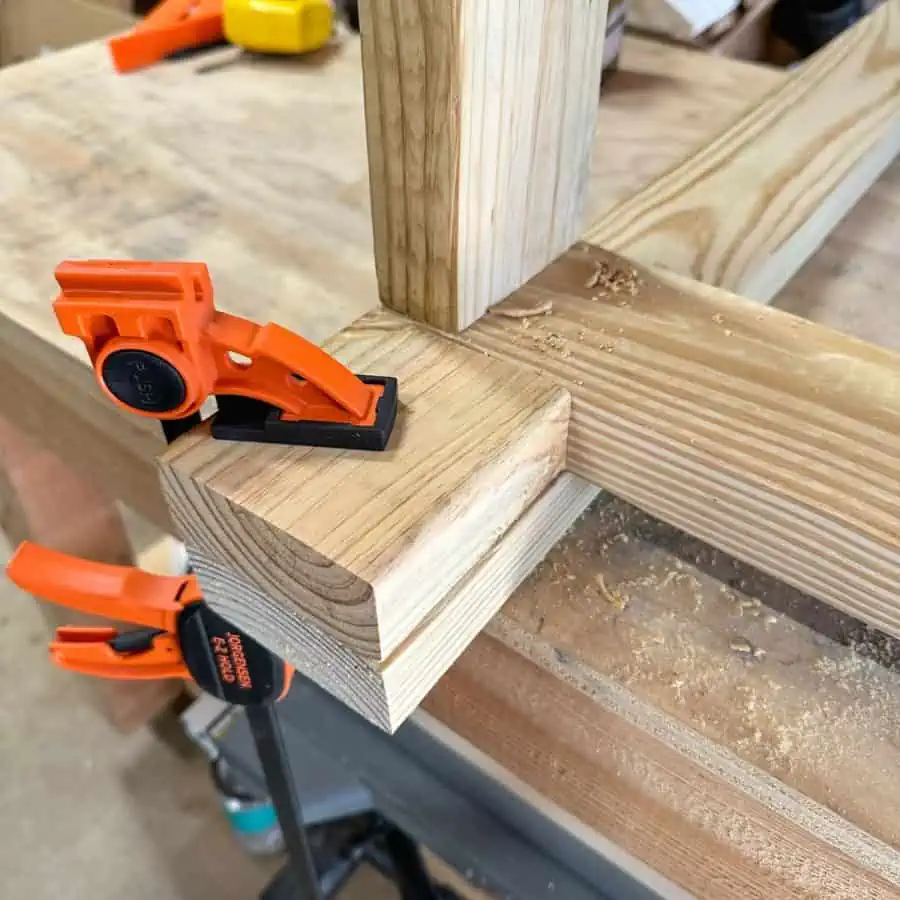
First, make the top frame. Use a framing square to line up two 19″ boards and two 46 ½” boards so they are flush.
Then clamp the long boards to the short ends. For one end, clamp them directly where the ends (rails) meet.

On the other end, clamp them just to the side of where the rails meet so they won’t be in the way when you screw them together.
Garden Planner!
Printable PDF Download
$2.99
Everything you need to plan your garden.


This will subscribe you to my newsletter where you’ll get updated when I have a new post, or tips and tricks. You are free unsubscribe at anytime.
Now use the 2 ½” screws to fasten them together.
Now repeat on the other end.
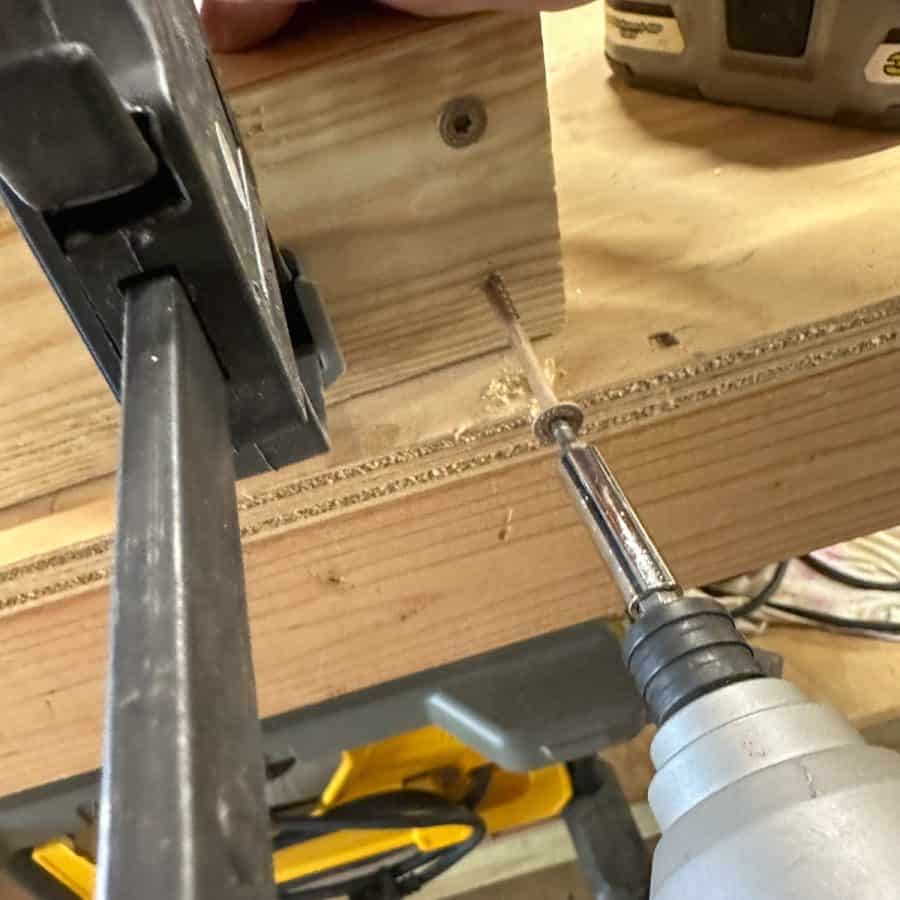
Next, you will need extra support in the center. Place one of the 19″ pieces in the middle, at 21″ from one of the short rails.
Then square it up and screw it in on both sides from the outside.
The top frame needs a support piece between the countertop soil slats and other countertop planks.
The support gets placed flat so it’s flush with the top of the frame. It will be fastened 13 ½” from one of the end rails.
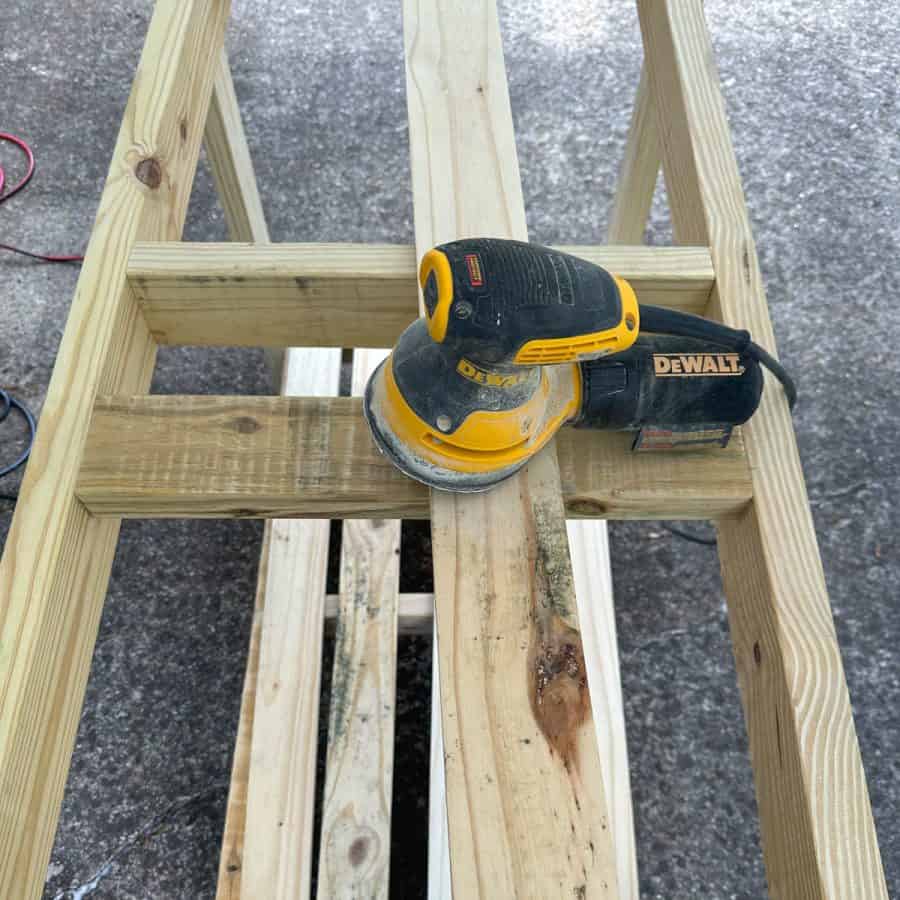
I forgot to make the support for the slats and planks, so I did it in a later step, but you can see it here when I was sanding.
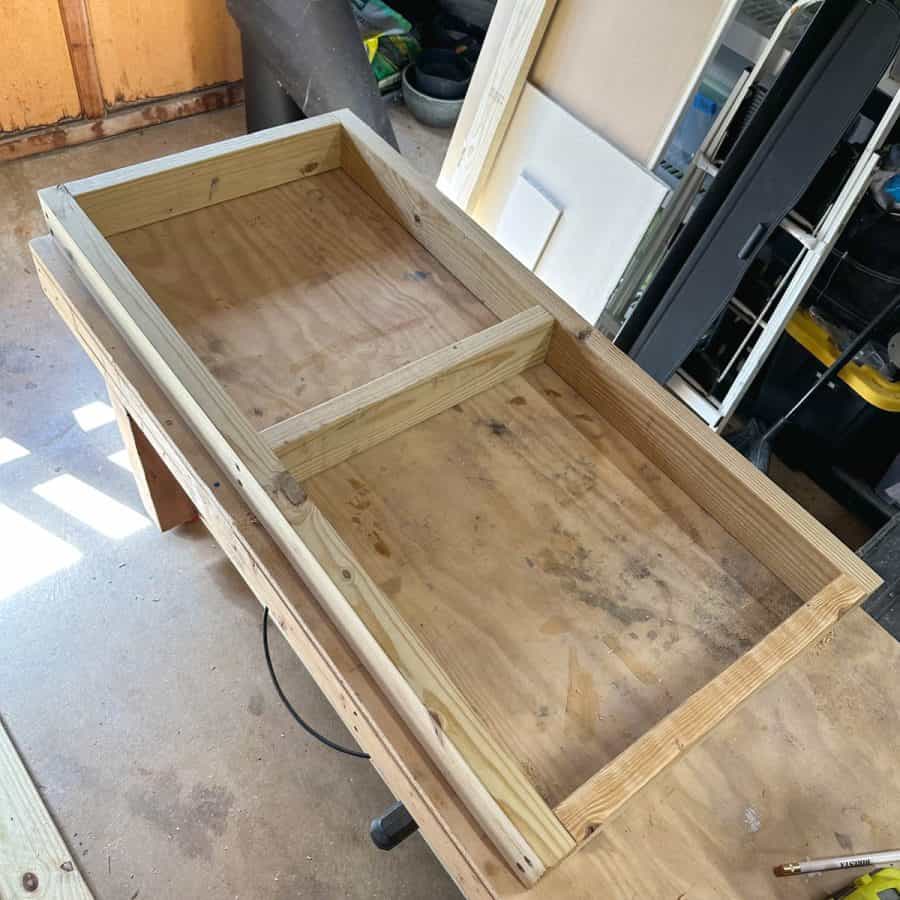
Now to make the bottom frame, use the other two 46 ½” and two 19” pieces and repeat the steps from the top frame. The bottom frame only gets the one center support.
Step 3. Attach The Legs To The Frames

The two 58″ pieces are the back legs, and the two 35″ pieces short are the front legs.
Lay the two front legs onto your table spread 46 ½” apart (outside to outside), then place the bottom frame on top.
Use the 4-inch length piece of 2×4 as a stop block for the location of where the legs meet the bottom frame. This will be easier than measuring.
Set the legs flush with the block on both sides and bottom, then clamp the block to the first leg and mark a line above the bottom frame just in case the clamp slips.

Now screw the bottom frame to the front legs from inside the frame.
Repeat this on the other front leg.
The top frame will get attached for the next part of this step. The bench won’t fit on your table, so get someone to help you bring it to the ground and flip it over to lie on the short legs.
Take care doing this because it is weighted unevenly. I recommend having a second pair of hands so one person can hold the pieces while the other clamps and screws.

Note: You may notice the slat support in the top frame is missing. You have already added it.
Lay the bottom frame on the ground with the front legs touching the ground.

Then lay the top frame on top of the front legs so they meet at the top. Line the top frame flush with the top of the legs.
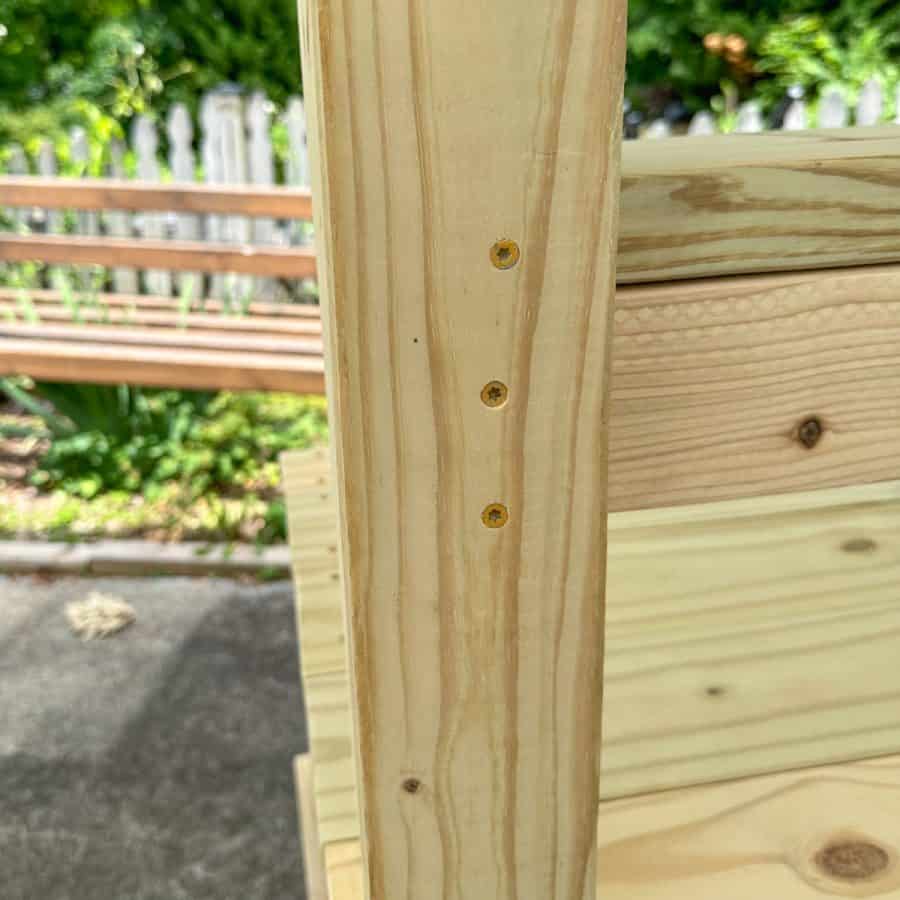
Fasten the frame to the legs, the same as before, from the inside, with two screws at each leg.
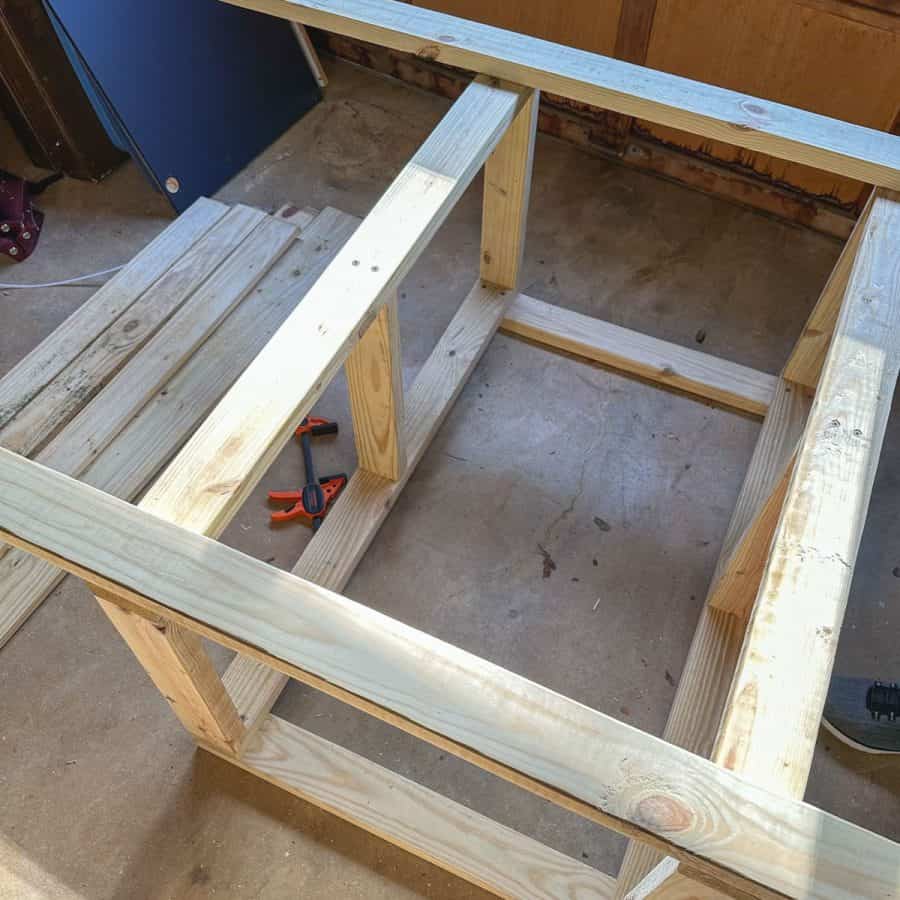
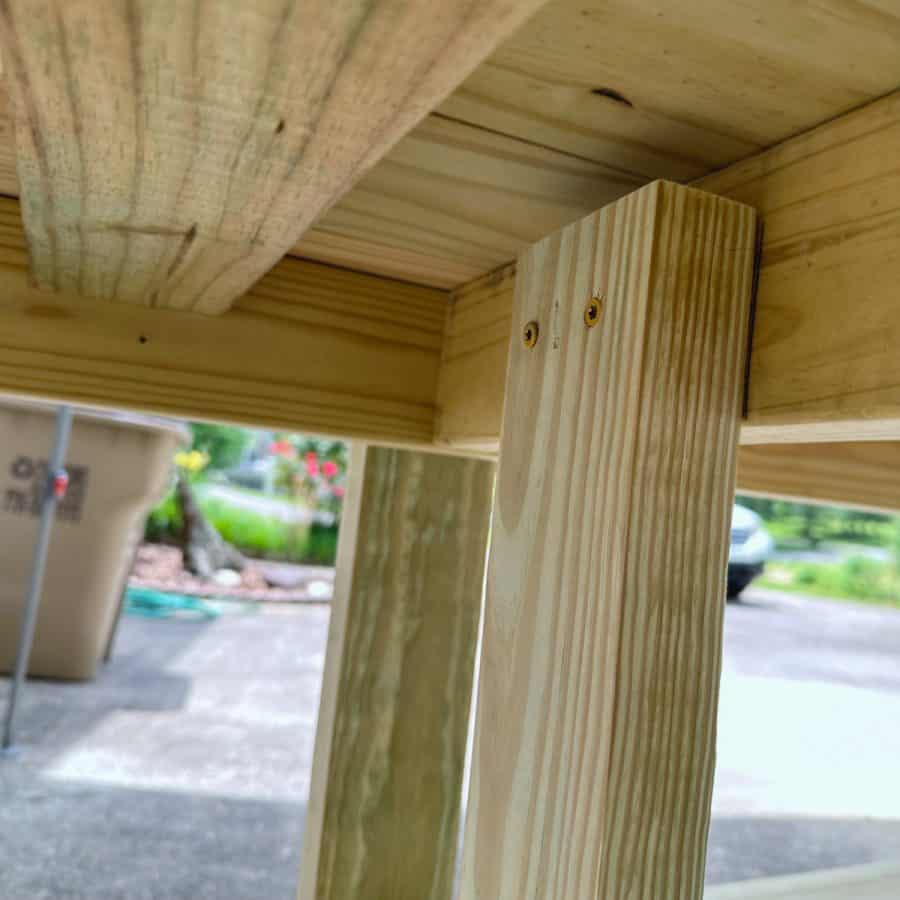
Next, add the back legs. Lay the long leg pieces across the two frames.

Then line them up. Use the 4-inch block as your guide again, just like you did with the front legs.
Screw the bottom frame to the legs from underneath. Then screw the top frame to the back legs.
Step 4. Make The Bottom Bench Shelf

You’ll need 6 of the 47 ½” boards for the bottom shelf. I have the overall measurement at 47 ½” to leave you with ½” overhang on each end.
Note: For fastening all the ¾” boards (1x4s and 1x6s), use the 1 ¼” screws.
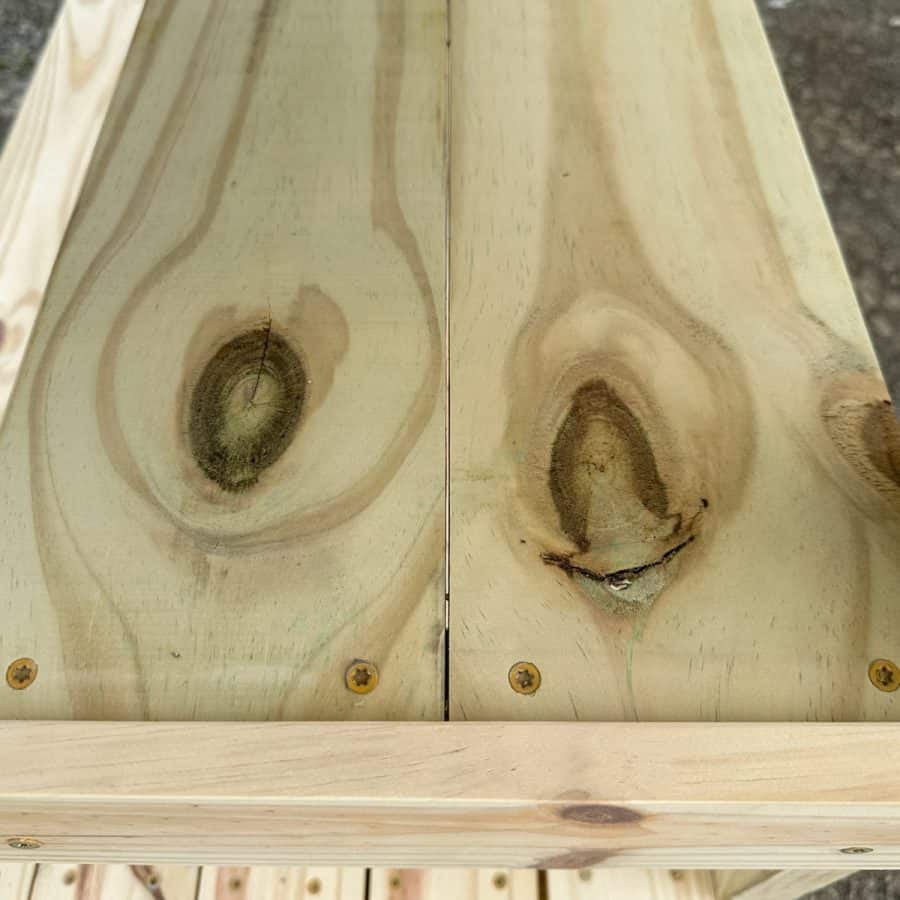
Loose lay your boards across the bottom frame. Some boards may be warped, so rearranging them or flipping them around may give you a better fit.
You should have approximately ⅛” of free space in between each board.
Screw these to the frame below with two screws on each end.
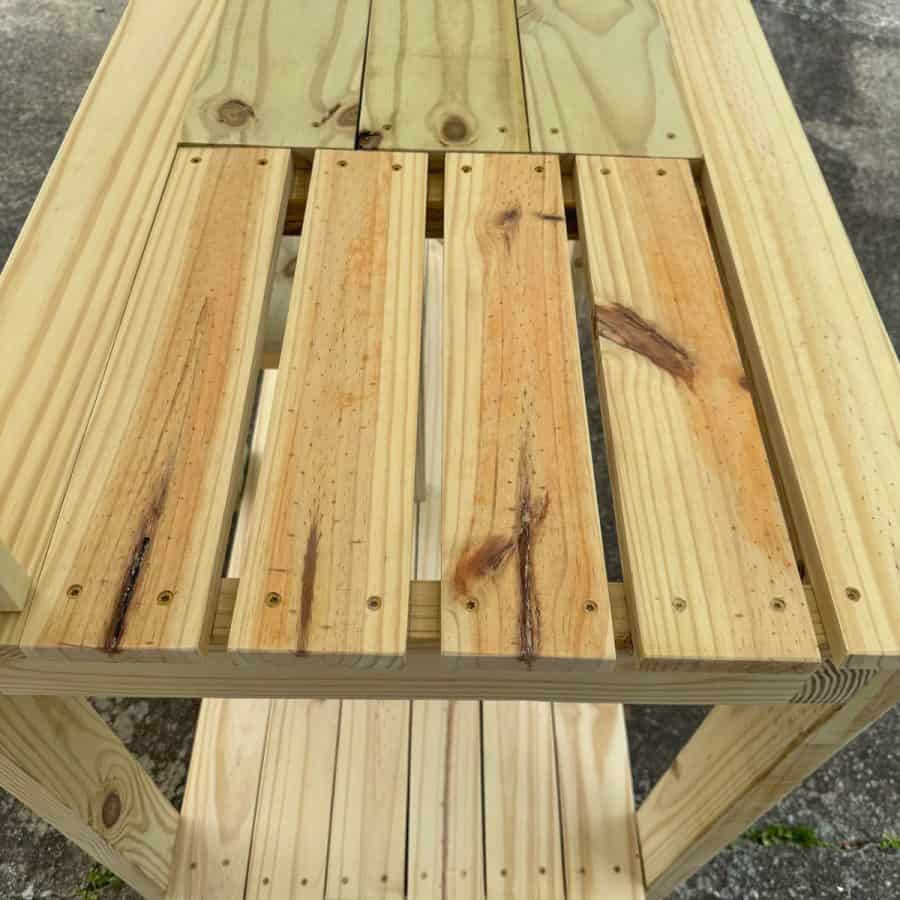
Step 5. Make The Countertop
The countertop has a mix of 1x4s and 1x6s planks. The 1x6s will be the three middle row pieces on the solid side of the top, and the 1x4s will be the front and back plank and the soil slats.
Again, play with the arrangement of the boards before securing them to the frame.
These will all be a tight fit except the slats, which will be spaced about ½ to ¾” apart.
Also, note that the front and back soil slats are butted against the longest boards. Only the middle three have spacing between them.
This is so that all the soil will fall into the soil bin and not outside the space.

Start from the back and work your way forward. First, screw the 47 ½” board at the back, to the frame.
Then screw the three 30 ½” 1x6s that butt up to that. Then do the front 47 ½” piece.
Now you can screw in the soil slats.
Step 6. Make The Bottom Split Shelf
The 29 ½” piece is the back support leg for the potting bench’s lower half shelf.
Place it in the center of the top and bottom frame. Line the bottom of the leg to flush with the bottom frame, then screw it in at the top and bottom.
Take care not to hit the screws holding the center support pieces in the top and bottom frames.
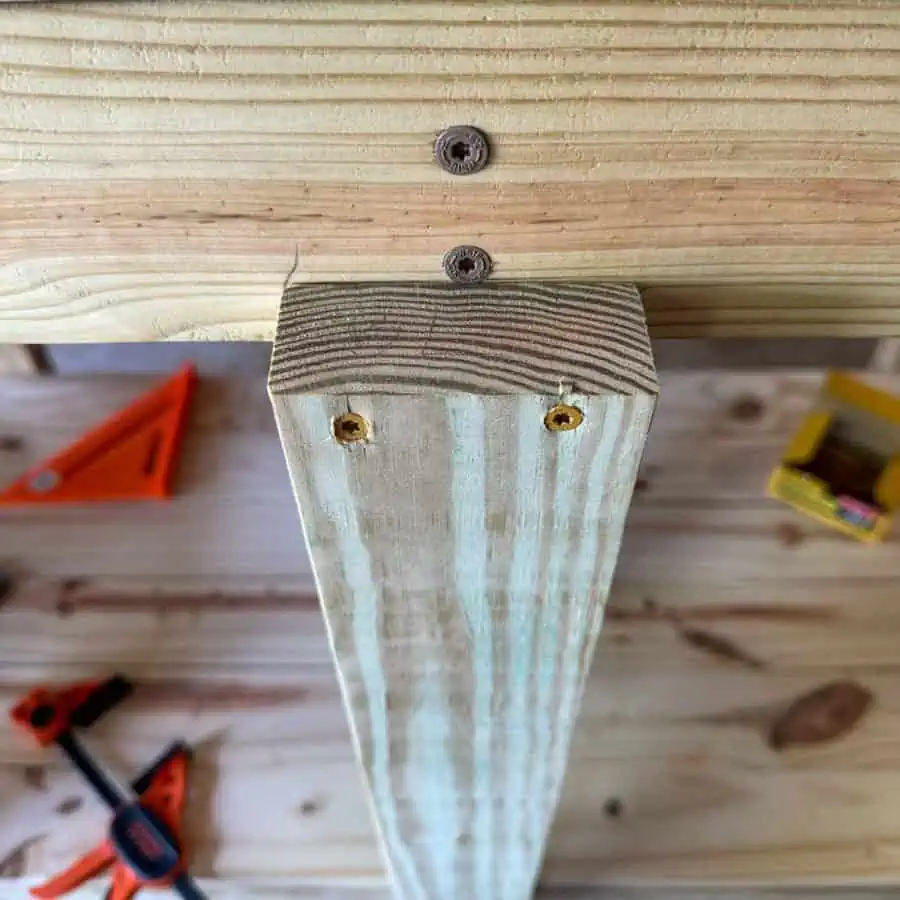
I cut my piece too short. Yours will come up higher.
Now take the 26″ piece to use for the inside half shelf support. It doesn’t go to the top because it’s not essential for support.
Place it 11 ½” from the front edge of the back support piece you just screwed to the frame and screw this to the center top support.
For this next part, use the two 11″ 2×2 pieces as the horizontal supports for the lower half shelf boards.

First, attach one of the 11″ pieces to the back and middle support legs. Measure up the legs 10″ from the bottom shelf.
To secure it, place two screws into the middle leg support, then one screw into the back leg support and into the edge of the 2×2.
Next, you’ll attach a side support cover for the 2×2 support piece. Screw the 25” board to the front and back leg- from the outside.
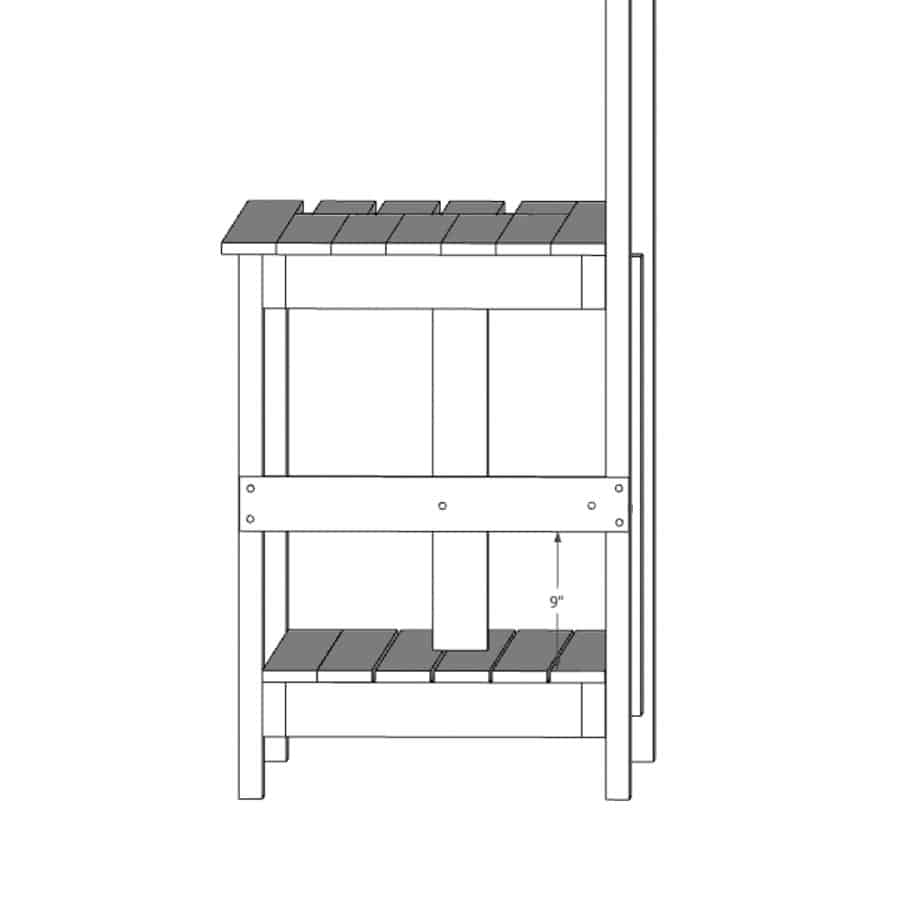
The bottom of this board will be 9” from the bottom shelf.
The horizontal support for the right side will also be placed 10″ from the bottom shelves. Secure to the side piece from the inside.
Note: I had to screw my shelf supports from the outside because I didn’t have screws that were the right length on hand.
I have adjusted the tutorial with the correct length screws so you can screw from the inside.
Use the 1 ¾” screw this time and place two screws in the side, going from the 2×2, into the side piece.
Also, use a 2 ½ screw and screw into the back leg through the end of the 2×2.
To make the half lower shelves, take the two pieces of 1×6 pieces that are 24”. Then screw these into the top of the 2×2 side supports.
Step 7. Add The Top Shelves

Prepare to make the cuts to the 2×6 boards.
First, measure the distance between the back legs at the very top. The distance from outside to outside will be the length of the top shelf.
It should be close to 46 ½”. You waited to cut this now because the legs may be slightly wider or narrower at the top, and you want to ensure your cut fits.
Now measure the distance from outside of the legs at the point that is 8” above the potting bench countertop. This is where the lower shelf goes.
You will need to subtract 1 ½” from the overall measurement to allow for the ¾” pieces to sit on each side. The measurement should be about 45”.
Now you can make those cuts.
Next, cut the shelf supports. The top shelf support is the length of the top shelf minus 1 ½” to fit inside the side pieces. It should be about 45″.
The lower shelf support will be the same as the lower shelf, approximately 45″.
*When fastening the pieces, be sure to do the lower shelf first.
Measure 8″ from the countertop on each end and mark it. This is where the shelf support piece goes.
Use two screws to secure the shelf support from the back legs. Next, screw the shelf into the support from the top.
I used 4 screws spaced evenly across. Then, use one screw to secure it from the back on each side.

For the top shelf, you will actually secure the shelf before the support. Line it up flush from edge to edge with the tops and backs of the legs. (I took this photo after I added the side pieces).
Screw the top shelf into the top legs with two screws. Now place the support underneath and screw it to the back legs, and then with 4 screws on top, spaced equally apart.
Now screw the shelf into the support piece at the top with four equally spaced screws.

And finally, add the shelf side pieces. Cut these to size by measuring the distance from the countertop to the bottom of the top shelf.
They should measure close to 22 ¼”, but one side may be slightly longer.
Screw the sides to each shelf and add one screw at the bottom from the back.
Step 8. Fasten The Front Bib

Finish the building of the bench by putting the front bib on. This is your remaining piece that is 39 ½”.
Screw it to the front of the top frame, from inside the frame. This will cover all the screws and provide a little extra support for the front countertop plank.
Step 9. Sand The Rest of The Potting Bench
Go back over the potting table with 240 grit sandpaper.
Step 10. Stain The Wood
First wipe down the bench with a cotton cloth.
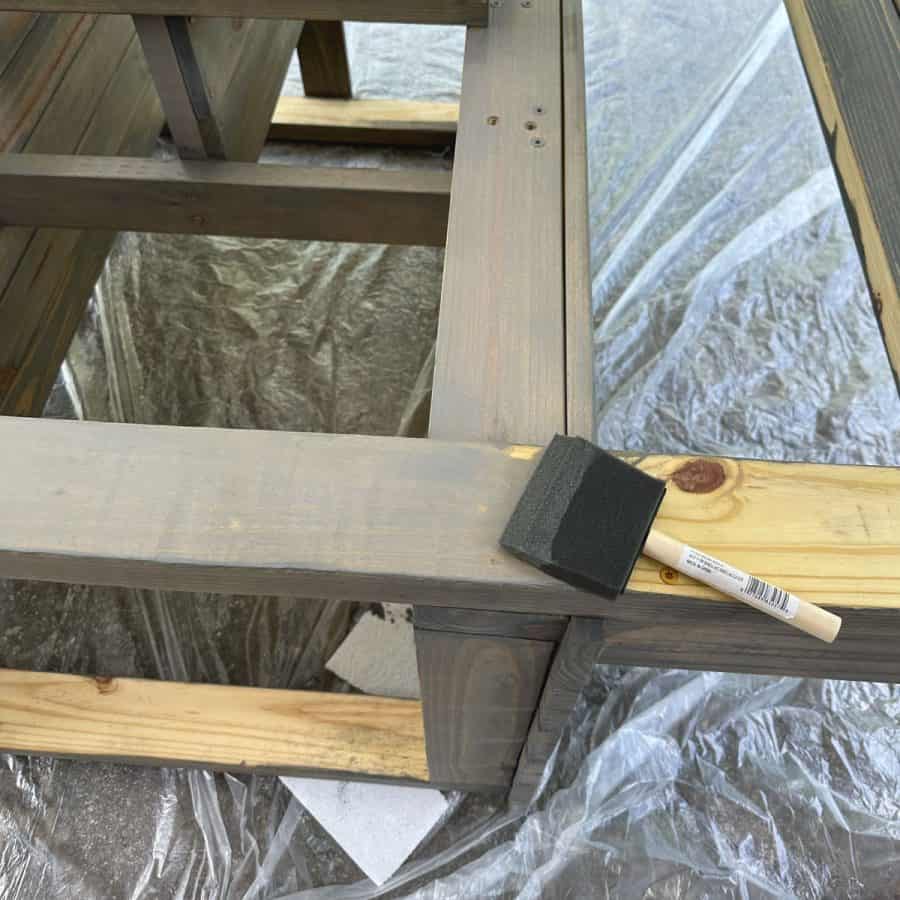
Then use a stain meant for outdoor use and stain the bench.
If you stained the boards ahead of time, then you can skip this step.
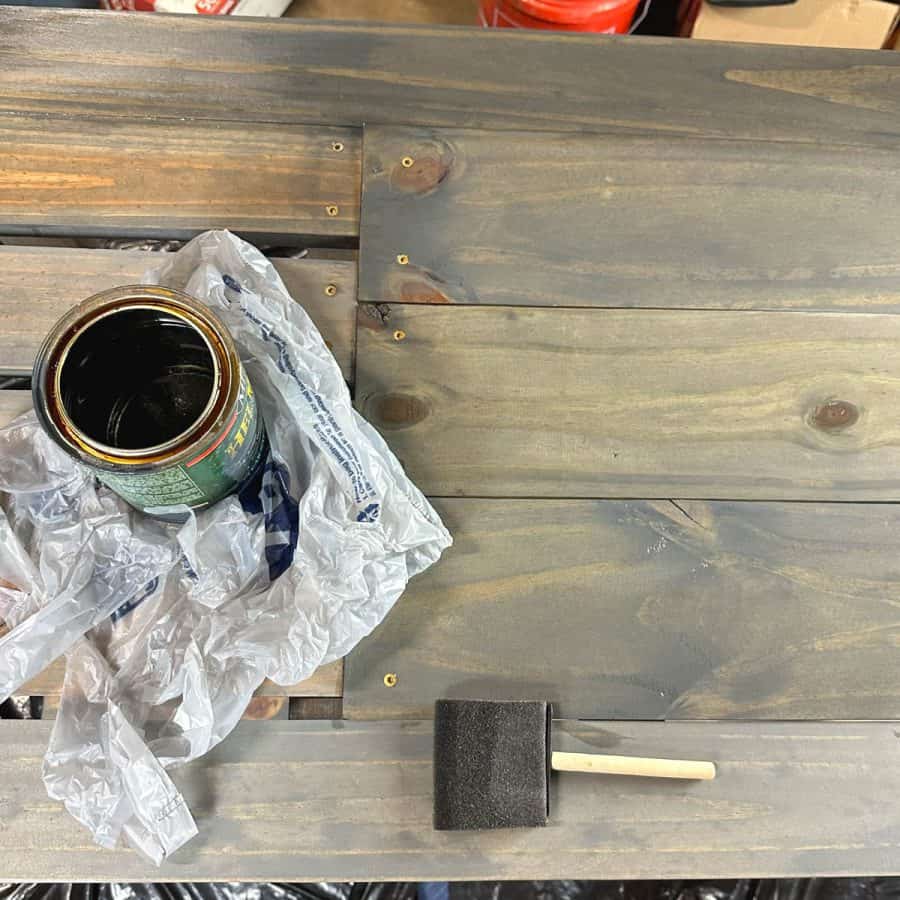
Use a foam brush to apply the stain. Wait up to 15 minutes (I waited less than 10) and then wipe off the stain.
Once it has dried, you can apply a second coat if you like (I only applied one coat).
Step 11. Apply A Top Coat
Follow the manufacturer’s instructions for the polyurethane finish for the wait time between the stain and applying the first coat of top coat, and the waiting times between top coats. This is typically 24-48 hours.
Then follow the directions for applying your top coat.
Step 12. Add The Gardening Tool Hooks and Soil Trash Can
Screw the hooks into the side of the top frame on the right. And if you wish, you can also use the lower side piece for this.
If you do, check that you don’t hit any screws from the 2×2 support. Now grab your gardening tools and hang them on the hooks.
Do you need pots for your plants? Here are 60+ DIY planters you can make.
Free DIY Potting Bench Plans
Fill out the form below to get your free plans. You will automatically be subscribed to my newsletter where you’ll get updated when I have new posts and tips and tricks.
Don’t forget to Pin it for later!

Don’t forget to Pin it for later!

How To Make A DIY Potting Bench
How to build a DIY potting bench that is functional and has tons of storage space. Make gardening easier with a flexible workspace. A step by step tutorial with free woodworking plans.
Materials
- pressure treated pine boards
- 2x4 boards
- 1x4s
- 1x6s
- Exterior framing screws
Tools
- Please see the full materials list above the tutorial for details and links.
Instructions
- Sand the boards with 100 grit then 220 grit sandpaper with an orbital sander.
- Construct the top and bottom frame using the 2x4 boards.
- Attach the legs to the frames with 2 ½” screws and the short boards between the long boards.
- Screw in the 1x4s to the bottom frame to make the bottom bench shelf.
- Fasten the top planks to the top frame. Leave spacing for the soil slats.
- Add support legs and horizontal supports for the lower half shelf. These go 10” from the bottom shelf.
- Screw the 39 ½” front bib piece to the front frame.
- Sand the rest of the potting bench if you didn’t do it at the beginning.
- Stain the bench.
- Follow the manufacturer’s instructions to apply the top coat.
- Screw in the gardening tool hooks and place the soil trash can.