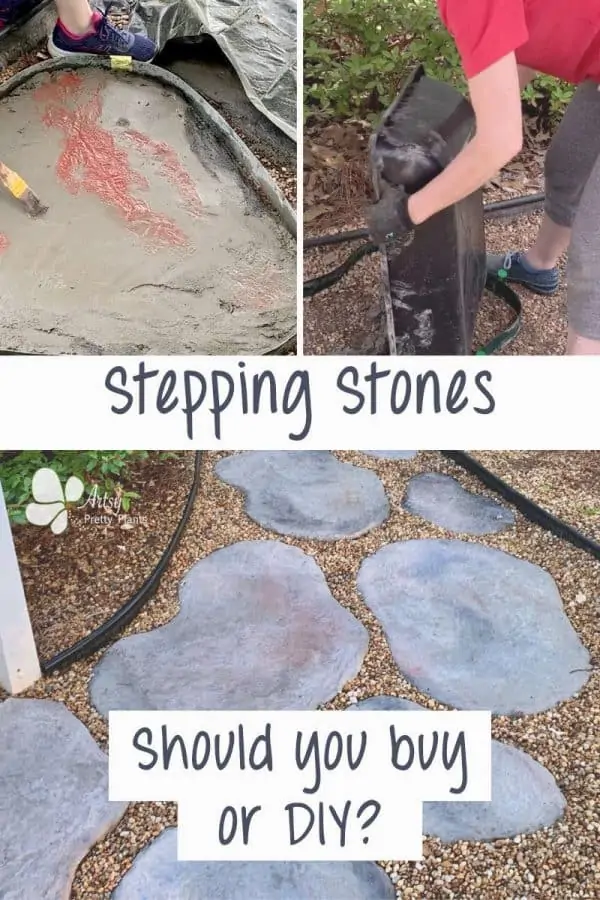
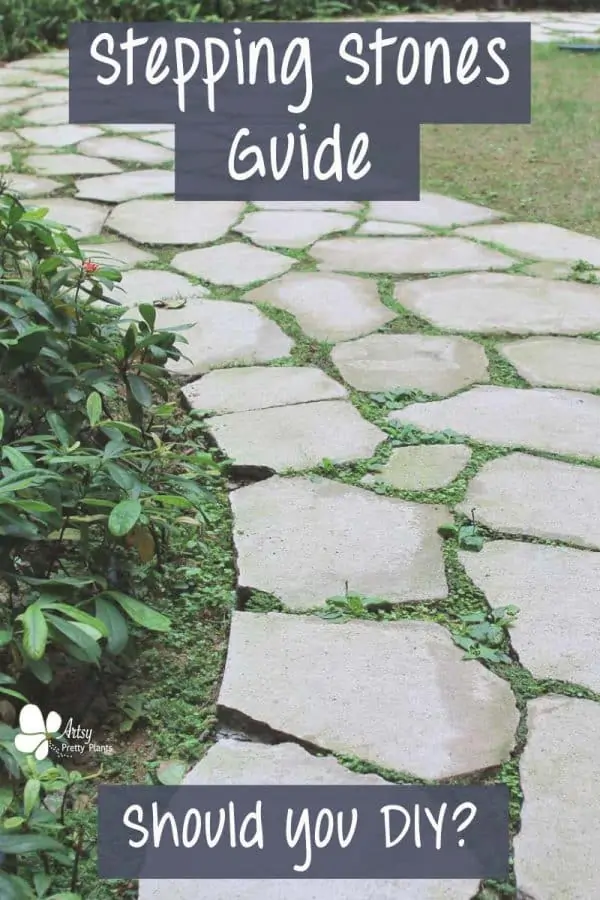
Stepping Stones Guide: Buy Or Make?
Here’s what you need to know about stepping stones to help you decide whether to buy or make them. If you decide to make your stepping stones yourself instead of purchasing and paying for an install, you’ll find multitudes of design options!
The weather’s warming up and you’re finally ready to move on to the stepping stone project and you’re wondering if it’s better to buy or make your path stones.
Maybe you need them for a pathway to a garden or an actual garden path? Or maybe it’s for a walkway from your driveway to your front door.

Now the question is, is it better to purchase stepping stones and have them installed by a pro, or can you just make your stepping stones and lay them yourself.
I’ve put together this guide to help you decide which is best for you, as well as help you brainstorm some ideas- should you choose to make them.
What Are Stepping Stones?
Traditionally, a stepping stone is any piece of stone that is laid out as a path or a walkway. The term stepping stones has come to encompass any material, not just stone.
The types of materials used for these paths can be stone, brick, wood or concrete.
Regardless of material, stepping stones will be one piece laid out in front of another separately, unlike a continuous solid path like concrete sidewalks.
Other names for stepping stones might be garden stones and pavers.

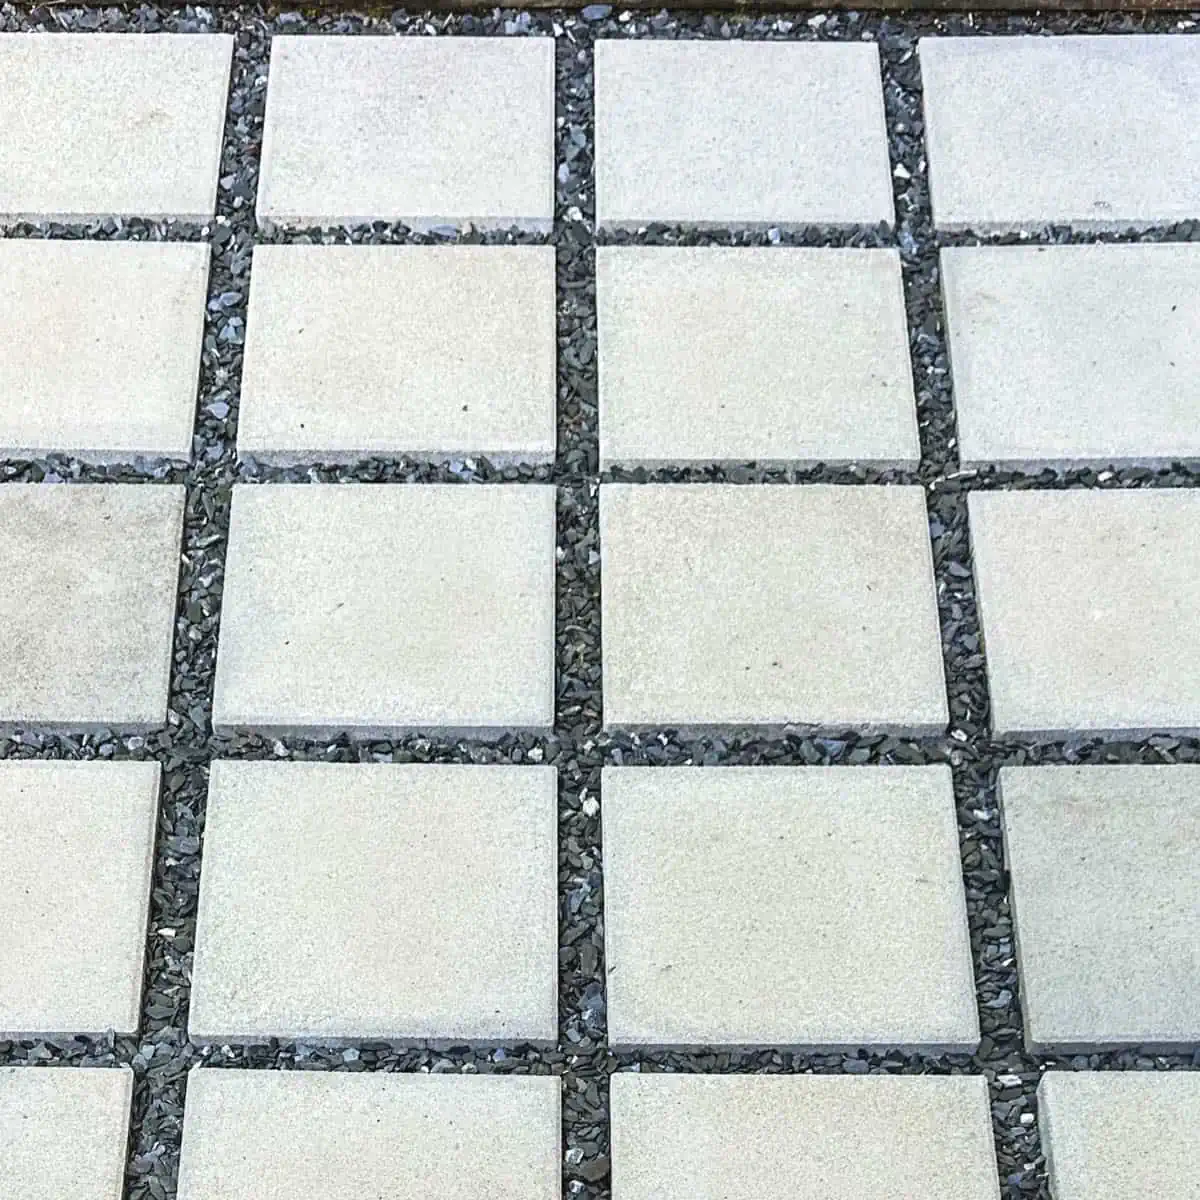
The term paver usually refers to a square or rectangular piece rather than a natural stone shape.
Pavers serve the same purpose as stepping stones, they are used as a walkway or a patio. Here’s a project where I used square concrete pavers to re-do a patio that was caving in.
I’ll explain more in the Should You Buy Or DIY section below, why I chose to buy those pavers.
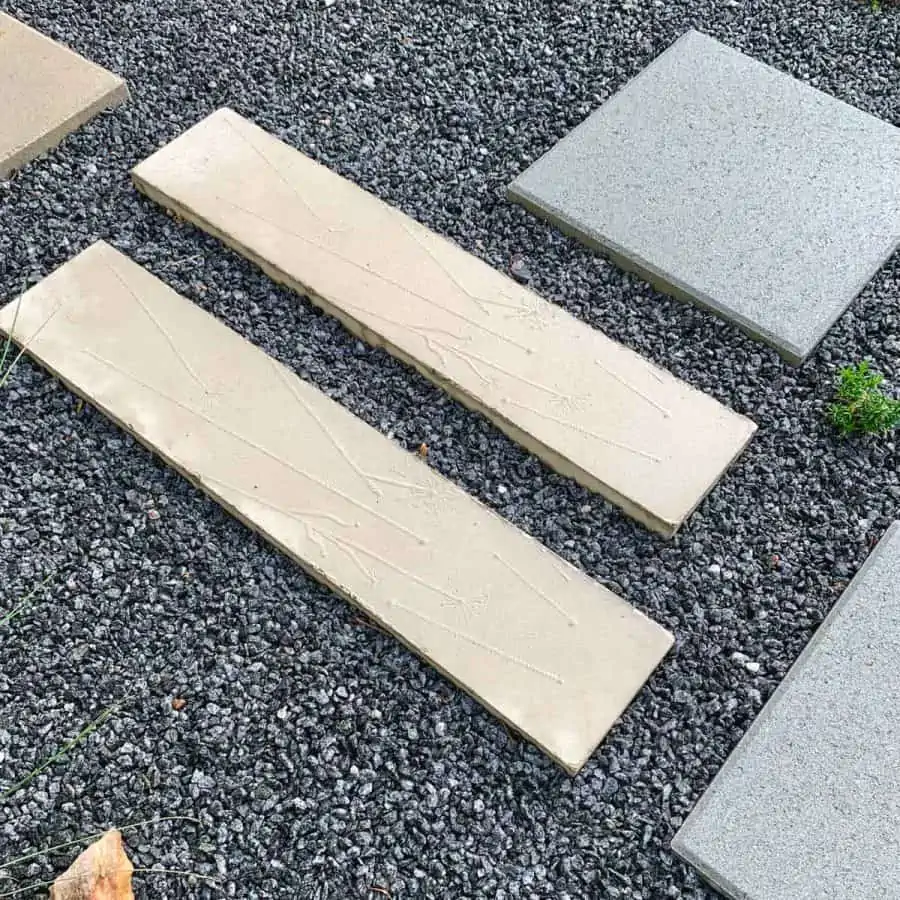
The most common materials for pavers are brick, concrete, sandstone or even tile. I made these stamped concrete pavers for cheap and in day!
If you are considering using tiles as stepping stones, you would not want to use a ceramic tile.
Instead, a suitable tile for this purpose would be Saltillo.

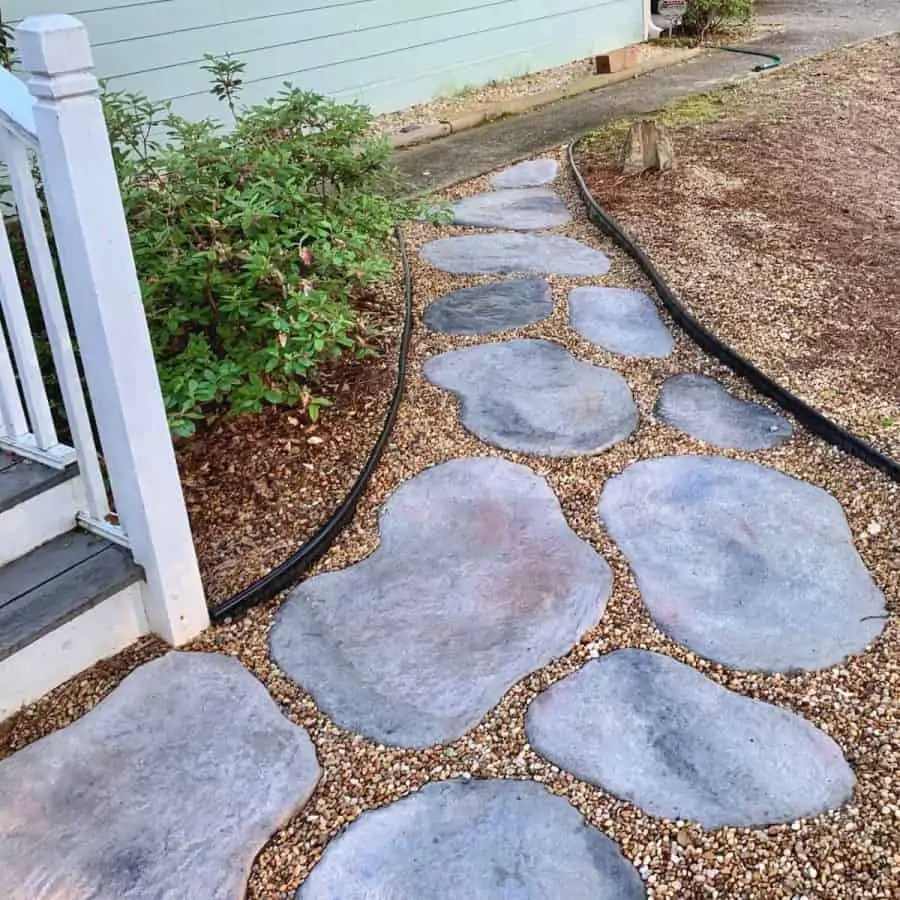
The types of natural stones typically used in stepping stone pathways are fieldstone, flagstone and slate.
These stones are ideal for stepping stone paths because they come in large, flat shapes, and are relatively inexpensive and durable.
Flagstones also have a texture to them that makes them not too slippery when wet.
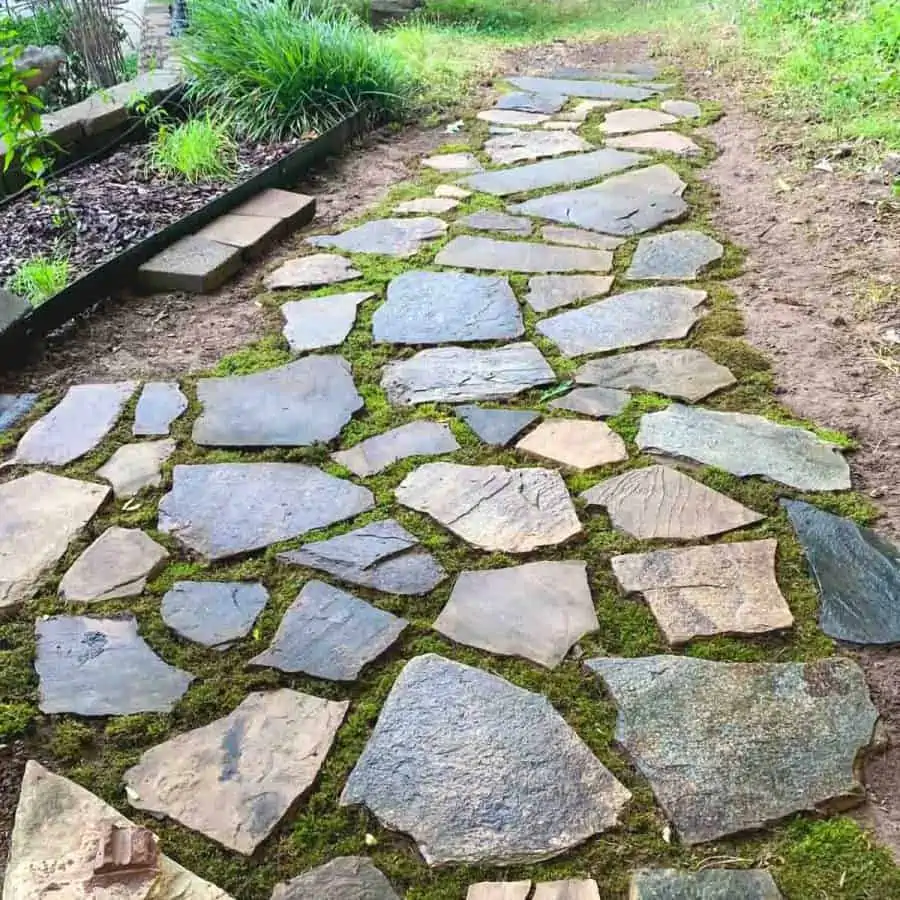
Flagstone comes from rock quarries and is broken down into large thick slabs. The slabs are chiseled into flat, irregularly shaped pieces.
These edges will be angular, not rounded.
The photo above is from the flagstone path I made on top of dirt –a tutorial you may be interested in.

The colors for these natural stones will vary. For instance, fieldstone can be a variety of earth tones.
It ranges from a pale tan, rusty orange, or even a charcoal blue.
In some regions, you may find each color available, and some regions may tend to have a less varied color range.
Fieldstones are naturally more rounded and commonly used for stacking garden beds, walls, etc.
These do not come from quarries. They are instead, harvested from fields.
Should You Buy Or DIY Stepping Stones?
Is it cheaper to make stepping stones? The quick answer is that usually it is cheaper when making your own stepping stones. It will save you the most money, but this may not be the best option.
You actually have three options for stepping stones. You can hire a professional, which means the labor is and material is tied together in the cost.
The other option is to purchase your path stones and install them yourself. And the last option is to make them as well as install them.
When making a decision, you need to consider cost, difficulty and time.
Stepping Stones Costs
Buying- The Costs Of Hiring Professionals To Install Stepping Stones
So just how much does it cost to have stepping stones installed by a professional?
Let’s use an example of a stepping stone walkway that is 20 feet long and 3 feet wide. That’s going to be 60 sq feet.
The cost for this will depend on the region you live in, but an average cost for stepping stones installation is $11-$17 per sq ft.
This would be for a fieldstone type of material, which will be one of the cheaper natural stone pathway materials.
Flagstone usually starts around $15 and can go well into the $20/sq ft range.
Here in the southeast where labor prices are lower than much of the country, a safe bet would be $13, this puts your average cost at $780 for hiring out your stepping stone path.
A stone like flagstone, will put you at a higher price point.
These estimates came from the website Porch.com. There you can check your stepping stone costs with their online calculator, using your square footage and zip code.
Garden Planner!
Printable PDF Download
$2.99
Everything you need to plan your garden.


This will subscribe you to my newsletter where you’ll get updated when I have a new post, or tips and tricks. You are free unsubscribe at anytime.
Buying- The Costs Of Installing Path Stones You Have Purchased
If you have the time and the physical ability to lay your own stones, then you can save money by purchasing stones from your local stone yard or home improvement center.
You can read more below for what would be involved in terms of time and physicality for installing stepping stones.
You can expect to pay around 7-$8 per square foot to purchase fieldstones.
With a 60sq ft path, this puts you at $450, plus leveling sand and gravel or pebbles, Add more if you need to buy tools for this.
Not all stepping stones are expensive. If you were to purchase actual concrete pavers, you could expect to pay a little more than $3 a piece.
In the case of my concrete paver patio build, I only paid around $200 for all the pavers. However, if I made them, my cost in concrete would have been closer to $400.
And when you factor in the labor of making them, I think you can see, this is a Buy– not DIY.
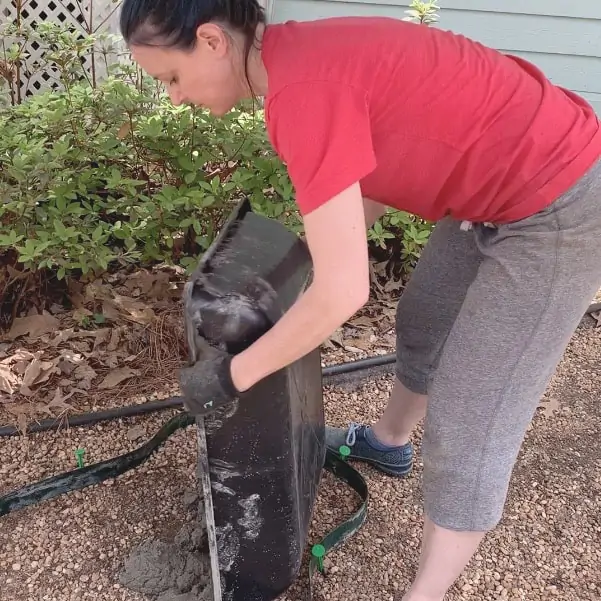
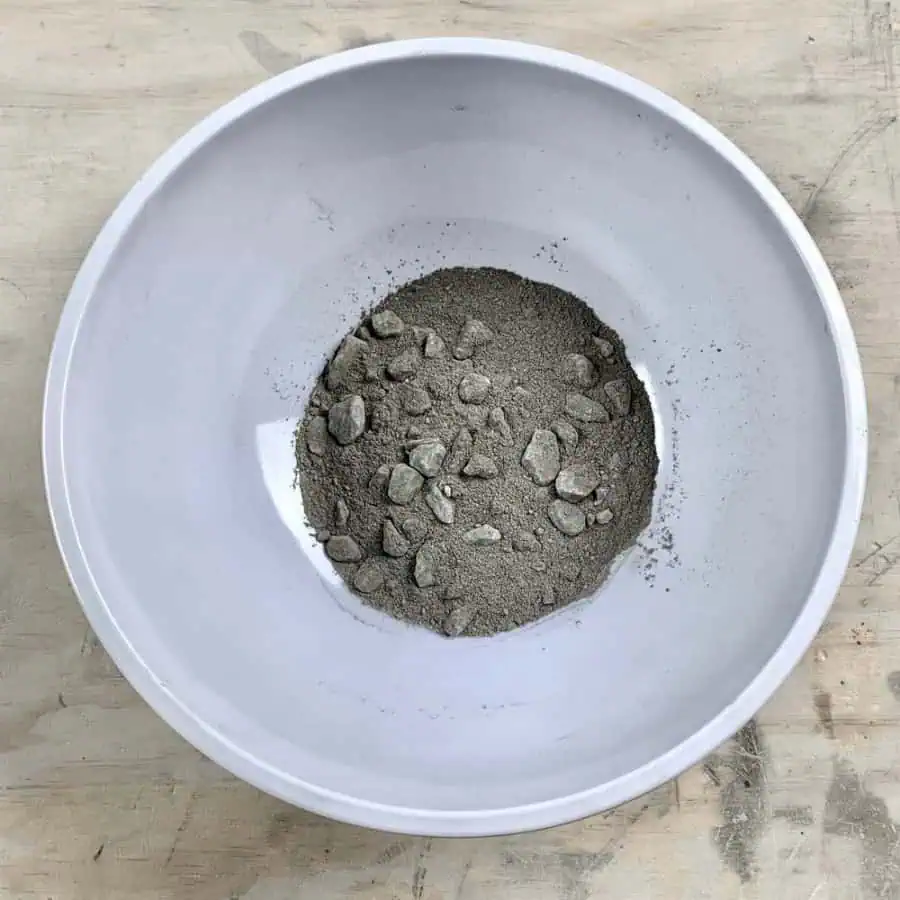
Costs For Making Your Own Concrete Stepping Stones
Your cost will vary mostly based on the amount of stepping stones you plan to make, and how many different colors you want them to be.
For my project, I used 7 bags of concrete. I also needed to purchase a mold, 3 different colorants, a giant mixing bin, and a hoe and trowel.
All in, my DIY stepping stones came in just under $150. Now one thing I didn’t do was seal the stones. These should be sealed to prevent stains.
It will add another $30 to your total, but I’d say, $180 for your own stepping stones is a pretty good deal.
If you use a fiber reinforced concrete mix, then your costs for the concrete will be higher.
Physical Factors To Consider When Deciding Whether To Install Your Own Stepping Stones
Another important factor in deciding if you should buy or DIY stepping stones is the difficulty of the labor involved.
Stepping stones are going to be heavy.
I’m 5’3 and I can carry smaller ones, but larger stones may require two people.
If you make your own, keep in mind that concrete is quite heavy, but you can help yourself out and by using a wheelbarrow.
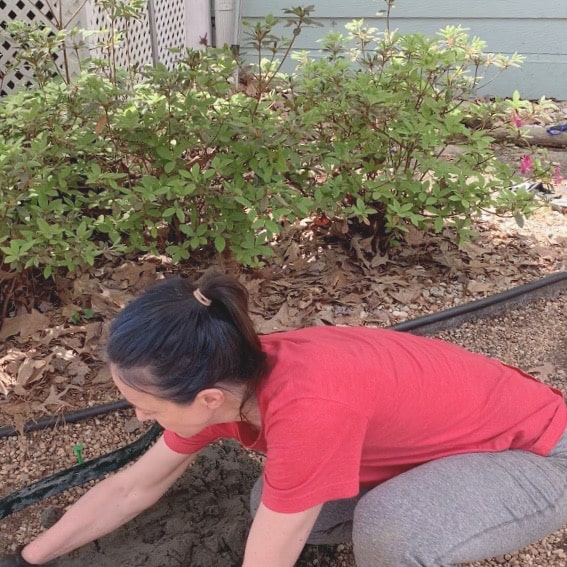
Laying stepping stones requires a lot of bending down and crouching —you’ll be using muscles you don’t use every day.
The labor involved may be a deterrent for some.
Time Factors For DIY’ing Your Own Stepping Stones

Time is a consideration when deciding if you should make and install or just install your own stepping path.
When I made my natural-looking stepping stones from concrete, I finished them in one weekend, spending about 4 hours each day.
However, it’s important to note that I had some space prepping but it was only to remove existing gravel.
I didn’t have to spend time shoveling dirt and grass and it didn’t require leveling with leveling sand.
If you have a lot of prep work involved, then you may need to add at least another half a day to the amount of time this takes.
If you are making concrete stepping stones, then be sure to factor in a color testing time several days before you start. I’ve got details on that in the article linked above.
Years ago, I tackled a stepping stone project where I purchased fieldstones from a stone yard and installed them myself.
Once again I had an existing path that only required laying leveling sand/crushed gravel on top.
I was able to carry the stones myself from the car to the path.
The rest of the physical work was the actual placing of the stepping stones and then carrying a couple of bags of pebbles and filling in the spaces between the stones.
To the best of my memory, this only took a few hours. The better part of that time was just figuring out the best fit for the layout based on the shapes of the stones I had to work with.
How To Make Pavers Or Stepping Stones
When making your own stepping stones or pavers, the material you will want to use is concrete.
Concrete stepping stones are very durable and will allow for a great deal of flexibility of shape, size, color, texture and decoration.
So let’s dig in to get creative with the types of stepping stones you can make.
If you’re planning on spending more time in your outdoor space this year, take a look at our list of the best outdoor natural gas patio heaters and these heaters that are specifically for natural gas.
Some of the links on this page have been provided as a convenience for finding materials. These links may also be affiliate links. As an Amazon Associate I earn from qualifying purchases, at no extra cost to you.
I only recommend products I’ve used and loved, unless otherwise stated. Click here to read my full disclosure policy.
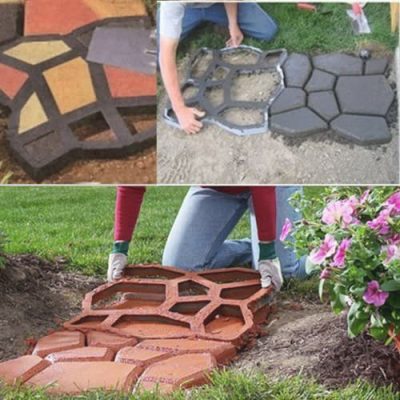
Options For Shapes For Path Stones
Let’s first talk about shapes. The options for shapes of stepping stones are truly unlimited.
You are only confined to the options by the mold you use. Get a bit crafty so you can make just about any shape you can think of.
Natural Looking Stepping Stones
For natural-looking fieldstone stepping stones you can use vinyl furniture slats or slats from vertical blinds.
In the this concrete stepping stones tutorial, I used vinyl furniture strapping as the mold.
You can learn more in this article, about choosing which mold material to use when making things with concrete.
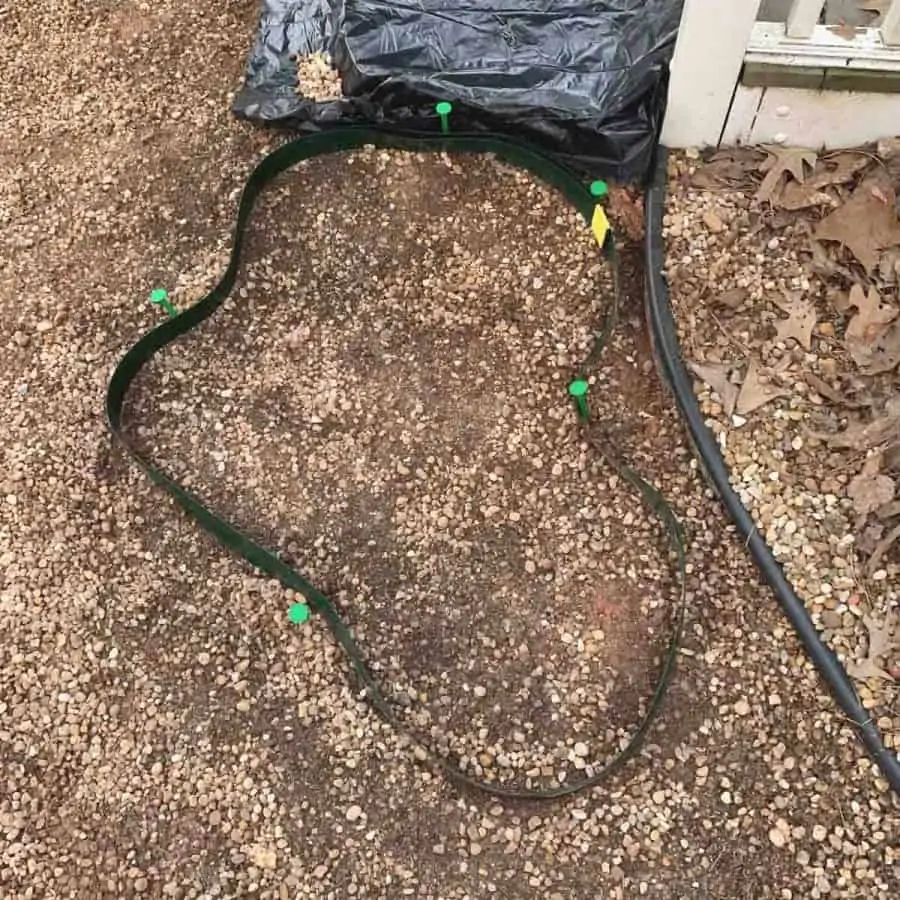
A flagstone is more angular than a fieldstone. You can create sharper angles by using the above vinyl material.
And when you remove the straps from the concrete, you’ll just mold angular shapes at the corners, instead of making them rounded.
The reason molding these into the shape you want, is easy to do, is because at this point, the concrete still hasn’t fully set, you’ll have plenty of time to angle the stones with a trowel.
This is when I did most of my shaping. You only need the straps for about 15-20 minutes after the pour, which helps confine the concrete to one spot.
Square Stepping Stones
There’s plenty of square molds on the internet for stepping stones, but most are a bit small. You can easily make your own with melamine boards.
You would just cut them to the length and width you want your stones and screw them together. The process will be the same as for making flagstone-like stones.
Round Path Stones
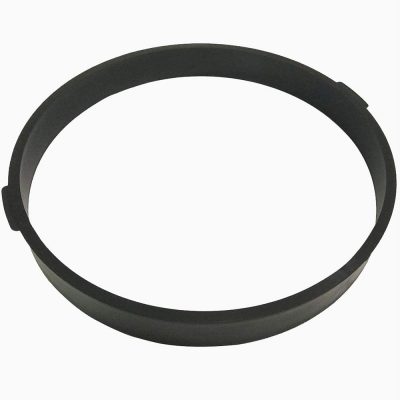
You can make a round mold with the vinyl strapping as well.
You’ll have a bit of a rounded point where the two pieces meet, but again, once you remove the strap, you can just shape this with your hand or a trowel.
You can find these round stone molds on Amazon or a local hobby store, but they will be small. By using straps, it allows you to control the size.
Pebble Pavers
I’ve seen stepping sones that look like rounded pebbles laid up against each other. You can purchase these at Home Depot online, and also Amazon.
Geometric Path Stones
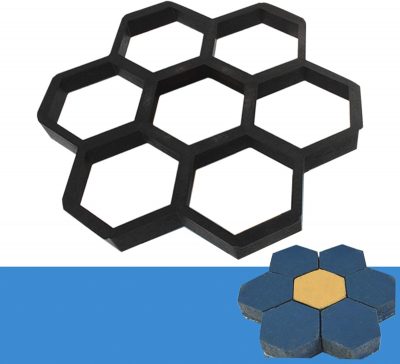
How about super cool looking geometric steppings stones. Again, Home Depot online has options for these, as well as on Amazon.
Miscellaneous Patterned Stones

Did you know you can even use a rubber doormat for a stepping stone mold!?
Coloring Options For DIY Stepping Stones
Here’s another fairly unlimited benefit of using concrete- coloring options.
The best way to color stepping stones is to add a pigment specially made for coloring concrete into the mix. This is your best bet against fading.
I did a hybrid of this for my natural looking concrete stepping stones and the color didn’t turn out the way I wanted.
However, this is more because I didn’t do a test sample first. I discuss this in that tutorial.
The topical coloring is a decent option but is likely going to be susceptible to fading.
It hasn’t been long enough yet since I made mine, but only adding coloring topically isn’t the best method.
The next best method is adding a topical concrete stain or concrete dye to the top of the stooges.
This requires a bit more work, a few extra materials and a little more time. That’s why I recommend just adding the pigment internally into the mix.
These need to be applied with a roller, well after the concrete has cured. You also have to do some prep work to color the path stones this way.

You will be able to find concrete powders and liquid colorants in earth tone colors at most home improvement stores and on Amazon at a good price.
Be sure to seal the stones because the concrete can get stained. I’ve got some nasty black marks from leaves that decomposed on them. They will come out, but a sealer would prevent most stains.
Texture Options For Concrete Stepping Stones
And you thought the coloring options were fun, well, it gets even more fun with textures.
Options for textures are natural stone, wood grain, and even decorative patterns like lace, or flowers.
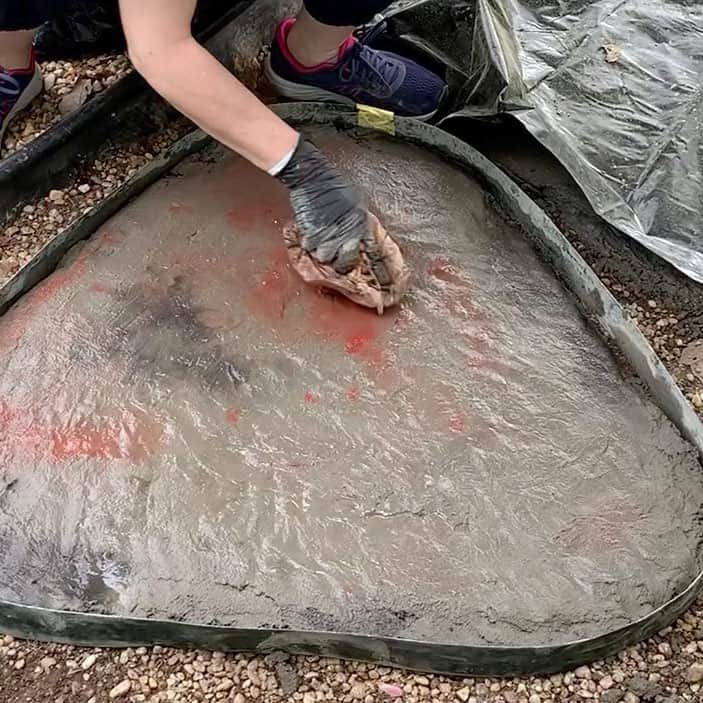
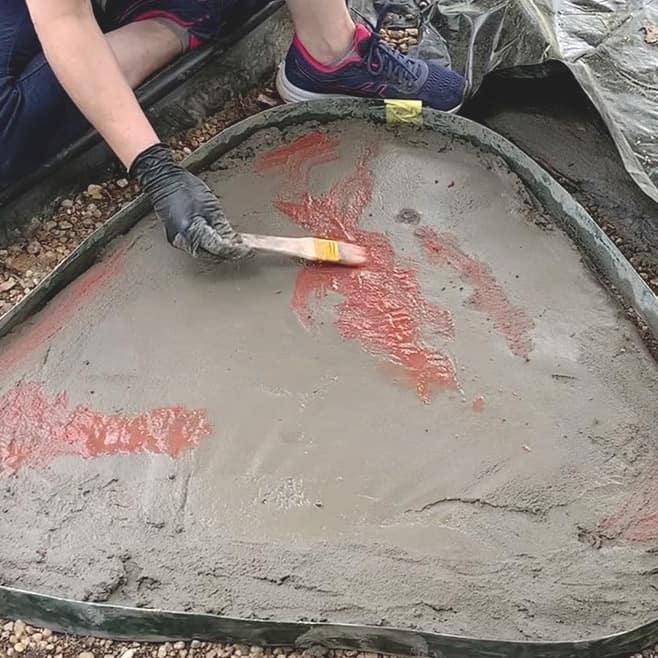
I achieved my natural stone texture (which is not concrete’s natural texture), by simply using a plastic bag to press on top of the concrete before it’s fully set.
The wrinkles from the bag and my hands pressing on it basically embossed natural curves and lines into the concrete.
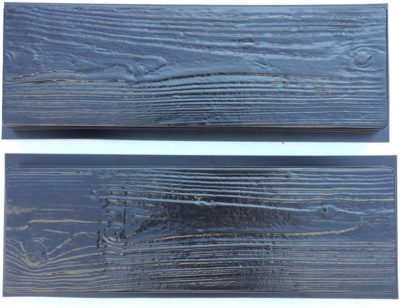
To get a wood grain, you can purchase a rubber stamp mold that has wood grain grooves.
These are just a mold, made of rubber that is in the shape of a wood plank.
The concrete is cast into them- just like a regular silicone mold like the kind that is used for planters and other concrete crafts.
There are also paint rollers that are similar to the way a stamp mold works. You get this effect by using a “brush” made of a rubber stamp material.
You use it like a paint roller and just brush the roller over the concrete.
These rollers produce stone textures- like slate, flagstone, wood grains and more.
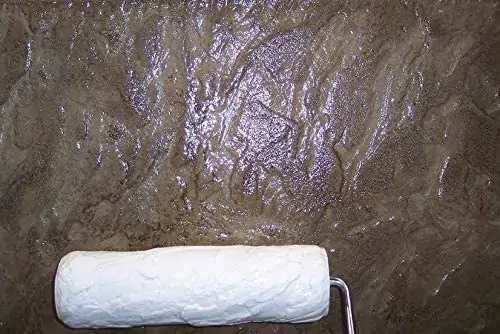
The texture of this one is a weathered flagstone.
If you are into a fun patterns like lace, there are silicone mold sheets that are made for cake decorating.
Decorative Stepping Stones
And beyond the decorative silicone patterns, you can actually decorate your own stepping stones by adding mosaic tiles, or glass cabochons. I’ve got a tutorial for an easy garden mosaic tile stepping stone here.
Many hobby stores sell the kits for these, but cost/value-wise, only makes sense if you are only making one or two.
And personalization is a great way to memorialize .
You’ve probably seen stepping stones with hand or footprints, dates inscribed, and even digital photos that are printed onto tiles and then embedded into the concrete.
Like I said, the options are endless.
Best Concrete Mix For Stepping Stones

There are a few things to look for in selecting your concrete mix for stepping stones.
The first thing to understand is that not all concrete mixes are appropriate for stepping stones. You need to check that the stones can be cast to the thickness you need.
Most manufacturers will list the thickness the mix is rated for right on the bag. Another place to check for this is on the manufacturer’s website.
They usually have a Data Sheet that provides this information.
Most brands also have good customer service, so it’s worth a phone call if you can’t find the written info you are looking for.
Stepping stones that are made from concrete should be at least 1 ½” thick. My natural looking concrete stepping stones were closer to 2” thick and maybe a little more.
The type of concrete I used was Sand Topping Mix.
This is portland cement with sand already added. The max thickness stated for this mix was 2”.
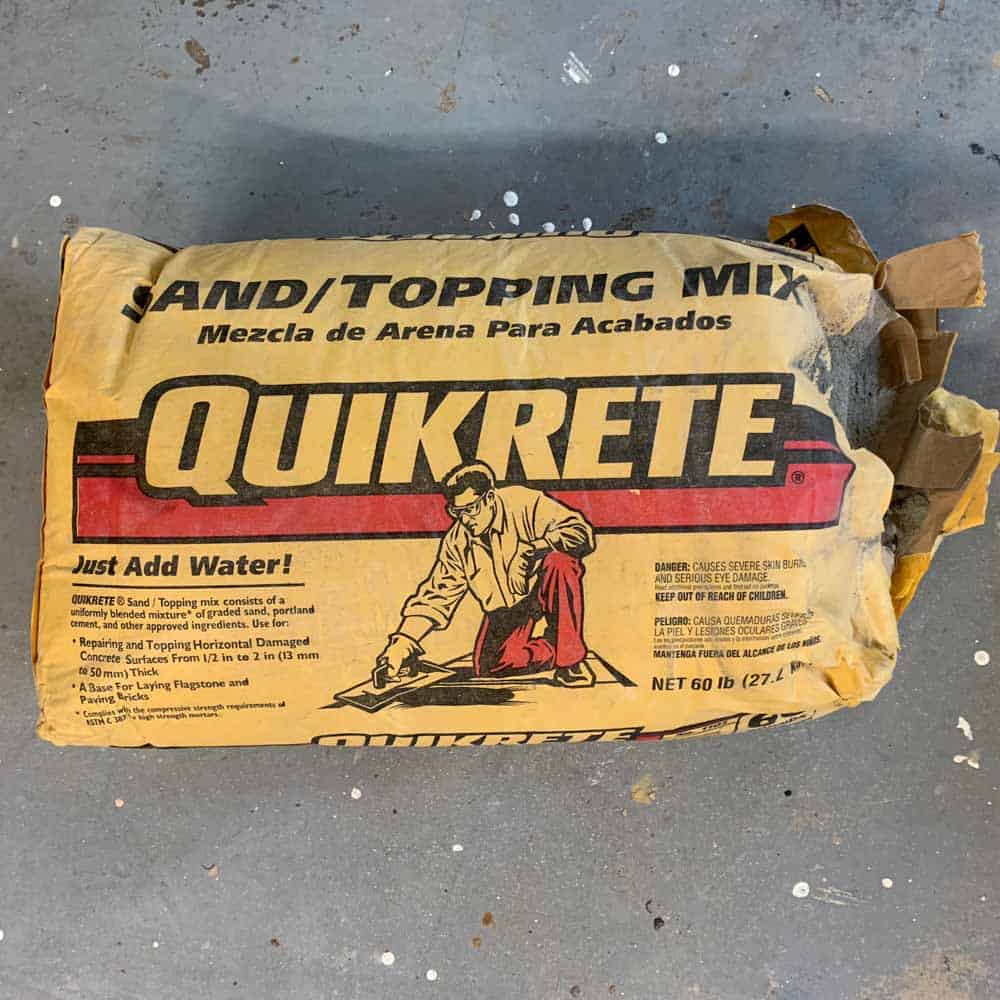
I did have parts of my stones that were thicker, but didn’t experience any problems.
There are more expensive concrete products that are made to be especially crack resistant. These mixes contain a fiber that is mixed in to help with reinforcement.
These fibers are usually nylon or fiberglass.
Though pricey, they should be a safe bet for your own stepping stones. But be sure to double-check the max and minimum thickness that these can be poured.
You do not need to reinforce concrete stepping stones with rebar or wire mesh. You only need to reinforce if the stones are larger than 2×3, or if you are using a mix that is not suited for concrete stepping stones.
General Tips For Laying Your Own Stepping Stones
To lay stepping stones on a dirt path, you’ll need to dig down about 3-4” deep. Then tamp down the dirt and lay leveling sand, which also should be tamped.
You can lay stepping stones on top of grass, but if your lawn is uneven, it will make walking in the stones a bit awkward and possibly unsafe.
Ideally, the walkway should be prepped by first removing the sod and grass in the location the stone is being placed.
The distance that you place stepping stones apart depends on the size of your stepping stones.
Smaller ones may need to be closer together. For my medium and large-sized stones, I had them spaced 2-3” apart.
Unless you are remaking an existing pathway, then you will likely need to level the stepping stones pathway. You can do this with leveling sand.
At the very least, you should place leveling material directly underneath where the stepping stones will be. This will help keep the stepping stones from sinking.
If you have grass growing in the area you are laying these pathway stones, then you may want to use a weed barrier to prevent the grass from coming up in between.
This is of course unless you plan to have the stones encompassed in grass much like garden stones.
And for more ideas on other types of garden pathways you can make, here are 15 different types with tutorials.
Don’t forget to Pin it for later!
Don’t forget to Pin it for later!


Hello Ellen,
Hope you are doing well and that you are not too busy today 🙂
Nice to meet you! I’m Slobodan, and I’m working for the outdoor rocking chair e-commerce website.
This site is focused on selling premium American-made rocking chairs and patio furniture.
I’m reaching out to you because I was looking for sites that I like and that I think would be an excellent fit for our informative guest post about a rustic double swing glider that is perfect for every home with a backyard.
Your site caught my eye.
My question for you are you willing to accept a guest post?
I would provide a perfectly structured 1000-words info article and pay you for your help and time to publish that piece of content on your blog.
Is that something you’d be open to?
Kind Regards,
Slobodan
Hi,
I’m sorry, we don’t accept guest posts. Good luck with your rocking chair business!
Great post; covered every aspect. Thank you.