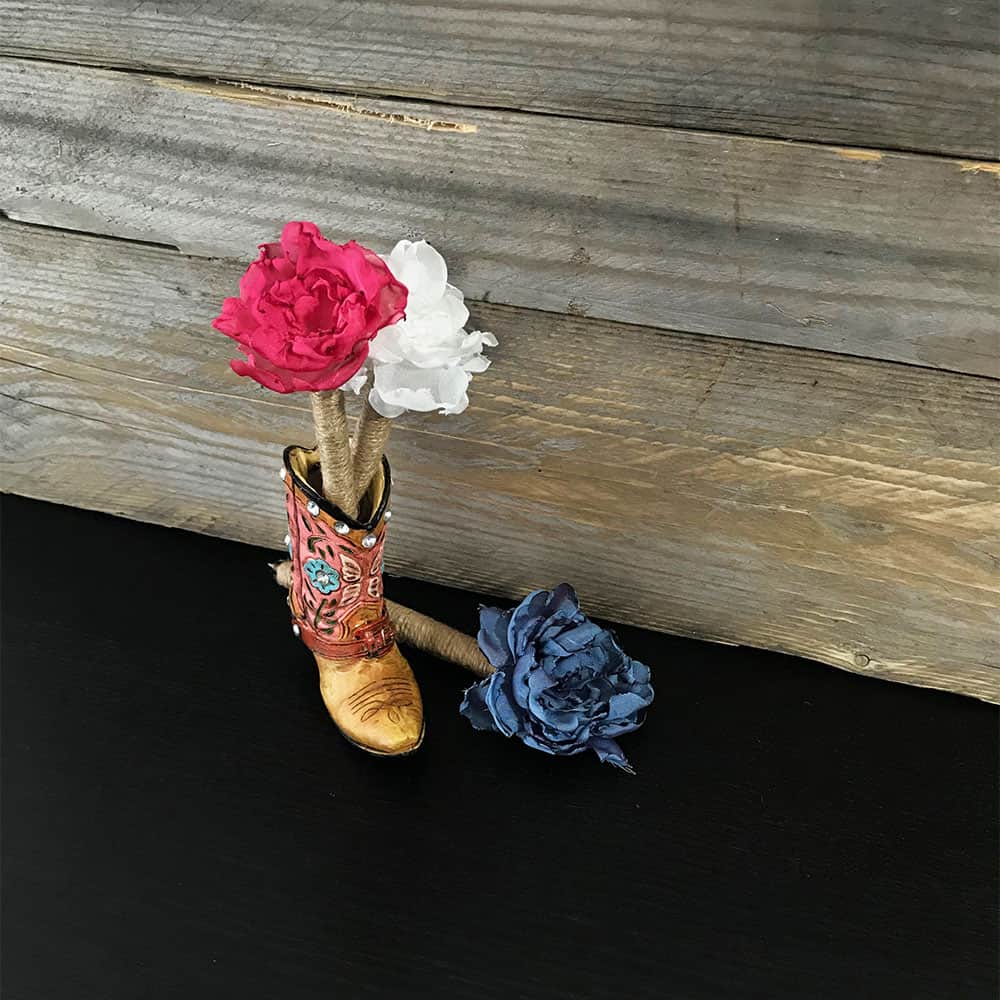
Wedding Guestbook Pen
A rustic wedding guestbook pen, made with twine and decorated with melted fabric flowers. Match the flowers with your wedding theme colors!

I made these cute pens for my own wedding a few years ago. My wedding was a rustic wedding and the venue was a barn. For an alternative to a traditional guestbook, I made wood wall art out of pallet wood and stenciled tree branches with leaves for them to sign- hint– upcoming tutorial project.
I wanted wedding guestbook pens for the guests to use when signing the leaves that would have that same rustic charm as our unique sign-in board. The rustic twine pen was just the right fit.
What Not To Do:
Don’t have your lit candle near a drafty window
Don’t use too much glue and don’t let it be thick
DIY Difficulty Level | Easy
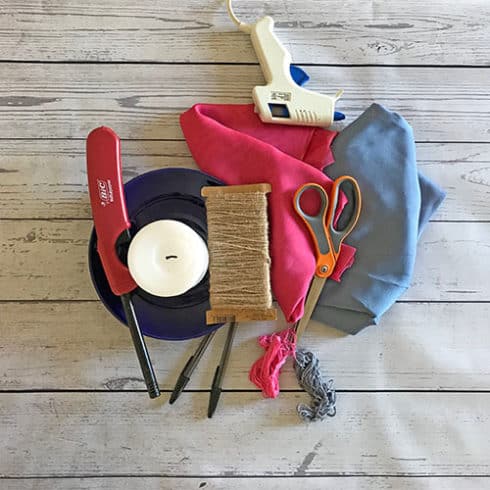
Materials For Making A Wedding Guestbook Pen
- Pens or extra fine point Sharpies
- Hot glue
- Organza material- 1/2 yard
- Scissors
- Candle
- Thread to match the organza
- Fabric stiffener- optional
- Bowl of water
- Hot glue gun- low heat preferable
- Lighter
Wedding Guestbook Pen Tutorial Steps
Step 1. Glue The Twine
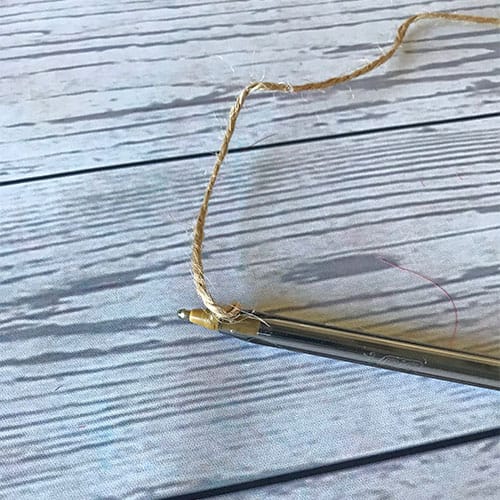
To get started on your wedding guestbook pen, you’ll want to wrap the twine from the tip of the pen (the writing end). Place a small dab of glue where the pen is beveled.

Point the end of the twine toward the top of the pen (non-writing end).
Step 2. Wrap The Twine Around The Pen

Now wrap your twine by starting wrapping the tip of the pen. Add another thin touch of glue and wrap the twine string around the pen a few times.
Only add 1/4-1/2″ at a time or it will dry too quickly and only place a very thin amount of hot glue on the pen. I rarely squeezed the gun, but instead just rubbed the tip on the pen, to help keep it thin.
After those first few wraps, instead of wrapping the twine around the pen, just spin the pen between your fingers while holding the string and letting it feed as you spin. This will be much easier and quicker.
Also, you don’t need to glue the entire length of the pen, you only need to add glue every other inch or so. Keep pushing downward so you don’t end up with gaps.
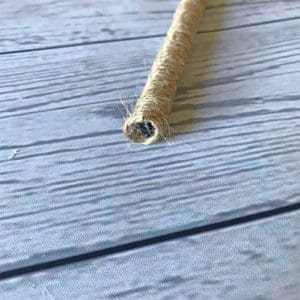
Step 3. Prep The Location For The Flower
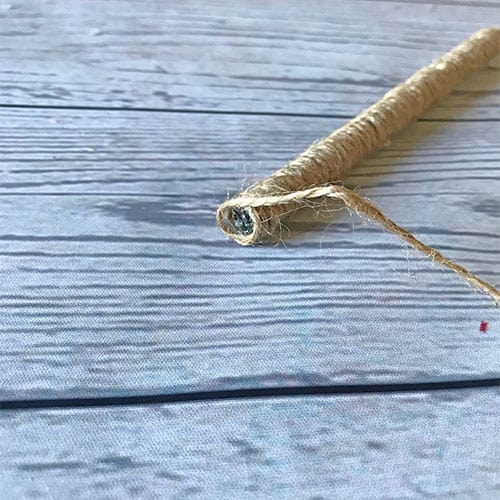
Continue moving upward until you come to the top.
You want the whole pen covered with the twine, but also need a place to glue the flower to, so in addition to the last wrap at the top of the pen, you’ll add an extra couple of wraps to hole.
Add some glue to hold it together. This little hole will also help shape your flower when you attach it. Snip off the excess twine.
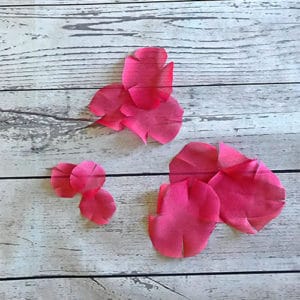
Step 4. Trim The Fabric Into Squares
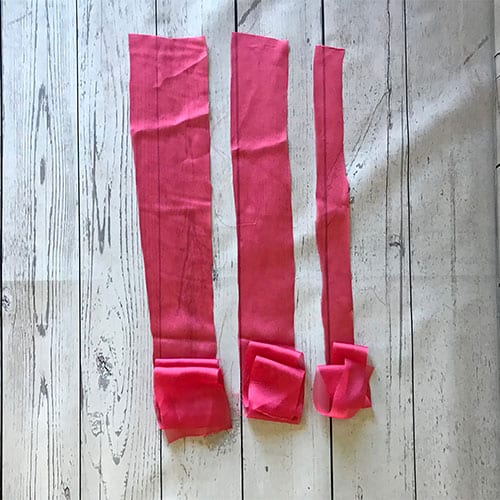

Time to start on the fabric flowers.
Cut your material into squares 3 different sizes of squares by first cutting into long strips that are 3 different widths. I did mine at 3 1/4″, 2 1/4″ and 1 1/4″ wide. Then cut each strip into squares.
Step 5. Round Off The Fabric Squares

Next, since you want the pieces to be fairly round, cut the corners and round them off. I found that the rounder I made these, the better the flower looked.
Note: These circles don’t need to be perfect in size or shape, but the size and shape will affect the way your flower looks. Have fun and play around with this to see what shapes you create and how you want your flower to look.
Step 6. Cut Slits Into The Petals
Cut short slits in the circles evenly spaced. I usually cut 4, 5 or 6 slits per circle, and only about 1/4 to 1/3 of the way in. If you cut them too far in, the petals will be floppy.
Once you have your slits, it is time to singe them with the candle. The flame will melt the edges which will make them curl and also seal them so the threads aren’t peeling off.
Step 7. Singe The Fabric Flowers
[fusion_text columns=”” column_min_width=”” column_spacing=”” rule_style=”default” rule_size=”” rule_color=”” hide_on_mobile=”small-visibility,medium-visibility,large-visibility” class=”” id=”” animation_type=”” animation_direction=”left” animation_speed=”0.3″ animation_offset=””]

Light the candle and very carefully hold the fabric to the flame. Make sure to have your bowl of water nearby in case the fabric catches on fire.
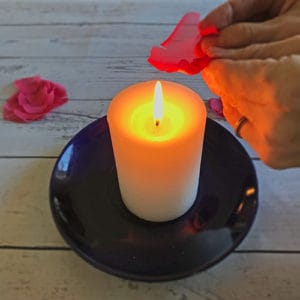
Turn the edges as they melt and shape them with the flame and by the angle you are holding them at. Experiment with how close to the flame you need to get because there is no set rule here.
There are many variables like how large the flame is, whether it’s moving a lot, the exact make-up of your organza.
Step 8. Sew The Petals Together
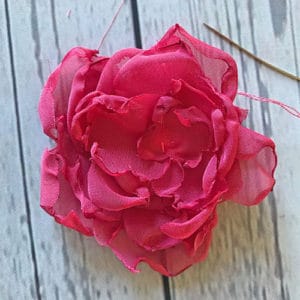
Take your melted petals and stack them from largest to smallest. Alternate them so the petals overlap the spaces between.

Now thread your needle and make a couple of stitches through the flower. Start from the bottom and go straight through the top and back down and repeat. Don’t tie your knot on the bottom without checking if the flower petals have stayed the way you want, sometimes the stitch makes it go a little askew.
Step 9. Fasten The Flower
Finally, place a dab of glue in the hole you created on the end of the pens and carefully press your flower into there.
If you feel like the flower is too floppy, you can spray it lightly with fabric stiffener. Make sure you have the flower in something that keeps its petals shaped the way you want them, a wine bottle works for this.
Since the wine bottle is taller than the pen and has a narrow enough neck, it will hold it so the flower petals stay upward. Let it dry for about an hour.