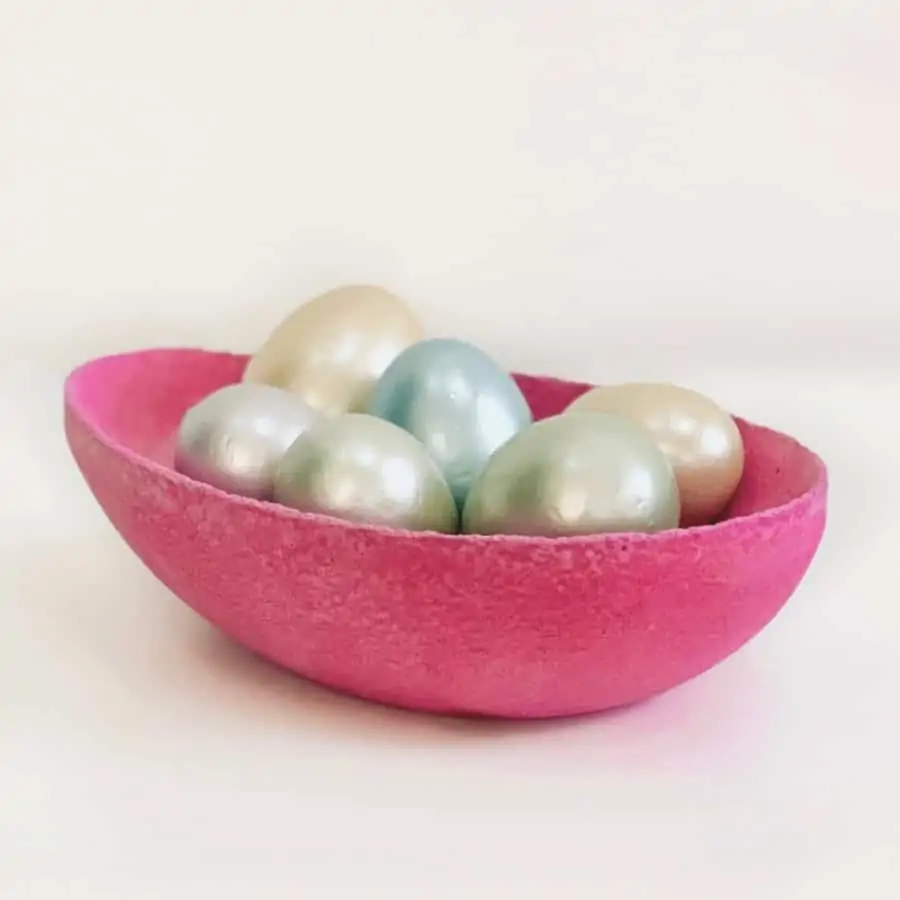
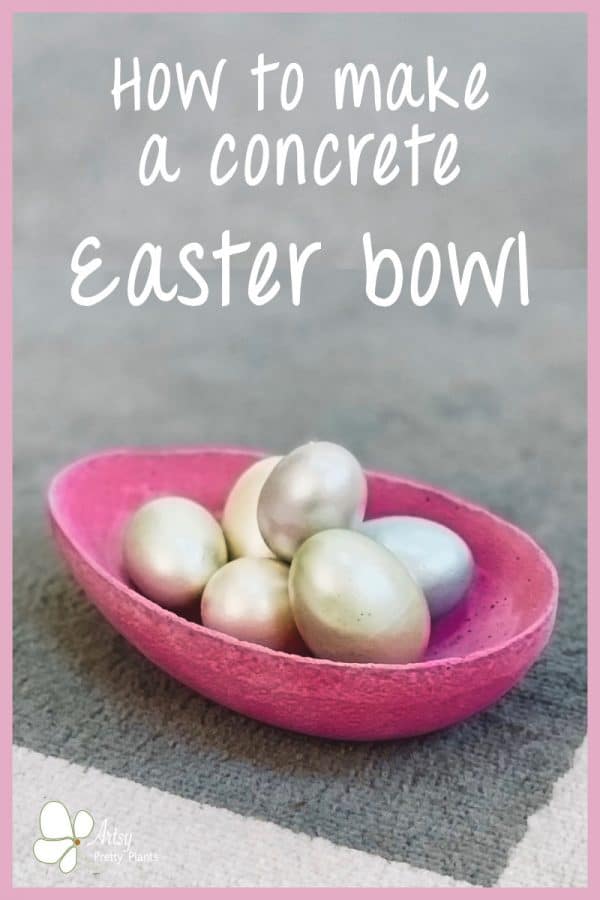
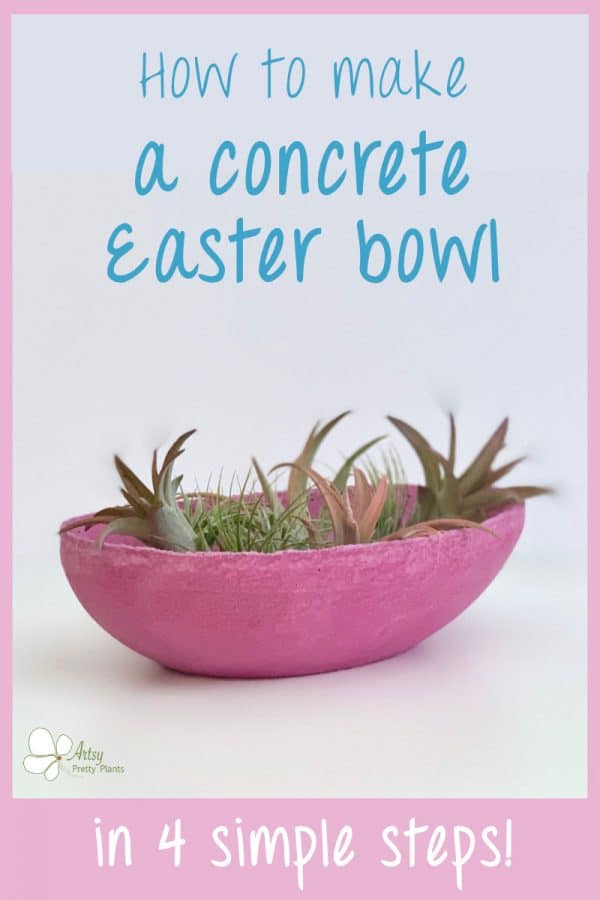
Simple Colored Concrete Easter Bowl
You can make this fuchsia colored concrete Easter bowl in just four simple steps!
This colored concrete easter bowl is super simple to make at home.
If you’ve been waiting for an easy one to get started with, this just may be the one.
Even though this is a great Easter craft for adults, it is also a perfect one to do with kids.
And what’s a better way to decorate your home, than to do it with your own handmade goods?
I guarantee your neighbors won’t have this unique and beautiful concrete Easter bowl on their tables. If you are looking for more Easter crafts, check out this post for 17 amazing ideas for Dollar Tree Easter crafts.
Here’s another unique decor project you can make for Easter- the concrete eggshell air plant planters.
Some of the links on this page have been provided as a convenience for finding materials. These links may also be affiliate links. As an Amazon Associate I earn from qualifying purchases, at no extra cost to you.
I only recommend products I’ve used and loved, unless otherwise stated. Click here to read my full disclosure policy.
DIY Difficulty Level / Easy
Materials For How to Make A Simple Concrete Bowl For Easter
- White mortar mix
- Disposable bowl
- Disposable cup
- Durable nitrile gloves– I like these because they are so durable, you can rinse and reuse them
- Safety glasses
- Safety mask– rated for silica dust
- Large plastic Easter egg bowl
- Powdered, cold water dye
- Play sand
- #220 grit sandpaper
- Ceramic tile -min 8×8”, or a flat board (to help with vibrating)
- Heat gun (or hairdryer may work)


Tutorial Steps For How A DIY Colored Easter Bowl
Before starting the tutorial, it may be helpful to read my article comparing the different concrete mixes and sealers– Cement & Concrete Crafts Tests!
Another important article is Making Cement Crafts Techniques & Tips with info on cement materials, mixture consistencies, demolding, safety and clean up!
Step 1. Mix And Color The Concrete
The beautiful thing about this project is that you don’t need to fuss with the molds.
The two plastic egg halves for the concrete Easter bowl are ready to go.
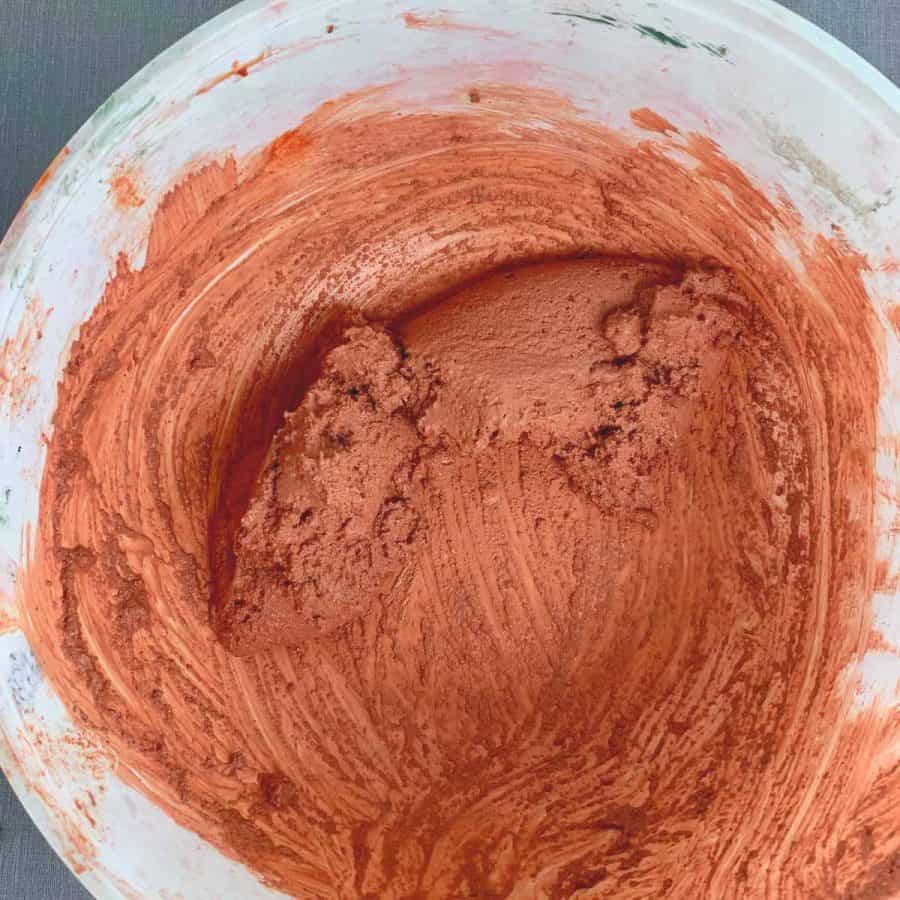
First mix the dry mortar mix with water. If you are using the white mortar mix, then you will need to make the mix a little thicker than you might with a regular cement.
This mortar mix can’t handle too much water, so mix it to a mud pie consistency.
Once the lumps are gone, go ahead and add the powdered dye to the concrete. I probably added just ½ of a teaspoon.
If you add more and the dye color doesn’t get deeper, then you’ve hit the maximum concentration of color.
I would say my concrete bowl is slightly under the deepest level of color concentration.
Also, make sure you make enough dyed mix for the Easter bowl.
You will need enough mix that when the inner bowl is inserted inside the outer bowl, that the concrete will overflow.
Step 2. Cast The Concrete Into The Bowl
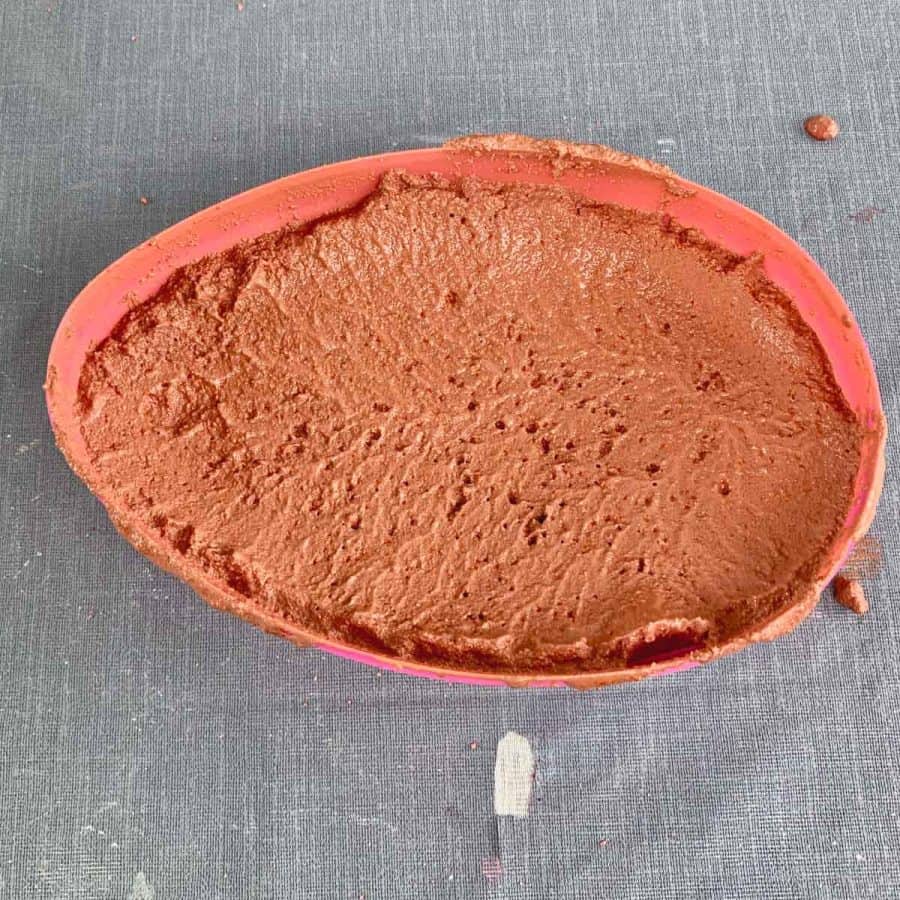
Add the concrete mix to the bowl. Just scoop it up and drop in the bowl.
Though I didn’t use a board here, I normally like to use a board underneath my concrete crafts when casting because it helps with vibrating the bowl or other crafts.
Before adding the inner egg mold, go ahead and vibrate this now.
If you don’t have a board, then just tap the bowl on the table and tap the sides for a minute or two.
And by the way, if you like this tutorial, then you may want to check out my egg planters made with cement!

Now go ahead and add the top/inner mold and press it as far as it will go. You can see in this photo that the top (clear) mold is slightly larger than the bottom mold.
The inner mold will stop automatically with just enough space at the bottom to provide a proper thickness of ¼ – ½”.
Something to note, where the two edges come together, the edges will be thin.
This is fine, just wipe off the excess and just be aware that the edges may be brittle when you demold.
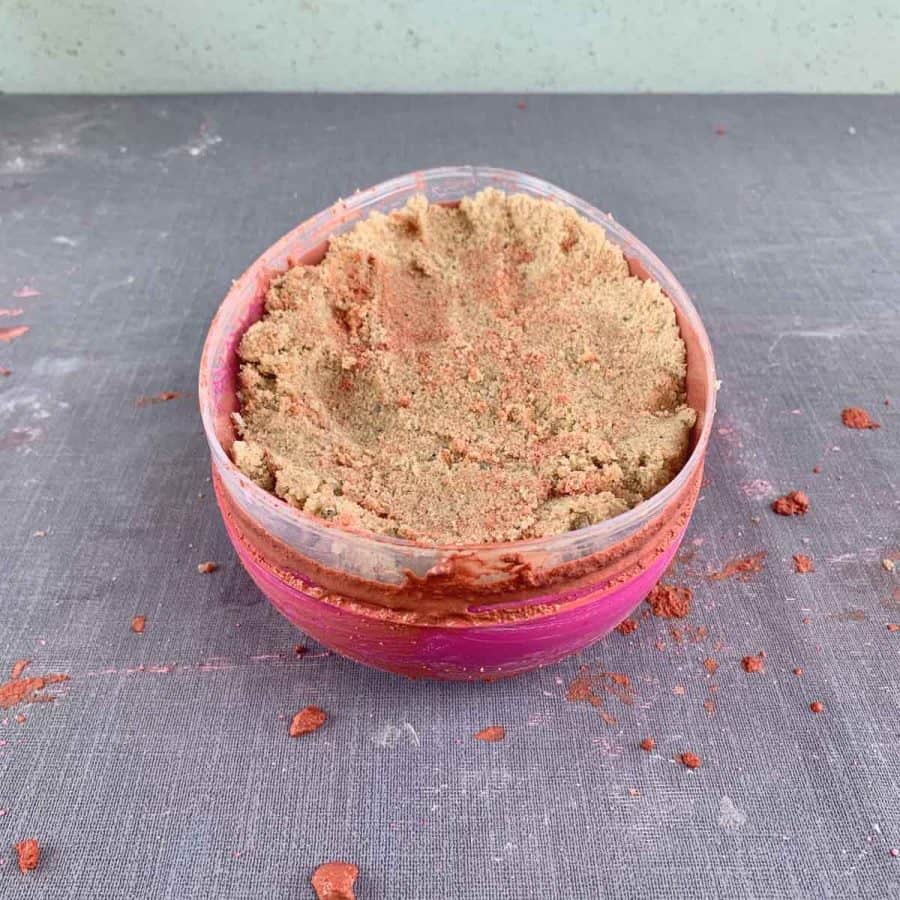
The lid will slide out of place, so add moist play sand to weigh it down.
I like using sand because it will keep the inner mold weighted evenly so your cast piece doesn’t become lopsided.
This mix needs 24 hours before it can demolded, so let this cure overnight.
Step 3. Remove The Concrete Easter Bowl From The Form

This should be easy to demold and you may even be able to pull the top right off.
If so, then flip this over onto a soft towel and try to gently shake the bowl out.
Keep the bowl close to the towel so it doesn’t break when it comes out.
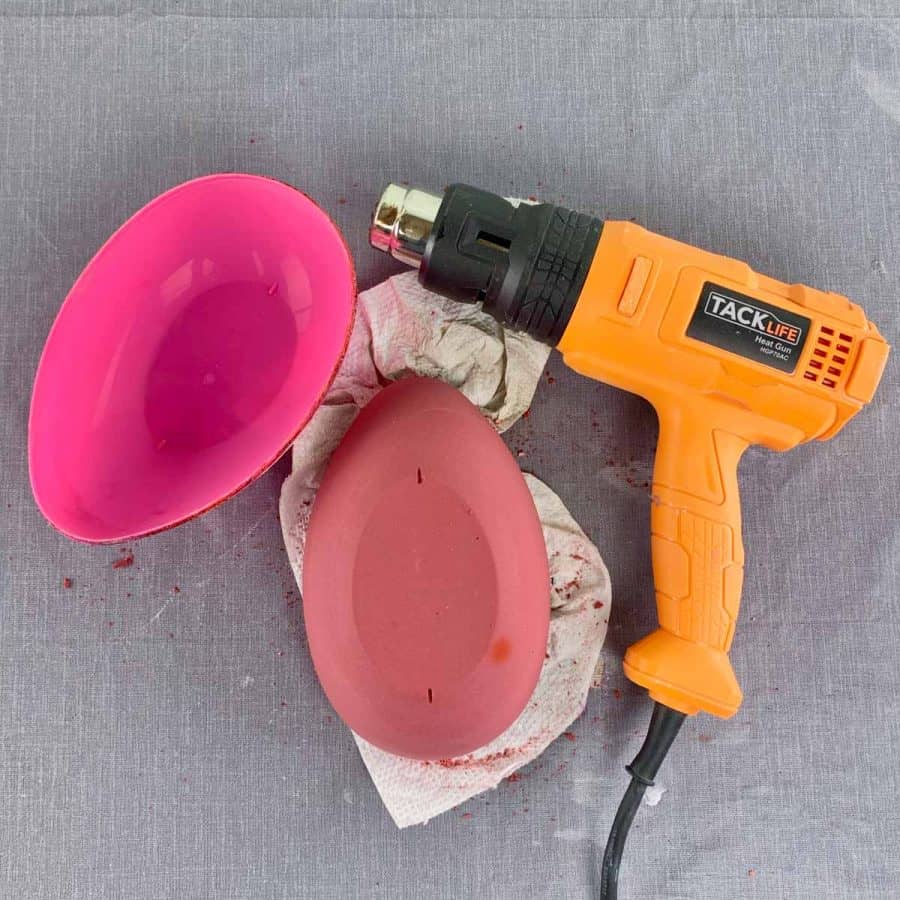
If it doesn’t release easily then use a heat gun ( a hair dryer will probably also work for this mold) and run it back and forth over the outside bottom of the outer mold.
It should release the concrete within a few seconds.
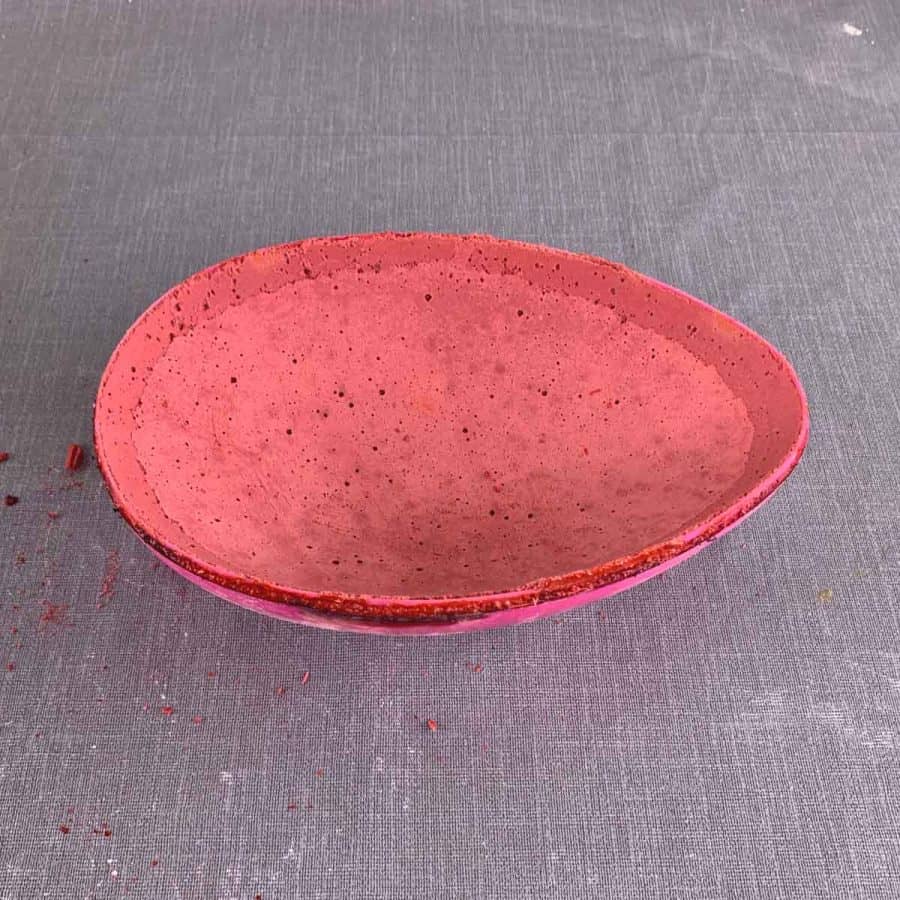
Step 4. Sand The Edges Of The Concrete Easter Bowl
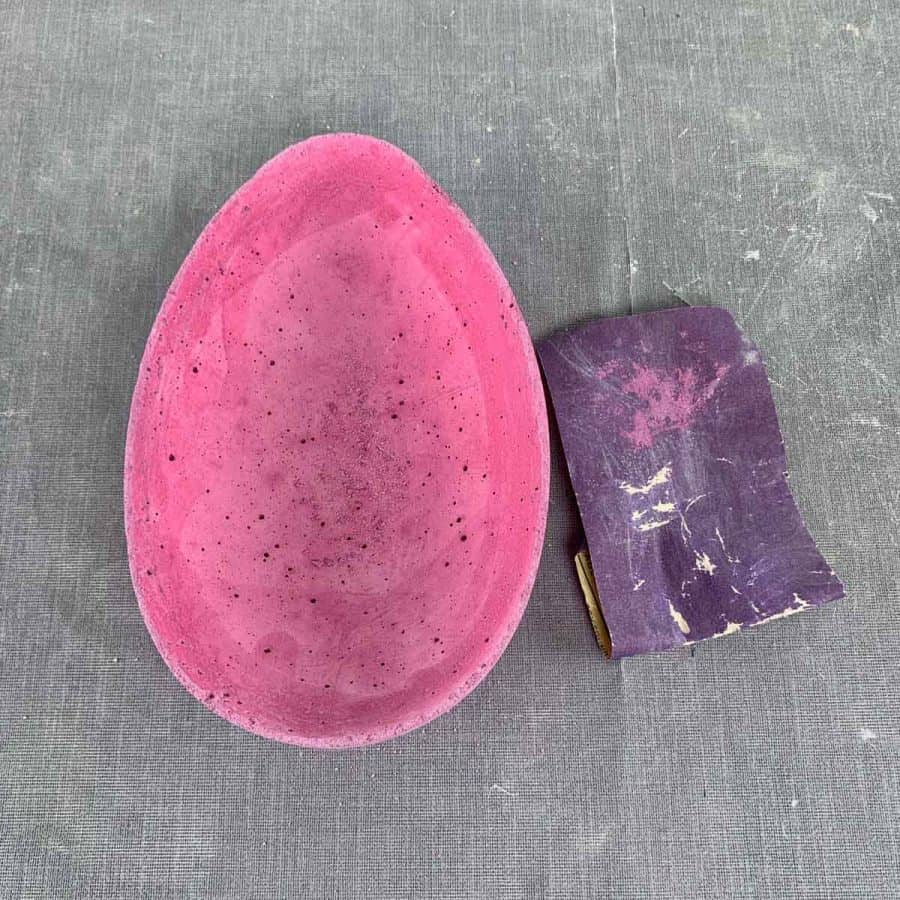
Use the #220 grit sandpaper to clean up the edges. Remember that the thin edges may be brittle, so work gently.
Don’t sand the other parts of this bowl or you may scuff up the surface.
Since the plastic was so smooth, the rest of the concrete easter bowl should be smooth as well and not require sanding.
Don’t forget to Pin it for later!
Simple Colored Concrete Easter Bowl
How to make a colored concrete bowl for Easter! Here's a super easy tutorial for making something with concrete in just four steps! Cheap too, because the mold for it came from the Dollar Tree.
Materials
- White concrete
- Powdered dye
- Plastic egg mold
Tools
- Please see the full materials list above the tutorial for details and links.
Instructions
- Mix The Concrete To A Mud Pie Consistency And The Color To The Wet Concrete Mix
- Cast The Concrete Into The Easter Egg Bowl And Press Inner Mold Inside
- Demold The Concrete Easter Egg Bowl From The Egg-shaped Form- Use A Soft Cloth Underneath
- Sand The Edges Of The Bowl With #220 grit sandpaper


Hi Ellen, I can’t express enough how much I love your site! I tried to follow the link to the powdered dye & the link seems to be broken. Is it titanium dioxide you are using? Thanks so much!
Hi Victoria,
Thank you! And thank you for letting me know about the link. It’s actually not a titanium dioxide, it’s not even made for concrete which is why I’m surprised at how concentrated the color is. I have fixed the link. The price went up since I first added it -I think it was about $6 before. Some of the other colors are cheaper right now, but I bet it varies from day to day.