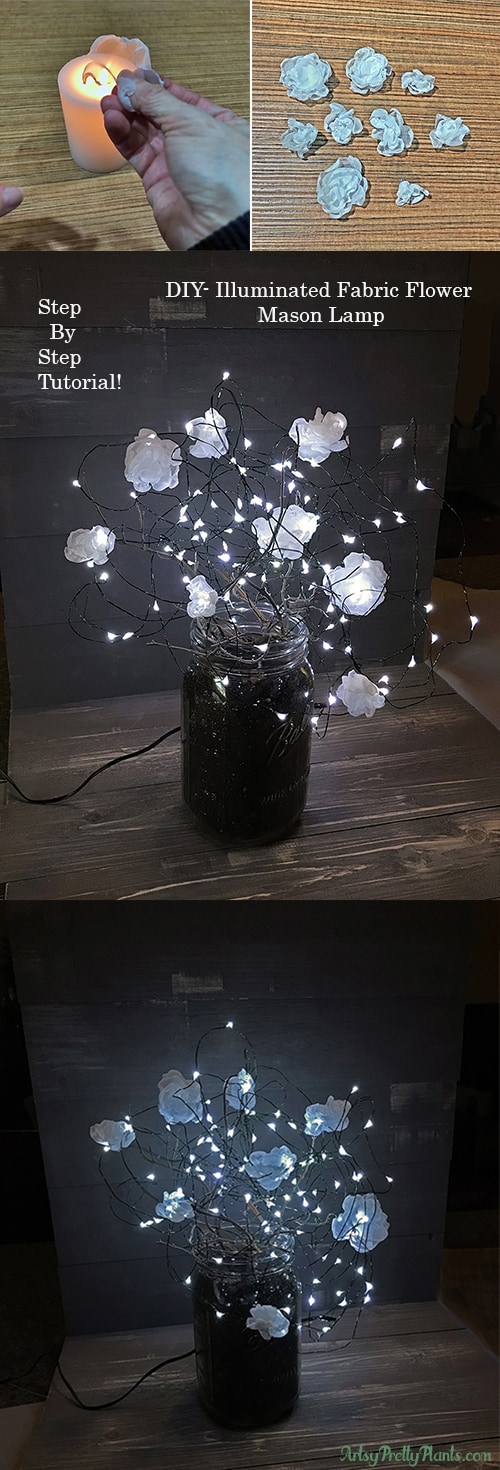
DIY Mason Jar Table Lamp (with Fabric Flower lights)
Learn how to make a beautiful and ethereal DIY mason jar lamp with fabric flowers, and fairy lights.
I learned how to make singed fabric flowers when I needed rustic guest sign-in pens for our wedding.
They were much easier to make than I expected and they are so beautiful and it seemed like there must be a way to use these in other projects.

Back in the winter, on my porch, I had a Rosemary plant in a Mason jar that had died.
The wiry branches of this plant were shaped wonderfully so I didn’t want to throw it away.
I then got the idea to attach singed fabric flowers to the branches and make it look like a plant.
I draped some fairy LED lights around it and the result was this beautiful, little ethereal DIY Mason jar lamp.
Some of the links on this page have been provided as a convenience for finding materials. These links may also be affiliate links. As an Amazon Associate I earn from qualifying purchases, at no extra cost to you.
I only recommend products I’ve used and loved, unless otherwise stated. Click here to read my full disclosure policy.
DIY Difficulty Level | Easy
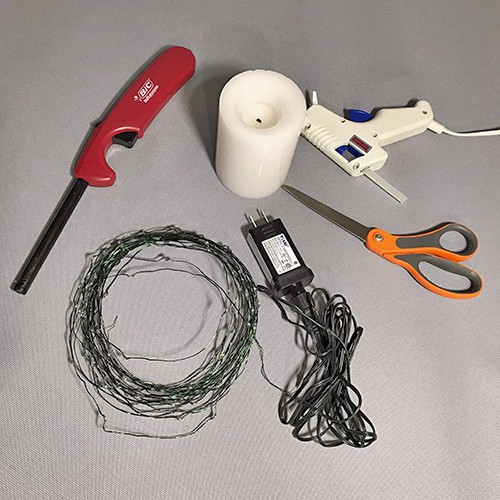
Materials For Making A DIY Mason Jar Table Lamp
- Mason Jar
- Filler- soil, small stones or glass beads
- LED fairy lights -battery operated
- Organza Fabric
- Thread to match fabric color
- Fabric Stiffener
- *Rosemary twigs or other small twigs or branches- you can find your own in nature, or pick up from a craft store
- Scissors
- Hot Glue Gun
- Sewing Needle
- Candle
- Lighter
DIY Mason Jar Lamp Tutorial Steps
Step 1. Trim The Fabric

Cut the material into 3 different sizes of squares, approximately 1 ½”, 2″ and 2 ½”, depending on what size you want your flowers to be.
our outside petals will be the largest, medium size in the middle, and the smallest squares will be the most inner petal.
The bigger the squares, the bigger the flower. Varying the overall sizes gave me some variation and a more natural appearance.
Step 2 and 3. Round The Fabric Petals
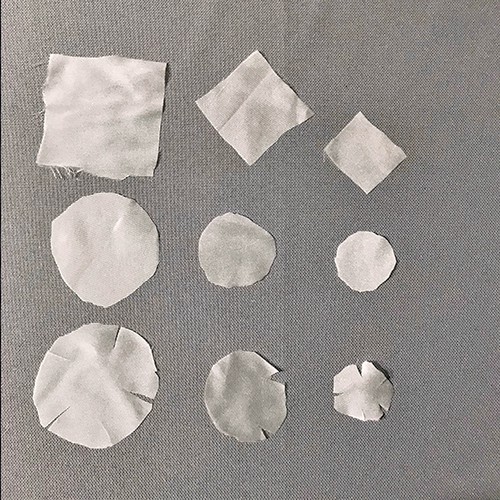
Start rounding off corners a bit to make into a circle. This doesn’t have to be perfect, but you also don’t want the circle to be too lopsided.
Cut slits about 1/3 of the way from the edges. I mixed up a different amount of slits for each size anywhere between 4-6 slits.
Step 4. Singe The Fabric
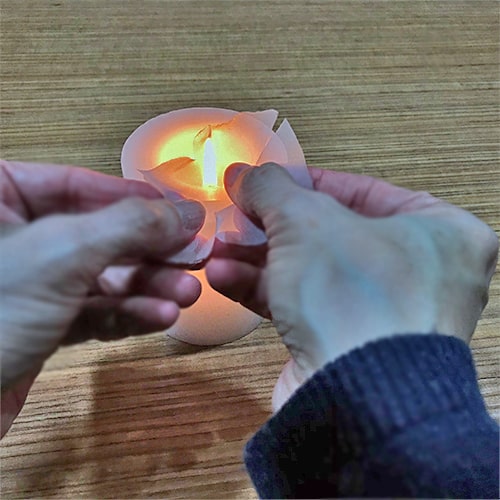
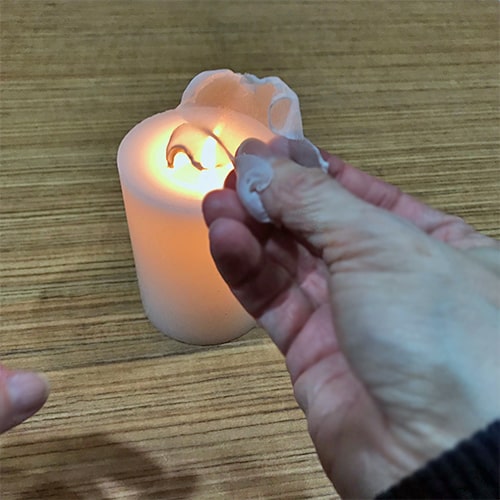
Light the candle and hold the fabric above the flame. Be careful to not get it too close or it will burn the edges and make them black instead of singeing them.
Rotate the fabric around so your petals start to curve. You’ll want to play with this so you can figure out what shapes you want and how to get them.
Have fun with it, there’s no right or wrong here.
Step 5. Assemble The Petal Pieces
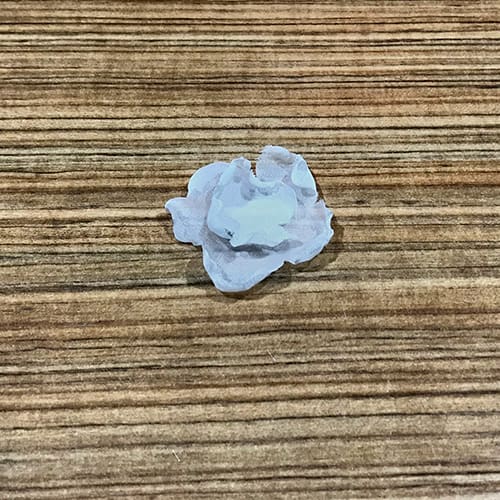
Once you have your singed petals, assemble them so that the largest goes on the bottom medium in the middle, then smallest.
Alternate them so the petals aren’t overlapping in the same spot so that you have the petals looking like a natural flower.
Step 6. Stitch The Fabric Flower Pieces

Thread your needle to a length of about 6″ long and tie a knot. Run the needle up through the petals from the bottom, and in the center.
Make a couple of cross stitches. If you want a more closed petal look, just pinch the bottom so the petals close and run the needle up higher where you have it pinched.
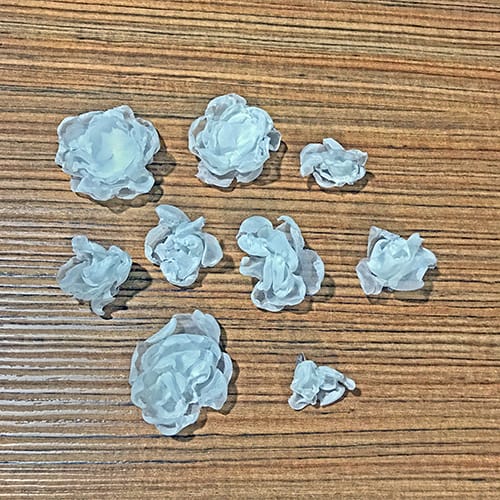
Step 7. Stiffen The Flowers
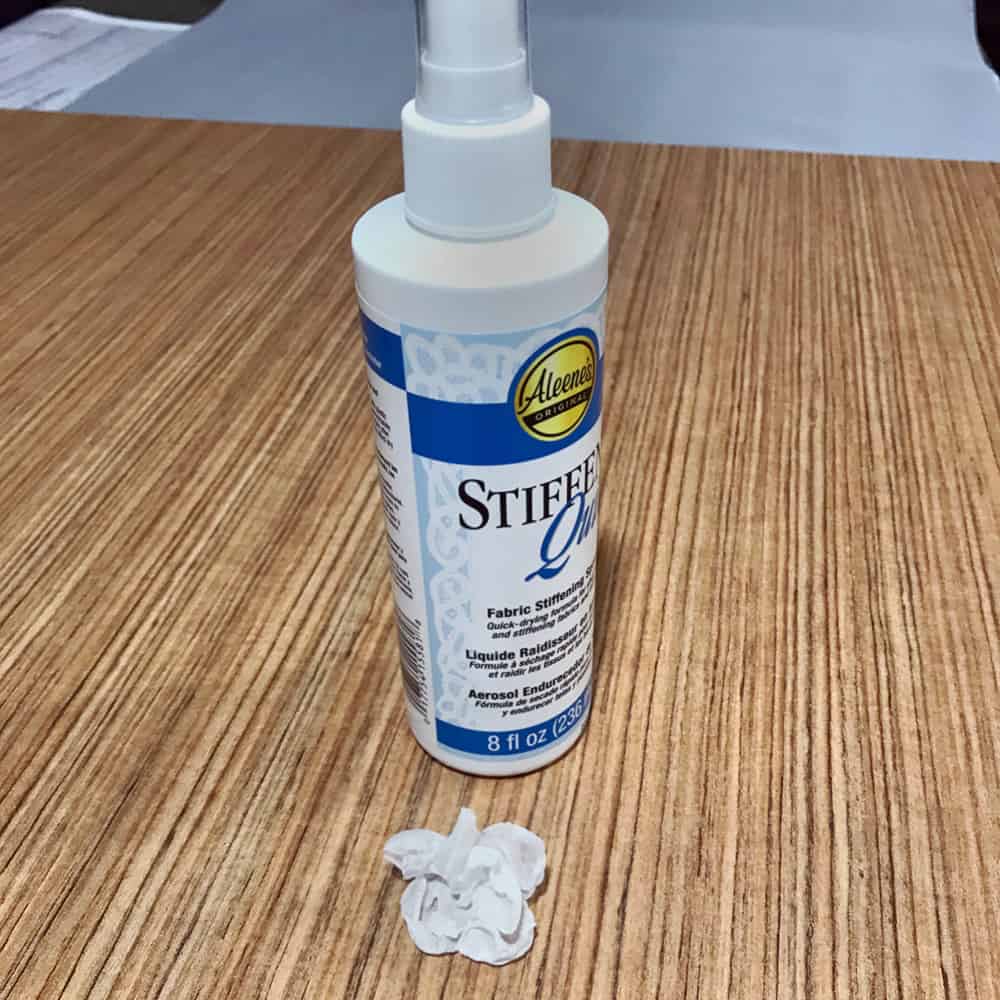
When your flowers are the shape you want, spray them with fabric stiffener. This will prevent the flowers from drooping over.
Next, hang them upside down to dry so the petals don’t flatten out. You will want to let these dry about an hour or less.
Step 8. Fill and Arrange The Mason Jar
Take the Mason jar and fill about ¾ of the way. I had soil in it already from my no longer living Rosemary, but I recommend adding pebbles or glass beads.
Now set in your branches and arrange them.
Add more filler to secure them. {I don’t have a photo of this since I my Rosemary branches were from ones I planted in the summer, but didn’t make it through winter.}
Step 9. Add The Lights

Drop your fairy lights onto your branches and manipulate to your liking.
Step 10. Apply The Fabric Flowers
Using the hot glue, add glue to the bottoms of your flowers and place them strategically on the wires. I put most of mine right on top of the actual bulbs since they are LED and don’t get hot.
If you have an excess amount of light strand left over, you can wrap it around the neck of your jar.
To keep the cord in the back, just put a dab of glue on the back of the jar and attach your wire to that.