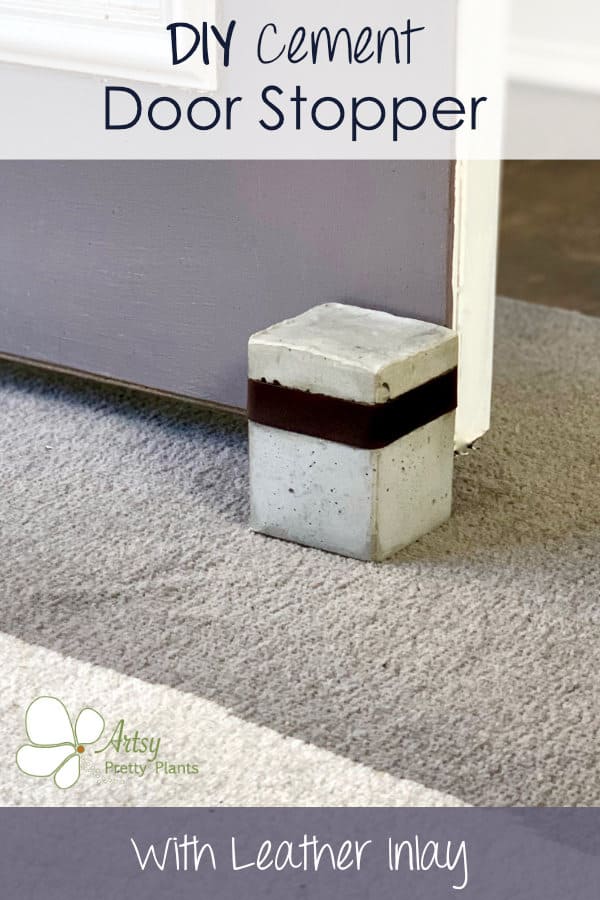
Make a Cement Door Stopper (with a Leather Inlay)
An easy and unique DIY cement door stopper, wrapped with a decorative leather inlay.
When I made this cement door stopper with leather, we were living up on a ridge.
And when we had our windows open, we could get crazy wind tunnels through the house, so doors were slamming all over the place.
I couldn’t find the generic door stopper that I got at a big box store a while back, so I went ahead and made one out of concrete – and looks much nicer!
I wanted this to have more visual interest than just a block of concrete.
Since we had some leather left-over from a bag my husband made, I designed the concrete door stopper to have a leather inset that wrapped the stopper.
I ended up making this four times because of the challenge of creating a recess for the leather inlay.
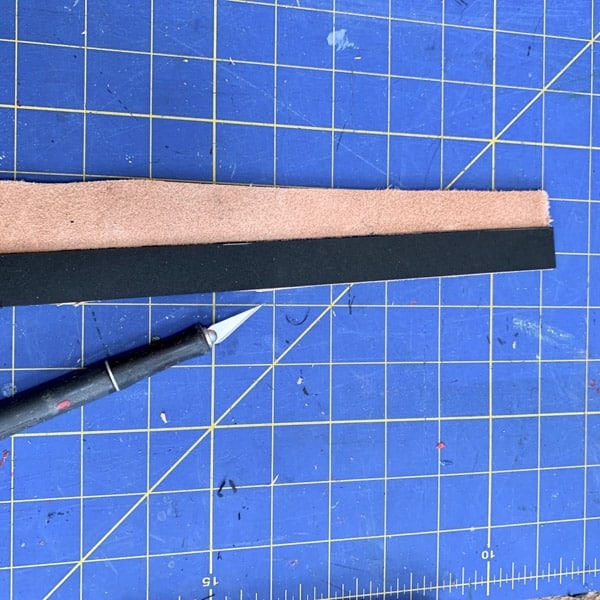
First, I needed something that would be the same thickness as the leather so that it would be flush with the cement.
My first couple of attempts were using an acrylic sheet, but it was way too difficult to cut without having a power saw with the right kind of blade.
A year later, I realized that black matting board was approximately the same thickness and finally, a success without much trouble!
Some of the links on this page have been provided as a convenience for finding materials. These links may also be affiliate links. As an Amazon Associate I earn from qualifying purchases, at no extra cost to you.
I only recommend products I’ve used and loved, unless otherwise stated. Click here to read my full disclosure policy.
DIY Difficulty Level | Easy
Materials For A DIY Cement Door Stopper
- CementAll, Rapid Set– 10lb box
- Pint-size cream or milk carton
- Charcoal pigment (optional- the cement is off-white naturally)
- Tooling leather, dyed -3/4″ x minimum of 12″; thickness of 5 ounces or 1/16”
- Leather dye– if you want to dye your own
- Black mat mounting board at 1/16” thick
- Tyvek tape or packing tape
- 2-part epoxy glue
- Craft sticks
- X-acto knife
- Disposable plastic bowl
- Disposable plastic cups (2)
- Nitrile gloves- light duty
- Straight edge ruler
- Non-skid rubber pad (if your floors aren’t carpeted)
- Sanding block- grit around #180-220.
- Lint-free rag
Notes About Materials
For the leather, I have a link to Amazon, but if you have a Tandy leather or other leather store near you, it’s easy to get a small piece.
You can pick up dye there or buy a piece of leather pre-dyed.


Before starting the tutorial, it may be helpful to read my article comparing the different concrete mixes and sealers– Cement & Concrete Crafts Tests!
Another important article is Making Cement Crafts Techniques & Tips with info on cement materials, mixture consistencies, demolding, safety and clean up!
DIY Cement Door Stopper Tutorial Steps
Step 1. Cut The Mat Board Pieces

First, cut the mat board 11” long by ¾” wide. This will act as your mold for the leather inlay.
Then, using the X-acto blade, carefully score the mat board and then make a few passes, cutting until you have sliced through.
The 11” piece is longer than you’ll need because you will be using it to trace the leather in the next step and it needs to be a little oversized.
Note: If you are using a pre-cut and dyed piece of leather, then skip to Step 4.
Step 2. Trim The Leather
If yours came to-size, then skip ahead to the next step.
Take the 11” mat board piece you just cut and trace it onto the leather.
This way you will be sure to have an exact fit with the leather inlay. Then using an X-acto blade and straight edge ruler, cut your strip.
Now trim the mat board into 4 pieces. The carton you are using isn’t completely square inside, so the lengths will be different with (2) at 2 ⅝” (2) 2 11/16” long.
Step 3. Dye The Leather
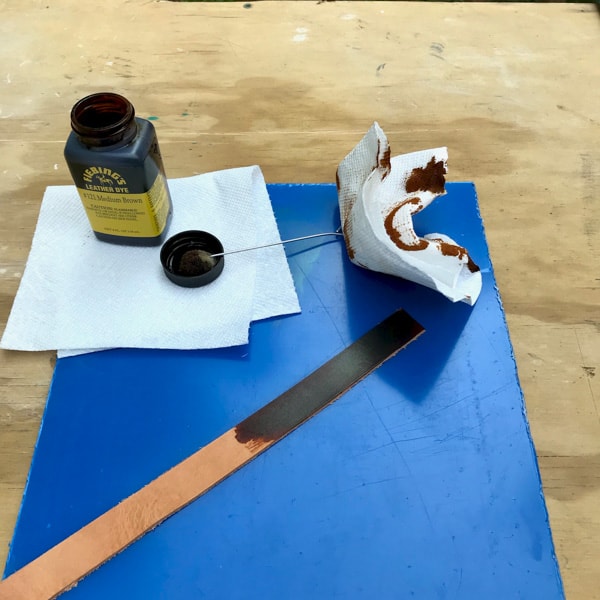
You may skip this step if your leather is pre-dyed.
Use gloves for this step. Take the dye stick, dip it into the dye and apply it slowly in overlapping layers, blending and wiping with a cloth as you go to keep it uniform in color.
Step 4. Trim The Carton Mold For The Cement Door Stopper

Open the top, bottom, and side of the carton- where it is seamed together. Use the X-acto knife to cut off the angled top part of the carton, taking care to not squish the carton.

Next, carefully open the side seam, then cut three sides of the bottom off the carton, leaving one side attached. Do this as level and straight as possible.
Trim off the part where the side seam has the extra overlapping piece.
Step 5. Trace The Placement Area For The Mat Board
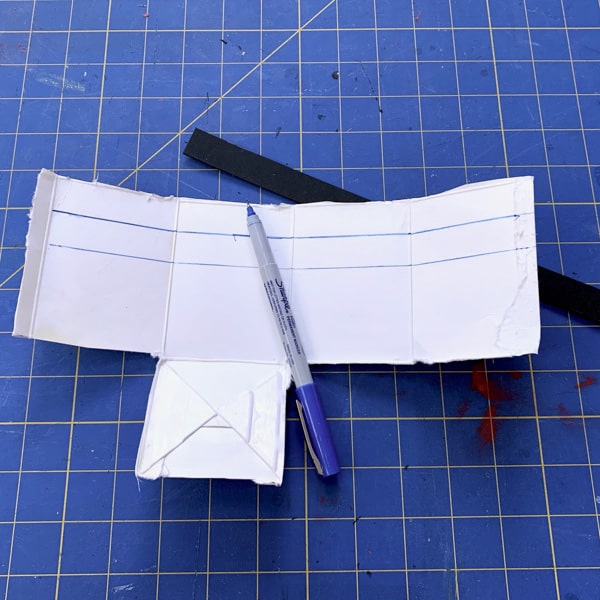
With the carton lying flat, use the mat board piece as a guide for tracing and lay it at the top of the carton and mark a line across the bottom.
Then move it down to that same mark and create another line at the new bottom so that you have just traced it. This is where the mat board will be glued in Step 7.
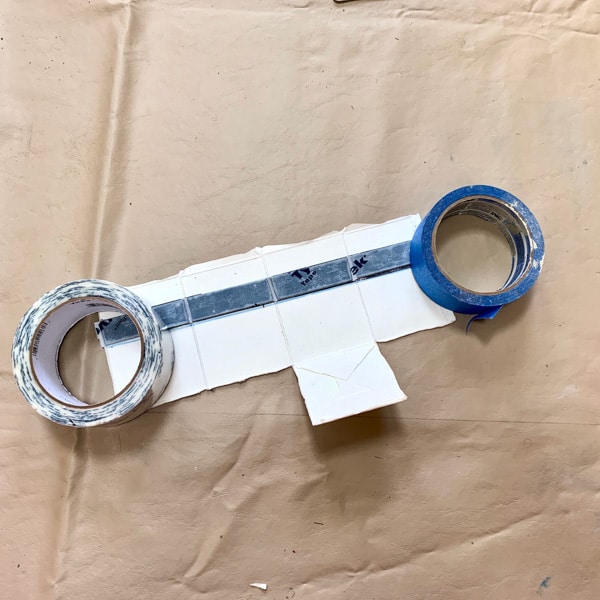
Step 6. Seal The Mat Pieces

Wrap the individual pieces of the mat board with Tyvek tape. They get glued to the carton at the location where your tape seams come together.
When taping these, make sure to leave about a ⅛” overlap on each end and press the ends together to seal it (picture a wrapped stick of gum).
Step 7. Glue The Mat Board Pieces For The Stopper’s Leather Inlay
Mix the epoxy glue, per the instructions on the package, and lightly rub it on the back of each piece of the Tyvek-covered mat board.
You want the glue to be thin so that these sit as flush as possible to the carton. Be sure to have the seam facing the carton.
Line up each piece to your marked line and press down. They will be very slippery at first, so wait about 5 minutes before positioning them.
Try to line them up perfectly. FYI- your taped ends will meet at that harsh seam in the carton.
Check again that the mat board pieces are positioned correctly, then place something on top of them to hold them flat.
You must wait at least 30 minutes for these to set before pouring the cement.
Step 8. Re-assemble The Cement Mold Container

Now you can re-assemble the container using the Tyvek tape to re-seam the vertical opening and also on the bottom.
Step 9. Mix The Concrete Mix And Pour

Once the glue is permanently set, mix the concrete. Fill up one of the disposable cups with water, the other you’ll use for scooping the concrete powder.
Scoop out about a full cup of the concrete. My cup was a 12oz cup and I ended up using a little more than 2 full cups worth. Then slowly mix in a little bit of water.

Use your gloved hands to mix the concrete and once it is the consistency of a thick milkshake, you are ready to pour it into the carton.
Now just pour it in until it’s close to the top, but not all the way- leave about 1/8”. Shake it a bit and tap it on your work surface to level it out and help remove air bubbles.
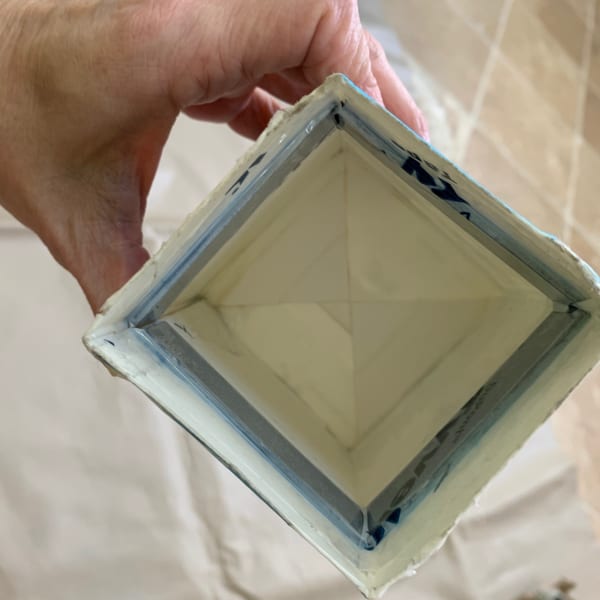
Step 10. De-mold The Cement Stopper

After a couple of hours, the concrete has cured enough that you can de-mold the cement stopper.
Just tear or cut open the container and pull out the door stopper.
Test the inlay spacing to make sure the leather strip fits. If there are spots where the inlay is too tight, then gently sand those areas with a sanding block.
Step 11. Affix The Leather Strip To The Door Stopper
Make sure the concrete has cured at least 24 hours before applying the leather strip because you don’t want residual moisture getting onto the leather.
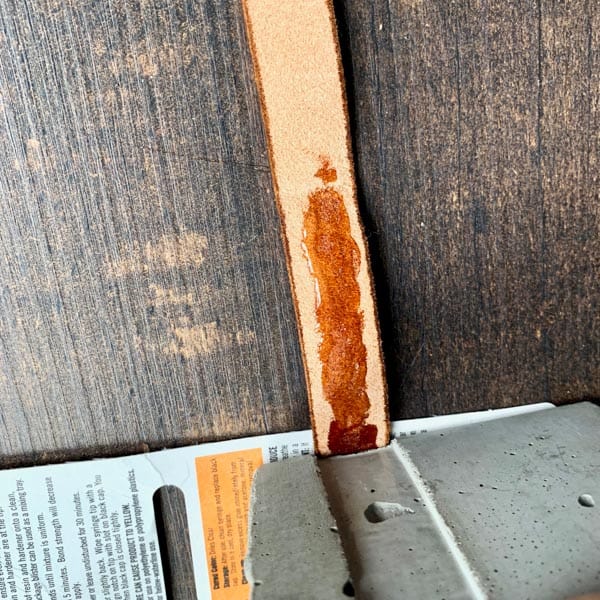
To dress up the cement door stopper, you will add the leather trim. Start by mixing the epoxy.
Only mix a little at a time, just enough epoxy for one side of the concrete inlay and apply it one side at a time.
You don’t need to get the epoxy all the way to the edges, but you should get close. After the glue is applied to one side, take the leather strip and attach it.

** Make sure to overhang the end of this beginning strip by about 1/16” the same thickness of the leather.
This gives you something to butt into because you want to avoid having a raw, undyed edge, which you will see when you trim the strip.
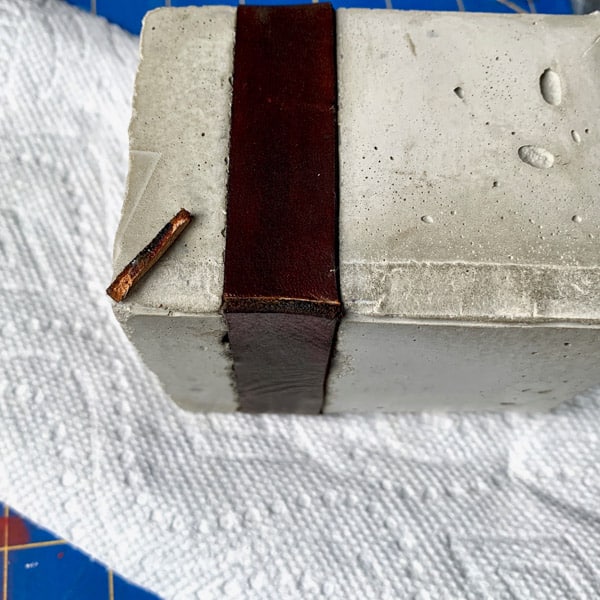
After mixing the epoxy, hold the strip to the door stopper for about 5 minutes before moving to the next side. Do this for each side until you reach the fourth side.
Here you want to pre-wrap it before gluing and pull it toward the beginning piece of leather to where it will butt to the beginning edge.
Now mark this location and use the X-acto knife to trim it.
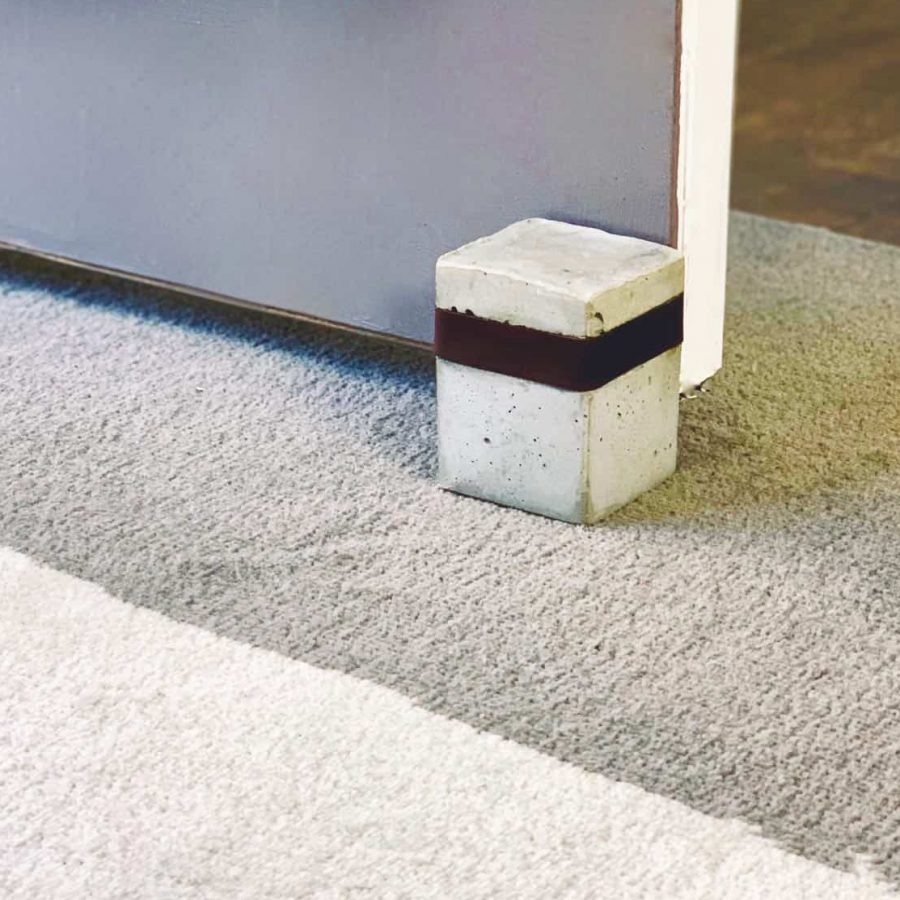
Step 12. Add The Pads To The Cement Door Stopper

Apply the non-skid piece to the bottom and you are all set!
If you liked this tutorial, here are a couple more you might like:
Magnetic Bottle Opener
Wine Bottle Wall Vase Decor
Don’t forget to Pin it for later!