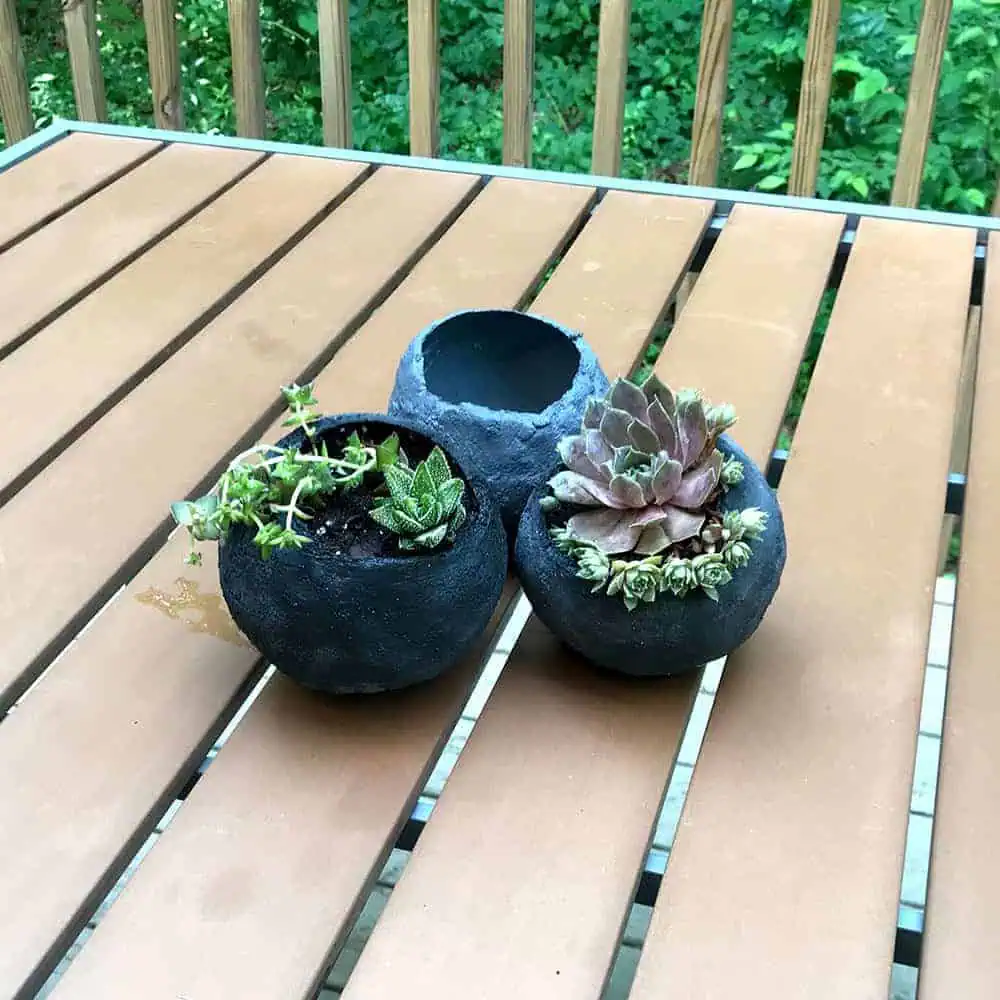
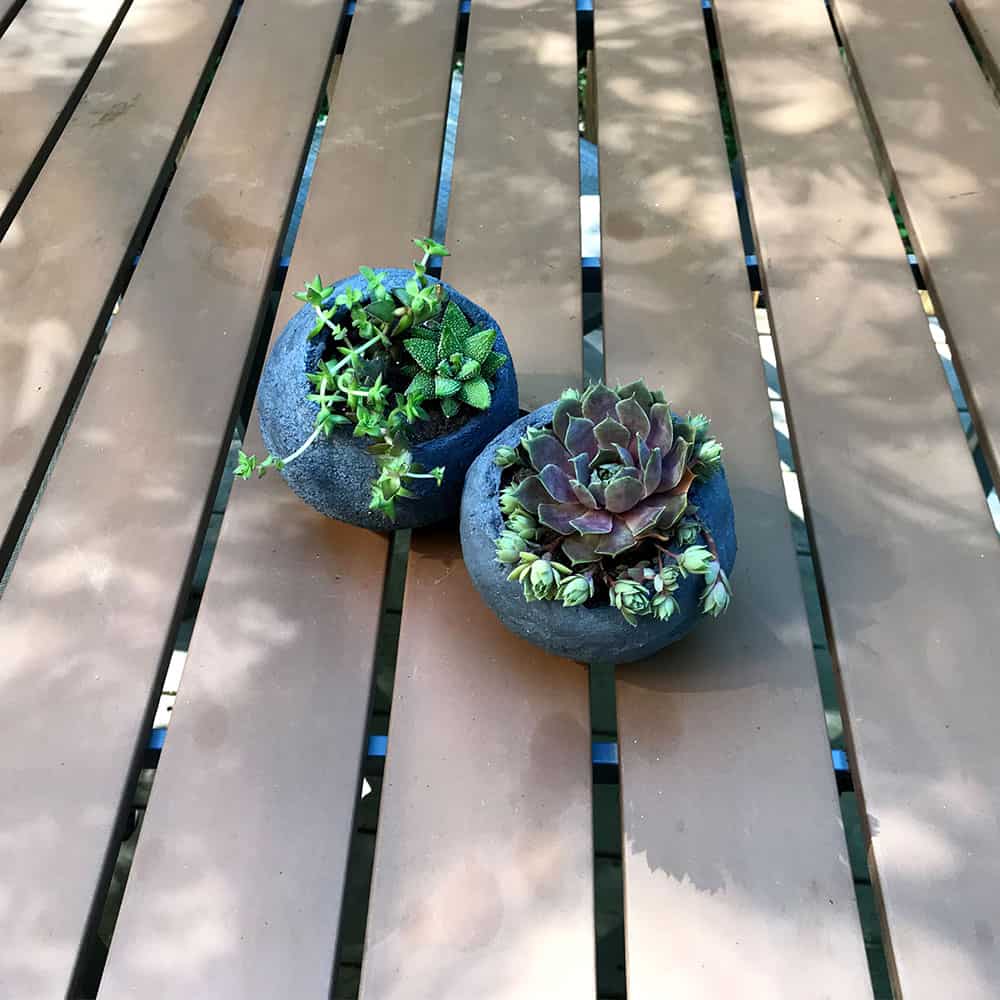
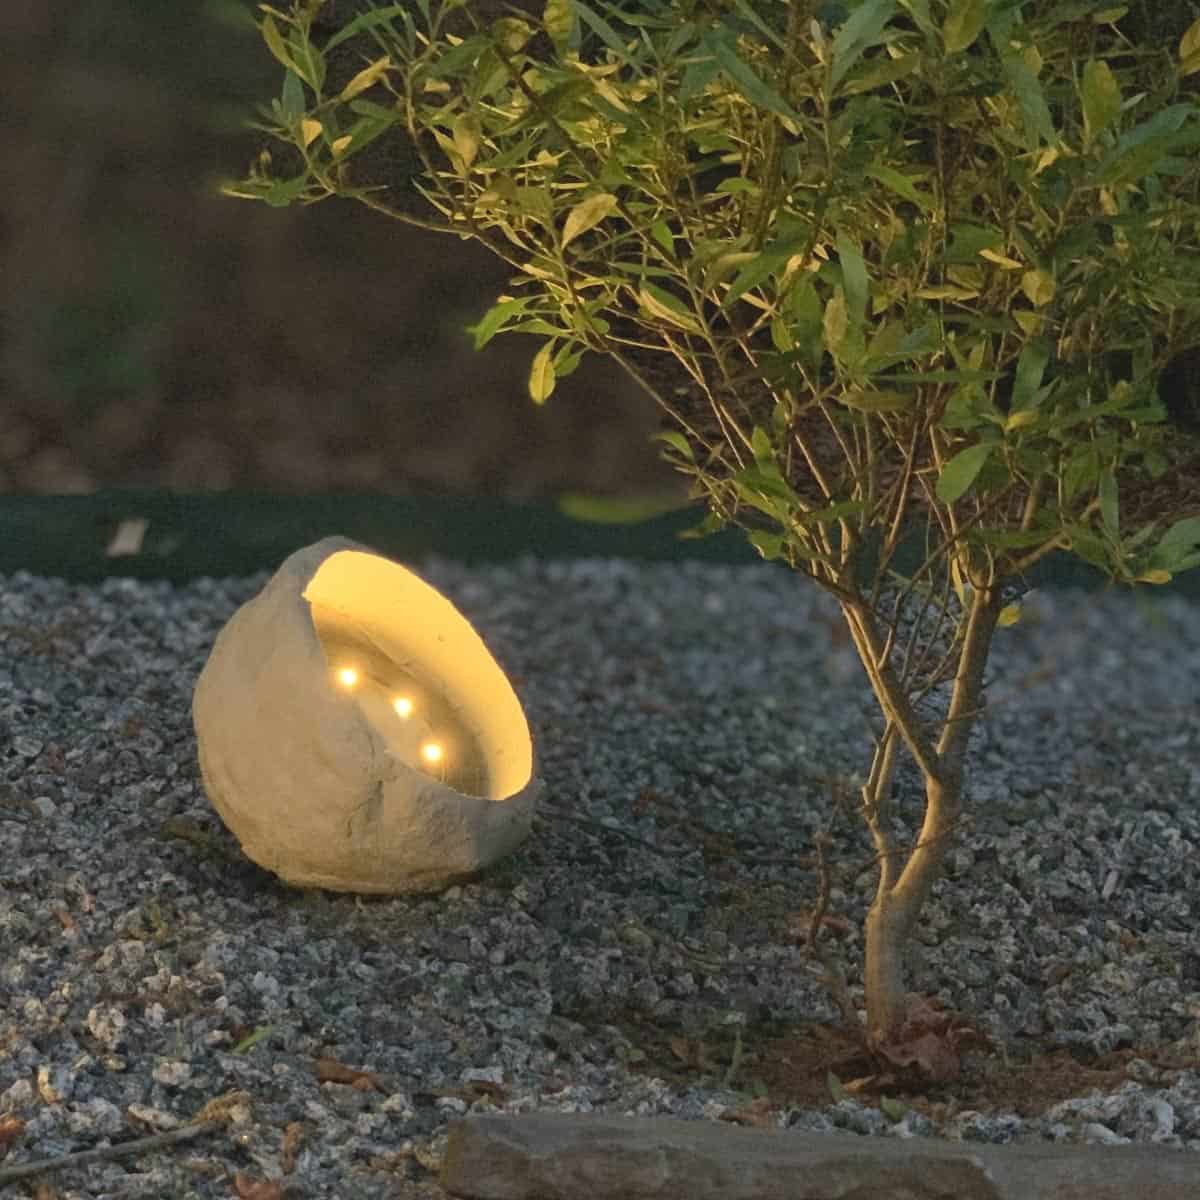
Mini Cement Balloon Planters (Dark Grey Pigmented)
Here is how to make deeply pigmented mini cement balloon planters.
Color the concrete with cement pigment for a vibrant contrast with succulents.
I loved making the original Cement Balloon Planters (linked below) so much that I wanted to make them again.
But this time I wanted them to be darker to give a more dynamic color contrast between the planters and the plants.
For these pigmented mini planters I’ll show you the parts of the process that were different, including how to color the cement.
Here are the original balloon planters.
Some of the links on this page have been provided as a convenience for finding materials. These links may also be affiliate links. As an Amazon Associate I earn from qualifying purchases, at no extra cost to you.
I only recommend products I’ve used and loved, unless otherwise stated. Click here to read my full disclosure policy.
DIY Difficulty Level | Easy
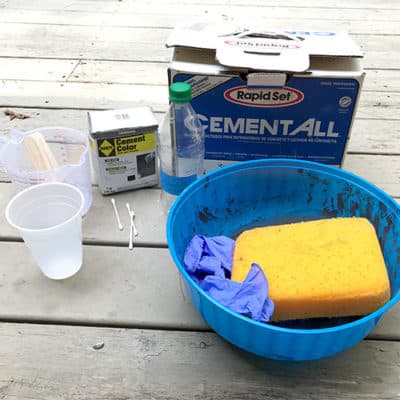
Materials For Making A Mini Cement Balloon Planter
- 5″ round balloons – thickened
- Cement All, Rapid Set-10 or 20lb bag
- Cement colorant powder in Charcoal
- Durable nitrile gloves– lots of them
- Disposable water bottle
- Large plastic mixing bowl (these can be re-used -see the hint in Step 4)
- Plastic cup
- Disposable measuring cup
- 3 Q-Tips
- Large sponge
- Succulent soil
- Succulents
As always, please ask me any questions you have about how to make these. Just use the comments section at the bottom of the page. Comments and suggestions welcome.
To learn everything you need to know about making all kinds of DIY concrete planters, you may want to read How To Make Concrete Planters, after this.
Mini Cement Balloon Planters Tutorial Steps
Before starting the tutorial, it may be helpful to read my article comparing the different concrete mixes and sealers– Cement & Concrete Crafts Tests!
Another important article is Making Cement Crafts Techniques & Tips with info on cement materials, mixture consistencies, demolding, safety and clean up!
Step 1. Inflate The Balloons
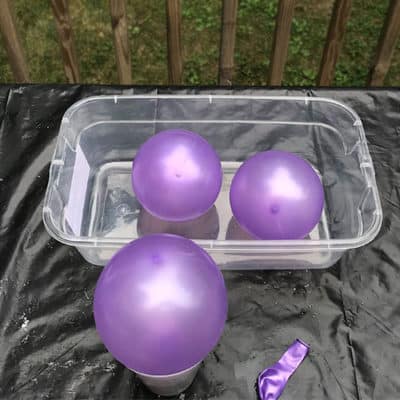
Blow up your balloon to a little larger than you want it to be, then push it into a round shape and let some air out.
This helps make it round because even the round ones can get oblong.
Step 2. Weigh Down The Cup

Place the balloon in a cup that is weighed down with stones or sand.
Step 3. Prepare The Pigment For The Mini Cement Balloon Planters

If you are looking for more in-depth information on how to color cement crafts with pigments, I wrote a comprehensive article where I tested multiple types of pigments for mixing in before and applying after cure. You can see the Concrete Pigment Tests here.
Using the disposable measuring cup, mix up the colorant by adding 1/3 of the powder to 2 cups of liquid.
If you want your planters to be lighter or darker, adjust the powder accordingly. Now stir it in the measuring cup using a wood popsicle stick.

Once mixed, pour it into the disposable water bottle, put the cap on and shake well.
You will want to shake it very well every time you add it to the mix because it separates quickly. If it separates, you will have uneven coloring.
Step 4. Mix The Cement
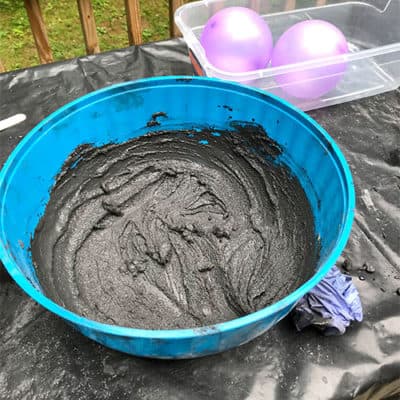
In your big disposable plastic bowl, pour in about 1/2 a cup of water, then add some colorant until it’s the color you want.
Add a little bit of cement and mix with your hands. Make sure you wear gloves! Mix the cement slowly, adding more cement as you go.
You will do this a few times until the cement is the consistency of a milkshake.
This doesn’t have to be an exact science, just play with it. If it gets too thick, add water and if it’s too thin, add cement.
You can also just add only the colorant as you are mixing if you still need the cement to be darker, but make sure to mix it well.
Since the cement is rapid set so you need to work quickly. If your mixture starts getting too thick as it starts to cure, you can add water to thin in.
It’s important to keep the color consistent so make sure you add the appropriate colorant amount.
*Hint- When you are done making these, you can keep the bowl and re-use it by gently pushing on the sides of the bowl. The cement will crack and you can throw it away. Do not wash these, cement will ruin drains.
Step 5. Mold The Balloon
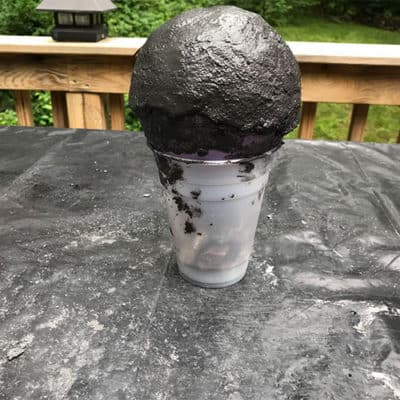
Now for the fun part of making the pigmented mini cement balloon planters.
Start with the tied end of the balloon facing downward. Scoop the cement onto the top of the balloon and mold it, working your way around, shaping and smoothing as you go.
You can keep wetting the cement or your hands as you are sculpting, and also add cement to any areas that it may need to be built up.
Be careful not to let the cement touch the edge of the container or strainer or it will cause a bump.
Don’t worry about trying to get the first side fully covered, because the second side will be easier. Even if you just cover a third, you will be good.

Immediately after you are done, carefully use a Q-tip to press a few small holes for drainage, then just sort of spin the tip to create the space.
You may need to wet the Q-tip to get the holes free of cement.
Step 6. Apply Cement To Second Side
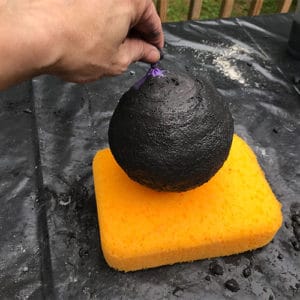
The cement will cure within an hour or so. You can flip it over and rest it on the large sponge, once it has set,
The sponge will alleviate pressure on the cement balloon planter while you are working on it.
Leave the tied area free of cement since this is the area where you will leave the opening for the plant and also be sure to leave it large enough to have working space to get your hand in so that you can add the soil and plants.
Continue adding cement around the 2nd half of the balloon, pay special care to the edges where the two ends meet in the middle and smooth as best you can to give it continuity.
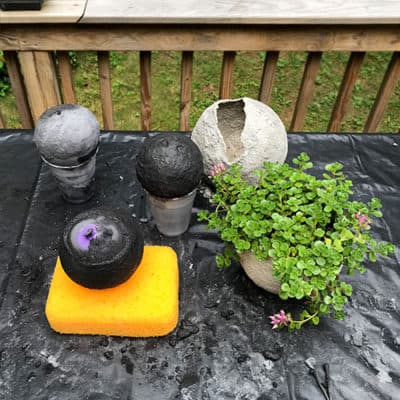
Step 7. Let Cement Cure
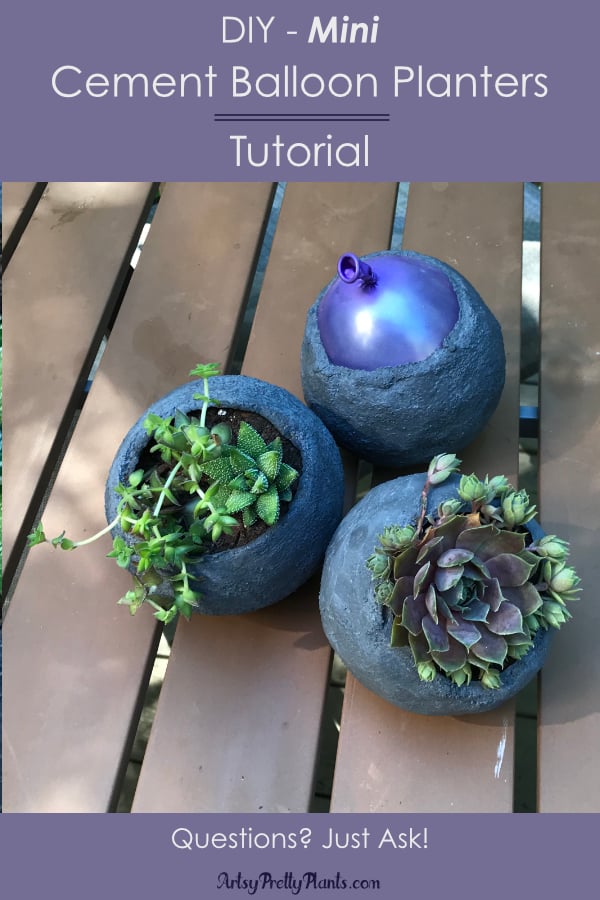
Let the cement dry. In this photo you can see each of three I made at different stages, including a finished one from the original Cement Balloon Planter post.
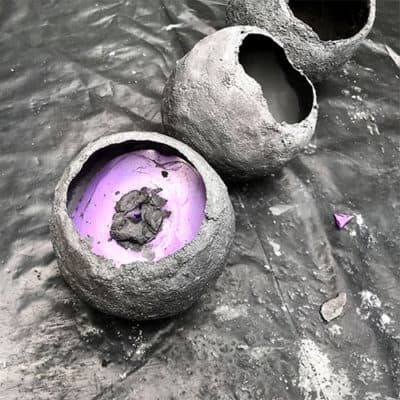
It should take about 1 hour to 1 1/2 hours depending on climate conditions, then you can pop your balloon.
If you wait too long to pop it, the balloon may be more difficult to pull out and could stick to the cement.
To pop it, just use scissors and snip the tied piece, then pull out the balloon.
Step 8. Reinforce The Planter

You should reinforce the balloon by adding more cement inside. Mix up some more cement into a slurry so it is thinner than you made it before.
This makes it easier to pour in and coat the insides. After pouring it in, just roll the planter back and forth till the edges are coated.
Make sure to keep your drainage holes clear, use the Q-tips again if you need to. I made mine about 1/4-1/2″ thick on the bottom, then built up the sides just a bit.
Your planter may be durable enough without this step, but better safe than sorry.
Step 9. Plant Your New Cement Pots
Add soil and then your succulents to your mini cement balloon planters!
For 21 really unique Concrete Planter Tutorials, you may want to check this post out.
And for two other adorable mini concrete planter tutorials, take a look at the magnetic cement planter balls and the mini concrete cowboy boot planter!
Don’t forget to Pin it for later!


Really cute, although I bet it is a little harder than you are making it look. It would be cute also to make the concrete a lighter or darker shade than the outside of the pot. I think the contrast would be cool, especially if you free form the concrete on one side or the other.
Hi Natelia,
If you do try to make them, let me know how easy the balloon planters are (or aren’t). I guess everything is relative, but these really were so surprisingly easy. I like your contrast and free form idea. I considered painting the inside a contrasting color, but wasn’t sure if it would be okay for the plants?
Love them! So cute with succulents.
Thanks Karin!
I’m doing this with the grad kids!!!!
Hi Matianne,
If you do make these, send me pics! I would love to see them. I think this could be a great project to do with kids.
Fabulous and looks so easy…lol Gotta try this!
Hi Judy,
They really are pretty easy. Good luck!
Such a great creative ideas!
Thank you Cindy! And so incredibly fun.
Question. Since these are round, do they tend to roll around on a flat surface when done? Can you make a flattened out spot so they will not roll? Did you have a problem with them rolling?
Hi Darlene, Good question. I have them outside on a table and they roll when I put them down, but settle into a spot on their own, it really isn’t a problem for me. You can see from my pics that they don’t stand in a perfect position, but that’s what I like. If you have them on something like a ledge, then you will want to add a little cement, maybe do 3 little pea-sized balls rolled up. Just let the cement mix thicken a bit, then roll -put them in a triangle shape outside of the drainage holes. I bet you could even roll it into a worm shape and attach it like a ring too. I think you’ll need to use a little water to attach, because they might not want to stick.
Let me know what you end up doing if you make these! The next time I make one, I will also test this out.
Haven’t tried this yet but will. Another suggestion might be to latex paint them after and then spray with a satin or shiny top coat that will hold the color outside, similar to what we do with the rocks we paint. Just a suggestion but looking forward to making a few of these. Thank you for your tutorial.
ev
Hi Ev,
Yes, you could paint them after. I think the hard part in trying to post-paint is that the texture is rough, so may be a challenge do nicely. However, it would be less messy. The cement colorants are so messy! Good idea.
I just made these, they were easy like you said!
I’m so glad to hear that Frannie. Do you have a pic you can upload? I’d love to see.
Cemetery leaches chemicals, I was told in a class that you have to let cement cure by spraying water on it many times and letting chemicals leach out, otherwise you could kill any plant you put in container. I think it is lime that leaches out of cement. Can’t wait to try this!
Hi Holly, I have heard that also. To be safe, it’s probably best to soak them in water for a few days before planting. I think it’s related to alkalinity.
However, I actually haven’t ever taken any leaching precaution and have planted right away and my plants have done well. It may be because of the type of plants I’m using? Just a guess.
Let me know how they turn out!
WOW!!! Love this idea ☺
Gonna give this a try with my grandbabies!!
How Fun will this be….
Maybe put their hand prints on them…
Thanks So Much For Sharing?
Hi Tammy,
Handprints would be so cute!
Hi! I wanted to know why all the cement used in these tutorials looked so smooth? The “quick drying” cement has a great deal of gravel–which does not make for smooth looking cement. Thank you for your time.
Hi LaVona,
Did you click on the links to see which cement I’m using? The cement I use for most everything is Cement All. It’s the smoothest mix around. It doesn’t have any gravel in it whatsoever. It’s not like Quikrete’s quick drying/fast setting mixes, which have large gravel in them because they are concrete. Try the Cement All, you’ll love it. Assuming you’re in the US, it’s sold at Home Depot, not Lowe’s.
I’m very excited to try this. Can you tell me about how much cement you needed per planter, or about how many of the planters you would get from the 10lb bag you used if the balloons are 5″ around?
Thanks!
Hi,
I’m not sure, but probably at least 10-15 of them. Maybe more?