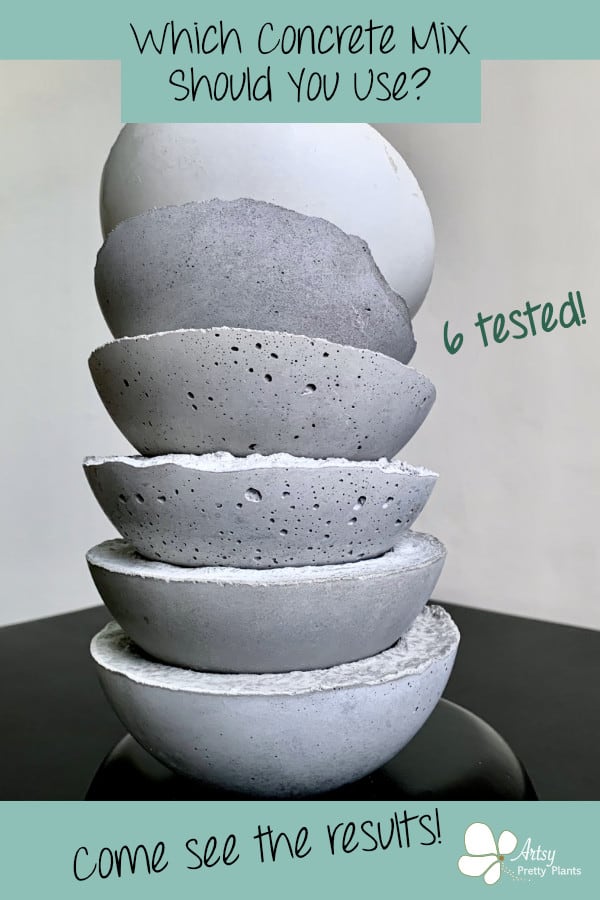
Guide To Concrete Crafts Mixes: My Cement Tests
Based on my extensive testing, I will teach you everything you need to know about cement and concrete mixes for making crafts.
With six years of making concrete crafts and hundreds of concrete projects, I’ve gained valuable experience.
However, early on in this experience of making cement and concrete crafts, I was confused by all the different mixes. It was frustrating knowing which one to use and when to use it.
I decided to teach myself the nitty-gritty of the different mixes, and the best way to learn was to personally test the common mixes available.
And what’s a better way to learn about cement and concrete crafts than to conduct experiments? I learned more during this time experimenting and testing than I could have possibly imagined.
My goal was to usurp as much concrete-making knowledge as possible so I could make concrete crafts more easily and better help you.
This is the first in a series of informational concrete crafts posts which will provide you with the help you need in just about every aspect of making concrete crafts.
In the post Getting Started: Techniques For Making Cement Crafts, I have more in-depth information on cement and concrete crafts, including materials, terminology, safety, and clean-up tips. This is an article you should save for later.
Also, check out this post for the 10 best beginner projects for new concrete craftsmakers. Bookmark this one, too.
What Are Cement and Concrete Mixes?
Concrete mixes are used for structural purposes, such as patios, sidewalks, or buildings.
These mixes are also used for making concrete crafts, such as concrete planters, bird baths, and home decor, like candles and serving trays.
For this article, I tested concrete mixes used to make concrete crafts items.
First, let’s discuss the terms cement vs concrete for making crafts. Mixes sometimes have the label ‘cement’ instead of ‘concrete’. Are the terms interchangeable?
Yes and No. In reality, the materials are not 100% of the same ingredients.
Let me first explain the “No” (sort of). Most forms of cement are composed of sand and minerals such as clay, limestone, and shale.
Concrete will have these same properties but also contain an aggregate such as gravel or sand.
The short answer is that cement is the main component of concrete without the aggregate.
Now for the “Yes”. When you want to make something like a concrete planter and want to find a tutorial on how to make something, what do you do?
You search the Google machine for a ‘DIY concrete planter.’
Google will favor showing you results from websites that use the term concrete more so than showing you sites that use the term cement.
Why? Because it’s likely the look of a concrete planter that led us to use that term in our search.
You can’t tell, just by looking, whether concrete or cement was the material that someone used.
And in the US, concrete is the term more commonly used.
It just becomes too much of a conversation to separate the two terms. Sometimes, we say cement when it’s technically concrete, and vice versa.
I sometimes use the term concrete scattered in the introductions of my tutorials and sometimes even the title.
But… in all of my tutorials, I always link to the product I used so you will know exactly what to purchase.
The mix I use is often critical to the success of the project. This article explains why the right mix is important and how to choose it. Please bookmark it for later.
If you still need clarification, I have an entire article explaining the differences between cement, concrete, and mortar.
And, if you’re interested in hypertufa mix materials– this has details about the mixture recipes.
At the bottom of this post, I have reviewed the different types of cement and concrete mixes for making crafts.
I have based my review on these test results. But for a deeper understanding, please read through the tests here first.
How I Tested The Mixes
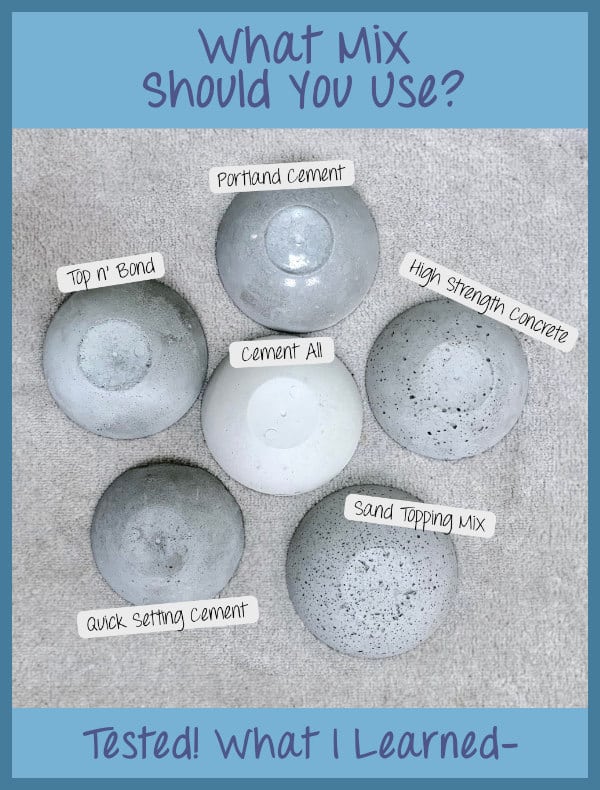
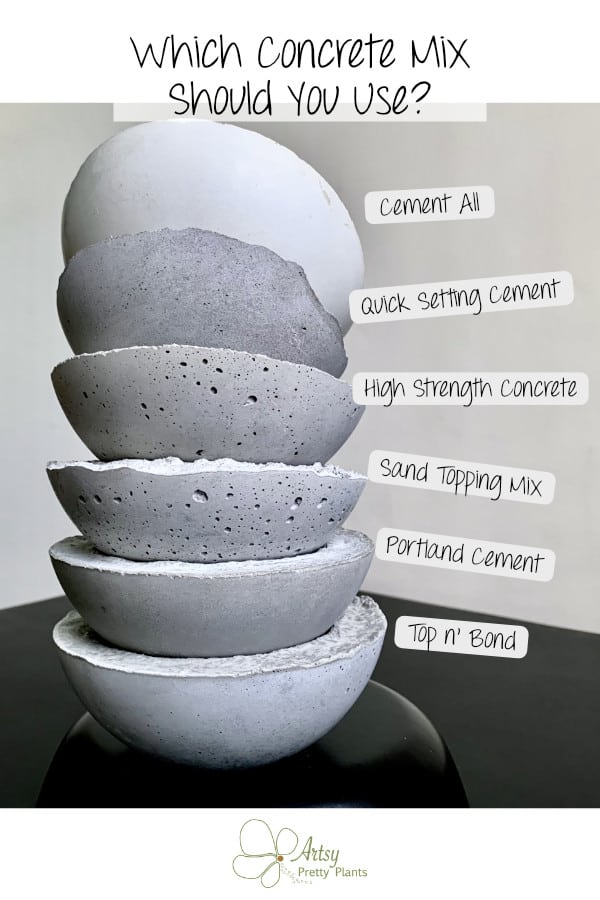
To better understand the various mixes, I have tested and compared six different concrete and cement mixes.
I chose these particular mixes because they were viable contenders for making cement or concrete crafts.
I also made my selections based on availability in my area.
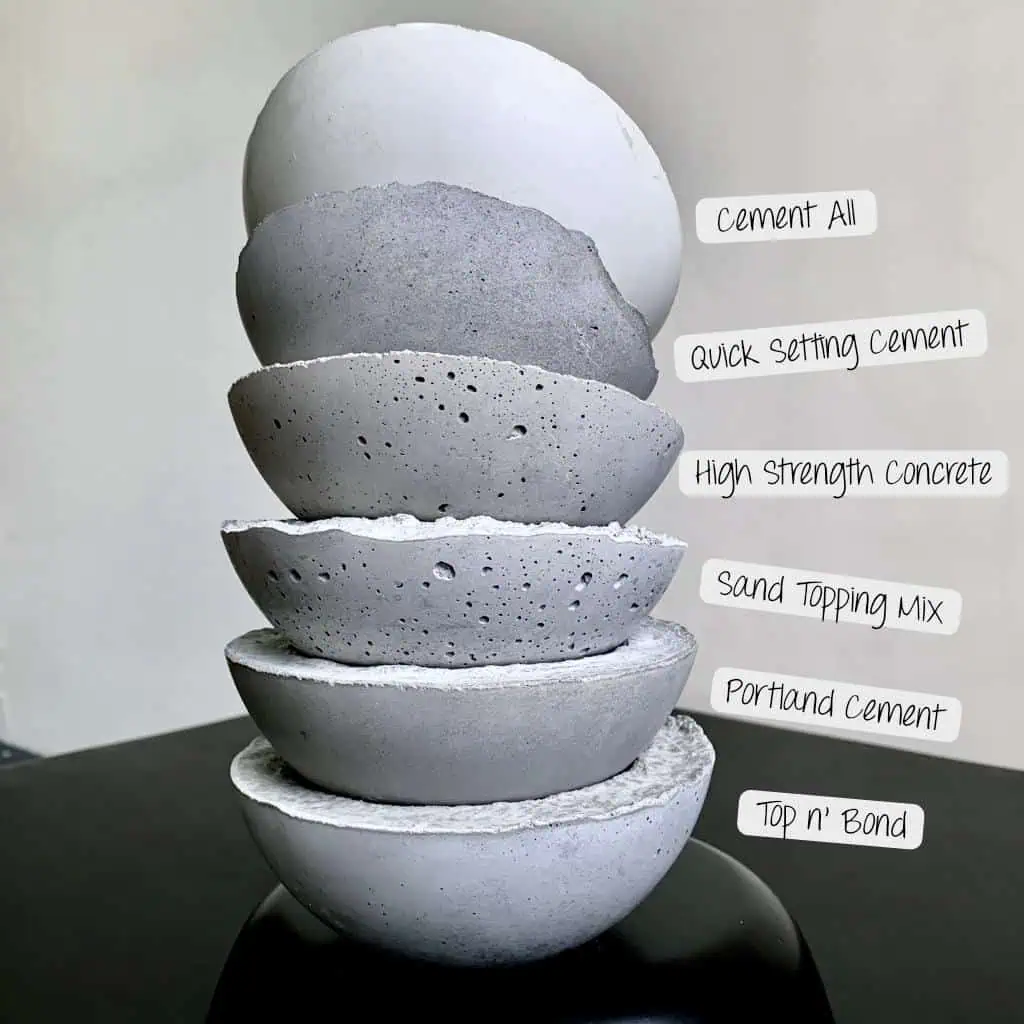
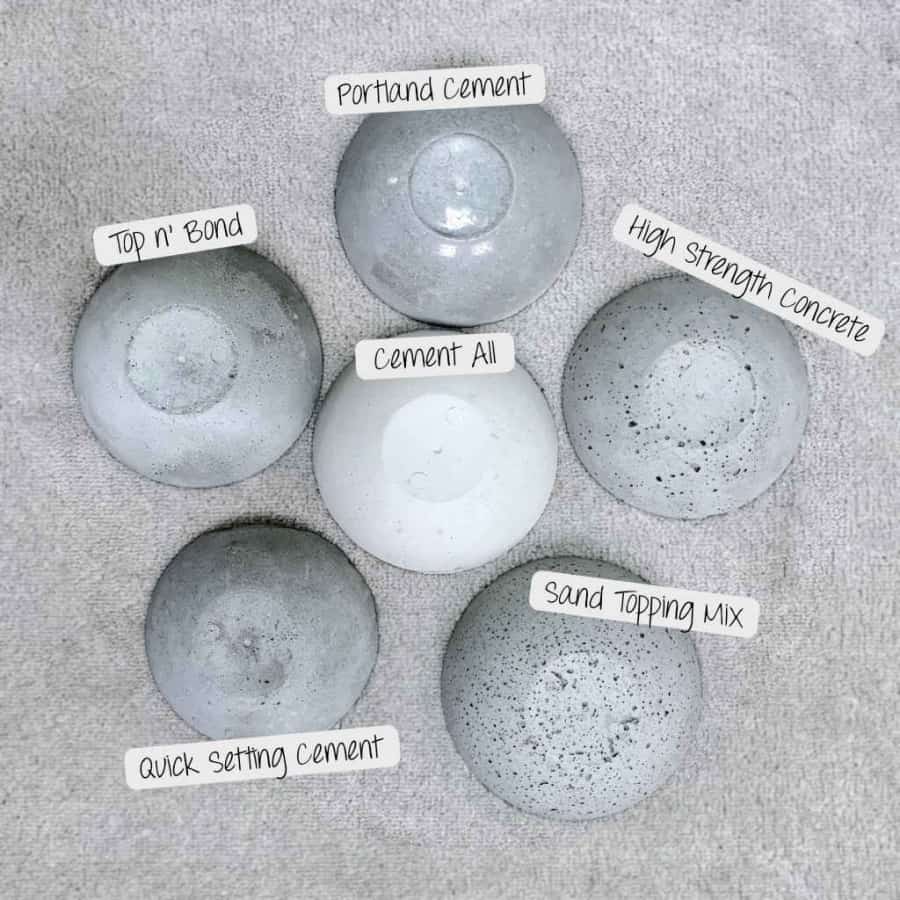
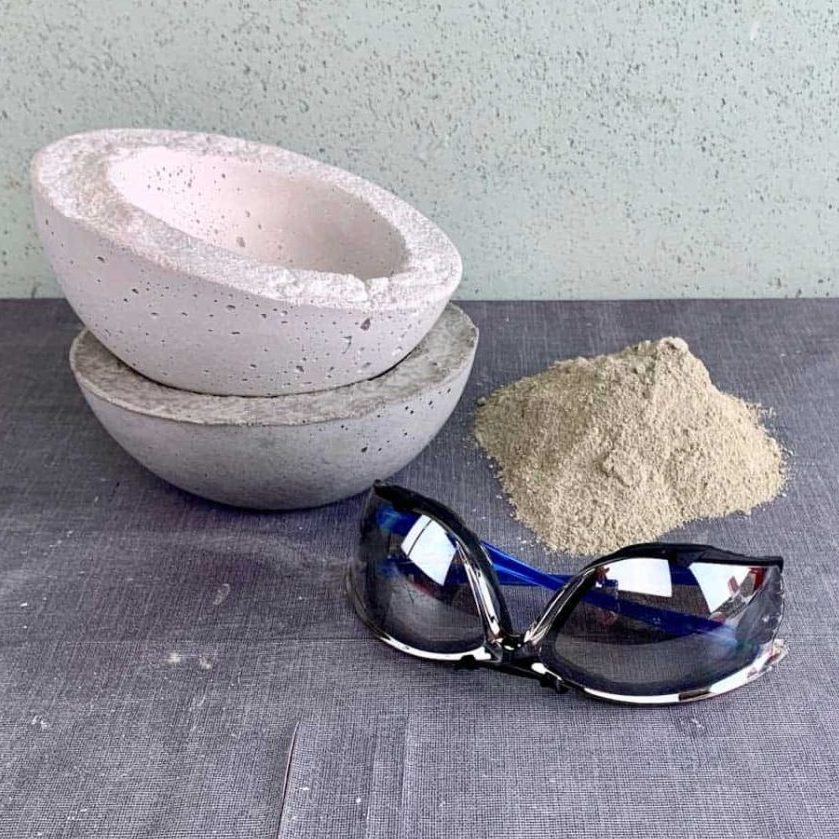
My tests included making a couple of small and large bowls for each type of concrete mix.
First, I’ll give you the official description from the manufacturer, then tell you about my experiences working with these mixes.
Note: The water ratio mix for concrete of cement for concrete crafts will vary from mix to mix. Climate conditions will also play a factor in the ratio. But you can read this article for the whole run down on the best water to cement ratio.
By the way, if you live outside the US or Canada, you aren’t likely to find these mixes below. I have a particular article for you with information that I’ve received from readers with recommendations on their favorite mixes outside the US.
But please come back to finish reading because there’s still much more below that pertains to any mix, like curing, molds, and sealing.
How The Concrete Mixes Compared Based On The Results Of My Cement Tests
CTS Rapid Set Cement All For Crafts
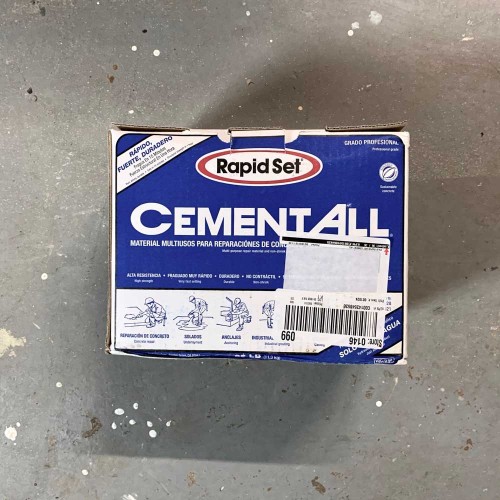
Official Description
Cement All® is a high-performance, fast-setting concrete repair material that is durable in wet environments. Apply Cement All from featheredge to 4” thick.
Use for general and structural concrete repair, doweling and anchoring, industrial grouting, formed work, vertical and horizontal trowel applications.
My Tests
Working time is about 10-15 minutes and can be demolded in an hour. It reaches its final color within a couple of hours after demolding.
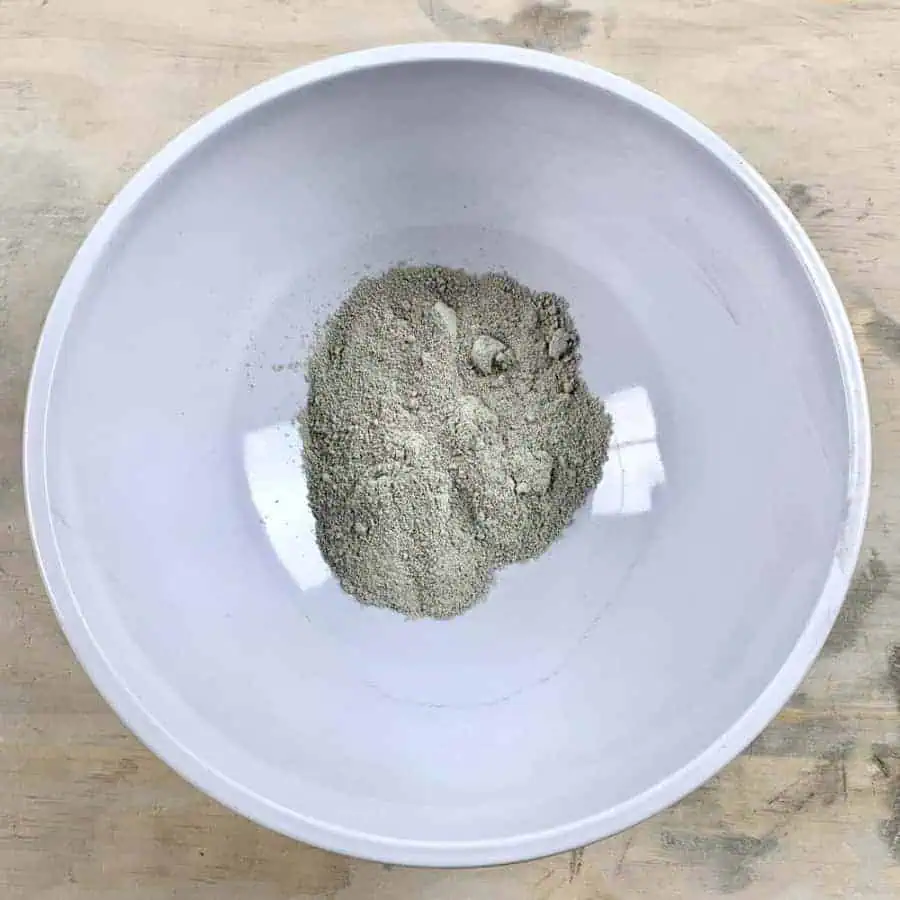
The dry mix is a fine cement when water is added, and it is very smooth and clay-like in texture. The color is more of an off-white to sometimes beige.
You can turn this mix white, which makes a difference when coloring your concrete because whiter equals brighter.
The shade of the color can vary slightly from box to box or bag to bag.
It is easy to work with when making cement & concrete crafts and isn’t fussy regarding the amount of water needed.
This is compared to most of the other cement and concrete I have tried here.
Cement Crafts Mix Quikrete Portland Cement -Type I/II

Official Description
Complies with current ASTM C150 and Federal Specifications for portland cement.
It is mixed with aggregate and other ingredients to make concrete mix, mortar mix, and base coat stucco. Available in Type I, Type I/II and Type III.

You must add sand to Portland cement or it will crack (trust me, I did try) ;0}. The Portland mix is a fine cement that changes when you add the aggregate.
This Portland mix is the cheapest of the concrete mixes.
Demold time is 24 hours, but the cement will take another two days to reach its final color. It will dry to a light-medium grey.
The directions call for at least a 3:1 ratio of sand to cement, but this is unnecessary for most cement & concrete crafts.
When I used a 3:1 ratio, I ended up with a great deal of pitting.
I made a bowl using a 1:1 ratio, and at that it was as smooth and moldable as Cement All to work with. The bowl also had the same smooth finish.
I did a series of tests on Portland cement and sand ratios, testing five different ratios to see which was best.
My initial tests show that a 3:1 ratio is durable enough for smaller crafts like small to mid-sized planters and has the least amount of pinholes.
The mix was as smooth and moldable as Cement All at a 1:1 ratio. The cured bowl came out just as smooth as the Cement-All bowl.
For larger crafts, a 2:1 ratio is what I recommend, which is what I used for the 3D cement tiles in this planter box tutorial.
It will require a 2:1 ratio for durability beyond that size, but please reference the article I mentioned above for full details on when to change up your ratios.
Look here to get inspiration with 21 Tutorials For Unique Concrete Planters. Or read this to learn specifically about how to make concrete planters, which has information about everything you’ll need to know.
Quikrete Quick Setting As A Cement Crafts Mix
(Not the same as Quikrete’s Fast Setting Concrete)
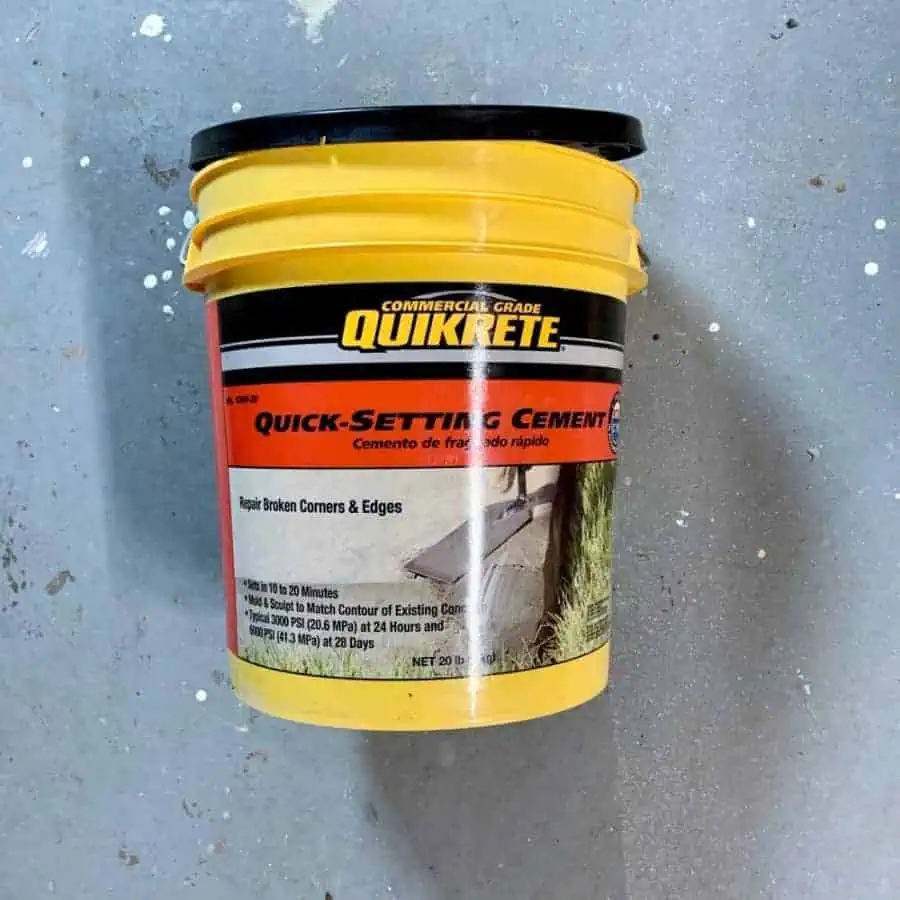
Official Description
Specially formulated to set in approximately 10–15 minutes. This quick-setting cement can be molded or sculpted into place.
- Making concrete repairs where rapid setting is required
- Ideal for repairing broken edges of concrete steps and curbs
My Tests
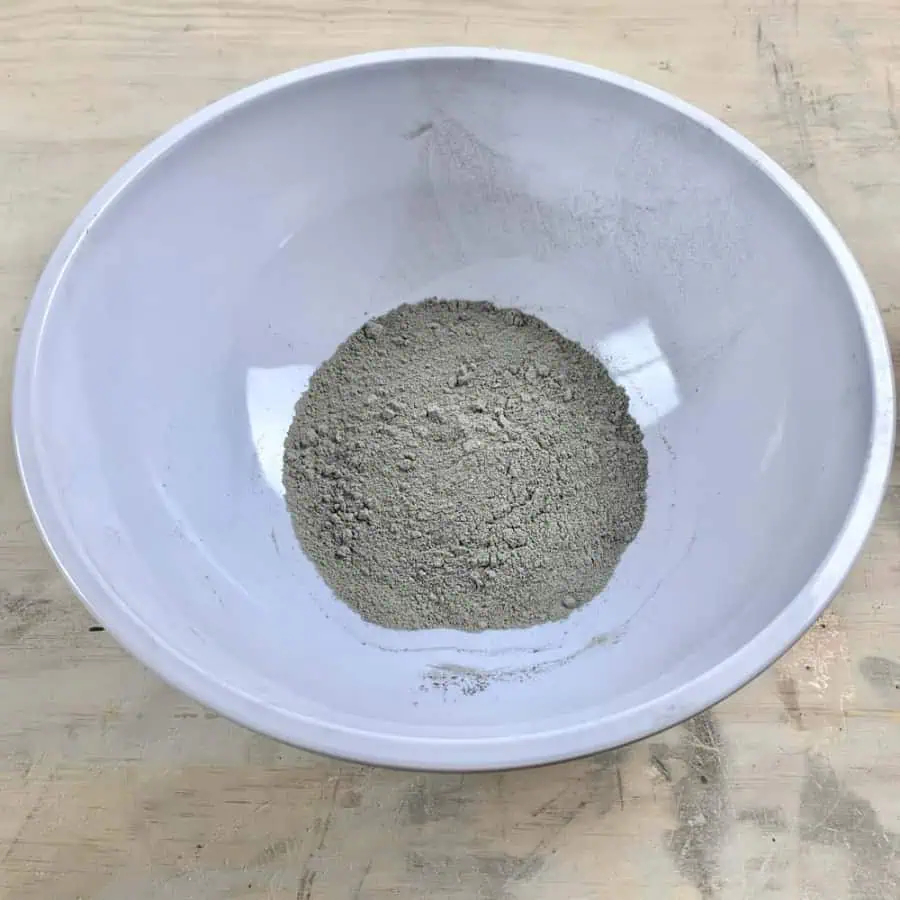
Quikrete Quick-Setting sets about as fast as the Rapid Set Cement All and is similar in texture in that it is very smooth and clay-like.
It can be demolded after 16-24 hours.
The final color will be medium grey with just the slightest hint of brown and take about 2 days to reach that color.
And like the official description claims, it is pretty moldable.
Sakrete Top n’ Bond Concrete Patcher

Official Description
Sakrete Top ‘n Bond Concrete Patcher is a polymer modified sand cement repair mortar requiring only the addition of clean potable water.
For applications from 1/2” (13 mm) to feather edge. For refinishing, patching, and general repairs to concrete/masonry.
The Top n’ Bond demolds in 24 hours and takes two days after demolding to cure and fully reach its true color of light grey.
Forming into shape is a little easier than many of the others tried here. It is supposed to be suitable for making cement & concrete crafts requiring layering.
Quikrete High Strength Concrete Mix For Crafts
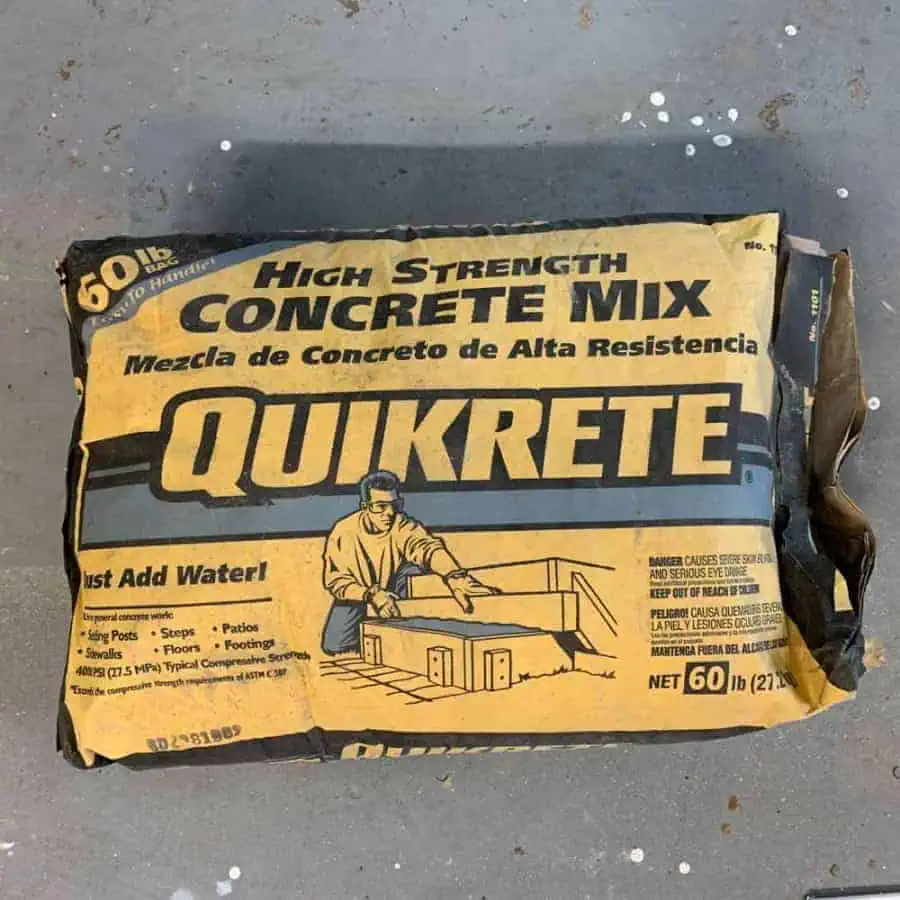
Official Description
This is the original 4000 psi average compressive strength blend of portland cement, sand, gravel or stone.
Just add water. Use for any general concrete work.

This concrete will require sifting out some of the aggregates to be used for crafts. The gravel is quite large, and there’s a lot of it.
I only sifted out the larger rocks for this test, and the concrete bowl still resulted in a fair amount of pitting.
With more sifting, you could reduce most of the pitting. The color is light to medium grey but has a bit of brown. It almost looked as though it contained some dirty sand.
The high-strength mix demolds in 24 hours and takes two days after demolding to cure and reach its true color.
There are better mixes for casting concrete if your mold has narrow cavities.
Using Quikrete Sand Topping Mix
Official Description
Consists of a uniformly blended mixture of portland cement, commercial-grade sands, and other approved ingredients.
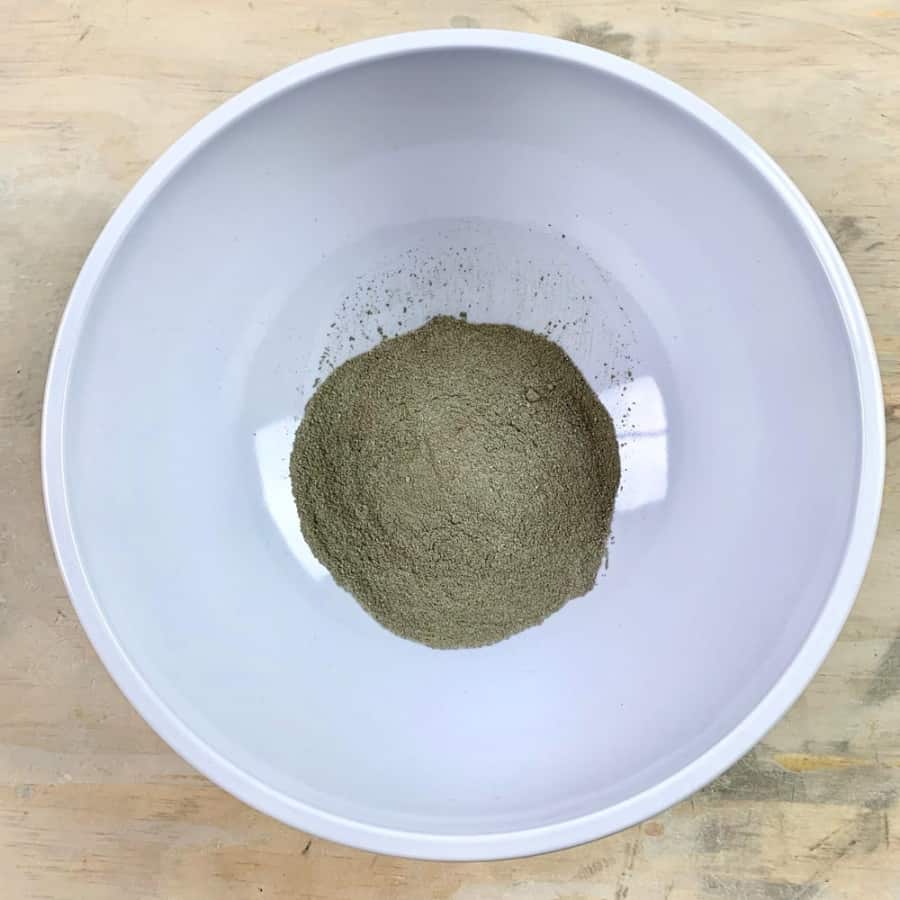
This sand and cement mix has a very sandy texture when working with it.
Demolding time for Sand Topping Mix is 24 hours. It takes 2-3 days after demolding to reach its final color, light grey.
The demolded bowl looks similar to the Quikrete High Strength mix but doesn’t contain stone aggregate.
I repeated this test twice, and the cement bowls came out with large pinholes.
Pitting hasn’t been a concern when using this mix for a thicker project.
With the concrete coasters test, I needed to add a lot of water to the mix to get it thin enough that I would be able to vibrate out the air bubbles.
The mix doesn’t do well with too much water and weakens the cured piece.
I had no problems with pitting in these two projects, which were both 2 inches or thicker or slightly more.
This concrete mix is best for making stepping stones. I used it for the natural looking stepping stones and concrete side table.
How The Finish Of A Concrete Mix Changes Due To External Factors
How Cure Time Affects Sheen
For most of these, I performed the same test on both a matte cement piece and a shiny cement piece.
It was important to do since sheen significantly affects things such as water evaporation, color, and texture.
I needed to demold the Cement All early to get a matte texture.
And I could ensure the cement piece would be shiny by waiting another 1-2 hours past demolding time.
So I tested both sheens of cement where it could come into play.
I based the cement demold times in the tests on a temperature of about 68-73 degrees.
In colder temperatures, you extend the demold time; in warmer temperatures, the demold may be shorter.
Another significant factor in the demold and cure time is the thickness of the cement craft.
Something with a ¼” thickness can often be demolded in under an hour, but may need to be extended several hours when something is ½” or 1” thick.
I based these cure times and sheen tests on crafts closer to ¼” thick.

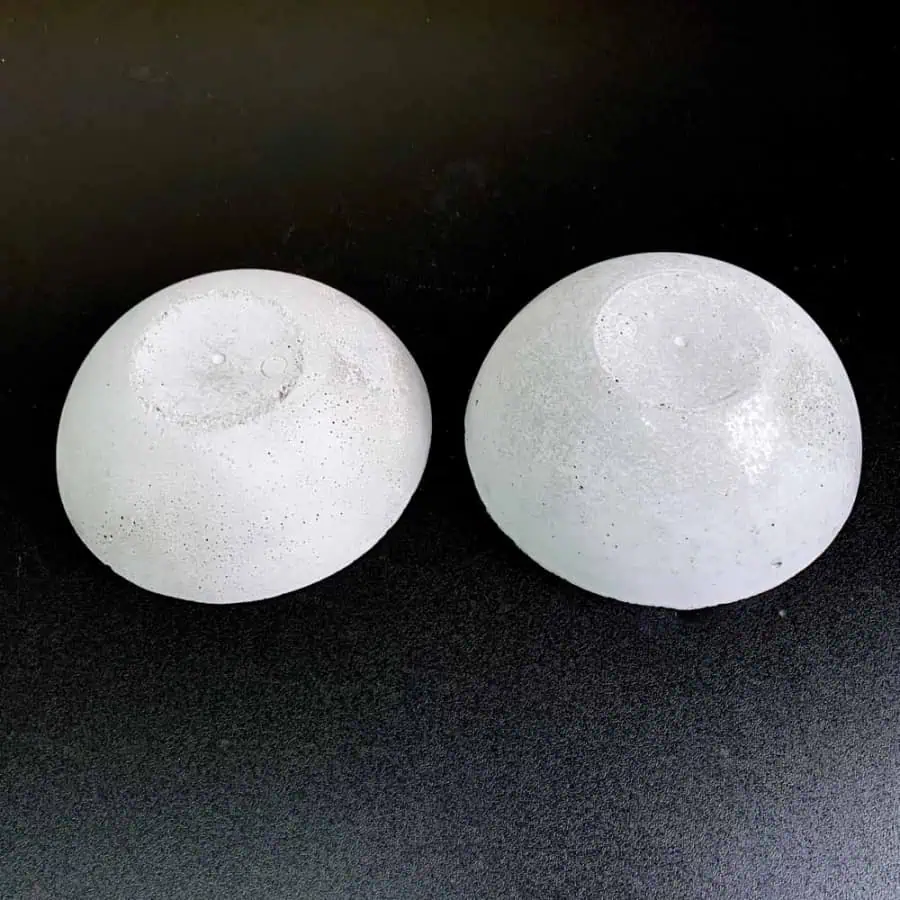
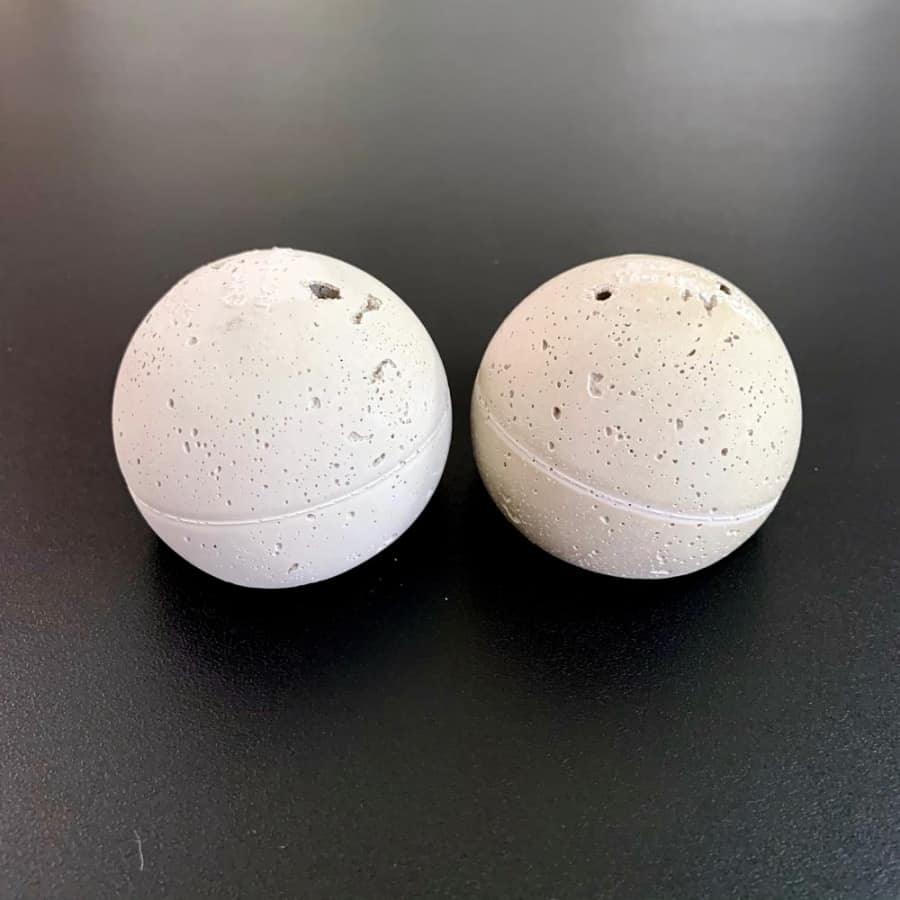
Cement All has the most pronounced effect on sheen, which comes from the duration of cure time before demolding.
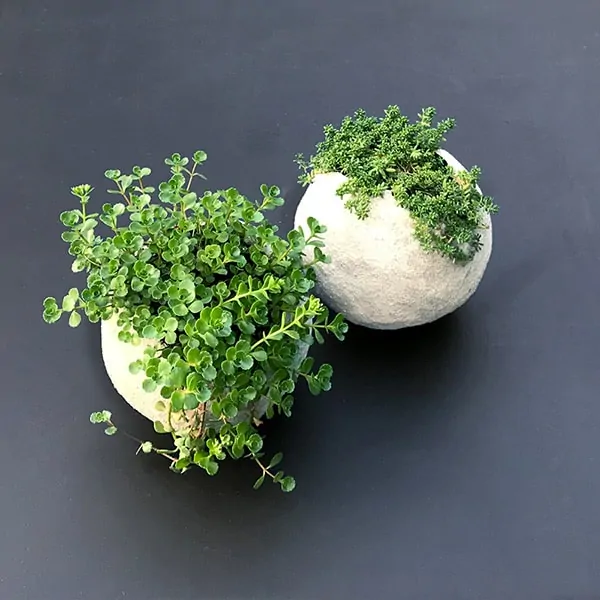
In the photo, I’m showing two examples of cement planters.
I made these in a tutorial and put magnets in them so they can hang on your refrigerator.
Here is the tutorial for the Cement Magnetic Planters.
The first cement planter ball (on the left) was demolded in less than 45 minutes. You can see that it is nearly completely matte.
Cement ball #2, on the right, was demolded after a couple of hours and is glossy.
Here’s an example of sheen differences using the Top n’ Bond Concrete Patcher.
I made these concrete bowls twice using this mix. I demolded the first concrete bowl after 24 hours, and the surface was matte.
After two days, I demolded the second bowl, and the surface was shiny. Even though it did lose some sheen over time, it has settled in with a satin finish.
When I tested a few non-Cement All products, the results showed an effect with sheen. These effects were less pronounced than the Cement All.
Aside from the Cement All pieces, the sheen on the concrete became muted as the days and weeks passed.
The pieces demolded later retained some sheen but were closer to a satin appearance.
The lesson here is to demold early (though not too early) for a matte appearance.
Demold late for a shiny appearance. The longer you wait, the more sheen you will have.
For more information, here is an article on four ways to make concrete shiny.
How Using A Lubricant Affects The Color and Texture Of Concrete
Concrete Color
For this cement crafts test, I wanted to prove what I had noticed on the few occasions when using a lubricant to help in the demolding process.
The first part of this experiment was to determine if discoloration was caused by lubricants, and if so, to what extent?
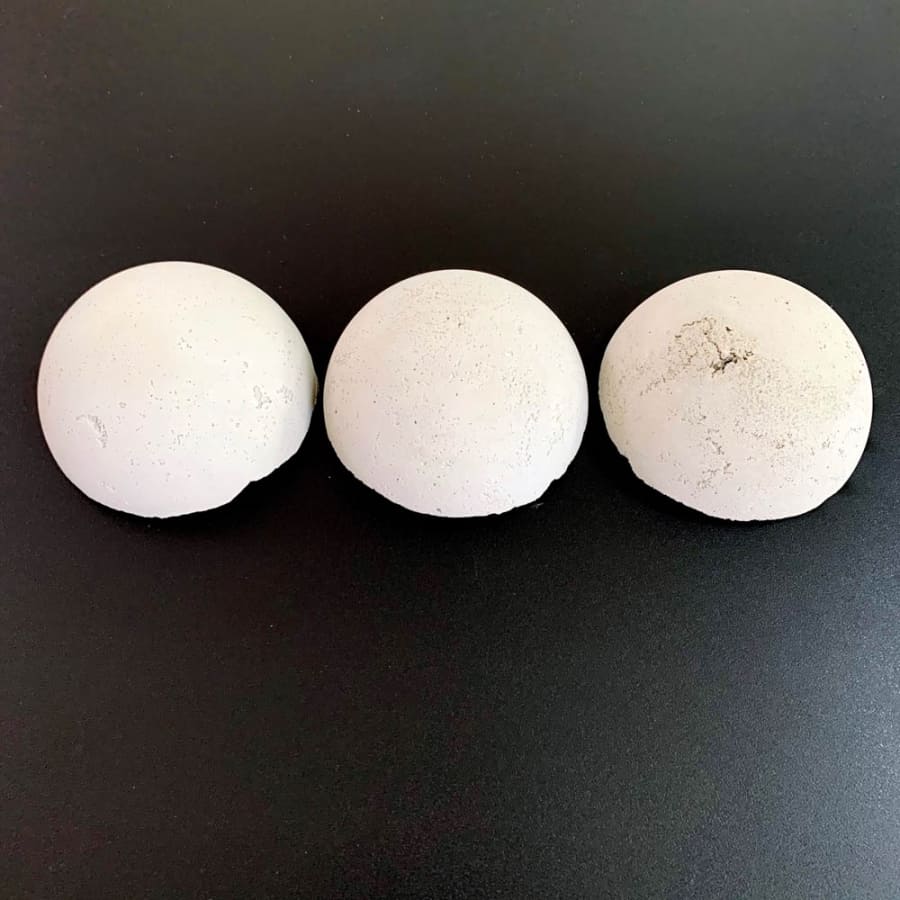
I used two types of lubricants on the molds of these cement spheres.
I made one sphere without using any lubricant so we’d have a good comparison. The sphere on the left is the subject without lubricant.
The middle cement sphere has baby oil applied to the mold. And the third lubricant has vegetable oil sprayed inside.
First, the baby oil is clear in color, and the vegetable oil, of course, has a yellow tint.
Did this color difference transfer to the cement? Yep.
You can see in the photo that the non-lubricated sphere has no discoloration.
The middle sphere has a slight yellow tint, and the cement sphere to the right has a pretty distinguishable yellow tint.
Concrete Texture
Now, the second part of the cement lubricant test was to check to see what the lubricant did to the texture of the cement.
Referencing the same photo above, the sphere on the left didn’t have any lubricant in the mold.
I applied baby oil, using a cotton ball, to the middle sphere. It gave me something to compare to the bubbles that appear when applying a vegetable oil spray.
The results showed that the non-lubricated cement crafts piece is the smoothest and has few pinholes.
You’ll see a moderate amount of pinholes on the sphere with the rubbed-on baby oil.
The vegetable oil sprayed sphere has the most pinholes and even has some pitting.
How Vibrating A Concrete Mix Affects texture

This one should be pretty obvious on how it turns out.
However, I wanted to compare just how different the effect would be based on the vibration level and how much is necessary when making cement & concrete crafts.
I cast these cement pieces inside a plastic cup. Other than a few quick taps on the work surface, which allowed some cement to settle, the piece on the left was left alone.
For the middle piece, I tapped on the work surface and tapped and shook the sides for about 30 seconds.
To the right was the third piece. I tapped it a few times, then used a power sander (without the sanding pad) and vibrated it against the cup for about 20 seconds.
As we all expected, the piece on the left that was left alone has lots of pitting and pinholes.
The piece in the middle that I manually vibrated and tapped has a few pinholes and just a little bit of pitting.
Finally, the right-side piece with the power vibration shows the smoothest texture, no pitting, and has only a few pinholes
The Effects Of Concrete Sealers On Concrete’s Sheen
Sealers come with different levels of sheen.
I will give a quick overview here, but you can read a full, in-depth article that shows my tests with concrete sealers, which offer the visual results and how well they performed.
The long and short of it is that generally, a concrete sealer can be matte, satin, or glossy.
However, even within different brands, the levels of sheen will vary. One brand’s satin may be shinier than another.
According to the tests I did for concrete sealers, even a matte sealer has a slight sheen. Please read the sealer tests article for details.
Sanding Effects On Concrete & Cement
For the final test, sanding effects on cement crafts.
For those of you who have followed some of my tutorials, you probably notice that, with a few exceptions, I don’t sand my cement crafts.
I usually only do this when there are sharp edges or a rough top edge of something like a planter, bowl, or vessel.
Here’s why: I usually choose a smooth cement-like Cement All for most of my crafts.
Other concrete and cement mixes here are also very smooth, and I wouldn’t sand those either.
In this test, I demolded the planters early to achieve a matte sheen when cured.
I used a 220-grit sanding sponge for the one on the right and did not sand the planter on the left.
Do you see the yellow tinge?
I don’t know what causes this effect, but sanding creates an unwanted effect on the cement’s sheen and color.
I have tried all levels of sandpaper grits and various diamond grit sanding sponges, and they all create the same effect.
Besides the uneven rough spots, I typically sand only a few of my pieces.
My Review Of Each Concrete Mix I Tested
I based my review on what I’ve learned about the six different types of cement and concrete mixes specifically for making crafts through these tests.
I had high hopes for the Quick Setting Cement.
Though this can be demolded in a couple of hours, it still takes a day or so to reach its final color and be cured enough to use.
It’s more practical for me just to use Cement All and add a little black to it if I’m going for a grey color.
I don’t have much experience with this product outside of the tests, but I have a whole bucket full of it, so I will continue playing.
Two mixes for cement crafts piqued my interest the most.
One is the Portland Cement because it’s moldable, very smooth, and can have a sheen.
It’s like the Cement All, but it has a longer working time, which can sometimes be incredibly helpful. It takes a day before you can demold and two days more to fully cure.
It could be a good choice if I need a long working time. I do like the control of how much sand to add.
The negative to this Portland Cement is that it’s only available in a 90lb bag in my area. Okay, really? 90lbs is pretty impractical.
The Sand Topping Mix is over-the-top sandy and very rustic for thinner pieces but works well in applications 3/4″ thick and up.
If you prefer a rustic look, the Topping Mix may be a good option as the sand has been added, so it’s one step (unlike Portland Cement)
The other product with high potential is the Top n’ Bond.
It’s not too sandy, so I find it easy to work with and easier than the others (for me) to determine how much water it needs.
I like its grey color, and I find the frosted/satin finish interesting. The bonus is that it is available in 40lb bags in my area, so it is easy to handle.
The High Strength Concrete mix is the least expensive of the six concrete types.
However, if you are making smaller crafts, you may not be left with a lot of workable concrete by the time you sift out all the aggregate.
What’s The Best Concrete Mix For Crafts?
While there’s no perfect concrete or cement, I do think the best overall mix is Cement All. Concrete and cement have about a 6 month shelf-life, after being opened.
As a concrete craftsperson, I have to be practical and it is easier to stick to one type of cement or concrete, even though sometimes there may be a slightly better choice.
In the end, the best mix is what works best for you, your project and what’s available in your location.
Why is Cement All my favorite? because of its quick setting workability and cure time. I love its moldability and smooth final texture.
Additionally, Cement All is the smoothest mix for making cement crafts, very fluid, and the hardest after it cures.
I’m impatient and it’s helpful to know in a few hours if my cement projects have failed.
If I need a cement that has a longer working time, at the time of writing, Top n’ Bond will be my cement mix of choice.
Please keep safety in mind when working with concrete and cement mixes. To read more about this, take a look at Safety Concerns With Concrete For Crafts.
And here are the essential supplies you’ll need for making concrete crafts.
Don’t forget to Pin it for later!


Thank you for this information as I am new doing concrete crafts for my garden this was very helpful. I will no longer go to the home improvement store and ask questions of employees who know less than me. I now have some options and know what will work for me.
Hi Eva,
Thank you for the nice comment! I’m happy to heat that this is helpful. Good luck with your garden crafts! I will have more posts coming in the next couple of months with good detailed concrete crafts info like this, but more in-depth.
I enjoy using all of the rapid set products. The only problem I found is the rapid set time as the name implies. According to the manufacturer, the particular type of cement that’s used in the mixes can be slowed down in setting time by using citric acid.. Experiment with a ratio of 1/4 cup per 55 lb sack. This does not hurt the strength and will greatly slow down the set time which is especially needed in hot weather. You can purchase the citric acid in its powdered form at a health food store. I have found that using the mortar mix for resurfacing old concrete works very well. I screen the mix with a window screen over a 5 gallon bucket to remove all the larger aggregate. What’s left is a wonderful topping mix for resurfacing concrete. It works wonders even without a bonding compound. You can start and stop wherever you want with no shrinkage cracks. I would recommend watching some YouTube videos for the application. I like mixing it to a syrup-like consistency. The PSI of this mix is outstanding. Much much stronger than ready Mix Concrete. If I’m not mistaken it’s about 8,000 PSI rather than the standard 2500 PSI mix.
Hi,
CTS Rapid Set sells their own specially formulated citric acid, called Set Control, that you can use. It’s really cheap and should be right next to the boxes of cement.
I actually have used the Cement All for resurfacing without a primer/bonding agent. If I recall correctly, the Cement All has a slightly higher PSI than the Mortar Mix. It’s good to know that it works for that though. I haven’t used it much because of the gravel, but I like the mottle look it gives on planters.
Thank you for all information it was very helpful. I also make garden sculptures. I wonder if you can tell us if CO create 1 cement to 1 sand is waterproof after muture?
Hi Hanlie,
Regardless of ration, no concrete is waterproof. Concrete is naturally porous, which is why it works so well for planters. It allows moisture to evaporate through the pores so it’s difficult to overwater your plants. There are many acrylic concrete sealers available that can be used to help make them waterproof.
However, for outdoor use, you shouldered to make them waterproof. A nice concrete sealer will help protect your garden sculptures somewhat from discoloring, but some natural changes will still occur overtime.
Wow! Every cement/concrete company should be publishing your information! Amazing attention to detail and easy to understand. It will be much simpler now for me to purchase the appropriate material for my projects. I especially like the photos showing the end finishes. So awesome! Thanks very much for your work!
Thanks Arlene! Let me know if you do run into any questions along the way.
Is there a list of what concrete to use for what type of project. Just a quick.reference would be amazing!
Hi Colleen,
I wish it were that easy, but I did write an article explaining how to figure out which is best for which project. https://artsyprettyplants.com/best-mix-for-concrete/
Much of it comes down to size of the project and thickness of the walls. Also, some of it is personal preference. Another good way to figure it out is to look for a tutorial of mine that closely matches what you’re trying to make (size and mold type) and click on the link of the mix I used to see what exactly it was.
After reading quite a few tutorials on concrete/cement garden crafts I feel more “enabled” after reading your article. It contained quite a few points that I needed clarification on before I started out on my next adventure with cement. A lot of articles are written using American products and have been hard to follow or adjust for Australian products. Know I feel I can purchase our products without having to ask ‘dumb’ questions.
Thank you
Hi Helen,
I’m so glad to hear that. I have a few more posts that will be up in the coming weeks that are informational about cement/concrete making. They go beyond just the mixes, so please stay tuned!
I stumbled upon this! Nice post! We share a passion for working with concrete! I also compared the mixes: https://www.madebybarb.com/2018/07/04/compare-concrete-mixes-for-crafting/
Happy making!!!
I experimented with different texture for my concrete leaves I’m making for my water feature. How do I ensure it doesn’t drip? I had to use a mixture of pure cement and water to coat the back. The concrete premix I used was too porous. Is there a better way of mixing concrete for Crafts for water features?
Hi Sharon, This is something I haven’t done before. I know Barb has a tutorial on this and she used the sand topping mix. Here’s a link to her tutorial.
https://www.madebybarb.com/2019/05/18/rhubarb-leaves-concrete-pathway/
Wow! Simply just wow!.. Thanks so much for this info. Truely amazing how some people are so forth coming with info when others are so (should I say, just info hoarders)..haha. This was so detailed and well written where it was so easy to read and understand. Thanks also for the pics of your outcomes. Thanks so so much. I am so grateful for the info. You should really get paid for your knowledge! Sincerely. Again thanks and look forward to more of your posts. I dont struggle no more to know which cement/concrete to choose when doing my crafts or garden/yard appeals. Sincerely and grateful for this in deph info…oh question. Do you happen to have this type of info on like plaster of paris and the likes? Would really like to know more on this as well. TIA.
Hi Lynn,
Wow is right, thank you so much for the compliment. I do sincerely appreciate you writing that. More often than not, when I write a post, I don’t find out if it is of much help to anyone. That’ really good to know, and I’m glad it’ helpful to you. My mission when I started this blog was to give ALL the details. I’ve often been frustrated myself, with tutorials that are overly slim on details. :0}
Unfortunately I don’t know anything about plaster of paris or similar. I haven’t ever worked with it. Sorry, I wish I could help.
Hi & thank-you for such a detailed and thoroughly researched article! I’m just getting into using cement and I’ve experimented with a few different products. Like you I also prefer the Rapidset Cement All. The only problem I have is it sets too fast. I found that Rapidset makes a product called Control Set – its supposed to extend the set time 15 – 30 minutes. Have you tried it? I’ll be experimenting with it this week and really hope it works since I like the finish of the Rapidset Cement All.
Hi Melanie,
You are welcome! I did try it once, but I didn’t research ahead how much I should actually be using for a smaller amount, so I winged it. Apparently I didn’t add enough because it didn’t slow down the workability time. I also wish it had more workability, as well as sandability. Please report back on how the Control Set works for you. I have more of it and will try again.
I just found a new cement I like, but it’s not a quick set or cure. The long cure time is an issue for me since I have such limited time to get posts out. However, the cement is WHITE. Do you have Quikrete Glass Block Mortar Mix available in Canada? It’s only available in some areas in the U.S., but it has the same type of texture as Cement All, but takes a day to cure and another day or 2 to dry. I can easily sand it though.
I saw your site, by the way. So cool!! Plus the name is great.
Hi Ellen! Thanks for your reply! I looked for the Quikrete glass block mortar but it looks like it’s not available in Montreal. I just bought some plaster that is supposed to leave a satin finish and it’s white. Hopefully this works because it’s hard to find white cement here for some reason. Thanks for popping over to check out my website? I have my first show in April so I’ll be busy for the next few weeks making planters!
White cement isn’t widely available here either. ?
Good luck with your show! Love the name too.
do you water cure your Cement-All projects? and how long?
Hi Kate,
I haven’t ever water cured any of my projects – Cement All or any other mix. I haven’t experienced any cracking, so it hasn’t been necessary. If you do have cracking and need to water cure it, then just mist the concrete with water and wrap it in plastic. And just keep it like that until it’s cured- so for Cement All- an hour or two. Does that help?
Thanks so much! I’ve started submerging them in water overnight after I remold them and letting them dry outside in the shade in our humid Florida environment. Hopefully won’t see cracking!
Hi Ellen, thanks for sharing all those secrets! Quite the most comprehensive tutorial to anything I’ve ever seen.
Question … I heard that adding a percentage of PVA to the water would strengthen the final product. Do you
have any experience?
Hi Elspeth,
My pleasure! I don’t have experience adding PVA to strengthen concrete. I know it can be used as a sealer. You can try it, but I have a feeling it’s not that effective. I think your best bet for strengthening concrete/cement is by adding glass or nylon fibers. I have some upcoming projects where I may need to strengthen the concrete and that’s what I will be reaching for if I do.
Thanks Ellen, actually I need to imprint a logo before it starts to set, which is fiendish with the timing,
always turns out different, so I might try that but fear than detail would be lost. Love to hear how you get on … Elspeth, U.K.
What kind of mix are you using? Do you have anything that is the U.K. equivalent of our Cement All? It takes the finest detail brilliantly and is ridiculously strong. Timing is always an issue with these things, isn’t it?
Hi there! I’m so glad I found your page and took the time to read this wonderful write up! Thank you for you for such a great step by step article. I’m new to making things with cement and would love more tips. I would be making planters for candles and am wondering what kindof sealant is needed. I’ve been told that the cement needs to be sealed before I pour soy wax? I’d like to make sure this isn’t a hazard.
Hi Ikeda,
I’m glad you found the site. Have you seen my cement candles post? I used soy wax and didn’t use a sealer. It’s here https://artsyprettyplants.com/round-cement-candles/. It’s possible that some types of cement or concrete require a sealant to be used as a candle or with soy wax. I haven’t heard anything about needing to use a sealant. However, it’s probably a good idea to use one because the oil from the wax can easily drip onto the cement/concrete and it will permanently stain it. I’m guessing that’s why people are suggesting that?
Sealing is a very easy thing to do, but I’m not sure if there is a type that is better. I think you will have to experiment. I don’t think there is any hazard, I have used the candles and haven’t had any hazardous issues. The only sealers I have experience with are Easy Seal (from Amazon) and Stone Care Sealer (Home Depot or Amazon). The Easy Seal may be a better choice for this.
Hi! Thank you so much for replying so quickly! I will give it a try. Blessings to you!
Hi Ellen,
I am just curious to learn concrete crafts, tried couple of them and terribly failed with pots. Please bare with my basic questions.
1. What kind of cement I should use?
2. How do I make molds? I tried with garden pots and cement stuck to them, instead of making new one I screwed up old one too ☹️
3. How long I should wait to remove the mold? I just need box type planters, what mold you suggests?
Thank you so much for your time and help. Really appreciate your time for community. Simply amazing!!
– Ramesh
Hi Ramesh,
No worries, that’s how you get started-with basic questions.
1. To answer this question on which type of cement to use, I would need to know what size planter box you plan on making.
2. What material were your molds for your pots? There are many materials you can use, but for a basic pot, you might want to start with plastic. Keep in mind that not all plastic is friendly to the process. If it’s a rigid plastic, you will have trouble demolding it. Look for a pliable plastic. A heat gun is super helpful for demolding.
3. Your wait time before removing the mold depends on what type of cement/concrete you use. A rapid set/fast setting can be demolded in 1-4 hours. All other types need 24 hours. If you are making a planter box, then what mold you use will depend on size. You probably want to use melamine to make a box. You can use silicone caulk to seal all the edges and corners. Then you can just take it apart to demold it.
I hope that helps!
Ellen
Thank you so much Ellen. This is really helpful. As one of your articles said, I will get Cement all to see how it will work for me. I want to make small cylindrical planter so i will try with some Gatorade bottle. Hope that is not too rigid.
Does cardboard box works for box type planter? Or is it becomes too soft after pouring cement?
Thank you again
Ramesh
Hi,
A gatorade bottle will work, but you will most likely need at the very least , a heat gun to help demoed it. If that doesn’t work, a heat tool to burn the plastic, or just cutting it with a box cutter will work. Make sure you only make a mold of the bottom half of the bottle, not where it starts to bevel.
Cardboard that is waxed will work (like a milk carton). But if it were me, I would use acetate sheets to line the cardboard with. This will give you a nice smooth surface. I used the acetate sheets for my Triangle Planter, as well as Cone Vase. The corrugated plastic that I used in the Triangle Planter is probably a better choice than cardboard, but you will see the corrugated lines if you don’t use acetate.
Hi Ellen,
I tried some cylindrical pot using some protein drink bottles. They came out good but I see some cracks, how do I avoid them? Do I need to mix something in the cement? Please advise. Really appreciated your help and time.
Thank you
Hi Ramesh,
What type of cement are you using? If it’s Portland, then yes it has to sand or it will crack. Otherwise, cracking usually means too much water was used.
I have some sodium polyacrylate from a “fake snow” experiment. It is a powder that expands in water 1,000 times. Now what do I do with it? It says it is sometimes added to concrete. I guess it creates voids in the concrete. Too much and it will be too porous. The right amount adds desirable properties. Have you tried this at all? I want to make some fake boulders this Summer and wonder if it will make them look more or less realistic.
Hi Elizabeth,
How are you planning to shape these? Are you using a mold?
I have not tried polyacrylate. My guess is that you would only need a tiny amount and only on the outside, but it depends on how you are creating the boulder shape.
Can you give me some more details? I may have some better tips for you, especially since on Friday I hope to post my concrete stepping stones tutorial and video. I didn’t want to create voids, but depending on what yo are doing, I may have an idea for helping with texture.
I enjoyed reading your article. I want to make different coloured and shaped cement stepping stones. From a cement product. Of the products you reviewed, do you know which one would be the strongest for stepping stones, I guess made about 1 1/2 to 2” thick? Thanks for help.
Hi Maria,
I’m glad you enjoyed it. Yes! Did you see my Concrete Stepping Stones post?
Don’t be intimidated by the length of it, I just had a lot to explain about my color issue, which I explain how to easily resolve. You’ll want to use Quikrete’s Sand Topping Mix. Good luck and let me know if you have any questions.
Thank you so much for this it’s super helpful. I am adding a couple of concrete candle holders to my line of candles and there is a bit of a learning curve, so thank you!
Hi Casi,
Oh good! Glad you found it helpful. I went to your site. Cool stuff!
I love all the cement info. Have you attempted to make the concrete gnomes? Wondering what kind of cement would work best. They would be at least 12″ tall and would be outside in the garden. Let me know if you have ideas for these. Thank YOU!!
Hi Cathy,
I haven’t tried making gnomes, but I did make a concrete owl- https://artsyprettyplants.com/concrete-garden-owl-statue/
For that I used Cement All, but it was only 6″ tall. You may be able to get away with CementAll, but you probably should use the set control powder they make, with it. I think it will be difficult to manage something of that size and thickness without it.
Your next best bet is probably Sand Topping Mix from Quikrete, or make your own with Portland cement at a 2:1 sand to cement ratio. Since I haven’t tried it, I can’t guarantee these will be perfect, but if I were making one, I think I’d start with the Portland cement. Good luck with it and let me know how they work out.
I have just got into mucking around with cement pieces for the garden, my first hand was quite good but found the mix had quite big stones in it so got some portland cement this mixture was interesting can I ask do I need to add sand to this? or do i use as in. Info i=on bag does not tell me much other than add water.
Hi Janine,
Yeah, you will need to add sand to Portland cement. It will crack without some type of aggregate like sand. The ratio of cement to sand will depend on what you’re making, but if it’s a medium sized planter, 2:1 (2 sand : 1 cement) is a safe bet. You can also try a 1:1 ratio.
I’ve been making concrete crafts for years, and have always wanted to do a test like this. Well, not JUST like this… You may be impatient, but apparently not as impatient as I am! You went into way more detail than I would have! So all that to say… THANK YOU! EXCELLENT article. <3
Hi Veronica,
You’re welcome! And I’m still testing. I feel like I could be testing for 10 more years and still learning new things. I’m often surprised, and not always in a good way. Lots of DIY fails, but it’s still too much fun to deter me. I’m guessing you feel the same- but probably with less fails. ;0}
I enjoyed your post! I have a couple tips for using Cement All. 1) You mentioned using Control Set to slow down curing time. Control Set is essentially powdered citric acid which is readily available and much cheaper. It doesn’t take much to have an effect – just a couple pinches in small mix batches. 2) Cure time is also strongly affected by temperature. You can slow cure time by substituting an equivalent amount of ice for any water you normally add to your mix. For instance, if you normally add 10 pounds of water to your mix you can instead add 5 pounds of water and 5 pounds of ice. As long as the combined weight of water and ice doesn’t change your mix won’t be affected other than any ice will slow the cure time. Finally, I’m a big fan of adding glass fibers for enhanced strength and crack resistance. I typically add 3% fiber content by weight. Even though this will seem like a lot of fiber it really increases the strength and durability of the final product. Hope these help!
Hi Curt,
I love these tips! I live in the southeast and lately have been using a cooler to hold my water with big ice packs around it, and adding ice cubes as needed. Ice cubes do help a lot. Thanks for the percentages, those are helpful.
Great tip on the citric acid!
And the last great tip- the glass fibers. I have some and I haven’t tried them yet. It’s good to know about the 3% ratio, I was wondering how much to add. I see that you are a science person. It’s super helpful to have a science person reading a cement-oriented blog. Thanks for your help! When I update the post, if you don’t mind, I’ll add this info into it.
Excellent information.
I decided to use Hydro stone for m8ni pots to give me a white finish, very quick setting and easily tinted. They came out great but they are porous. Do you have any suggestions as to how I could make them water resistant.
Thanks
Thanks Judith.
I’m not familiar with Hydro stone, its sounds like a winner. Are the going to be planters? I find ports ones to be better, especially for succulents.
Otherwise, the sealer I sometimes use that makes them less porous is this Easy Seal. It will darken them a touch though. I So far all the sealers that do a good job of sealing, that I have found, will either create a gloss effect, or darken it. The others that don’t do that, also don’t seal as well. The next best bet for non-darkening is Sealer Stone care.
Hi! Thank you so much for helpful post.
After seeing this post, Ive made some concrete containers for candles, but the wax seeps out. Do you have any suggestion what kind of sealers I should use to make the concrete waterproof?
Thank you for your help!
Best
Eriko
Hi Eriko,
Glad you find it helpful. Is the candle actually leaking oil? You can try Easy Seal acrylic concrete sealer, it does a good job of sealing. You can also try a water based polyurethane on the inside- HOWEVER- I don’t know if it would be heat or flame resistant, so you may want to check with the manufacturer’s product specialist, or test it in a safe area.
Good luck.
Yes, it was seeping out! Thank you so much for your tips. I will try that!
Looking forward to next post!
Best,
Eriko
Wow! What an extraordinary summary, your attention to detail is amazing. Thank you so much, it’s all the information I need to get started. I really appreciate your hard work and am looking forward to putting my new found information to good use.
Thank you Alexandra! Let me know if you have any questions along the way.
So much great research & info….thank you for sharing!0
Hi Linda,
You’re welcome!
Hi Ellen
Thank you so much for all the info you have provided on the site, I am a beginner and felt a bit overwhelmed before reading your articles.
I have a few questions about sealing concrete, I am planning on making some concrete plant pots but also doing some acrylic pouring on them. I have no idea whether to seal the concrete first or seal after the acrylic pouring (and if I should use an acrylic specific sealant or a concrete sealant instead).
I have also seen some very cool projects people have done, and I was wondering if you could give me some advice on how to achieve the look in the photo that I have attached? Apparently they used a normal plant pot mould but didn’t specify how they achieved the technique.
Thank you again for all the information you have provided on your site, its really insightful!
Thanks
Alicja
Hi Alicja,
Great, I’m glad to hear you feel less overwhelmed now.
You don’t have to seal the concrete unless you want to. What’s your reason for wanting to seal it? That will determine which sealer to use. Is this for indoor or outdoor use?
It looks like the planter in the photos was done in a similar manner to my Cement River Planter that I did for my friend’s blog. I used hot glue to create voids, but I have since learned that silicone caulk will be make it much easier to demold, but you have to wait longer for the caulk to dry before you cast the cement.
It can be a bit tricky trying to apply caulk in a small mold, but you can get a plastic syringe, often used for resin and put the caulk inside of that and then apply it inside the mold.
It also looks like they used two different colors of cement. I believe they casted the grey color below where the caulk was, then applied the white cement on top. You can see that in some parts there is an indent and full void. The caulk was thicker where the voids are and thinner where the indent is. The gold is painted on- the River Planter tutorial linked above will show you what I used for the gold.
Hi Ellen,
For some reason I can’t reply to your comment. So I am replying here
Hi Ramesh,
What type of cement are you using? If it’s Portland, then yes it has to sand or it will crack. Otherwise, cracking usually means too much water was used.
– I am using RapidSet CementAll.It is not only cracking but also so brittle it is just breaking pretty easy even when I try to sand little hard. Can you please advise me how do I make them strong?
Thank you
So that’s very strange that the Cement All is brittle. Usually when something cracks, it’s because there’s too much water in the mix. What type of consistency was the mix? Was the bag of Cement All a fresh bag? After opening the bag, you usually only have about 6 months before the mix starts to go bad and that will give you brittle cement.
Also, how thin are the walls? If the walls are thinner than 1/4″ then you can have cracking. From your image, it does look like it either had too much water in the mix or had walls too thin.
Hi Ellen,
Thank you so much for your time and reply.
Walls are pretty thick close to 1/2″. I didn’t had too much water either (at least to my knowledge) I had to fill it with spoon since it was thick to pour in the mould.
I will try them again.
Hi,
I think you should do a test in a simple mold- something with edges that don’t go in and out. The shape of that mold you are using difficult is difficult to do, even if you’re not a beginner. Try one in something like a yogurt container and see if you have the same problem.
Unfortunately I don’t know why they are crumbing on you. The taller, more narrow molds do tend to be a little more difficult than a wider, shorter one.
Hi Ellen
Thank you so much for all the information
I have made a planter with concrete mix and it didn’t come out good , im not very happy with texture
I want to make a big planter for my garden and my question
1. what kind of cement should i use ?
2, Is Mortor mix can be use to make planter ?
Hi,
The mix you’ll use will depend on the size of the planter, and the thickness of the walls. Also, what will you be using for the mold?
I have some big garden planter that i can use and also thinking of using oatmeal 2 lb box for outside
is it okay to use Oatmeal box ?
I would avoid using cardboard as a mold, especially for larger projects. The cardboard won’t be rigid enough to hold the weight of the wet cement and will warp and bow. You’ll also have a heck of a time peeling all the stuck cardboard off of the cement.
For the size of a 2lb oatmeal box, the Rapid Set Mortar Mix is probably a good choice.
ok, Thank you so much for all ur input
Can you show a pic or link of the sealants you used?
Hi Becky,
I’m sorry, I thought I had done that. I have linked it now, but here it is as well- brush-on sealer. Currently, I have two favorites the one I just linked will be more water resistant but will also slightly darken the cement. This one – spray sealer, is barely visible but also isn’t as water resistant.
Hi Ellen
I’m making a 3′ tall Japanese lantern with a 6″x 6″ column base. I’m happy to have aggregate in the mix but wanted to see what you thought about reinforcing the 14″ tall column with anything else.
I’ve seen wire added to forms but it looks only “coat hanger thick” and wondered if 10 or more, 2″ wide strips of stiff plastic gutter guard (with its 1/2″ holes and jagged edges) would be practical?
Thanks for your time, love your work,
Cheers
Eric
Hi Eric,
I don’t have much experience with tall narrow projects like yours, but I do recommend using hardware cloth/mesh wire for reinforcement. I’ve never seen something like a gutter guard used, but I would definitely stay away from anything plastic as a reinforcement because it won’t want to stick to the cement/concrete. Use wire mesh. You just need to add some extra grip for the concrete to grab hold of.
Good luck!
Great guide. Thank you. I tried using the Rapid Set Cement All for some small concrete planters. The first time worked great but the second and third times using the same ratio of mix and water resulted in cracks within minutes of setting. I had a consistency of a slightly thin milkshake. Enough to pour in the silicone mold without clogging up. It also set really fast. In some cases before I could finish pouring it. Any thoughts on why it’s cracking? Am I using too much water? Any insight would be great! Thank you.
Hi Scott,
It sounds like your water wasn’t cold enough. If the air temperature is too warm, you’ll need to cool the water down. You can add ice, or keep your water in a cooler. I’m in the Southeast and in warmer weather, I keep my water in a cooler because the tap water is too warm within minutes. If it’s cracking shortly after setting, then that’s the likely cause. Let me know if cooling the water stops the cracking! Good luck.
Thank you for the notes! I did two things: 1. used cold water as you suggested and 2. covered the mold with a damp cloth. That seems to have solved the cracking issue. I also figured out that with this type of cement, smaller batches are better. I was trying to fill 4 molds at once and by the 3rd mold, the cement was starting to set. I’m now making small batches and filling one at a time. I really like the Rapidset Cement All.
This is incredibly thorough! I’m a first timer with concrete and this is by far the best information on colors and finishes, and how those are affected by composition, cure time, etc. Being able to control that finish is important for what I’m doing, and I haven’t found another review that even touches this. Thank you!
Hi Jack,
I’m so glad you found this helpful! Let me know if you run into any problems along the way. Good luck!
Thank you for the notes! I did two things: 1. used cold water as you suggested and 2. covered the mold with a damp cloth. That seems to have solved the cracking issue. I also figured out that with this type of cement, smaller batches are better. I was trying to fill 4 molds at once and by the 3rd mold, the cement was starting to set. I’m now making small batches and filling one at a time. I really like the Rapidset Cement All.
That’s great news! Oh yeah, I’ve done the same thing with trying to batch process with Cement All. I’m all about being efficient, but unfortunately it doesn’t work with Cement All. They do make Set Control which will slow down your working times and you’ll be able to batch process. I don’t have a lot of experience with it, but you may be able to cast at least 3 molds if you use just a tiny bit of that. It’s very inexpensive too.
You, ma’am, are my new hero. Absolutely superb article. Exceptionally well done..
Answered virtually all my questions and concerns I have about incorporating into my sculptures.
Much appreciated!
Hi Lon,
I checked out your site, love your sculptures! Thank you, and I’m glad you found this useful.
I am so excited to find you!! I was looking for info on making silicone molds, watched your video, then saw in the comments you have a website. This post comparing different kinds of cement/concrete is fantastic! I made stained glass stepping stones a hundred years ago. I recently got into the world of succulents and decided to make concrete pots for them. I’ve just been using the same “recipe” I did when making stepping stones – 2.5 parts sand to 1 part Portland cement. (Way back then the white Portland cement was more readily available and didn’t cost an arm and a leg. These days I’m just using the gray cement). Even though that works okay for me, I have been so curious about the other products out there. Your article has been very helpful and given me the encouragement to try other products.
As for the 90 pound bags of Portland cement – oh my gosh. That’s definitely the biggest drawback. I drive an SUV, so I place a tarp in the back when I buy a bag. When I get home, I leave it there, put on my mask, cut the bag open, then fill up five gallon buckets with a manageable amount. This is kind of a pain, but the buckets do have lids so the cement does store well that way.
I can’t wait to explore the rest of your site. Thank you so much for all your hard work and for sharing with us!!
Hi Debbie,
I’m so glad you did find me and that you found the article helpful! I actually have an ebook coming out where I tested 5 more mixes and lots of sealers. Stay tuned.
Aren’t the 90lb bags insane! Do you have an Ace hardware near you? I just saw that Ace will order the 45lb Portland cement bags and you can pick them up. When I checked, it said it was 2 weeks before they would be ready. I think that’s what I’m going to do, because even though I do what you do with the 5g buckets, my mix still goes bad before I can use it.
Very thorough and informative post! One question – do you have to soak these cement pots in water (I would be using Cement All) before planting things in them? I have read some info about lime leaching into the soil from concrete pots and the plants not being happy about that! Not sure if this applies to all types of cement. Thanks!
Hi Dee,
I think it depends on what type of plant you are putting in them. I know it’s strange, but I have only potted succulents in my cement and concrete planters, and succulents prefer a more alkaline environment. My plants usually do great, and if they don’t it’s easy to identify overwatering (it rains so much here) or insects as the issue. I also don’t know if some concrete/cement mixes have more or less compounds that create alkalinity. But I think if you are going to pot other types of plants, especially vegetables or herbs, it’s probably a good idea to soak them. I have heard it’s best to soak for a few days, and refresh the water each day.
Thank you for the response!! So excited to get started!
Hello Dee Roth, thank you so much for the excellent research and info you are posting here. I have one questions that I still haven’t been able to find a clear answer.
How much concrete mix I need. Making crafts objects with concrete is not like pouring a concrete slab, which is simple to calculate. I did find some calculators online, but nothing works.
Any tips as to how you find out how much concrete dry mix you need for a casting?
Hi,
You can fill up the space you are casting with water and then dump it back into a bowl or measuring cup. That will give you an idea of how much cement you will need to fill up that space- it won’t be exact, but it should be close. So if when you pour the it back in a bowl, and that turns out to be about a cup of water, then you probably need about a cup of wet cement. I can tell you also that if you are using a mix that is very fine, with no aggregate, it seems that it takes about about 1 1/2 cups of dry mix to give you 3/4 to 1 cup of wet mix.
Alternately, you could fill the casting space up with sand instead of water and probably come closer to seeing how much cement you need.
I hope that helps.
Thank you so much !! I will try it both ways.
all the best
Hi..
How much water do I need to add to 1:1 sand to Portland type cement mix for concrete crafts?
Hi Sahar,
There’s not really a formula for adding water. I have never measured it out and it’s different all the time. The important thing to know is how thick or thin the mix needs to be for the particular mold you have. I always have to play with the amount of water and adjust as needed.
Hi Ellen, Thanks so much for such a detailed comparison. I also like the Cement All for making pots. My question is, I seal the outside of the pot with a matte sealer. I use a soft cloth to apply and am careful to wipe any drips before setting it to dry. I can often see the marks from my application of the sealer – do you have a suggestion on what to use to apply the sealer that won’t be visible once dry? Thank you for sharing. Sue
Hi Sue,
I find that the spray sealers are much better for not leaving marks. There are two that I like- Black Diamond Granite Sealer and Stone Care Granite Sealer. Neither of these have left any visible marks.
Thank you so much. I know you must be very busy and I agree with everyone who has posted on here that we appreciate the time you take to share your crafting experiences and to answer our questions. I will definitely give the spray sealers a go. Spread concrete….and kindness…. hmmm….that might not stick as a saying! Enjoy your day.
Wow, such a comprehensive post, who knew there was so much to think about. I read where you colored after curing and am assuming that’s when you recommend adding color…….any thoughts on why I wouldn’t add a colored stain to the mix???
Hi Lisa,
I rarely color the cement after curing. I prefer adding color to the cement mix. I haven’t actually used a concrete “stain” yet, but those work differently and are made to only be applied after curing. When I color my cement, I either add a dry powdered pigment to the dry mix, and then add water and mix it in- like with the Pink Cement Planter. If it needs more color, I’ll just add the powdered color to the wet mix. It’s just easier for mixing, to add a powdered pigment into a dry mix.
I also will use just an acrylic or latex paint and add that to the wet mix- like with the marbled concrete planter.
Usually the only time I add color after curing is if I’m going for a decorative finish that can’t be achieved with a concrete colorant like this Ribbed Concrete Planter. I also will do that if it’s a large project because colorants can be pricey. And for a large project, paining is just easier and more budget friendly. That’s what I did for the bird bath.
Hi Ellen!
Thank you for sharing and showing the different mixes. I am currently making Dog Bowls with Cement-All and I am having a few snags on efflorescence and the seal. I used a natural stone and concrete wax sealant on the inside mixed with a little coconut oil. My question is how to I prevent efflorescence and is the wax sealant safe for dogs to drink from?
Thanks!
Zac
Hi Zac,
I’m not sure I can give you a definitive answer. You may want to do more research about letting your dog drink out of concrete. I know there are materials that can be used for this- because I know that store-bought concrete should be safe, but I don’t know if they are commercially available.
Any wax that says it’s food-safe, or is used for countertops is generally safe. However, I’m not sure if it’s safe for drinking out of.
I would feel better about it if the concrete had been leached before waxing. At least that would pull out the alkalinity that’s leaching out from the lime. You could sand it and then leach the chemicals out (soak in water for 3 days and refresh the water each day). Then rewax- but I’m still not sure about the safety.
For efflorescence, I’m not sure it’s easy to prevent, but diluted vinegar is supposed to help. So if you start by sanding the bowl and then soak it in water. Next, do the vinegar solution and then re-wax. You may need to repeat the process a couple of times.
Wow, what a comprehensive and informative article. I really want to try my hand at “concrete crafting” and fell down a rabbit hole of overwhelming info. Somehow I stumbled across your blog and now feel less daunted. I look forward to experimenting! Thank you ?
Hi Karyn,
I’m so glad you feel less daunted! Even for me today, it’s a lot of trial and error. It’s like baking- it’s different every time. Good luck!
I am in AWE…THANKS YOU so very much for this comprehensive tutorial.
With your instruction, I think I might be able to create some beautiful art.
You are my hero….no really, you are!
I wish I could do something for you….perhaps a concrete bowl?
Kidding
Thanks Kat!
Thank you for all your great information on cement projects. I’m new at this and will be using rapid set cement all and was wondering if there is a formula for making small batches instead of one giant batch. Is it a process of testing or does someone out there have a breakdown of how to make smaller batches. Thank you again for the information. It has gotten me on the right path to making my own cement planters.
Hi Erik,
So there really isn’t a hard formula for large or small batches. I have never actually measured my ratio of cement to water. It’s ALL about the consistency of the mix and that is something you need to feel. For casting molds with narrow cavities you need a thinner mix- like a milkshake. Slighter wider cavities may be more like a mud pie. For each of my tutorials, I specify the consistency. It really is something you have to play wit, unfortunately. Just add a little water to the mix until you have the consistency that works with your mold. If you want to tell me what you project is- size, etc. – and what the mold is you are using, I can help you figure out what consistency you may need.
Thank you, Ellen. The cement I will be mixing will be used in several silicone molds to create planters. They are pretty standard shaped like round, hexagon & square. There is one mold that I bought that has honey comb and bees on the planter. I wanted to try my hand at adding color to the cement as well. I’m assuming that for my project a milk shake consistency would be best? Thank you again for your help and I look forward to using all of your resources to get me through my various projects.
Hi Erik,
Yes, a milkshake consistency is probably good. If you are adding color, Cement All is off-white-to beige so your colors will be muted. I have found that adding a white concrete powdered pigment like zinc oxide will work quite well in helping offset the muted color. Sometimes an acrylic paint will work too, but you have to add a lot and some of those paints will actually cause the concrete to crack. If you have a Michaels craft store near you, they sell a white outdoor “mosaic” concrete which works nicely, but take care not to go too thin on that.
Great, thank you so much. I’ve ordered the zinc oxide and will give that a try.
Amazing and thorough tutorial..thanku so much for sharing what must be hours..days or even years of experimenting ?
Never had much success with the ol cement..concrete. .mortar lol drives me nuts! This just may help me to take the plunge again.
Much appreciated and again thanku
Kaz ?
Hi Kaz,
I hope this does help. Good luck!
Ellen
This is all great info, thank you for taking the time to write it and test all these different types of cement/concrete. I have a question, what kind of bowls did you use as molds and where did you get them? thank you!
I just used bowls I found at Dollar Tree. They were nice and flexible.
Wow, way to go. This is one of the best sites with complete information. You must have spent considerable time doing all these tests and I for one am most appreciative. I haven’t read all the comments but I will. Thank you for sharing. God bless you.
Hi Judi,
They did take some time, but it was well worth it. I was tired of running into so many different results every time I made something. The only way for me to really figure things out was to take a deep dive. I’m so glad you are finding the articles useful!
How much of a 55 lb bag do you need for a 14” diameter concrete orb?
Hi Kietra,
That’s hard to say. It depends on the mix. Does it have aggregate in it? Is the orb solid? I really don’t know, I always have to guess. If it’s solid, it’s probably going to take at least 10 cups, but I’m not sure. If it has aggregate in it, it will be a lot more.
Hi! Enjoyed all the info. Thanks! My question is: can mortar be used as ‘cement for making cement crafts? Wanting to make rock shapes to arrange into flowers. Bought quickcrete cement and a mortar as it isn’t going to have the stones in it…..
Thanks!
Hi Debbie,
Your welcome!
You should be able to use most mortar mixes for cement crafts, and is generally preferred. For this type of project, I like Cement All. It doesn’t have any stones at all and is easy to work with. Some mortar mixes aren’t that easy to work with though and I’m not sure which Quikrete cement you’re referring to? What thickness are your molds?
Thank you! I used some today to make a glove hand, and in nylons for making the flower. Tomorrow shall see how the birdbath turns out!
Hi Ellen, first of all thank you so much for setting the cement and concrete term! I’m located in Australia and I find that the term concrete, mortar and cement is used correctly and not interchangeably. So you can imagine how confused I was when Google showed me US results. I purchased all concrete, mortar and cement to see the difference. Lol. I am working with a slightly different purpose. I’m making candle vessels and it’s very hard and expensive to find Rapid Set Cement All in Australia, especially when I’m located in the city. All the ones I have purchased for my candle vessel failed terribly. They either don’t set by 2nd day or crack when I demold. I followed the pancake consistency for all of them. I am going to try to make my own cement mix – ratio 3:1 like you mentioned. Can you explain what sand is used? Do you have a reference brand or type? ?
Hi Phoebe,
My readers in Australia like this mix. https://www.davcoaustralia.com.au/products/technical-mortars/surface-preparation/lanko-136-rapid-patching-mortar/
I don’t know if that’s available near you?
Yes, just regular fine sand. I have used “playsand” for kid’s sandboxes or the kind you get at home improvement stores that is used for mixing with cement. The one from that is made for mixing with cement has some small gravel in it which I will sift out for small projects. Larger ones I’ll leave it in. Really any sand will work- even some from a beach. Quikrete makes both of those types that I used. Also, maybe try a slightly thicker pancake batter, something that forms when you pick it up and falls more solidly, than drippy, if that makes sense. A wet mud pie. Good luck!
Thank you so much for sharing the link. I’ll check it out. 🙂
Thank you Ellen!
Hi!
Thank you so much for this! I have to read it again slowly!! You mentioned using a little black to make Concrete All more gray. What type of paint do you add? Does adding color it compromise the durability of concrete? I am thinking of grinding some grooves to add resin. Have you tried to do anything like that?
Thanks
Wendy
Hi Wendy,
Yes, paint can compromise durability so if you don’t want to risk it, stay away from paint. Use a colorant or pigment that’s made for concrete. Home Depot and Lowes sell a cheap powdered and liquid (I like powdered better) colorant in the concrete section. Amazon also sells the same. If you use paint, acrylic is best, but some types will dry it out and cause cracking. Craft smart from Michaels has been mostly okay, but most other’s have caused cracking when I’ve used them. When looking for concrete colorants or pigments, those are the terms you’ll search for. Hope that helps!
Thank you for your prompt reply!
Hi, I bought the Sakrete Pro Mix All-Purpose cement mix to make cement soap dishes on a silicone mold. After unmolding I noticed it had white and some almost fading circles/rings after it dried off. Kinda like when you sprinkle water in a mirror and it dries off leaving marks. I tried making another dish with pigment and it did the same thing. I also used distilled water. Prior to the Pro Mix I had used Sand Mix and that left no marks. I just didn’t like that it had a grainy texture and not smooth on the final product. Do you know what can be causing the marks? I tried searching online but I couldn’t find any information. Thanks.
Hi Jessenia,
This sounds like efflorescence. It when minerals and salts rise to the surface. This happened to me when I made my concrete stepping stones- using Quikrete’s Sand Topping Mix. I have not had that problem otherwise. I wouldn’t used distilled water, definitely just use regular tap water, the distilled could be reacting differently with the concrete.
For the mix, I almost always use Cement All and have never had efflorescence. I haven’t used the Pro Mix all purpose, but it may be prone to it. Cement All will be extremely smooth, but off-white, so you’ll need a black pigment if you want it grey. Portland cement and sand at a 3:1 or 2:1 ratio will be nice and smooth and grey.
Hi Ellen. Thank you for all the tips!! I clicked to request you concrete mix guide but did not receive it. Can you please try sending it to me again?? Thank you!!
Hi Laurie,
I just sent it to you. Please let me know if you don’t receive it.
Ellen
Hi Ellen,
Thanks for posting this! I’m researching various media to use for making fake stone slabs for bonsai and also for outdoor and indoor sculptures. Your research has helped save me a few steps!
I also got some great tips in the comments. One commenter mentioned adding PVA to the water; however, I’ve read that it is not nearly as effective as Acrylic Polymer. Have you experimented at all with using it to add strength to the concrete mix?
Thanks again for sharing your experiments!
Hi Carey,
This is a little out of my wheelhouse, but I’m pretty sure PVA is an acrylic polymer. These are often added to concrete mixes. In fact many mixes you purchase from the store already have these in them. If you are using portland cement, with an aggregate of your choice, then it won’t come with a polymer in it. I haven’t heard much about adding these to water, but I can see it could make sense. Here’s an article I just dug up that backs up some of what I said, https://www.concreteconstruction.net/how-to/materials/understanding-polymers-in-concrete_o
Hi Ellen,
Thank you for making this guide! It’s really helpful for anyone starting out with cement/concrete projects.
There is a project I would like to get started on and was wondering if you would be able to advise me on what type of cement to use + how to go about this. The whole concept is dipping sunflowers in cement paste to create these sculptures that dry firmly. Along with this I also plan to coat a vase in cement to match the overall look of the flowers. I initially thought of using fresh sunflowers but decided to go with artificial ones to avoid any complications with the flowers decomposing and losing its structure. Anything I should take note of for this project?
Thank you so much for your help!
Isaac
Hi Isaac,
You are welcome!
I did some playing around with coating artificial flowers many years ago. The material or fabric used was a factor in how well the cement grabbed onto it and kept its form. A fast setting cement will make it easier, and definitely a smooth one. If you are in the US, then Cement All (at Home Depot) is perfect for this. Otherwise, try to find a fast setting, smooth mix.
I really don’t have enough experience, to give great advice, but you may need to get different flowers with different materials- petals and stems to see which will work best. Do a thin mixture, and you probably should try getting the fabric dampened first.
Coating the vase shouldn’t be difficult, but you may have trouble with expansion and contraction and experience some minor cracking. I’m not sure how to avoid that. I’ve covered wine bottles with cement and some had hairline cracks and others didn’t, and I had even used the same batch of concrete mix. Again, you’ll use a fast setting, smooth mix, but try a milkshake or think shake consistency. I wish I could be more helpful, but hopefully this gives you a start.
Best,
Ellen
Hello, I’d like some direction. I want to make 2’x2’ concrete planter boxes that I can also stick a metal pole into for my string lights. Is this possible to make with concrete panels and attach the panels with more cement/concrete? (I’m a total cement novice). If those go well, I want to also make longer but shorter raised flower beds.
I’m thinking of adding a small plank to the cement at the tops so I can screw in a wood board as a topper (is this even doable?)
Hi,
This is a tough one. I’d be concerned that once potted with soil and the soil was wet, that the weight of it all would be too much for gluing panels, but it’s possible. It could be worth trying. Using concrete block would be easier, something like this: https://artsyprettyplants.com/diy-concrete-block-planter-box/. You can use Rapid Set mortar mix vertically to smooth across the sides of the blocks (much like a venetian plaster technique, but smooth) to make it look like concrete.
It would be more durable to make a mold and let it be one piece. However, it’s not a great beginner project, but is doable. You’d have to build a box from plywood, then another box to insert inside. The walls would need to be about 2″ thick. This would be difficult to demold so I recommend getting big sheets of acetate film to line it with, and also you would demold by unscrewing. the inner piece may be the more difficult part to get out.
I have had this on my list for a while, but as you can see, there’s a reason I haven’t tackled it yet.
If you want to add a metal pole, I’d recommend cutting a big hole in the plywood- both inside and outside molds, putting PVC in there. Plan on leaving the PVC in there permanently to act as a sleeve for the pole. Bury the pole in the ground.
The wood topper is a whole other thing. I would plan that into the mold design somehow so that it can sit within a lower edge so it’s flush. Screwing into concrete opens the door to cracking it, so if it can sit on top, I think it would be better.
Hi Ellen, I have an outdoor concrete fire pit and need to replace the top ring as it is about 10 years old and starting to deteriorate. It is basically a donut where the outside diameter is 48 inches, inside is 32 inches (so concrete is 8 inches wide), and it is and inch and a half thick. I was wondering what type of concrete (or cement) I should use and what would be the best way to make a mold? cardboard? I am also going to color it as today it is a deep red. Thank you so much!!
Hi Brent,
I’m not sure. Is it just a cover? If it doesn’t need to be fire-safe, then probably Rapid Set Concrete or the Rapid Set Mortar. Even Quikrete 5000 might work, but isn’t fast setting. As for the mold, I wouldn’t use cardboard- it’s not a great mold material for concrete in any application. Is the middle a dome as well? If it’s not, I would use melamine and use 100% silicone caulk to caulk the edges to the the ring and pour it on. If it is a dome, then I would try to find something that closely fits that shape and do the same. Sorry, it’s a tough one to comment on without seeing it.
Hello. So please tell me what would be the best concrete in ur opinion if I was cast 3×3 tiles? Like zellige tiles, for a back splash I can’t see paying 12/sqft.. I’m hoping this could be a much cheaper alternative. What do you think?
Amazing article. Thanks for all the time you put into testing and sharing the information.