Make A Cute Clay Gnome (With Air Dry Clay)
Get ready to learn how to make a cute clay gnome, step by step. If you’re a fan of adorable gnomes and like making things with air dry clay, then you will enjoy this clay gnome tutorial.
I was in the mood for a clay project, and lately, I’ve been drawn to the whimsical.
And so clay gnomes were one the first thoughts that popped into my head –and such a fun one!
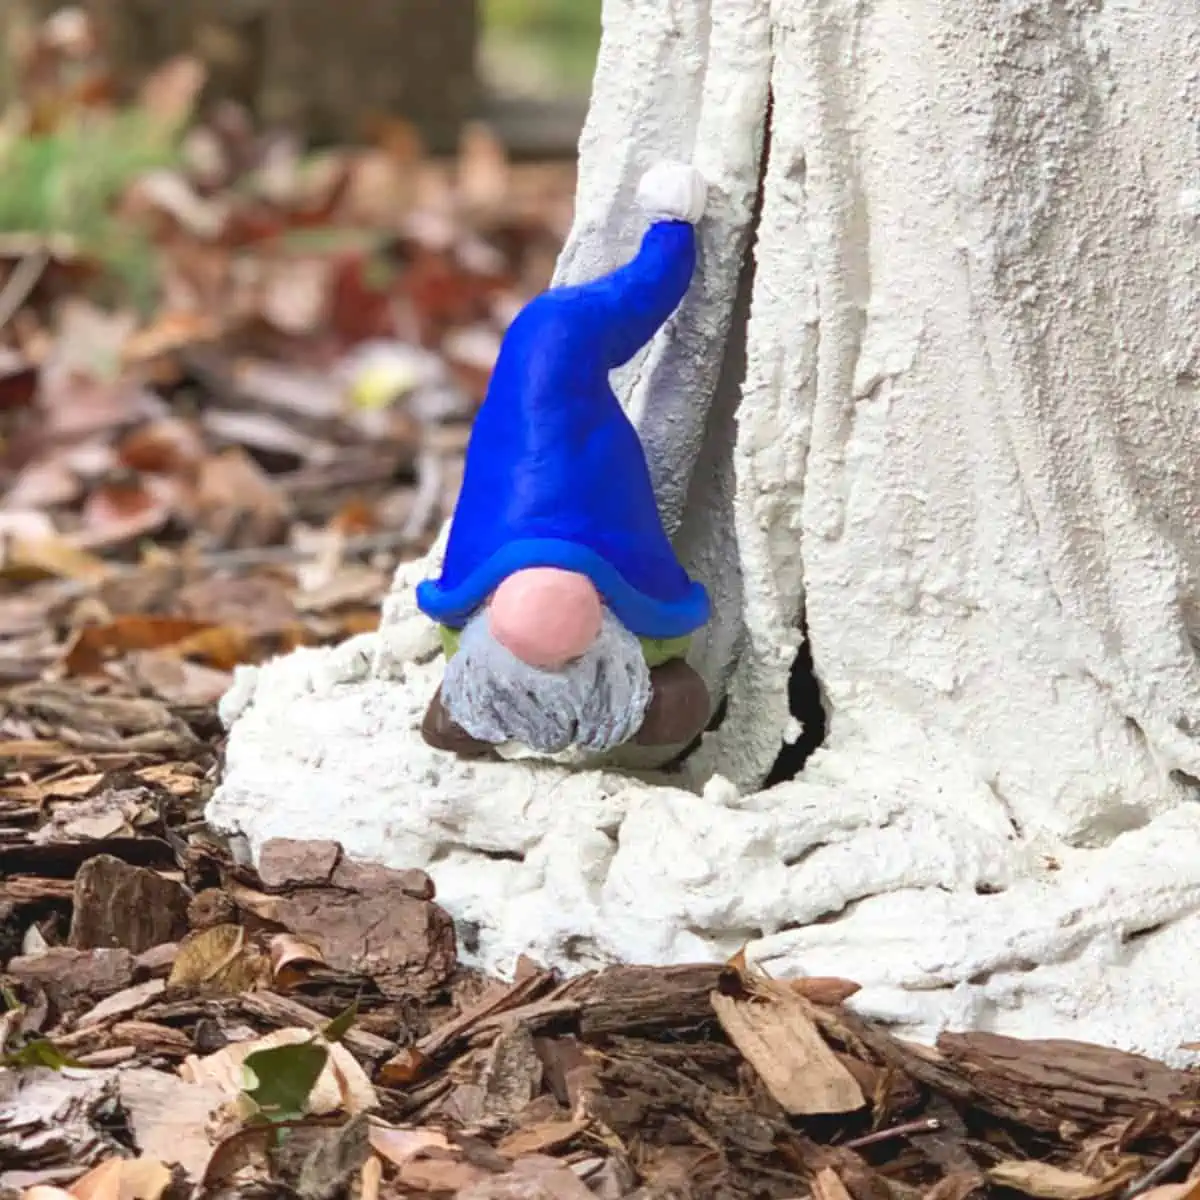
A couple of years ago, I decided to make a lady when I made a gnome out of concrete.
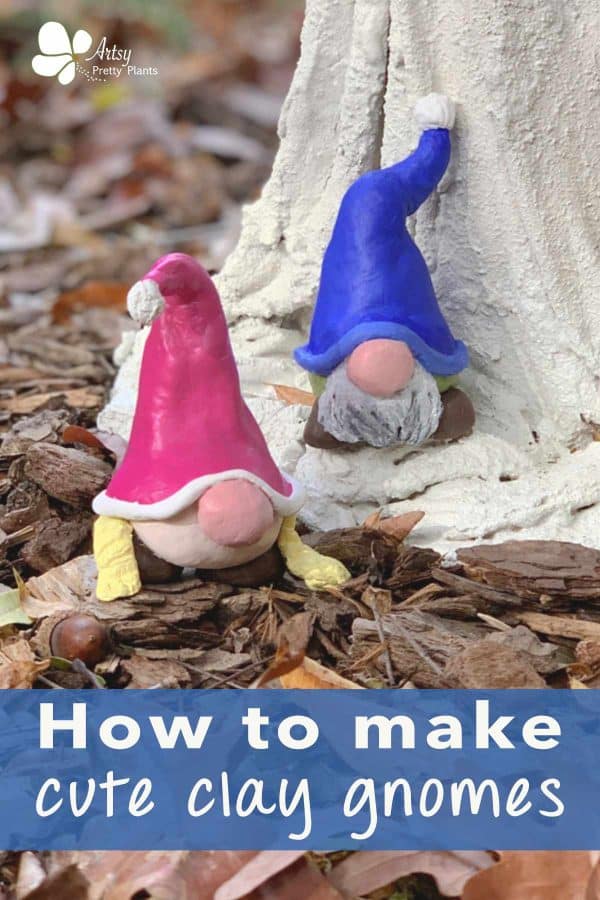
And for this project, I couldn’t choose between making a man or a lady, so I made both.
Making a gnome isn’t a difficult clay project, but if you are looking for more of a beginner project, then start with these easy air-dry clay mushrooms.
Some of the links on this page have been provided as a convenience for finding materials. These links may also be affiliate links. As an Amazon Associate I earn from qualifying purchases, at no extra cost to you.
I only recommend products I’ve used and loved, unless otherwise stated. Click here to read my full disclosure policy.
DIY DIFFICULTY LEVEL | Easy
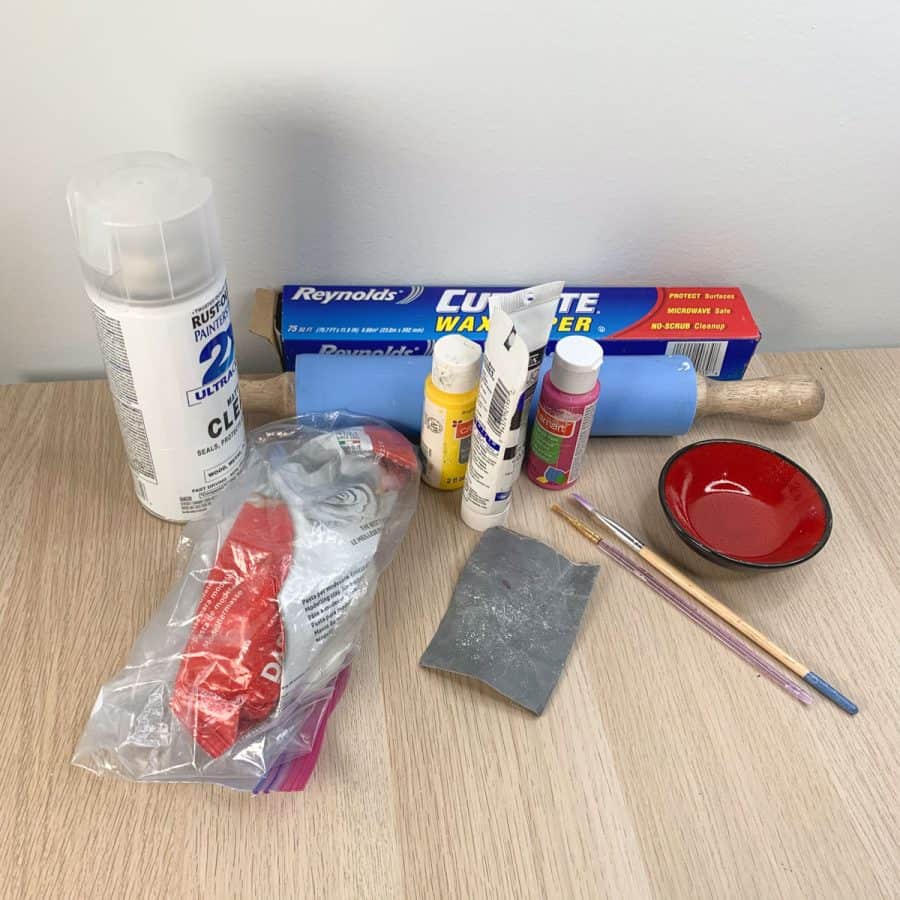
Make A DIY Clay Gnome Materials List
- Air dry clay*
- Clay sculpting tools*
- Flexible palette knife (plastic or metal -not serrated)
- Shallow dish
- Wet/Dry sandpaper (320 grit)
- Rolling pin or clay roller
- Parchment paper or wax paper
- White spray paint* (optional)
- Acrylic craft paint– assorted colors
- Paintbrush
- Top coat spray
Materials Notes
*Air Dry Clay
Get white clay rather than a terracotta color to make it easier to paint your gnomes.
*Clay Sculpting tools
I linked to a whole set of sculpting tools instead of individual tools, but I have found tons of uses for most everything in the set, even outside clay projects.
I only used a few of the tools out of the set for this, but those few aren’t sold separately at a price low enough that it makes sense to purchase alone.
The wedge-shaped rubber tip tool in the materials photo below is great for pushing clay into small places.
Unfortunately, I couldn’t find it when making the gnomes, so you’ll see the pointed-shaped one in the step photos. However, they are both helpful.
*White Spray Paint
I used this as a primer coating. Air dry clay is porous and can be a little fuzzy.
To help the paint look smoother, I sprayed a base coat of the white paint first. It seemed to help.

If you’re inspired to make other things with air dry clay, you can check out this awesome clay candle and ball-shaped planter.
Here’s the concrete gnome I mentioned making in the intro.
How To Make A DIY Clay Gnome Tutorial Steps
Step 1. Make The Body Of The Clay Gnome

First, warm the clay in your hands by mushing it together and then rolling it into a ball shape.
The clay needs to be warmed up first to help make it smoother.
Then continue your ball shape on your parchment, wax paper, or table.
I finally gave up on using paper as using my table made it easier to get smoother surfaces and was still easy to clean.
My man gnome was almost 4″ tall and 2″ wide- including the hat’s brim, so the ball’s size for the body was about 1 ¾” wide in diameter.

Once you have the round shape and it’s smooth, form it, so it’s a little narrower at the top. It will help when you add the hat.
For more clay ideas, I have a list of 55 things you can make.
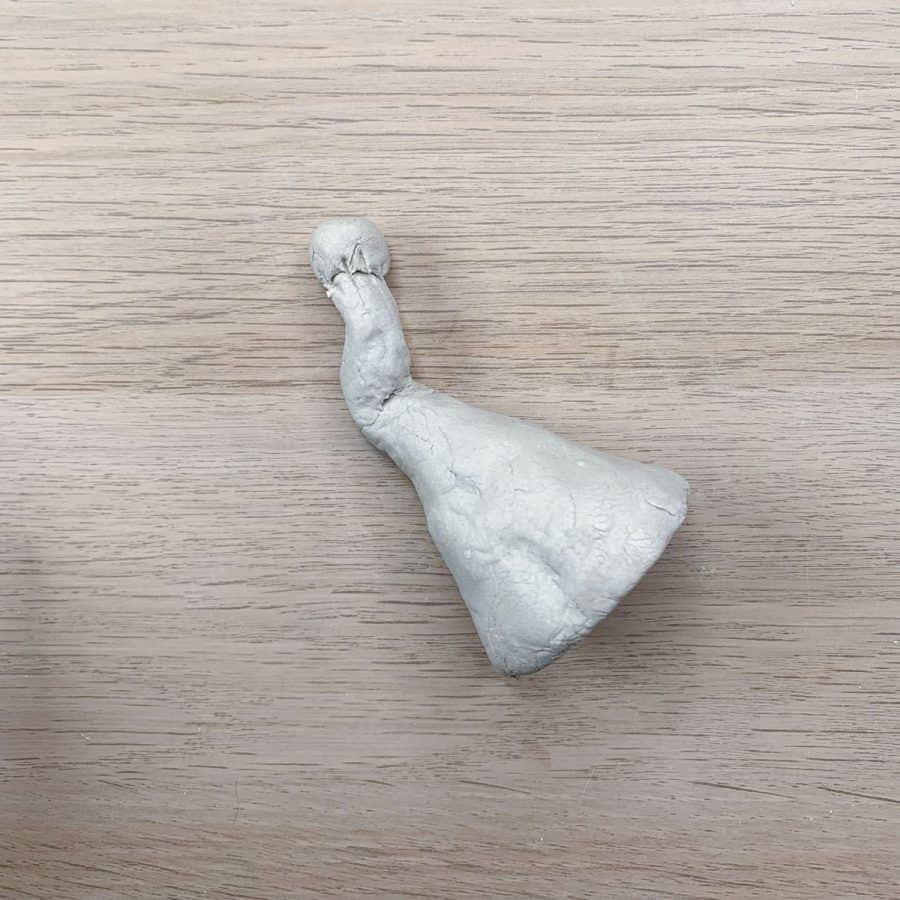
Step 2. Make The Structure For The Gnome’s Hat

Take another chunk of clay and roll it into a larger-sized ball. It’s better to have too much clay and just cut away what you don’t need.
I made my ball about 2 ½” wide, barely enough to be the length I wanted for the hat, so make sure you use enough clay.
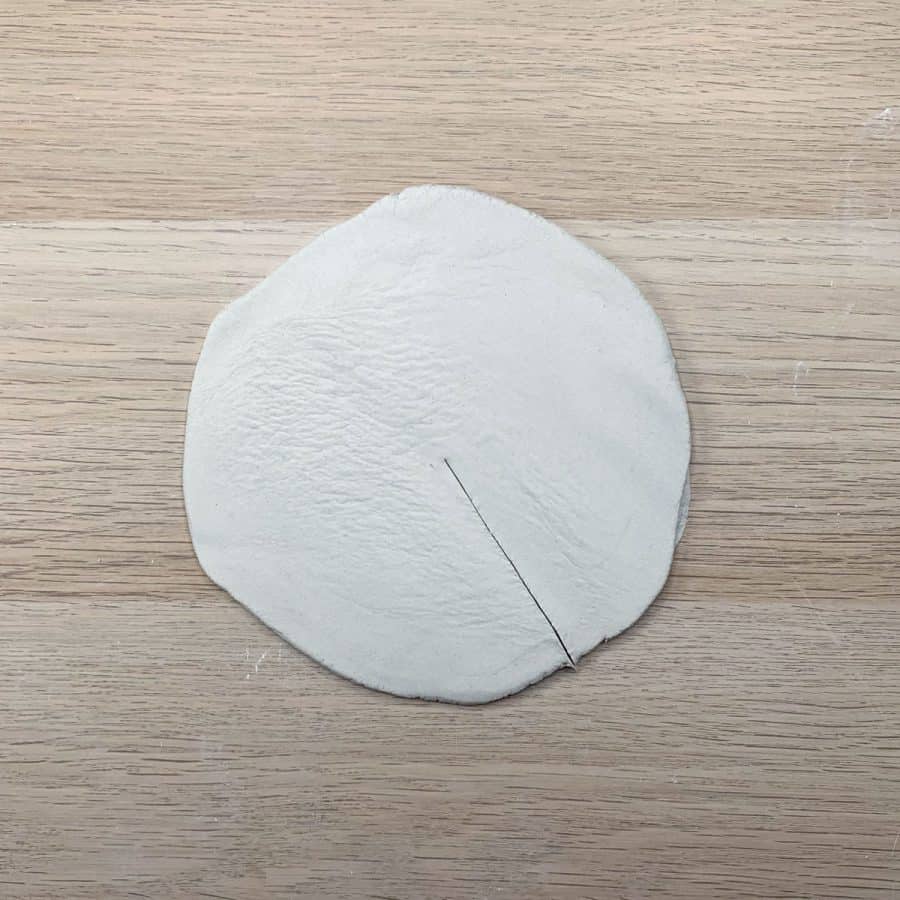
Now press the ball evenly into a pancake shape, flatten it slightly, then use a roller to roll it into a circle shape that is slightly less than ¼” thick.
Then take a palette knife and cut a slit down the center that stops halfway.

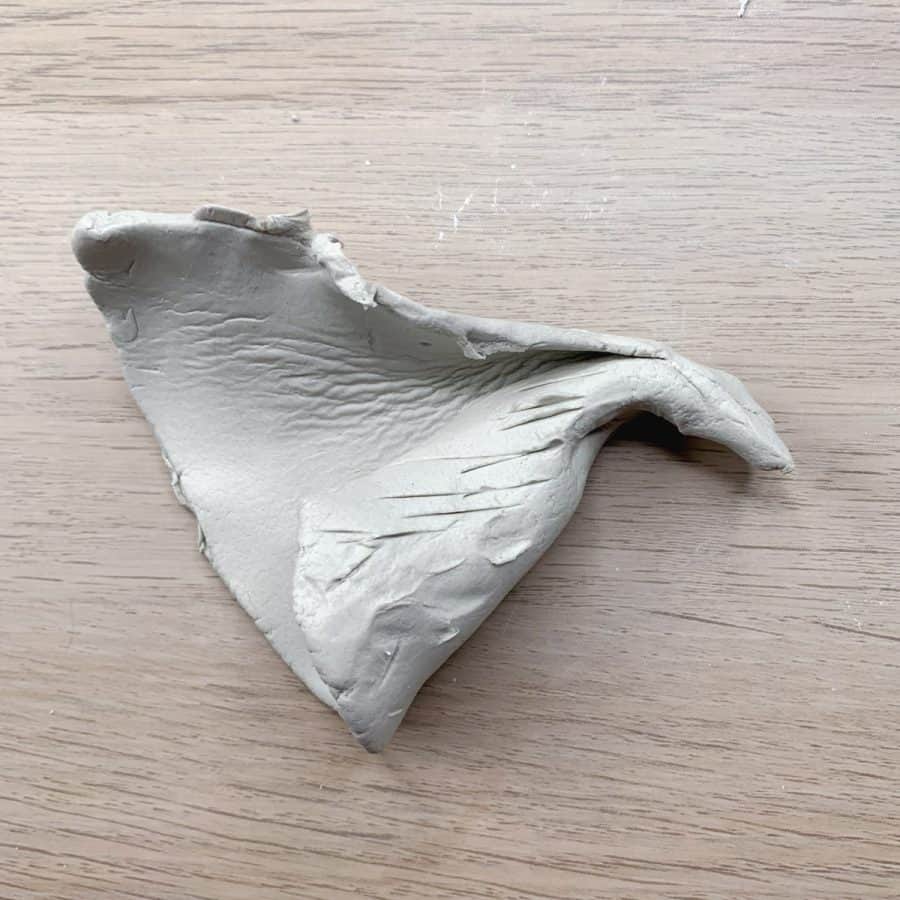
Now roll this into a triangle shape as you fit the opening over the gnome’s body.
A gnome’s hat typically hangs lower in the back and will come down about halfway in the front.
Once you have the size of the opening, triangle shape, and length worked out, go ahead and trim the excess.
But be sure to leave about ¼” extra where the sides of the cone overlap.

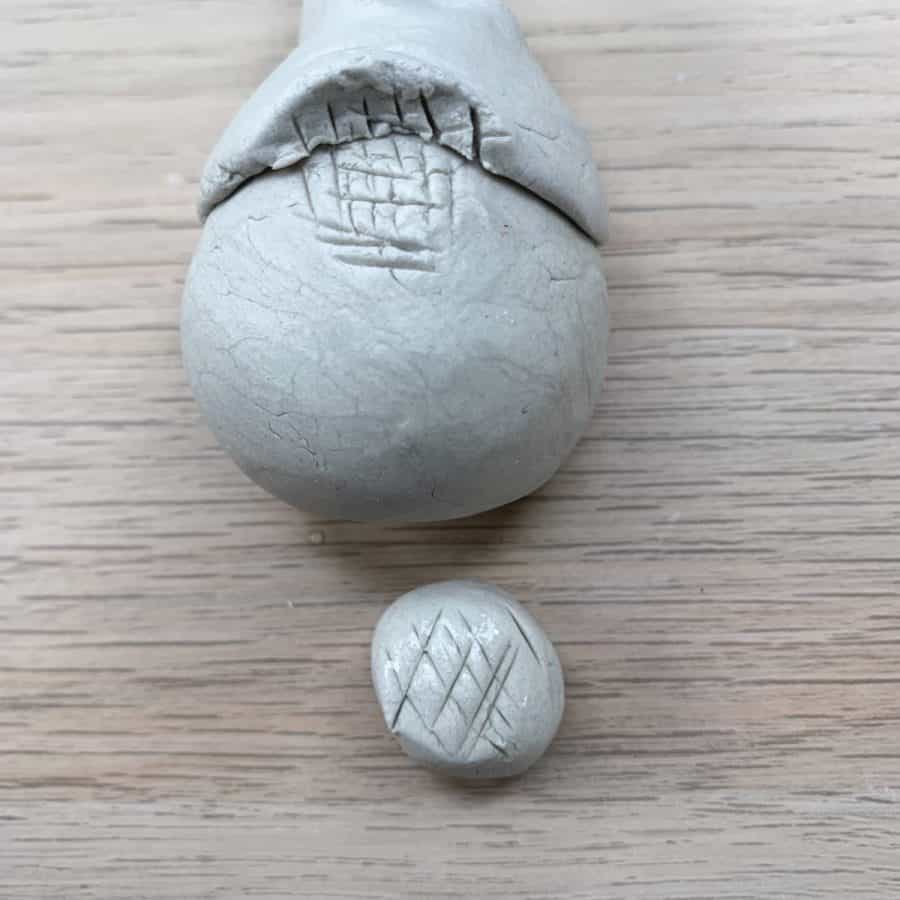
To prevent the hat from collapsing, you will fill part of the cone with some clay. I used some of the clay I had that was older and drier.
Only fill it part of the way, and leave space for the hat to fit over the body. It also doesn’t need to be a tight fit. It needs a bit of structure.
Now create score lines or hatch marks on the edges of the hat where they overlap.

Then, use your finger to wet those areas, refit the hat over the gnome’s head, and press the sides of the hat together.
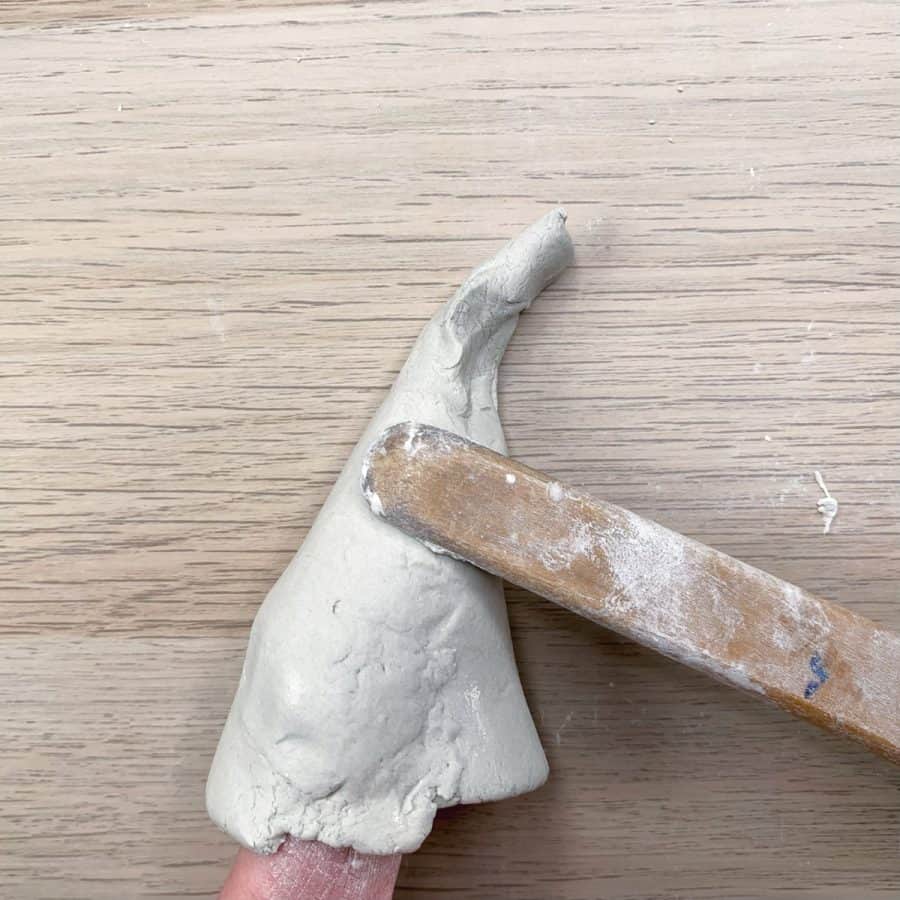
Then use the thumb joining tool and a little more water to smooth the outside seam.
If the bottom edges of the hat are uneven, you can trim them.
You may need to shape the hat to get it longer and narrower at the right points.
I played with the form for a bit until I had it shaped the way I had it pictured.
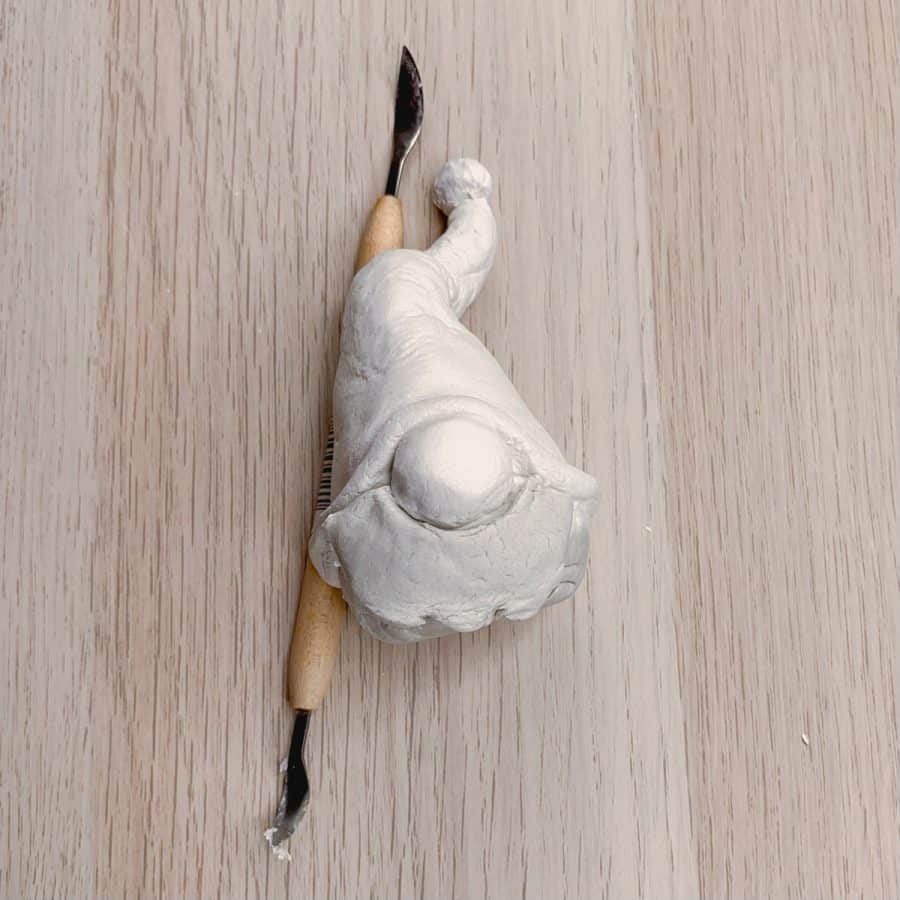
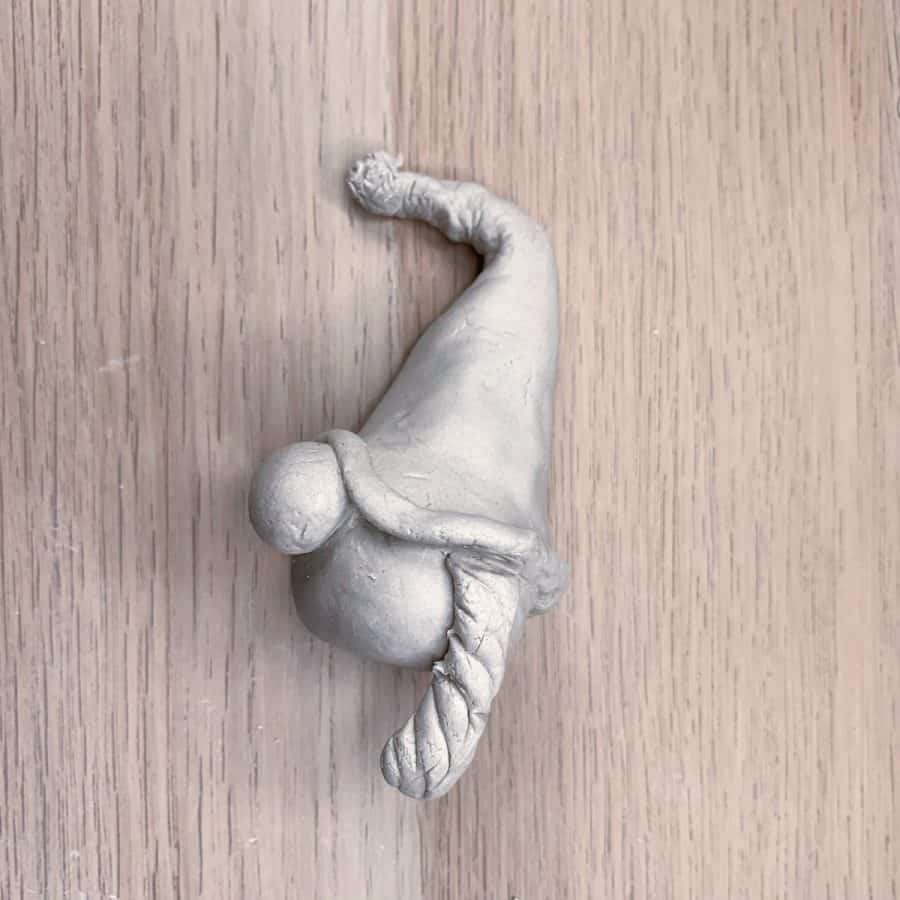
Now create a bend in the hat. I made a double bend where it went sideways, slightly down, and back up, making it a bit tricky. A single bend will be easier.
Step 3. Add A Pom Pom Ball Top The Hat

To create a pom pom for the tip of the hat, make a tiny ball and use the end of a small tool to create an indent.
Be sure the hat’s tip tapers slightly to place the ball. Now make score marks on both the tip and inside the ball’s hole, then wet both and put the ball on top.
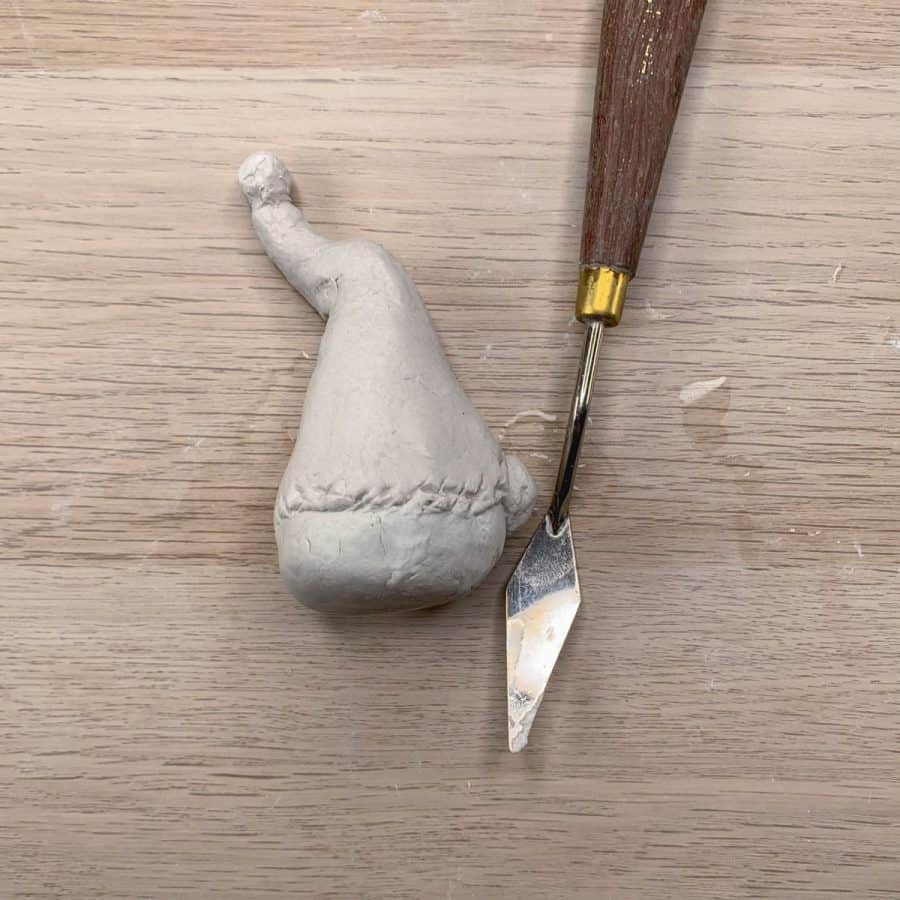
Next, score the area where the ball meets the hat by marking lines that cross over both.
Then press carefully with one of the tools and smooth the place where they meet.
Now use the palette knife to mark texture lines through it to create a fuzzy look.
Unfortunately, I forgot to do this during this step, so I had to wet the clay later to get the grooves on the pom pom.
Step 4. Make The Nose For The Gnome

Push the hat up a little at the center of the body to make room for the nose.
You’ll “glue” the nose to the body for this next step.
Roll some clay into a ball, then flatten one side just a bit.
Then make hatch marks on the backside of the ball and the body where you will place the nose.
Next, add some paste to the body where the nose will sit.

To make the paste, take a small piece of clay and wet it, then mush it onto your work surface.
Mix water with it to turn it into a paste-like texture; this is a wet clay slip.

Next, hold the gnome in your hand, use the rubber-tipped clay tool with the wedge-shaped tip, and add some clay slip/paste to the underside and sides of the nose where it meets the body to help glue it together.

Now smooth all the glued areas using either the rubber-tipped tool or the rounded part of the thumb-joining tool.
Step 5. Add The Brim Of The Hat
First, make hatch marks along the edge of the hat.

Then to make the hat brim, roll a long thin piece of clay and dip the thin piece of clay into the water and wrap it around the hat’s rim.
Now mark hatch marks along the bottom of the brim and into the gnome’s body.

After that, make more paste to glue the brim to the body. But this paste can be a bit thicker.
Then push the paste in between the two and smooth it over.
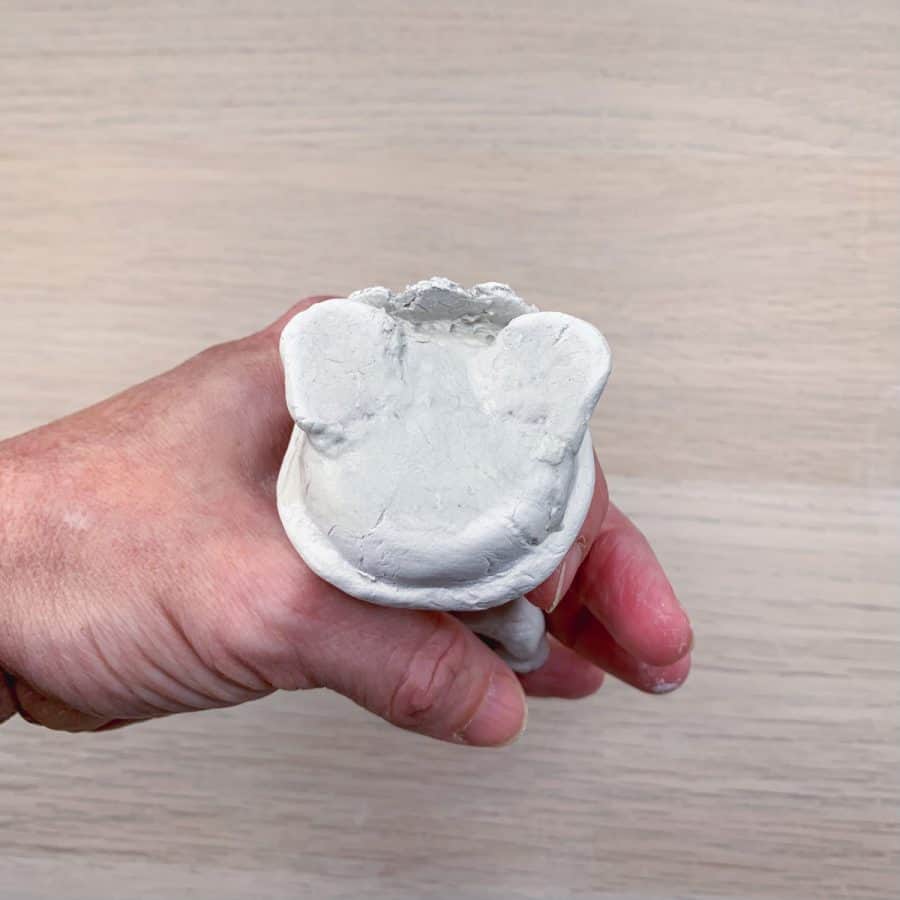
Step 6. Add The Gnome’s Feet


When you place the feet for the gnome, they should be ideally more toward the front so that the beard can fall in between.
Plus it will help the gnome look more gnomish. I made the mistake on my girl gnome of setting them too far back –just something to keep in mind.
Roll two small pieces of clay into balls. Place them under the gnome and press down on it, so the clay feet slightly flatten and form to fit the shape of the bottom of the gnome.
Take care that the gnome can sit upright and doesn’t tip.
Next, remove the gnome from the feet and make hatch marks on them. You will also create hatch marks on the gnome where the feet and bottom came together.
Then wet your fingers to wet the clay where the hatches are. Place the gnome back on top of the feet, then carefully hold the feet to the gnome and tip it upside down.
Use the leftover paste, or make some more, and press it into the gaps between the body and feet. This area may require a thicker paste and several layers packed in.
When done, smooth the clay and place the gnome back on the table where it can dry. Reposition the feet and body if needed.
I recommend letting the gnome rest in this position for a day before moving on to the next step.
If you want to make your gnome a girl, skip this next step and see the optional step below it.
Step 7. Option 1- Make A Clay Beard For A Man Gnome
If you want to make your gnome a girl gnome, skip Option 1 and see Option 2 toward the bottom of this step.
The reason for attaching the beard after the gnome has had a day to dry is that the extra drying time will allow the feet to stay connected.
And with the feet attached, you have the proper height for placing the beard.
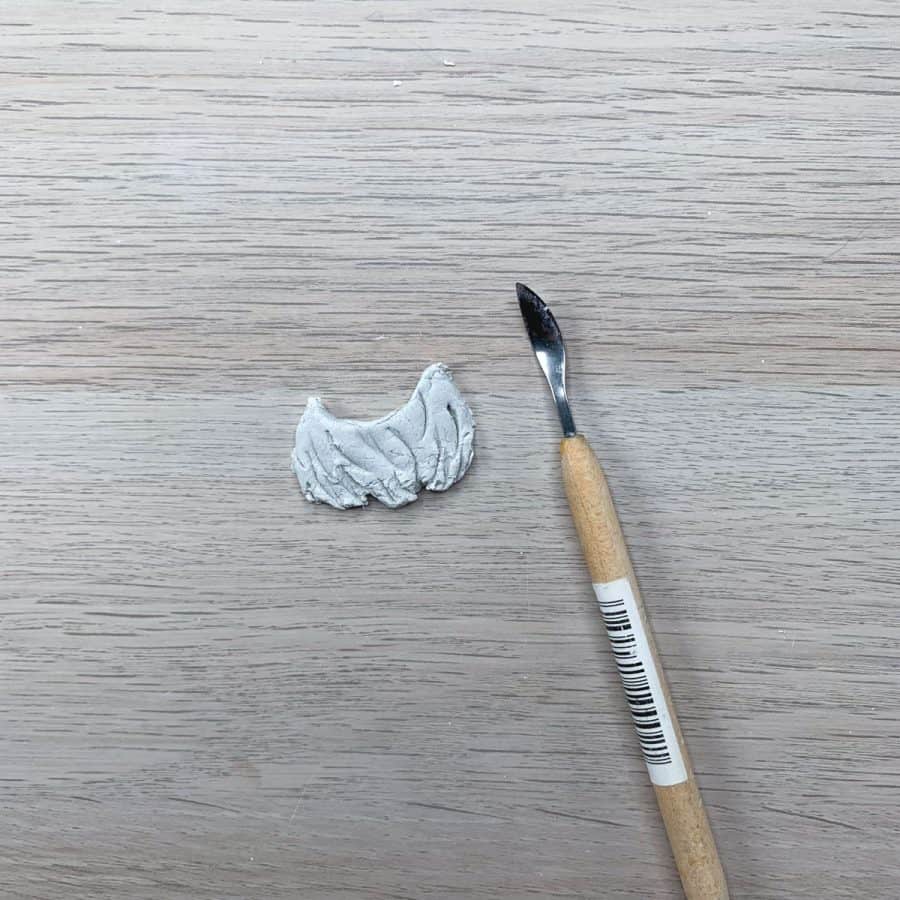
First, roll out a small amount of clay onto your work surface. Cut it into a rectangular shape approximately the width and height of the beard.
I recommend oversizing it because it’s easy to trim.
Place the clay over the gnome’s face, just under the hat but over the nose. Let the bottom flare.
Now use the carving tool to trim the bottom, so it falls just short of the table.
And on the sides, it should cover most of the front of the body. Trim off small amounts until you have the shape you want.
Some of the trimming was easier to do with the clay on the gnome’s face, and some was easier when it was lying flat on the table.
Press the top of the beard in between the hat’s brim and the body.
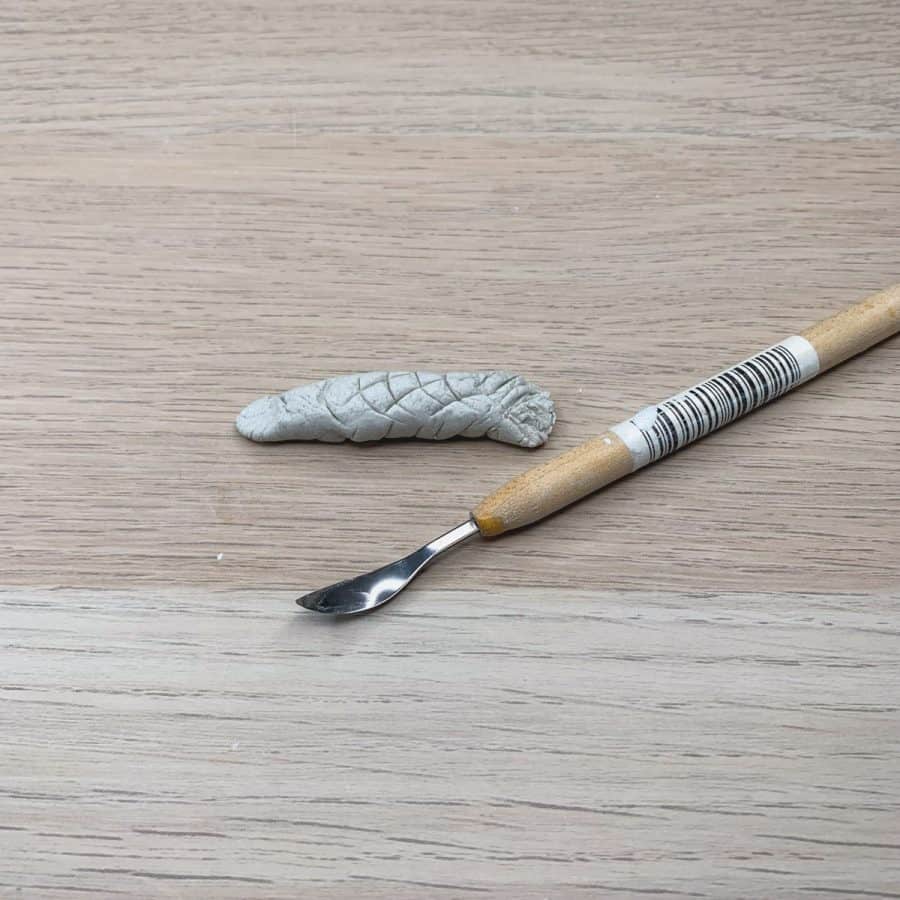
Use the curved sides of the carving tool to make grooves in his beard and at the bottom. Then add more lines for a fringed texture.
Next, make a thick paste and add it to the underside of the beard. You can pack in a good bit here.
Then thin the paste slightly, and glue the outside of the beard where it meets the body, nose, and hat.
Step 7. Option 2 -Make Clay Hair For A Girl Gnome
To make the hair for the girl, roll a piece of clay that is thicker than the brim. Then cut it in half.
Press each piece to flatten it slightly. Then flatten one end so it will fit under the hat.
Next, use the palette knife to make diagonal lines to look like braids.
Then make some vertical lines at the ends to make her hair more fringy.
Attach each piece to the space that you left the room inside the hat. If you missed this step, don’t worry, I did too.
You should be able to lift the hat still and tuck in the braids.
The braids can be any length, but if they are longer, I recommend bending them upward, so they are out of the way while sanding, painting, and sealing.
These are fragile and may break off like one of mine did. If this does happen, use E6000 glue to glue it back into place. Note: the bond requires a 24-hour dry time before handling.
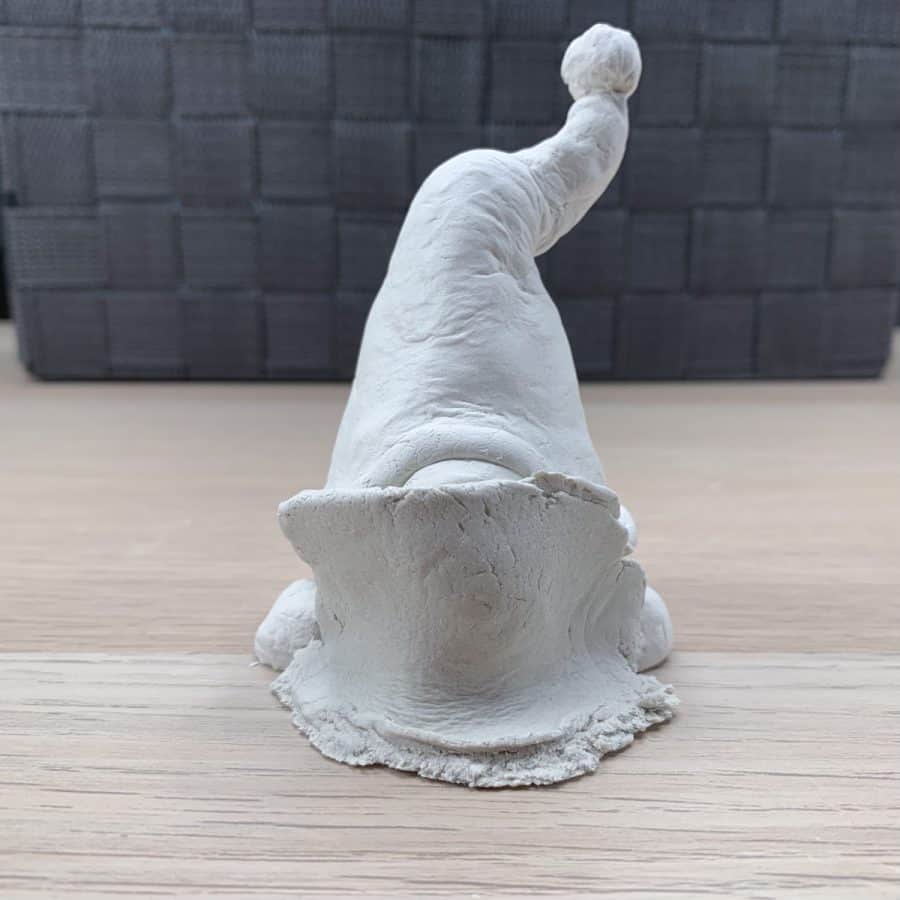
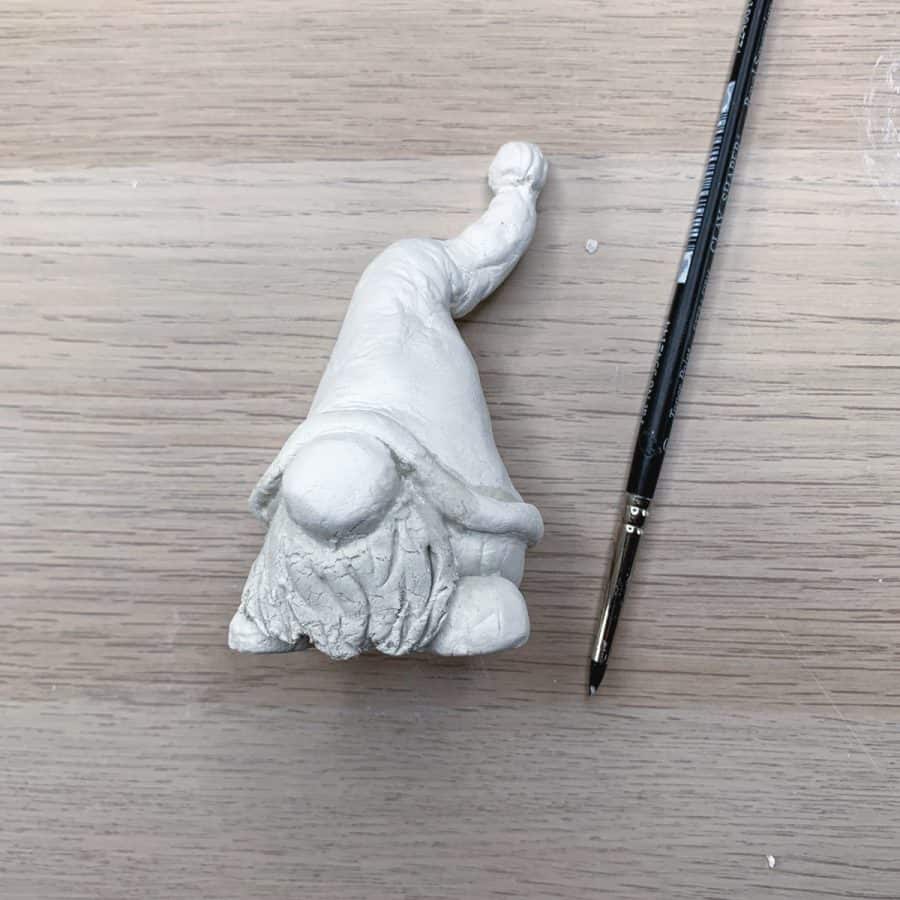
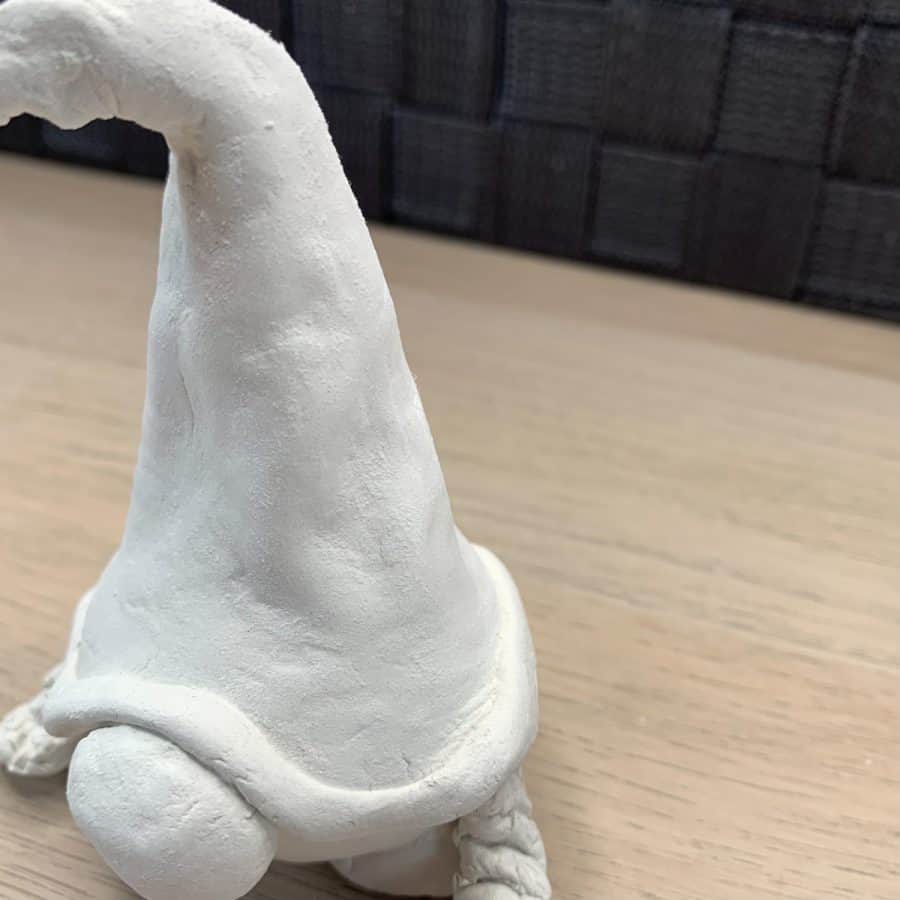
Step 8. Post Sculpt Smoothing
I was working with old clay on the drier side, so avoiding monitor cracks and keeping it smooth was challenging.
There are two methods to get some fine cracks out of air dry clay. One is to sand it once it’s dry, and the other is to add a little slip or paste to press into the cracks and smooth it.

The photo above is from before I tried either method.

Here is what the gnome’s hat looked like after I smoothed it by adding the thin paste slip. It is easier to do once the gnome has partially dried.
Please note the gnome will take up to a week to dry completely, but doing this the next day is good timing for smoothing.
To do this, make a paste as you did in the previous steps. This paste will be quite thin and watery.
Now use one of the rubber-tipped tools or your finger to press the clay into the cracks or indents.
Then use your finger to smooth it. You may need to wet your fingers a couple of times to help with smoothing.
See the next step for how to sand air dry clay.
Step 9. Sand The Gnome
Sanding air dry clay is easy. You can smooth it using sandpaper, either dry or wet.
Also, I recommend using a mask for this because it creates a lot of dust.
Lightly sand any raised or rough spots, as well as fine cracks. You should see the cracks erase pretty quickly.
I did both methods for this project because I wanted my paint finish to be as smooth as possible.
Be sure the gnome is completely dry before painting.
Step 10. Paint The Air Dry Clay Gnome
First, wipe all the clay dust off the gnome before painting it.

Spray the gnome with white paint. It will help give the entire surface a smooth base.
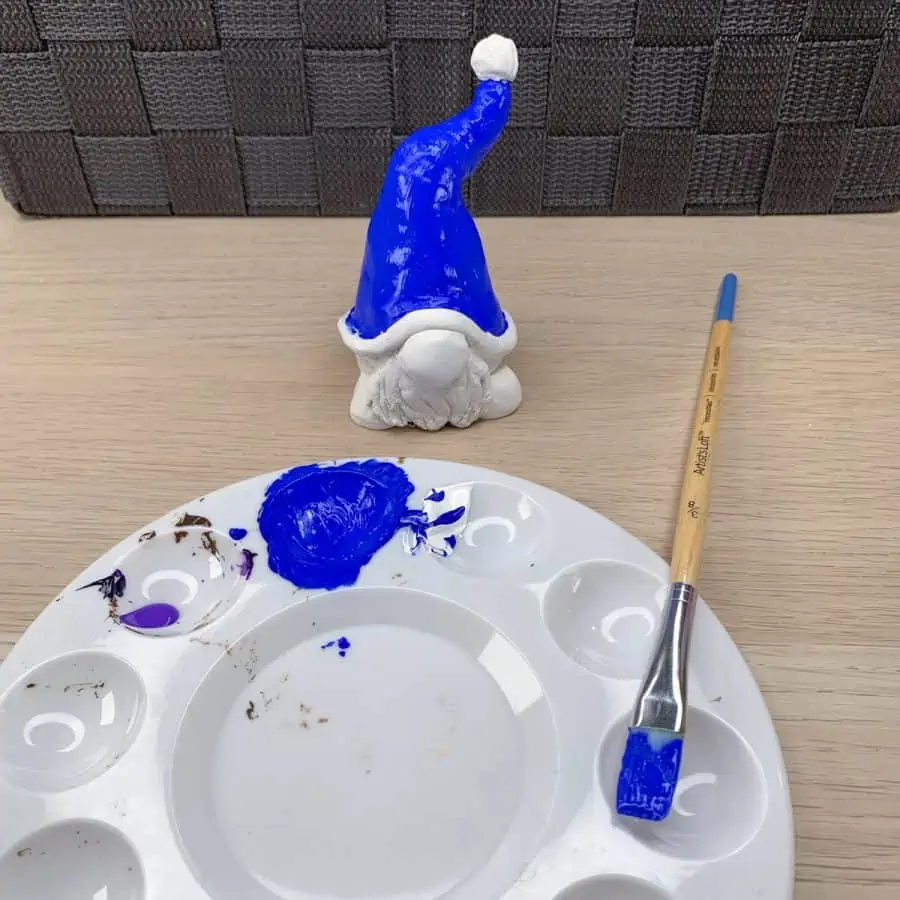
Decide what colors you want to paint your own gnome, and don’t be afraid to go bold or decorative.
Then, use a soft paintbrush to paint any color craft paint to make the gnome the colors you want.
For the white ball, I just left it as is with the base paint rather than adding another coat of craft paint.
Step 11. Seal The Paint
It’s up to you if you want to seal your gnome. The paint is already adding a protective finish.
But I like to go one step further to help protect it from scratches or stains, especially if you have young ones who might want to handle them.
Wait until the paint has completely dried. I recommend waiting a few hours if you use acrylic craft paint or longer for other types.
Then follow the manufacturer’s instructions and spray one or two coats of top coat over the gnome.
Be sure to do this outside. And also, remember to get the bottom side of the gnome.
Don’t forget to Pin it for later!

Make A Cute Clay Gnome –With Air Dry Clay
How to make an adorable clay gnome. A step by step tutorial for making a gnome with air dry clay. Easy detailed instructions.
Materials
- Air dry clay
- Clay sculpting tools
- Flexible palette knife
- Clay roller
Tools
- Please see the full materials list above the tutorial for details and links.
Instructions
- Make A Ball To Form The Body Of The Clay Gnome
- Make The Gnome’s Hat From A Triangle Shape
- Add A Pom Pom Ball Top The Hat With A Ball Of Clay With A Hole Inside
- Roll A Small Piece Of Clay To Make The Nose For The Gnome
- Roll A thing Stringy Piece To Add The Brim Of The Hat
- Make Two Balls For The Gnome’s Feet
- Option 1- Make A Clay Beard For A Man Gnome, Option 2 -Make Clay Hair For A Girl Gnome
- Fill In The Cracks For Post Sculpt Smoothing
- Use Sandpaper To Smooth The Gnome
- Paint The Air Dry Clay Gnome With Acrylic Paint
- Seal The Paint WIth A Clear Top Coat Spray