How to Level a Concrete Floor: For Vinyl Plank
I will explain to you in depth, how to level your floor so you can properly install vinyl plank. If you are going to lay vinyl plank flooring over concrete, there’s a decent chance you will need to level it first.
When we purchased our new home, one of the first projects we wanted to tackle was replacing an old, worn out carpet that had stains and pet odors.
Little did we know this would become an adventure on how to level a concrete floor.
Vinyl plank flooring is durable and was our top choice since we knew this room would see a great deal of foot traffic.
But, it wasn’t as easy as just pulling up the carpet and slapping down the new planks.
When the contractor removed the carpet, we discovered a whole host of issues.
We had many multiples of high and low spots and it was clear we needed to use a self-leveling underlayment to remedy the non-flat floor.
Leaving these peaks and valleys would have made it likely that the vinyl planks would lose their bond, causing them to buckle or crack.
At a minimum, we would hear crackling sounds whenever we walked on these low spots.
With some trial and error, we eventually got things sorted, and learned how to level concrete floors in the process.
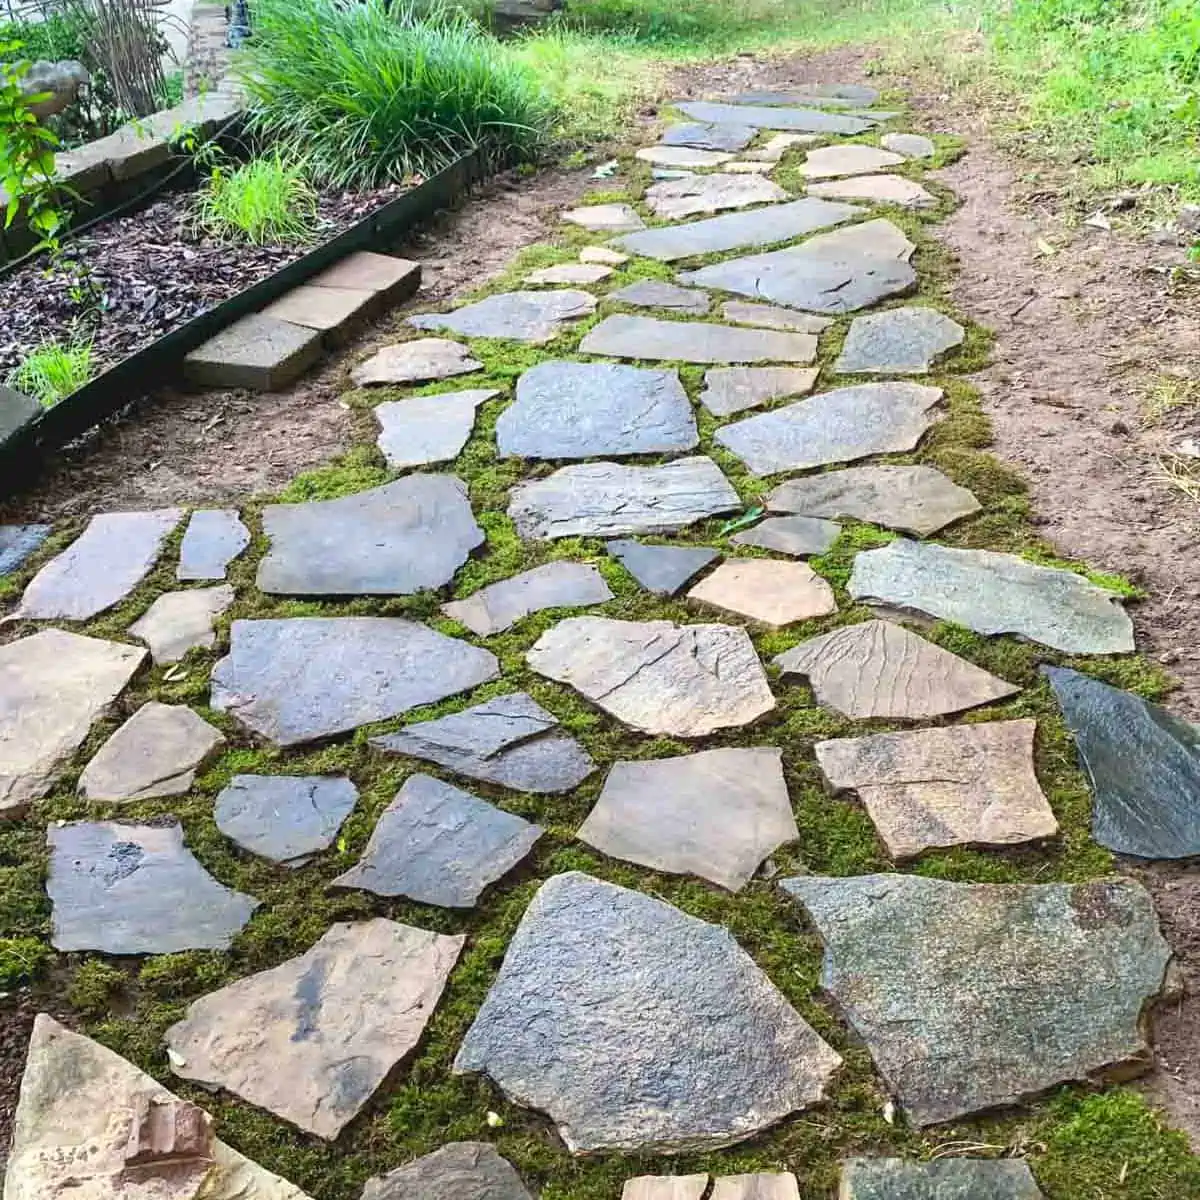
I learned a whole different set leveling skills only a month later, when I installed our new outdoor paver patio, which you may want to check out later.
Before The Concrete Floors Were Level

After The Floors Were Leveled And The New Luxury Vinyl Plank Installed
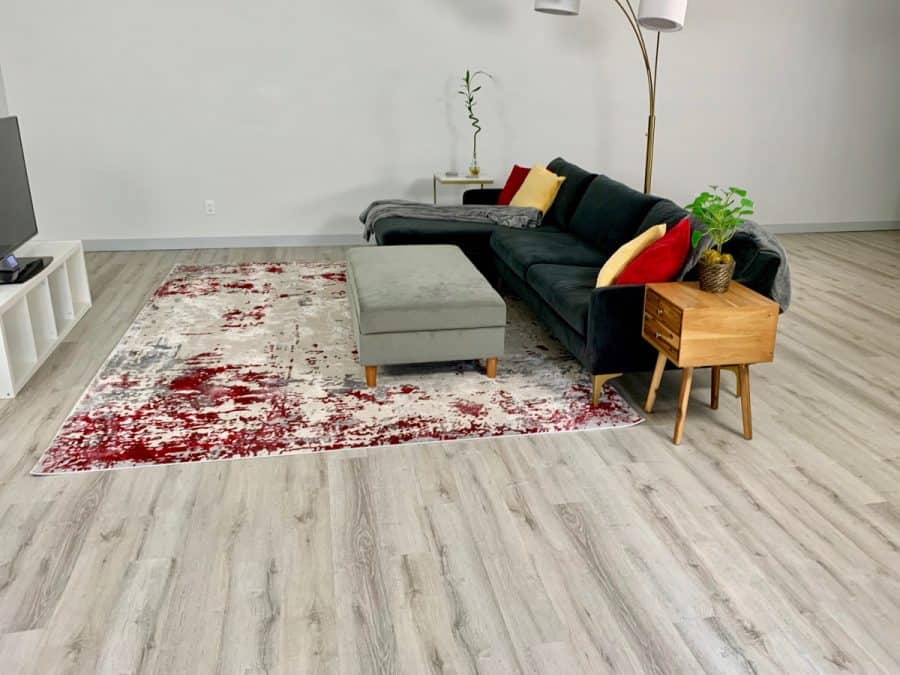
You can read more about the durability of vinyl planks, as well as the features and benefits of other flooring options that go over concrete in this basement flooring ideas article.
How Level Do Floors Need To Be Before You Install Vinyl Plank Flooring?
When you’re installing a vinyl plank floor or any rigid type of new flooring, it’s important for the underlying layer to be both level and flat.
If you’re installing vinyl planks on top of a concrete floor, the standard tolerance required is for the floor to be level to 3/16” within a 10’ radius. It also can’t have a dip of ⅛” within 2’.
Level
Level means that a floor doesn’t slope in any direction. From one end of the room to the other, there is no pitch.
That is less of a problem when laying vinyl plank flooring unless the pitch is severe.
Flat
Flat means there are no dips or raises in the floor. This is usually the bigger issue because you can’t have a dip of ⅛” within two feet.
How to Determine Whether to Raise the Floor or Fill Dips and Grind High Spots
We consulted with a company and it was their recommendation to raise the entire floor ¼” all around.

The reason for this is, because in addition to the number of dips we had, we also saw that there was a ¼” slope for 4” leading up to a wall.
And it extended the entire length of the wall.
So raising the entire floor to compensate for ¼” was the best solution.
We partnered with CTS Rapid Set who provided us with their Concrete Leveler mix to accomplish this.
Can I use Regular Concrete to Level a Floor?
Some regular concrete mixes can be used to level a floor, but to make the job much easier, you’ll want to use a cement or concrete mix that is specifically made for leveling floors.
Concrete leveling mixes cost more than regular ones, but it’s not worth skimping.
Products like Rapid Set® Concrete Leveler®, are formulated to have the correct flow to self-level. You’ll be able to mix it to the right consistency.
Whereas if you try this with a non-self leveling mix, you could end up with a pile of cement that doesn’t have enough movement to self-level.
And, if you overcompensate and add too much water to a non-leveling product, it will likely weaken the product.
When to DIY Level a Concrete Floor vs. When to Hire a Professional to Level for You
Leveling uneven concrete isn’t an easy job. Even if you hire a seasoned professional, things can go wrong.
But, how do you know if you can take on a full leveling job yourself?
Here’s what you should take into consideration before deciding if this is a DIY project you want to tackle.
Scenario 1:
- Your concrete floor has many valleys and peaks or ones that cover large areas.
- Your room is on the larger side (more than 15’ x 15’).
- You are working alone or have only one other person to help you.
This scenario makes it likely that you’ll probably need to raise the whole floor.
Unless you can get more assistance, I would not recommend that you tackle leveling your own concrete floors. Hire this one out.
If you can, try to find three people to help and coordinate the roles.
There will be one person who mixes, who pours, who screeds, and someone to act as an assistant cleaning tools, handing tools to others, etc.
Having a team makes this a very doable job, even in a large room.
Scenario 2:
- You have a few dips in the floor and some high spots and do not need to raise the floor entirely.
This will not require raising the floor entirely, so you can absolutely DIY this job yourself.
Typical Prep Issues Before You Level a Concrete Floor
In order to lay vinyl plank flooring, you need a clean subfloor.
This means you can’t have any oil, residue, dust or debris and you certainly don’t want anything textured that can transfer through the vinyl.
After removing the carpet from our floor, we were left with a floor covered with lots, and lots of carpet glue.
Typically when carpet is laid, it’s not glued down in every single spot, but ours was.
If your floor has glue just around the edges, like most carpeted floors, then scraping isn’t a big task.

- If your floor is covered completely in glue, then you will be better off renting a scraping machine from your local home improvement center.
Sometimes the glue isn’t sticky. It may be old and brittle like ours was. In that case, what you’ll need to be concerned with is getting the glue scraped well enough that you won’t feel it through the vinyl planks.
It’s best to test this by laying an extra piece of your vinyl plank flooring on top of it and walking on it.

- If you do determine your floor has high and low spots that need to be leveled, you can save time by getting a grinding machine instead of hand scraping.
The reason is that you’ll need to grind down the high spots. This machine will be a 2:1 solution for removing the glue and for grinding.
- You will also need to lightly grind the low spots in order to prepare the concrete for the concrete leveler compound. Grinding will open the pores to allow for the new material to adhere.
Ready to forge ahead? Then read on for step-by-step instructions on how to raise your floor with a concrete leveler.
I have provided a troubleshooting section below the tutorial, in case you run into problems with parts of the floor not being level after you have leveled.
Some of the links on this page have been provided as a convenience for finding materials. These links may also be affiliate links. As an Amazon Associate I earn from qualifying purchases, at no extra cost to you.
I only recommend products I’ve used and loved, unless otherwise stated. Click here to read my full disclosure policy.
DIY DIFFICULTY LEVEL | Moderate
Materials For How To Level A Concrete Floor For Vinyl Plank
- Plastic drop cloth
- Blue tape
- Backer rod foam (*see note)
- 5 gallon bucket
- Concrete grinder machine (can be rented)
- Shop vac with hepa filter (can be rented)
- Rapid Set Concrete Leveler– here’s CTS’s calculator to figure out how many bags you’ll need
- Rapid Set Concrete Leveler Primer
- Durable nitrile gloves
- Safety glasses
- Safety mask rated for silica dust
- Floor squeegee or gauge rake
- Floor scrub brush with handle
- Spiked shoes (optional)
- Corded drill
- Drill mixing paddle attachment -for concrete
*Material Note:
The size foam backer rod to get will depend on the height of the space between the drywall and your floor.
Your drywall may extend to the floor, or it may have different gaps at different walls, as mine did.
If so, go with a larger size (I used ¾” and just trimmed it with scissors to fit in the smaller gaps).
How To Level A Concrete Floor For Vinyl Planks By Raising The Floor
1. Clean The Floors And Protect The Walls

Clear all objects from the concrete subfloor and then vacuum it so it’s free of any loose debris.
Next, protect your walls from dry concrete dust and splatters from the wet mix by taping plastic drop cloth sheets to your walls using blue tape.
Be sure to tape the seams fully across and up and down. This is something we didn’t do in every spot and plenty of dust got in and we needed to wipe down our walls after.
If this happens, just use a dry mop and wipe the walls from top to bottom.
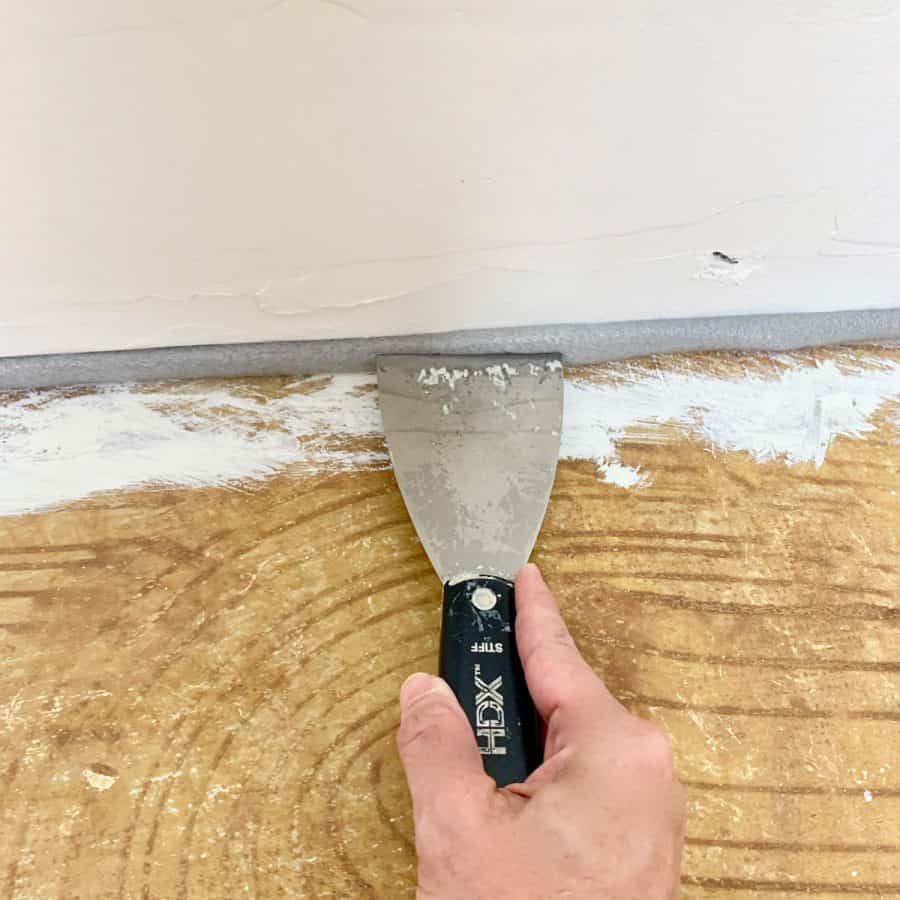
2. Prep Under Your Drywall To Prevent Wet Mix Leakage

The foam backer rod will prevent the wet concrete mix from leaking under the drywall. Take the foam rod material and press it under the drywall.
If the space under the drywall is a tight fit, use a spackle knife to help press it in. For tighter spaces, use scissors to trim the backer rod.
3. Prep The Concrete Floors To Accept The Self Leveling Concrete Mix
The night before you grind your floors, fill a 5 gallon bucket with hot water and pour it onto concrete and don’t be afraid to saturate the floor. Refill it as often as needed to cover your floor.
This opens up the pores in the cement. With the pores open, it helps soften any remaining residue from the carpet glue or any other adhesives stuck to your floor.
Any type of adhesive will hinder the ability of the concrete leveler to adhere to the existing concrete.

I know it feels kind of strange pouring such a large amount of water onto your floors like that, but it’s necessary.
If you have a squeegee, you may find it helpful in spreading the water. A wide plastic shovel, like a snow shovel, also works.
You may see areas where the water puddles up quite a bit. If you do, it just means you have some low spots, which is normal.
Be on standby with old towels in case any of these puddles butt up to anything that needs to be protected like a hardwood floor, or your walls.
If they do, use the towels to soak up some of the water.
I had that happen and placed the towel down in that area overnight to protect the wall.
4. Grind The Floors To Prep For Adding The Floor Leveling Compound Over The Existing Concrete
Husqvarna generously provided us with a fantastic machine to grind our floors. It was about the size of a riding lawn mower!
And, it shaved off the top layer of concrete in just one hour in our large space.

The ones available to rent from Home Depot or Lowes are going to be smaller than what you see in the picture.
This one from Home Depot has a 10” head and should be very manageable.
It has a metal disc on the bottom with diamond cutting blades with a disc that spins and grinds down everything on the surface to a certain point.
It will function similarly. After connecting it to the shop vac, start the machine. Slowly walk it over your floors and make even, overlapping passes.
Depending on how much floor surface you need to take down, this may take several passes.
Please get full, detailed instructions from a store associate, based on the exact model machine you use.
I would count on it taking most of a day for a space as large as 600 square feet.
Hint: Be sure to rent the vacuum that goes with it or you’ll spend gobs of extra time cleaning up nasty amounts of concrete dust. Trust me, it’s worth every penny.
5. Clean The Floors

After you shave down your high spots and any glue or other imperfections from the concrete floor, you’ll still have some concrete dust left behind.
The easiest way to remove the dust is to use a floor squeegee. Use the squeegee to push the concrete into piles and vacuum the piles.
After vacuuming, make a pass over the floor with a dry mop and then go over it again with a wet mop.
6. Prime Concrete Before Self Leveling
Now, the freshly ground concrete subfloor needs to be prepped for the concrete leveler compound.
The concrete surface needs to be primed first to properly adhere to the self leveling underlayment and to achieve a nice smooth finish.
The Concrete Leveler Primer will do this for the Concrete Leveler mix. It will also help the product glide on more smoothly.
You should apply this in two coats. For my 600 sq ft space, we used 3 gallons worth of primer.
You’ll need to dilute the first coat. Mix the concrete leveler primer with 50% water and then apply it to the floor and spread it around evenly with a soft bristled broom.
Take care to not let it puddle up in any spot.

Start in one corner of the room and work your way out. Make sure you are working toward an exit point because you won’t be able to walk on the floor once the acrylic primer is on it.
Pour the primer onto the floor in sections, starting from one corner, and use the scrub brush to spread it around the floor.
Use a back-and-forth sweeping motion to get the primer into the open pores and continue spreading it.
Take care to get the primer right up to all the edges and don’t be afraid to pour too much. You can always just keep spreading it to areas that don’t have primer.
Your goal is to fully cover the floor, without letting it pool up. If it pools, just pull it with the brush and spread it to another area.

Let this dry completely so when you touch it, it isn’t sticky. It can be tacky, just as long as when you touch it, it’s not sticking to your finger.
How long this takes will depend entirely on climate conditions. It could take anywhere from an hour to a few hours.
When it’s dry, repeat the process but this time, don’t dilute the primer.
As soon as the primer has dried, you are ready for the concrete leveler. The great thing about this Rapid Set product is that you don’t need to wait before applying it.
However, keep in mind that you do have a limited time of 24 hours between when the final coat of primer has dried until and when you apply the Concrete Leveler.
If for some reason, you miss this time frame, you will need to apply the primer again.
7. Mix The Concrete Leveling Material
Now the floor is primed and ready for the Concrete Leveler. For this mix, you’ll need a ratio of 5 quarts of water to (1) 50 lb bag.
We measured out 5 quarts of water and drew a line with a marker, so we’d know where to stop the water.
This way we could maintain the consistency of the mix and not need to stop to measure the amount of water for each batch.
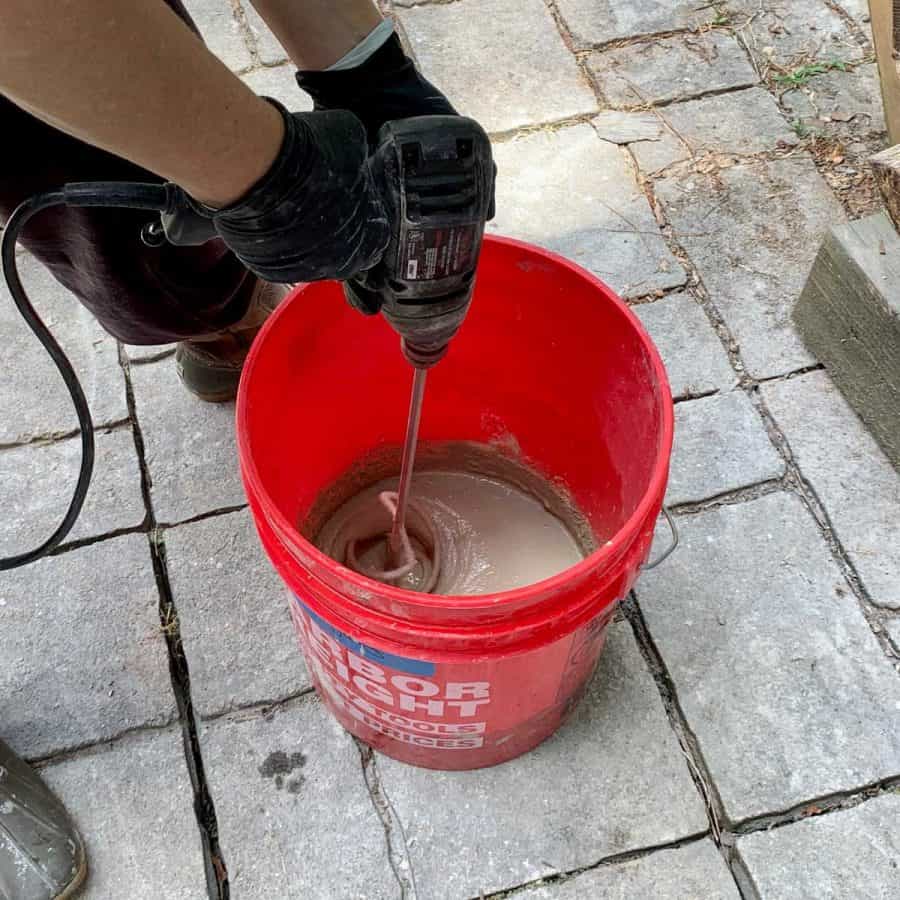
First, add some water to the bucket and then add some of the leveler mix. This will keep the concrete dust under better control than if you pour in the concrete first.
It will also make it easier to mix because you won’t have dry mix stuck at the bottom of the bucket.
You’ll want to mix this slowly, adding about ¼ of the bag at a time and adding water as you go.
Attach the paddle bit to the corded drill and mix these together until it’s very smooth and has no lumps. The ideal consistency is that of a thin pancake batter. It should be pretty soupy.
Also, keep the drill on a medium speed and again, take care to add small amounts of mix and water at a time so you don’t burn out your drill.
The thin consistency is important, as this is what will allow the mix to self level. If it’s too thick, it won’t have the proper movement.
8. Pour The Concrete Leveler
After you mix the first batch of concrete, have one person pour it into the floor and the other person pull the material across the floor with a squeegee.
While pulling the product across the floor, keep the angle of the squeegee the same at all times so that you maintain the same depth.

It’s extremely helpful to have a team of people working together on this because you have a very short period of time in which you need to mix the product and then pour it on.

Continue working your way across the room toward your exit point. When finished, be sure to rinse down and dry off all your tools.
Depending on climate conditions, the floors should be okay to walk on in 2-4 hours, but that’s under perfect temperature and humidity, so I would wait longer.
Technically, vinyl plank flooring can be installed after 16 hours after pouring the concrete leveler.
However, when I did this, it was a little humid outside and we didn’t want to run the AC in case there was still cement dust, so 24 hours or longer would have been necessary.
So if it’s warm or humid (or both!) when you do this, I recommend playing it safe and waiting a little longer than 16 hours.
Wearing shoes with spikes is also incredibly helpful when working with concrete leveler mix.
This prevents you from dragging cement everywhere and from ruining your shoes. I wore these.

9. Place Your Vinyl Plank Floors
Now that your concrete floors are nice and even, you can begin laying your vinyl planks!

-Troubleshooting tips if you have raised your floors with leveler and find that you still have dips and peaks.-
Working with a concrete leveling mix does require a bit of skill, mindfulness and several extra sets of hands.
When raising a floor completely, one person pours the mixed concrete onto the floor, another does the screeding or raking/pulling with a squeegee or leveling rake.
The rake/squeegee has a depth setting to help level, but you also have to take care to hold the rake at about the same angle.
If for some reason, the levelling squeegee wasn’t pulled at a consistent angle, then you may create some new peaks and valleys.
This happened to us, only because our leveling person was ill that day.
Under any typical circumstances, with a team of four and an experienced leveler, this would have been a standard job that goes right 99.9% of the time.
The outcome would be that the floors would have been level and flat.
Our result was that we had greater differences in highs and lows than we had to begin with.
So in assessing our new situation, we needed to determine whether we
- just fill in the low spots
- just grind down the high spots
- grind both the highs and fill the lows
-If we need to do both, how do we determine what’s going to be our baseline for level?
The first step is to determine your baseline for level. You are trying to see if you have more low spots or if you have more high spots.
To do this, you’re going to need a long level- the longer the better – a 6 or 8’ is ideal. If you don’t have a long level, you can use the straightest 2×4 you can find.
Use the level and mark out the highs and lows using a piece of chalk- make sure you don’t use something with a waxy residue, like a crayon.

A floor laser level will help considerably if you have lots of variations in the floor like we did.
Pay special attention to the door areas. Your room will have at least one entrance/exit.
And where you have a door, it needs to have enough clearance- including when the planks are added for the door to open and close.
Unfortunately, we had very little clearance and couldn’t add much more to this area. To make things worse, this was the low spot in the room.
If the doors weren’t located there, that would have been the starting point to add more leveling material, to bring it more in line with the rest of the floor.
If you run into this, you’ll need to feather in the leveler product as best you can without hindering the door clearance.
Marking out all these high and low spots will allow you to make an informed decision about what you’ll need to grind and what to fill.
If the room you are redoing is really large and it runs cold, then take a look at my post on the 12 best space heaters for a living room. I did some extensive research and figured out which ones actually will heat a large space.

Don’t forget to Pin it for later!


Wow, I’m so happy to see this finally done; it looks AMAZING Ellen! I know it wasn’t easy to level the floor, but hopefully it’s like childbirth and you’ll soon forget the pain -lol! Enjoy your new TV room!
Thank you Sara. We are loving it. It does make it a little more special when you’ve gone through a little extra sweat, I guess.:0}
Omg what a project! So happy for you that you finally relax and enjoy! You are truly a Champ and concrete Master !!
Thanks Arlene!
You are truly an inspiration. I love DIY projects. I have a few ideas that I’d like to try at my new home and since I found your site, I think I’m just about ready to try one out.
Hi Theresa,
Thank you, and thanks for the room compliment.:) Oh good, I wish you the best of luck on your project!
Btw…your room looks great!