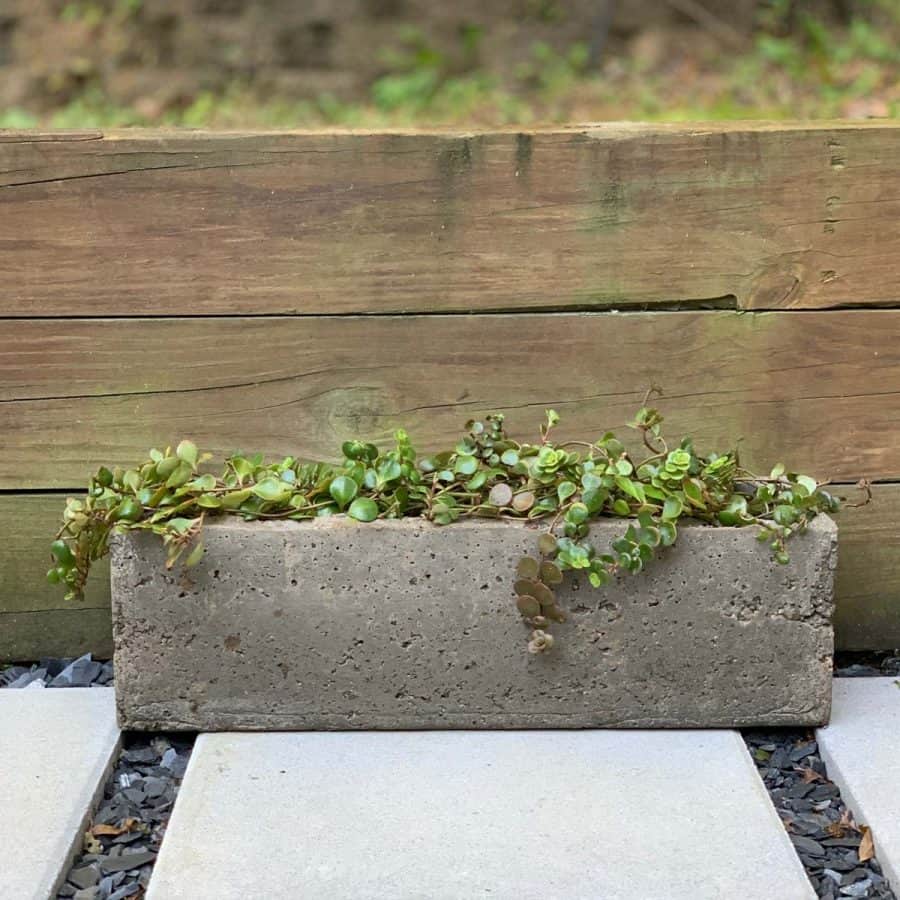
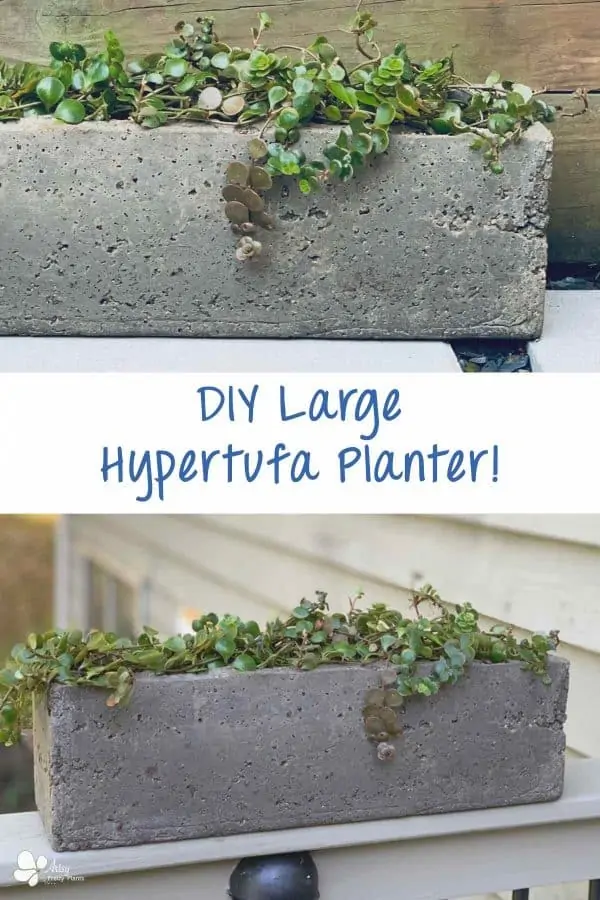
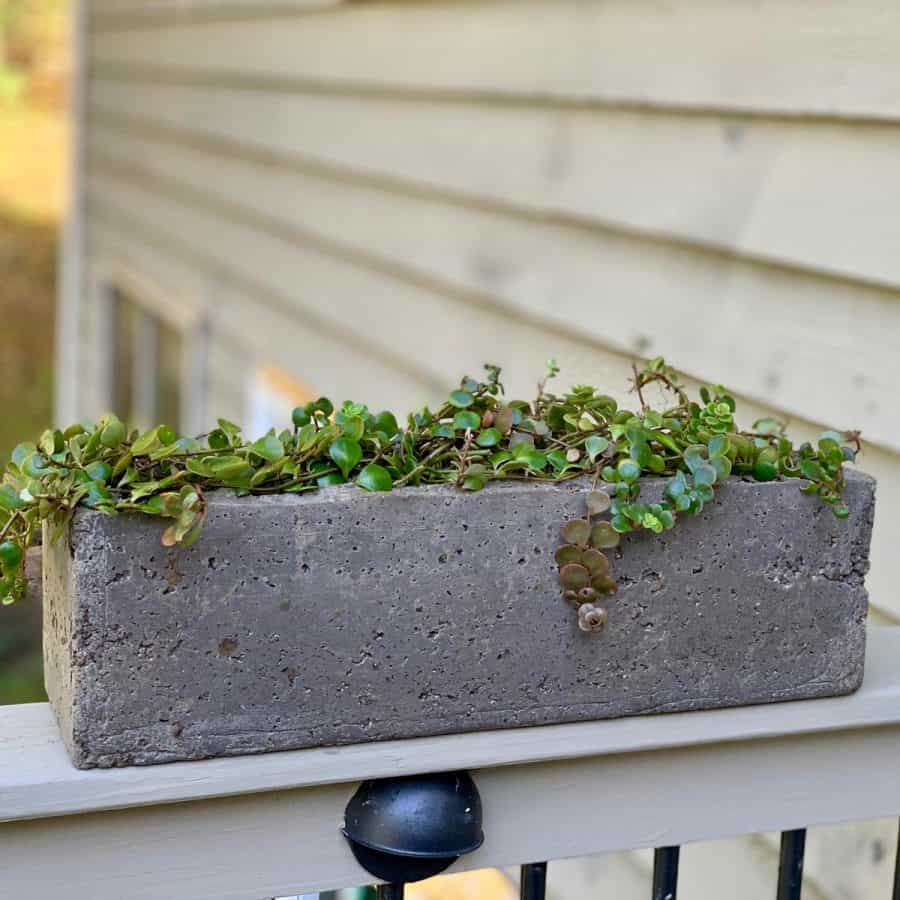
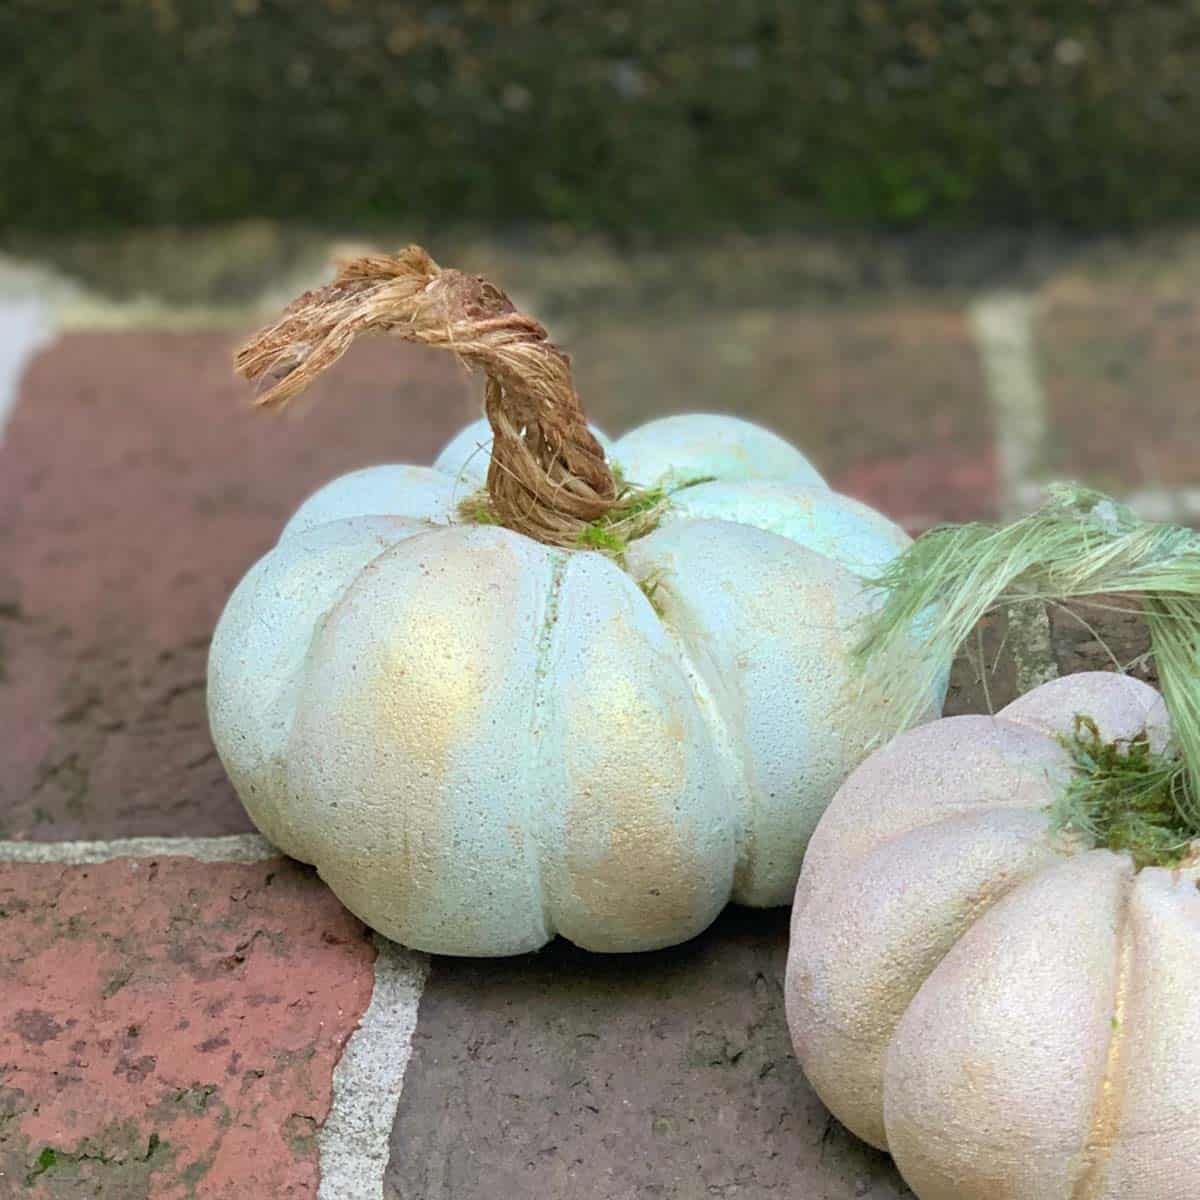
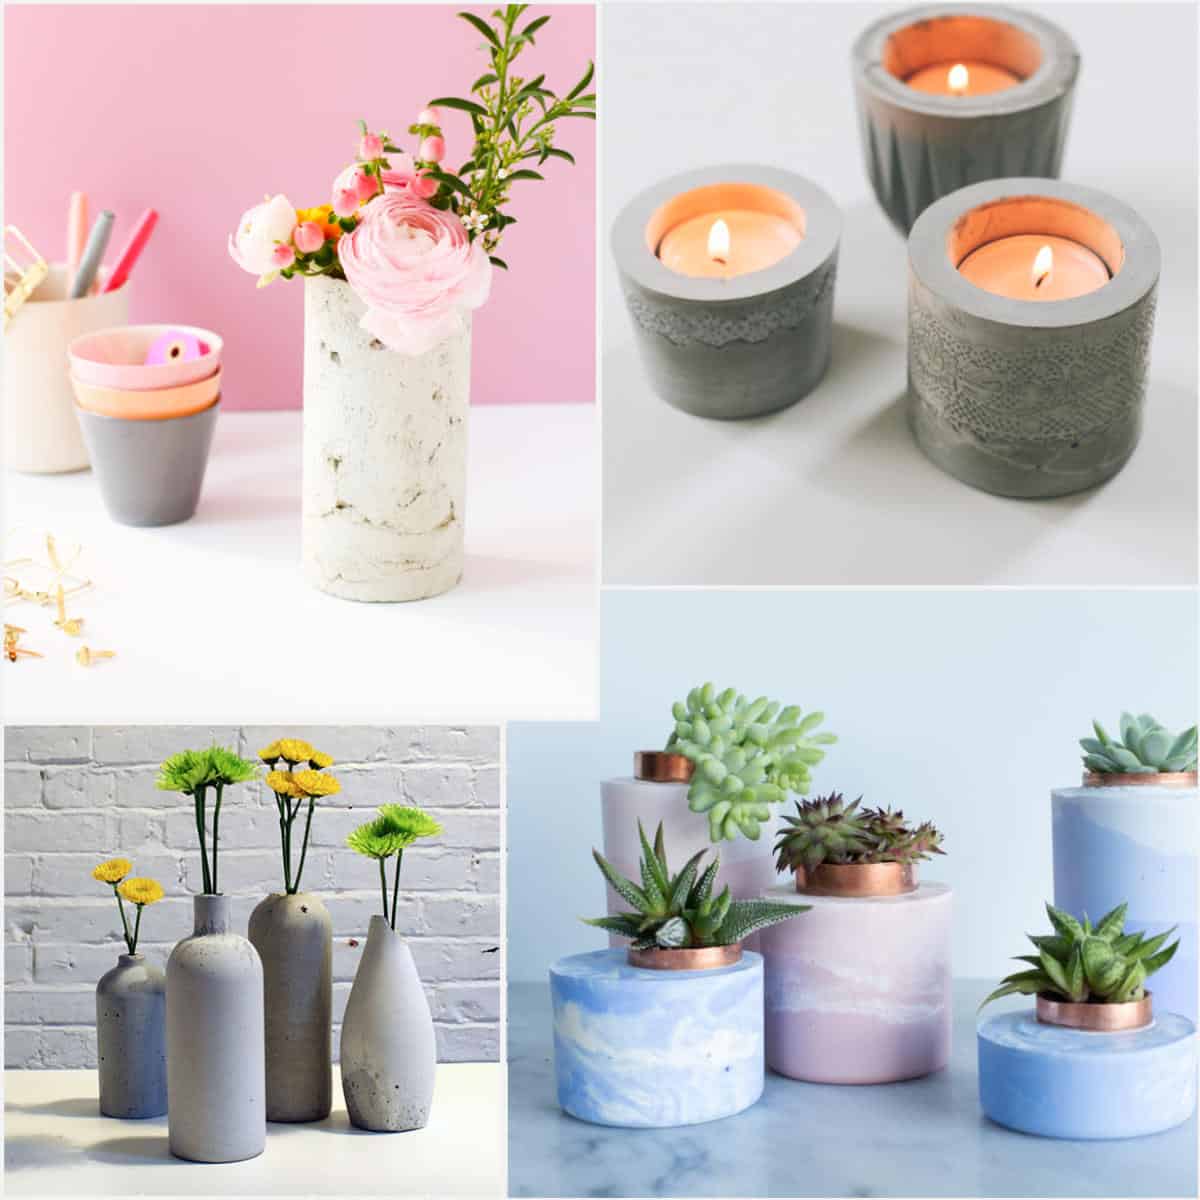
DIY Large Hypertufa Planter (Trough-shaped)
Here’s how to make a DIY large hypertufa planter in a trough shape. The hypertufa recipe allows for a larger size that keeps a large-sized planter lighweight.
And with foam insulation as the mold material, it can be customized to many sizes.
I have a spot on my deck that’s perfect for a trough-shaped planter, but I have been concerned about the weight, especially when wet.
So I decided to use hypertufa instead of my usual concrete for this. Hypertufa is a good choice as a planter material when you need a larger one and need it to be lightweight.
It’s also a versatile material because it can be mixed at different ratios that will suit a variety of uses.
This isn’t my first foray with this material. Several years back it was my mom who introduced me to hypertufa.
We made a couple of smaller sized planters. For the molds we actually used wicker baskets and lined them with plastic bags.
For this large hypertufa planter, I used foam insulation boards. These come in handy for all types of concrete projects, and held up extremely well even with this large of a pot.
There are other materials you can use to make larger forms for hypertufa troughs and large concrete planters.
A common material you can use is wood– especially melamine since it is smooth and non-porous. I used it to make a wooden frame as the mold for this 3D concrete planter box.
To make a large hypertufa planter, you’ll need a large form. I used foam insulation boards that were 22” long to make the form, but you can make this even larger.
You can also use cardboard or a plastic container if you can find one large enough.
For a hypertufa trough planter this large, plan on making the walls at least 1 ½” thick.
**Be sure to check out some general information that I answer at the bottom of the tutorial, about using hypertufa for pots. Or just click here to read that first.**
The Best Hypertufa Mix Recipe
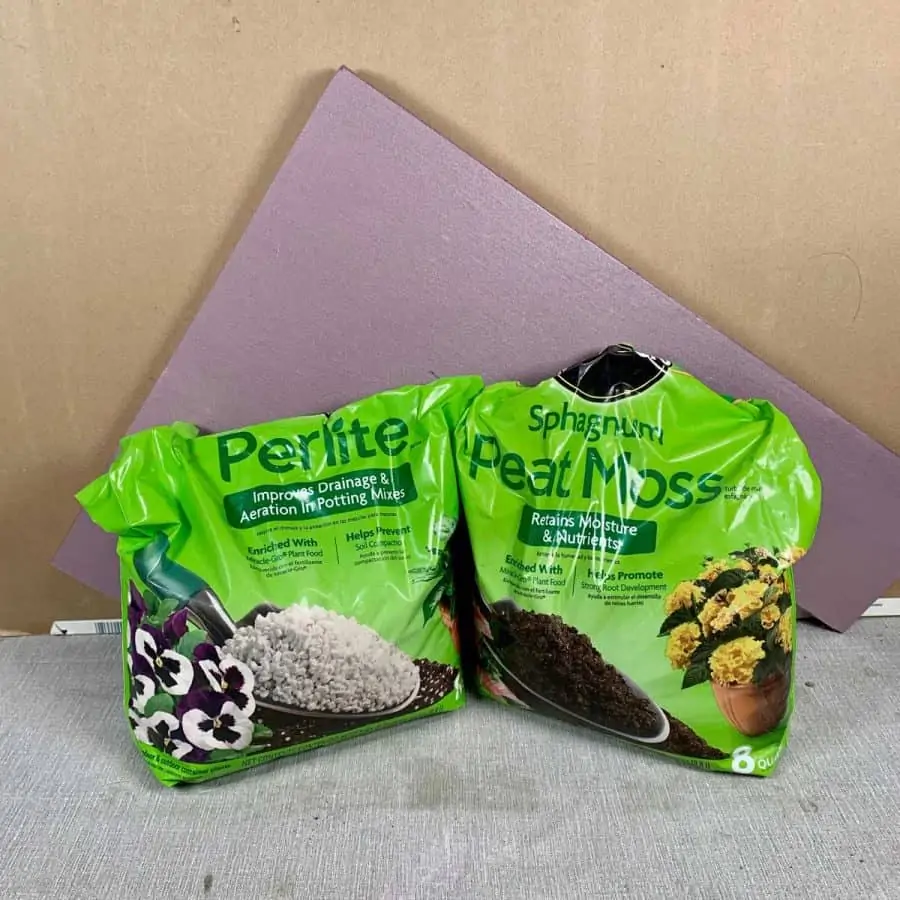
There are lots of variations of mixtures, but the most common hypertufa recipe is to use 1 part cement to 1 part peat moss and 1 part perlite.
You can substitute the perlite for vermiculite, or mix it half and half. If you need to strengthen the hypertufa, you can add more sand and less perlite or vermiculite.
Here are some other hypertufa recipe variations:
- 1.5 parts peat moss, 1.5 parts vermiculite and 1 part portland cement
- Or 1 part portland cement, 1 part sand, 1 part peat, 1 part vermiculite, the sand is added for strength
- 2 parts portland cement and 2 parts perlite and 1 part peat moss
You may also be interested in all the cement tests I did where I tested the different mixes to see which were the smoothest, tested for color, texture, etc. The results were very interesting!
Another type of concrete project where you’ll need to change up the ratio is when using portland cement and sand.
For smaller projects, you’ll use a 3:1 ratio of cement to sand and larger projects can vary, but recently I used a different ratio of cement to sand for this large concrete bowl.
And here’s an article where you can learn about the difference between cement and concrete.
Some of the links on this page have been provided as a convenience for finding materials. These links may also be affiliate links. As an Amazon Associate I earn from qualifying purchases, at no extra cost to you.
I only recommend products I’ve used and loved, unless otherwise stated. Click here to read my full disclosure policy.
DIY DIFFICULTY LEVEL | EASY
How To Make A Large Hypertufa Planter Materials List
- Portland cement– type I/II (approx 18 cups)
- 5 gallon bucket
- Disposable cup
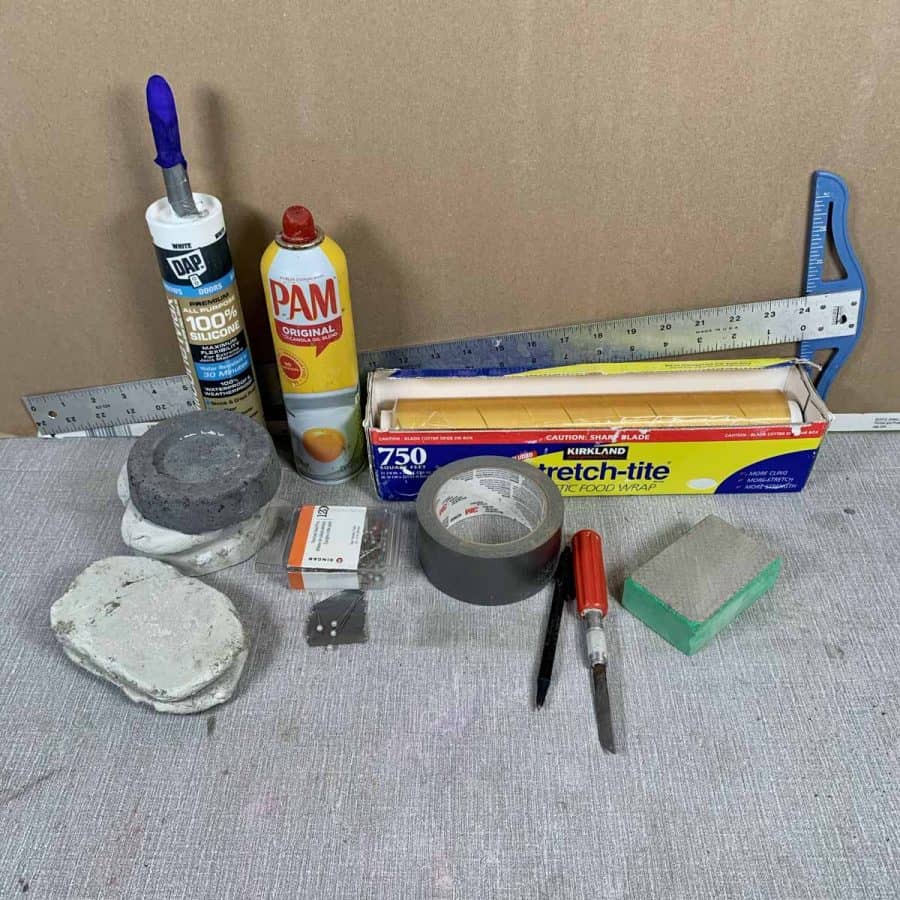
- Durable nitrile gloves or rubber gloves
- Safety glasses
- Dust mask –rated for silica
- Perlite (18 cups-approx.)
- Sphagnum peat moss (18 cups-approx.)
- Sand- all purpose or play sand
- (2) Foam insulation boards
- T-square
- Duct tape
- Hot glue and glue gun
- 100% Silicone caulk
- Long head pins
- Cooking spray
- Weights/ weighted pieces*
- Plastic wrap or large plastic bag
Materials Note:
The weighted pieces will go inside the inner mold. I used leftover pieces of cured cement.
I used 8 scoops of each and my scoop holds two cups. So I used a total of 16 cups of each, but was just a little short, so 18 cups of each would probably be perfect.
An 8qt bag is the common size sold for both perlite and peat moss. The 8qt bags will have more than the 18 cups you need for this project.
Make A Large Hypertufa Planter – Step By Step Instructions
I ended up having trouble getting the inner mold out of the hypertufa, but I came up with a few things you can do that should remedy this and have written the tutorial to reflect this.
Step 1. Cut The Insulation Boards To Size
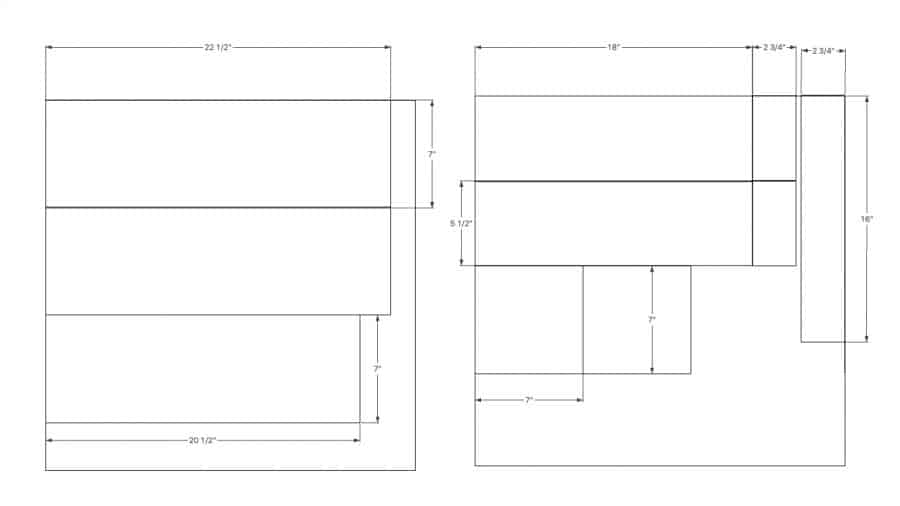
First, mark the pieces that you will be cutting out. On the first board, use a pen and a T-square to draw the following pieces:

(2) long side pieces – 22 ½” x 7”
(1) bottom piece – 20 ½” x 7”

On the second piece draw:
(2) long side pieces – 18x 5 ½”
(1) bottom piece – 16x 2 ¾”
(2) outside end – 7×7
(2) inside end – 5 ½” x 2 ¾”
Next, mark the letters on each of these.
These dimensions allow for the finished product to have sides thick enough to be durable for this large of a planter.
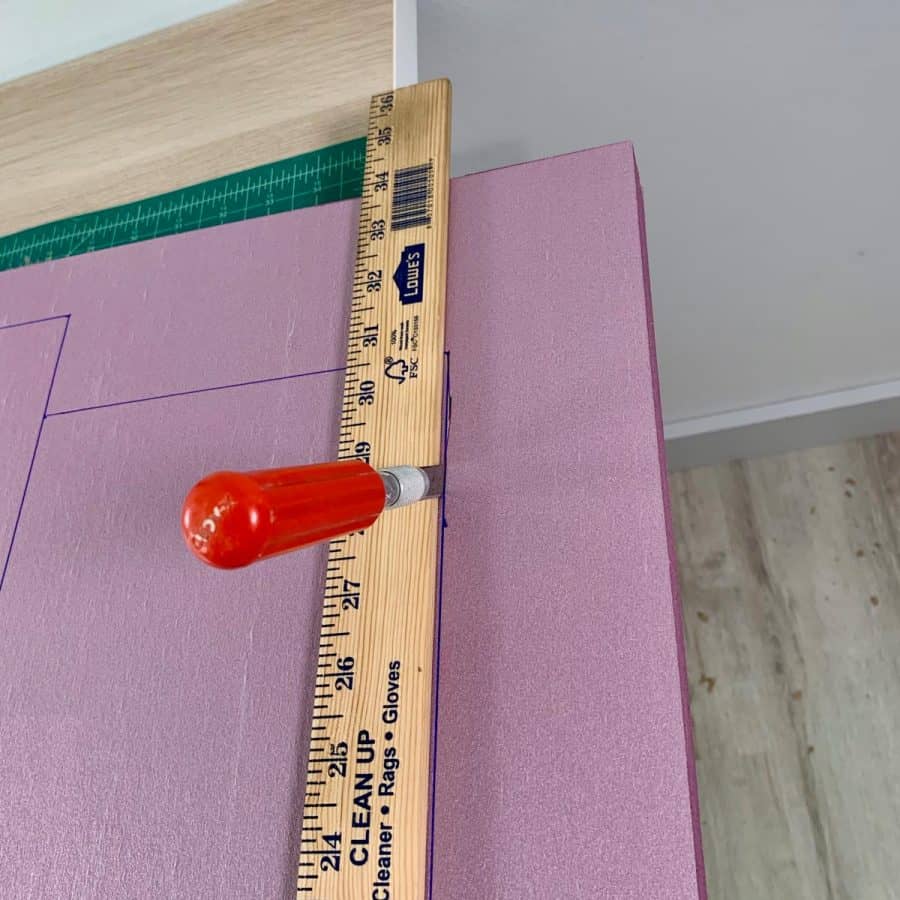
Now cut the pieces. I found it easiest to let the pieces overhang my table a little and to first score them, and then continue cutting lengthwise as if you are scoring, rather than sawing up and down. This gave me the cleanest cuts.
Step 2. Temporarily Secure The Inner Trough Mold
Start with the inside mold pieces. Take the bottom piece and lay it on your table, then wrap one of the end pieces and long side pieces against it so the corners meet.
Grab a few pins and pin these together at the bottom first. It’s a little awkward for these first few pieces. Just do your best to line them up so they are plumb and square with each other.
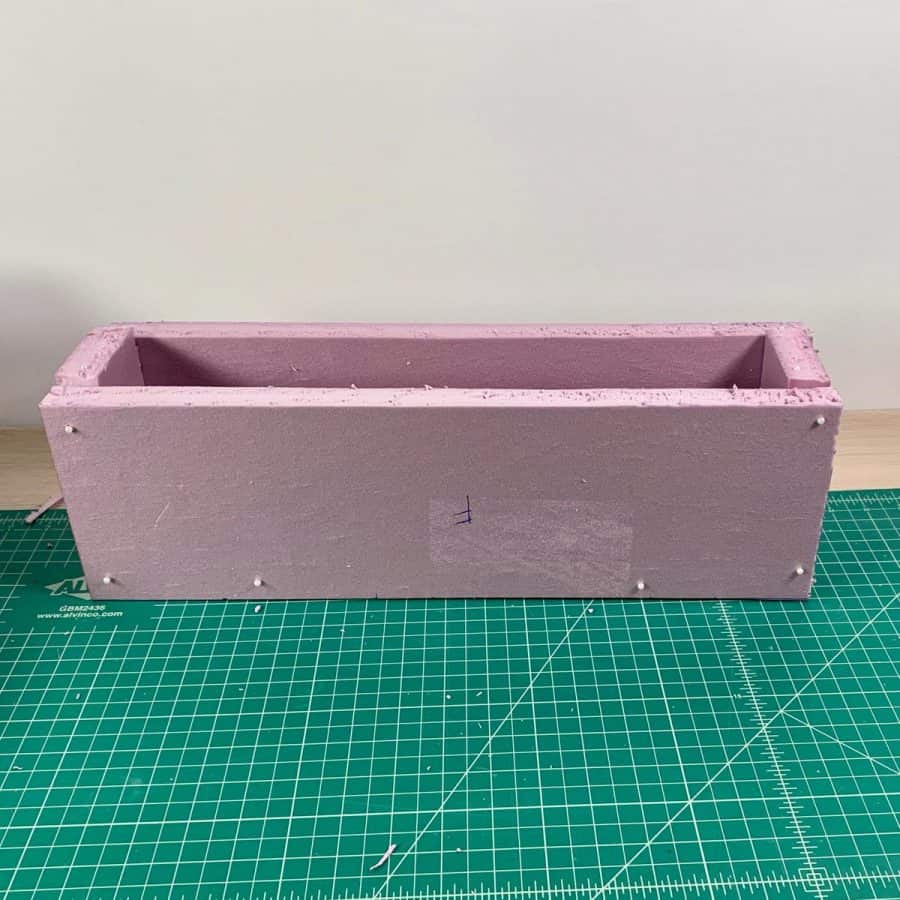
Now take the next long side and pin it to the bottom and end piece, and then finish with the last end piece. Now take the pins and push them in at the bottom where the long sides meet.
You only need a couple of them, and then just to make this a little more secure before you tape it, add more pins on an angle near the corners.
These angled pins will hold the pieces together quite firmly.
Step 3. Tape The Inner Planter Mold
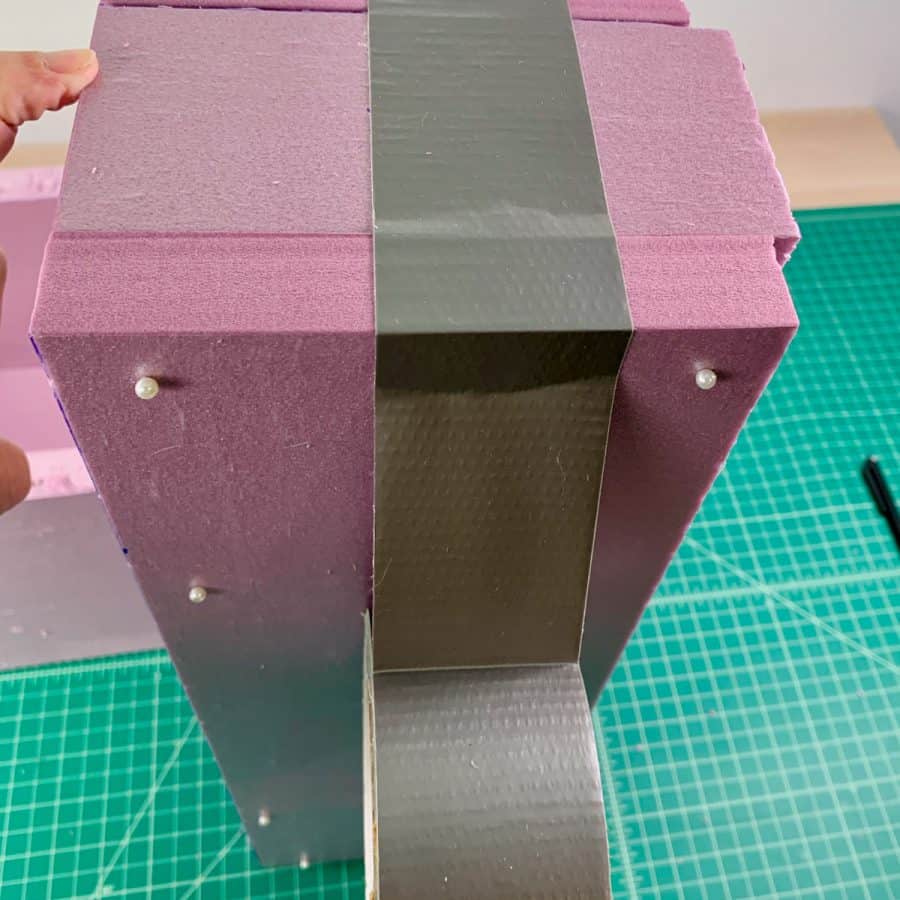
Now use duct tape to tape this all together. As you do this, remove the pins before you tape, but only in the area you are taping.
Leave the others in until you are ready to tape the next spot. I started at the bottom corners, and then the top corners.

Then I taped the seams along the very bottom outside to close the gaps so that the hypertufa mix doesn’t seep through.
This will help keep the sides from caving in when all the heavy mix is pushing against it when you have cast the large trough.
I mentioned above that I had trouble getting the inner mold out of the hypertufa. This is the first change that I’m recommending to remedy this.
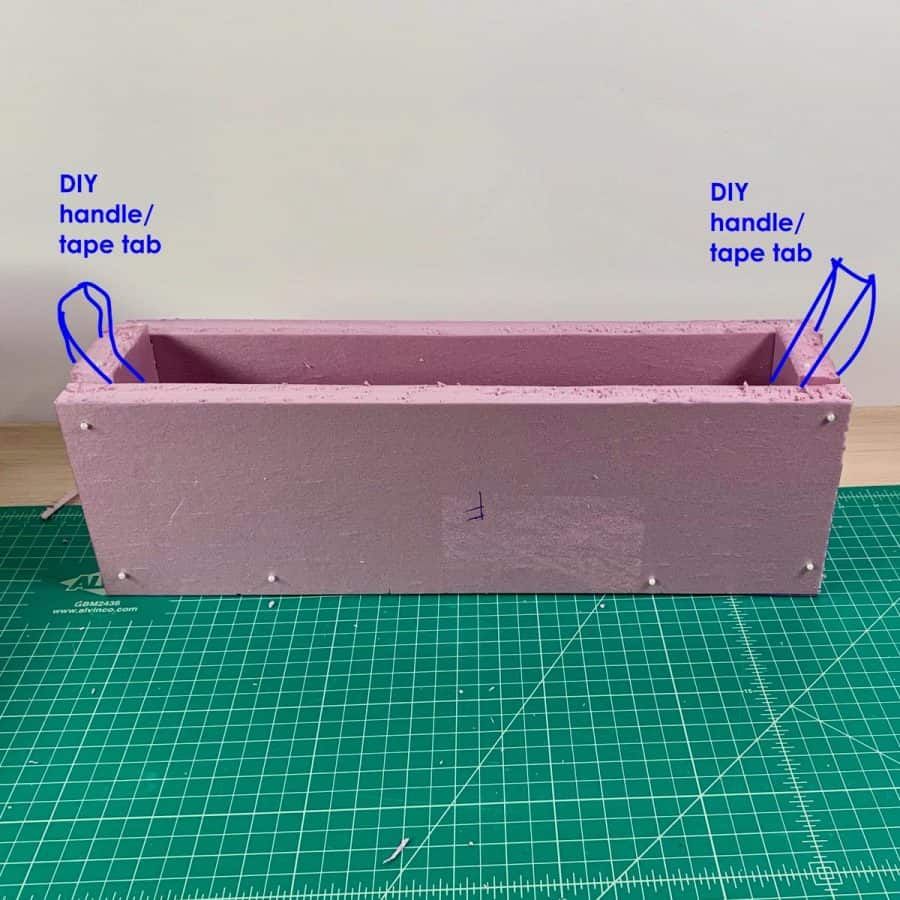
You will create handles to provide some leverage when you go remove this after it’s cured.
To do this, run a piece of tape from the bottom outside of this mold, up each end and over the end and down inside of it. Close the tape so it becomes a tab.
Step 4. Make the Planter Drainage Holes
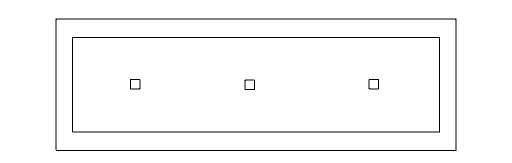
Cut three pieces of foam that are ½” x ½” and use hot glue to glue them to the bottom, spaced equally apart. I completely forgot to do this, but place them like they are in this diagram.
I had to drill the holes after this cured, using a ½ masonry bit. Creating a mold for the holes ahead of time is much easier.
Step 5. Secure the Outer Trough Mold
Repeat the same steps as you did in Step 2 for the outer mold. Once you have the outer form taped, you will have the extra step of caulking the inside seams.
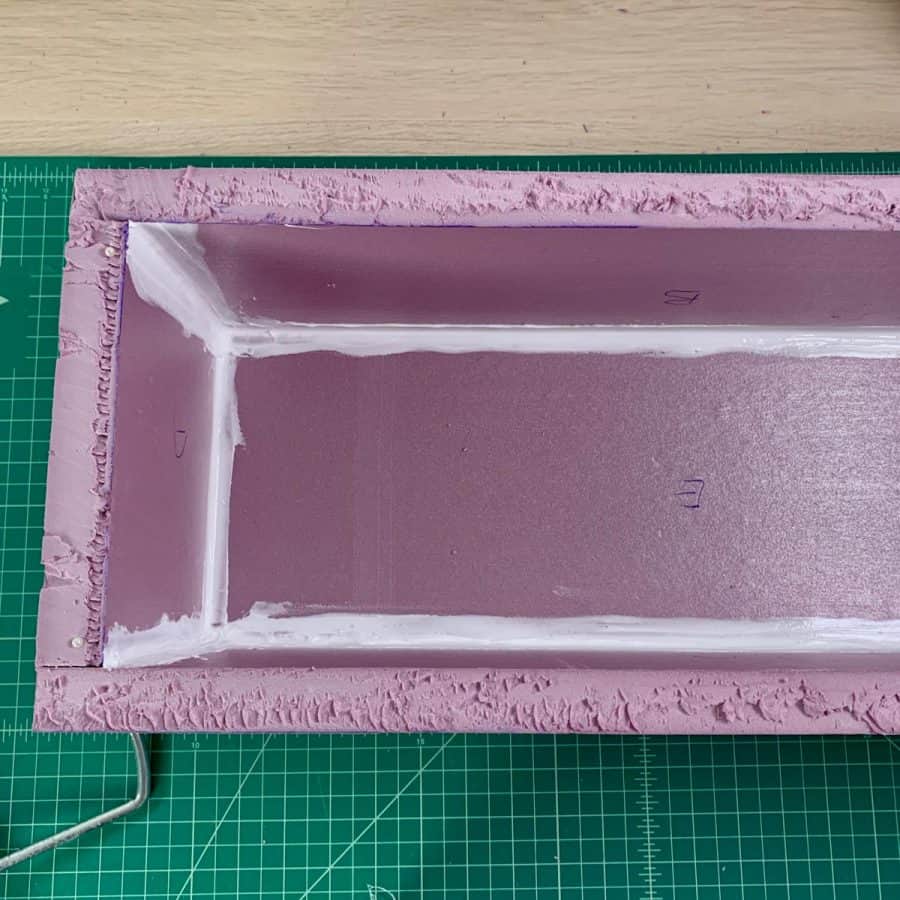
You need to seal it with the silicone caulk so the mix doesn’t seep through, this will also help the pieces adhere better. The caulk is better than using tape, plus the tape will leave marks on the planter.
You may notice that my caulk bead was quite large. This is because I had to cut the tip of the caulk tube really wide because there was old caulk stuck inside.
So you don’t need a humongous bead like mine, it just needs to be wide enough to cover any gaps from your cuts and to secure the pieces together.
The caulk will take a couple of hours to dry. Make sure it’s completely dry before moving on to the next step.
Step 6. Mix The Hypertufa Planter Ingredients
Before mixing the hypertufa, prepare the inner mold by spraying the outside lightly with vegetable oil.
Take care not to go heavy with the oil because you don’t want it to get under the tape.
Then place the weighted pieces inside of the inner mold. I added a piece of duct tape across the middle of the long ends, just in case the weights pushed against the sides.
This probably wasn’t necessary and is optional. You can see that photo in the next step. bowing inward and set it aside for now.
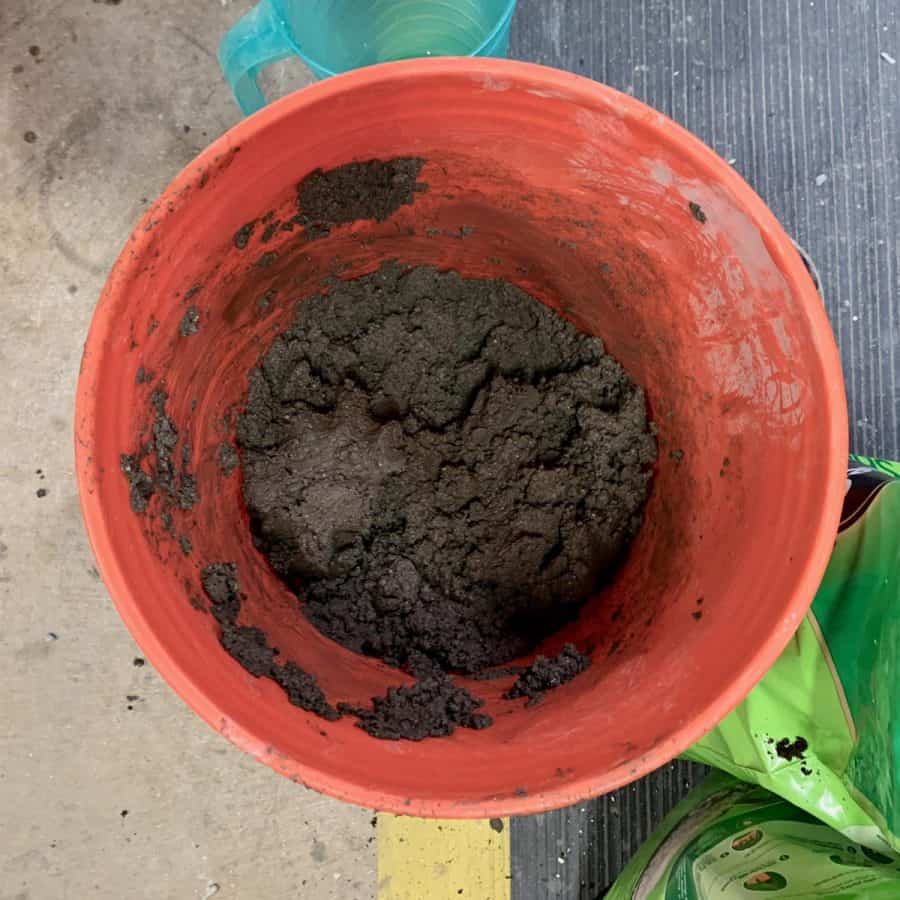
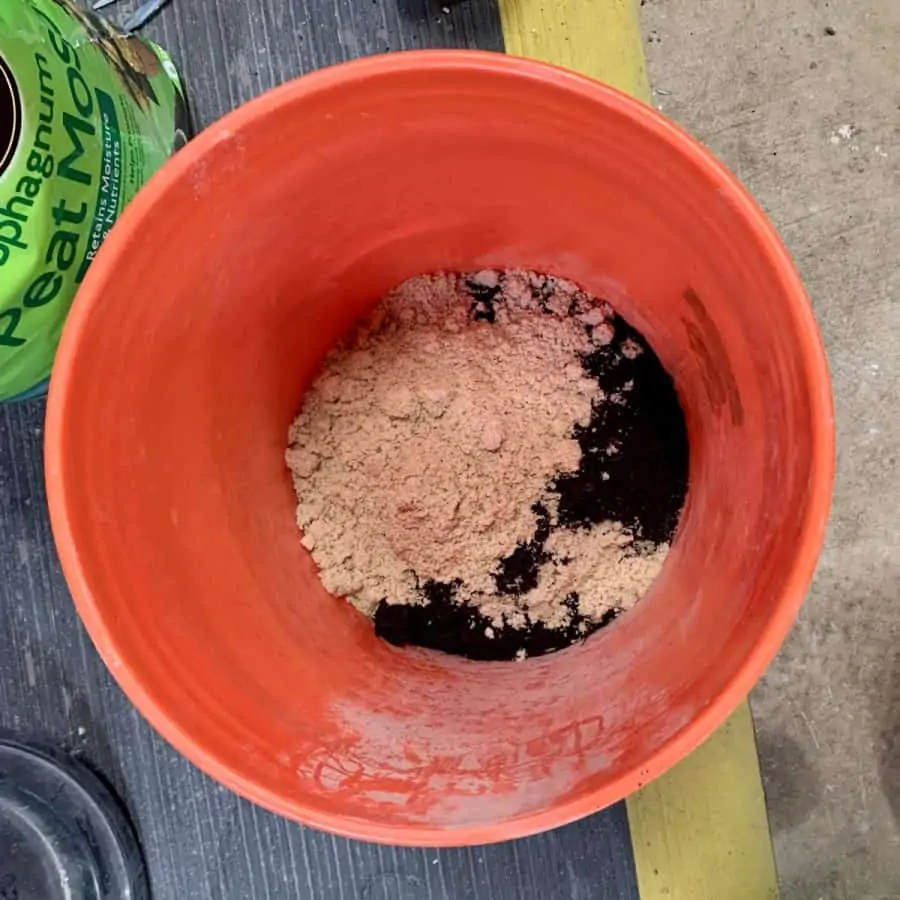
Now begin mixing the hypertufa. Use a 5 gallon bucket, mix 1 part cement mix, 1 part sand, 1 part perlite and 1 part peat moss.
Altogether it should come to a total of about 18 cups of each ingredient.
You may find it much easier to mix this in two batches or in two different containers because the mix is quite heavy. It was a good workout trying to mix all of that together.
Be sure to mix the dry ingredients together first, and then slowly add water. You’ll know the hypertufa has the right consistency if it looks like oatmeal and you can form it into mud pies.
Step 7. Cast The Trough Mold

Place the hypertufa mixture on the bottom of the mold so that it is even and about 1 ½” thick. The mix should be just a little higher than the drainage pieces that you glued to the bottom.
Next, build up the sides of the large hypertufa planter mold to about half way, or as high as you can before the hypertufa mix starts sliding down, and then place the trough inside.
It should be even with the sides of the outer mold.
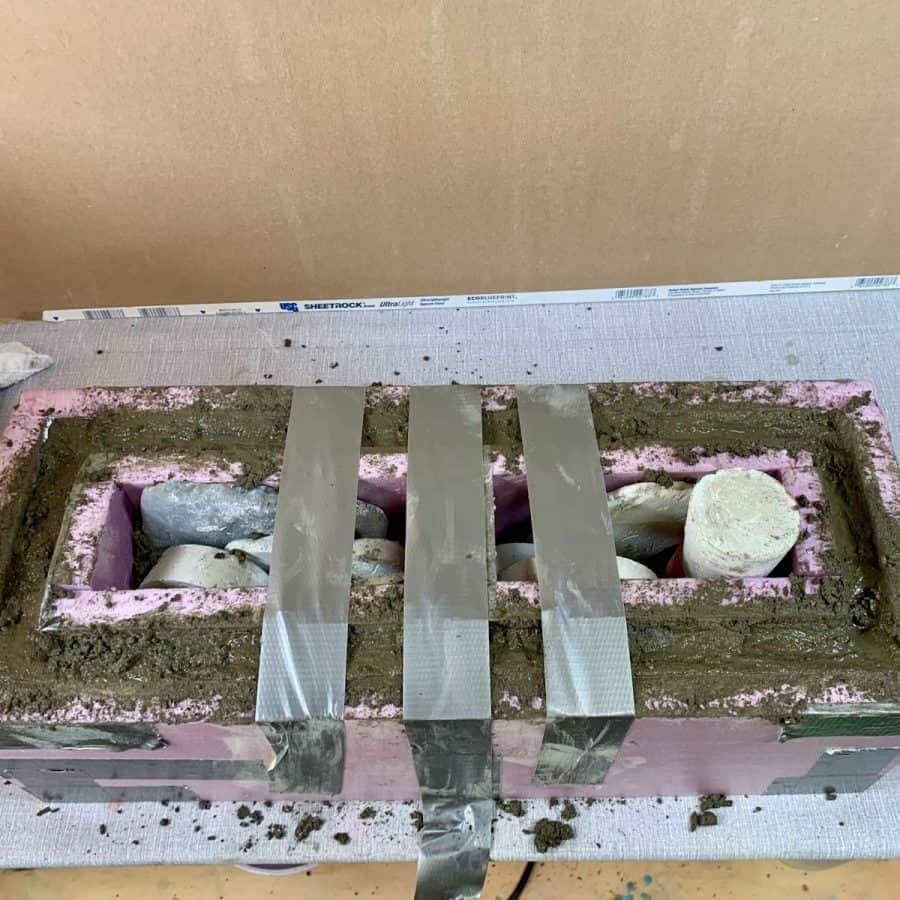
Now finish adding the mix into the cavity sides.
Once you get near the top, add more duct tape in the middle to keep the sides from bowing due to the weight of the mix.
You do not need to pull this tight and should not. This should be just tight enough that your sides are straight and not pulling inward.
This is another reason I have a little trouble demolding. My tape had one side angling in at the slightest angle.
Before setting this aside to cure, clean up the edges so they are flat and not angled, just so they look nice when you demold it.

Cover this with plastic wrap or a large plastic bag, and let the hypertufa cure. The curing process for hypertufa at this thickness is going to be about 36-48 hours.
Just note, if you are making this outside and intend on letting it remain outside to cure, make sure it is in a shady spot. If it dries in the hot sun, it will dry too fast which could cause it to crack.
Step 8. Demold The Large Hypertufa Planter
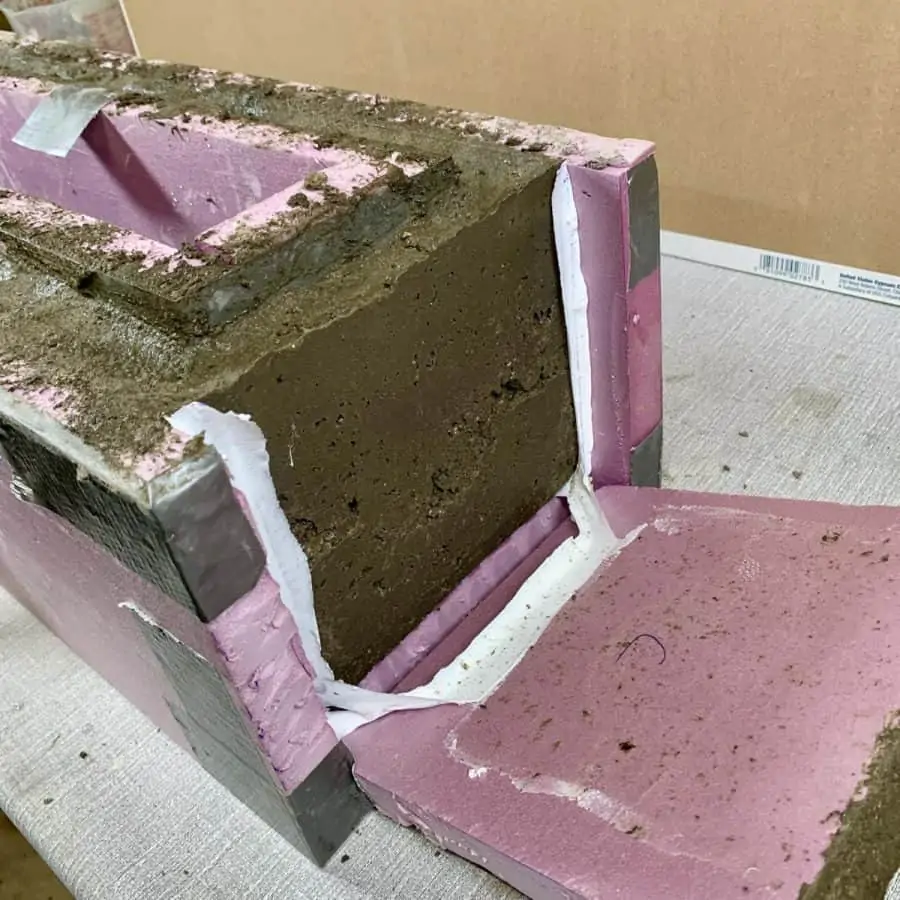
First, remove all the remaining pins from the outer container and then use the craft knife to slice through the tape where the foam pieces are seamed together.
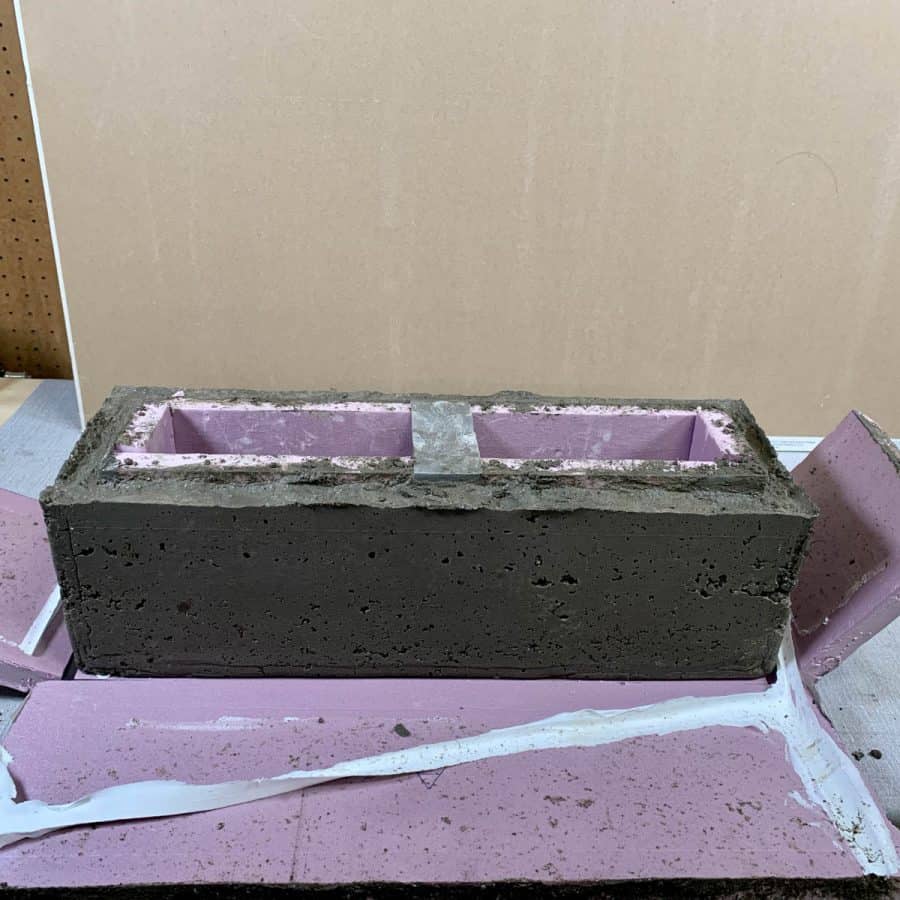
Now just peel back the end pieces and then long sides. Everything should just open up like a box. Then take the planter out and place it on the table.
The drainage pieces should come right out. If they don’t, you can push them out after you remove the inner mold.
With the extra precautions I have added here for removing the inner mold, this should be a fairly easy task.
First try pulling up from the tape handle/tabs you created in the beginning. If it doesn’t lift out, then try to gently pry it the sides free with a caulk spatula in case it is sticking anywhere.
Take care that you are not applying pressure outward toward the sides. There is a small chance this large hypertufa planter could break if you apply outward pressure.
If you are concerned about this, then wait another day to allow the planter to gain strength. I waited a day and had no problems.
If for some reason this still doesn’t free the inner mold, then you will need to use the craft knife or a utility knife to start cutting away pieces of the foam.
I recommend starting from one end and then working on one side. Once you can break those free, it should release enough pressure that you can easily pull the mold out.
Step 9. Sand The Rough Edges And Add Your Plants To The Large Hypertufa Planter

For the final step, use sandpaper to sand any sharp edges and use a rag to dust it off.
And now the best part, add plants to your hypertufa trough!
A Few Interesting Facts About Using Hypertufa As The Material For Planters
What grows in hypertufa pots?
Plants, like succulents that require drier soil, do great in hypertufa pots.
Hypertufa does soak in water, but also releases it quickly, which is perfect for keeping soil just moist enough for succulents, without being too wet to cause root rot.
How long do hypertufa pots last?
Perlite and vermiculite allow for the planter to be lightweight because they essentially create air pockets.
However, the air pockets make the planter less durable over time because plant roots can break through the them and cause cracks.
Is hypertufa watertight?
Hypertufa has a porous texture and so it is not water tight or waterproof. It is durable and resistant to water but will soak up moisture, which is why it is a good material as a planter.
It also releases moisture very easily, which is why it makes an excellent planter for succulents.
Despite being somewhat porous, you should add holes for good drainage.
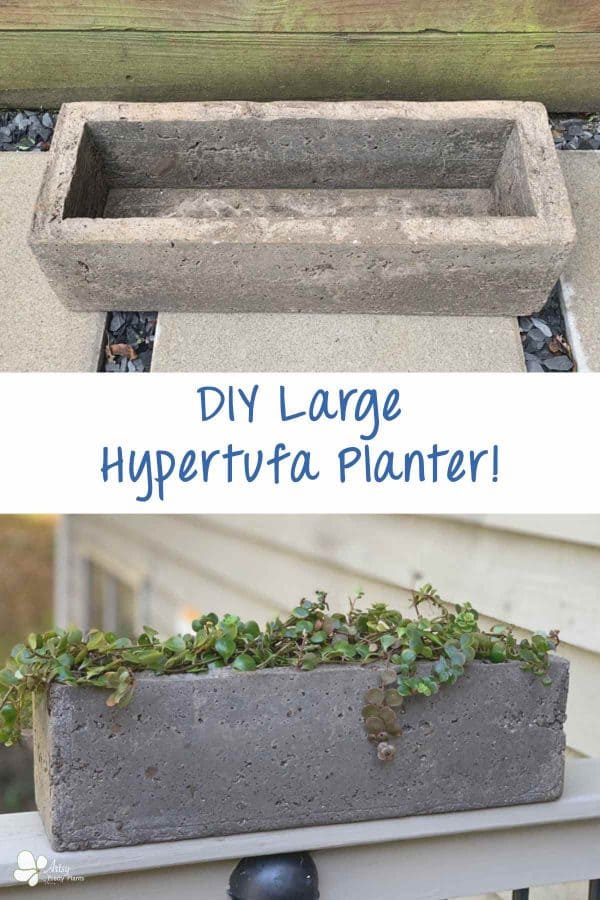
Large Hypertufa Planter Trough –DIY
Make a lightweight large hypertufa planter in the shape of a trough. This DIY tutorial uses simple materials to make this amazing planter.
Materials
- portland cement
- all purpose sand
- perlite
- peat moss
Tools
- Please see the full materials list above the tutorial for details and links.
Instructions
- Cut The Insulation Boards To Size
- Temporarily Secure The Inner Trough Mold
- Tape The Inner Planter Mold
- Make the Drainage Holes
- Secure the Outer Trough Mold
- Mix The Hypertufa Ingredients
- Cast The Trough Mold
- Demold The Large Hypertufa Planter
- Sand The Rough Edges And Add Your Plants


Can you use coconut coir (sustainable) instead of peat moss (not sustainable?
Hi,
Yes, from what I understand, you can.
Hello, I’m thinking about making a considerably larger hypertufa planter, perhaps 24 to 30″ tall and 30″ or so in diameter. I’m wondering about wall thickness, the weight of the soil while wet, and how to fortify it. Can you advise?
Hi Mary,
I wish I could reasonably answer this for you, but I have only made hypertufa this one time. That’s a really large-sized planter, and I know mine is heavy to lift when wet so yours will be extremely heavy. I have considered making a concrete planter about 24×24 and thought I would make the walls about 2″ thick. When people do this with concrete, they often use wire mesh layered in the middle of each side. Hypertufa isn’t as strong as concrete, and unfortunately I don’t know what you need to fortify it. I would try to google “large hypertufa planter” and see if anyone has made one and has a tutorial. Without having made one, it’s hard for me to advise.
Excellent demonstration, congratulations
Could one just use cement and perlite? What ratio?
Hi Doug,
Cement needs a binder, so you’ll you will need another binding ingredient. Perlite alone isn’t doing much to help the cement bind. You’ll need to add sand or fiberglass fibers or something similar to peat moss so that it doesn’t fall apart. Whatever the ingredient, many ratios tend to work, but I would try to keep it at 1:1:1. If you use sand, it will make it heavier.