How To Paint Plastic Drawers (so it lasts!)
How to make ugly plastic storage drawers look good, by painting them! A detailed tutorial.
Aren’t you so sick of looking at the mess inside those clear plastic drawers? I was, but can you really paint plastic drawers?
You can paint plastic drawers and do it so that the paint remains durable.
However, even the best paint requires some prepping in order to obtain and retain a durable finish.
The way to paint plastic storage drawers to keep the finish from peeling and resist scratches is by preparing the surface. Plastic is slick and inherently doesn’t like grabbing onto things.

The way to keep your plastic bins from scratching is to sand the plastic first. That’s going to be key to making this plastic drawer makeover technique work.
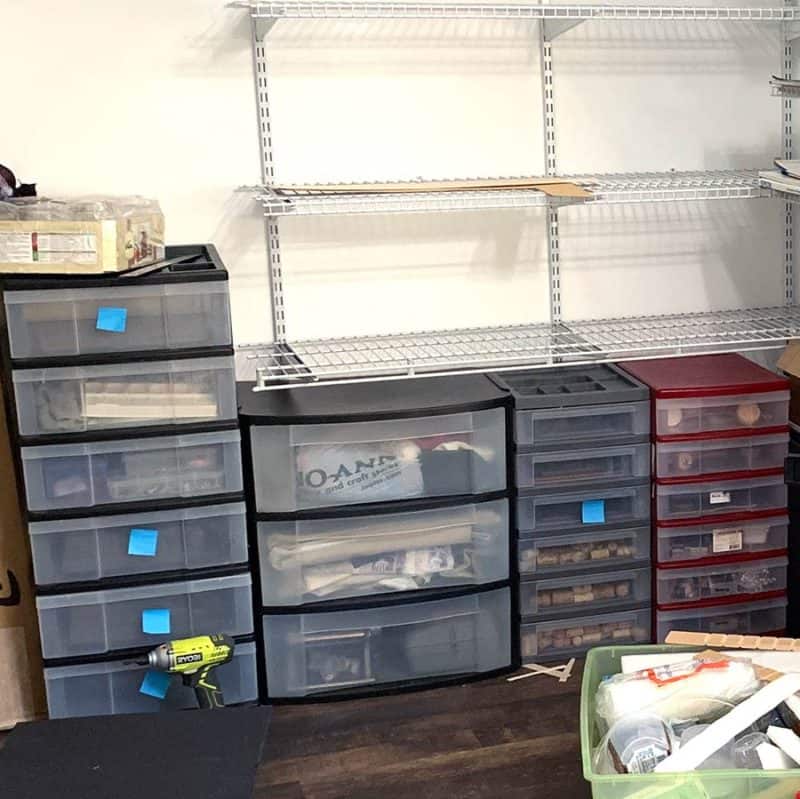
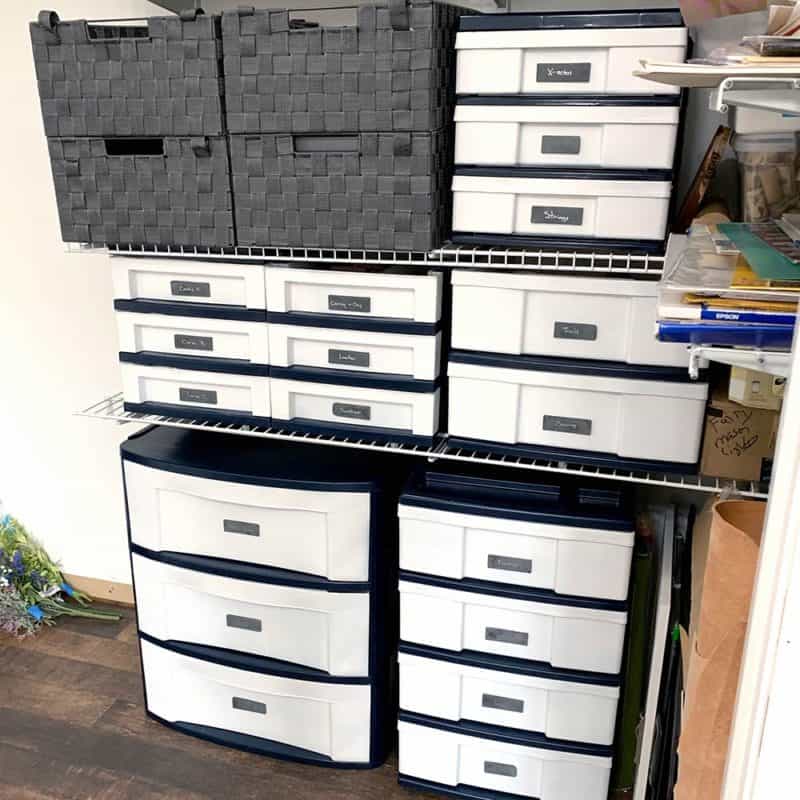
These photos of this project space are in my craft room and is where I store my art and craft supplies.
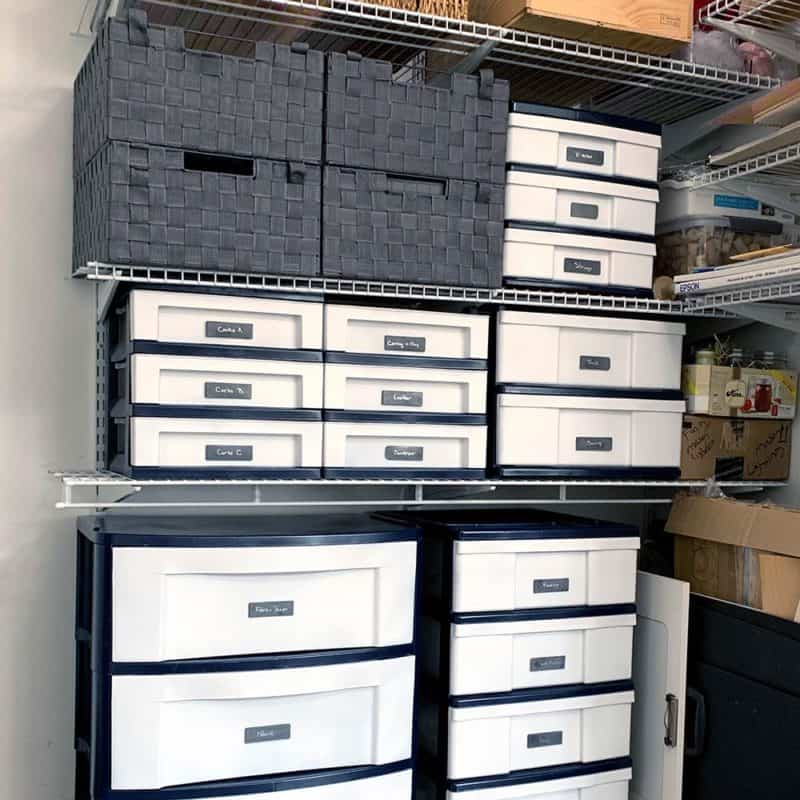
Before painting these drawers, the items inside looked messy, but my plastic drawers look much better now that they are painted. The paint conceals all the different objects inside so they don’t look messy anymore.
This is the first mini project specifically for the craft room.
This project took me about 8 hours to do, which is completely ridiculous. :0]
It will NOT take you that long to do. I had multiple compounding issues such as:
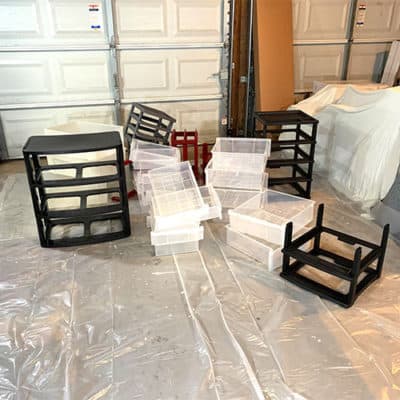
- I had four separate drawer units which was altogether, 4 frames and 21 drawers that needed to be painted.
- Some of my storage drawer units were in a basement that had mice and the mice had gotten in and all over everything.
Plus some of these had been in an attic that had some bugs, so I felt extremely compelled to wash the heck out of these.
Washing them was a problem in of itself, because when you wash the frames, water gets in between the rails that separate each drawer.
And even after drying them all off, the water would still drip out so I had to dry them 3 times. - Even though I know about overspray being a concern, I stupidly laid everything out at the same time so overspray powder got all over each piece.
It was kind of dark in the garage and some of it I couldn’t see so this all caused 2 more problems. - The overspray of the blue frames got on the drawers that were getting painted white, since I couldn’t see this, the blue showed through and I ended up having to do 3 or 4 coats instead of 2.
- Overspray also got on all parts of the drawers that I wasn’t even painting, so the clean up was enormous. Boy, the “What Not To Do” list is long.
I will explain in this tutorial how to save yourself a lot of time and grief when you spray paint plastic bins.
I’m surprised how actually durable the plastic spray paint job ended up being.
It’s now been over a year and they’ve gotten a good amount of use.
If you take your finger nail and try to scrape it, it will scratch. But even though I haven’t been super gentle using these, they have held up quite well.
Here’s a list of amazing DIY garage shelf ideas you may also be interested in looking at.
And to see another great drawer improvement project, take a look these DIY wood drawer dividers.

Some of the links on this page have been provided as a convenience for finding materials. These links may also be affiliate links. As an Amazon Associate I earn from qualifying purchases, at no extra cost to you.
I only recommend products I’ve used and loved, unless otherwise stated. Click here to read my full disclosure policy.
DIY Difficulty Level | Easy
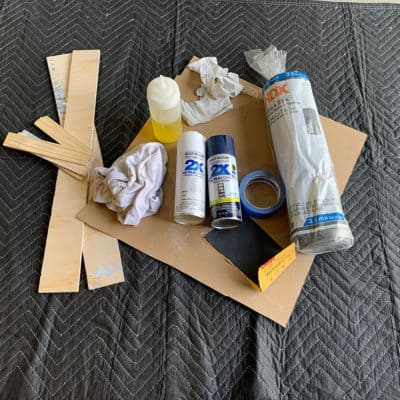
Materials For Painting Plastic Drawers
- Spray paint for plastic- Midnight Blue | Satin
- Spray paint for plastic- White | Flat
- (2-4) 9 x12 drop cloths (depending whether you do this outside or inside-like a garage
- Sand paper #600 grit
- Rags
- Nitrile gloves
- Wood shims or scrap wood
- Blue painters tape
- Scrap cardboard – as large as your drawer
- Olive oil- potentially (to clean up overflow)
Painted Plastic Drawers Tutorial Steps
Step 1. Clean The Drawers
First you will need to sand both the frames and the drawers. I’m assuming they are clean to begin with, unlike mine were after sitting in a basement for so long.
If they aren’t clean, then you should clean them after sanding. At the very least, they will need to be wiped down.

So first, take your high grit sand paper and sand all the parts you will be painting.
I didn’t worry about painting anything but the drawer fronts, and part of the sides of the drawers that were visible in front of the frame.
Then for the frames, I only sanded the tops, the rail that the drawer sits on, the rails between the drawers and the sides.
After sanding, wipe them down with a rag to get the dust off.
If you need to clean them, try to do it with a wet rag, rather than immersing everything in a tub.
This way you will be able to dry off everything easily.
Step 2. Prep For Painting The Drawers
I don’t have a photo of this because it’s one of the many missteps I took, but follow these instructions and you’ll do great.
Prepping for painting. After sanding, you will lay out your paint station.
Since spray paint particles are very fine and will blow all around, you must protect everything around, especially your other pieces.
Remember the show Dexter! Make your spraying area look like a Dexter room with plastic tarps taped everywhere.
Seriously, if you skip this part you’ll wish you hadn’t. :0}
Make removable layers of tarp to make this go more efficiently. You can this by trimming a plastic drop cloth into as may pieces as you have drawers.
These only need to be slightly bigger than the size of each piece you are painting.
Next, stack them all and then each time you lay a piece on the ground to paint, just remove the top layer to reveal a fresh piece underneath.
Outdoor set-up:
You can do this outside, but only if there is no wind.
You don’t want dust getting on your freshly painted surfaces. This is a good option if it’s not a humid day and the temps are mild.
Check the manufacturer’s specifics on the can.
Make sure there’s nothing in a 15ft radius, and if so, then you only need one drop cloth and your trimmed plastic tarp squares.
Make sure your unpainted and freshly painted pieces are nowhere near the piece you are spraying.
Garage/Indoor set-up:
Here you will need possibly a few drop cloths.
Have one for the floor, one that you will cut up for underneath the pieces (see above), one for behind the piece you are spraying, and possibly one to protect whatever is on each side.
Make sure both your unpainted and freshly painted pieces are nowhere near the piece you are spraying.
Now take blue tape and tape the inside front edge of the drawer. Additionally and important!
Use a piece of cardboard to lay on top the inside of the drawer so you don’t get paint inside.
Prop up the piece a bit with some shims or scrap wood so it doesn’t stick to the plastic.
Step 3. Paint The Plastic Drawers


Make sure to shake the can for a full minute. Then with wide sweeping strokes, spray in a back and forth motion, about 12-18″ from the piece.
Don’t get too close or you will get drips. After you have finished, wait just a few minutes and then apply a the second coat.
That is all it should need. Wait about 24 hours before re-assembling all the drawers.
Step 4. Re-assemble The Painted Plastic Drawers
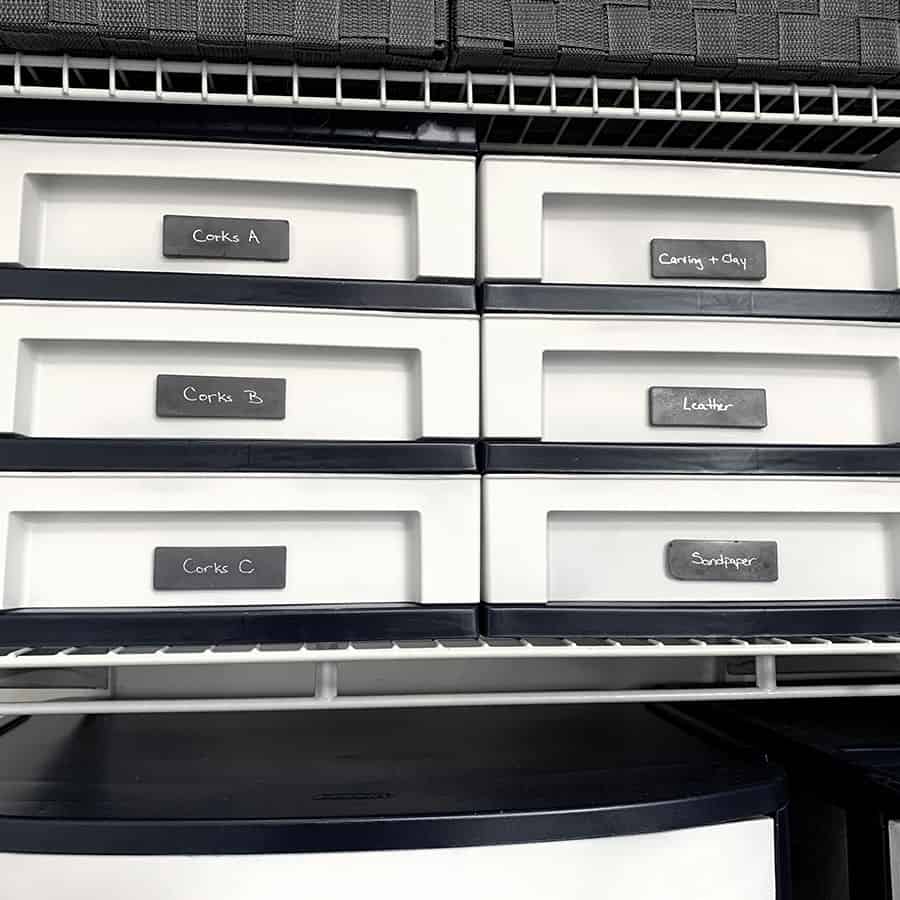
Did you notice the cool concrete drawer labels?
Painted Plastic Drawers
How to paint plastic drawers to make them look neat and organized. A tutorial for painting them correctly so that you get a durable finish and they don't peel and resist scratches.
Materials
- spray paint
- sand paper
- drop cloths
Tools
- Please see the FULL materials list above the tutorial steps.
Instructions
- Clean The Drawers To Get Off Any Residue
- Prep For Painting By Lightly Sanding Them
- Spray Paint The Plastic Drawers
- Re-Assemble The Painted Plastic Drawers


Wow! What transformation! Are you available for an in house consult?
Lol! Yes, for VIPs like you. :o]
Love it! I am also thinking of découpage with a spray paint on the drawers. Just curious, though….why did you use black spray paint on black plastic? How are the parts that rub together holding up?
Hi Michelle,
That’s a great idea!
The paint color was navy blue. It was the accent color of other items in the room.
The paint has held up terrifically. I don’t have anything coming off where it rubs. But I really did spend a ton of time on that prep, no shortcuts. It was totally worth it though.
Have you tried the decoupage yet? I’m gonna try it. I’m tired of looking at plastic in my she shed. Sincerely. Dar Shields. [email protected]
Hi Darlene,
I haven’t done decoupage on plastic drawers, just on a planter. That would look great though!
Love this idea. I have many plastic drawers and bins that I want to do this to. It will make my garage look so much better and organized.
Thank you, Ellen.