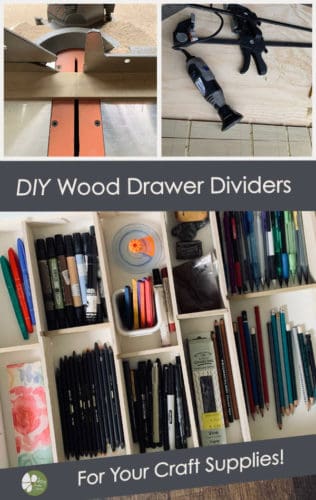
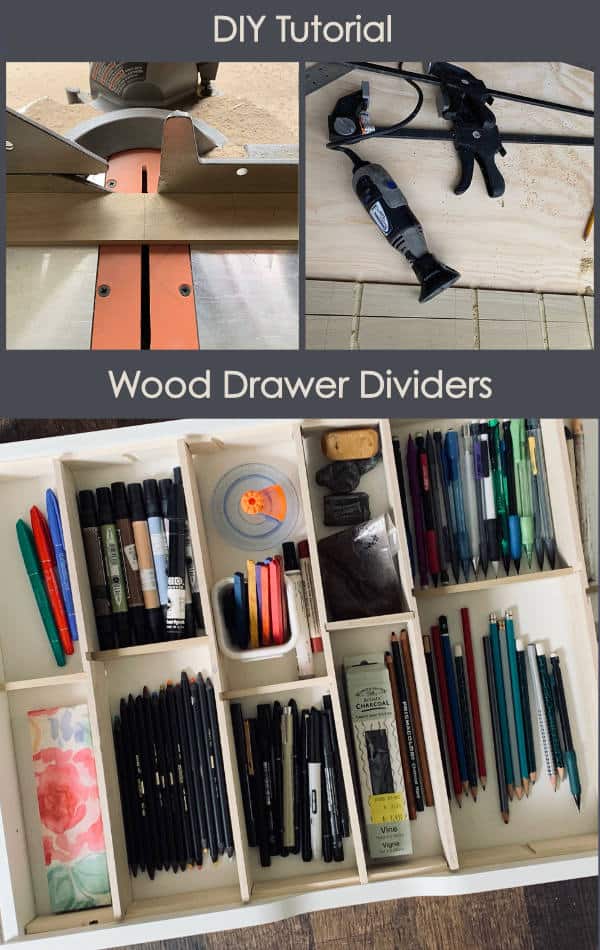
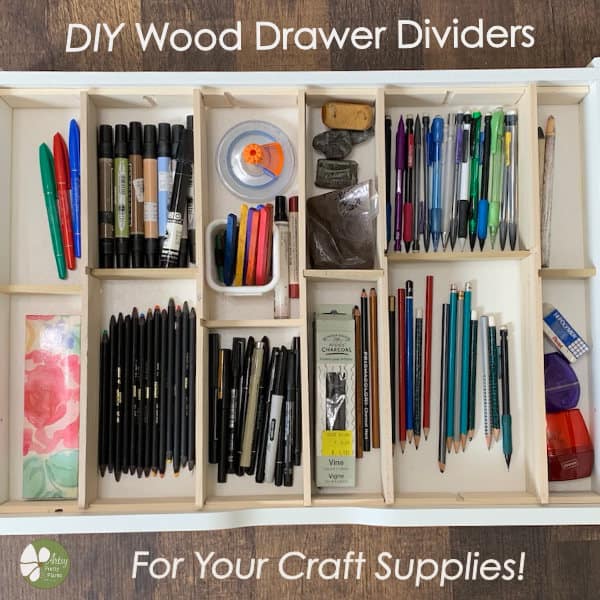
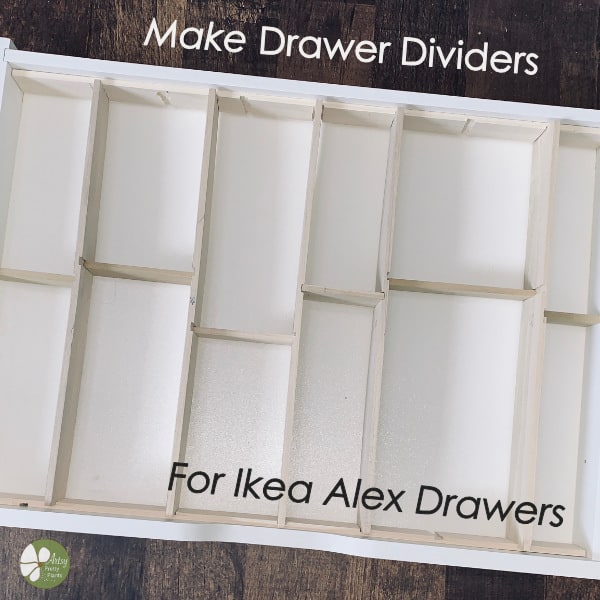
DIY Wood Drawer Dividers
How to make adjustable DIY wood drawer dividers to organize your drawers, using only a Dremel for routing and a miter saw.
I mentioned in my post from the beginning of the year on our move, that I’m desperate to get organized.
My goal was to get my main craft cabinet drawers organized with dividers, so I could finally be able to get most things put away.
The first step in all of this was fixing my sagging Ikea Alex drawer boxes.
I really couldn’t put my things away in them, even temporarily because the sagging was so bad.
Here’s why I needed to take action on fixing and organizing the drawers.
I actually got stuck trying to determine what configuration to make for the drawers.
And because of that, I ended up not making any progress for a couple of months because I couldn’t commit organizationally to a fixed divider position.
I really needed these dividers to be adjustable and flexibility is always good, especially when it comes to supplies.
As you run out of supplies or start working on different types of projects, your spatial needs will change.
However, we are somewhat limited in our woodworking tools and I didn’t think I had the equipment needed to make dividers that could be adjustable.
So, I ended up dealing with most of my items in piles on the floor for much longer than I wanted.
I kept thinking… sure, if I had a table saw or a router, this would be a cinch.
And then I went a different path for a bit and considered making these with corrugated plastic.
But I knew it would likely only be a matter of a short period of time before they got bent up because some of these items are pretty heavy.
The plastic could work for some drawers, but not these.
Finally, I remembered that my Dremel came with an attachment that can make routing grooves.
Once I remembered having the routing attachment, I knew I could make it work.
It would just be slightly less cost effective because I had to buy pieces that were already cut, instead of ripping down one larger piece, but it was so worth it.
My disorganization was driving me batty.
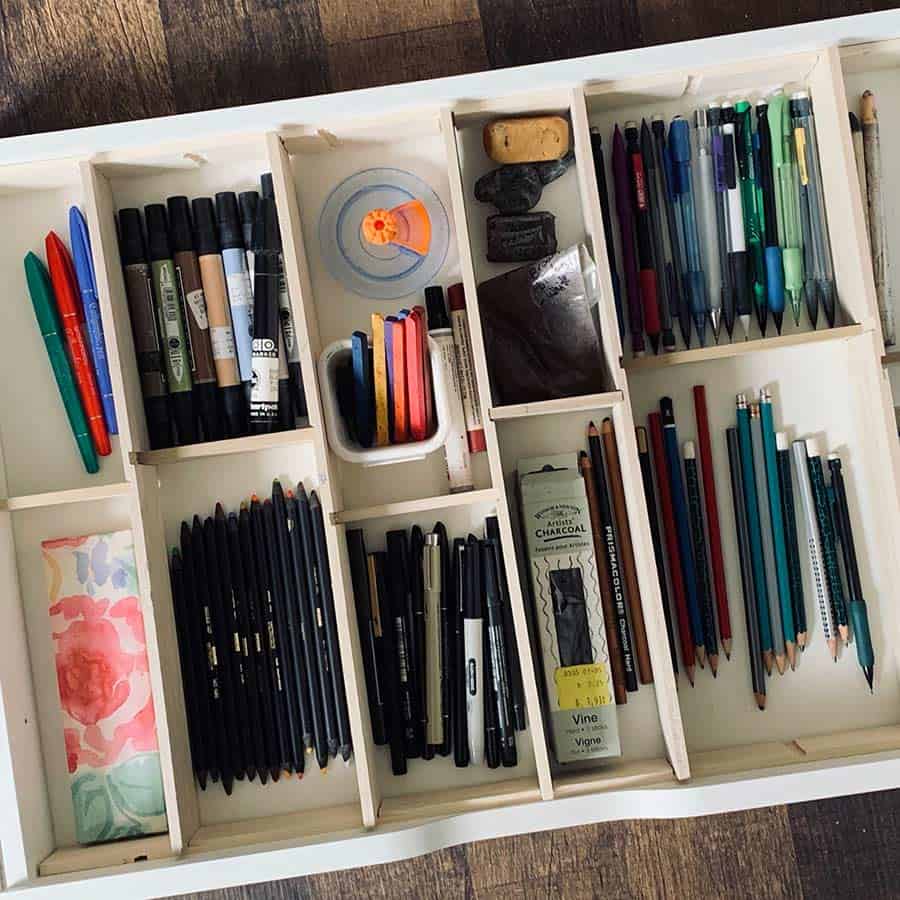
As for the configuring of the wood drawer dividers, I had to determine what needed to go where.
I laid everything out inside the drawers, in the locations I thought they needed to go.
You may also like this tutorial for painting ugly plastic organizer drawers so the paint won’t chip or peel.
Some of the links on this page have been provided as a convenience for finding materials. These links may also be affiliate links. As an Amazon Associate I earn from qualifying purchases, at no extra cost to you.
I only recommend products I’ve used and loved, unless otherwise stated. Click here to read my full disclosure policy.
DIY Difficulty Level | Moderate
Materials For Fixing Sagging Ikea Alex Drawers
- Wood glue
- Sliding bar clamps- as many as you have
- Paper towels or rags
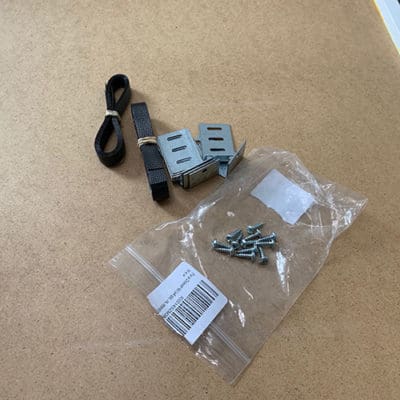
- Fix-a-drawer kit
Philips head screwdriver - Power drill 1/8″ drill bit
- Square driver head (for Alex drawers)

Materials For Making Wood Drawer Dividers
- Poplar wood strips .25 x 1.5 x 36″
(You can get these from a big box store. The quantity depends on how many drawers you have. I used between 3-5 boards per drawer. You’ll see in my pics that I used a mix of 1.5″ and 2.5″ pieces because I had both on hand, but you really only need the 1.5″ - Measuring tape
- T-square
- Sliding bar clamps
- Pencil
Miter saw - Dremel -this link includes the routing guide attachment
- Dremel routing guide attachment
- Dremel square routing bit


DIY Wood Drawer Dividers Tutorial Steps
This is broken down into two parts. If you don’t need to fix sagging drawers, then skip ahead to Part Two.
Part One | Fixing The Sagging Ikea Alex Drawers
Step 1. Remove The Drawers

Other than removal, disassembly, and assembly, this same technique will work for all sagging Ikea drawers.
Mine just happen to be from the Alex unit.
We also have Malm drawers and they are easier to remove.
You just reach down to the underneath of the drawer where the glides are and pull the 2 tabs outward, toward the sides and it will release the drawers, then you just pull them out.
This is how most drawer slides release, in general- Ikea or not. The Alex is a little different.
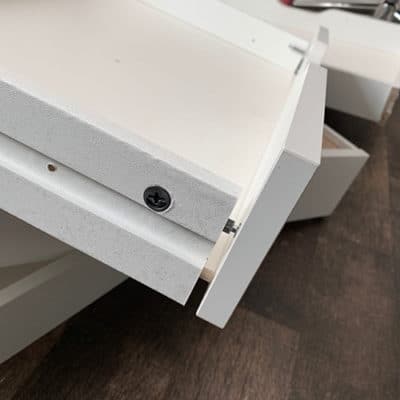
Start by removing the screw on the inside of each side of the drawer box where the glides are and set them aside somewhere safe, you don’t want to lose any Ikea pieces.
Then, with a flat head screwdriver, turn the cam lock screw until the drawer front releases from the box and pull out the bottom panel
Step 2. Glue Up The Drawer Box

Apply a thin line of wood glue to the groove and all around each of the three sides of the drawer box and also the front.
Next, slide the bottom back in and tighten the cam lock screw.
Clamp the drawers together, holding them together directionally front to back.
Step 3. Attach Fix-A-Drawer Strap

Use the Fix-A-Drawer (link here) strap to secure the center of the drawer bottom to prevent further sagging.
I’m linking to a video because I think it’s much easier to do if you watch this than if I explain it in written word here.
YouTube video for Fix-A-Drawer hardware.
Part Two | Making The DIY Wood Drawer Dividers
Step 1. Determine General Location and Structure
It’s my top two drawers that are the most critical because they contain such a variety of items that it was taking too long to find things.
I was wasting a lot of time, not to mention space, because the wood dividers would eliminate some dead space.
These top two drawers would also contain the items that slide around the most.
First, I arranged everything per drawer the way I thought best suited my needs.
Next, I sketched out the divider configuration along with some basic dimensions.
Items like pencils are so short, the long dividers require horizontal supports, so in addition to vertical, horizontal dividers were kind of mandatory here.
Start laying out where you want things to go and then create a sketch of the space and add dividing lines to your sketch.
Next, measure your interior space and add dimensions to your wood divider sketch.
All of the dimensions below are based on the Ikea Alex drawers, adjust your sizing as needed.
The tutorial explains the process for the first drawer, so just repeat the process and adjust to fit your organizational needs.
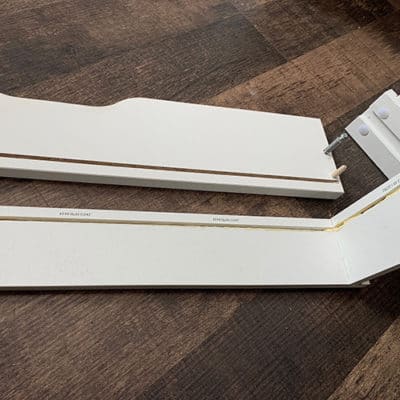
Step 2. Trim Horizontal Main Wood Supports
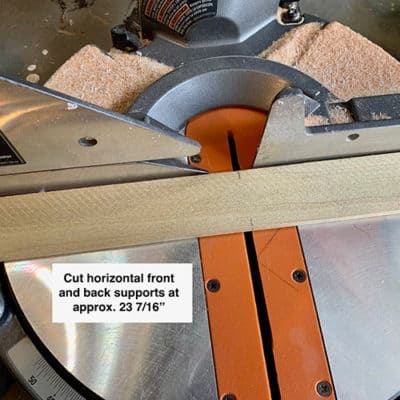
Measure out the front and back horizontal main supports on (2) 36″ pieces and mark them at 23 7/16″ long. Then using the miter saw, cut them.
Step 3. Route The Vertical Divider Slots
On the horizontal supports, first, mark out the spacing for the grooves for the vertical dividers onto one of those horizontal supports that you just cut.
You don’t need to mark the second one. Base these locations on what you sketched. I had some that were 3, 4 and 6″ apart.
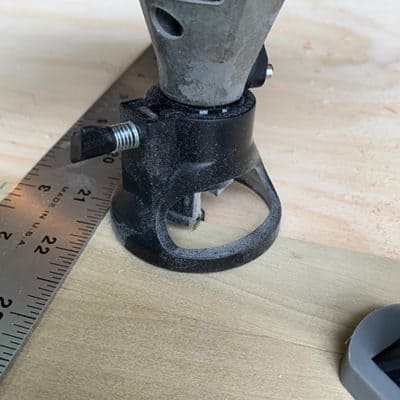
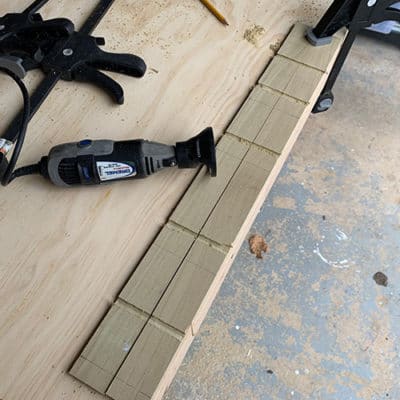
Now using the square routing bit, Dremel and guide attachment, route the slots for the drawer dividers.
Go ahead and lay the support pieces next to each other, flush with the front edge of your worktable. Then take 3 bar clamps and clamp them down.

Use the T-square to line up the router attachment to those lines.
You’ll need to eye the location as best you can. Start with the first line and clamp the T-Square.
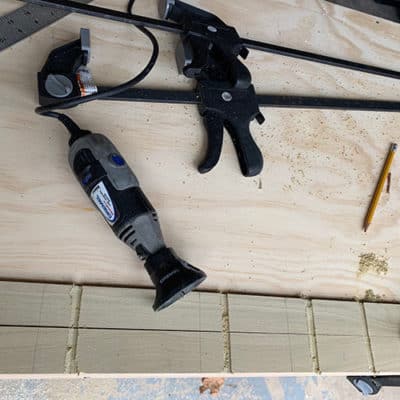
Turn the Dremel on at speed 8 (high) and hold the T square and use it to guide the Dremel through both strips of wood.
Be sure to hold the Dremel firmly and steadily.
Then lightly sand the rough edges.
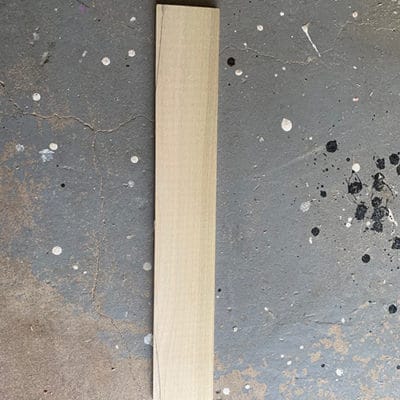
Step 4. Cut The Vertical Dividers

Insert the horizontal supports at the front and the back of the drawer.
Measure the space you have between the pieces where the groove is inset, front to back. It should be pretty close to 16 ¼” if you have the Ikea Alex drawers.
Now trim each vertical piece, lightly sand and insert into the routed slots.
Step 5. Route The Slots For Horizontal Dividers
Repeat the process of routing the slots onto the vertical dividers that will connect the small horizontal dividers.
With the vertical dividers in place, mark on each one where the horizontals will go- make sure they match with the sides of the boards that face each other.
Then do the same with clamping both down together so that you can be sure to route the slots in the same spot facing each other.
Insert these into the horizontal support pieces.
Note: Check to see if there are gaps below the vertical divider and bottom of the drawer.
Your drawers may be sagging pretty deeply, if so, then you will notice a gap toward the middle and center of the drawer.
If this is the case, you may need to angle the bottom of your vertical dividers to fit the sags.
No sagging? Skip to the Final Step, otherwise see Step 6.
Step 6. Adjust The Curvature Of The Vertical Dividers
With the horizontal dividers inserted, note the distance of the gap. Then trim the bottom in reverse.
If your gap is ¼” in the middle, you will want to take ¼” off each end and angle it.
My gap was nearly ½” and I angled it in about 5″.
I did this by eye and was pretty close. It doesn’t need to be perfect, but if you leave large gaps, your drawer items will slide underneath the dividers.
Mark out this shape, it probably looks like mine.
This is not the greatest method of trimming, nor the safest, but I did use the miter saw for this. (Again, my wish for a table saw ;0}).
You can cut these with a coping saw, but if you use the miter saw, just be careful of your fingers, and make sure to wear your safety glasses.

Line up the angle of your marks with the miter saw and adjust the angle to fit.
Then carefully trim this piece off.
Do this on each piece, on the same end the angle lines up with, then do the other end and re-adjust the angle of the saw.
Lightly sand each cut.
Step 7. Cut The Small Horizontal Dividers

Measure out the lengths needed for the horizontal dividers and cut them with the miter saw, then lightly sand.
Now insert the horizontal dividers you just trimmed.
Repeat as needed for each drawer, then put everything back together, including your drawer items and marvel at how organized you are!


Thanks for the excellent detailed instructions looks very doable
Great idea. We will have to make this drawer set- up .
Thanks. These have been so helpful, I’m planning on making them for my clothes dresser too.