DIY Wood Pallet Painting (Pet Portrait on Wood)
How to create a DIY wood painting that’s a portrait of your beloved pet, using wood boards as your canvas.
Do you totally love your pets? Are you one of those people who shows people photos of their pets as often as you do your kids?
We don’t have children, so of course, our cats are our children.

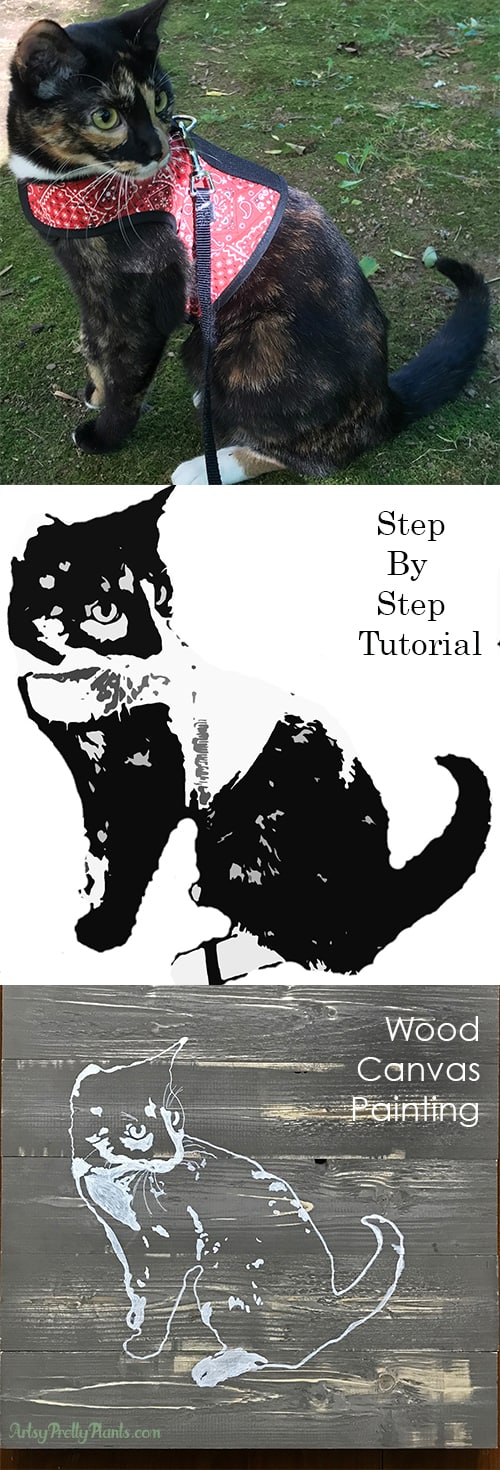
My little Lucy is an amazingly cute tortie/calico (we call this a tortico ;0} ) and she is a character.
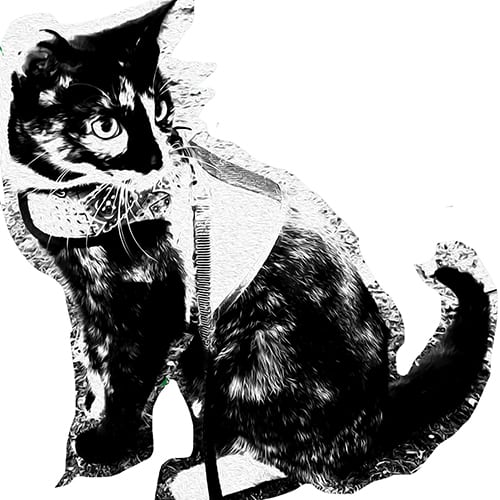
This cat goes for walks on a harness and leash, and that’s when I took the photo of her that I used for this project.
Now I gotta brainstorm ideas for doing artwork that shows our beautiful tabby, Leia.
I’ve always loved the look of art where wood is used as the canvas and so I thought I would make a painting of Lucy, using wood boards.
So I made this cute DIY wood painting. Read on for the tutorial.
Some of the links on this page have been provided as a convenience for finding materials. These links may also be affiliate links. As an Amazon Associate I earn from qualifying purchases, at no extra cost to you.
I only recommend products I’ve used and loved, unless otherwise stated. Click here to read my full disclosure policy.
DIY Difficulty Level | Moderate
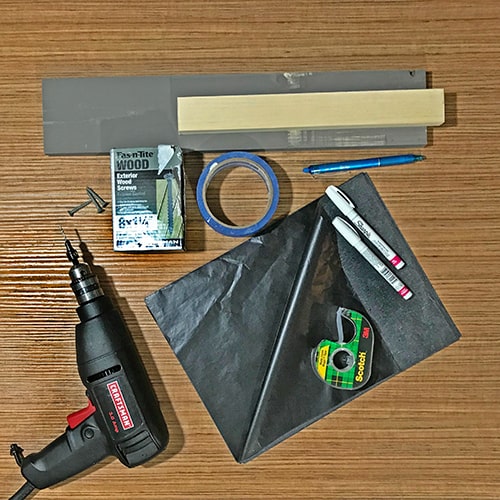
Materials For Making A Wood Canvas Painting
- Sharpie Oil markers- fine and ultra fine point
- Graphite transfer paper
- Clear tape
- Blue painter’s tape
- Wood- repurposed, or new lumber- pre-stained or raw- 8 feet of 1 x 4″, 6 feet of 1 x 2″
1 ¼” wood or deck screws - 220 grit sandpaper and orbital sander (if you have one, or use a sanding block)
- Stain- if you don’t use the pre-stained boards. Water based stain recommended for quicker drying time, but oil based is fine.
- Template, stencil or image to trace from. If you use an image, you’ll have an easier time if you have a solid background or at least not a complicated background.
- You can create a template using design software. I used Adobe Photoshop for this, but there are great alternatives like Affinity Photo which is at a great price and is what I currently use in place of Illustrator.
Scissors - Miter saw- Or have the boards cut at your local big box store
- Power Drill
- Drill bit – 1/8″
- Stain brushes
- Orbital sander (or sanding block)
Normally I make the canvases for the wood paintings out of repurposed wood, like pallets.
But here in the Northeast, when I decided to make this we were experiencing sub-zero temperatures, so breaking down pallets wasn’t an option.
I went to the local big box store where I found some pre-stained, weathered barn-like wood. I couldn’t stain the cut edges since the stain won’t dry properly in cold temperatures.
I also couldn’t stain the back frame, if you’re wondering why it looks like that. Come spring, I will stain the areas that I wasn’t able to and will post updated pics.
Wood Painting Pet Portrait Tutorial Steps
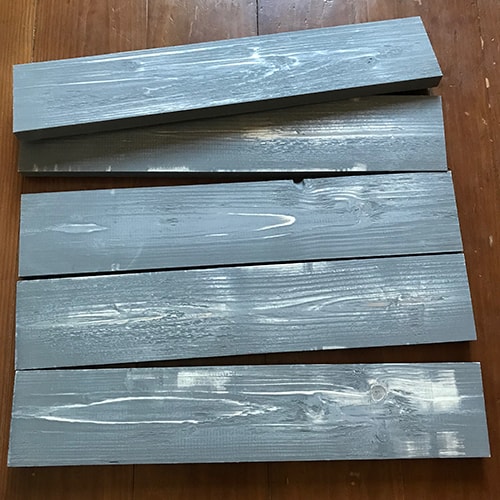
Step 1. Trim The Wood Boards
Choose the wood for your DIY wood painting, either buy new pieces or find re-purposed wood.
You can cut them to any length depending on the canvas size you want. If you don’t have the tools to cut these, the big box stores will usually do this for you.
The dimensions I have given you are based on an 18 x 18″ canvas size.
Cut the 4 x 1″ boards into 18″ lengths (or have it done at the big box store where you purchase it). This will give you 5 pieces that will be just about 18 x 18″.
Get an 8′ length of 2 x 1″ and cut it (or have it cut) so you have (2) at 15” and (2) at 12″.
Step 2 & 3. Prep The Boards
Sand and stain your boards (staining is optional). I used pre-stained boards, but they really didn’t provide as much contrast as I would have liked.
If you can’t find pre-stained boards in the color/darkness that you’d like, then stain them and if you want quick drying times, use a water-based stain.
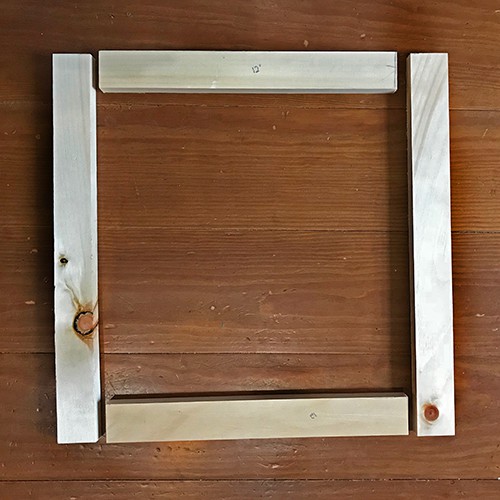
Step 4. Assemble The Boards And Frame Together
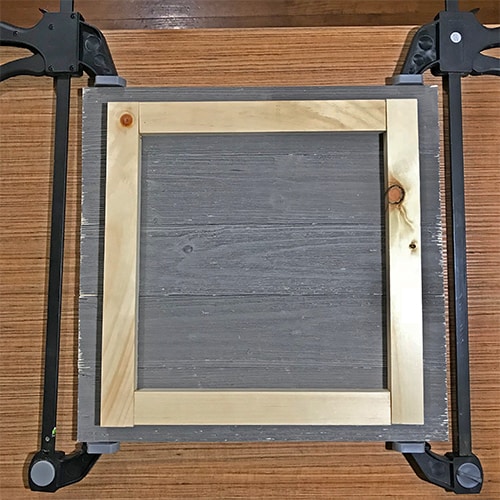
You’ll need a way to secure the boards together so you’ll start by creating the back frame. Turn the front sides of your boards over to make a frame on the back.
Then, take a piece of the 2 x 1″ pine that is 15 ½” long and line it up perpendicular to the boards.
Bring it about 1 ½” in from the edge so it’s not as visible from the side so that it leaves about 1 ¼” from the top and the bottom.
Use bar clamps to hold your canvas boards together.
Step 5. Fasten The Frame To The Boards
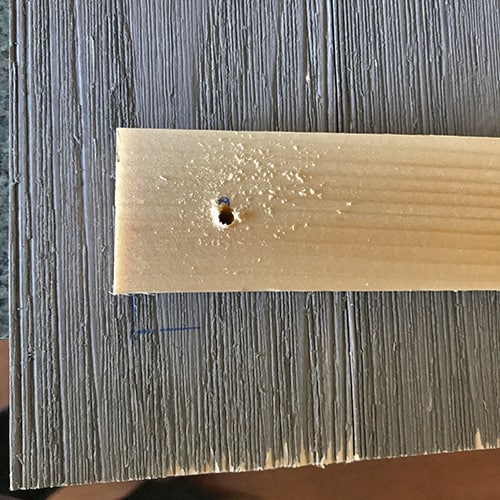
Clamp the 4 x 1″ wood and 2 x 1″ frame piece together, then drill a pilot hole so the wood doesn’t split.
Be careful not to go through the front side of the canvas.
Hint: Mark your bit with blue tape to create a flag stop so you know where to stop drilling.

Screw in your first screw to help secure the 2 boards. Then continue on drilling a pilot hole in the 2 x 1″ so you have one through each 4 x 1″ board.
Put screws through each hole. You will do the same on the other side, also perpendicular, but position your 2 x 1″ boards first in case the cuts aren’t perfect, and use that as your starting point on where to line up the 2nd 15 ½” long 2 x 1″.
Step 6. Fasten the Last 2 Frame Pieces

Take the remaining 2 x 1′ s and position in between the 2 perpendicular boards, one at the top and one at the bottom so you have a square shape.
Drill 3 pilot holes, one in the middle, the other 2 about an inch in from the ends, add screws. Repeat for the last one.
Step 7. Create the Artwork For Your DIY Wood Painting
If you already have your image or are going to draw freehand then jump to step 16.
Photoshop: I was intimidated to draw freehand, so here’s my technique for creating this block print-like style using the Cutout effect in Photoshop.
Step 8. Initial Photoshop Steps

That’s my Lucy! Yes, she goes for walks and loves them. Open up your image in Photoshop, crop it as tightly as possible. Duplicate the background so you can reference it if you need to.
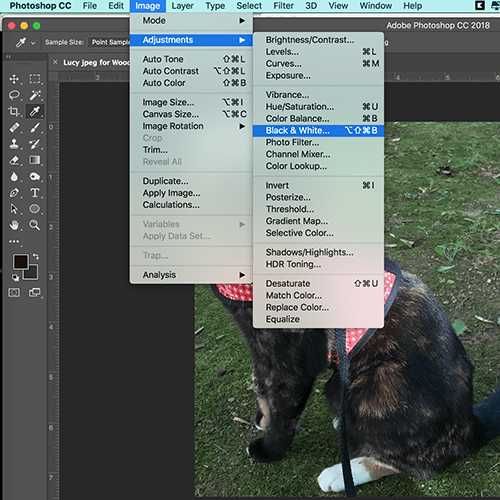
You are going to turn it into a black and white image, so go to Image: Adjustments: Black & White, and press Auto.

Now, go to Image: Adjustments: Threshold to get your image looking the way you want. You want a lot of contrast and to brighten it.
You want enough detail that it shapes the image nicely, but not too much detail.
After the next step, if it doesn’t look right, the Threshold is where you should come back to and adjust and try again.
Hide the background layer. Use the eraser tool to get a transparent background.
-Even though my degree is in this field, it’s been so dang long since I’ve used Photoshop consistently that I put my self back to basic knowledge, so I’m sure there are more adept ways of doing this.
Start wide with a large brush size, then make it quite small as you go in toward your image to delete the background details.
Step 9. Final Photoshop Steps

Go to Filter: Blur: Gaussian and set it around 1.8.

Now go to Filter: Filter Gallery: Artistic:
Cutout and adjust the number of levels to 2, try simplicity at 3 and fidelity at 1.
Play with these last 2 to get desired results and your image still has too much or too little detail, then undo until you are at Threshold and try playing with those settings and repeat this Step 9.
Step 10. Tile and Print The Pet Image
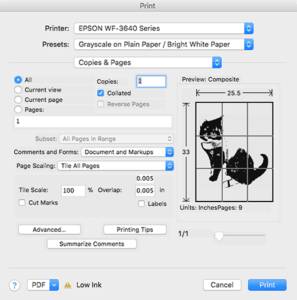
Now print the image. Unless you have a large format printer, you probably won’t be able to fit the whole image on one piece of paper.
I can’t find a tile to print setting in Photoshop, so I did it in Adobe Acrobat.
So I first saved it as a PDF, then opened it in Acrobat. In my version of Acrobat, I went to File: Print: Page Scaling: Tile All Pages: Print.
Step 11. Tape The Image To The Wood
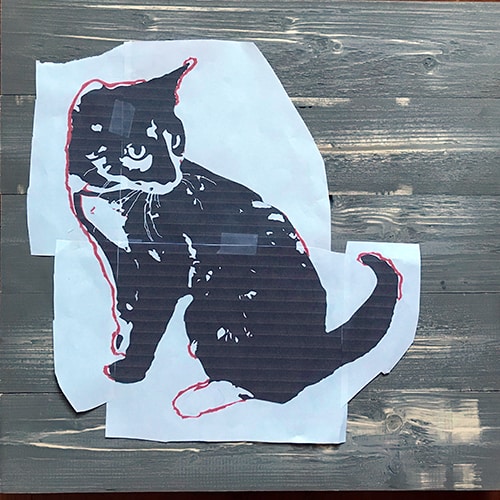
Trim off the excess white where the image overlaps, but only on the top piece of the overlapping image and tape it together with the clear tape.

Then tape this to the transfer paper. Make sure the side with the graphite on it is face down.
Position the image and transfer paper where you want it on the canvas and tape it to the wood using the painter’s tape.
Step 12. Trace The Image
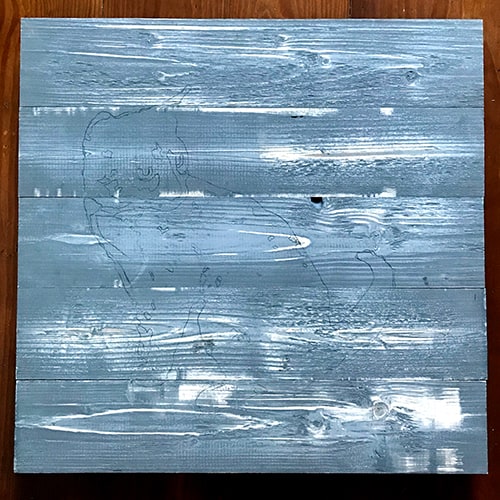
With a pen, carefully trace the outlines of your image. You may want to do a test mark first to make sure the graphite is coming through.
Be careful to not press too hard or it may be hard to cover up with the paint, depending on what color paint you use.
After tracing all the outlines, carefully pull off the image and transfer paper and you should have the penciled-in outline of your image.
Step 13. Draw Over Your Tracing Lines and Fill

Using the oil marker, trace over your lines and fill in where necessary.
Hint: To get your markers flowing well, shake a few times, open the cap and press down on the tip for about 10 seconds, put the cap back on and shake for a little bit, take the cap off again and press and hold.
You may need to repeat this a couple of times, especially initially to get the paint to flow.