DIY Wine Cork Wall Art (for Valentine’s Day)
Learn how to make this sweet DIY wine cork wall art for your home. Repurpose wine corks to decorate for Valentine’s Day!
Here’s a quick and easy way to use those wine corks you have stuffed away and to celebrate Valentine’s Day, all in one.
I like to have a glass (or two ;0}) of wine at night and even with the excess of corks, and I still can’t bring myself to throw any good ones away, and just keep saving them.

I must have hundreds of wine corks from all my wine cork projects- the cork succulent planters, the grape bunch ornament, and the tree ornament planters.
I feel like you just never know what you will need them for! To keep organized, I sort them by quality, I don’t keep any that are torn up.

So the coolest looking ones with great character are in a drawer labeled A, the moderately cool looking ones go into a B drawer and the ones with little to no character go into the C drawer.
So for this wine cork wall art project, it was the perfect excuse to use mostly C and some B quality ones.
For this, it really doesn’t matter if they have character, other than the ones on the edges of the heart since you will only see the tops. Yay! I don’t have to create a second C drawer.
Another way you can use these is to hang the heart on your front door to have as a Valentine’s Day wreath!
Some of the links on this page have been provided as a convenience for finding materials. These links may also be affiliate links. As an Amazon Associate I earn from qualifying purchases, at no extra cost to you.
I only recommend products I’ve used and loved, unless otherwise stated. Click here to read my full disclosure policy.
DIY Difficulty Level | Easy
Materials For Making Valentine’s Day Wall Cork Art
- Wine corks
- Foam core or poster board or cardboard for your backer
- Hot glue sticks
- Red food coloring
- White vinegar
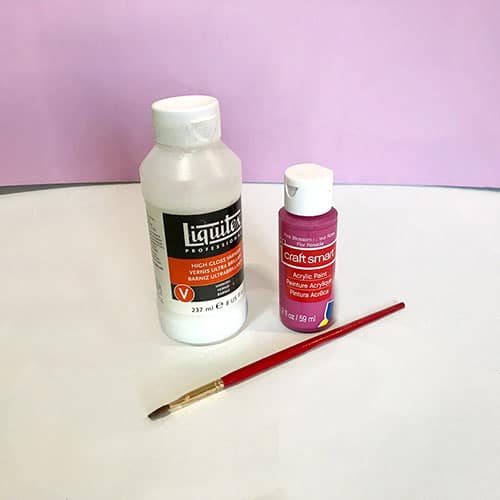
- Pink or red acrylic paint
- Varnish or glossy lacquer
- Cutting board
- X-acto whittling blade
- X-acto knife
- Cutting matt
- Hot glue gun
- Measuring cup
- Pan large enough to steam your corks
- Strainer -if you don’t have a steaming basket
- Glass bowl or baking dish
Valentine’s Day Wine Cork Wall Art Tutorial Steps
Step 1. Trim The Corks

Prepare the wine corks for slicing. Hint- This is optional, you do not need to cut the corks, it just depends on what depth you want your wall art to come off the wall.
The next time I do this, I will keep my corks at full length and only trim if there is a big difference in heights.
If you are trimming the corks, then place them into boiling water and leave the lid on for 5 to 15 minutes.
Any amount of steam will cause them to swell a bit, so if you don’t mind the corks being wider, then steam them up to 15 minutes.
If you are making a larger heart, you should work in batches so that your corks don’t dry out too much before you cut them since the wetter they are, the easier the slice.
Step 2. Slice The Wine Corks
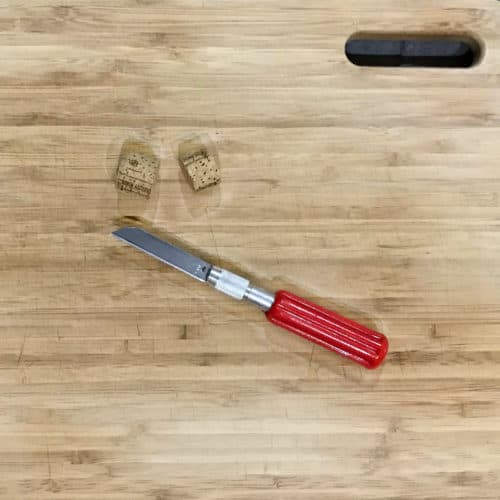
Use a cutting board and X-acto whittling blade to slice your corks to your desired length.
The whittling blade is perfect for cutting corks. It cuts through them like butter. I haven’t found anything else that comes close.
Step 3. Dye The Corks

Boil your water for dyeing the corks. Pour a ratio of ½ cup of water to 1 tsp of vinegar to ½ of a small bottle of food coloring to the dish or bowl that you will be dyeing the corks in.
Apparently there is a science to this, so measure it accurately and then add your dye. I did mine in multiple batches but ended up using 3 small bottles.
Your corks will float so put something on top of them like a strainer or a lid.
Step 4. Check The Corks For Desired Color
Check after 15 minutes to see how dark the wine corks are.
If you want an ombre effect, remove them at different times so you will have color variation.
You will have color variation most likely anyway because different cork materials will take the dye.
Step 5. Create The Valentine’s Day Heart Backing

Draw a heart on your backing substrate. You will want to make the heart smaller than you want the wine cork art to be. Cut it out with your X-acto knife.
Test it to make sure it’s the size you want by placing your wine corks on top. Your corks should overlap your backing substrate.
Paint both the top of the backer and also the back because this will help avoid warping. Don’t forget to paint the edges.
Step 6. Glue The Wine Corks
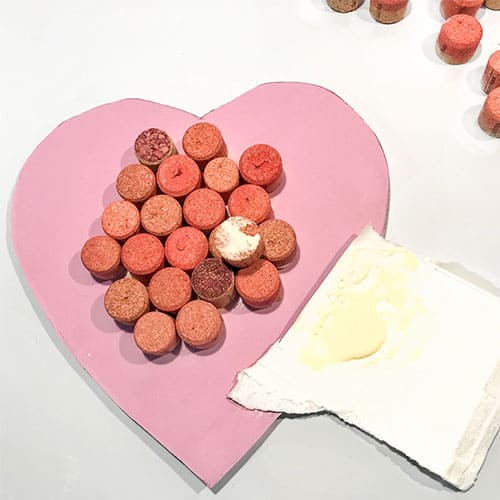
Use the wood glue to glue your corks to the backer substrate by dipping the bottom end of the cork in the glue and apply to the backer.
Step 7. Outline The Edges
Once you have covered the backer, then work on your outlining pieces. Use the hot glue gun to apply glue to the sides of the corks to finish your heart shape.
These won’t sit on the actual backer and will hide where the glue touches the backer on the inner pieces.
I recommend weighing down the heart cork art with something overnight to ensure it doesn’t warp from initial gluing.

Step 8. Seal The Corks
Apply the varnish or glossy lacquer to the tops of the corks to give the heart a bit of a shine.

Valentine's Day Wine Cork Wall Art
Decorate for Valentine's Day with wine cork wall art. Repurpose wine corks, dye them and make into a heart shape. Step by step tutorial.
Materials
- Wine corks
- Food dye
- X-acto with whittling blade
Tools
- Please see the full list of materials please above the tutorial.
Instructions
- Prepare The Wine Corks For Slicing
- Slice The Wine Corks With The Whittling Blade
- Dye The Corks With Food Dye
- Check The Corks For The Desired Color
- Make The Backing For The Wall Art Valentine’s Day Heart
- Glue The Wine Corks Together
- Outline The Edges For Shape
- Seal The Corks With Varnish

