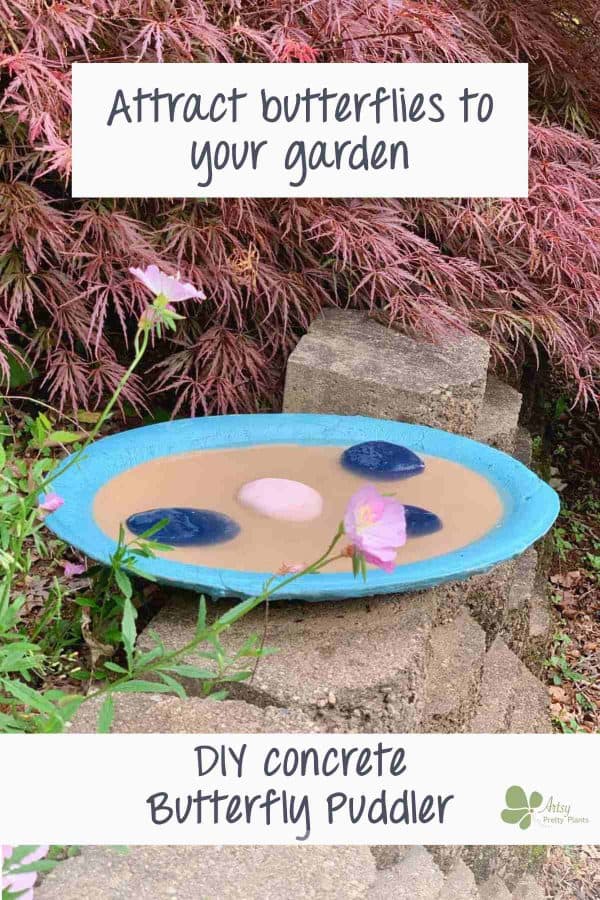
DIY Concrete Butterfly Puddler: Attract Butterflies!
Add a splash of life to your garden and make a DIY concrete butterfly puddler, a watering station for butterflies.
DIY DIFFICULTY LEVEL | Easy
Why not attract some of nature’s most beautiful visitors – butterflies! Let’s create a special watering station designed just for them.
But first, let’s talk about why butterflies are so important.
Why Butterflies Matter
Butterflies, bees, and hummingbirds play a crucial role as pollinators in our ecosystem. One-third of our food plants depend on pollinators to reproduce.
Unfortunately, many butterfly species face extinction risk or are already endangered.
By inviting them into your garden, you’re not just adding beauty; you’re also contributing to their survival and the health of our planet.
Why a Puddling Station?
You might wonder why butterflies need a puddling station.
Unlike other creatures, butterflies seek out shallow puddles for hydration and the essential minerals found in them.
Regular bird baths are typically too deep for them. That’s where our DIY project comes in!
Creating a shallow concrete puddler with sand and water provides a safe landing spot rich in nutrients like salt – which is essential for their diet.
Just be sure that whatever you add to your concrete puddler doesn’t contain any fertilizer or additives.
Why I Chose These Materials
For this project, I wanted to focus on simplicity and safety. You’ll need a shallow dish or tray, ideally 1 ½-3” deep.
The addition of sand offers a sturdy landing and supplements their diet with salt.
I also decided to make concrete rocks (don’t worry, they’re easy), each with slightly different heights and sloped sides, so I won’t need to refill them as often on hot, sunny days when water levels drop.
By making multiple landing spaces, there’s flexibility with water levels. I’m all about making things low maintenance!
If you’re wondering if concrete is a safe choice for butterflies to drink from, it is!
Painting it assures the alkalinity from the compounds in the concrete doesn’t leach out.
However, you can also soak the puddler in water for a few days to achieve the same, should you want to avoid painting it.
Just refresh the water each of those three days, then it’s good to go.
Making It Your Own
This tutorial isn’t just about functionality; it’s also about adding a touch of art to your garden.
And for those interested in further visually enhancing their gardens, look at this incredible squirrel proof bird feeder you can make or a concrete garden gnome and cement bird bath to accompany your puddler.
Join me in this gardening tutorial to make a difference for our butterfly friends and add a unique element to your outdoor space.
Here is some additional reading about butterflies and their importance within our ecosystem.
Some of the links on this page have been provided as a convenience for finding materials. These links may also be affiliate links. As an Amazon Associate I earn from qualifying purchases, at no extra cost to you.
I only recommend products I’ve used and loved, unless otherwise stated. Click here to read my full disclosure policy.
Materials For Making A Butterfly Puddler
- Rapid set cement
- Disposable bowl
- Disposable cup
- Durable nitrile gloves– I like these because they are so durable, you can rinse and reuse them
- Safety glasses
- Safety mask– rated for silica dust
- Large tray
- Plastic wrap
- Small level
- 2 craft sticks
- Vegetable oil spray
- Play sand
- Bucket
- Acrylic spray paint- teal, (*pink and blue for the stones- see note below)
- Acrylic top-coat
You can use either the concrete sealer or paint sealer, as long as they are water based.
Both will be safe for the butterflies and protect from fading, but you may need to touch up the paint over time.

*To make your own concrete river stones- follow the DIY Cement Stone Planter tutorial.
The only material you will need, in addition to what’s listed above is nylon trouser socks or pantyhose. Skip the adding of pigment, as well as holes for the plant and drainage.
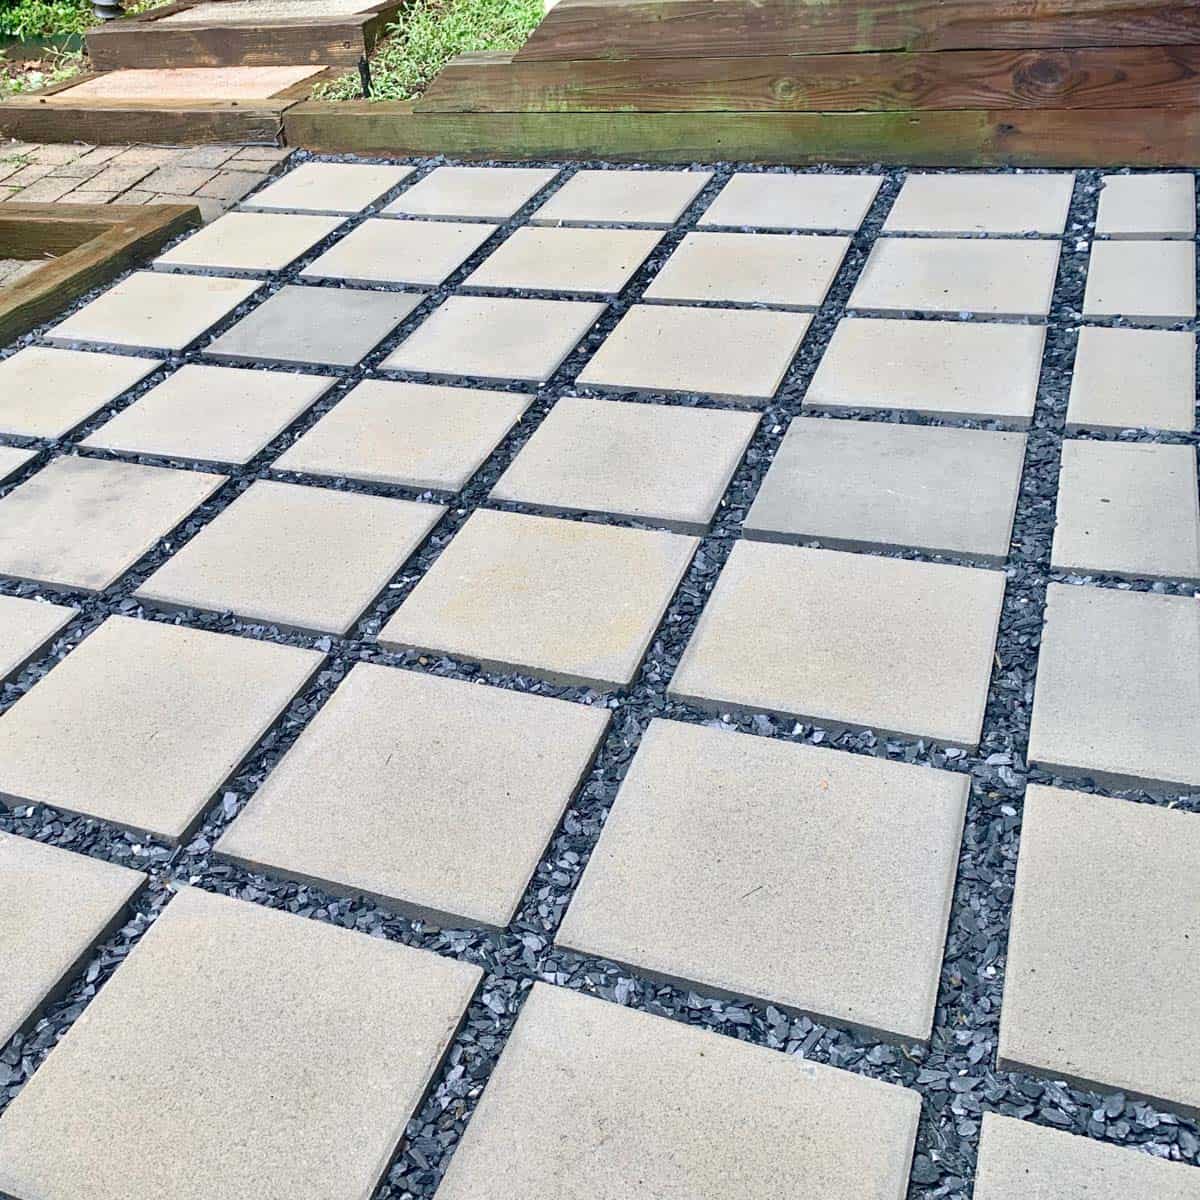
Another way to attract butterflies is by designing a garden with native plants—like we did here. And you’ll find even more in–depth information on native gardening here.
Tutorial Steps For Making A Concrete Butterfly Puddler Station
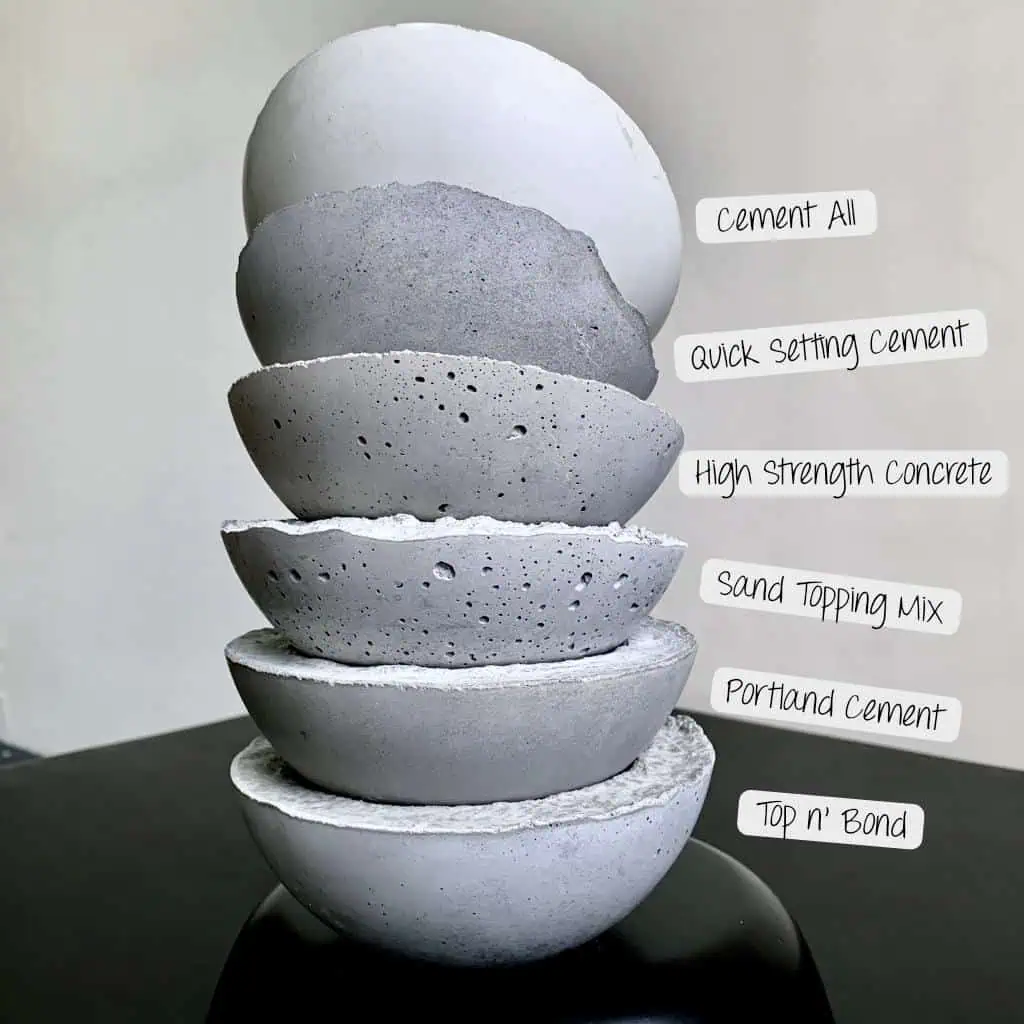
Before starting the tutorial, it may be helpful to read my article comparing the different concrete mixes and sealers– Cement & Concrete Crafts Tests!
Another important article is Making Cement Crafts Techniques & Tips with info on cement materials, mixture consistencies, demolding, safety and clean up!
Step 1. Build Up The Depth Of The Tray
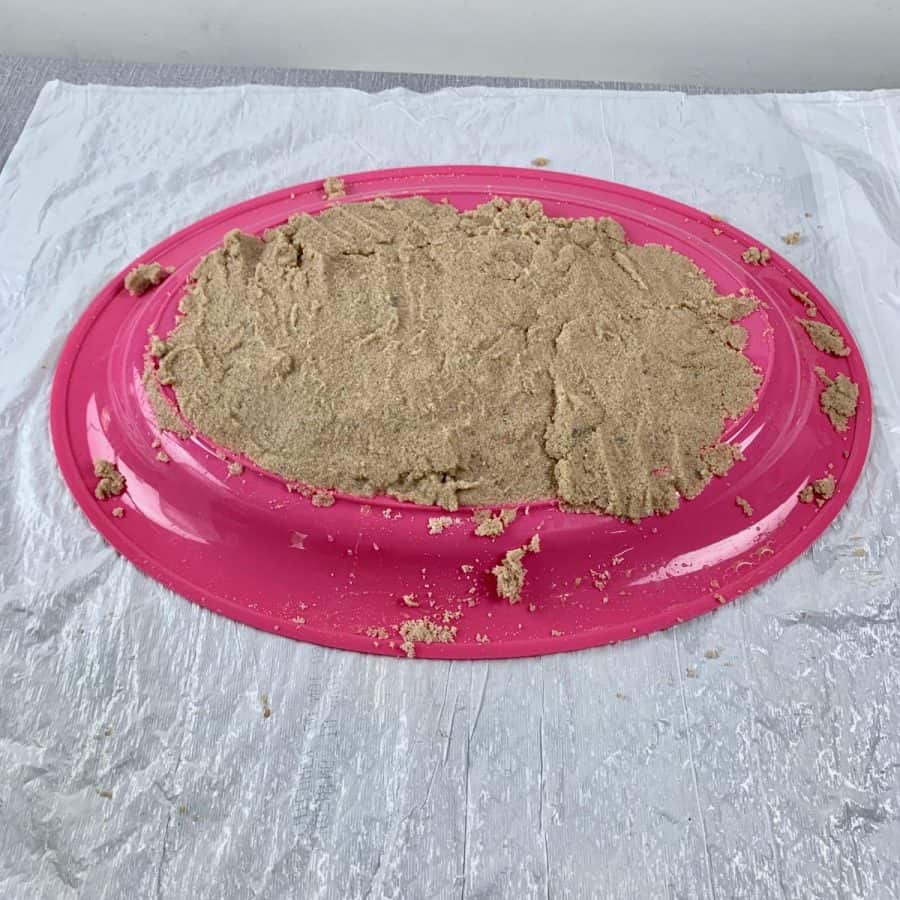
First, add play sand to a bucket and then add some water so that the sand is damp.
Now take a plastic garbage bag or plastic table cloth and lay it on your work surface and place the large tray upside down on top.
Scoop the sand onto the tray to give it a little more depth. You’ll notice your treaty probably has an edge where it would sit when it’s right side up.
Normally, if we were putting cement directly on top of this tray, when it was time to demold, we would have trouble because of this protruding edge.
The sand will eliminate this problem, plus give us the added depth we need.
Build the sand up to whatever depth you want your butterfly puddling station to be.
I made mine 3” in the center and sloped the sides so it became less shallow.

Now smooth the sand around the tray so you have nice even sides. And try to get a nice transition to where the protruding edge is.
You can measure the height of your highest point in the sand by taking two rulers and laying one flat across the top and the other horizontally on the table to see where they meet.

When you are satisfied with how your sand is molded, tear a piece of plastic wrap and place it over the sand and then spray it with vegetable oil spray.
Make this piece a couple of inches longer than the tray and tape it underneath the tray with painter’s tape to secure it. I didn’t do this but realized after it would have made it easier.
This will make spreading the cement across the sand easier because otherwise as you are spreading, you will be pulling sand back up into the cement and it may take chunks of the sand with it.
Try to get the plastic wrap smooth and tuck it under the corners as best you can.
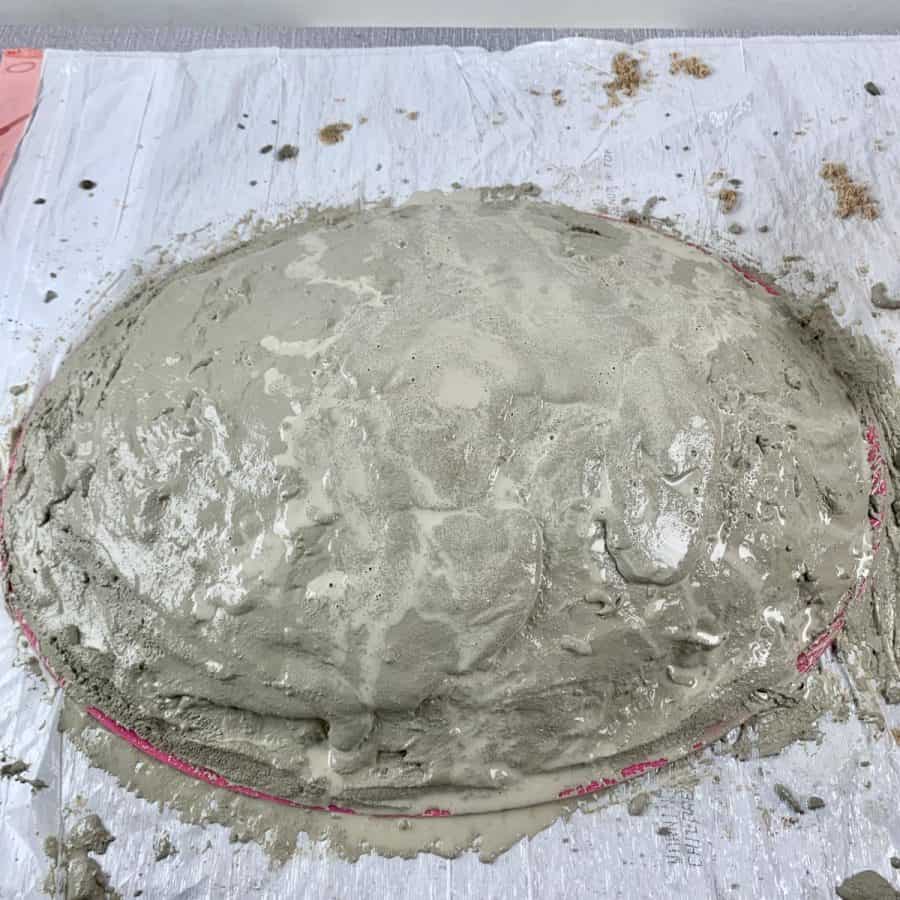
Step 2. Mix The Cement And Cast And Mold Station Base
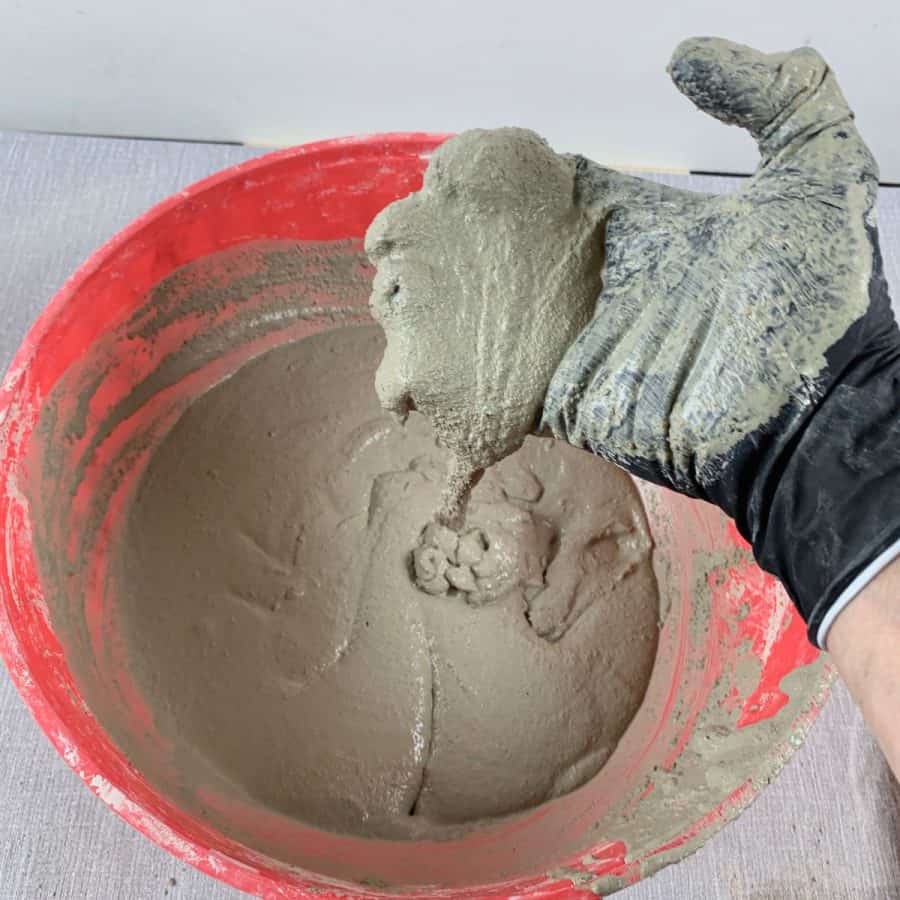
Mix the cement to a thick brownie batter consistency. This needs to be spreadable but not too runny.
Place the mixture on top of the sand and start spreading it over the mound. Continue adding more mixture and spreading.
In the end, the concrete puddler should be a little more than ½” thick, but you don’t need the very first layer to be exactly that.
Just place it on and spread it so the sand covered plastic is fully covered with cement.
Garden Planner!
Printable PDF Download
$2.99
Everything you need to plan your garden.


This will subscribe you to my newsletter where you’ll get updated when I have a new post, or tips and tricks. You are free unsubscribe at anytime.

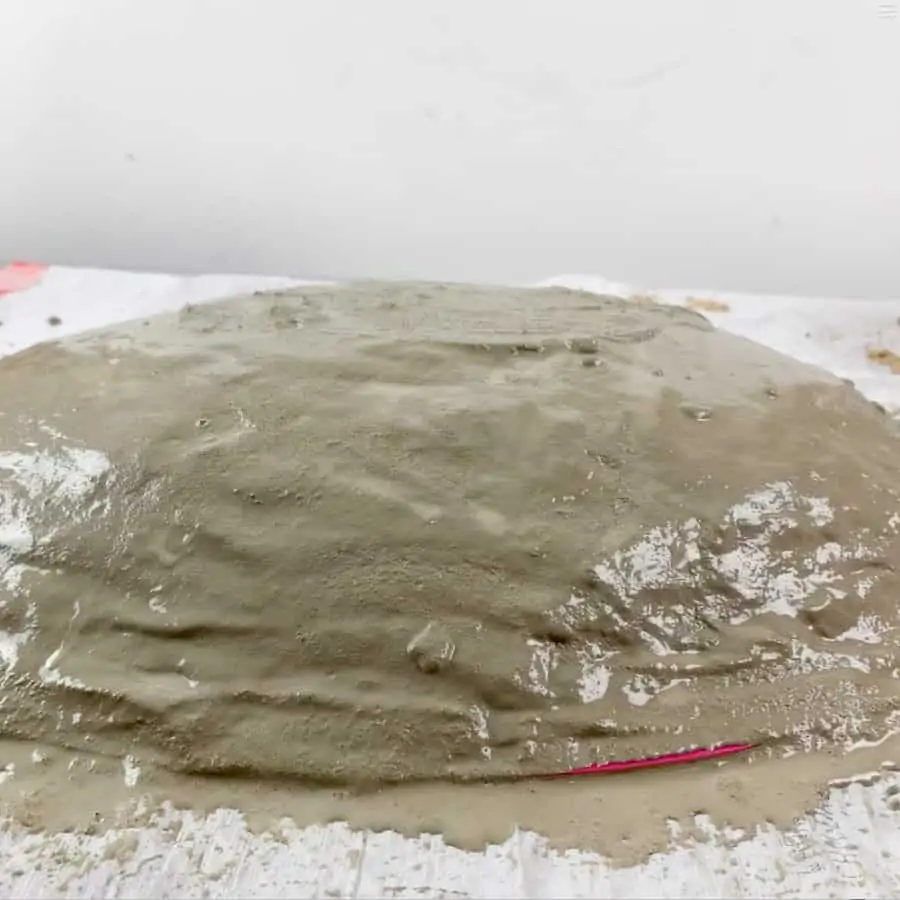
Now take a craft stick and press it into the cement in several locations around the sand.
Check to see where you need to add more cement to build it up to the proper thickness, or maybe where you need to take some away.
Pay attention to the edges and take care that these are also the same thickness.
Once you think you have it at the right thickness, then work on smoothing the bottom of the puddler out. You won’t really see this, so make it as smooth as you’d like.
Once you have it close, you can also dip your fingers in water and then place your fingers on the cement and run them over the cement for a final sort of glazing to keep it smooth.
You will want your concrete puddling station to sit flat, so depending on how much the cement has set, now is probably a good time to create a flat bottom.
To do this, the cement should be somewhat firm, but definitely not hard. Even if it’s still soft you can do this, it’s just easiest to do just as it’s getting a little firm.
Take the popsicle stick and shave the rounded part of the puddler off. Get down to it so you are eye-level and make it as level as you can.
Then take your small level and place it on top to check to see if it’s level. Shave a little more if you need to.
Unfortunately, I couldn’t find my level, so I had to eye-it.
Now let this cure. Depending on climate conditions, it will probably take about 1 ½ hours.
Step 3. Demold The Concrete
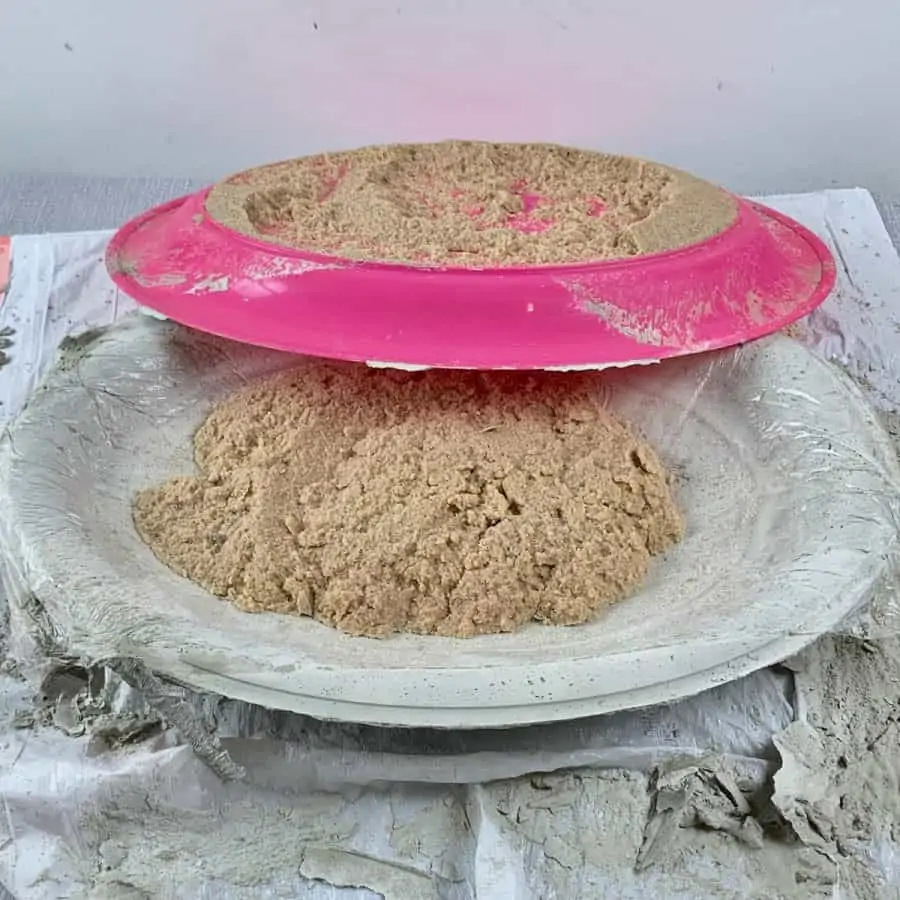
To remove the puddler from the mold, just carefully flip it over and place it right side up on the table.
You should be able to lift the tray right off. Scoop off all the sand and dust if with a rag.
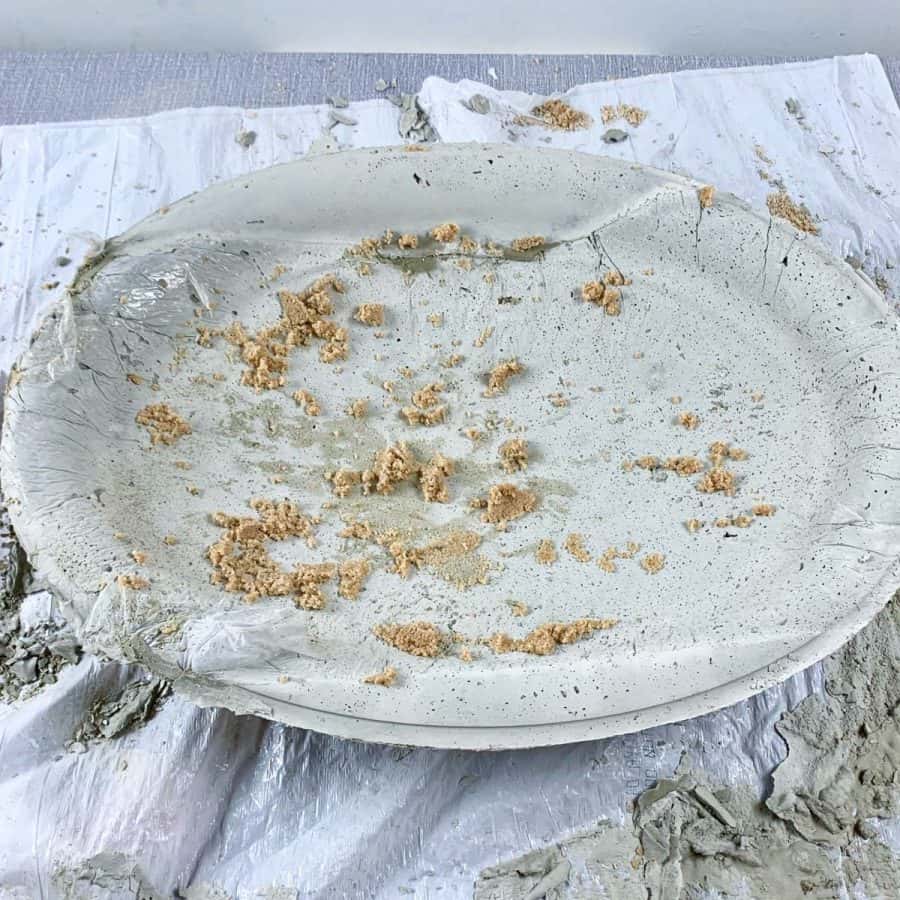
Some of the plastic wrap may stick in some folds of the cement.

If this happens, use a #60 grit sanding sponge, or a high grit sandpaper sandpaper to sand where the folds are to pull it out.
You probably have pin holes from spraying the area where the plastic wrap was, but this is normal and the butterflies won’t mind.
Sand any rough edges and then wipe it down with a wet paper towel before painting. Be sure the cement is dry before painting- see Step 6.
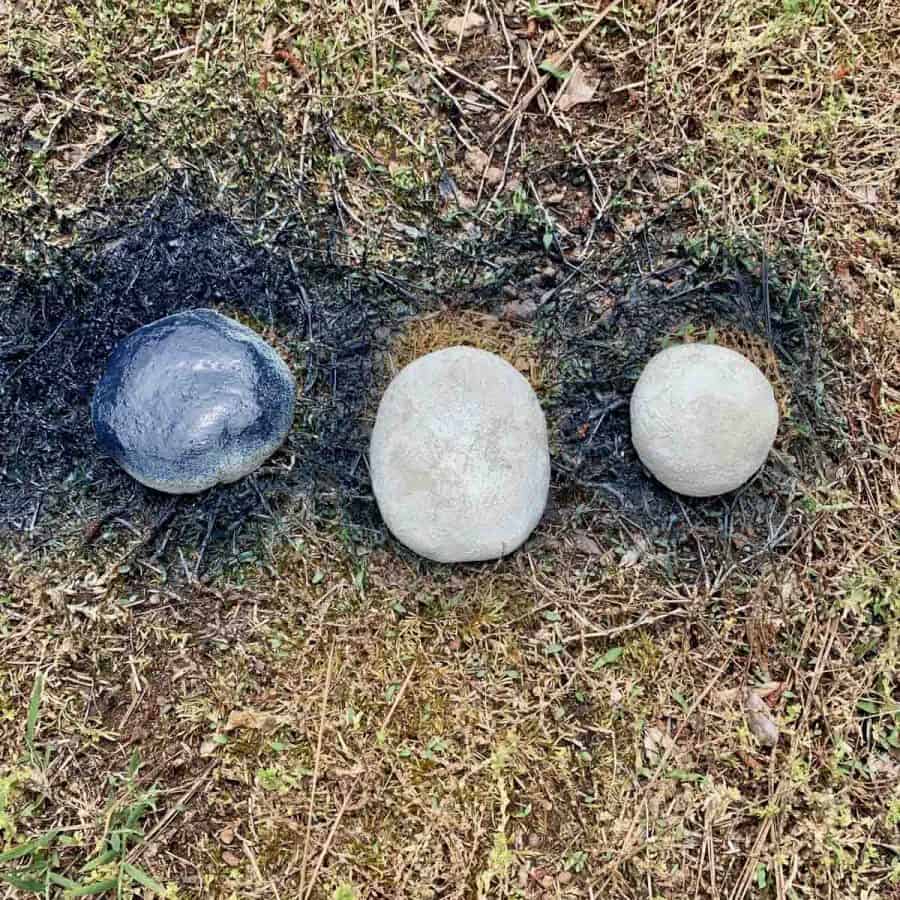
Step 4. Make Concrete River Stones For The Base- Optional

If you want to make your own concrete river stones, instead of purchasing some, then take a look at the DIY Cement Stone Planter tutorial and follow those steps.
You will skip adding pigment to the cement, as well as skip adding a space for the soil and drainage.

I made 4 different rocks, each at different heights and widths. You can paint the rocks once the cement is dry. Just follow the same instructions for the puddler below to paint the rocks.
Step 5. Paint The Concrete Butterfly Puddler

Once the cement is completely dry, paint the butterfly puddler and cement stones. I spray painted mine. First, I applied one coat of spray to the top of the puddler and of each stone.
After letting it dry, I applied a coating of the clear top coat to the stones and puddler.
I did it in this order because using the 2X acrylic paint, if I waited more than an hour to apply the top coat, then I had to wait another 24 hours to apply it.
Then after the first sides dried, I flipped everything over and painted the second sides. Again, I let these dry and applied the top coats.
Step 6. Assemble The Items For Inside The Station

By the way, you may also be interested in this concrete mosaic stained glass stepping stone.
I pre-washed my sand because some concrete accidentally got in there, but you can place yours inside the puddler while it’s dry.
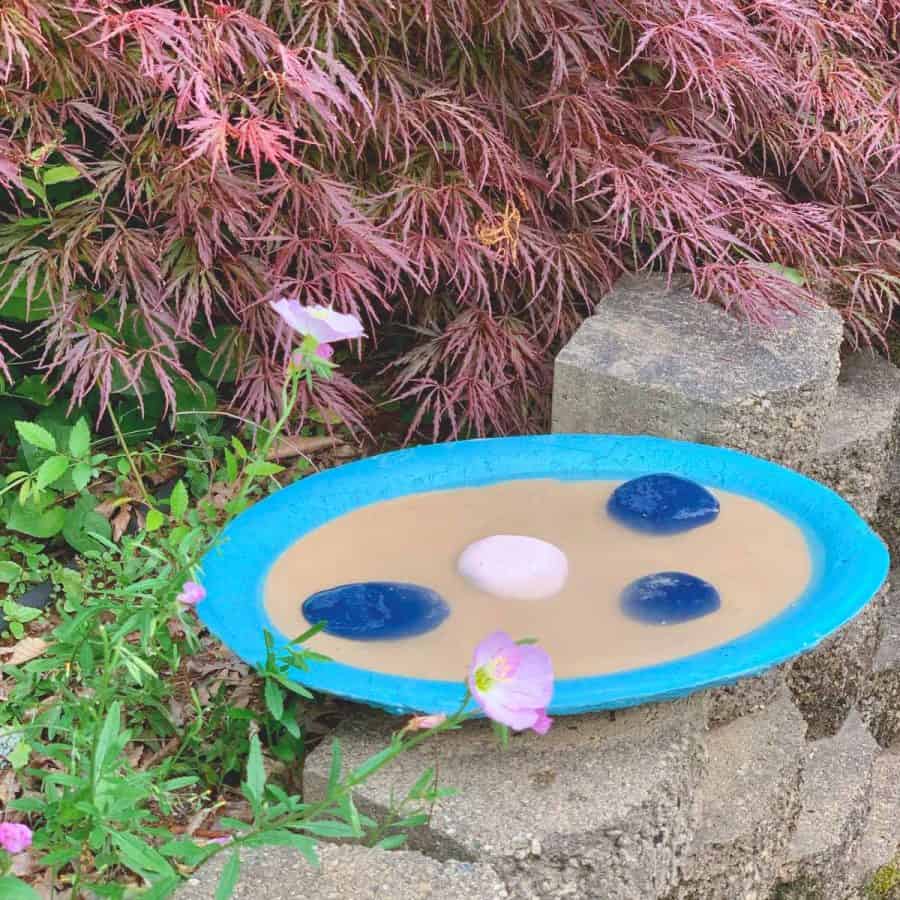
First, pour in the sand and then place your stones around the puddler in different locations.
The goal is to provide as many options as possible for the butterflies to land on, depending on how full the concrete puddler is.
Remember, they can also land on the sand.
The location you place the puddler should be near or near plants that attract butterflies, or a butterfly garden (if you have one).
Once it is in its final location, fill up a bucket or a watering can with water and pour it in. I filled mine to just below the rim.
I decided to keep mine in a location where I see them flying frequently. It’s not in the wide open, but I think it’s still in good view for the butterflies.
It can take a while for butterflies to find the puddler so give it several weeks before trying a new location. Much like birds and bird baths, patience might be needed.
If you want also attract birds to your garden, here are 10 great squirrel proof feeders to get you started.
DIY Concrete Butterfly Puddler- Attract Butterflies!
Make a concrete butterfly watering station to attract butterflies to your yard. Help our pollinators out, by providing them.
Materials
- Cement
- Acrylic Spray Paint
- Sand
Tools
- Please see the full materials list above the tutorial for details and links.
Instructions
- Build Up The Depth Of The Tray To Make It Deep Enough
- Mix The Cement And Cast And Mold The Puddling Station Using Sand
- Demold The Concrete Butterfly Puddle Station
- Make Concrete River Stones For The Bottom Of The Station- Optional
- Paint The Concrete Butterfly Puddler Using Spray Paint
- Assemble The Items For Inside The Puddler- Including Rocks And Sand
Don’t forget to Pin it for later!