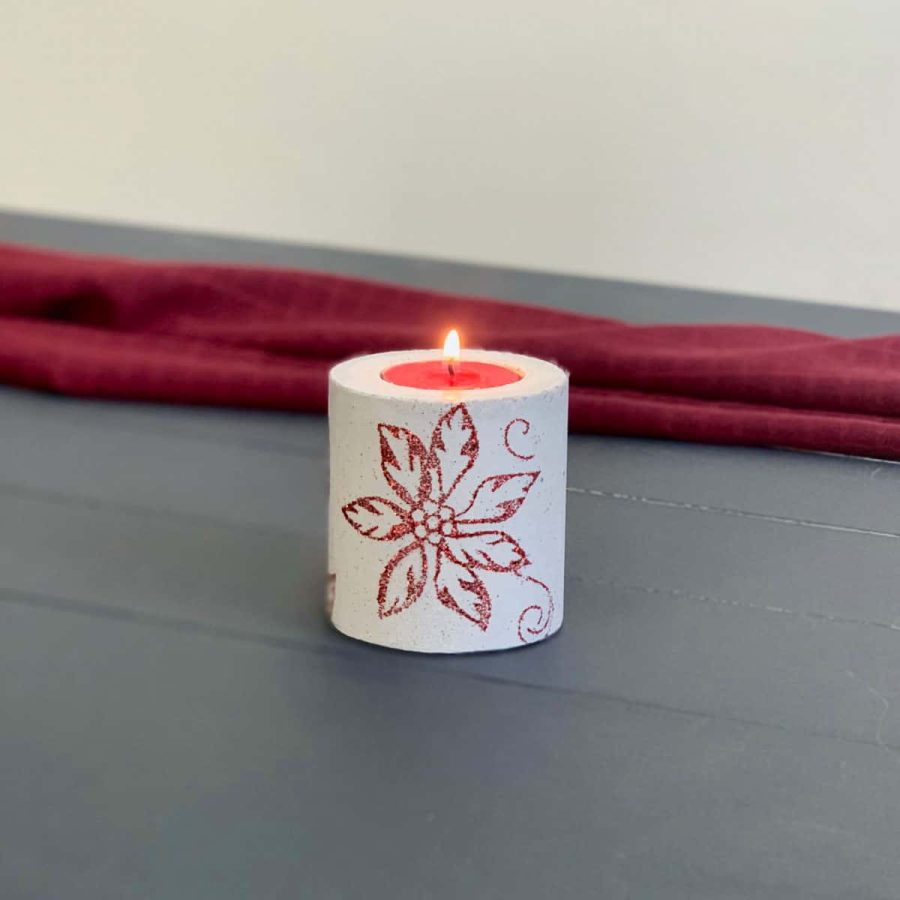
DIY White Concrete Candle Holder –A Great Gift Idea
Here’s a tutorial for how to make a DIY white concrete candle holder. This is a versatile design and is perfect as a gift.
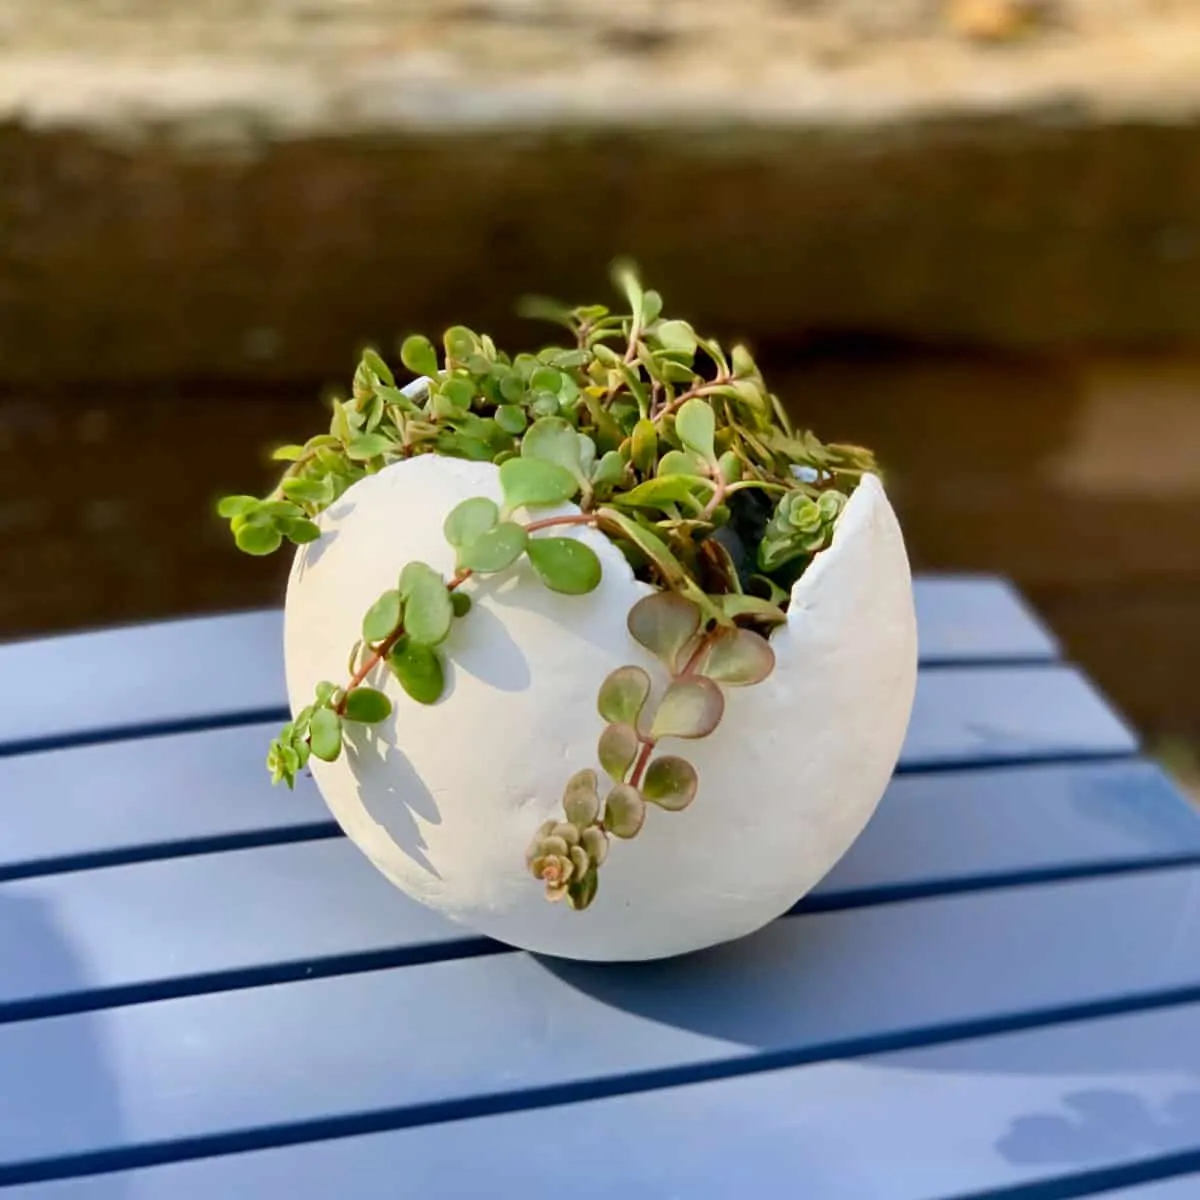
Here’s another sweet idea for a handmade Christmas gift- a white concrete candle holder for tealight candles.
Concrete decor has unlimited options in what types of handmade products you can make.
If you were wondering… yes, candle holders made with concrete are the same as concrete candle vessels and concrete candle jars. You have found the right tutorial!
And this particular candle holder design is especially versatile for use in home decoration because it can be made into an “anytime of year” candle instead.
Rather than decoupaging it with Christmas mesh, you could use any decorative mesh for a unique look, or skip the mesh altogether.
You can also replace the tealight candle and just switch the color from red to any other color.
I bet you’re wondering —is concrete safe for candles? Yes, concrete is safe for candles. But it’s important to note that high heat can cause cracking with certain types of concrete cement.
However, a candle generally doesn’t produce enough heat to cause cracking.

The thing you want to make sure is that the concrete is sealed so that it is protected from the oily residue leftover from candle wax.
How do you seal concrete candles? You seal concrete candles the same way you seal concrete by using an acrylic based sealer.
Some sealers do a better job of sealing than others. I have found this concrete sealer to do a very good job of preventing oil from candle wax from staining the concrete.
Get started early this year and make this unique Christmas gift that people will never believe was handmade.
Here is another great idea for a Christmas project, little red and gold concrete bowls.
Some of the links on this page have been provided as a convenience for finding materials. These links may also be affiliate links. As an Amazon Associate I earn from qualifying purchases, at no extra cost to you.
I only recommend products I’ve used and loved, unless otherwise stated. Click here to read my full disclosure policy.
DIY Difficulty Level | Easy
Materials For A DIY White Concrete Candle Holder Christmas Gift
- White cement
- Disposable bowl
- Disposable cup
- Durable nitrile gloves
- Safety glasses
- Safety mask– rated for silica dust
- *Smartwater bottle- 20 oz.
- Utility knife
- Aluminum flashing (14” long and about 1” wide)
- Blue tape
- Packing tape
- Permanent marker
- Hot glue gun
- Acetate sheet
- 4×4” tile
- Mesh ribbon with Christmas design
- Mod Podge
- Needle nose pliers
- White felt
- Scissors
- Standard tealights
- Foam brush
- Concrete sealer
*Materials Note:
You can use a silicone mold to make this instead of a plastic mold, then you can skip the first step.
However, you’ll save money using the plastic bottle and it will be quite easy if you follow my straightedge method below. The bottle will also give you a smooth surface and shinier surface than the silicone will.
Also, I don’t recommend using a release agent like a cooking spray, especially something like that or vegetable oil because they may cause the white cement to discolor or cause slight variations in color.
In fact, with the plastic bottle, you will be cutting away the plastic from the cement when you demold it, so a lubricant isn’t necessary.
With a silicone mold, you may need lubricant, in which case I recommend a clear one, like mineral or baby oil.
Before starting the tutorial, it may be helpful to read my article comparing the different concrete mixes and sealers– Cement & Concrete Crafts Tests!
Another important article is Making Cement Crafts Techniques & Tips with info on cement materials, mixture consistencies, demolding, safety and clean up!

Tutorial Steps For A DIY Concrete Candle Holder Christmas Gift
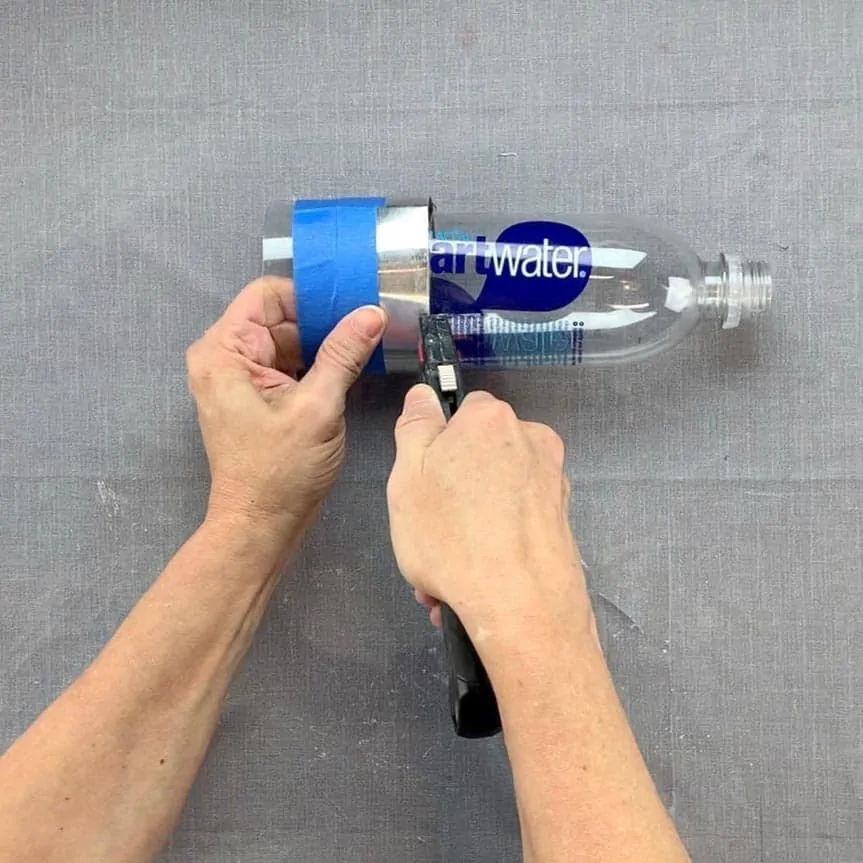
Step 1. Make A Straightedge To Help Cut The Plastic Bottle

Decide what height you want to make the concrete candle holder. I made mine 2 ¾” tall because the poinsettia on the mesh Christmas ribbon I had was 2 ½” tall.
By the way, you can also turn this into a pillar candle holder. It doesn’t need to be short, just follow the same instructions, and just cut the bottle to about 5 ½” tall.
Now you will need to cut the plastic bottle to that height- let’s assume 2 ¾”. The straighter you can cut the bottle, the straighter your candle will be.
You can make a homemade straight edge by taking a piece of aluminum flashing that is long enough to wrap around the plastic bottle twice. This should be about 14”.
Cut the flashing to 1” x 14” but make sure that one side of this 14” is cut from the factory edge so you know that edge will be square.
Now take a piece of blue tape and tape it lengthwise along that non-factory cut edge and let it overhang a couple of inches longer on each end.
This will help you secure the straightedge to the bottle without it slipping.

Step 2. Make The Mold For The Concrete Candle Holder
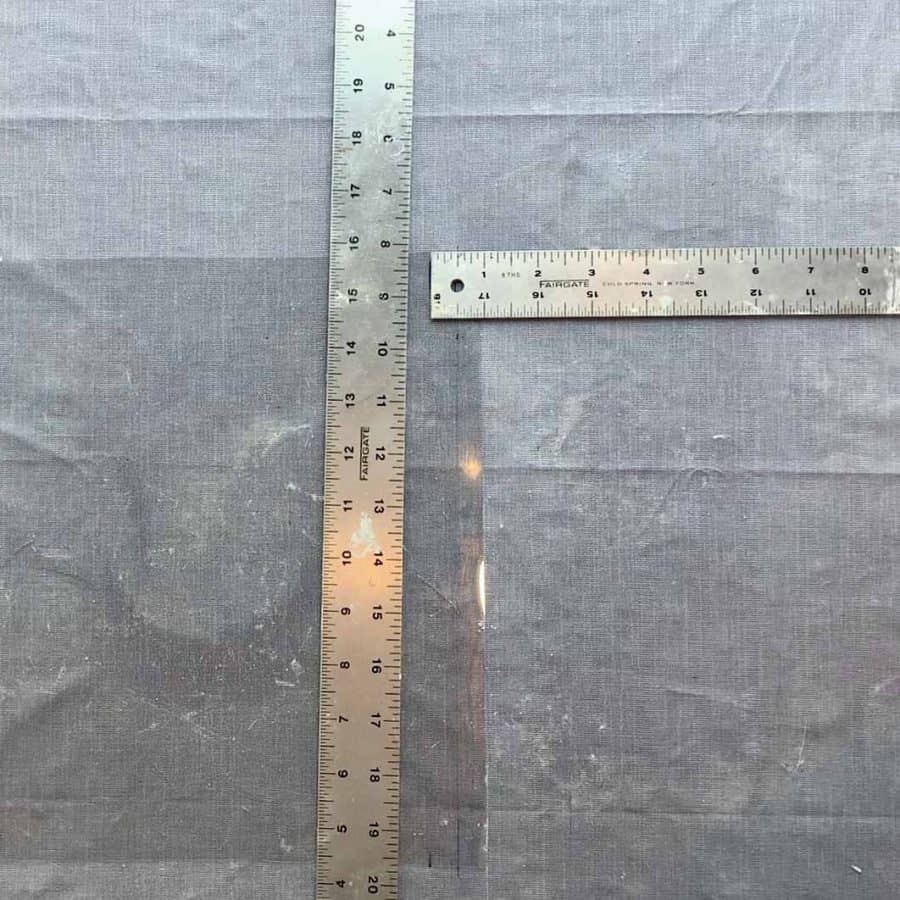
Once you have your homemade straightedge, measure from your work surface, up the bottle to about 1” from the bottom. Mark this in three locations around the bottle.
The reason we are not just using the bottle’s rounded bottom for the bottom of the white concrete candle holder is because when you go to decoupage the fabric, the curved edge will cause the fabric to gather and it won’t give you a nice clean look.

Wrap the straightedge around the bottle and use the utility knife to cut the bottle.
Be sure to hold the blade right up against the aluminum while cutting.
Now place the cut end of the bottle on the work surface, and measure up 2 ¾” and again mark this in three locations around the bottle.
Cut this the same way you did for the bottom.
Note: Take care to wrap the straightedge around so that it covers the part of the bottle that you will be using for the mold.
This way if you make a mistake, the cut will go into the part of the bottle you aren’t using.
Step 3. Make The Inner Concrete Mold
We won’t be able to use the aluminum candle holder for the inner mold because the metal will react with the concrete/cement and cause it to crack.
To get around this we will protect the candle (so it doesn’t melt while curing) with a strip of acetate to temporarily act as the tealight holder.
Measure the height of the candle with the holder. Many holders are ½” high but the colorful ones I had for this project were just over ¼” at 5/16”.

Next, take a piece of string and wrap it around the candle holder 3 times, with just a touch of overlap.
You’ll need a strip of acetate that is that length- mine was about 17”.
The reason for doing this is so that the hole in the concrete holder will be wide enough when finished to fit the candle with the holder.
You won’t want to have the candle without the holder sitting in the hole or it will just be a mess and not fully burn.
The three wraps of the acetate sheet end up being the perfect diameter.
If your piece of acetate isn’t as long as 17”, then just cut another strip to make up the difference.

Wrap the acetate strip(s) around the actual wax candle- not the tin holder, and secure it with a narrow piece of packing tape.
Step 4. Make The Base For The Concrete Mold
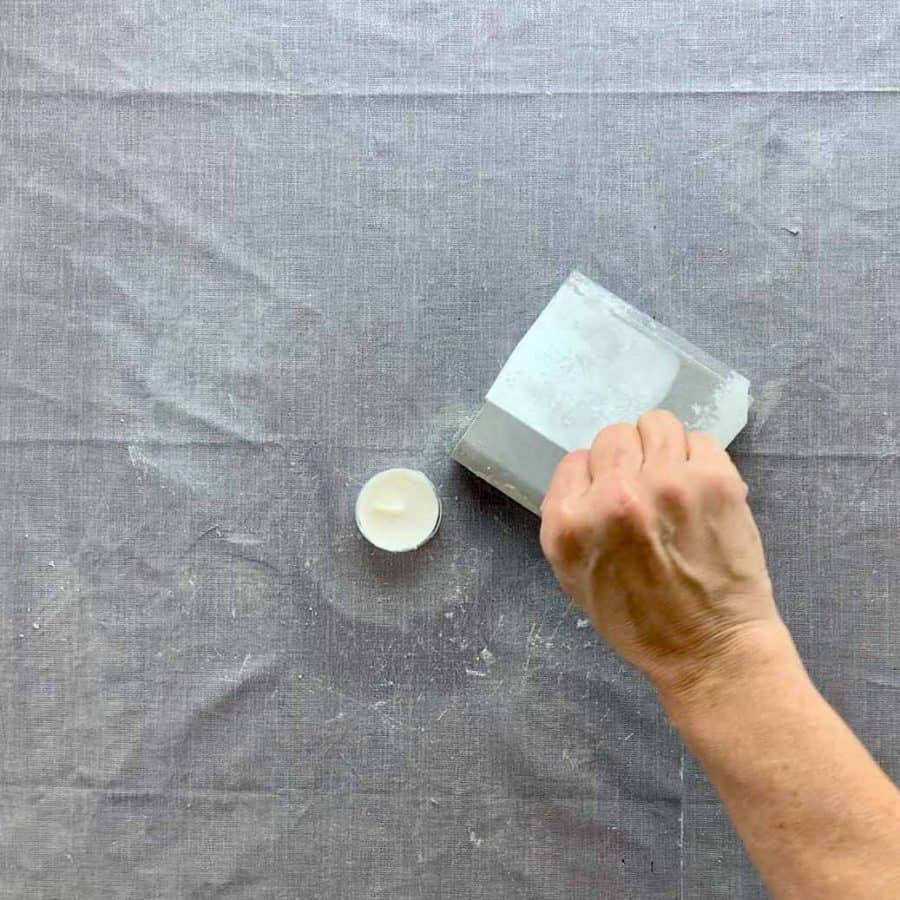
Cut a piece of acetate about 4 x4” and use spray adhesive to adhere it to the 4×4 tile. This will be the base for the concrete candle mold.

Now take the aluminum piece of the candle holder, place it upside down on a piece of acetate and trace it and then cut it out.

Next, heat up a hot glue gun to a low temp. Be sure it’s a low temperature or the glue will melt the candle.
Carefully add glue to the top of the candle and keep the glue inside the acetate collar because if it gets on the outside, you will see this mark when you demold it.
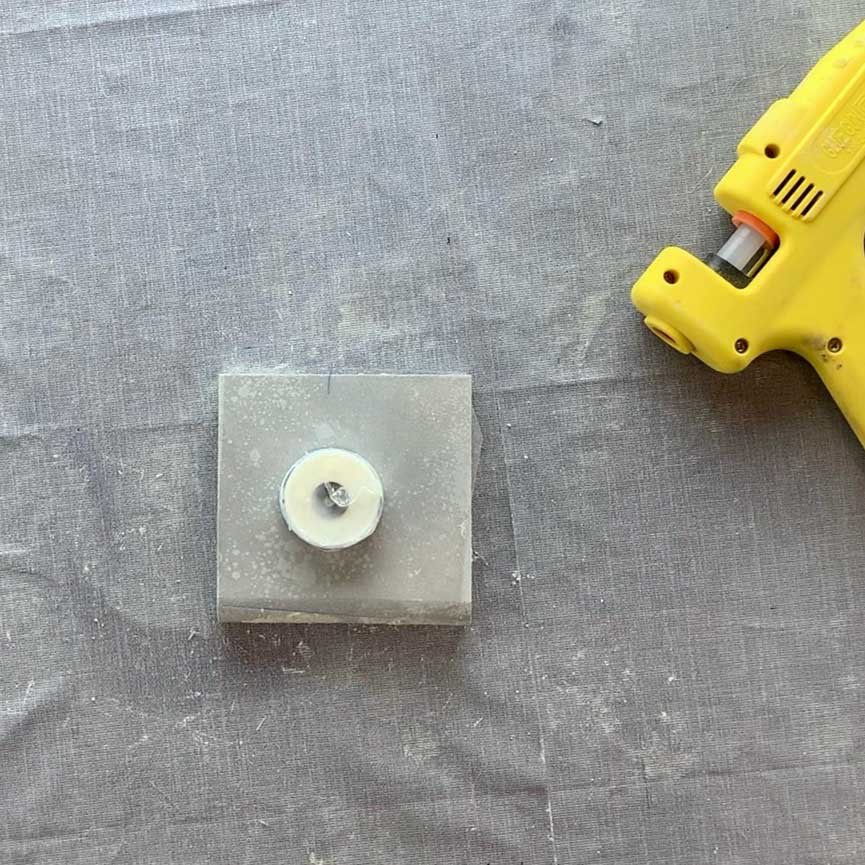
Now place it glue-side down onto the middle of the acetate/tile base.
Next, take the circle you cut out and just dab a small amount of glue on the bottom of the candle- now facing up, and press the acetate circle onto it.
It just needs to be lightly secured as this will protect the candle from melting a bit while curing and to not get wax inside the hole.
Step 5. Secure The Outer Mold To The Base

Take the outer form and place it over the glued candle. Try to get it centered and mark this.
The plastic is very slippery on the acetate, so I found it easiest to just mark the outer edges of the bottle in four spots around it and then add a dab of glue in those spots first.
Then I let those dry, which kept the bottle from slipping while I finished glueing.
Alternatively, you could caulk this instead of glueing. Caulk usually produces cleaner lines than glue.
If you caulk this, use 100% silicone caulk and wait a couple of hours for it to dry before moving on to the next step.
This kept the bottle from moving while I was glueing all the way around it.
Step 6. Mix And Cast The White Concrete
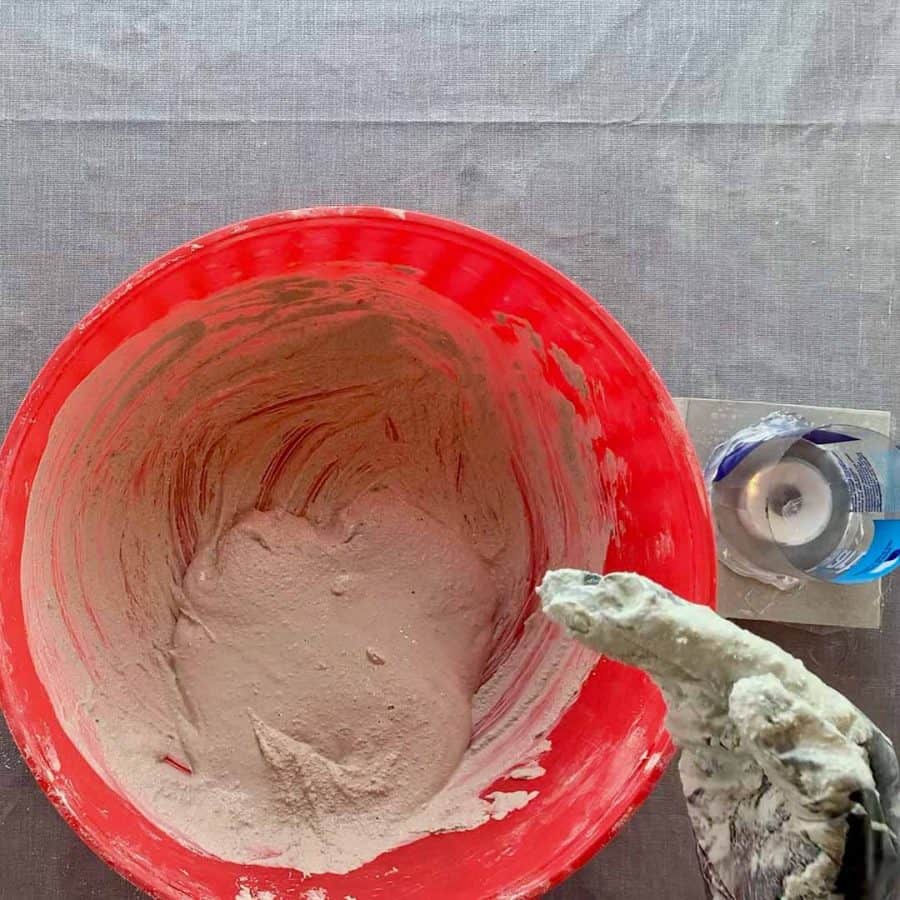
The cement mix should be a thick milkshake consistency. Make sure there aren’t any lumps and then pour it in the mold.
Be sure the cement is level within the mold, and then shake and tap the tile on your table top or work surface and tap the sides.
Do this until most of the air bubbles rise and release.

Now set this aside to cure for at least 16 hours.
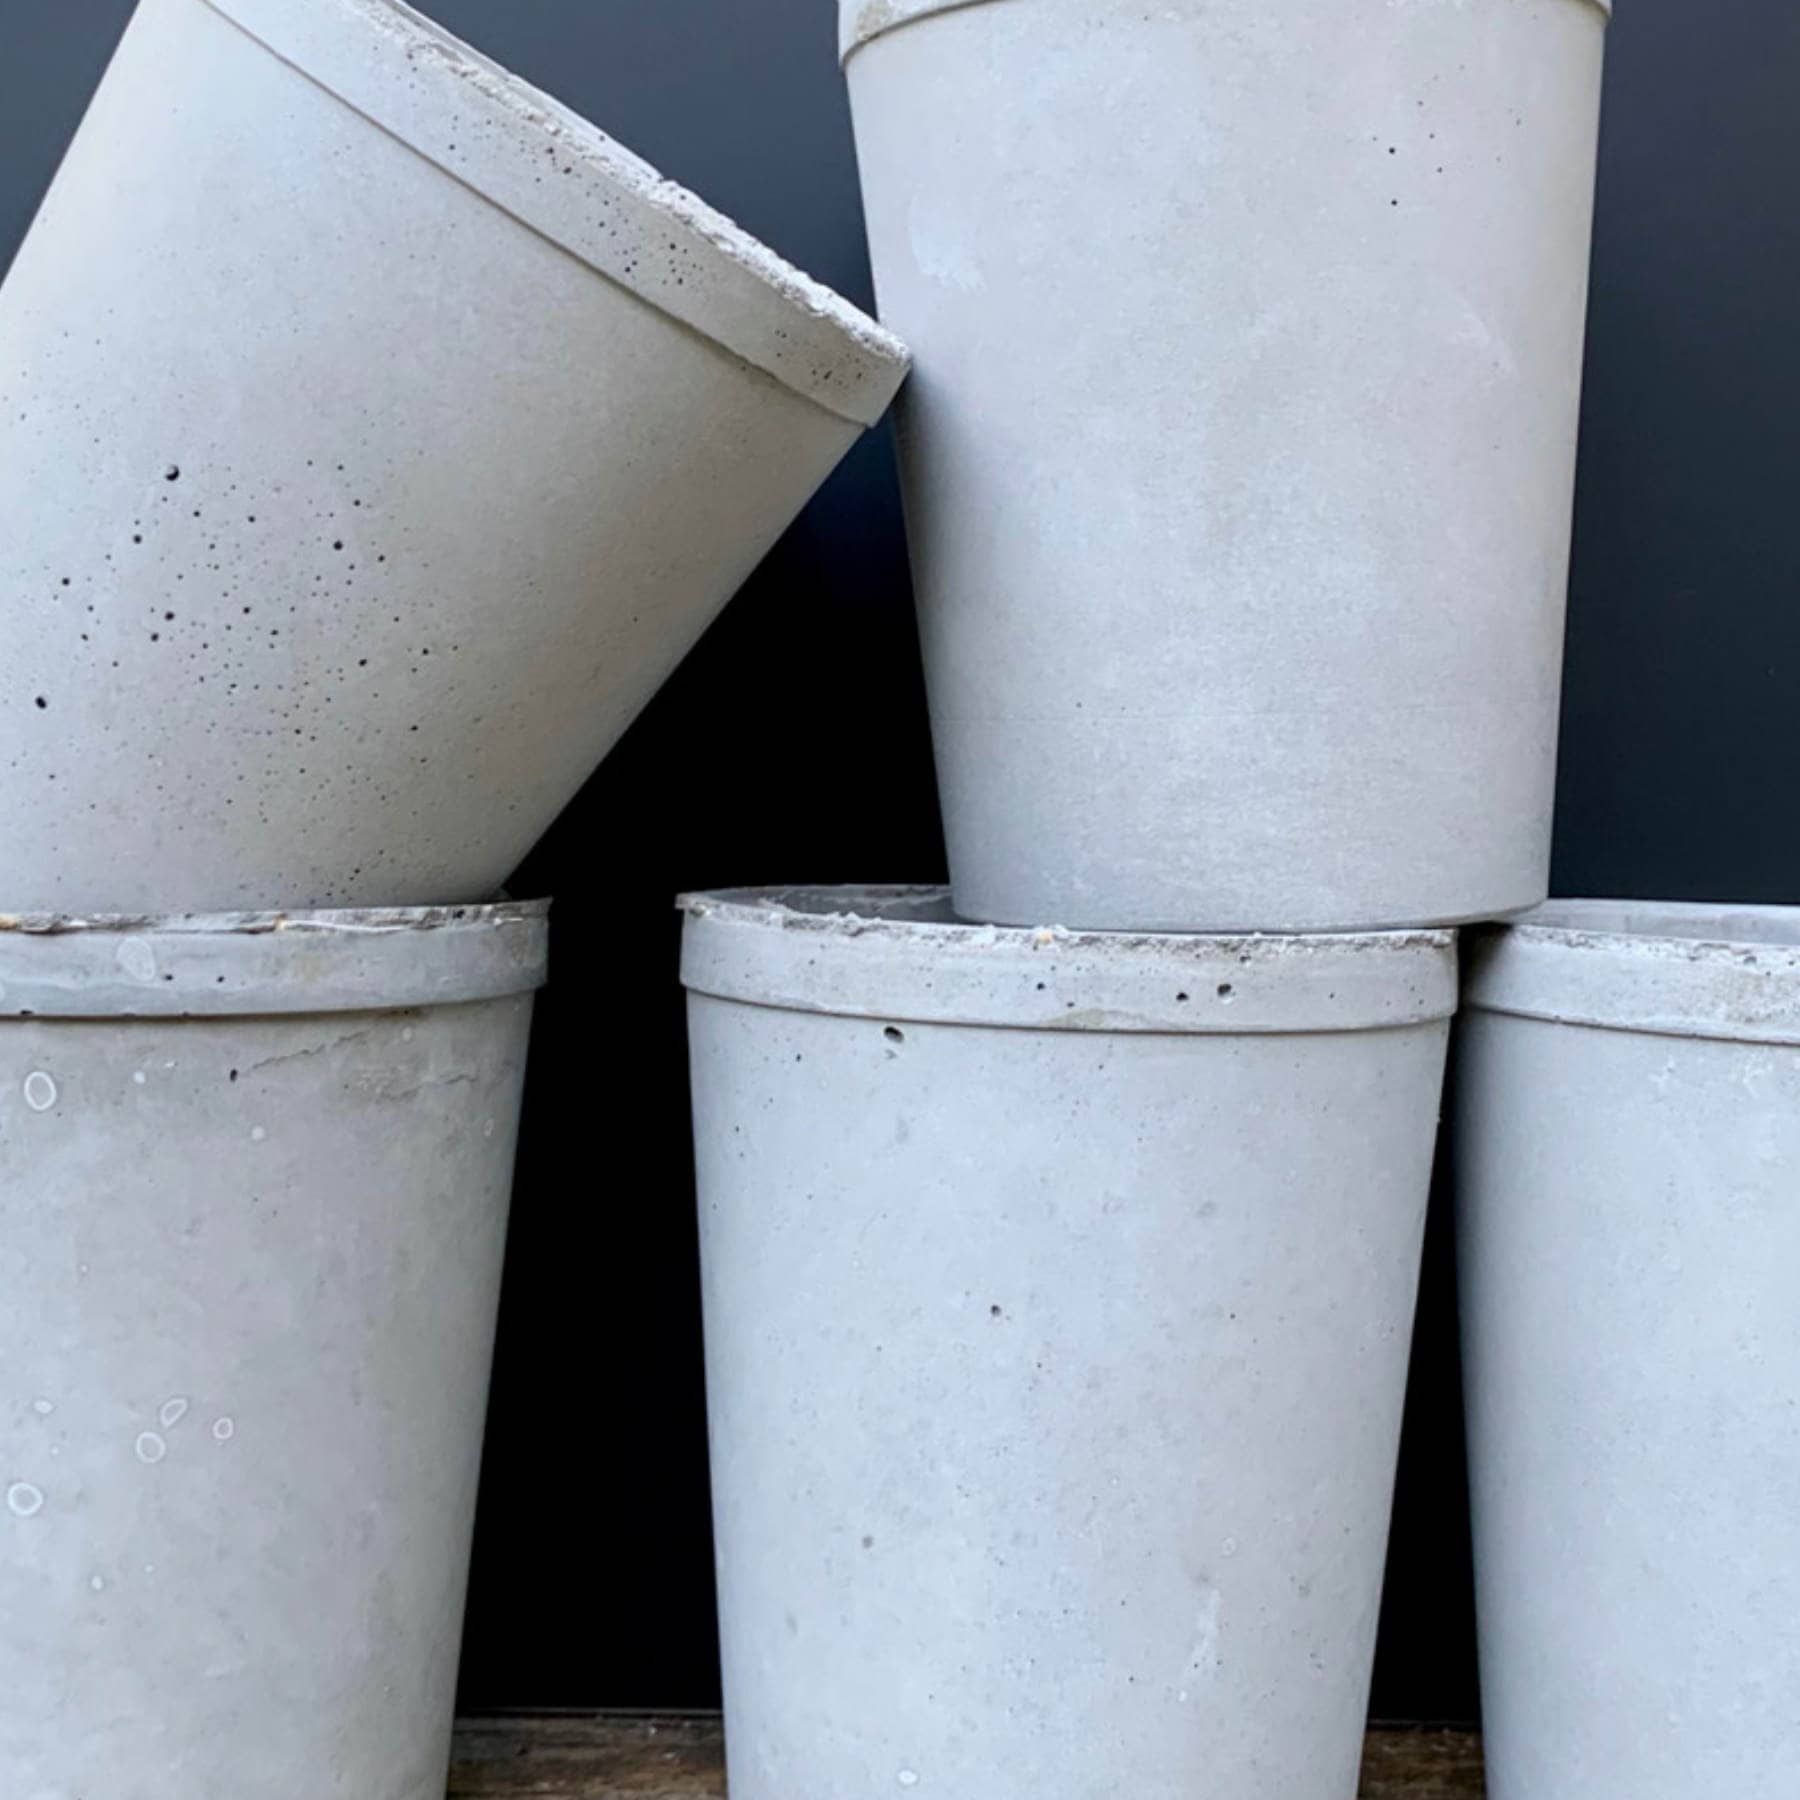
Step 7. Demold The Candle Holder

Pull the concrete candle holder off of the base and remove the acetate piece.

Now carefully use the utility knife to cut through the top edge of the plastic.
You should be able to peel off the plastic once you have gotten a piece started.

Next, grab the wick of the candle and pull it out. If you can’t remove it that way, then grab some tweezers or needle nose pliers and pull out the acetate that’s wrapped around it.


Test to make sure a new tea light candle and aluminum holder will fit into the hole. If it’s a little bit off, then use 220 grit sandpaper to sand the edges.
The edges may be rough anyway, so go ahead and sand those.
Step 8 | Seal The White Concrete Holder
Wait another day so that the concrete has completely dried and then you can seal it.
To seal it, use a foam brush and apply a coat of the acrylic sealer to the entire candle holder. Wait for this to dry 4 hours before applying a second coat.
You should apply the second coat to the top, and you may also want to play it safe and apply the second coat to the sides as well.
The sealer should be completely dry before you decoupage the mesh holiday fabric onto the concrete candle. I waited several hours before decoupaging.
Step 9. Decoupage The Christmas Mesh Onto The Concrete Candle Holder
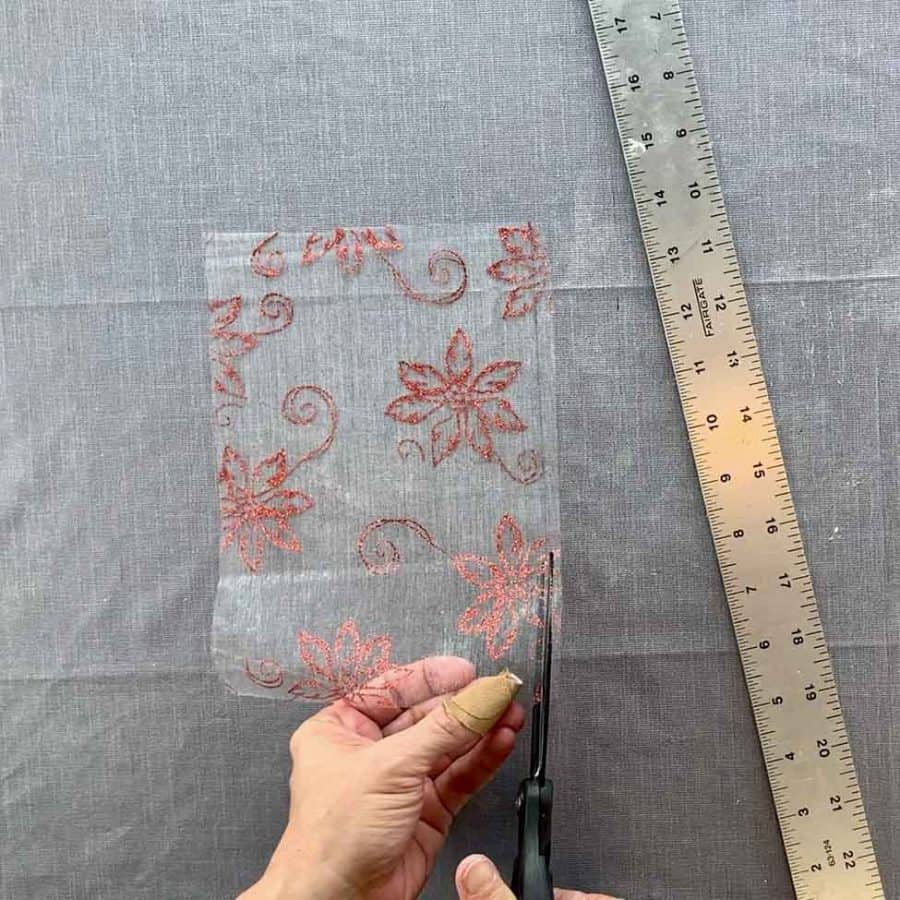
If you are using the same mesh I have, then you may have planned on having one of the poinsettia’s show up fully on the candle.
The poinsettias are off center and so you will need to cut the fabric so that you can get one that will be in the middle.

Wrap the fabric around the candle and find the location where a poinsettia is in the middle. Then mark this on the fabric.
Also, mark the length and height you will need to fit the candle.
Be sure to let the mesh be about ¼ – ½” longer when wrapped around the candle, this will be easy to trim off after decoupaging it.

I find it easiest to smooth the glue with my finger, rather than using a brush.
And being a Christmas gift, you’ll want the Mod Podge to be as smooth as possible so that it doesn’t leave marks on the cement.
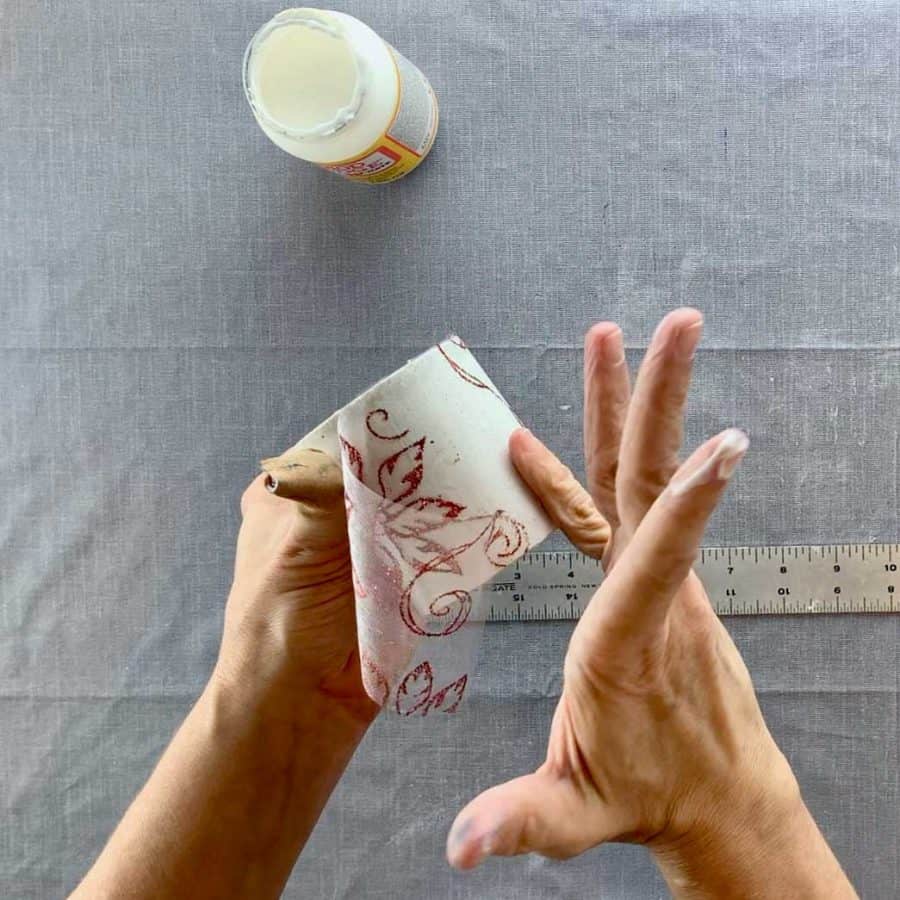
Start by spreading some glue on just a couple of inches of the candle from top to bottom. Then take the fabric and line it up carefully and smooth it onto the glue.
Continue to do this, only a couple of inches at a time.
Note: This particular Christmas mesh has lots of sparkles.
I had a little trouble spreading this without getting, even more, sparkles onto the parts of the candle that were supposed to be the transparent mesh- where there wasn’t the red design.
The main reason for this was because I had a cut on my thumb and the bandaid was getting in the way.
If you want to avoid this, I recommend doing a test run on something else, like the plastic bottle that is left over from the outer mold.

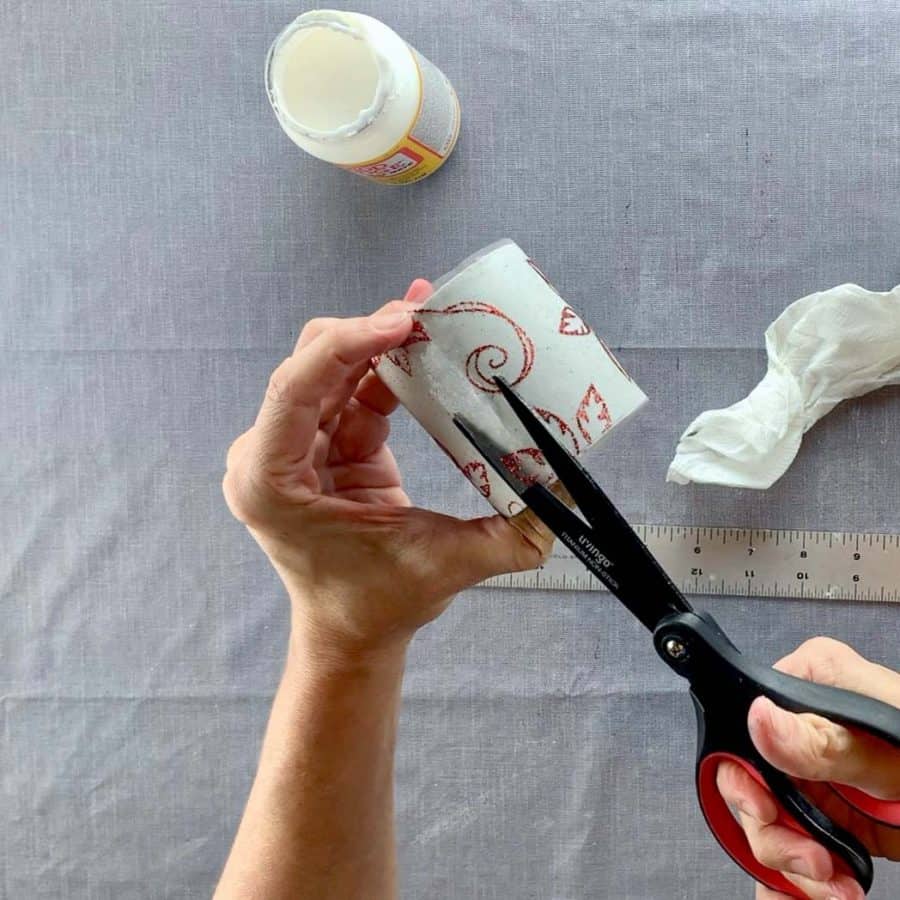
Once you get to where the seam is, glue one end and then trim the overlap.
Step 10. Add Felt And The Candle

Cut a piece of felt that is about 1/4″ narrower than the bottom of the candle, so it is somewhat recessed. And finally, add a red candle and wrap up your handmade Christmas gift.
Want more? Here’s a list of 12 concrete candle holder ideas!
For other ideas on what to make as Christmas gifts, check out the other tutorials in this series-
Ribbed Concrete Christmas Planter
Lightweight Air Dry Clay Planter With Ribbing
Concrete Burlap Bag Planter
Or try this diy candle holder made from clay!
And you must check out this list of 25 concrete gift ideas that are handmade.
Don’t forget to Pin it for later!


DIY White Concrete Candle Holder For A Christmas Gift
Handmake a white concrete Christmas candle holder. Here's an easy tutorial for making this fun concrete craft to give as a Christmas gift.
Materials
- White concrete
- Mesh with a holiday design
- Tealight candle
Tools
- Please refer to the full list of materials above the tutorial.
Instructions
- Make A Straightedge To Help Cut The Plastic Bottle So It's Straight
- Create The Outer Mold For The Concrete Candle Holder By Cutting The Bottle Using A Utility Knife
- Make The Inner Concrete Mold Using An Acetate Sheet
- Create The Base For The Concrete Mold By Gluing Acetate To A Tile
- Secure The Outer Mold To The Base With Glue
- Mix And Cast The White Concrete
- Demold The White Concrete Candle Holder By Pulling The Concrete Away From The Base
- Let The White Concrete Cure Overnight
- Use The Christmas Mesh To Decoupage Onto The Concrete Candle Holder

These are so cute. I love the idea you could do custom ones in any color.
Hi Rosemary,
Thanks! I know, so many options!