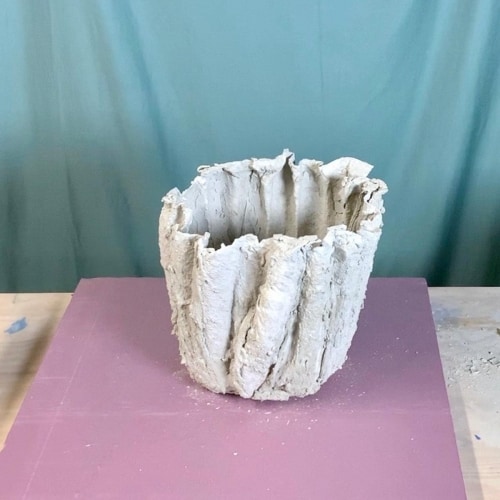
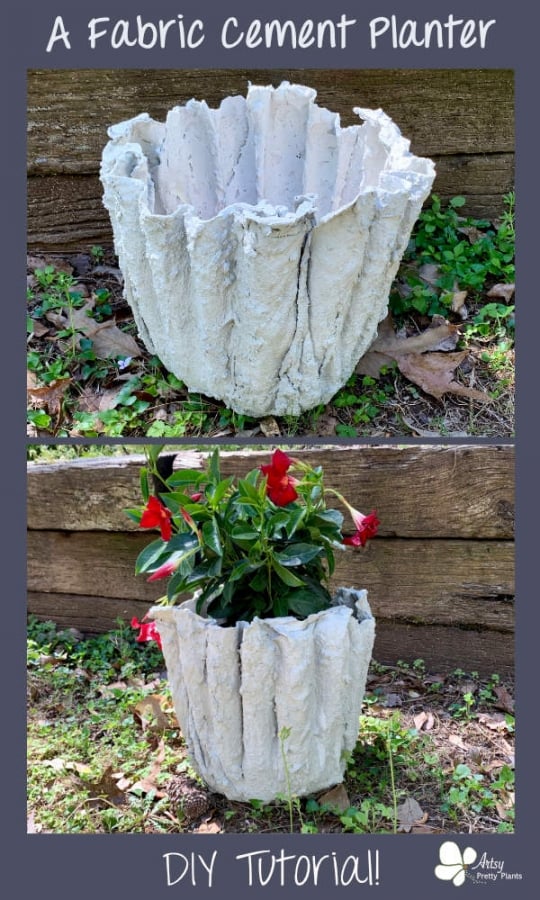
Cement Draped Fabric Flower Pot
A tutorial for how to make a cement fabric flower pot with draped cloth.
Have you needed a larger planter? With gardening season here, I thought making this fabric draped flower pot would fit the mold- so to speak. 🙂
I really wanted one that emphasizes curves, so I decided to add the balloons. Plus the balloons give the flower pot more girth.

You can totally skip the balloons all together and it will reduce the amount of time it takes in half. This is another fun cement crafts project.
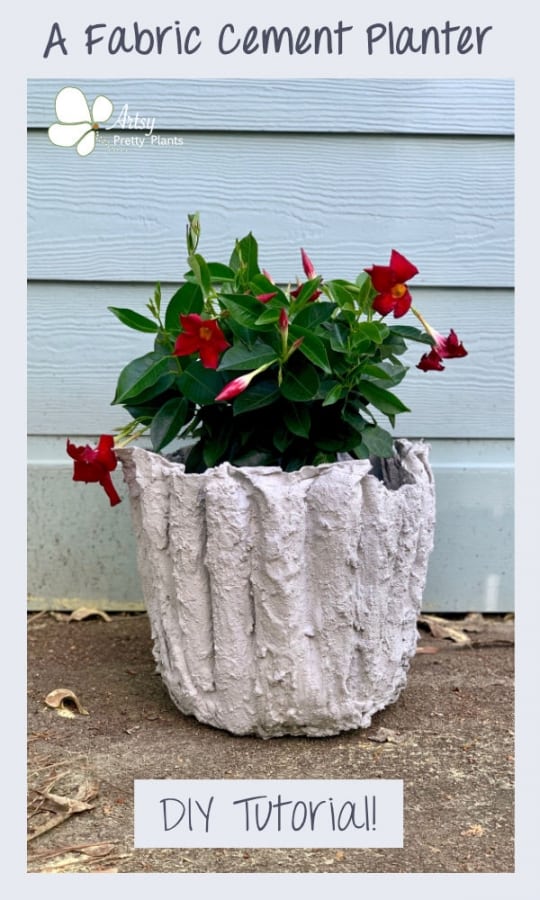
When I finished, and realized this is supposed to be a flower pot, I kinda panicked. Flowers?
I know practically nothing about flowers- what do I put in here? It’s taken me a while just to start figuring out succulents. I think these look nice though!
DIY Cement Fabric Flower Pot Video
Please click the button to subscribe to my YouTube channel and be notified when I have a new video tutorial!
DIY Difficulty Level | Easy
(but the balloons make it tricky, just having to size them)
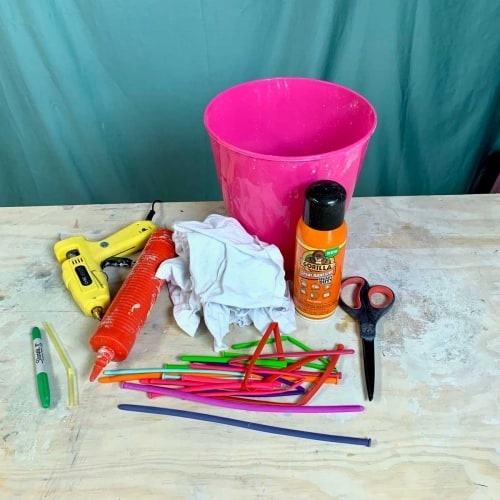
Materials For a DIY Cement Fabric Flower Pot
- Cement, Rapid Set
- Disposable bowl- large
- Disposable cup
- Safety glasses
- Durable nitrile gloves– I like these because they are so durable, you can rinse and reuse and end up costing less in the long run
- Safety mask
- Long balloons
- Bucket- (Dollar Tree) make sure it is smooth and doesn’t have a rim that sticks out or you may have trouble demolding it (home depot types of buckets have this rim)
- Scissors
- Drinking straw
- Balloon pump
- Spray adhesive
- X-acto or craft knife
- Sharpie marker
- Power drill- may not be necessary
- Fabric- You can use many types of material, but I wanted my planter to look relatively smooth so I chose to use cotton t-shirt material. For a more in-depth assessment of how different fabrics look when dipped, check out Made By Barb’s fabric tests.

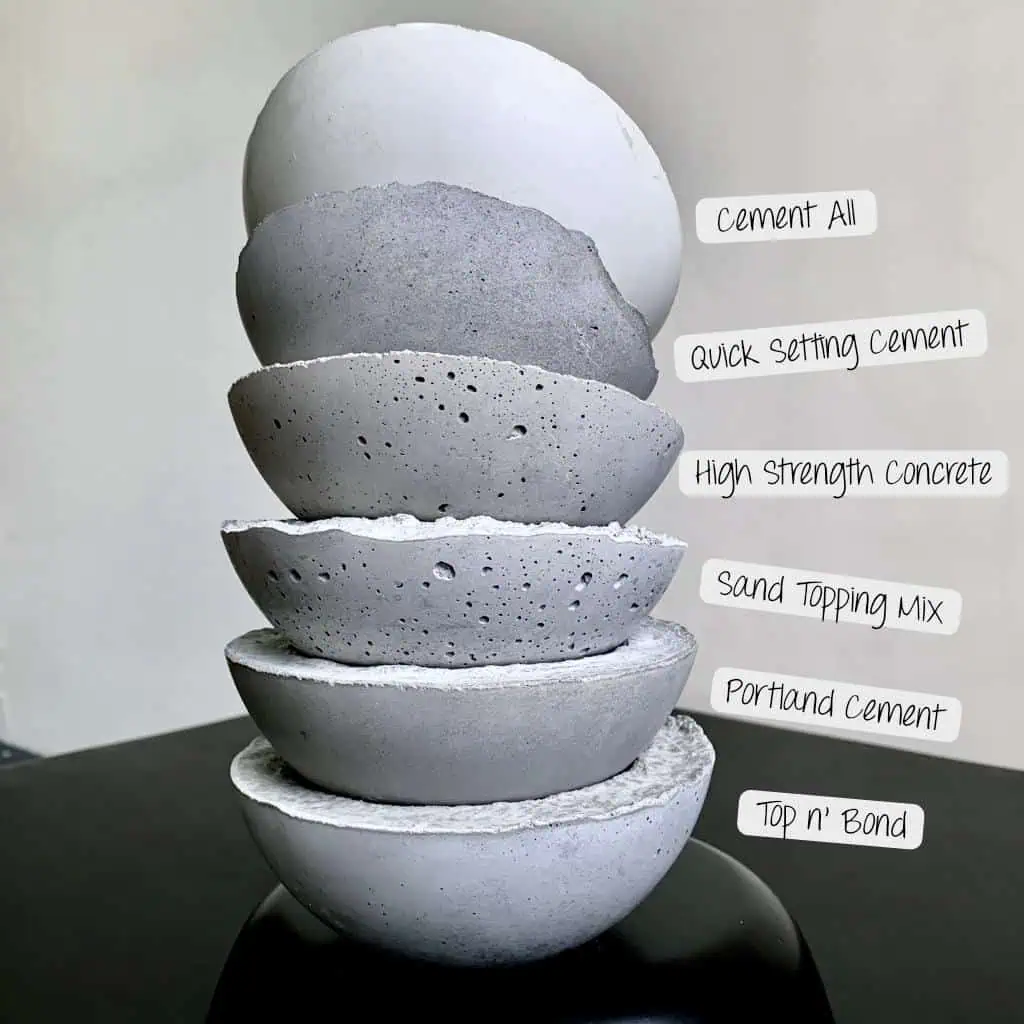
Before starting the tutorial, it may be helpful to read my article comparing the different concrete mixes and sealers– Cement & Concrete Crafts Tests!
Another important article is Making Cement Crafts Techniques & Tips with info on cement materials, mixture consistencies, demolding, safety and clean up!
Tutorial Steps For Making A DIY Cement Fabric Flower Pot
Step 1. Create Drainage Holes

Cut a piece of straw into 3 pieces, each at about ½”. Using a hot glue gun, glue them in 3 places on the bottom of the bucket.
I recommend adding glue to the open end to seal it to keep the cement from entering.
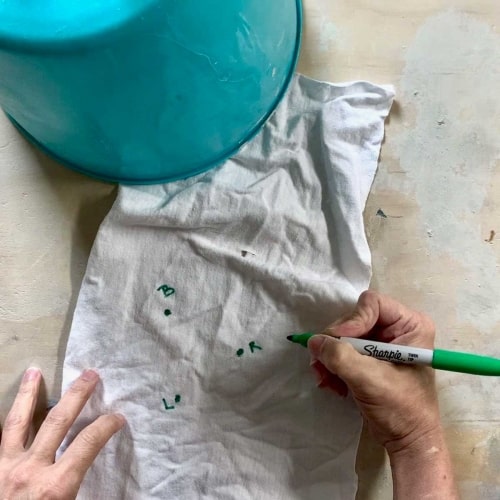
You want to make sure that you know which direction to place this piece of fabric because you need the holes to line up with the straws.
So take a piece of fabric and cut it to about 7×10” and drape it over the glued straws. Using a Sharpie marker, mark the 3 locations for the drainage.
Before pulling the fabric off, be mindful of which mark goes where. I marked mine with a B for back, R for right and L for left.
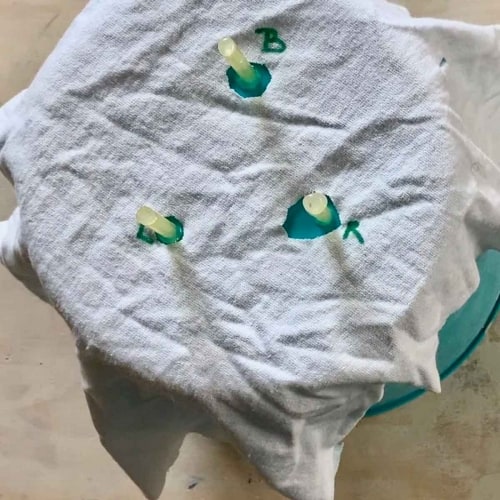
Now twist the marked spot slightly and snip across it. This will create a circular hole. Repeat for the other 2 marked locations.
Step 2. Cut The fabric

Cut your material into wide strips to make it easier to dip and apply. My strips were about 20” long by 7″ wide.
Assuming you are using this same 9″ high bucket for your cement fabric flower pot mold, I recommend cutting each piece to about 16″ long instead.
I wanted mine to have no rim it all so I didn’t let the length extend past the bottom of the balloon. If you want a rim, then make yours longer.

It will also be easier for you to drape the pieces if you taper one end so that it fits nicely between the straws.
Step 3. Inflate The Balloons For the Cement Fabric Flower Pot
Using the balloon pump, inflate the balloons. For a 9 ½” wide bucket, I used 17 balloons.
Make sure your balloons will be positioned so that the tops (which will be the bottom of the planter) are shorter than the straws- the straws should protrude above the balloons and all the fabric.
Sizing the balloons will be the trickiest part because you want to have them all close to the same height.
The easiest way to do this is to inflate a balloon so that it is longer than you need.
Carefully squeeze the end you will be tying so that you have enough slack that you will be able to tie it.
Hold it up to the bucket to size it. Gently release some air until it is the length you want.
Now go ahead and tie it. Repeat this with the rest of the balloons, using your original balloon for sizing.
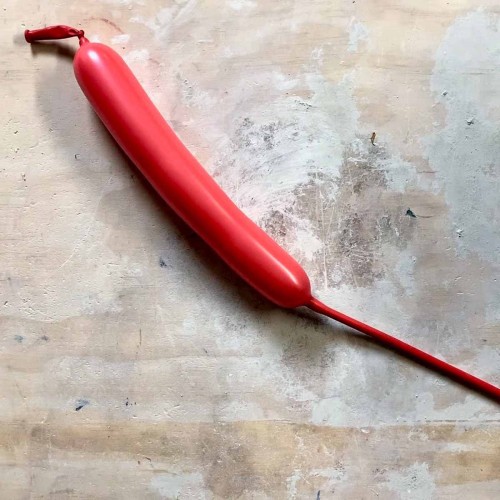
If you end up under inflating it, a trick is to take the untied end and pinch it closed with your fingers several inches from where it is inflated.
Then snip it with scissors and re-insert the tip over the balloon pump. If it deflates the whole way, it’s not a big deal, just re-inflate until it’s the size you want and tie it off.
After inflating all the balloons and ensuring the lengths are correct, tie off the end that isn’t inflated and trim it so you don’t have tips sticking out.
Step 4. Adhere To The Mold
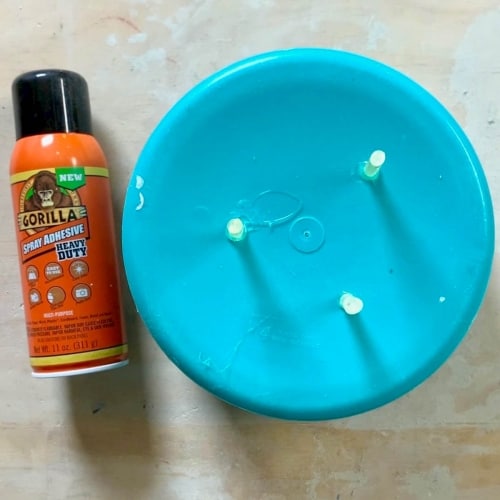
Using the spray adhesive, spray the outside of the bucket- be sure to follow the instructions on the can.
The can instructions say to wait a few minutes before adhering the balloons to the bucket, but I found it easier to do this as soon as I sprayed the bucket.
I did need to respray some spots a couple of times, I think because of the static from the balloons.
Step 5. Prep Material And Mix Cement

Take that first piece of fabric where you marked the straw locations and dip it into the bucket of water and wring it out.
Set this aside again because this will be the first piece you will drape.
Now repeat for the rest of the fabric. This should help the cement stick better.
After you have done this with each piece of fabric, start mixing the cement to a milkshake consistency.
It should be fairly drippy.
Step 6. Dip The Fabric & Position

Again, take your marked piece of fabric and dip it into the cement.
Make sure it is saturated and none of the fabric is showing through.
Position it in the direction and locations you marked so that it fits over the straws.
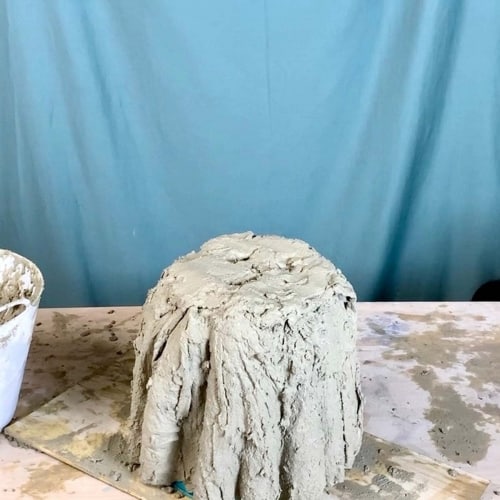
Repeat with each piece and position from the bottom of the planter, down.
Take care not to cover the straw holes.
When you have all the pieces positioned, if you have gaps or divots on the bottom due to avoiding the straws, then take some cement and fill in between them to make the bottom level.
Now let this cure.
Normally the cure time is 1 hour with the Cement All, but because the fabric was wet, it will take longer.
Depending on air circulation and temperatures, you will need to wait 24- 30 hours.
Step 7. Demold The Cement Fabric Flower Pot
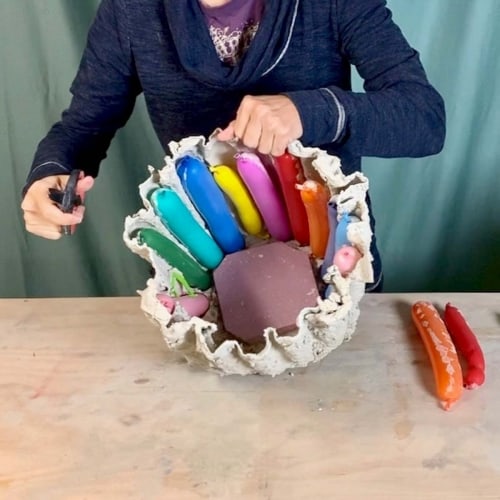
First pull the straws out from the pot.
If they don’t pull out easily, either try with pliers, or just take a power drill, drill from the outside and they should come right out.
Check to see if your inner mold will come out easily. If not, then pop the balloons. I used scissors to snip the ends.
Once the balloons have been popped, the inner mold will come right out.
Now it’s time to pop the balloons! I wimped out and did it the quiet way by snipping the ends, for a slow deflate.
Once the balloons are out, your bucket should come out easily.
Don’t forget to Pin it for later!

Hi Ellen
I just joined, well done on your website.
I’m a newbie to cement pots, l’ve read some makers soak them in water for a week to make them less alkaline, have you found anything like that necessary?
Also what type of plant did you use and how has it lasted in the planter?
Cheers
Eric
Hi Eric,
Thanks!
Most cement and concrete products are Portland cement based which contains lime. It’s the lime that makes them alkaline. Pretty much any succulent I use in a cement planter has done very well. I don’t seal them. Not all plants love alkalinity so if you are putting other types of plants in them, I recommend soaking them in water for 2-3 days, then replacing the water with fresh and repeating the soaking. That is supposed to help pull out most of the alkalinity. My experience with soaking Cement All is that it makes the cement a gritty texture, but that’s what I use for most of my pots and don’t leach them, or seal them.