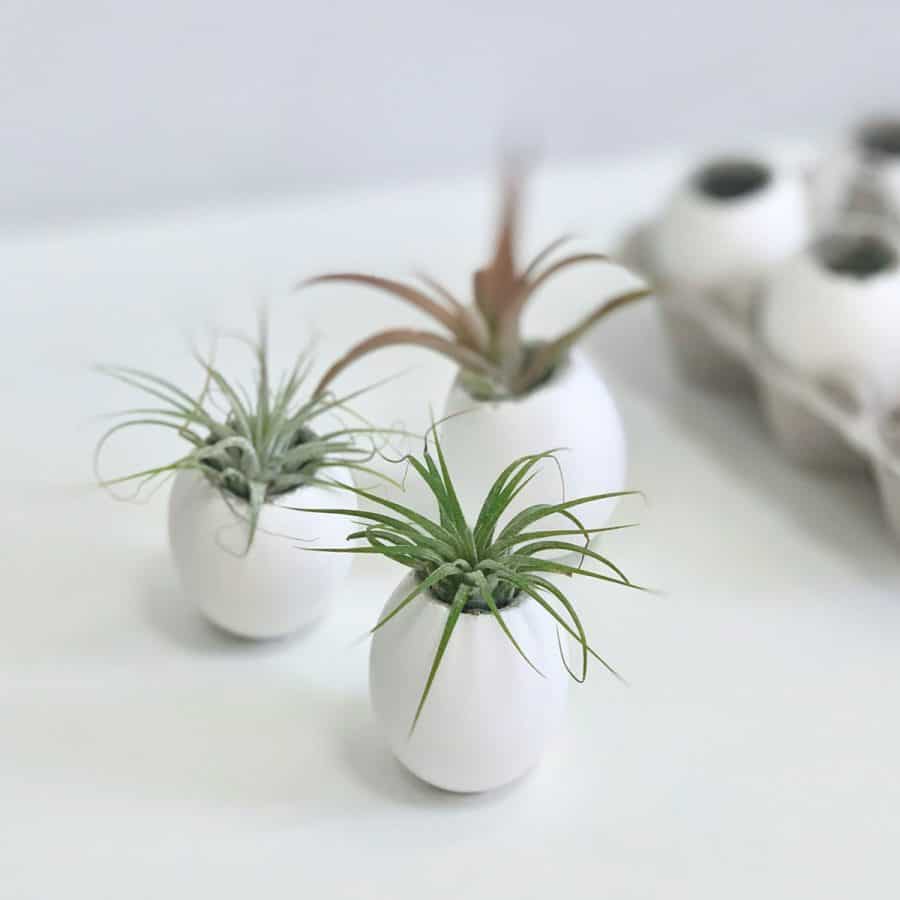
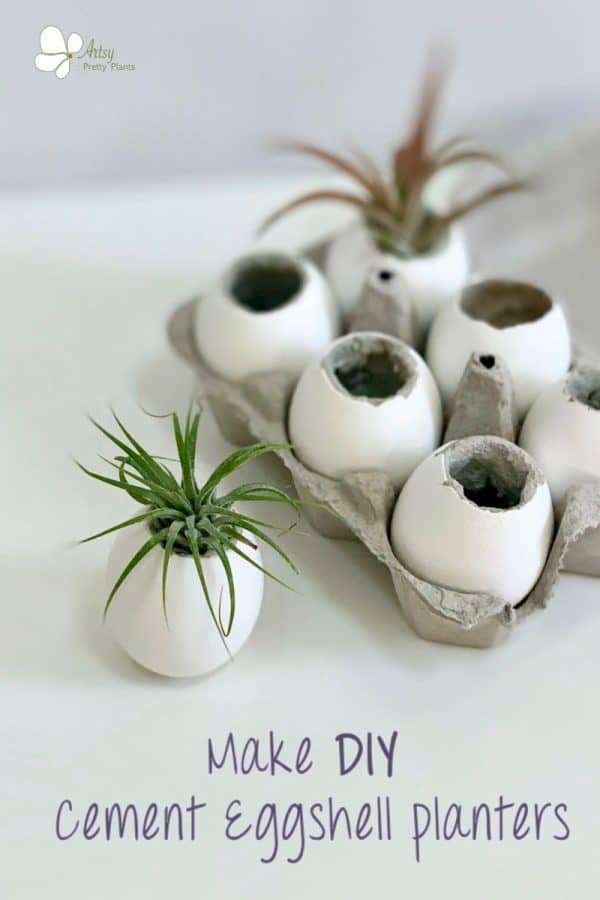
How to Make Concrete Eggshell Planters For Air Plants
How to make durable air plant planters from an egg shell that are so durable, they’ll last year over year. The way I designed these to be so durable is by lining the eggshells with a coating of concrete.
Another special secret to having extra added durability is that you’ll want to leave the casing intact with the shell.
And you can wrap them up after Easter, store them away, then pull them out each year still looking as good as the first.
Are you worried about the shells starting to yellow?
Well, only time will tell, but I can tell you that I made my first concrete eggshell planters over four years ago and they’re still as white as the eggs in my refrigerator.
I made another type of cement egg planter a couple of years ago that you may also want to check out.
In that particular planter craft, it was important to remove the inner casing in order to get the shell off once the concrete cured. But for this project, you don’t have to go through the extra step of removing the shell.
Some of the links on this page have been provided as a convenience for finding materials. These links may also be affiliate links. As an Amazon Associate I earn from qualifying purchases, at no extra cost to you.
I only recommend products I’ve used and loved, unless otherwise stated. Click here to read my full disclosure policy.
DIY Difficulty Level | Easy
Materials You’ll Need
- Rapid set cement
- Disposable bowl
- Disposable cup
- Durable nitrile gloves– I like these because they are so durable, you can rinse and reuse them
- Safety glasses
- Safety mask– rated for silica dust
- Eggs (keep the carton too)
- Bookbinding awl or similar tool
- Q-tips
- Paper towels

Tutorial Steps For Concrete Air Plant Planters
Before starting the tutorial, it may be helpful to read my article comparing the different concrete mixes and sealers– Cement & Concrete Crafts Tests!
Another important article is Making Cement Crafts Techniques & Tips with info on cement materials, mixture consistencies, demolding, safety and clean up!
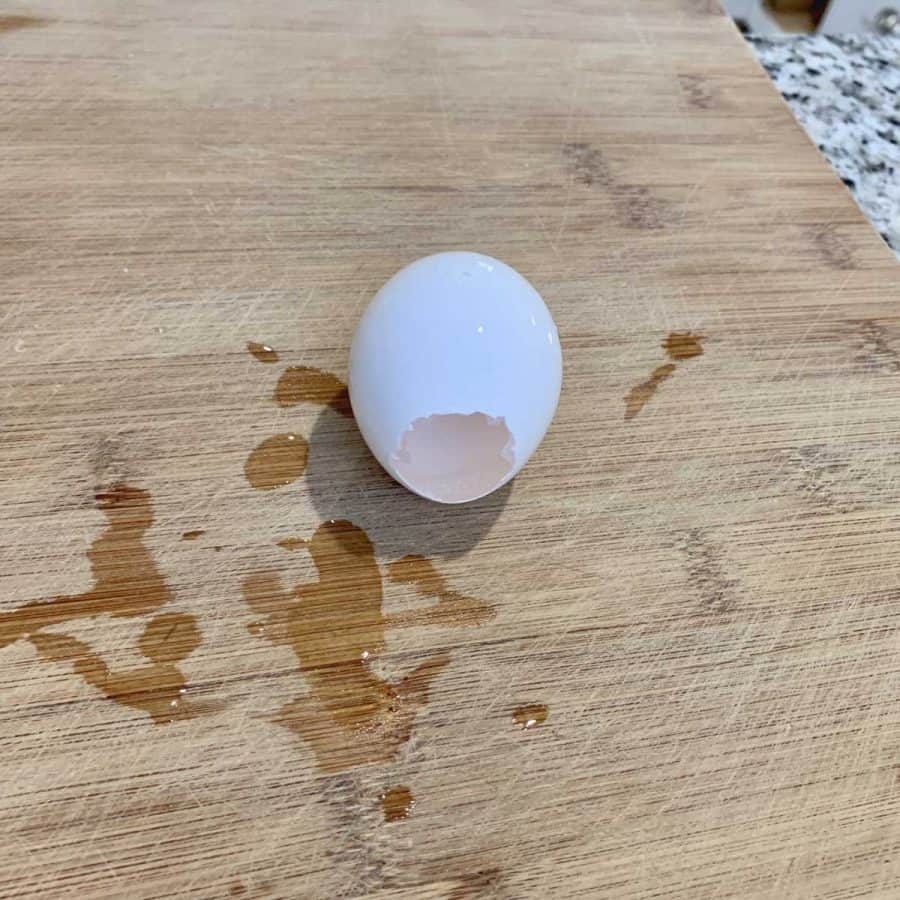
Step 1. Select The Eggs
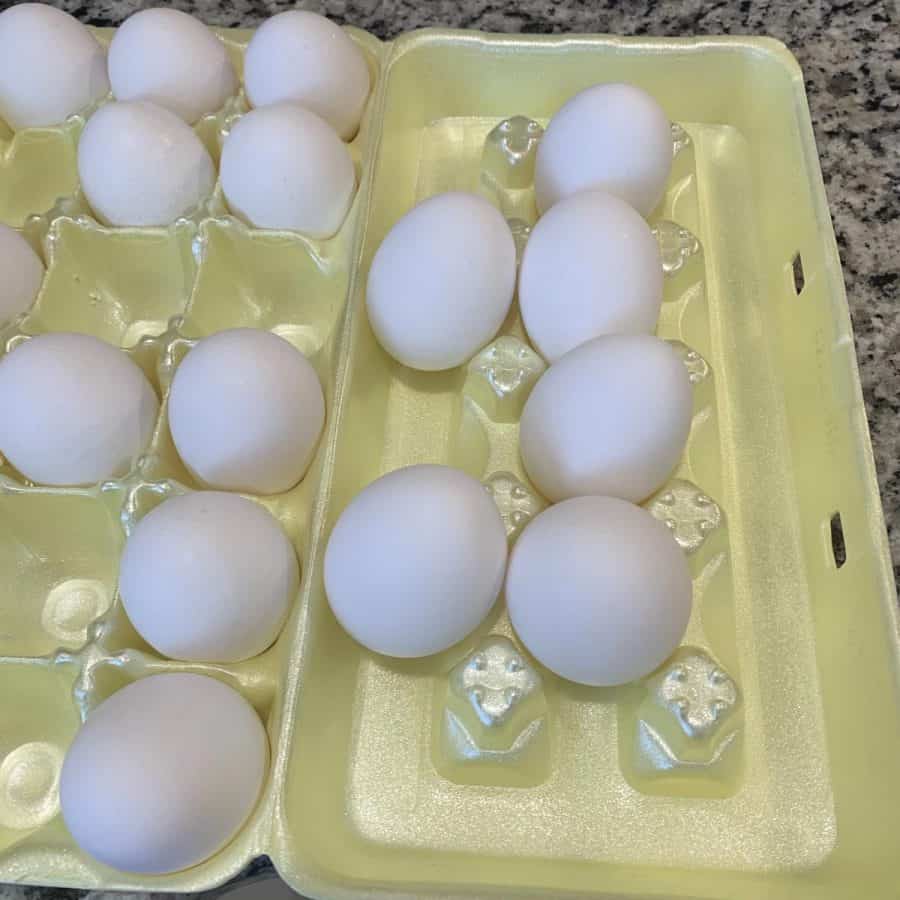
Select your eggs based on smoothness and lack of markings. Some eggs get a bumpy texture, so I chose ones that were nice and smooth, which most in the carton were.
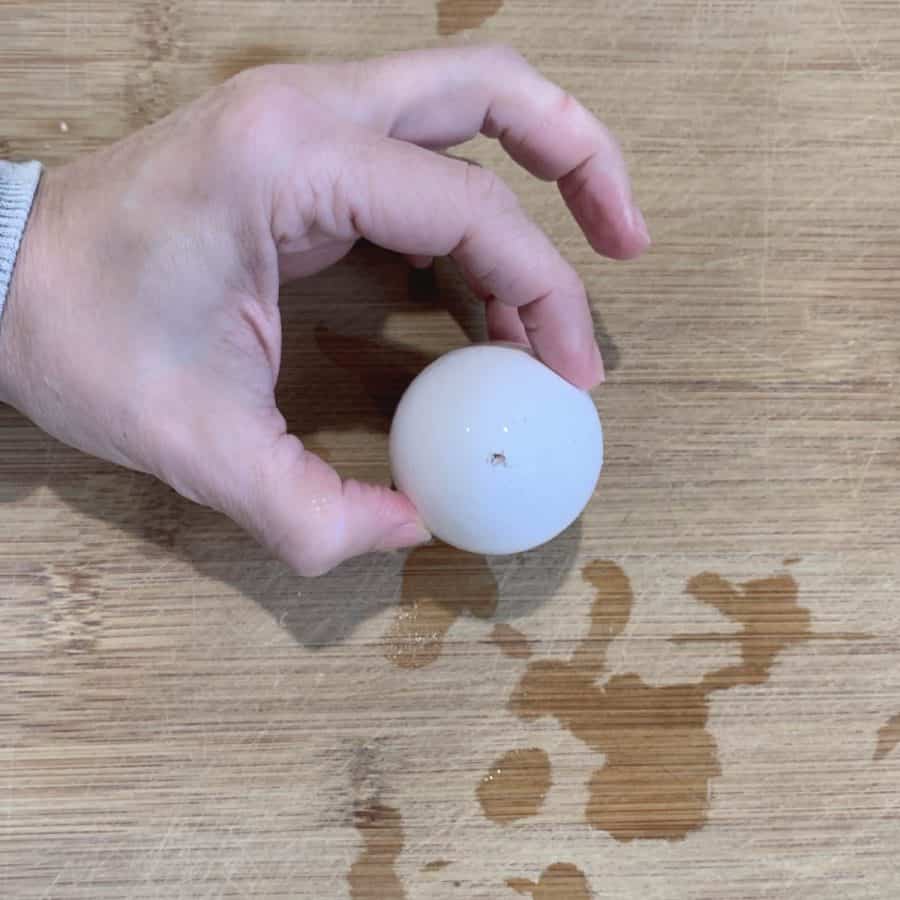
Start from the pointed end of the eggs. Hold the egg carefully, but securely in your hand with the pointy end up.
Now take the sharp tip of the bookbinding tool and gently press in the tip to first make a single hole and then add a few more right next to it.
Tap that area with the blunt end of the tool to crack a small opening.

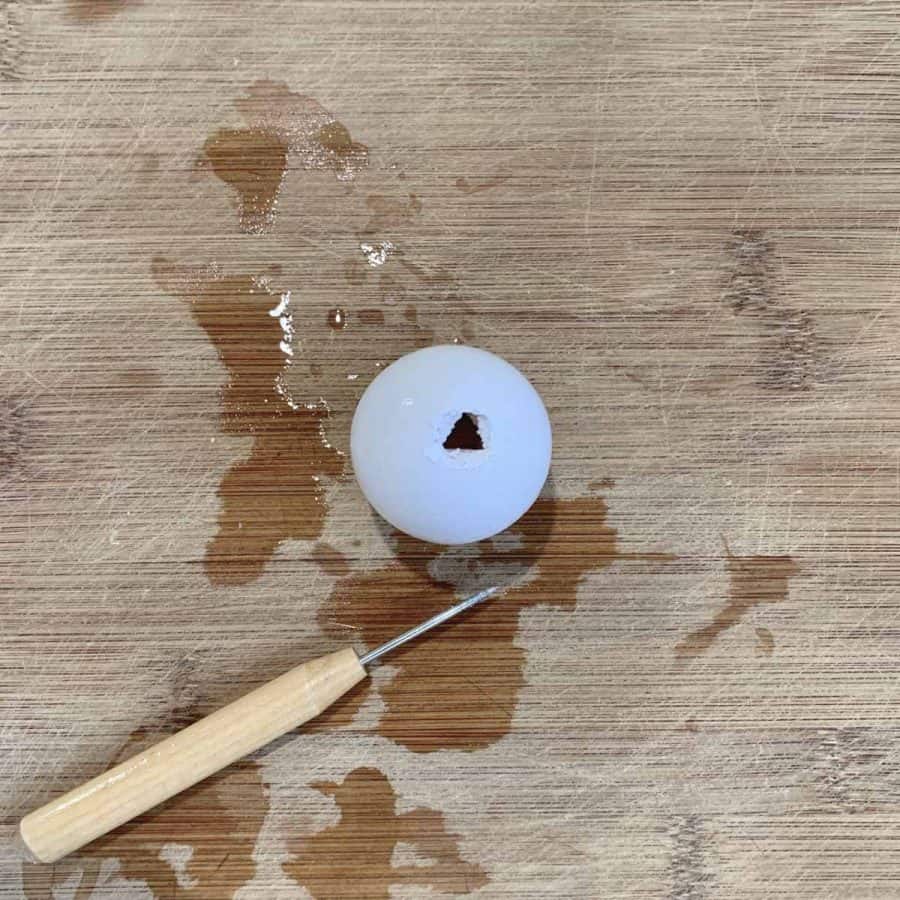
Now use the tip of the tool to lift up on the shell from inside to start widening the opening.

At this point you can either use your fingers to continue pulling up on the edges and peeling them back carefully to remove them, or use the blunt end of the tool to tap the edges inward and then pull the cracked edges out.
I didn’t want to waste the eggs and wanted to preserve them so I could make scrambled eggs, which is why I went for the peeling back method.
This helps keep the shell from breaking off and going inside.
If you are okay with not using the actual egg, then it’s probably easier to use the blunt end method. See how to do this in the first part of Step 3.
Since the main goal right now is to get the egg out, you only need to make it a little wider than a nickel.
You can peel back the broken pieces that are still attached to widen the opening, and then dump out the egg.

If any of the whites or egg yolk has gotten on the outside of the shell then rinse it off to prevent the outside of the shell from being slippery.
The opening needs to be wide enough to pot a plant, so chip the edges off by pressing backwards on them until your opening is about the size of a quarter or a little larger.
Step 2. Create The Bottom Hole
You’ll want a flat bottom to give the planter some stability. Turn the eggshell over to work on the bottom of the eggshell planter.

Do the same as you did with the pointy end of the egg and create a few small holes and then use the blunt end of the bookbinding tool to dent the shell inward.
This hole only needs to be the size of a dime which will allow you to have a flat bottom so the eggshell planter doesn’t roll.
Rinse again if needed, and then place the eggshells back into the egg carton with the bottom rounded side of the egg facing down.
Step 3. Mix The Cement
Since this is a rapid setting cement, you are best off making no more than six egg planters at a time.
Lay a couple of damp paper towels next to you, along with one dry one and then mix with the cement and be sure to use cold water to give you a longer working time.
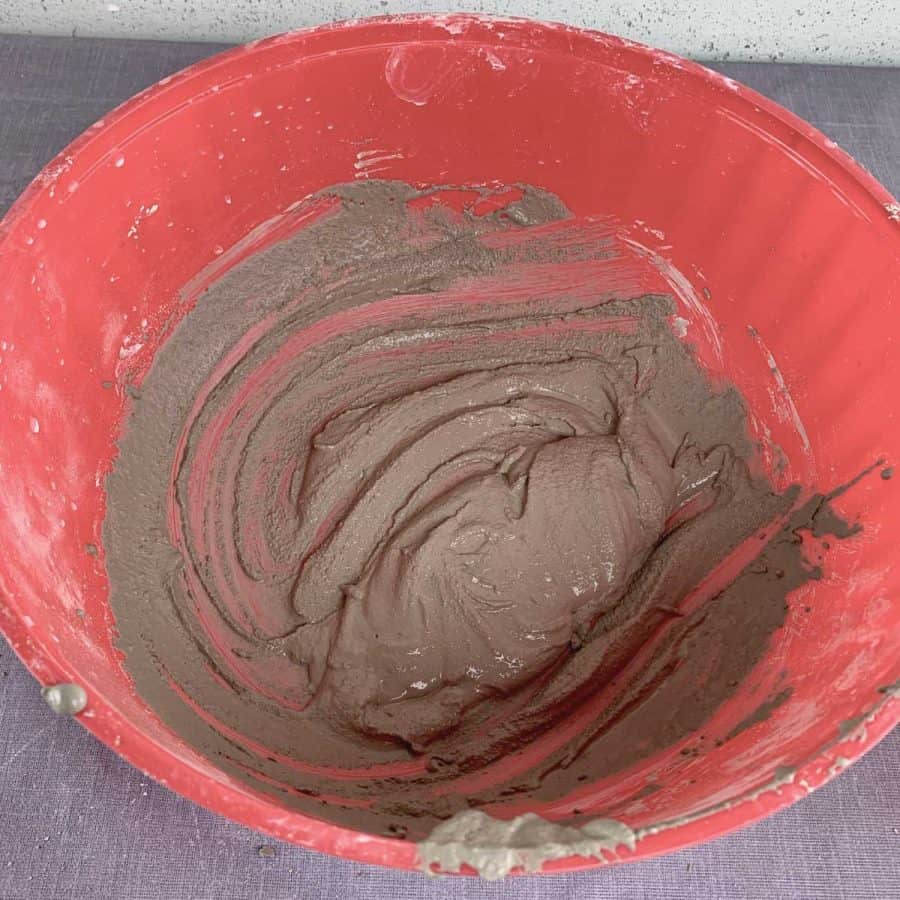
Add cold water to the mix. It’s important that the water is fairly cold.
Straight from the tap is about right, but if you are working in a warmer environment, you may want to add ice.
Get the mix to milkshake consistency. This needs to be gloopy —so if you pick up some of the cement and drop it back into the bowl, it should drip like a slow to medium drip.
Not super wet and fast, and not chunky drips. If it’s too chunky, just add some more water and mix it in.
Step 4. Cast The Eggshells
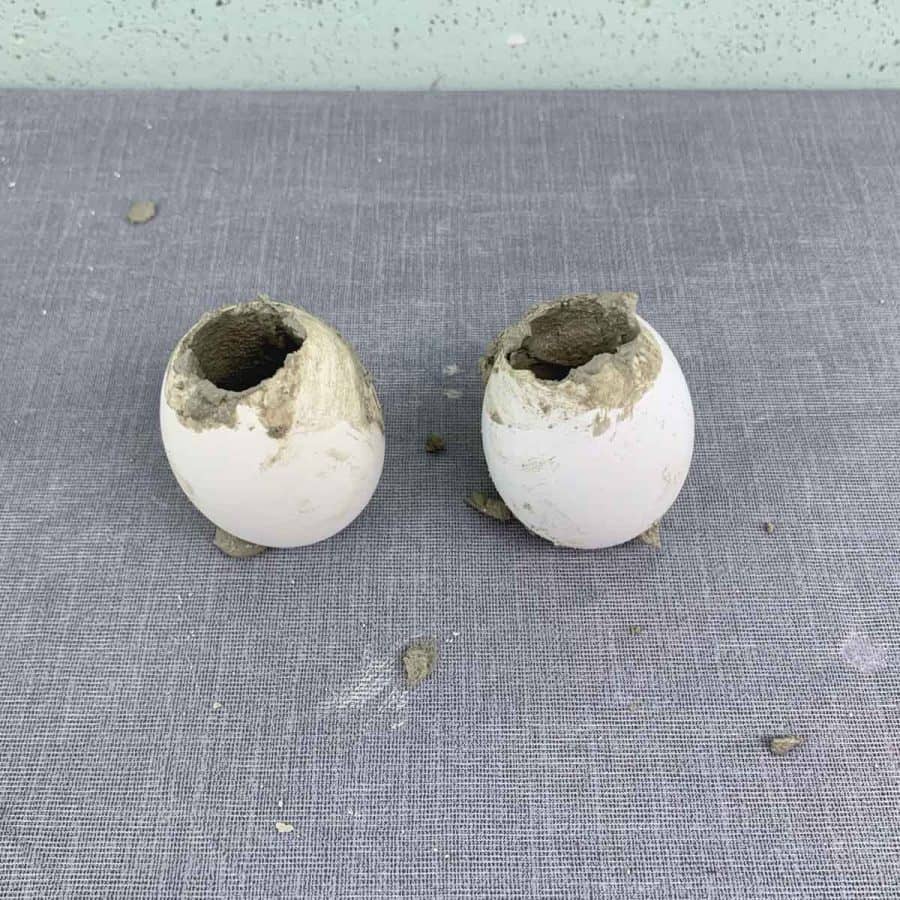
Now scoop the cement into the eggshells. This can be messy and you’ll likely spill the cement all over the outside of the shell.
This cleans up easily, so don’t worry about the messy shells right now.
Gently push the cement inside each of them up against the sides of the shell.
The planter’s walls should be about ⅛” thick and the bottom slightly thicker. You’ll need to work at a good pace before the cement starts setting.
If the cement keeps sliding down on you, then set it down for the moment and move on to the next egg.
Repeat this for each egg and then go back to the first couple of eggs if the cement was slipping.
By this point, the cement will have started setting which will make it easier to skim coat the insides with.
Set these on your flat work surface.
The bottoms of the shells are open and at first the cement may slip out, just keep working on these, but by the time you finish, the cement will have stiffened enough it won’t drip.
Finish smoothing the insides and making sure they are evenly coated. I like seeing the cement at the top, so I pulled the cement right up to the top edge.
You can always add another skim coat after these have cured.
Step 5. Make The Planter’s Drainage Hole —Optional
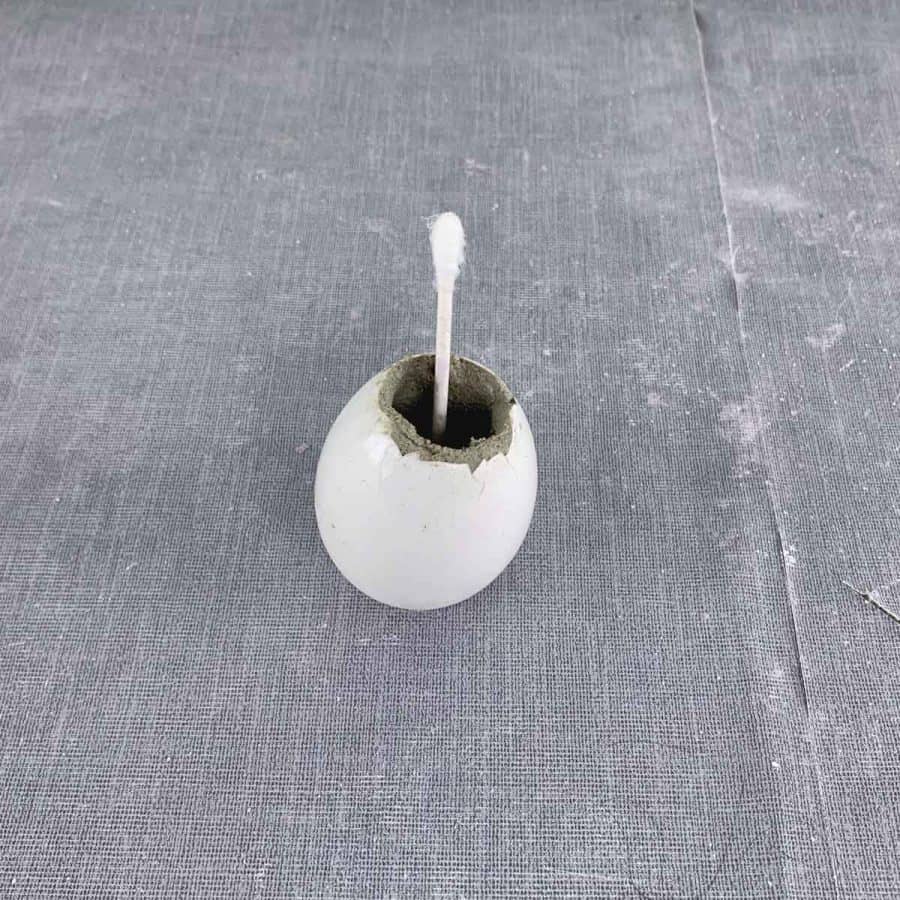
If you want to use these eggshell planters for plants other than air plants, then you’ll need to create a drainage hole.
To do this, simply press a Q-tip through the bottom, center of the cement egg to clear a hole.
If the concrete is getting too hard, dip the Q-tip in water to soften the cement and then press.
Let these cure for an hour. After they have cured, you can safely wipe off the excess cement with a wet paper towel.
Step 6. Refine The Planter

If you want your edges to be flat and not jagged, then take the eggs to either a concrete patio or use a brick if you have one and use it as a sanding pad.
This is the easiest way to grind down the top of the egg. Anything that has a hard rough texture to rub it against should work.
*Just a mild warning- if you angle the egg too much, you may chip the top edge of the shell off, like I did above.
So take care to hold the egg parallel with the cement surface. I sanded 7 eggs this way and it only happened to one of them.
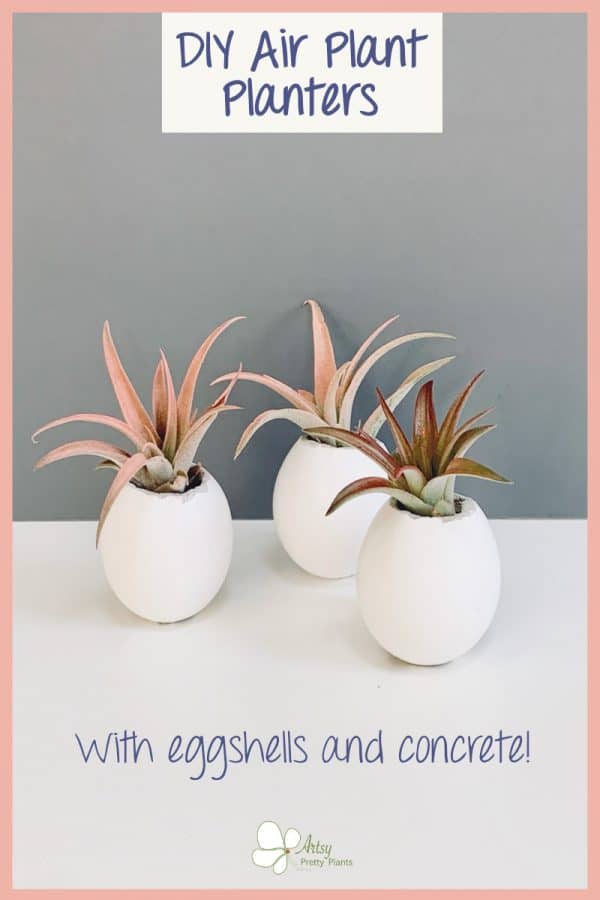
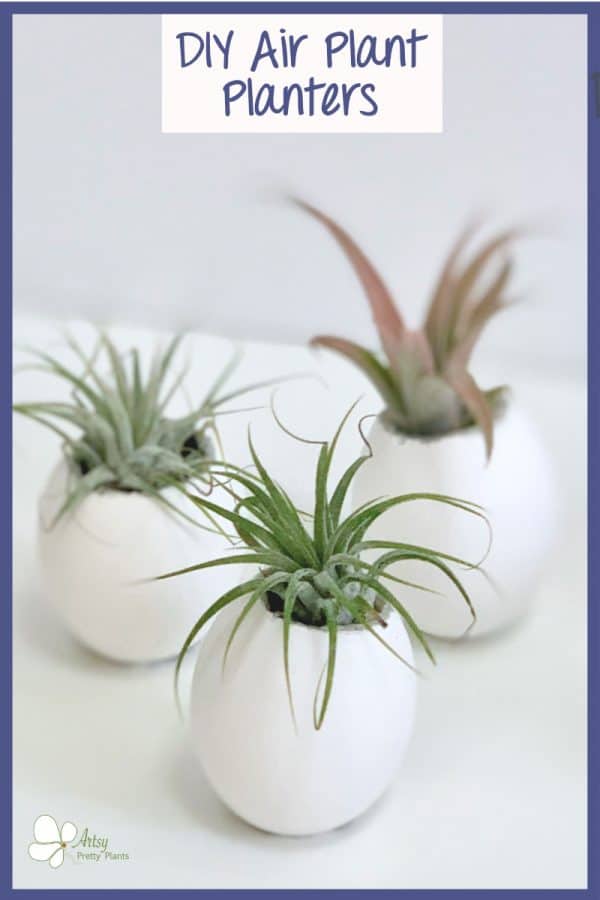
Now the concrete air plant planters are all set to be potted with air plants.
If you love these cute little planters, then you may also be interested in these tiny wine cork succulent planters.
Don’t forget to Pin it for later!
Don’t forget to Pin it for later!
Concrete Eggshell Planters For Air Plants
How to make adorable Eggshell air plant planters that are durable! Reinforce them with cement so these DIY planters will last for years.
Materials
- Eggs
- Cement
- Bookbinding awl
Tools
- Please see the full materials list above the tutorial for details and links.
Instructions
- Select The Eggs To Use For The Eggshell Planters
- Create The Bottom Hole For The Planter’s Stability Using An Awl
- Mix The Cement For The Planter To A Milkshake Consistency And Ensure There Are No Lumps
- Optional —Make A Drainage Hole For The Concrete Planter Using Q-tips
- Sand The Top Opening Of The Eggshell Planter


These are adorable! Would you seal the concrete for air plants if these are used outside?
Hi Sara,
I personally wouldn’t choose to seal them based on whether they are inside or outside. I almost never seal my concrete planters. With these though, there is actually a benefit to sealing because it will help them retain water, which the air plants like.