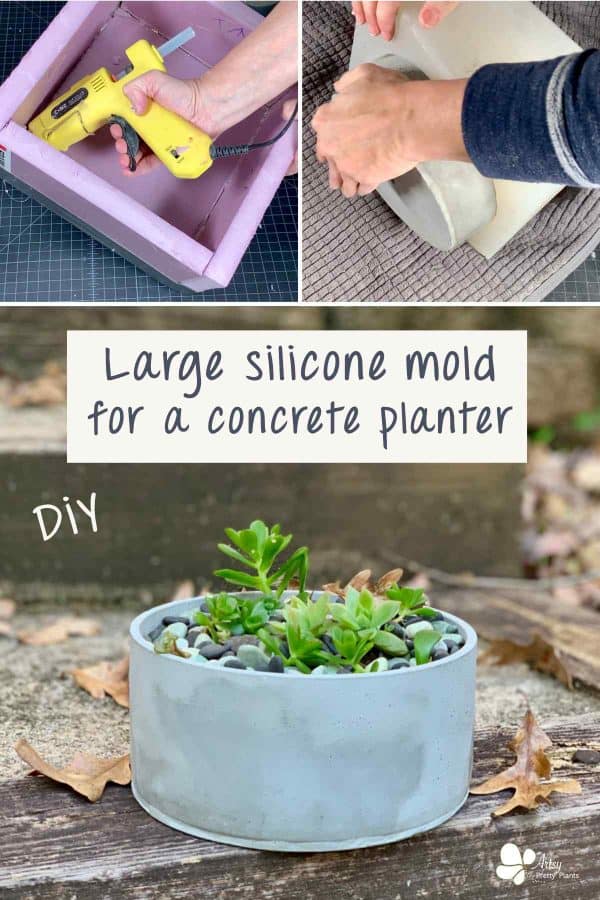
DIY Large Concrete Silicone Mold For A Planter
If you have wanted to make a large concrete silicone mold and haven’t known where to start, then I’ve got good news because I’ll show you how.
Making your own mold may seem like a daunting task, but it needn’t be at all.
Concrete silicone molds for large items can be particularly challenging, but I’m breaking it down for you in super detailed form so you can see how it’s done.

Additionally, I’ve made a video tutorial so you don’t miss a single step.
But be sure to also read and watch because some things are easier to explain in writing, whereas other parts are easier to show in a video.
Video For Making A Large Concrete Silicone Mold
Please click the button to subscribe to my YouTube channel and be notified when I have a new video tutorial!
When making a large concrete mold you have the option of using silicone or polyurethane. Both are a type of liquid rubber that is used for making reusable molds.
Both types of rubber molds are durable and will hold up to the roughness of concrete.
But for concrete planters, the right material is going to be silicone because of the release ability that silicone material has.
A concrete planter or any type of concrete vessel won’t release nearly as easily from polyurethane rubbers, which is better suited for flat objects or ones without cavities.
Making a square mold has its pros and cons. A square outer form (or box) in mold making is officially called a block mold.
Because it requires using extra material, it will cost more. However, this block mold shape is the easiest to engineer and it allows for a safety net when it comes to demolding.
The reason a block mold is helpful when demolding is because it has extra material at the corners which provides leverage for demolding.
The leverage reduces the amount of pressure placed on the concrete when you demold making it less likely to crack during demolding.
This can be especially helpful when it comes to things like concrete planters since they often have thin walls. This really is the easiest way to approach making our own mold.
Another option is to square off the inside corners by adding a piece of foam board at each corner.
This saves you the cost of extra silicone but increases the chance of cracking your concrete when demolding.
A third option is to make the walls of the concrete planter thicker to reduce the risk of cracking.
You can do this by using an oil based clay to build up the sides. You can see how I did this in my tutorial for making a silicone mold for a textured concrete planter.
Thicker walls won’t guarantee it won’t crack when removing it from the mold, but it definitely reduces the chance.
I opted to make the shape of my form into a block. Since this is a large concrete silicone mold, it was more important to have the ease of demolding.
If it were a smaller object, it would be easier to demold and I’d be able to get away with saving on silicone material.
Another benefit of the block is that the shape makes it a simple silicone mold to build. And it’s a really strong mold that will hold up extremely well over time due to the thick sides and extra thick corners.
It was the best choice because it turned out to be one of my most durable reusable molds and will last a long time.
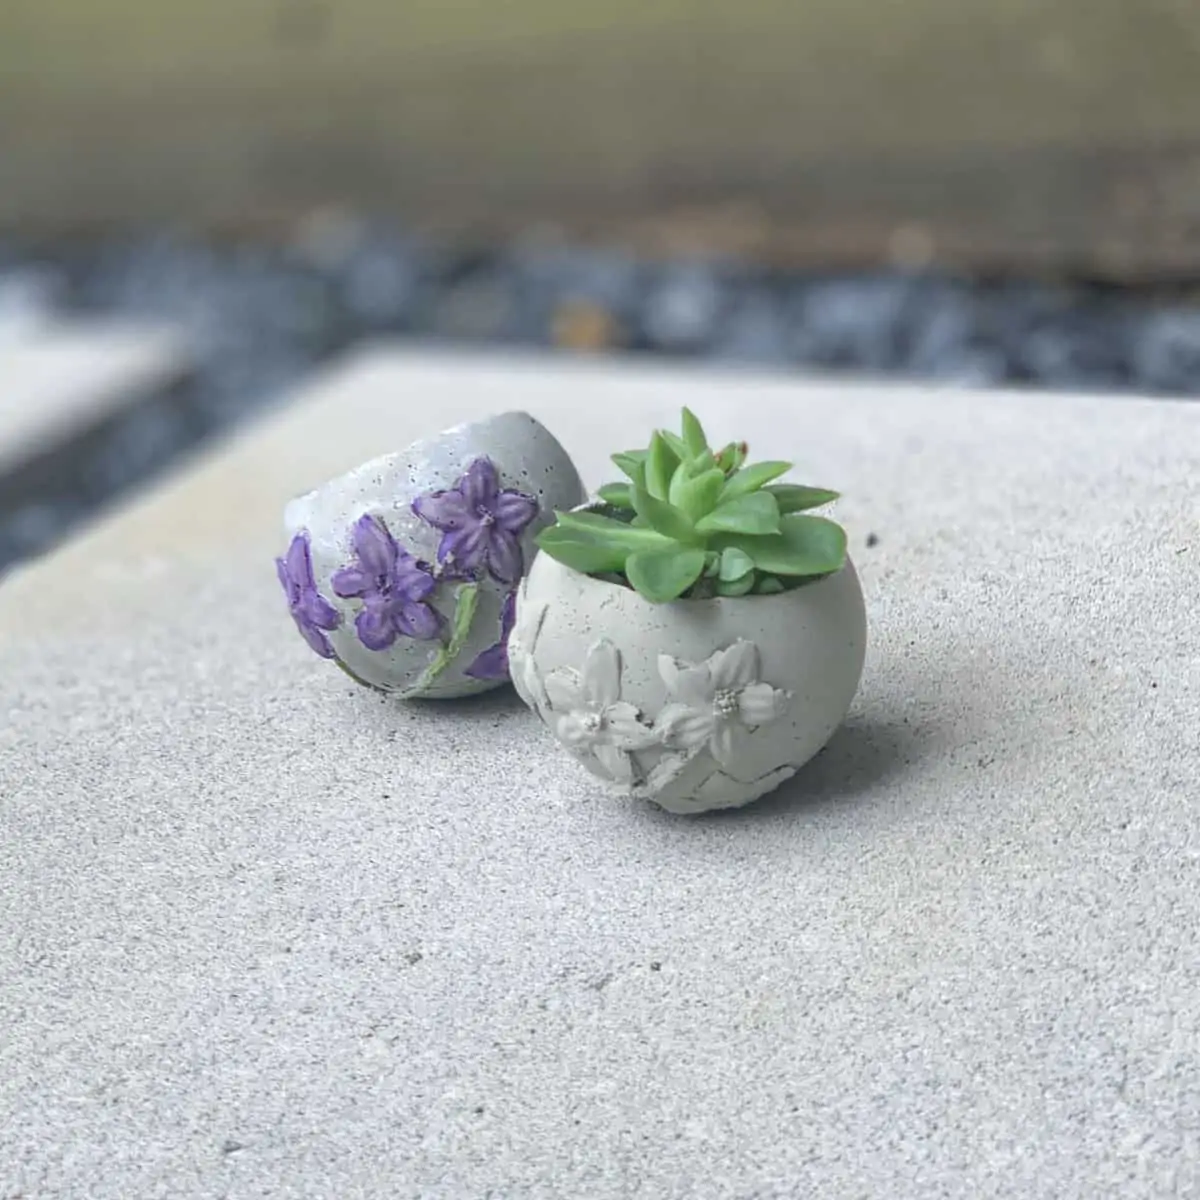
Check out this little concrete cowboy boot planter I made with a DIY latex mold and this other planter with a small silicone mold I made.
By the way, the silicone mold material I used for this comes from Alumilite. It was given to me free of charge to see if I like it and to explain how it works. I’m under absolutely no obligation to say a single nice thing about it, but I’m going to anyway, because I’m really impressed by it.
I’ve used one other competing brand and I actually like this better. It seems stronger and was either easier to work with or I got lucky, because it came out perfect, with no soft spots.
It shouldn’t surprise me because I’m also in love with another product from them that I used for the sphere-shaped silicone mold called Amazing Mold Maker-so awesome.
That one you’d use for objects that are more complex or round and need a softer material for demolding. You can use my discount code if you are interested in purchasing either of them, just use CODE: ArtsySphere10.
But if you’re just not up to making you’re own molds, here’s an article pointing you to a list of the good quality, unique concrete molds you can buy.
Some of the links on this page have been provided as a convenience for finding materials. These links may also be affiliate links. As an Amazon Associate I earn from qualifying purchases, at no extra cost to you.
I only recommend products I’ve used and loved, unless otherwise stated. Click here to read my full disclosure policy.
DIY DIFFICULTY LEVEL / EASY
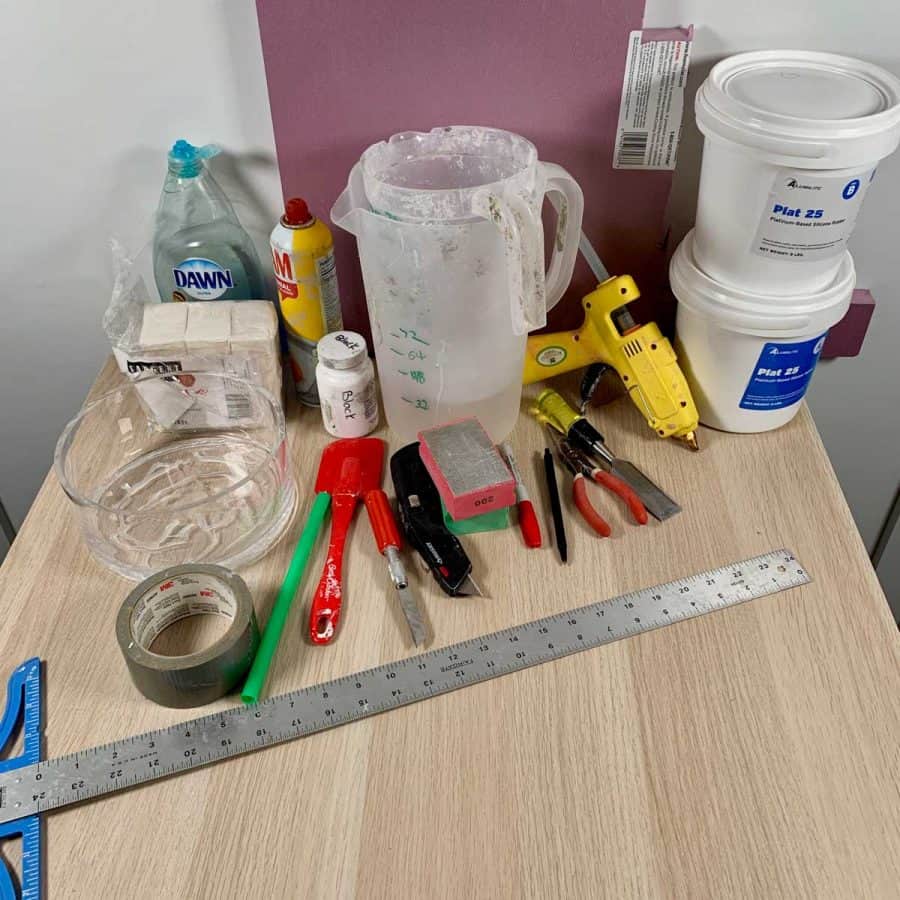
Materials For Making A Large Concrete Silicone Mold For A Planter
- Large glass bowl
- Pink foam insulation board 2’x2’
- Pen
- Craft knife with whittling blade
- Hot glue gun and extra glue sticks
- Duct tape
- Jumbo straw
- Cooking oil spray
- Silicone mold making material parts A & B-platinum –use code: ArtsySphere10 for 10% off
- Permanent marker
- (2) big plastic pitchers
- 1 large plastic container or bucket for mixing the silicone
- Oil-based clay –may not be necessary
- Big plastic spatula or spoon
- Utility knife
- Putty knife or chisel- something for prying
- Needle-nosed pliers
- Dish detergent
Materials For Making The Large Concrete Planter Using Your DIY Silicone Mold
- Rapid set cement
- Disposable bowl
- Disposable cup
- Durable nitrile gloves
- Safety glasses
- Safety mask– rated for silica dust
- Black powdered pigment– optional
- Diamond sanding sponges
Materials Notes
Glass bowl: I found my glass bowl at a thrift store. When looking for a bowl to use, look for one with straight sides, or sides that angle in only one direction (either inward or outward).
Don’t use a bowl that has curved sides because it will create undercuts, which means you won’t be able to remove it from the mold. For that type of shape, you are better off following this sphere mold tutorial.
Hot glue for use with the block mold form: You may fare better using 100% silicone caulk for adhering the sides of the box together, instead of using hot glue like I used.
I didn’t want to wait for the caulk to dry (a couple of hours) so I took a shortcut.
Silicone caulk is more effective at sealing gaps and preventing leaking. It will work with glue as long as you glue it well and make sure you tape all your seams with the duct tape.
Tutorial Steps For How To Make A Large Concrete Silicone Mold For A Planter
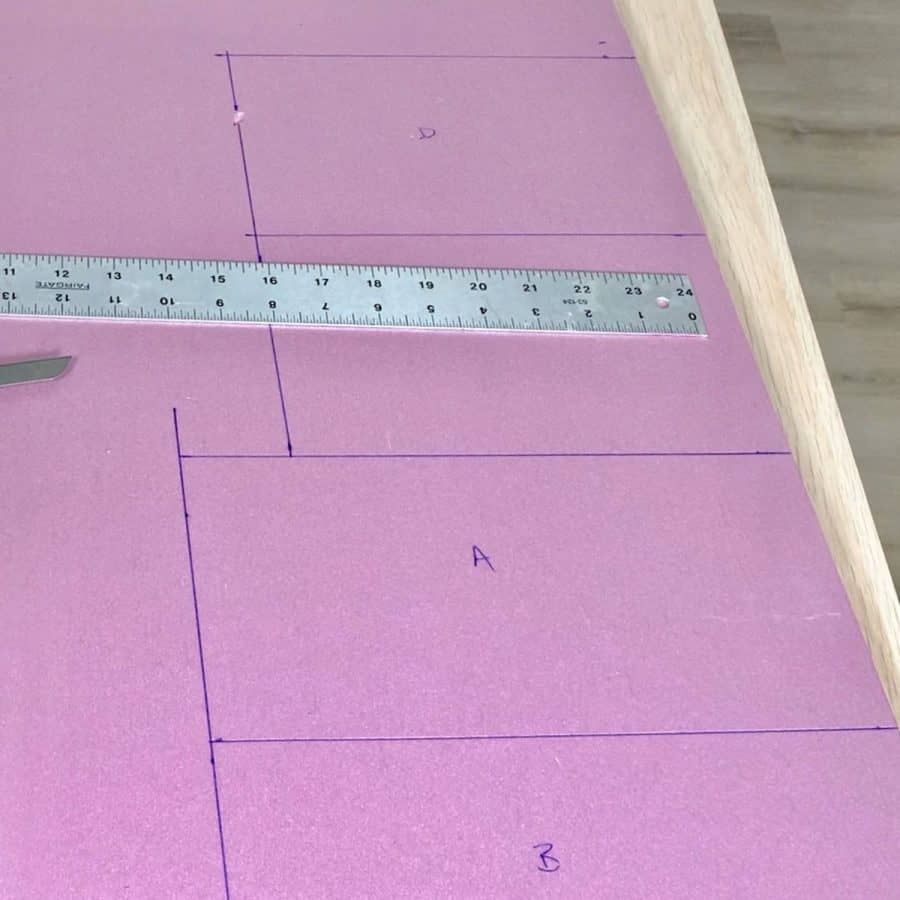
Step 1. Measure and Trace The Pieces For The Block Mold Form

The base of your block mold needs to be 1 ½” wider than the bowl. So first trace the bowl onto the foam board and then measure ¾” past the bowl on each side.
Use a T-square to mark straight lines in a square around the circle.
This will be the base of the mold and will determine the length you need for the sides of your box. Next make the sides of the box, based on the length of the base.
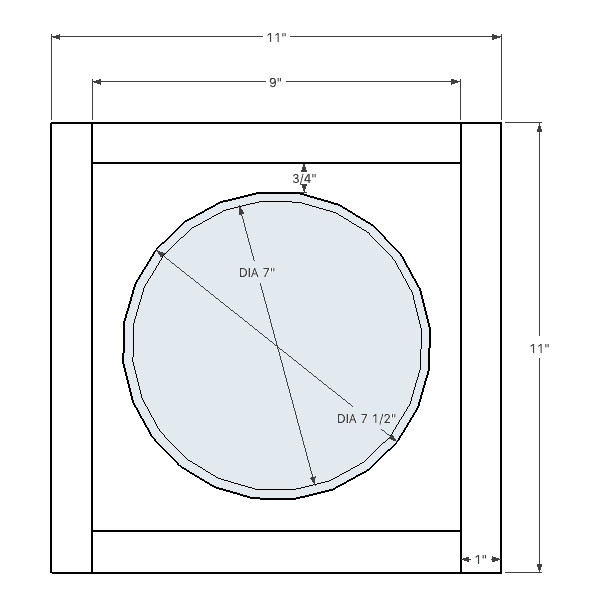
You’ll need two sides the same length as the base and two sides will be 2” longer to account for adding the 1” thickness of the sides.
The shorter sides will be tucked into the two longer sides. In my case, the bowl was 7 ½” so with the ¾” added on each side, my inner sides were 9” and the longer sides were 11”.
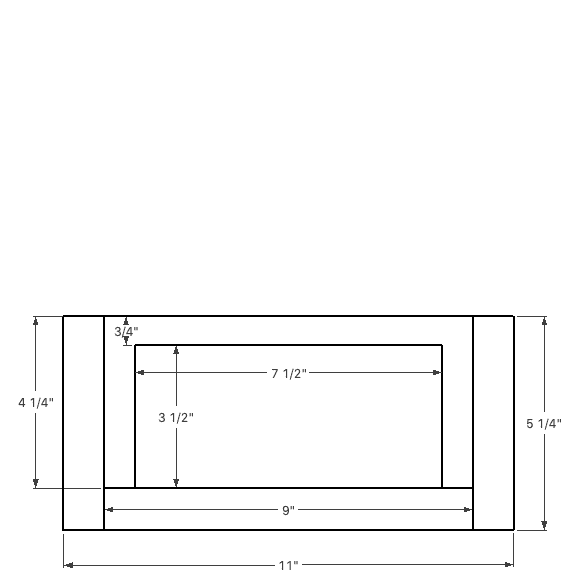
You also need to determine the height of these pieces. To calculate that, you’ll take the height of your bowl, add ¾” for the thickness of the bottom of the mold.
This is ultimately the bottom thickness of the concrete planter. You can make the thickness ½” instead, but I made it ¾” to play it safe.
Now add 1” to account for the thickness of the foam base.
So for my 3 ½” high bowl, I added ¾” for the silicone material for the bottom of the planter and then the thickness of the foam base at 1”. This came to 5 ¼”.
Sides:
(2) 5 ¼” x 11
(2) 5 ¼” x 9
Once you have these dimensions, measure and mark them onto the foam board and then cut the sides and base out.

To cut these, use a T-square and a craft knife with the whittling blade.
I find it easiest to cut foam insulation boards by placing the part I’m cutting so that it overhangs my work table so I can freely slice through the foam.
Tip: Be sure to hold the blade straight (perpendicular to the floor) when you cut. If it’s slightly angled, you’ll have a tough time attaching the sides.
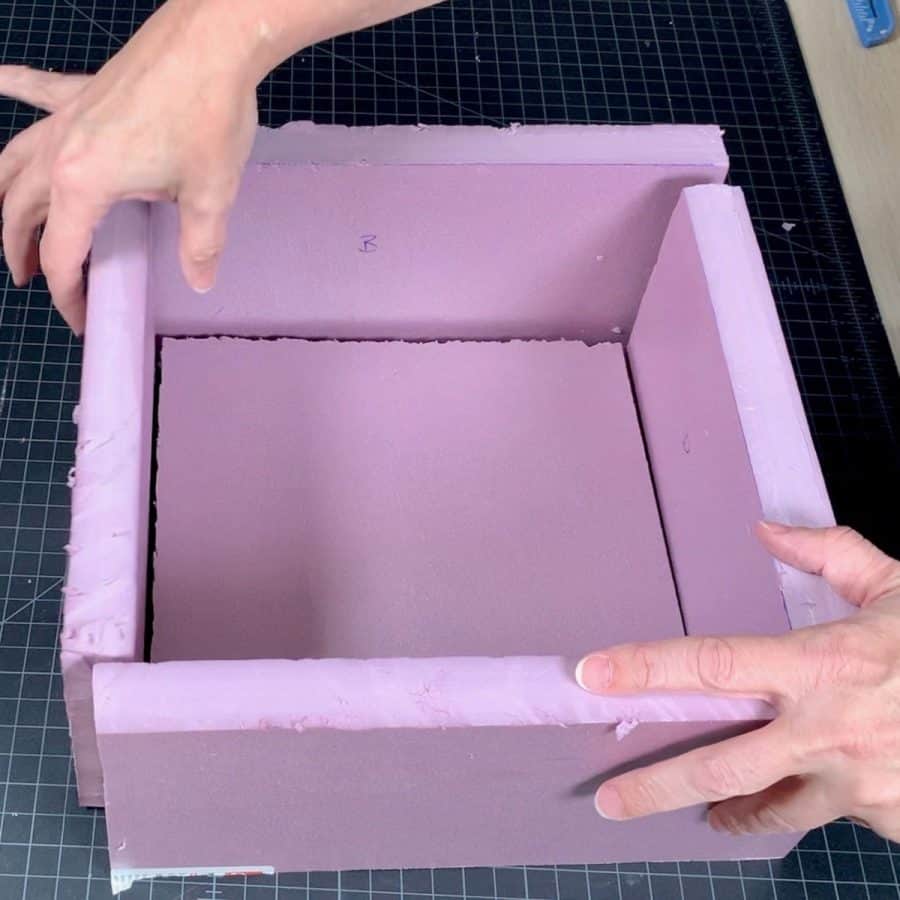
Step 2. Attach The Sides To The Base And Secure The Glass Bowl

Use hot glue (or 100% silicone caulk) to attach the sides to the base. Gluing it first will make it easier to work with when you go to tape it.

After gluing the sides to the base, add glue to the inside corners, as well as where the sides meet the base.

And then use duct tape to tape around the base where it meets the sides, and the outside seams at the corners and the bottom underside of the block mold.
Apparently, I didn’t pay close attention to how well my seams were glued and my box ended up leaking a fair amount of silicone on one side at the bottom.
If you do experience any leaks after pouring the silicone in Step 5, then you can use oil-based clay to plug the leak. See pic in Step 5.
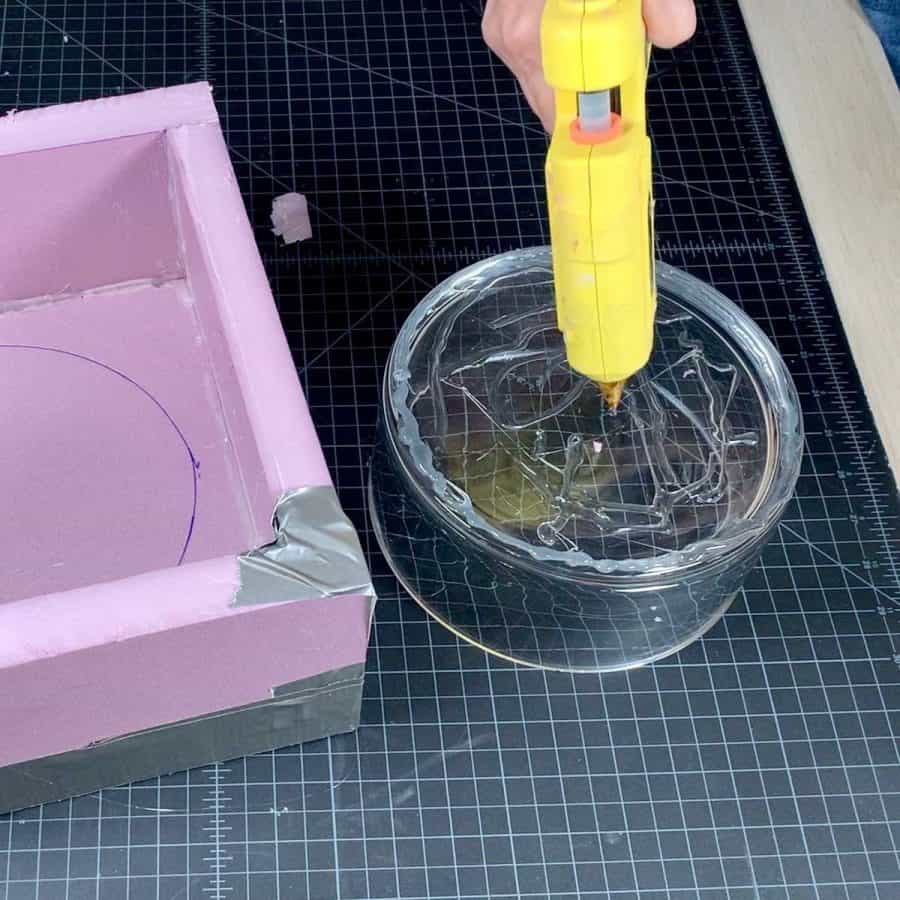
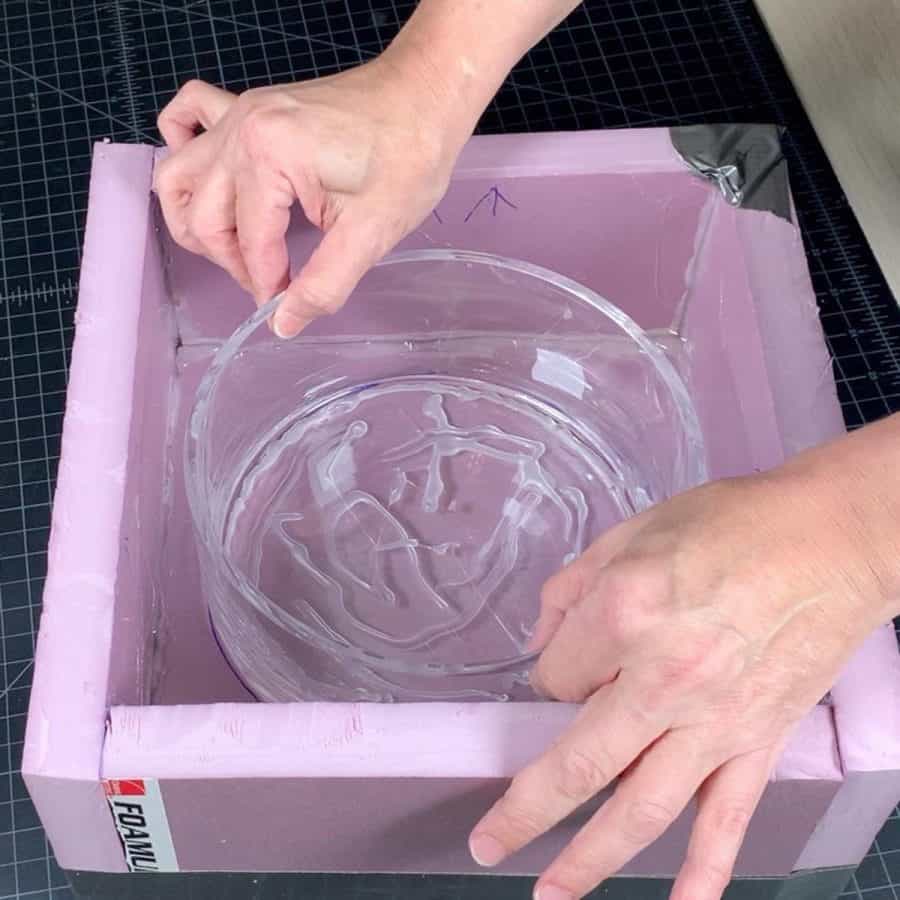
Next, use hot glue to secure the bottom of the bowl to the center of the foam circle where you created the traced outline in Step 1. Press the bowl onto the circle firmly, make sure it holds tight.
Tip: When you glue the bottom, try to keep the glue lines clean. It’s best to have the glue as close to the outside edge of the bottom of the bowl.
If the bottom has a bevel, try to stop the glue before the bevel. Gluing outside of this point will just make the lines of the silicone mold (ultimately the cast planter) less clean.
Step 3. Create A Hole For The Planter To Drain

You’ll want the concrete casting to have a hole so the planter can drain properly.
To create a drainage hole, cut a jumbo drinking straw to about 2” taller than the inside height of the bowl. Then glue it to the center and take care that the straw is secure.
With this method, you will need to insert a straw into your silicone mold when you cast the concrete, but it works like a charm.
Now lubricate the bowl with cooking spray. Take care not to get too much spray near the straw where it’s glued because the oil may loosen it.
I actually forgot to use a release agent and regretted it when it came time to remove it from the mold.
Unfortunately, I remembered when I was half way through pouring the silicone, which was way too late.
Step 4. Cast The Silicone For The Large Concrete Mold
Alumilite is the brand I used and it has a handy calculator on its site.
I did end up with a little bit of extra silicone, but I had prepared for that possibility ahead of time and made a second small mold of another object just in case.
With this material, you have a 35 minute working time. Because of that, I didn’t want to chance running into an issue of the silicone starting to set while I was still mixing up more.
This is because I’ve had that happen before, so I prefer to err on the safe side. It’s better to have too much silicone material mixed than not enough.

It’s very important to measure your parts A and B evenly.
I already knew I was going to need to use a full container of part A and part B, and from what the calculator said, I would need about half of a container of both A and B.
So I knew I could pour all of A and B into my big plastic bucket.
However, to determine exact equal amounts from both of the second containers, I needed to measure them.
I wasn’t convinced that my largest pitcher would fit half of a and b and so I thought I would need two.
As it turned out, I could fit both in one. It’s a good idea to prepare for two if there’s any chance it all won’t fit.
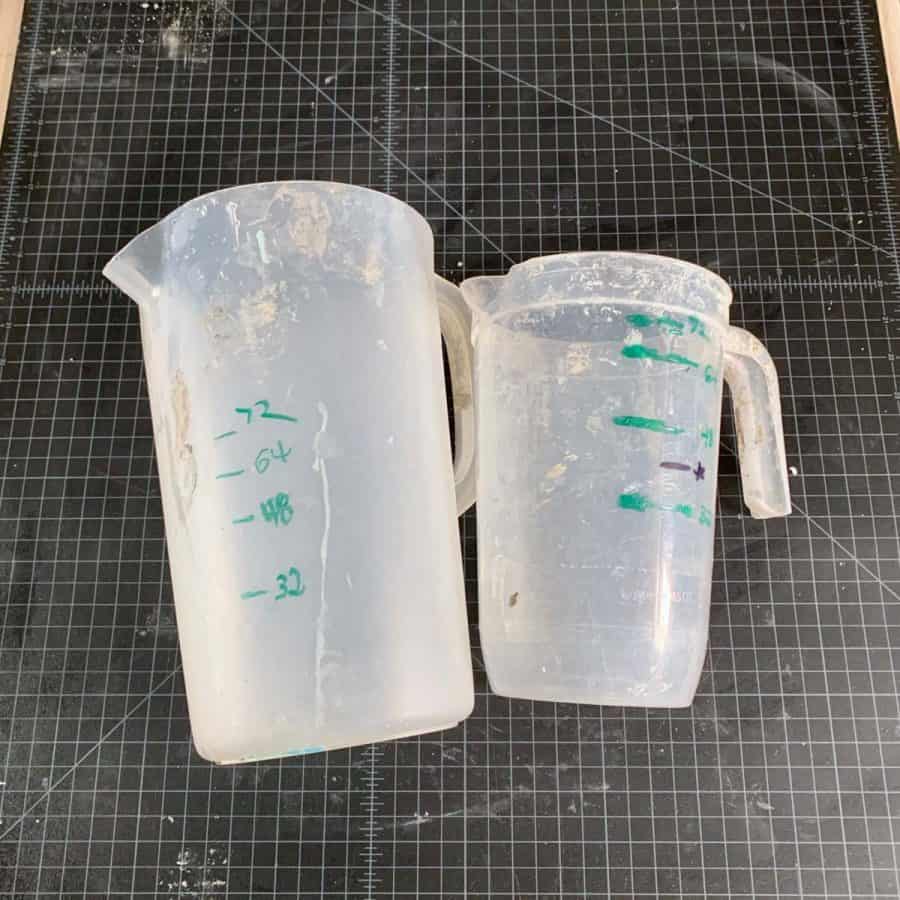
I had one pitcher that came with measurements on it, but the other didn’t. If you don’t have pitchers with units of measure marked on them, then you can make one.
Fill a measuring glass with water and let’s say it is a 32oz glass. Pour that into the pitcher and use a permanent marker to mark this on the pitcher.
Then keep adding increments of measurements until you’re sure you have at least the amount you think you will need. Do this for both pitchers to be safe.
First I poured container A into the pitcher up to the 32oz mark. I could see this already used half of the bucket and since that’s all I needed, I knew I didn’t need the second pitcher.
So I went ahead and poured part B into the same pitcher up to the 64oz mark, then set this aside for the moment.

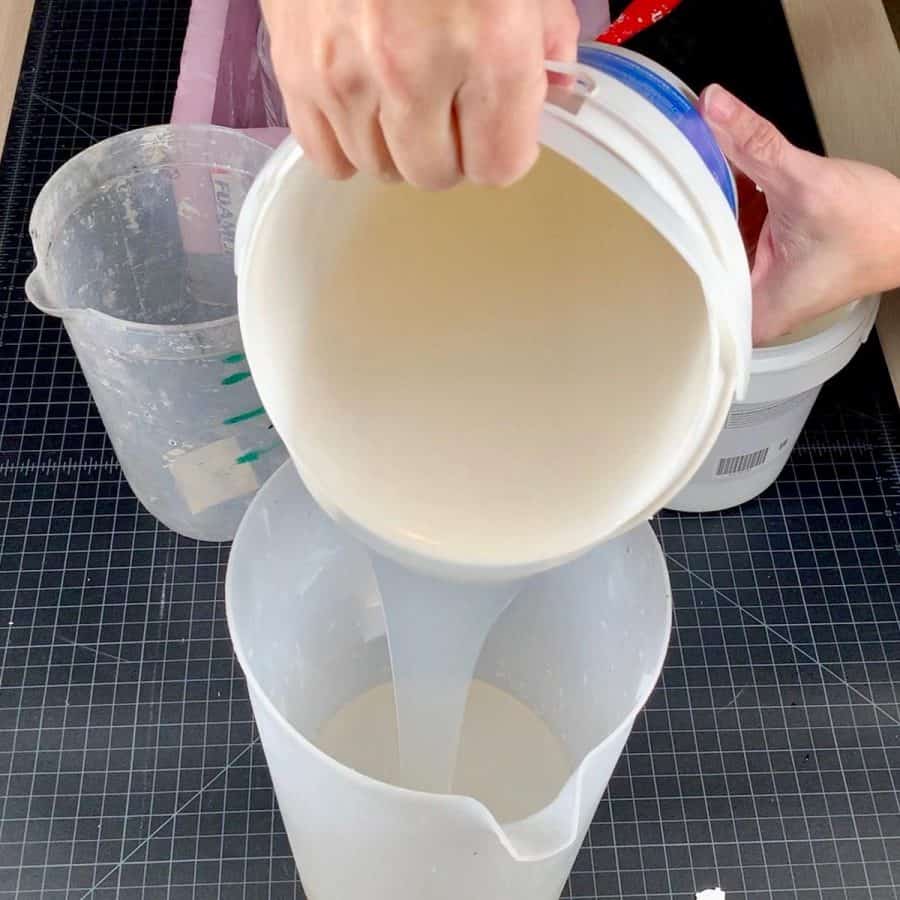
Next, I added the full container of A and B into the large plastic bucket. When pouring, make sure you scrape the sides of the containers that part A and part B came in.
This is so that you know you are getting equal amounts of each.
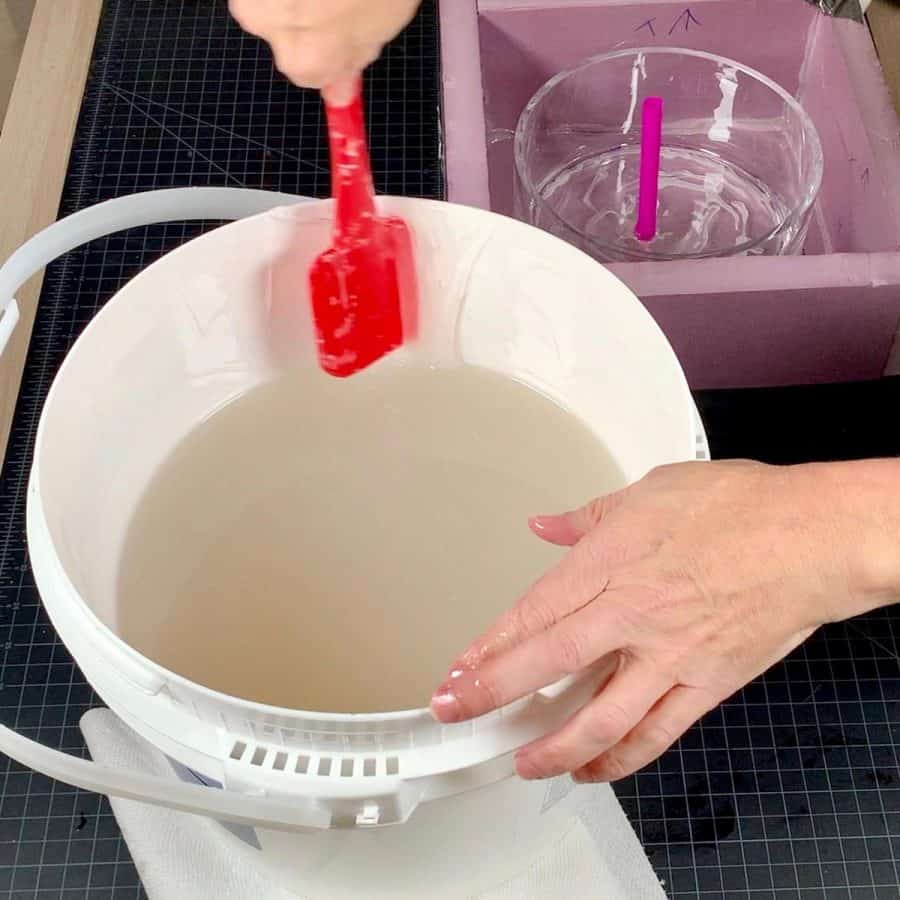
Mix them together well, and also take care that you scrape the sides of the main mixing container and the bottom.

Once I felt this was sufficiently mixed, which was at least after 3-4 minutes, I then separately mixed the parts in the pitcher, following the same steps.
Once it was mixed well, I added it to the large bucket and mixed them together.
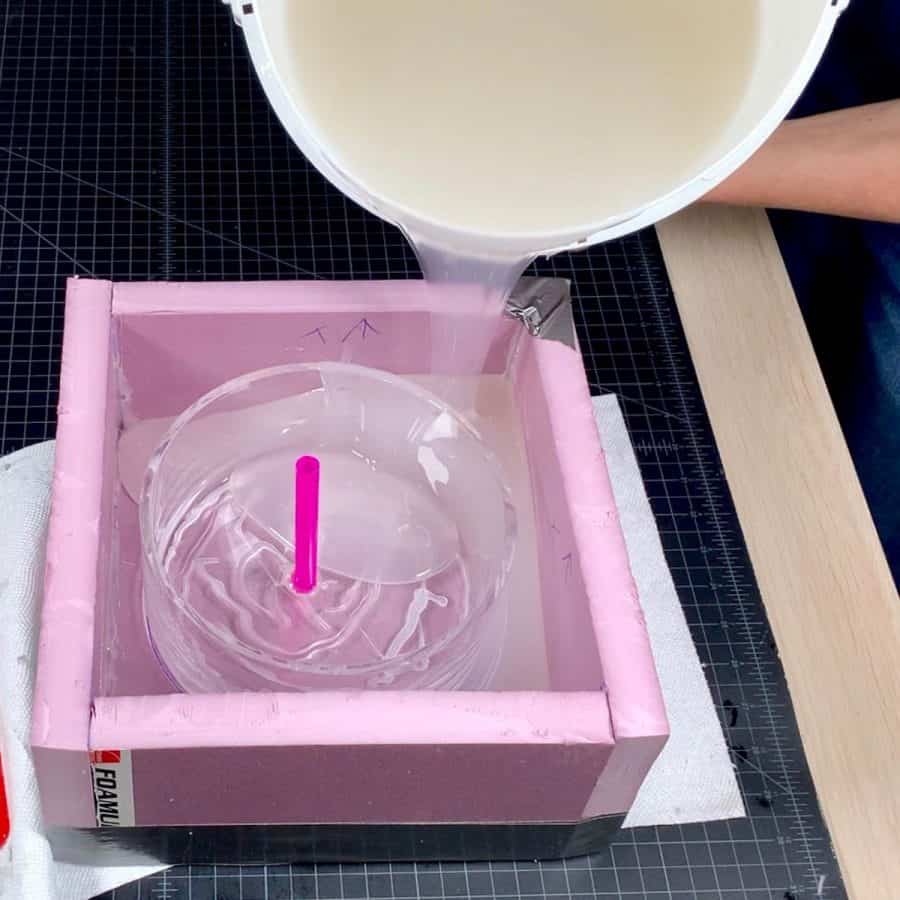
Now that everything is mixed, go ahead and pour this into your block mold. Start from the lowest points and let it overflow into the bowl as it gets higher.
Continue pouring directly into the bowl until you reach the top edge of the entire block mold.

Let this cure. The curing time will be approximately 18-24 hours at room temperature.
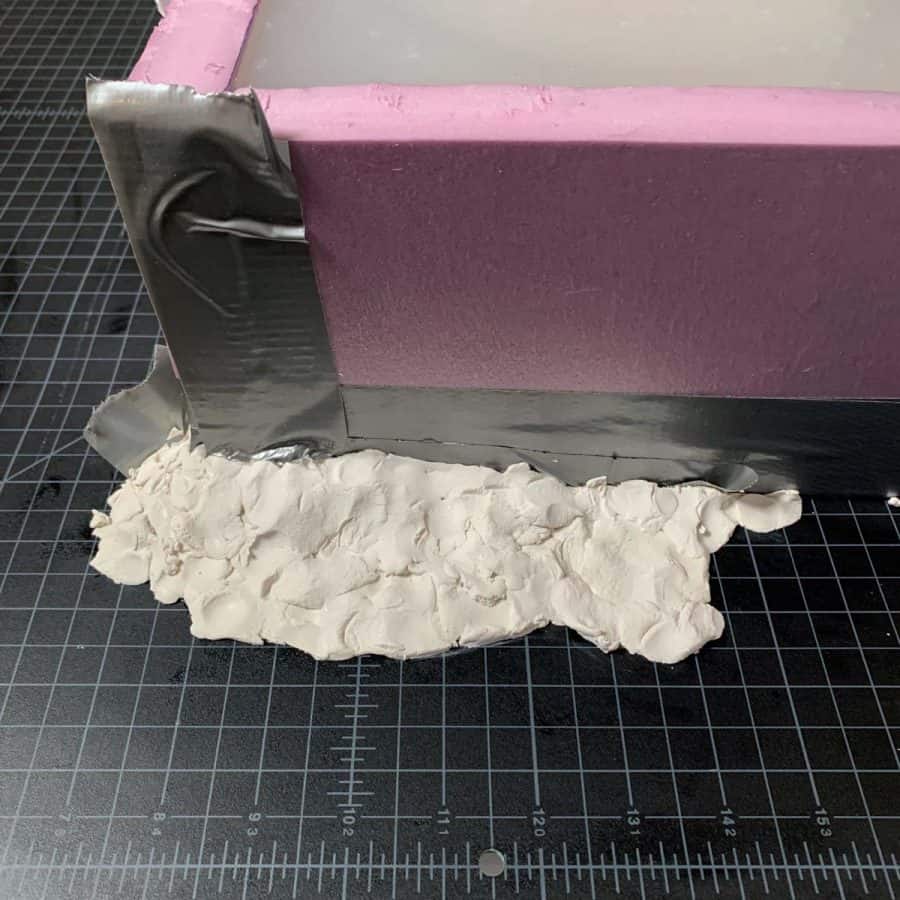
Check on this after about 15-30 minutes. If you see a leak, then use oil-based clay to plug it. Here’s where I fixed the leak that I mentioned in Step 3.
Step 5. Demold The Bowl From The Large Concrete Silicone Mold
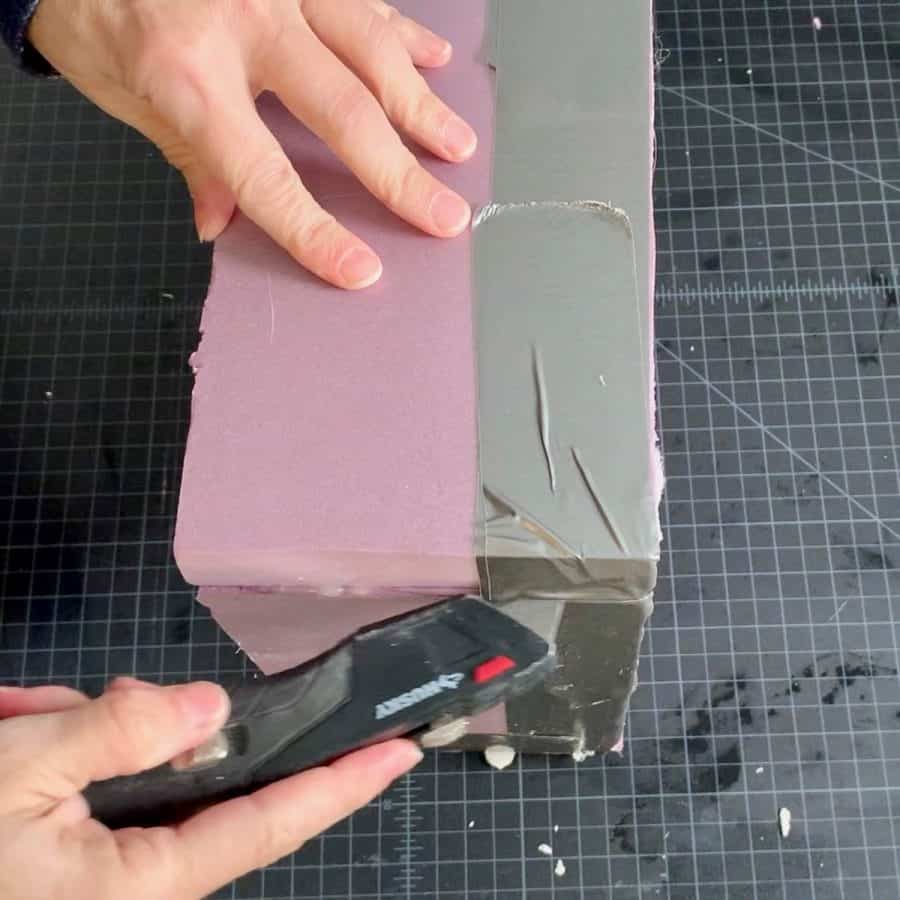
To remove the concrete silicone mold from the form, use a utility knife to cut through the taped areas and between the foam board pieces where it’s glued.
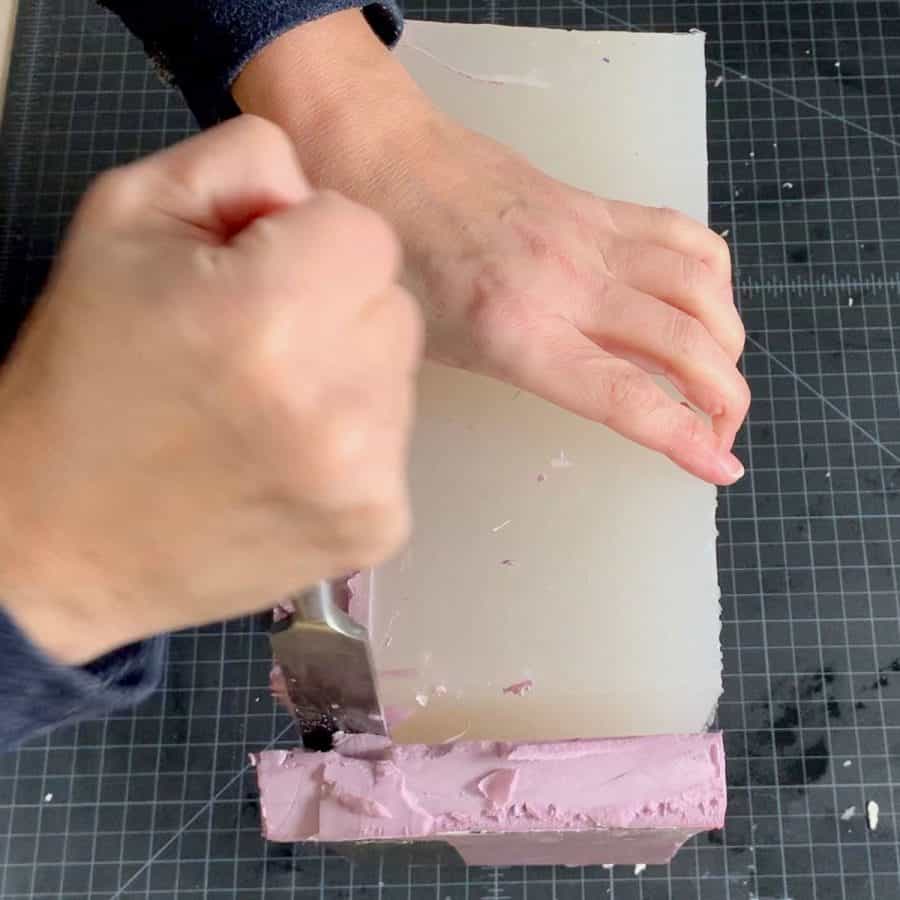
To help with removing the sides, use a putty knife ( I couldn’t find mine, but a wide chisel worked great) to shimmy in between the mold and sides and pry the pieces apart.

You probably have a bit of lip where the silicone is covering the bottom of the bowl. I trimmed this area to helpp make demolding easier, but your planter will look nicer you don’t.
If I had realized the impact, I would have left the silicone intact here. You can see in the final photos how there’s an uneven extended line at the bottom of my planter.

Now to demold the bowl, have a seat on the ground, take a sip of wine and a deep breath. Okay, just kidding– kind of.
I suffered because I didn’t realize that using rubbing alcohol to clean the glass would make demolding a next to impossible task. It was ugly, folks.
But I did learn, unfortunately after I had already demolded it, that rubbing warm soapy water into the mold would have made the task much easier.
Apparently, glass happens to form an especially tight bond to silicone, like a serious suction, so the soapy water will help separate it and allow it to slip out more freely.
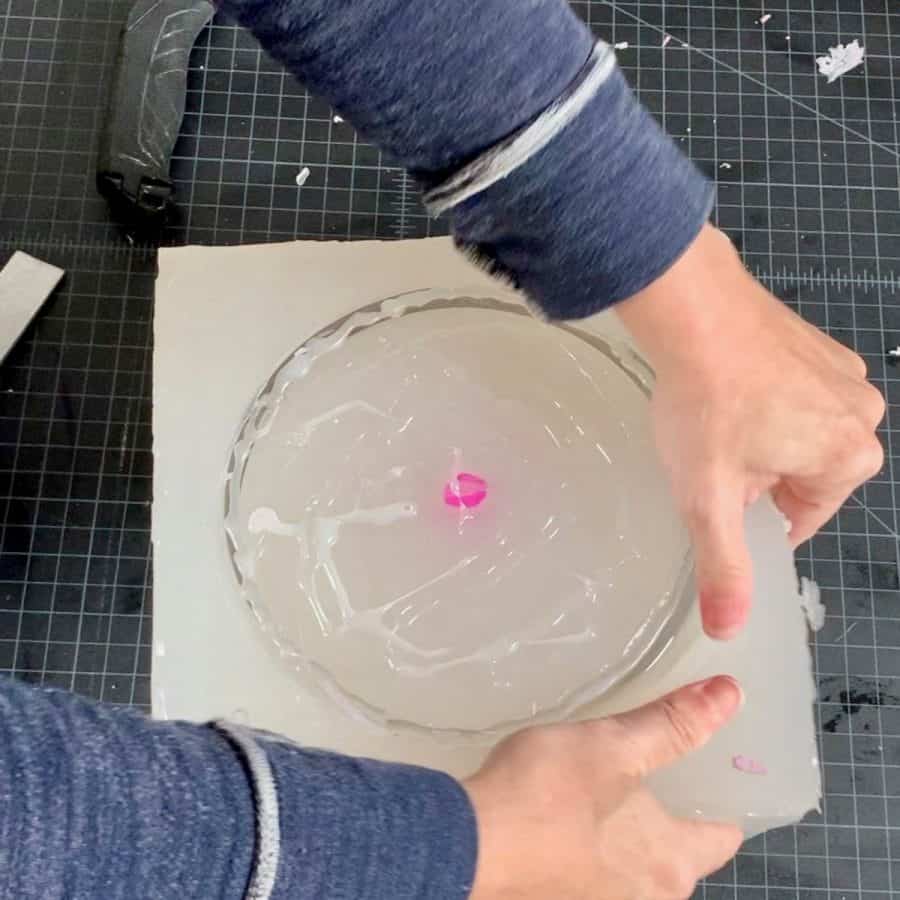
So please, start with the soap. First, press the sides away from the bowl to allow some air in then add some warm soapy water to your pitcher and pour some in.
Do your best to get it into every nook and cranny. Use your hands to rub it around if necessary.
Now you can start working that puppy out. Use those corners to apply pressure and then work on one side of the bowl.

Once you see one side pop its head out a bit, move to the other side, then continue like that.
Soon you’ll have enough of a piece sticking out that you should be able to pull on it and get it out. Man, I wish I knew about this soap water trick before I did this step.
Step 6. Cast The Concrete For The Large Planter
First, place the mold on a flat surface. It’s best to put it on something like a large tile or a very flat, level board because it will help with vibrating.
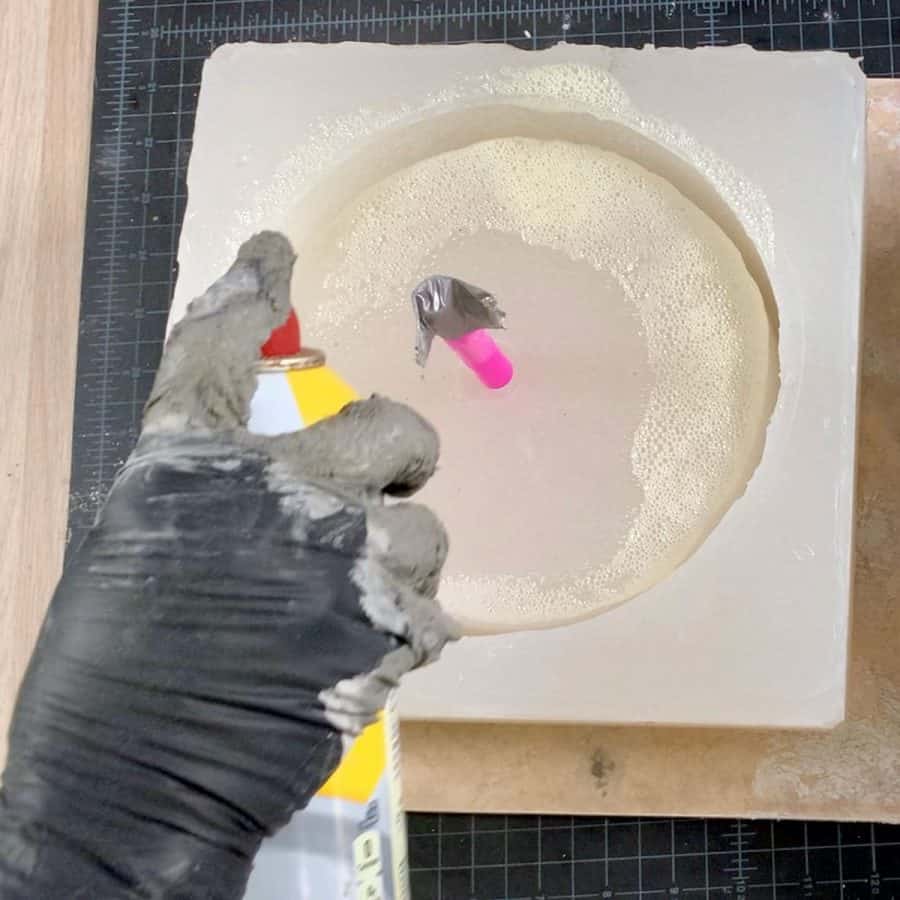
Note: I did this a little out of order in the photo. You should lubricate the mold and insert the straw before you mix your cement.
First, prep the mold for the casting by using a mold release. Spray this inside of the cavity walls and on top.
I recommend rubbing it in and smoothing it around to help reduce bubbles from the oil.
Now place a jumbo straw into the hole of the concrete planter mold, and place a piece of tape over the hole. You don’t want any mix to go inside when casting concrete.
Set up a large mixing bowl next to the mold and scoop in about 4 ½ cups of concrete mix.
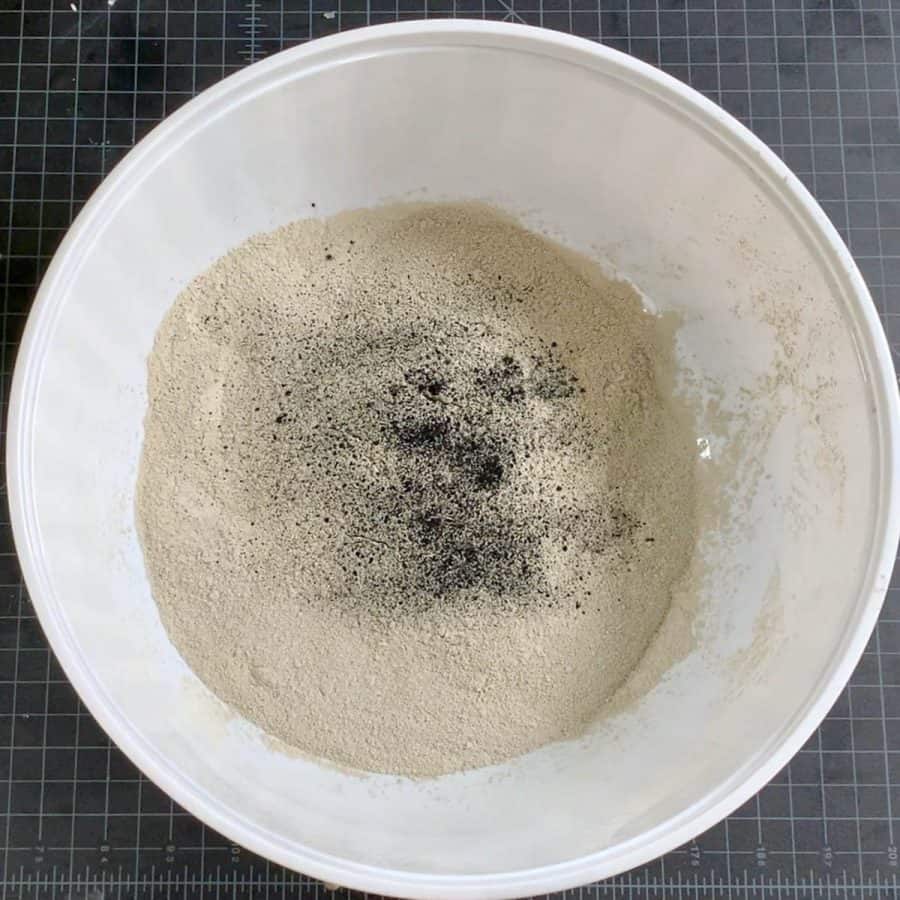
Optional: Add a little bit of plack concrete pigment to the dry mix and mix it in if you want the large concrete planter to be grey instead of off-white.
Add cold water and mix the concrete to a milkshake consistency.
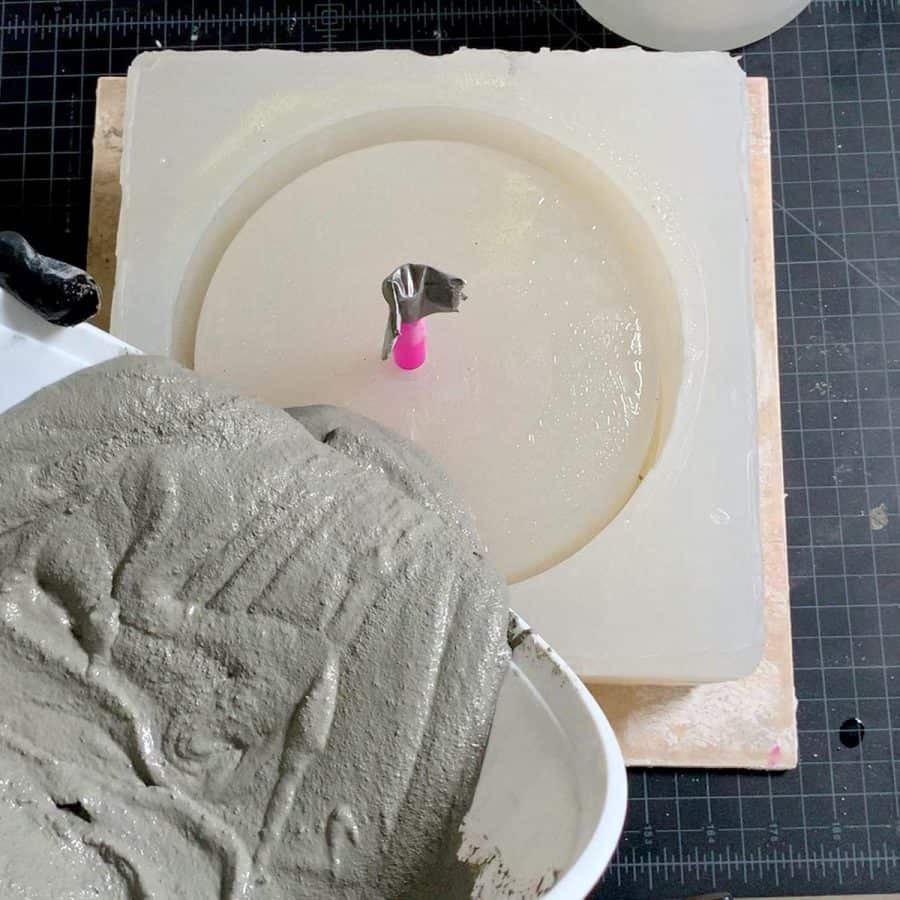
Once the lumps are gone and the mix is smooth, pour it into the large concrete silicone mold. To get the mix down into the sides, you can gently push the sides away to let the mixture sink down.
Next, vibrate the mold using your hands to gently tap the sides. Don’t push on the sides too much or you’ll cause more air to enter if the sides open up and this will actually create the pinholes you are trying to avoid.
Be sure to also lift the board underneath the mold and tap and shake it on your work surface.
For best results, do this for several minutes, at least until the air bubbles that are rising to the surface start to slow or stop.
Now let the concrete cure. The Cement All mix can technically be demolded in an hour.
But due to the thin walls of the cement planter and the heavy density of the silicone mold, I recommend letting this cure longer.
To be on the safe side, I let mine sit overnight to gain more strength.
Step 7. Remove The Planter From The Large Concrete Silicone Mold
Once the cement planter has cured, you can remove it from the mold. Removing the concrete planter was much easier than removing the glass bowl from the mold.

First, remove the straw using needle-nosed pliers, then use pressure on two diagonally opposite corners to work it out of the mold.

I recommend placing a towel underneath this in case it pops out quickly after you’ve jimmied it out half way.
You may need to keep working on it, placing pressure on one side to get air underneath it. Once one side loosens, then work on the other side. Keep working on it.

When you have it protruding about a third to half way out of the mold, then the rest will come out easily.
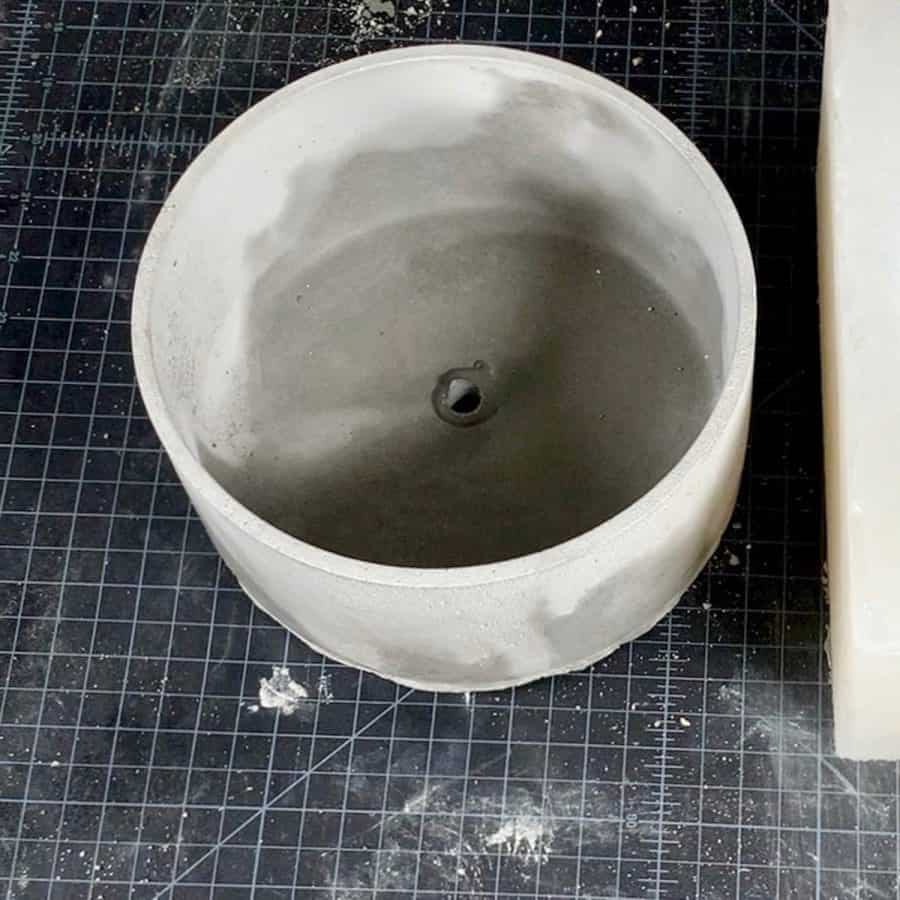
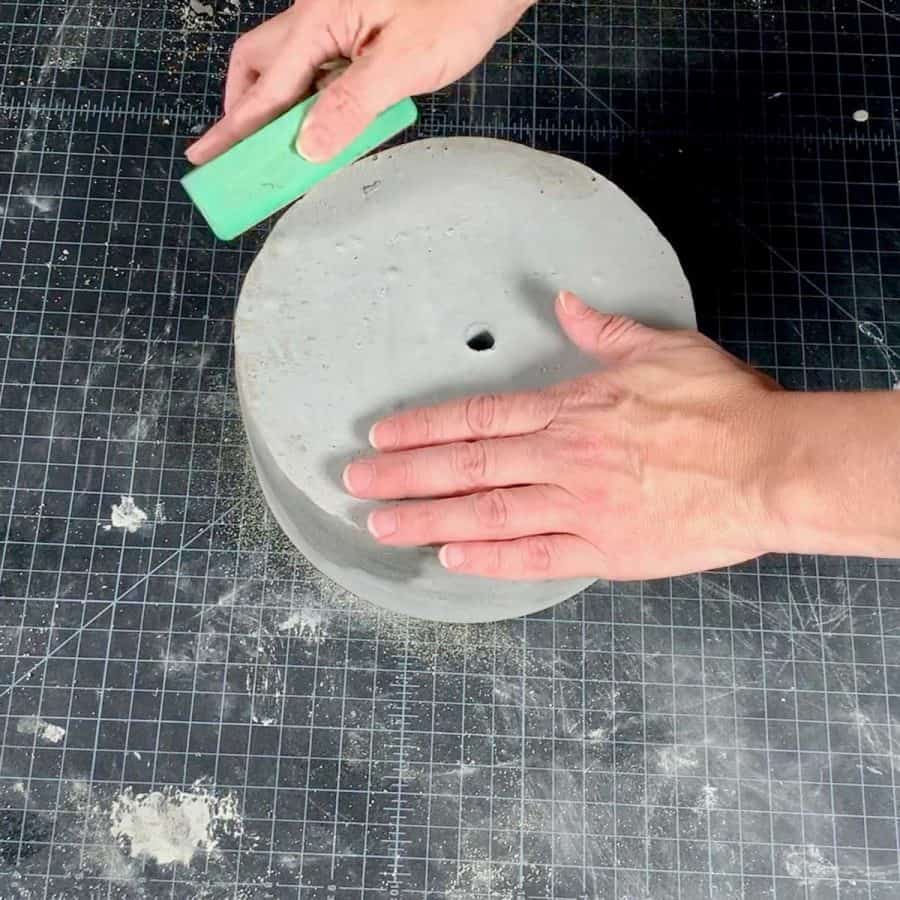
When the concrete planter is free, you can sand any sharp edges if you have them.
The top edges should be pretty smooth and it will likely only be the bottom corner edges that will be sharp, as well as some rough spots on the bottom of the planter.
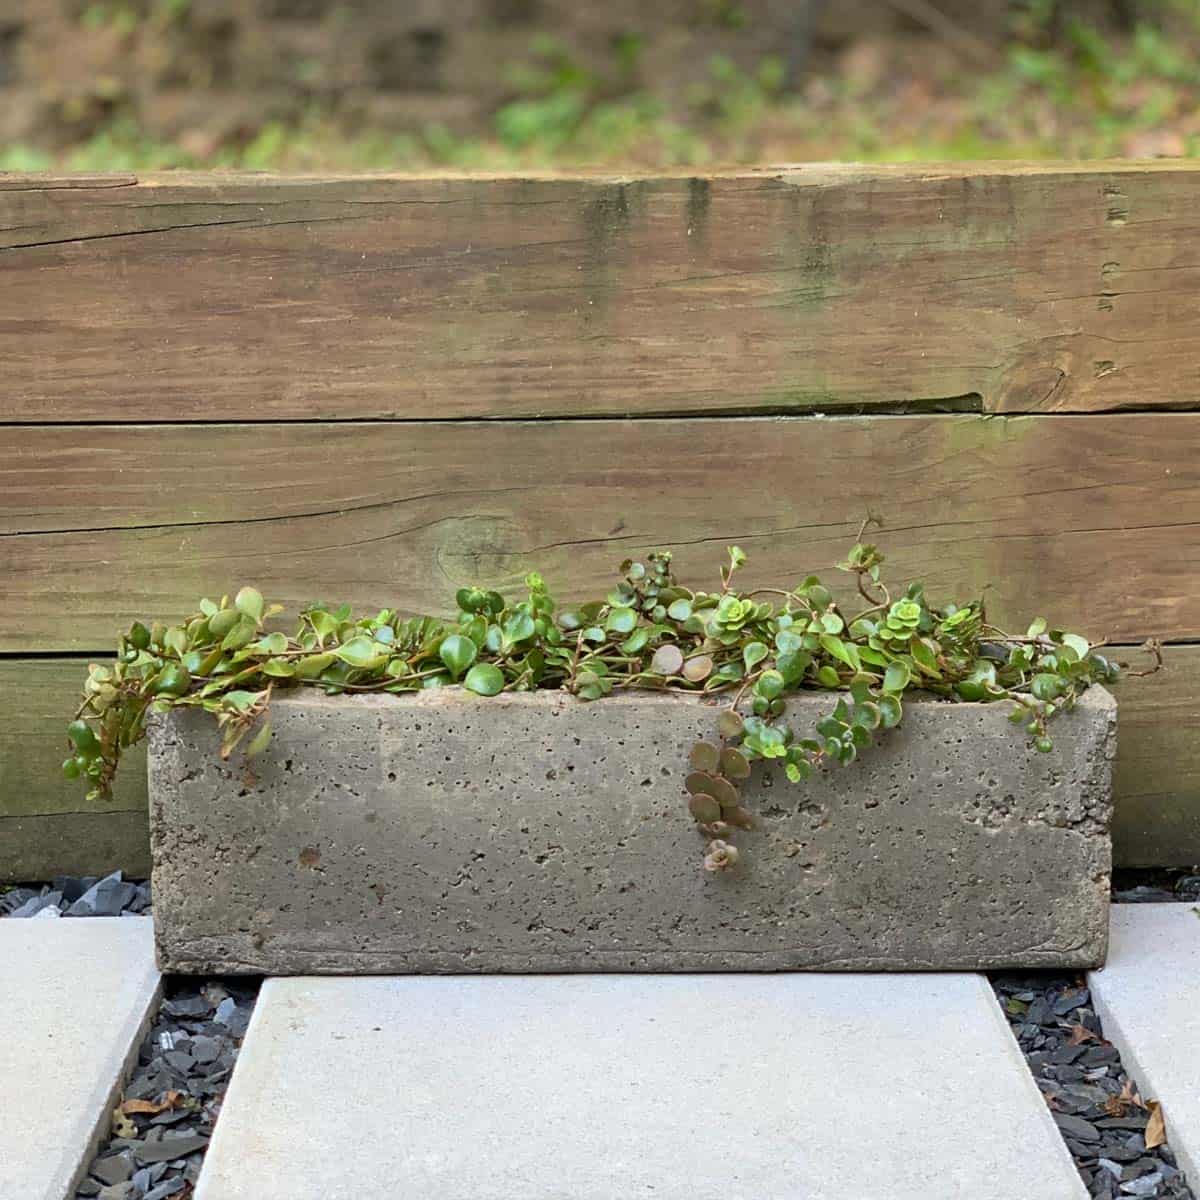
The final step is to pot your finished piece with some cute succulents!
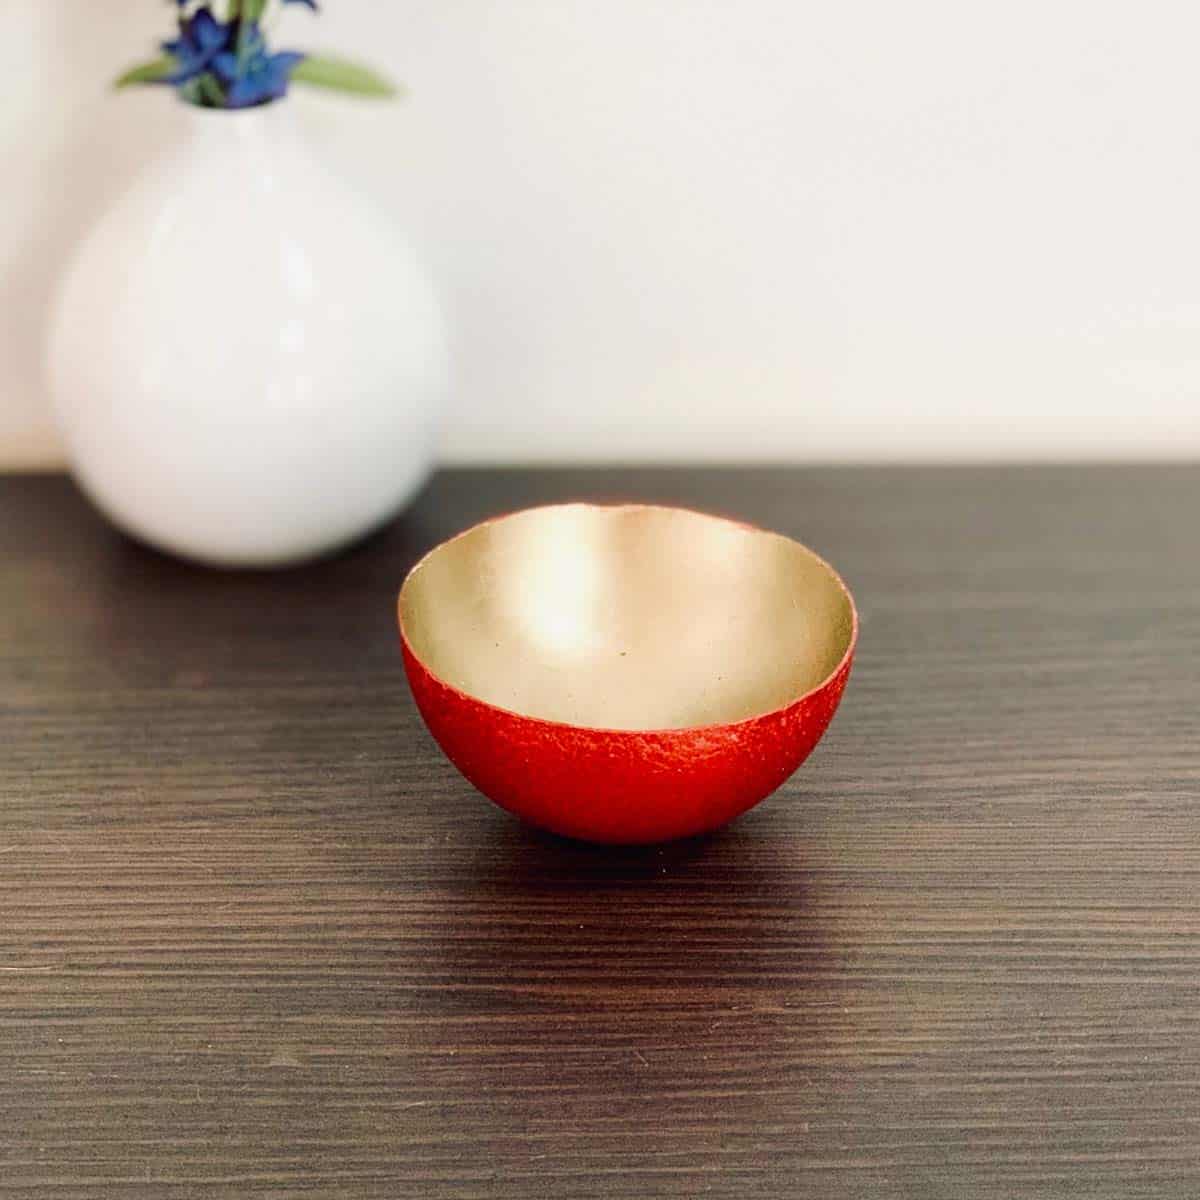
If you want to play with the finish on your planter, you can see how I applied a wood stain to a concrete planter.
And for another concrete planter, I made a really cool effect with an epoxy resin coating.
Don’t forget to Pin it for later!


DIY Large Concrete Silicone Mold For A Planter
Here’s how to make your own large concrete silicone mold for a planter, or any type of vessel. A detailed tutorial for making your own mold so you can make mass copies of concrete planters.
Materials
- Silicone mold A and B
- Cement
- Foam insulation board
- Hot glue
Tools
- Please see the full materials list above the tutorial for details and links.
Instructions
- Measure and Trace The Foam Board Pieces For The Block Mold Form And Cut Them Out
- Attach The Sides To The Base And Secure The Glass Bowl Using Hot Glue Or Silicone Caulk
- Create A Hole For The Planter To Drain Using A Straw To Glue To The Center Of The Bowl
- Cast The Silicone Mold Material Into The Form For The Large Concrete Mold
- Demold The Glass Bowl From The Large Concrete Silicone Mold
- Cast The Concrete For The Large Planter
- Remove The Planter From The Large Concrete Silicone Mold


Hi, Ellen
Not make a comment but more of a few tips. I would like to say I love your site, very informative especially the fact that you take the time to explain in detail your projects. I discovered that using motor oil, Vaseline, vegetable oil or WD40 works great as a release agent from your Silicone Molds. I found out of all of them WD40 works best for detail work. Also instead of using so much silicone I fill the larger negative areas with with wood blocks (2X4) pieces to save on material. Being I been using box store silicone products, didn’t realize there a part A & B product I could be using. Which is exactly what I need because I will be doing large scale pieces.
I’m still trying to figure out what’s the best concrete mixture I could use so my projects will not be fragile and last a lifetime.
Sincerely and always thankful,
Lupe
Guadalupe Herrera
Art/Creative Director – Innovative Graphic Artist/Designer
[email protected]
(713) 201-9160
Hi Guadalupe,
I’ll have to try the WD40, thanks. I intentionally chose not to fill in the extra pace because of the proportions of this mold. It’s so wide that I needed the extra leverage at the corners. I mentioned that I would have used foam or oil based clay if the leverage was less of a concern. Formy previous tutorial, I didn’t need extra leverage and used the clay.
The silicone I used is a platinum cured. Those will be the most durable and longest lasting, vs tin cured ones which are softer. The tin cured ones are also A & B. I have never used a silicone that didn’t have two parts, so I’m not even sure what that is?
Cement All is about the strongest concrete around. It’s almost impossible to crack, even if you try. Don’t add anything (no sand, no aggregate) to it. It’s super smooth too, so easy to cast. Home Depot sells it.