Cement Sneaker Planter (Step by Step DIY)
A tutorial for how to repurpose an old sneaker to make a DIY cement sneaker planter.
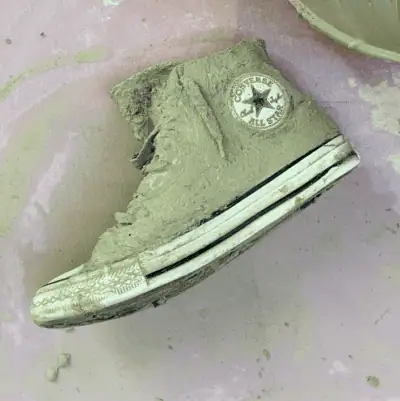
I saw a cement planter that someone made using a rain boot and I thought it would be really cute to make a planter out of a Converse hightop sneaker.
My biggest challenge was actually just trying to find cheap high top converse sneaks.

I love experimenting with unique shapes of existing items to make planters out of. Why not a cement sneaker planter?
I was hoping to find an old pair at a Goodwill store, but I skipped the trip and took the easy way out and ended up getting a pair on eBay for 12 bucks.
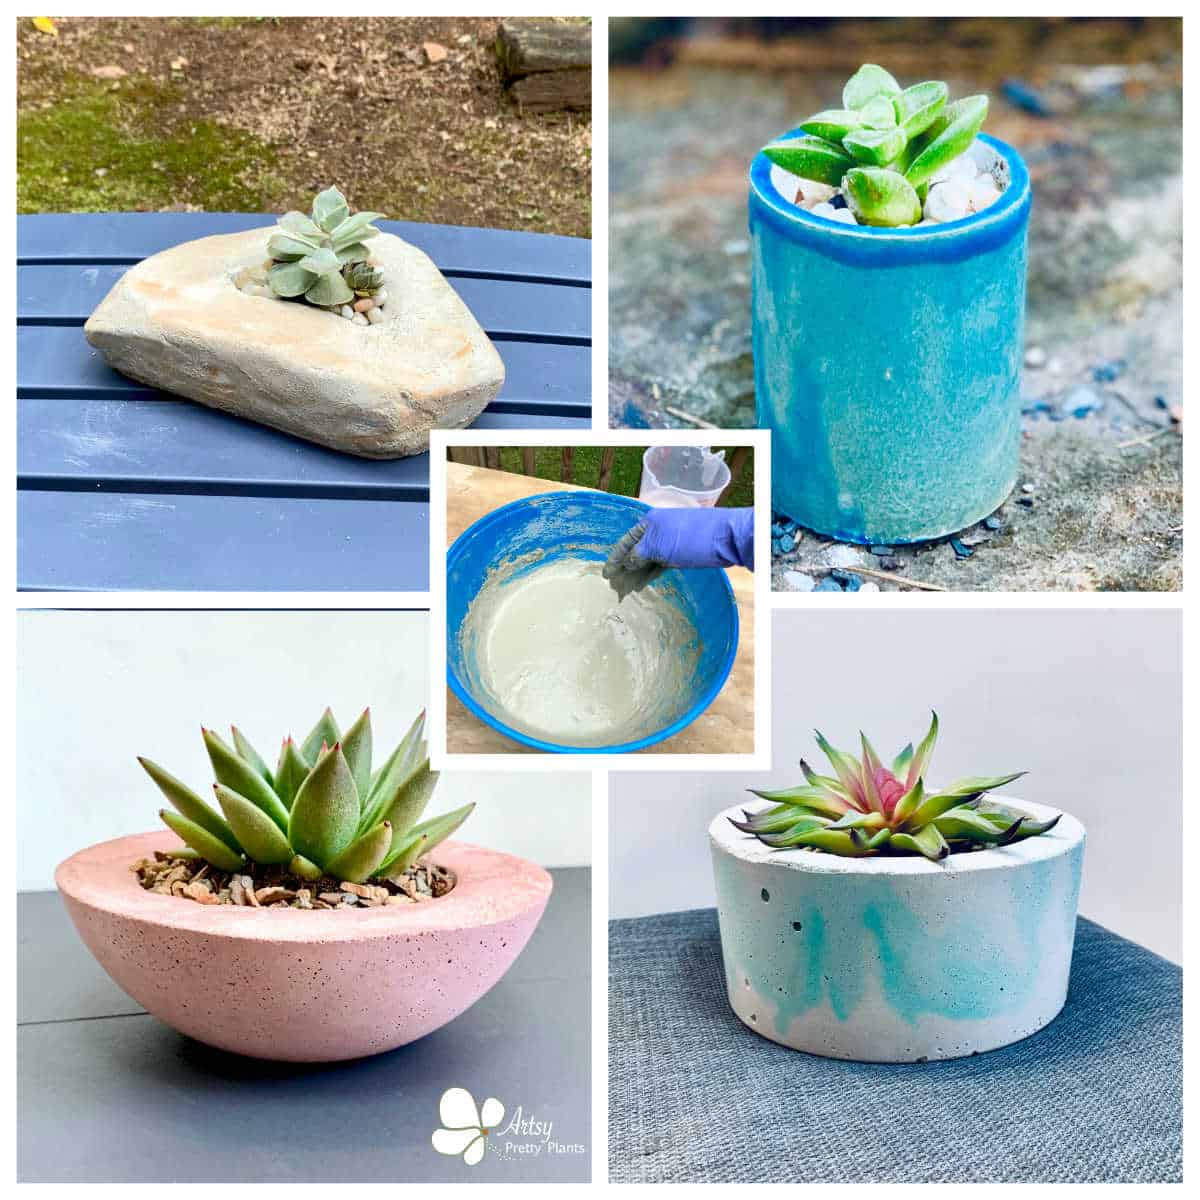
You may want to check out another cheap cement planter tutorial, the multi-compartment handmade succulent planter.
This is a good project for making a quick and unique planter and if this interests you, then you might also like my cement balloon planter.
Cement Sneaker Planter Video Tutorial
Please click the button to subscribe to my YouTube channel and be notified when I have a new video tutorial!
Some of the links on this page have been provided as a convenience for finding materials. These links may also be affiliate links. As an Amazon Associate I earn from qualifying purchases, at no extra cost to you.
I only recommend products I’ve used and loved, unless otherwise stated. Click here to read my full disclosure policy.
DIY Difficulty Level | Easy
Materials For Making A Cement Sneaker Planter
- Old sneaker of your choice
- Cement All, Rapid Set
- Durable nitrile gloves
- Disposable plastic mixing bowl
- Plastic grocery bag (for disposing of the leftover cement)
- Disposable plastic cup
- Disposable measuring cup
- Plastic wrap (if you wish to try to keep the markers from drying out)
- Old, cheap paintbrush
- Paint or craft sticks, or use gloves (for mixing)
- Rags and/or paper towels
- 4 plastic tube shaped objects that are rigid, like old markers. You can also use plastic cake dowels (trimmed)
- Power drill
- Approximately 1/4″ drill bit and 1/2″ drill bit
- Needle nose pliers

Before starting the tutorial, it may be helpful to read my article comparing the different concrete mixes and sealers– Cement & Concrete Crafts Tests!
Another important article is Making Cement Crafts Techniques & Tips with info on cement materials, mixture consistencies, demolding, safety and clean up!
DIY Cement Sneaker Planter Tutorial Steps
Step 1. Prep The Sneaker
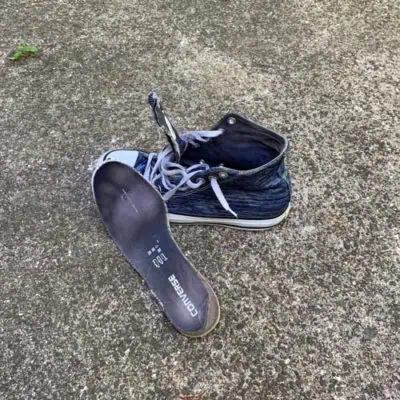
Remove the sole insert from the sneaker.
Step 2. Make Drainage Holes
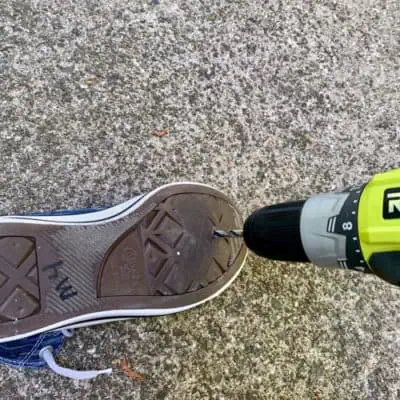
Create drainage holes using a drill. Start with a smaller drill bit, like 1/4″, and then switch it out to a half inch.
I had one hole that was in a spot much thicker than the rest where I had to make several passes.
Be sure to not drill through the actual fabric of the sneaker.

Take the tubular object – in my case, markers and push them through the holes so that only the cap is left inside.
If you are struggling with getting the marker into the hole, then try sizing up with a drill bit, or use an X-acto blade to widen it.
Make sure the open end of the cap is on the underside so that cement doesn’t get inside it and that it’s not sticking out of the bottom too far because you’ll need to put the sneaker down flat while working on it.
You also need it long enough that you can grab it with the pliers when you remove them.
If you want to salvage the markers, you can wrap plastic wrap around the tips while the caps are in the sneaker.
Step 3. Mix The Cement

Mix the cement with water, in the disposable mixing bowl. You want the consistency to be like a milkshake.
Step 4. Coat The Sneaker With Cement
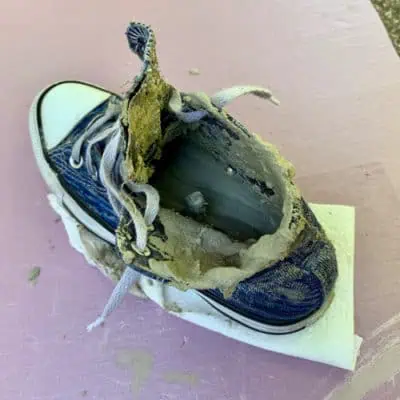
Pour it into the sneaker to coat the inside. Be sure to get all the fabric coated so water doesn’t seep through and create mold.
After the inside is coated, use your gloved hands to scoop the cement onto the outside of the sneaker.
Keep going around the sneaker until it’s fully coated. Be sure to get the laces, under the laces and the tongue.
Step 5. Clean Up The Sneaker
Next, wipe the cement off of any spots with rubber. Start with a dry paper towel, then use a wet one.
I wanted the Converse logo to be visible, so I also wiped that off.
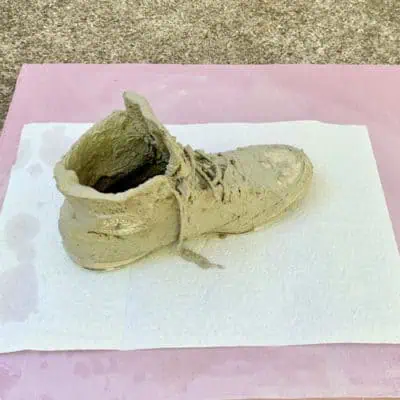
Step 6. Cure The Cement
Let it cure.
This can take 1 to 3 hours, depending on temperature and humidity of your working environment.
I actually put mine in the sun to speed up curing time.
Step 7. Remove Drainage Caps
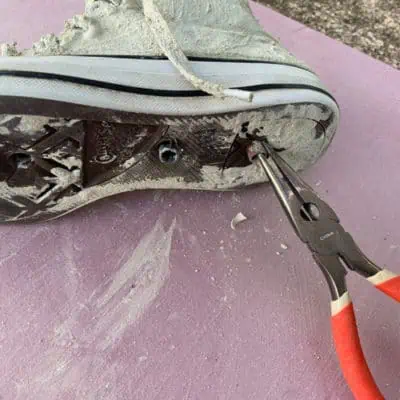
Once it is cured, remove the marker caps with the pliers.
Step 8. Re-Coat The Sneaker If/Where Needed
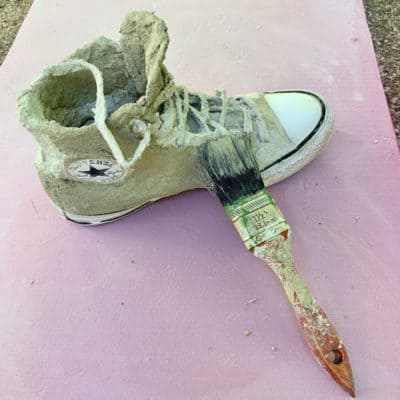
If you have some spots that need to be filled in or smoothed out.
Mix up some more cement, then using the paintbrush, dip it in cement to fill in and smooth out the surface, if needed.
Step 9. Plant The Cement Sneaker Planter
Once that layer has cured, you are free to place plants in your new sneaker planter.
If you love making cement planters then you can read more here with this guide to making cement planters & everything you need to know. Also, you may want to check ou 21 unique DIY concrete planter tutorials.
Don’t forget to Pin it for later!


thank you
Would you use same plan as with tennis shoes to make cement planter from leather boots?
Hi Kathy,
Yes, but my concern is whether the cement would stick to the leather. I have a feeling it would crack off because it doesn’t have much to grab to. You may want to do a test first. Even if it goes on at first, it might start cracking or flaking after a short period. Unfortunately I don’t have experience with that. The circle/logo on the converse sneaker is leather and I don’t think it would have stuck.
Hi. Tried to do this project & don’t think it came out as nice as yours. Please clarify how thick the cement is when u put it on the sneaker? Is it pretty thin or caked on?
It seems like my cement was caked on & pieces of cement were falling off the sneaker. Please clarify. Thanks
Hi Michele,
I made these 4 years, ago, but I believe it was on the the thin side. I made a planter out of both sneakers, and I do recall the the consistency of the two batches were slightly different. The thinner one came out better. I think pieces were coming off mine too. What I show in the video is how it was.