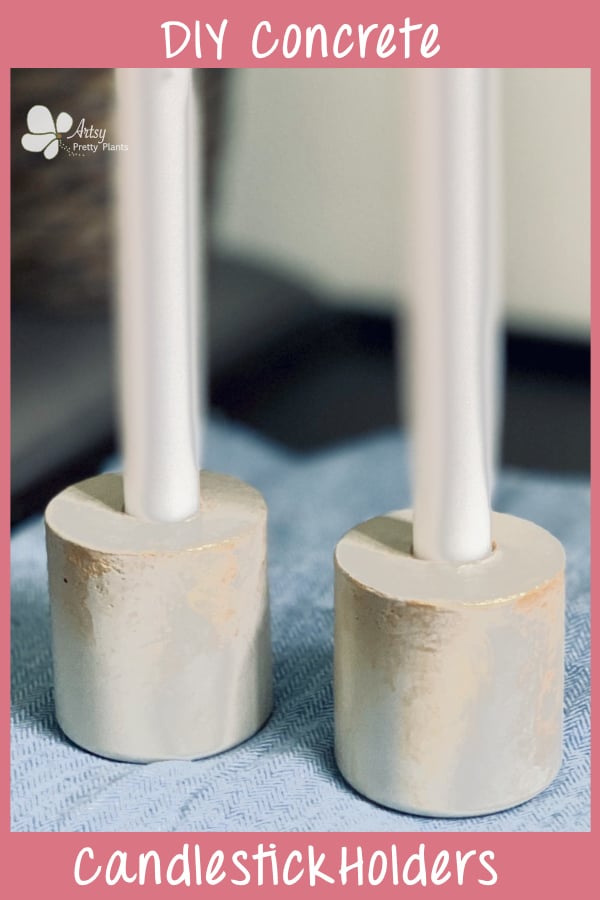
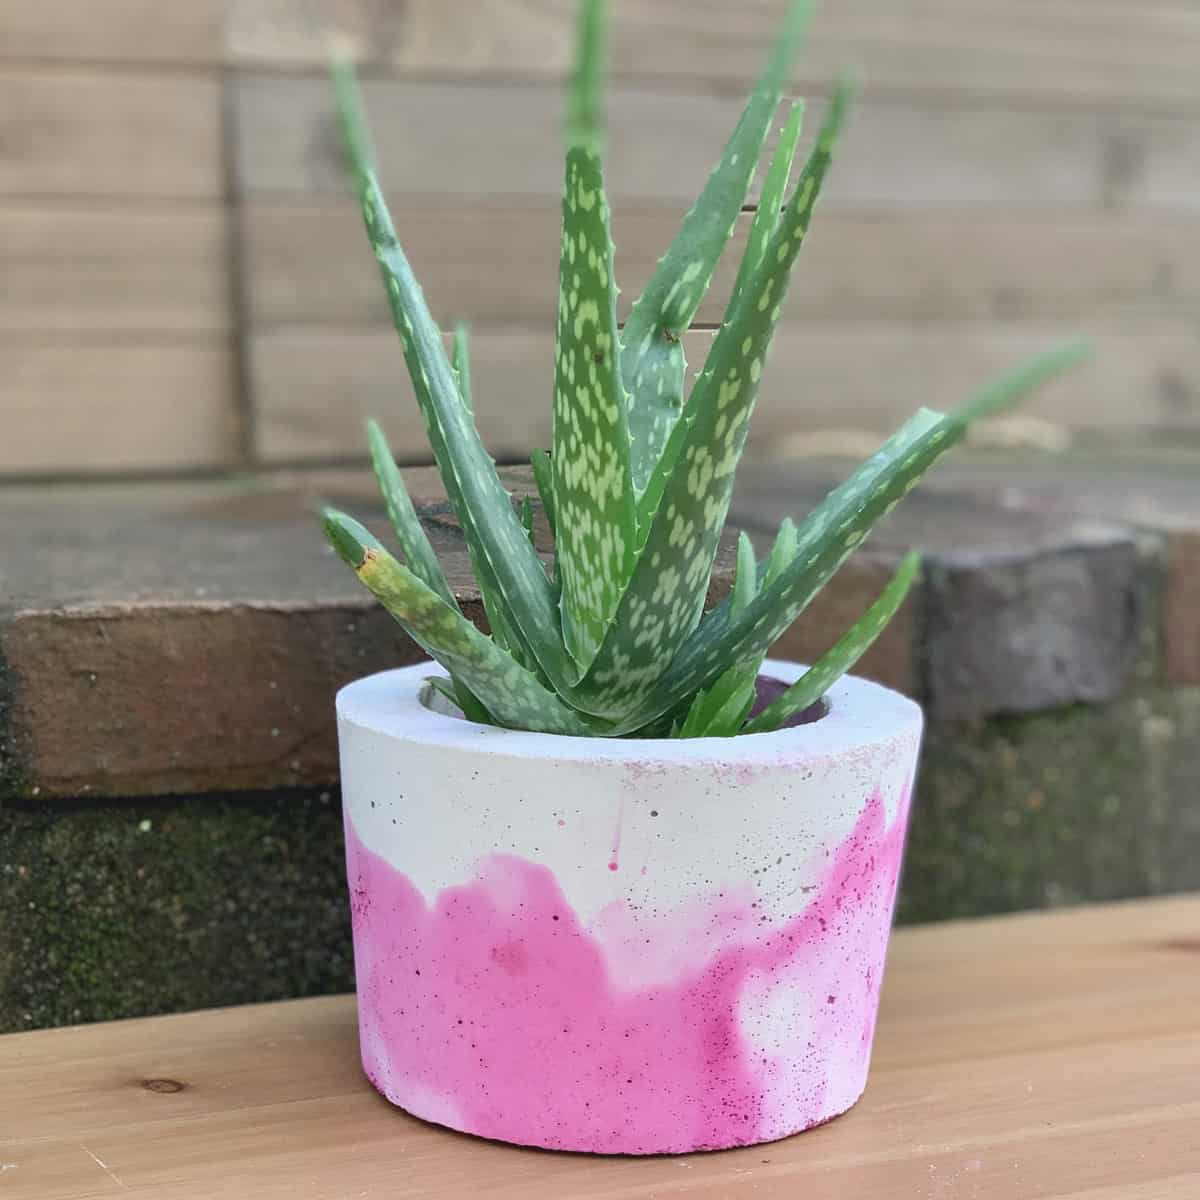
Elegant DIY Concrete Candlestick Holders for Fall
How to make DIY concrete candlestick holders for fall, to decorate your home.
These elegant candlestick holders are a great way to decorate your fireplace mantle or table for fall decor.
One of the thing’s that is great about these concrete candlestick holders is that they can even double as Christmas decorations.

I get amused when I make things with cement and realize there is only one brand and type of plastic container that will work perfectly for my project.
I get downright stubborn about using anything else when I get it stuck in my head that no other size or shape will do.
This, of course, people would tell me is ridiculous- (I disagree) :0]. It’s an affliction, I swear it is.
I could probably put out twice as many tutorials if I didn’t get so dang hung up on these things. So what am I talking about?
Smartwater bottles, of course! My poor husband always gets put on the mission of running around town for these very specific needs of mine.
What happens is that I horde away every plastic container I ever use.
They go into plastic bins and are then sorted by shape, and soon they will be further categorized by size because the collection is GROWING.
I mean, there are three other concrete candle holders I made using those water bottles. They are the bright rainbow colored one, the fall pillar candle holders, and the white Christmas one.
And though I have countless plastic containers, it’s not uncommon for me to only have one of a certain size or shape, that I “decide” is perfect.
So I’ll run a test and if that holds true, then I’m going to need back ups because I will need to revise the tutorial, or in the case of these fall candlestick holders, I’ll need a pair of them.
Top on my list of when I have a budget for getting some help —is a plastic container finder person. I just get myself so stuck on things!

The good news is that these Smartwater bottles are readily available at most places, at least everywhere I’ve lived on the east coast–and I have lived in just about every east coast state.
I’m guessing since Coca-Cola makes them, you can find them throughout the US.
Here’s an actual concrete candle where I utilized plastic bouncy balls for the mold! For the complete list, plus some others from around the web, check out these 12 amazing ideas for concrete candle holders ideas!
And here’s another project you can check out after this tutorial, where you can make more fall decor with these concrete coasters with iridescent gold leaves.
Some of the links on this page have been provided as a convenience for finding materials. These links may also be affiliate links. As an Amazon Associate I earn from qualifying purchases, at no extra cost to you.
I only recommend products I’ve used and loved, unless otherwise stated. Click here to read my full disclosure policy.
DIY Difficulty Level | Easy
Materials For DIY Concrete Candlestick Holders For Fall
- Rapid Set Cement
- Disposable bowl
- Disposable cup
- Durable nitrile gloves– I like these because they are so durable, you can rinse and reuse and end up costing less in the long run
- Safety glasses
- Silica rated dust mask
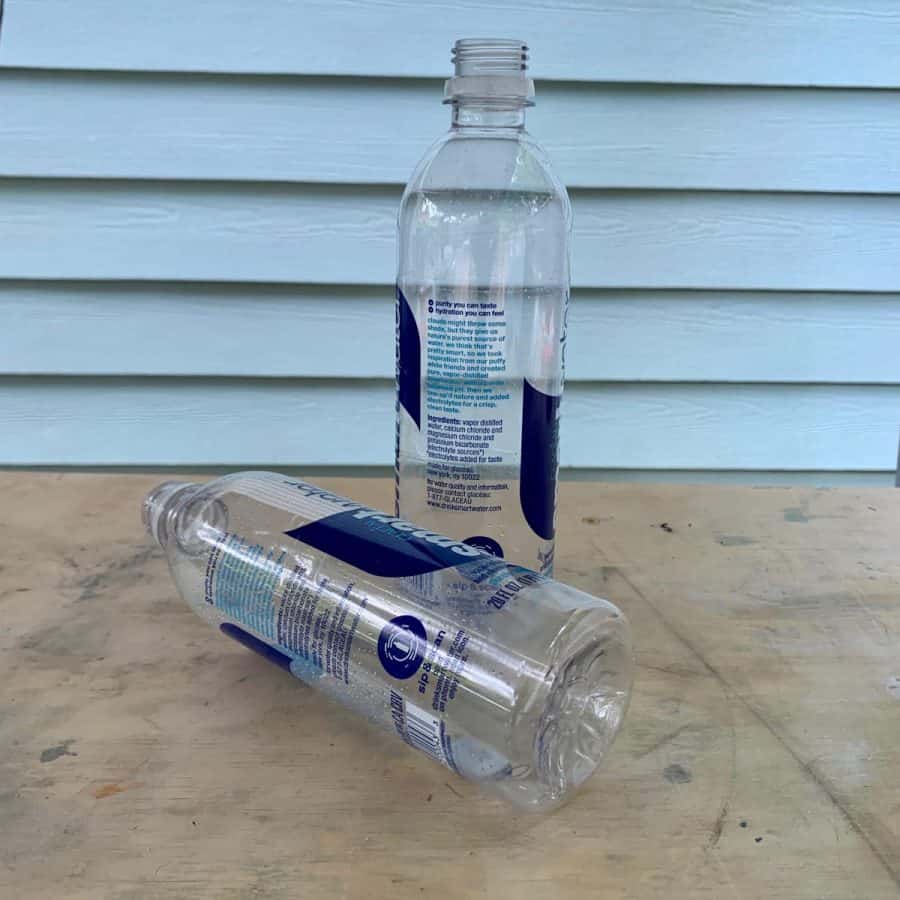
- (2) Smartwater bottles- 16 oz. (they happen to be the perfect size and shape because of how straight they are, then they round down at the bottom)
- X-acto, craft knife or box cutter
- Play sand
- Acetate sheet
- Packing tape
- Cork backed ruler
- Cutting mat
- Hot glue gun
- Candlesticks (2)
- Heat gun
- Roll of something with a straight factory edge like aluminum flashing, cetate, craft paper, etc.
- Metallic craft paint- I’m very particular about this particular paint, I tried others and didn’t like the effect other metallic paints looked for this project.
- Small paintbrush
- Foam brush
- Concrete sealer
Before starting the tutorial, it may be helpful to read my article comparing the different concrete mixes and sealers– Cement & Concrete Crafts Tests!
Another important article is Making Cement Crafts Techniques & Tips with info on cement materials, mixture consistencies, demolding, safety and clean up!
Tutorial Steps For Fall DIY Concrete Candlestick Holders
Step 1. Turn The Water Bottle Into The Mold For The DIY Candlestick Holders

First, cut the bottle to size. You’ll want to utilize something to act as a straightedge to help you get a straight line.
Use something that comes in a roll, like a roll of acetate sheeting or aluminum flashing.
Flashing is especially good because it has some rigidity and enough thickness, it basically acts as a true straightedge, but for these, I just used a piece of acetate.
Next, place the bottle on the work surface and measure up 2 ¾”.
Make this mark in a few places around the bottle. Then wrap the factory edge of the flashing/acetate around the bottle and line it up with your marks.
Use blue tape to tape the flashing to the bottle so it doesn’t slip.
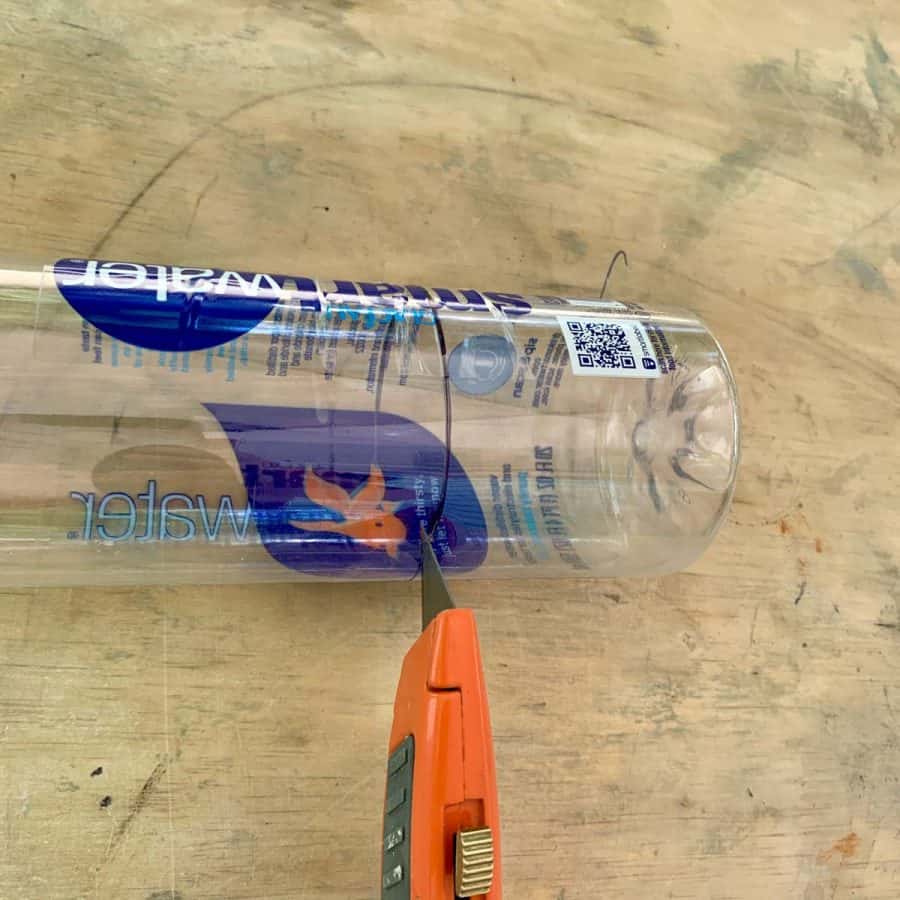
Now carefully score it with an X-acto, and then cut through the bottle.
Repeat for the second bottle.
Step 2. Make The Inner Mold For The Fall Candlestick Holder

Next, we need an insert for the mold for where the candle will go.
You don’t want to use the candlestick itself for this because it will heat up during the curing process and the wax will melt.
Cut a piece of acetate sheet to 4” by 3” and roll it around the candle so that the 4” is the height.
Use packing tape to tape it together. Pull the acetate down the candle so there is an inch or so of space.
Mark a line around the inner mold cylinder at 2 ½”, this will be your stopping point for when you insert it into the concrete.
I made the cylinder longer than the space for the candle because it will be easier to remove.

Now trace the candle onto another small piece of acetate and cut it out. Glue it to the bottom of the cylinder.
Next, pour sand inside and add some water to make the sand moist so that it is more firm.
Make sure the bottom is seated so that the cylinder is plumb and straight.
It will make it easier to keep it plumb when you insert it into the mold.
You probably won’t need to make two of these.
When I removed this from the first candlestick holder, it was fully intact and I was able to reuse it for the second one.
The only thing you may end up needing to do is to add a new piece of acetate to the bottom of the cylinder, because it may stick inside the concrete candlestick holder.
When I demolded the second candlestick holder, that bottom piece stuck to the bottom.
But if this happens, don’t worry about it, it won’t hurt anything by being there and you won’t see it.
Step 3. Cast The Fall Concrete Candlestick Holder Mold
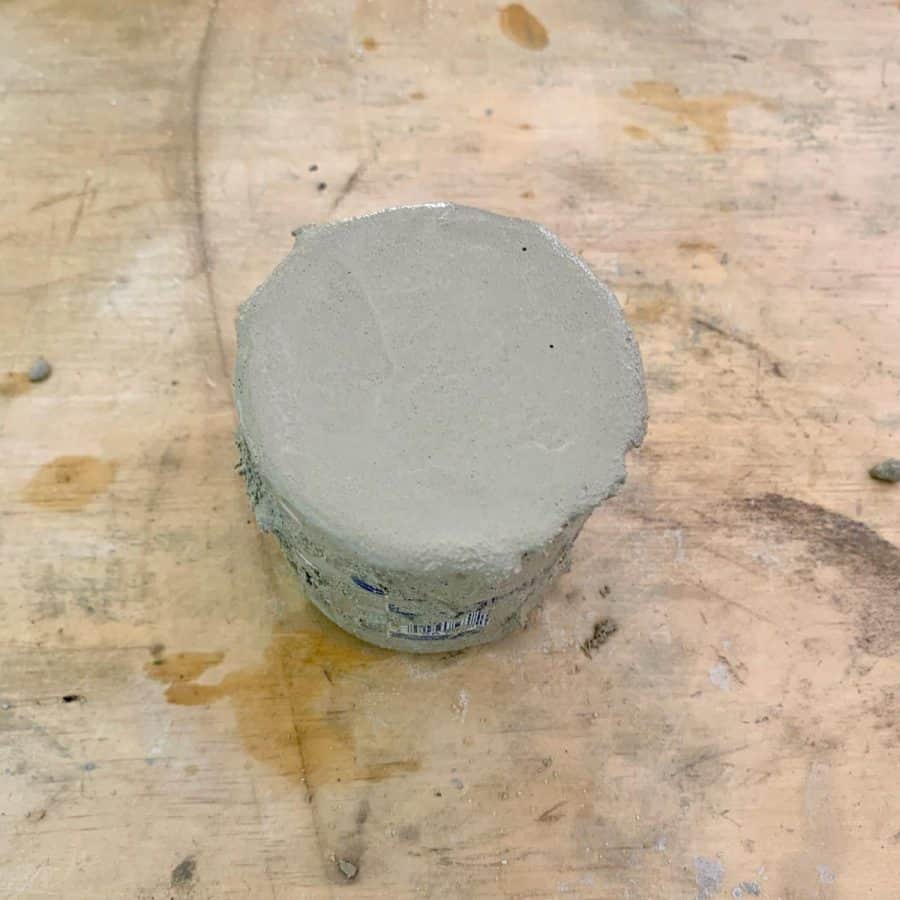
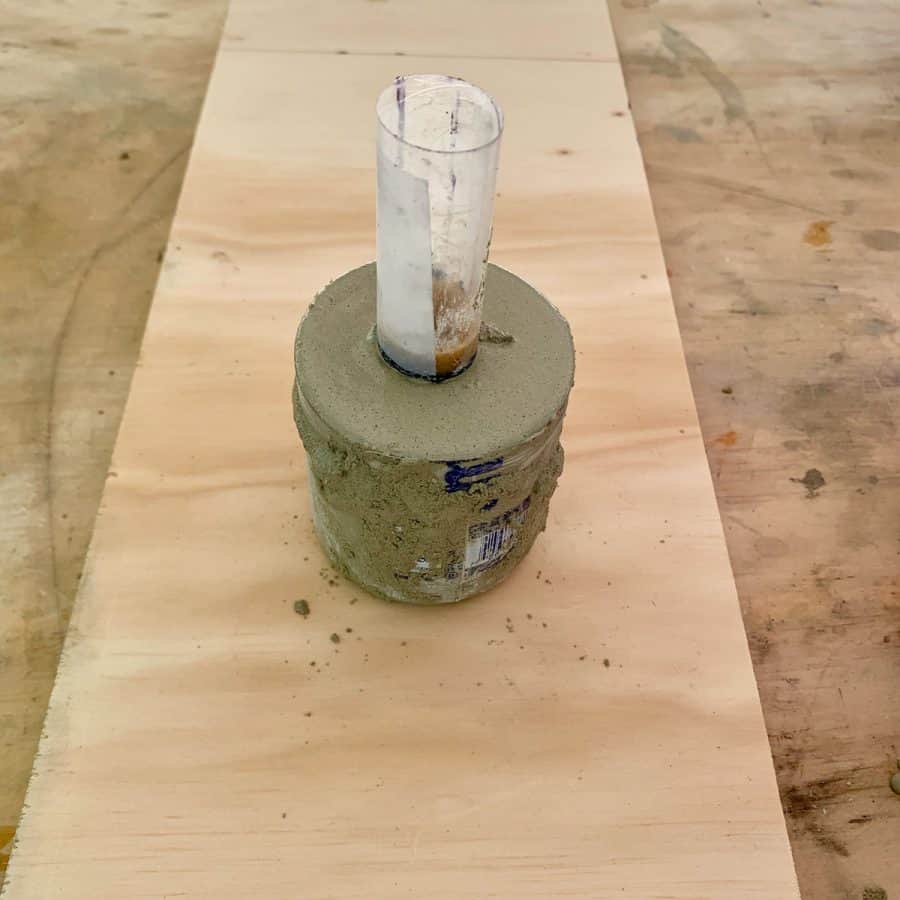
Mix the concrete to a thick milkshake consistency and pour it into the water bottle.
When it’s nearly filled, center the cylinder above the bottle and press it down, ensuring that you stop at the line you marked.
Now re-insert the candlestick into the top part of the cylinder. It will help you be able to tell if it’s lined up straight.
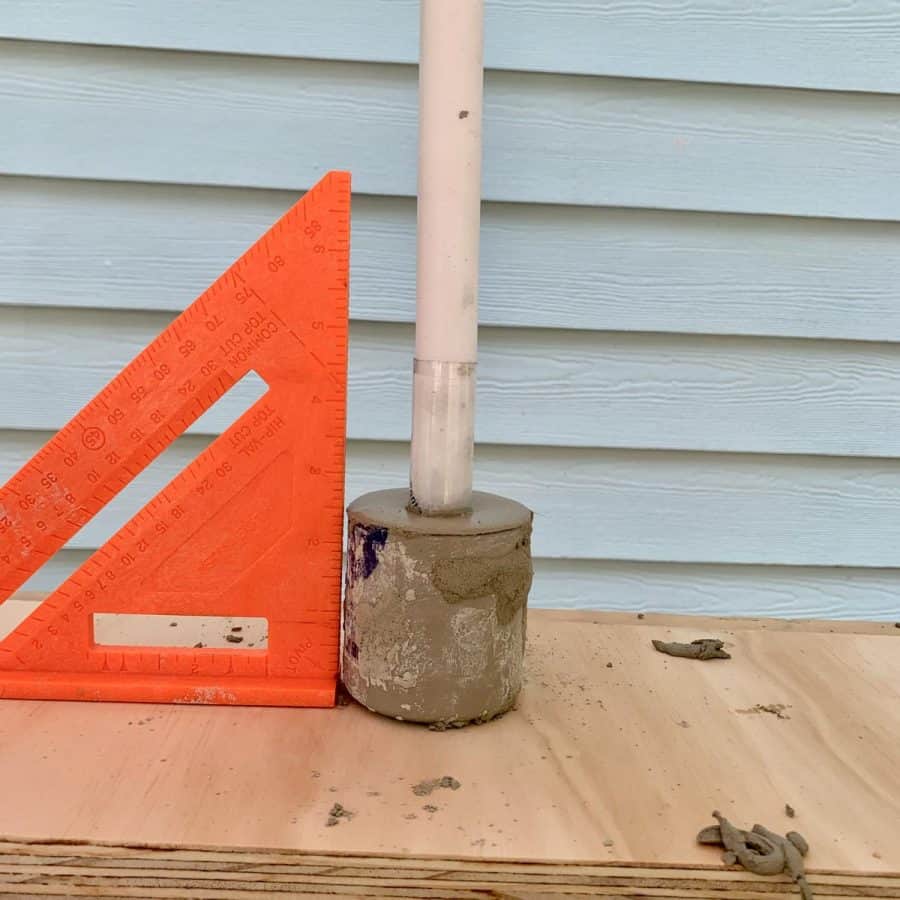
Use a squaring tool to make sure you do have the cylinder standing up straight and plumb. Once the concrete has started to set, remove the candlestick and then place a small weight on top to help keep it in place.
Let it cure for an hour or two. A longer cure will help it have a glossier surface when demolding.
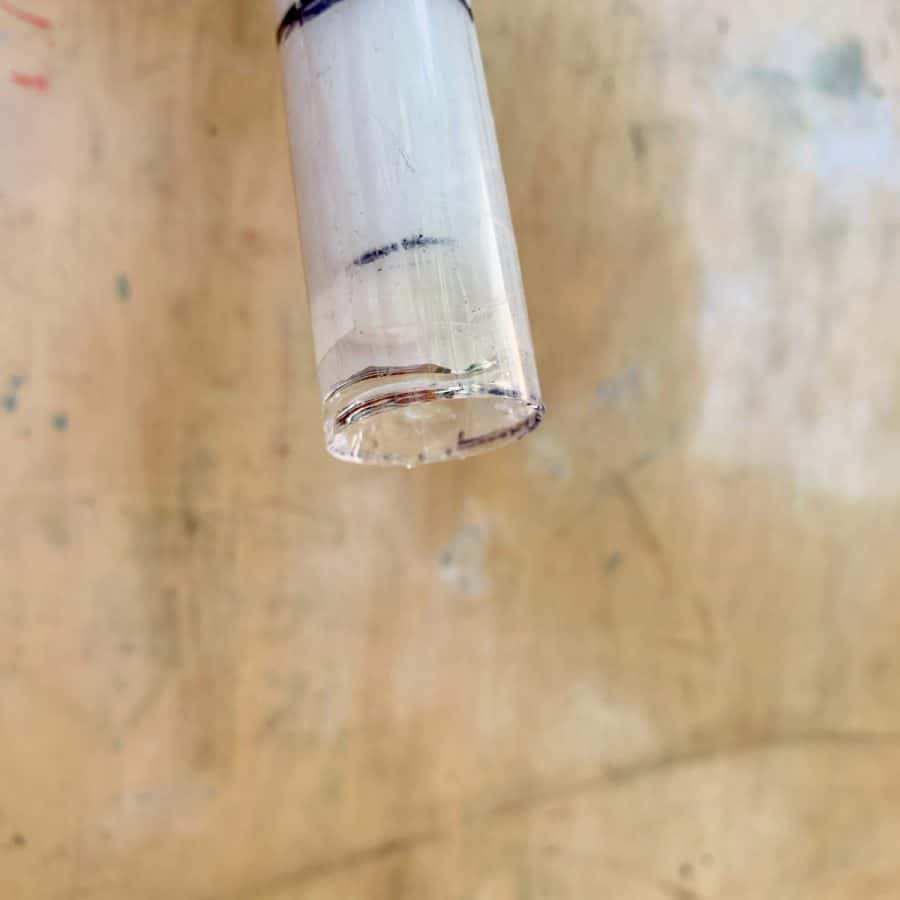
Step 4. Remove The Fall Concrete Candlestick Holder From The Bottle
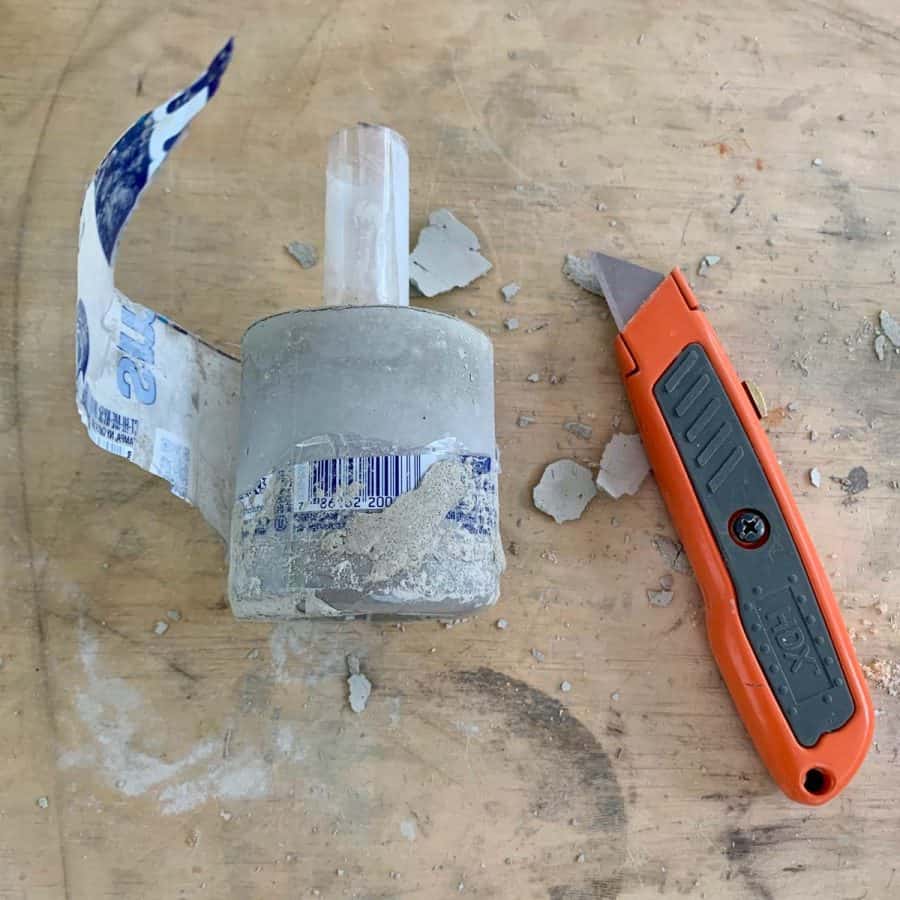
Demold the candlestick holders by using a heat gun to release the plastic from the cement.
If this doesn’t allow you to remove the mold, then you can carefully cut into the plastic with a box cutter.
Take care not to scratch the cement.
Step 5. Decorate The Fall Candlestick Holder
Paint the candlestick holders with the gold paint for fall coloring. I recommend this paint. I tried others and the effect wasn’t the same.

Start by putting some water into a cup and dab a little bit of paint onto a paint tray, or lid of a plastic food container.
To get a paint wash technique, dip the brush into the water and then into the paint and lightly brush the gold paint, running the brush vertically.
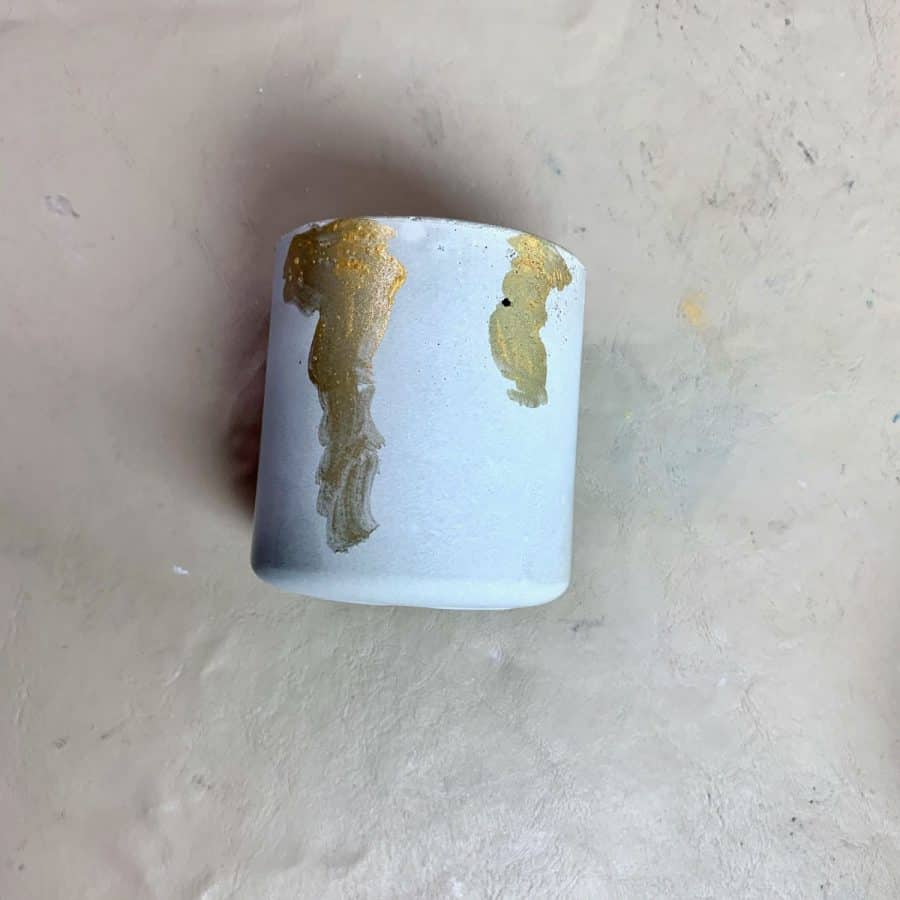
I intentionally created wave-like strokes toward the upper portion and then blended them.
The further I went down the concrete holders, the more water I added to give it a muted effect.
If your paint looks too heavy after brushing it on, just add more water and blend.
Now paint the top of the concrete holder. After playing with this on a test piece, I chose to make the top muted, like the lower portion.
Step 6. Seal The Candlestick Holders To Protect From The Candle Wax

I have found that the sealers that have a better sealing effect tend to make the concrete darker.
So you may want to consider not sealing the entire candlestick holder.
Put some sealer in a cup and brush it on the top and just inside the top part of the hole.
The sealer will help prevent oily residue from the candle wax from dripping on and staining the cement.
Here are a bunch of other concrete decor items you can make –all with a holiday theme.
Don’t forget to Pin it for later!


Love love LOVE this! And can’t wait to try! Your tutorials are always so easy to follow, thorough and fun too! And … I totally relate to those “must have items!” I have bins of all kinds of plastic and glass bottles and jars, but somehow always use the same ones! Thanks again for your wonderful tutorials!
Hi Marc!
Thanks, I’m so glad you are enjoying the tutorials. Let me know if you have any questions along the way.
These candlesticks are very elegant love them! ! Love them
What does the bottom of the candle holder end up looking like? Is it flat?
Hi Viki,
Yes, it’s completely flat- as long as the work surface you cast the cement/concrete on is flat.
Thank you for your response. But I’m missing something. The bottom of the bottles are rounded and have ridges. How do you make it flat? I want to make these but I need them perfectly flat on the bottom. I’m sorry I read through your directions several times and I’m missing instructions about the bottom.
I’m so glad you persisted! You didn’t miss anything. I made those a while ago. No, this particular set of candles is not flat, but can be perfectly flat. Just follow the steps for cutting both ends of the bottle in this tutorial https://artsyprettyplants.com/rainbow-concrete-candle-holder/
Or this one https://artsyprettyplants.com/diy-concrete-pillar-candle-holders/
which was the tutorial I was thinking you were referencing. Sorry about that. Completely parallel on both ends.
A million thank you’s for clarifying I appreciate you for responding again!
I know what to do now.
You’re the best ☺️