The Best Ratio of Cement to Sand (for Concrete Crafts)
When it comes to making concrete crafts, there is a perfect recipe of cement to sand. In this article, I will give you the best ratio of cement to sand when working with concrete crafts.
Portland cement is the most common and widely available cement mix throughout the world.
It is also the most versatile because you can customize the concrete mixture to fit every project.
As long as you know the correct mixture ratio of cement to sand and/or possibly an aggregate to use, you’ll have the perfect mix.
And based on my tests below, the best ratio of cement to sand is 3 parts cement to 1 part sand (3:1). But there’s more you should understand, because this is dependent on your project. I also tested other ratios and there are other times you should use a different ratio.
The differences I was testing for were strength, tactile texture and visible texture when used in making concrete and cement crafts.
Why is any of this important? Why should cement mixing ratios even matter?
Having the correct cement to sand to water ratio will be the main determining reason your concrete crafts project is a success or failure. Here’s a separate article explaining on how to get the best water to concrete mix ratio.
This large tile planter box is an example of a successful sand, cement and water ratio project.
You will need a mix that you are able to cast into a narrow cavity if you are making a concrete craft.
This means the mix has to be fluid and workable. If the ratio is incorrect, it will either not be workable enough to go into the mold.
In order to compensate for this, you will need to add excess water to get it into the mold, which will cause it to crack.
I performed five different tests, using different ratios of cement to sand, as well as percent cement of sand and aggregates to see how they performed.
Okay, so 3:1 is the correct mixing ratio, so I’m good to go, right?
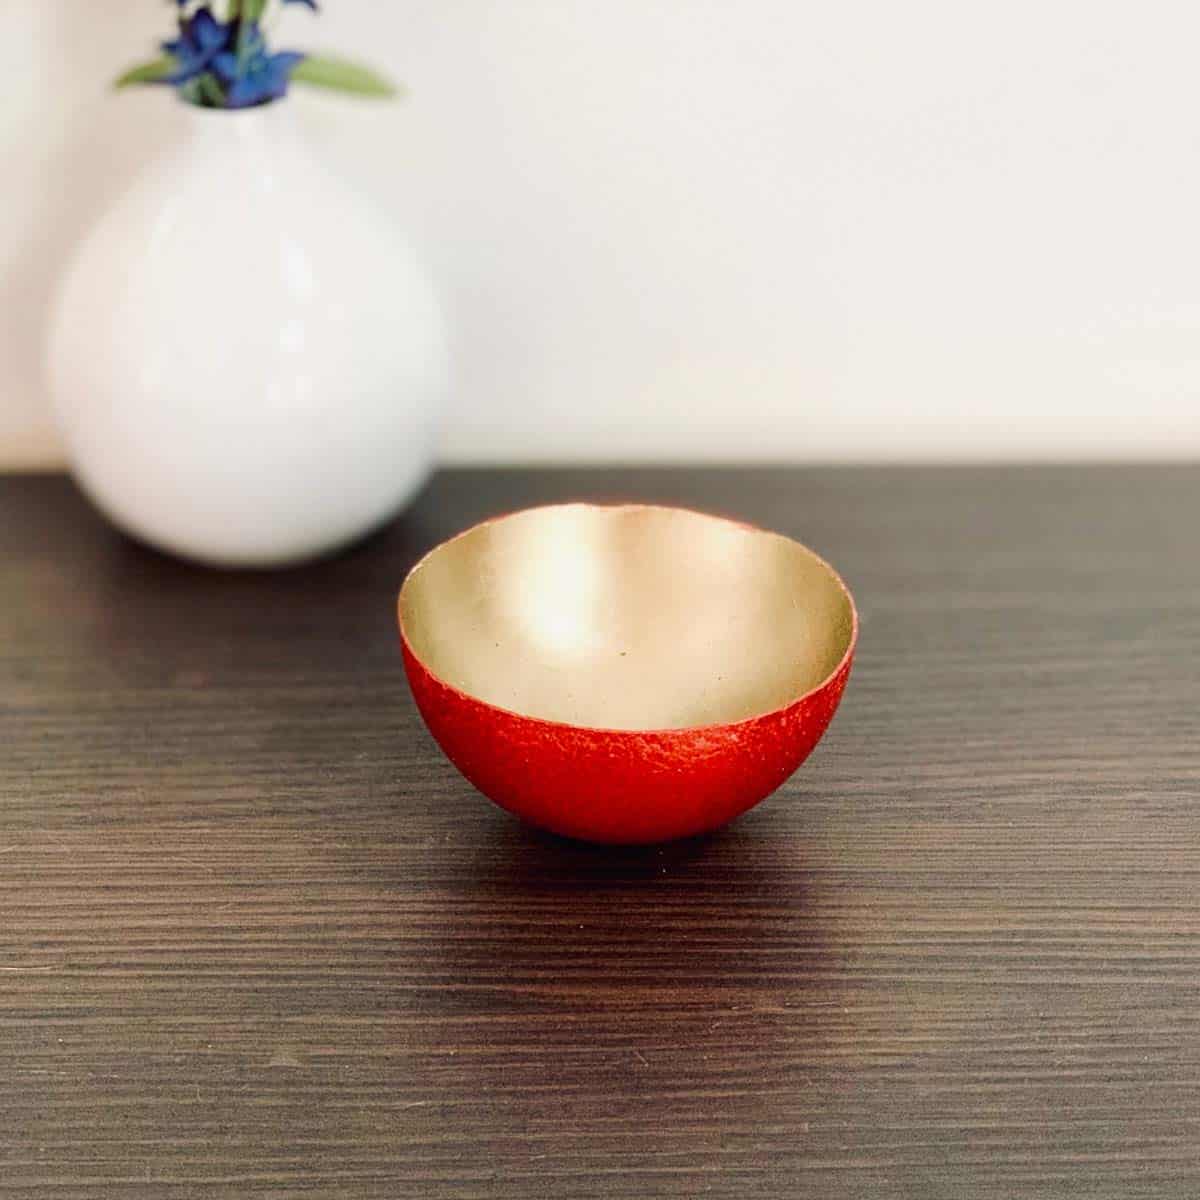
Well, you may want to read on because there are situations where you will need to change the ratio, like with this DIY Concrete Gnome, or with this very large concrete bowl.
I’ll explain why, in terms of the ratio proportions, you would need to make changes. Don’t worry, the principles are basic and easy to apply, but they are important.
But there are a few important things to understand about portland cement.
First, cement alone cannot adhere to anything. It doesn’t work without the addition of water and a simple aggregate, like sand.
Once these two components are added to cement, a chemical reaction takes place and the cement binds together.
You can increase the strength of the concrete in certain applications through the addition of pea gravel, or larger aggregates like crushed granite, which is a common aggregate.
There are more details about this in my article about the differences between cement and concrete.
You may also be interested in checking out this article about what ratio to use in a hypertufa mix.
Some of the links on this page have been provided as a convenience for finding materials. These links may also be affiliate links. As an Amazon Associate I earn from qualifying purchases, at no extra cost to you.
I only recommend products I’ve used and loved, unless otherwise stated. Click here to read my full disclosure policy.
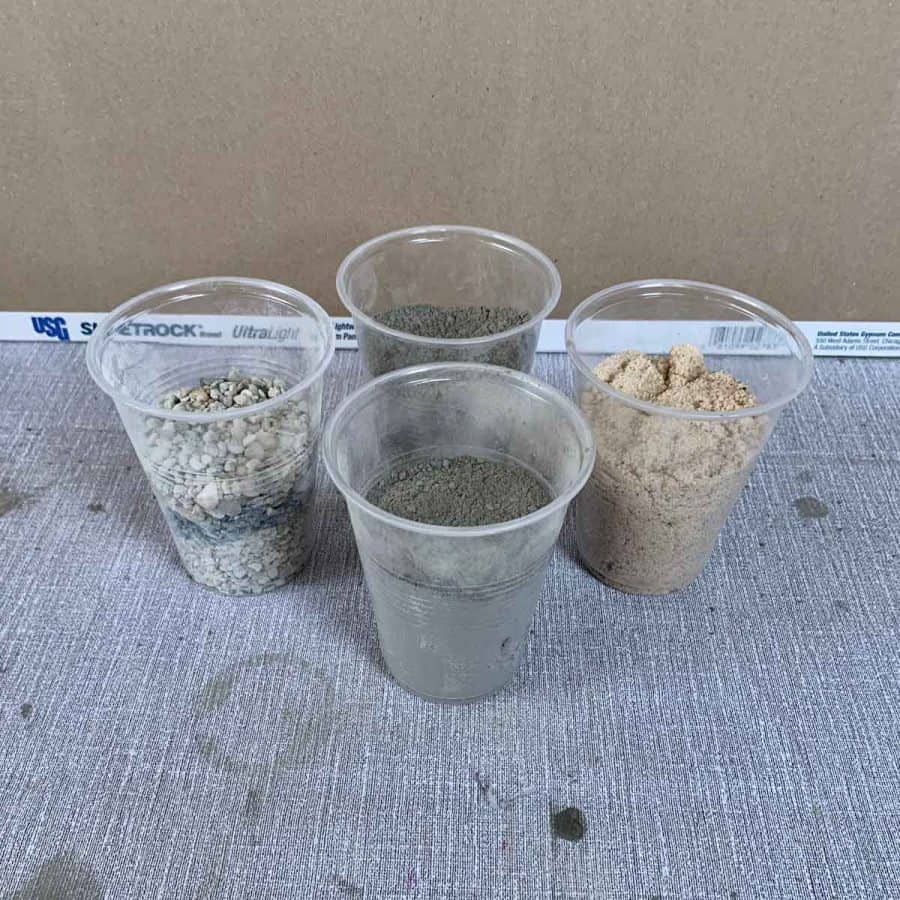
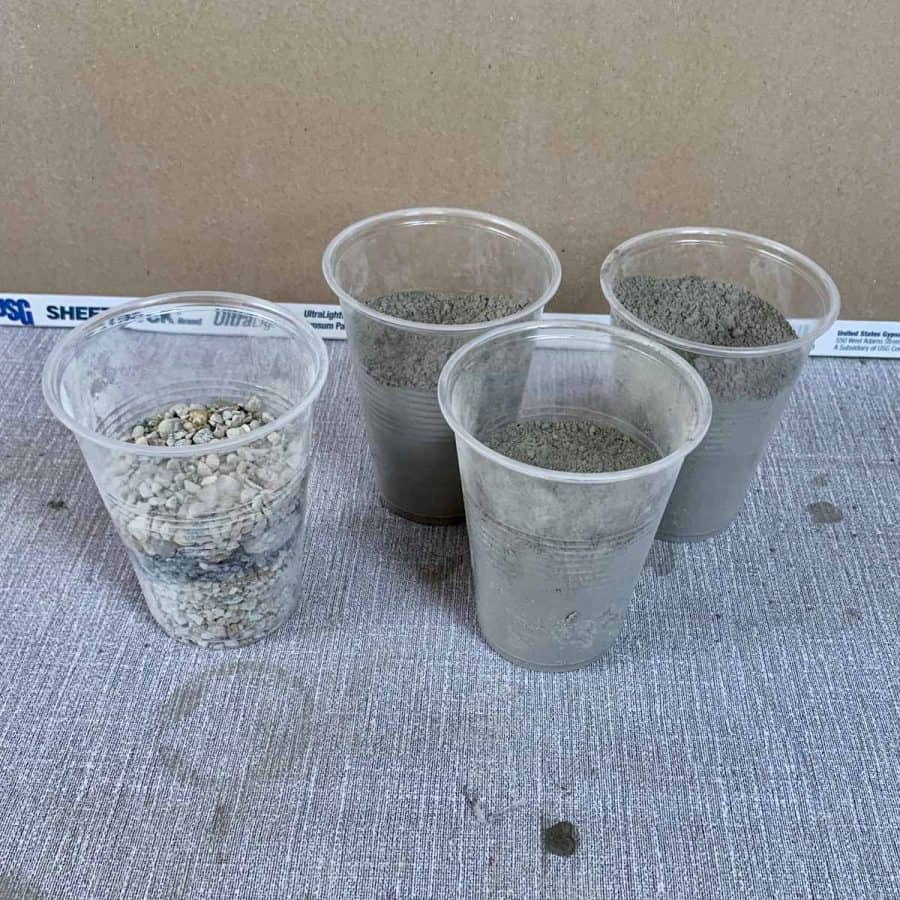
Basic Materials Used For Determining The Best Ratio Of Cement To Sand For Concrete Crafts
- Portland cement
- Play sand (for weight)
- Fine aggregate– play sand
- Small aggregate– pea gravel
- Medium aggregate– sandblasted sea glass
- Large/ coarse aggregate– crushed granite
- Plastic containers
- Plastic cups
I was running a little bit short on both types of larger aggregate material and so I substituted the sandblasted sea glass to have enough for a full ratio for these tests.

The sea glass was a perfect blend of both the small rounded pea gravel and the sharp aggregate from the crushed gravel.
For my sand, I used play sand. This types is a soft sand. It is typical of the kind found in smooth pre-mixed cement mixes. It doesn’t contain any particles other than fine sand.
I decided which ratios I would test based on the actual instructions for mixing portland cement.
The official instructions call for a ratio of 1 part cement to 3 parts sand.
The intended use at this ratio is more as a building material.
But having mixed this ratio in the past, I knew this high proportion of sand would be very difficult to work with for general purposes of working with crafts, but it was good to use as a baseline.
The reason 1:3 doesn’t work well with making concrete crafts is that you need a certain amount of fluidity in order to get the cement mixture into your mold.
Typically, our molds have small cavities and so to achieve the desired workability, at a 1:3 ratio you would need to add too much water.
The mixture would be very crumbly and you wouldn’t be able to get it into the mold.
Once you add the amount of water needed to get it into your mold, you will have weakened the mix so much that it would crack.
Click here to jump down to the bottom for a summary of the results.
Otherwise, read on for the details and steps taken in the cement recipe experiment below.
Mixing Cement: The Ratio of Cement To Sand
For each test I followed the same steps, except for the varying of the ratios.
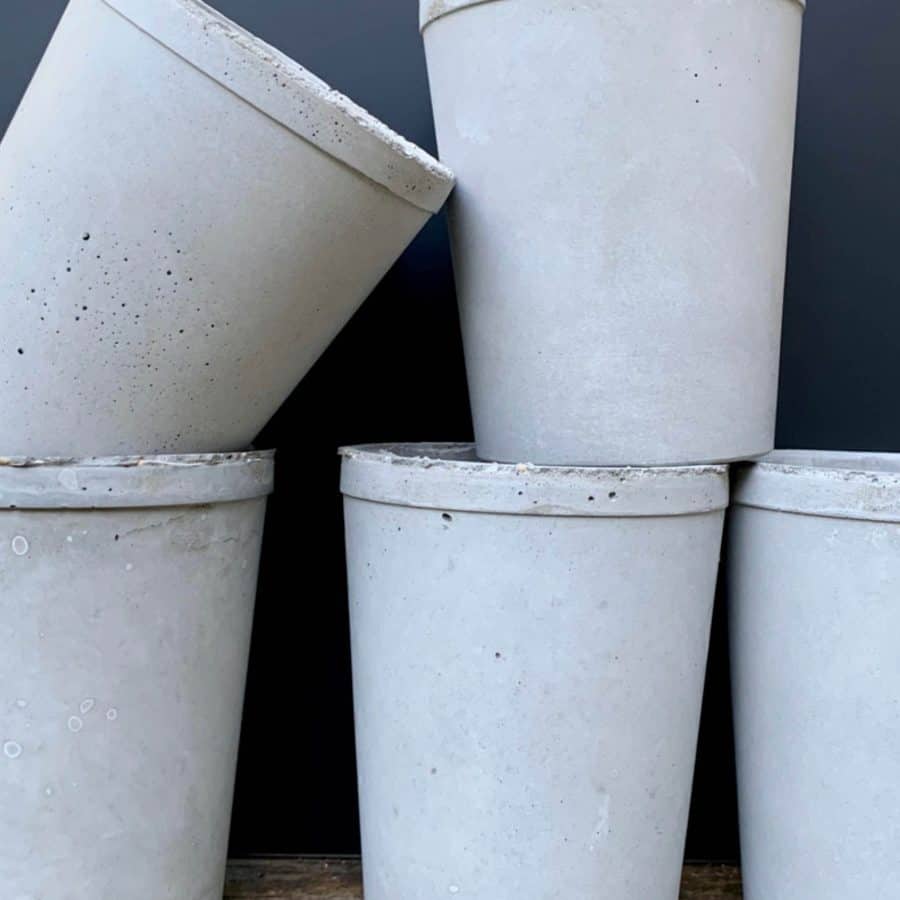
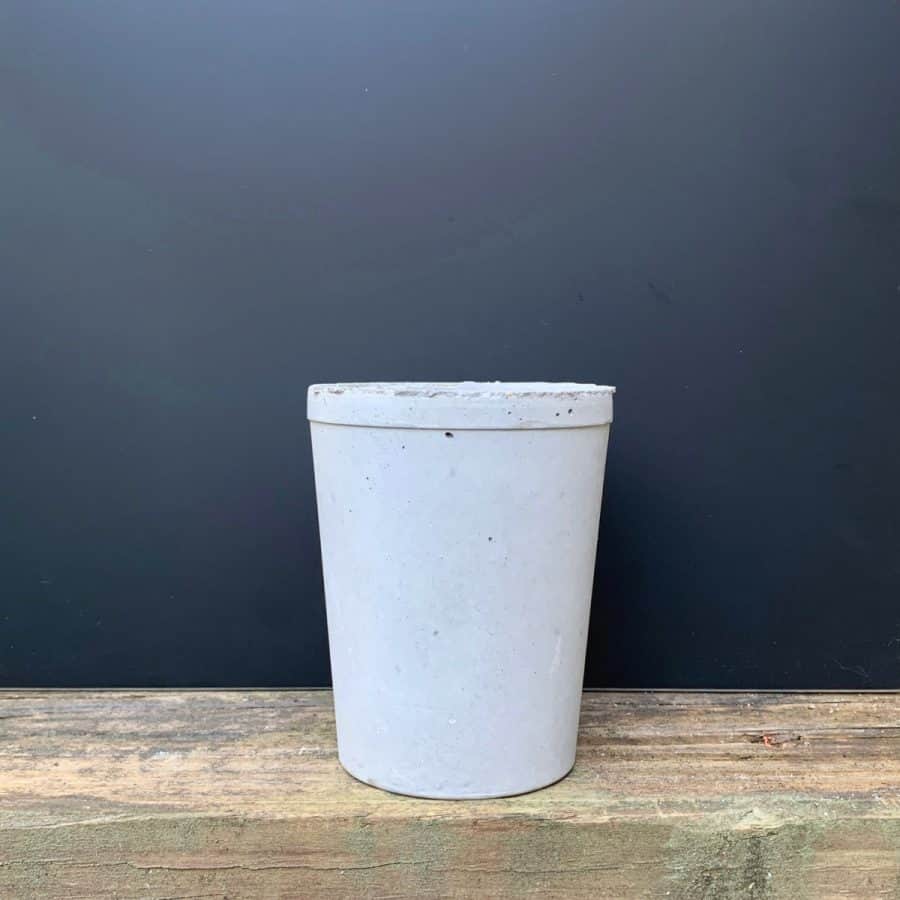
The cured concrete pieces that were made to test each cement mixture recipe were pencil holders. I used the same containers to maintain consistency.
*It’s important to know that the thickness of the pencil holders (basically planters without drain holes), had a side and bottom thickness of ⅜”. This is typical of many small to medium sized planters.
The Basic Steps For Each Cement to Sand & Aggregate Ratio Tested:

First, I mixed the dry portland cement powder together with the dry sand.
You should mix the dry ingredients together first for a well-mixed, smooth consistency.
Next, I added a small amount of water and mixed the ingredients together.
I continued to add more water until I had the consistency of a wet mud pie or very formed brownie batter.

Then I added the mix to the plastic cup, and set a timer for two minutes and vibrated it by shaking it and tapping it on my work surface. I also tapped the sides of the container.
After the two minutes were up, I placed an inner mold inside the container.
I then vibrated it for another 20-30 seconds and then set it aside to cure for 24 hours.
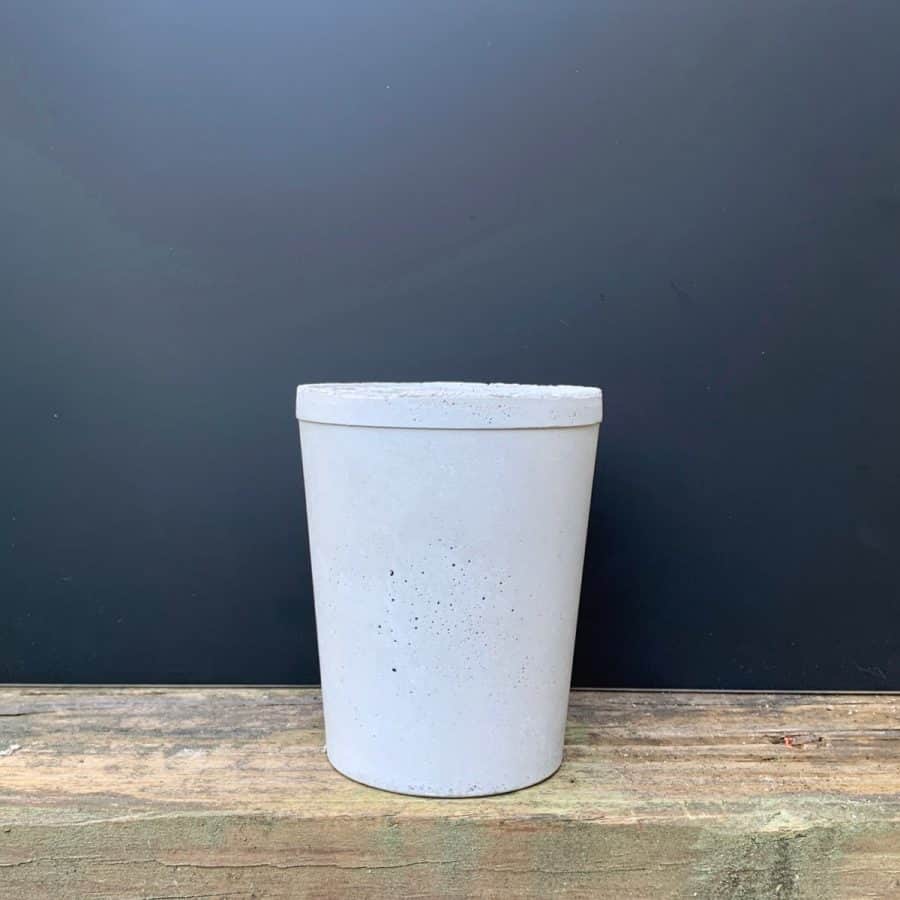
Test 1. 3:1 Ratio Mixture Of Portland Cement To Sand

Three parts of dry cement powder mixed together with one part dry sand.
Mixture Workability Notes:
This felt very similar to my typical go-to mix, which is a pre-mixed cement mix called Cement All.
Cement All is a smooth mix and forms very easily without requiring much water to have good workability.
The high cement ratio may have made it feel just slightly smoother than Cement All, but so similar.
Test 2. 2:2 Ratio Mixture Of Portland Cement To Sand

Mixture Workability Notes:
This cement mixture was easy to form but, with the high amount of sand mix, the cement mixture retained a lot of air.
This felt similar to a combination of the Michael’s white cement mix I used for this concrete candle and the white mortar mix used in making this concrete planter dyed with RIT dye.
This cement mixture has too much air in it due to the high proportion of sand, which traps air.
Test 3. 1:3 Ratio Mixture Of Portland Cement To Sand
One part dry cement with three parts sand.
Mixture Workability Notes:
This was not a workable mix for making concrete crafts. I needed to add too much water to make it less crumbly.
For the amount of water I ended up adding, I was concerned I risked making the cup holder weak.
Also, when vibrating this, a foamy, ice slurry appeared on top. I was curious to see if this would affect the texture or look of the cured piece.
Test 4. 2:1:1 Ratio Mixture Of Portland Cement To Sand To Gravel
Two parts cement and one part sand, mixed with one part gravel.
Mixture Workability Notes:
This concrete mix ratio was surprisingly not difficult to form, but it was heavy with the amount of gravel and sand.
When vibrating it, it took over 1 ½ minutes for bubbles to start rising to the surface, unlike each of the others, where the bubbles appeared typically early on.
Test 5. 3:1 Ratio Mixture Of Portland Cement To Gravel
Three parts cement mixed with one part gravel.
Mixture Workability Notes:
This reminded me of the same texture as Quikrete’s Quick Setting Cement which felt like heavy clay.
It was so dense that it was a little less workable than some of the other ratios.
The Cement Mixture Recipe Giving The Best Results

Test 1. 3:1 Ratio Results

A ratio of three parts cement to one part sand was smooth and the color was consistent. There were almost no pinholes present.
Test 2. 2:2 Ratio Results

Using a two parts cement and two parts sand ratio had only slightly more pinholes than the 3:1 ratio, but showed slightly more variation in color.
Test 3. 1:3 Cement Ratio Results
The one part cement to 3 parts sand ratio had a lot of pinholes, and some minor blotchiness in color.
Test 4. 2:1:1 Ratio Results
Using a ratio of 2:1:1 of 2 parts cement to 1 part sand and 1 part gravel was a pleasant surprise.
It had a mottled appearance which I expected and is often a desired visual outcome since it has a more concrete appearance than cement.
But despite the mottling, the overall color was consistent. It had almost no pinholes.
Test 5. 3:1 Ratio Results

The ratio of 3 parts sand and 1 part cement was, as expected, a bad ratio for making cement crafts.
The appearance was mottled, but the color was a bit blotchy around the piece. There was a decent amount of pinholes.
Summary of The Testing For The Best Ratio Of Cement Crafts Ratio To Sand:
The results show that the best ratio to use is 3 parts cement and 1 part sand when making small cement crafts.
This will result in a smooth, consistent appearance and give you the ability to easily vibrate any entrapped air. This ratio provides plenty of durability for a craft this size.
However, each of the ratios tested did result in a durable, fully intact cured piece.
But the one part cement to 3 parts sand ratio (1:3) wouldn’t have worked if I hadn’t added more water, or if the cavity that it was cast into was narrower. This is not a good recipe for concrete crafts.
If you desire more of a concrete appearance, with slight mottling, use a ratio of 2 parts cement, 1 part sand and 1 part gravel.
Quick Facts On Cement Mix Ratios
- Sand increases the amount of entrapped air
- Aggregates in mix will increase air pockets
- Trapped air that isn’t sufficiently vibrated will show pinholes
- Higher sand proportions and gravel-types of aggregates will require more vibration time
- Too much sand, gravel or both reduces workability and usually requires adding more water, weakening the mix.
- For a smooth surface, your safest bet is to use less aggregate and or smaller/smoother aggregate in your concrete mixture ratio.
When To Change The Cement Mix Ratio For Concrete Crafts

A general guide for a good recipe for medium-duty (or medium-sized) concrete crafts projects is (2:2) at 2 parts cement and 2 parts sand.
The concrete mix ratio for a heavy-duty project like large planters should have a higher proportion of aggregates.
The important factor is the durability required because these will require thick sides and bottom.
For this, the ratio should be (1:3) 1 part cement to 3 parts sand, or (1:1:1 or 1:1:2) 1 part cement, 1 part sand, and 1 or 2 parts aggregates.
Remember, for maximum strength in the resulting concrete, always use the least amount of water that still allows for good fluidity.
You can read more about how to choose the best mix for your project here.
This will help you understand more with recipes and about working with the premixed bags of cement that are available at most North American home improvement stores.
Don’t forget to Pin it for later!

Don’t forget to Pin it for later!


Hello
i need some advice please , i am based in South Africa
I purchased Silicone molds for small Succulent plants the size of each mold is
length is 16cm
Height is 5cm
Width is 8cm
if i use the ratio 3 cups of cement to 1 cup of Sand ……. is this ratio ok ? or should i use 1 to 1 ?
how much water in mL will i need to mix ?
please can e-mail your valued Answer to my e- mail [email protected]
Thankin you Adam South Africa
I read with amazement the details in explaining the usage of these products. The knowledge extracted from the results
I learned by that to increase the cement ratio to sand for craft projects.
I received and downloaded the description of products you sent about a year ago . So this latest discovery you did was very helpful.
I hope you are compensated for the effort you make to bring awareness to the subscribers.
If I can help in some way, I would like to know…
Hi Michael!
Thank you for your kind words. I’m just glad I can offer info that can sometimes help people. Knowing that, helps me. :0}
Thanks a lot for all your articles on this blog .. I came aroung looking for a solution of the cracks to my pots ..
I always worked with 2:1 (2 Cement to 1 Sand) with a soaking into water for 7 days , but they keep cracking with or without planting .
I will try 1:1 or 1:2 (1 cement , two sand) to see the result .. Portland and white cement do lot of shrinkage and cracks when highly dosed
Hi Malki,
Have you seen this article? https://artsyprettyplants.com/why-concrete-pots-crack-and-fix/
That may help give you some ideas why you’re having that problem. Cracking is usually caused by having too much water in the mix. I don’t know how big your pots are, but unless they are really big, I wouldn’t do a 1:2 of cement to sand. 1:1 is good. You also shouldn’t need to soak your pots in water. There are people who do that but I’ve never done that and never had one crack. Check out the article I linked about, you should find your answer there. Good luck!
Hi.
Thanks for the reply.
I already read all the article about cracks and think it’s because of excess of cement and not excess of water cause I usually use sika flow additive to make it fluid
I started testing the 1:1 ratio with some fine aggregates 0-3mm. The first pots that cracked where with 2 cement 1 sand and with only marble powder which is finest grain. I think some aggregates help giving more strength to pots.
I work on small pieces, less than 15cm in dimensions so it’s thin.
You can check them in
https://instagram.com/decocima34
What ratio did you find worked best for crafts?
Was it 1:1
Thank you in advance
It’s 3:1 of cement to sand. I actually mention it right in the beginning, but no one expects to see it there.:0)
Oh sorry Ellen, I thought I was replying to Malki. Yes, I did read all of your info which was very helpful. And I was supposed to actually ask her 2:1, sorry for confusion.
In the meantime I have also read about Lanko, an accelerator, have you heard if this is any good? I had been trying to get CementAll, and not many sell it here, and those who do won’t sell to me, so I came across this Lanko which helps cement set faster (a bit like CementAll), so hoping someone has an opinion on that.
Thank you in advance
Hi,
Oh, I see that now. 😉
I haven’t heard of Lanko, but accelerators are supposed to be pretty similar- it’s likely calcium nitrate- which is used in most admixtures to speed up set time and maybe one extra component to make it their brand. I would feel confident using it. Though it may not speed up cure time, so you’ll have to check that, if that matters to you- it doesn’t always do both.
Thank you for this test. I still have some questions:
1- Which one is the strongest and hard to break using hands?
2- How many days to fully cure for each?
3- Did you wash any of them with water to make it even stronger after the settle?
sorry for all these questions but I’m thinking of Artificial Marble making to get rid of all problems of cement, gypsum and plaster problems for home made arts.
Hi Ali,
1. If you’re in the US, Cement All seems to be the strongest. Impossible to break with our hands, unless you make your walls thinner than 3/8″.
2. Each manufacturer has different curing times. For Cement All, it is usually 1 hour, but can be longer if it’s an especially thick casting. Generally, most others are 24 hours, but the manufacture will also tell you the length of time on the bag.
3. Nope, never soaked anything in water for strength. You would never need to with Cement All, that’s for sure and nothing I’ve ever made with any other mix required this either. If you have the mix consistency correct- the least amount of water possible, but still allows it to be fluid, don’t cure in sun, wind or high temps, you shouldn’t need to do this. This article explains about this in more depth. https://artsyprettyplants.com/why-concrete-pots-crack-and-fix/
Hi there, thanks so much for your article!
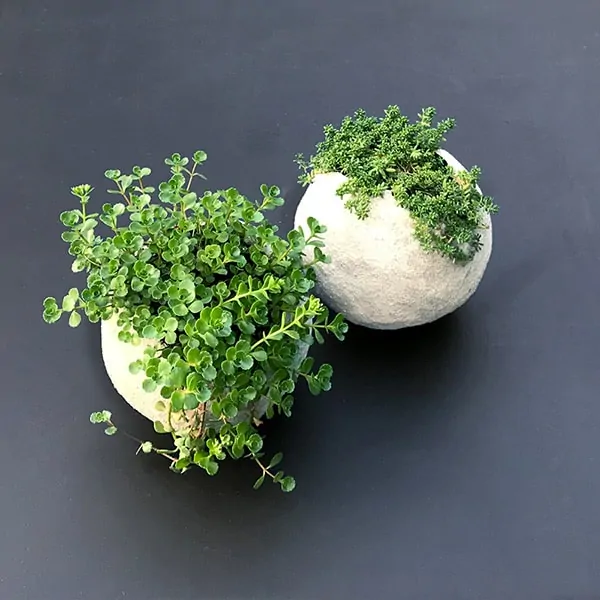
Any advice really appreciated here. I am making solid basketball sized globes up to 10kg.
I have had lots of cracked experiments using conventional building concrete ratios with higher aggregate recommendations, 1:3 / 1:1:2 / 1:2:3 etc..
Based on your recommendations I tried 3:1 (corse sand) and finally had no cracks! but unfortunately it chipped away easily on the base. I assume this was because of the high cement ratio in the mix & my extra heavy project.
What would you recommend for the toughest ratio but at the same time keeping it smooth & avoiding cracks in curing process?
2:1:1? // 1:1 – possibly?
Could I try without any gravel and just add sand or visa versa?
Many thanks,
Nathan
Hi Nathan,
Yes, I would think 2:1:1 or 1:1:1 would be your best bet. You probably do need gravel. I wish I had more experience with cement and sand, but they make it easy for us in the US with the premixed concrete mixes, so I don’t get to do many real life projects. I don’t know how long your letting it cure, but for solid objects that size, wait more than 3 days to demold. Keep the globe wrapped in plastic while curing, and mist once a day with water.
Thank you
Really great post and amazing detail of information
I had stumbled on your article after searching for DIY advice but you’ve woken on me a desire to start crafting!
Hi Paul,
That’s great to hear! Thank you.
Hi: Like your site. Trying a bird bath bowl. Portland cement plus sand. two bowls for molds. Plan to seal it with ECO Acri-soy concrete sealer.
Suggestions for sand/cement ratio? And am I missing anything?
Hi Christine,
For that I would probably do 2 cement to 1 sand and 1 gravel. I haven’t heard of that sealer, but I don’t think you’re missing anything. Good luck!
Attempting Japanese lanterns with home-made molds without much luck. Even with wire they crumble. Using a Sakrete crack resistant cement, but after your great advice will try 3 portland to 1 play sand. No Home Depot here, only Lowes.
Have you ever added latex or acrylic paint to the mix? Would like to get a limestone finish on one lantern I’m going to try. Thanks.
Hi Fritz,
I’m sorry you’re having trouble with those. The 3:1 should work, but will require patience since it won’t be quick setting. And yes, I have added both latex and acrylic to the mix. Acrylics are funny and finicky. Some make the mix dry and gritty. Latex regular indoor paint seems just fine. I would start with the latex. Here is the section in my concrete pigments post where I talk about acrylics and which type I tried that worked best. Also, how much you need to actually get the color to come through. https://artsyprettyplants.com/concrete-crafts-pigments/#h-tests-for-coloring-concrete-using-acrylic-paint
Note: I was using Cement-All which is off white to begin with so the gray cement is going to be a muddled version of what ever color you use. Limestone will probably be fairly easy to achieve though. Good luck!
Test adding 5% white wood glue to the mix. Increase or decrease to fine tune. You could start at 2% glue. Mix very small batches, cast 1/2″ thick wafers, let cure for 3 days or a week, then break and compare relative strength.
I’m using an FRP mold and it didn’t come with an inner mold so I have to form my own walls for my pot. What do you reckon is the best way to work around this as I can’t just pour in the cement to make the pot.
Hi Wes,
I’m not sure what a FRP mold is. For your inner mold, it depends what shape and size your outer mold is. I need more information to help you.
I make mosaic glass stepping stones, and most folks that mix their own concrete for these, use a ratio of 2 parts sand to 1 part cement. It’s what I use, and it produces a very smooth and very strong stone. I use the Top and Bond, or Vinyl Concrete Patch as the first layer, against the glass, as it is very smooth and fills in better around the glass. Then I fill with my concrete mix.
I find it odd that you did not include this ratio in your tests.
Hi Chess,
I didn’t include it because I don’t consider a mosaic stepping stone to a “concrete craft”, which is what my ratio recommendations were based on. By concrete crafts, I’m referring to small to medium sized planters, candles, etc.-things that require a smaller mold cavity to be poured in. You’ll see in my mosaic stepping stone tutorial that I go into depth about the mix materials.I used a 1:1 but also recommended people just use Sand Topping Mix instead or portland cement. https://artsyprettyplants.com/mosaic-stepping-stone/
If I were to do it again, I would use that. I also used Versabond for the top (it was reverse cast). I did general tests (again for concrete crafts- not stepping stones) here https://artsyprettyplants.com/making-cement-concrete-crafts-tests/ on Top and Bond and Vinyl Patch. But hey, that’s what concrete making is all about. You find what you like and works best for you. I provide information about my tests, and based on my experiences.
Thanks for the explanation. I am trying some Versabond on a test stone. Can’t find any white portland here anymore, so hoping the Versabond will provide a lighter stone.
I had not seen your piece on stepping stones, but I will give you a tip. I made 1/4″ plywood rounds, that fit into my molds. I use patterns for my stones (unless I am just sort of throwing something together, or testing) and cut a circle out of poster board, that also fits into the mold (I guess you could use paper, I just prefer a stiffer material). I draw my pattern on the poster board, which I also have sitting on the wood circle. When I have my glass pieces all placed as I want them (good side UP – just as you want the stone to look), I place a sheet of contact paper over the glass and smooth it to get a good seal. I trim the contact paper around the circle. Now I can take the mold, turn it upside down, and holding the wood circle in one hand, push it up into the mold, and then flip the mold. Now I can remove the circle and the poster board, and leave the glass in the mold, still attached to the contact paper on the bottom. This works better for me, than trying to flip the contact paper. Just thought I would share. 🙂
Hi
I am in South Africa and cannot get CementAll, however, I wanted to ask if screed mix is the same as using Portland cement with sand? I want to experiment….
I am fascinated with white cement so I am searching for white sand to mix, but I am struggling, I will keep looking though.
Thanks for all your helpful and wonderful info!!
Kind regards,
Kari
Hi Kari,
I’m not sure if it is? Screeding is what you do when you are leveling a floor, so I’m guessing a screed mix is a thin mix which can be used for feathering and is very likely a premixed cement with sand. It probably is a portland cement and sand, but I don’t know what ratio it is and if it would work. If the label says it can be used for feathering, up to 2″ then it should be an appropriate mix for making concrete crafts. It may contain polymers which can help or interfere, depending. Sorry, wish I had a better answer.
Was the screed mix white? If so, then you’d be all set. If the cement itself isn’t white, then white sand isn’t going to make it white, just a lighter gray. Here in the US, we have a hard time finding white cement. Even Cement All isn’t white, it’s off-white to tan. Hopefully you’ll have better luck.
Some great info on here, I’m in UK so will he using portland cement. I’m making a water feature which will be in a 12 inch by 15 inch planter, with 12 inch tall walls 2 inches thick. The portland cement instructions all have at least 3 gravel for every 1 cement bit seem to be for load bearing mixes. Do you think a 1:1:1 mix would be strong enough
Hi Gus,
When they write the labels of these, they aren’t writing them for concrete crafts. At 1:3 of gravel to cement, you wouldn’t be able to get the mix into the cavity without having giant voids. I made a large bowl 12×7 and 1 1/2″ thick using 2:1 of (2 cement to 1 sand 0 gravel) and it’s as sturdy as can be. I would probably even go higher with the cement than a 1:1:1. It’s difficult to get a mix like that into narrow cavities and not have some voids. You’ll need to be able to vibrate it really well. But, I believe it can be done.
Hi Ellen,
I’m Sandra from Ghana.Thank you for these experiments. I tried 3:1 cement to sand ratio with white Portland cement and I had the smoothest vessel ever. It is very solid I couldn’t break with my hand. I’m yet to burn my candles in them. I’ll keep you posted. Take care
Hi Sandra,
That’s great to hear! I’m so glad. :0}
Ellen
Hi there! I just saw a photo of some very interested textured concrete vessels (the exact opposite that we all try to remove the bubbles – with a “the more the better” attidute – and it looked fantastic). And the creator said that she increases the sand ratio for this effect. Have you ever tried a higher sand to cement ratio? And how high can one go? I have a photo but I cannot include it here. Thanks!
Hi Ioanna,
Yes, increasing the sand ratio will help. You can see (slightly) in some of my photos there are more pinholes in the planters I tested with a higher sand ratio. But, gravel will work better for a rustic look. Gravel will help create air pockets which causes pitting. Another thing that will help is not vibrating the cement well. We vibrate it to get the air holes out so that it will be smooth. So not doing so makes it more rustic.
It’s something you’ll have to play with because you may end up with pitting where you don’t want it.
I’m not sure what ratio to try because I haven’t tried to make the concrete rustic with cement and sand. When I want a rustic look, I use a mix that contains gravel and I don’t vibrate it. I only shake it enough to get it to settle enough I won’t have big open holes.
I hope that helps!
Hi there! Love your site, it’s soooo informative and the only deep dive source on this topic. Question! For your aggregate in the above tests, was it an equal mix of the three sizes you listed?
Hi Anastacia,
Ratios are confusing. Are you asking about a particular test? Band by aggregate, do you mean gravel or sand? Technically, both are an aggregate, but most think of gravel as an aggregate. I did a couple of the tests with gravel. “One part” gravel will always be equal to “one part” of anything else. One part gravel to two parts cement – the cement is double. Please clarify, if I’m not answering your question. :0)
Absolute treasure trove of good information