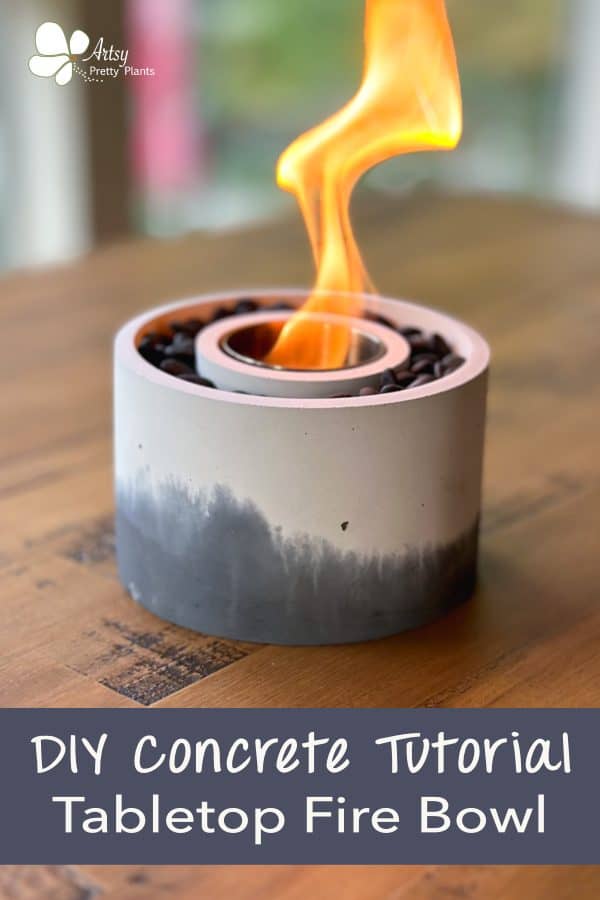
Easy DIY Concrete Tabletop Fire Bowl
Today, I want to show you this really easy, and I do mean easy, concrete tabletop fire bowl tutorial.
Don’t you love the ambiance that outdoor fire bowls and fire pits give? They are one of my favorite things.
I intend to build my own fire pit for years, but somehow, another project gets in the way. This little concrete tabletop fire pit fills the gap perfectly in the meantime.
I’ll admit, not engineering my version was the easy way out. But I have no regrets whatsoever.

Fire pit bowls are great because they are beautiful and functional. It is wonderful for outdoor decor that adds ambiance to any outdoor living space.
They look elegant on outdoor tables and are the perfect size for a picnic table or a large coffee table. And they are an excellent conversation starter.
A great idea for winter months is to use your tabletop bowl as a s’mores roaster in the winter months.
However, as lovely as one would look in a living room, I don’t recommend it for indoor use. The flames get quite high and aren’t adjustable.
But best of all, these will make such unique gifts! They are perfect for so many people. I’ve already figured out half of my Christmas gifts for this year.
I know what you’re thinking as you look down the page. It seems a little long for “easy”, right? Well, let me tell you, length is not indicative of ease!
In fact, this whole tutorial could be written in half the amount of words if it weren’t for the marbling effect. There are only 4 steps!
I provided many details for those who want to understand the ombre/marbling process so you aren’t left with questions.
If you don’t care to make the ombre effect, you’ll be done making this in less than an hour (not including curing time –just 3 hours), including sealing it!
Are you ready to join me in this fun DIY tabletop fire bowl project?
Some of the links on this page have been provided as a convenience for finding materials. These links may also be affiliate links. As an Amazon Associate I earn from qualifying purchases, at no extra cost to you.
I only recommend products I’ve used and loved, unless otherwise stated. Click here to read my full disclosure policy.
DIY DIFFICULTY LEVEL | Easy
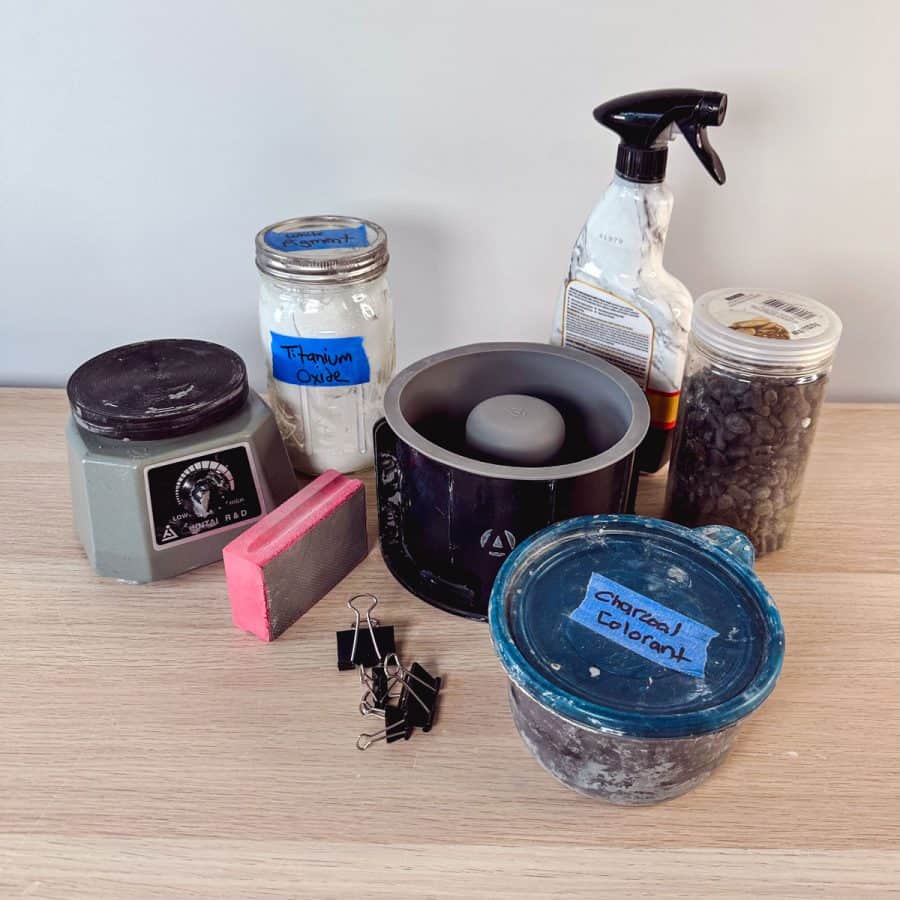
Materials List For A DIY Concrete Tabletop Fire Bowl
- Rapid setting concrete
- (2) Disposable bowls
- Small pitcher (for water)
- Plastic cup for scooping mix
- Durable nitrile gloves
- Safety glasses
- Safety mask– rated for silica dust
- White pigment (optional)
- Black pigment (optional)
- Tabletop fire bowl silicone mold
- Binder clips (optional)
- Vibrating machine, or orbital sander (optional)
- Diamond sanding sponge 200 grit, or 180 grit sandpaper
- Concrete sealer
- Decorative rocks
Materials Note:
Rapid setting concrete:
The manufacturer recommends this brand of concrete mix. It is my favorite mix, so I’m also recommending it.
It’s super strong and highly resistant to cracking. It’s a no-brainer for me, especially since it cures quickly, but you need to work quickly as it sets fast.
Making these fire bowls is very easy. And if you want an ombre look, this mix has the benefit of being off-white which helps with the ombre look. However, it’s fast setting so you’ll need to use very cold water to extend the working time.
White Pigment:
The first step will be deciding what color or color(s) you want to make your tabletop fire bowl.
The white pigment is used if you want a black and white ombre/marbled effect.
The reason for adding white pigment to the off-white cement is that it will make it quite a bit whiter and provide a brighter contrast.
Black Pigment:
This is used for a black and white ombre/marbled effect or a charcoal-colored fire bowl.
You can choose any color pigment to make a single-color fire bowl or a different marbled color. Of course, you don’t need to color it at all.
Vibrating machine:
I recently invested in one of these. I make enough concrete items. It seems silly not to make life easier. I’m happy I did.
I can do so much shaking and tapping of molds before I run out of patience and stop before I should. I’ll have more about this in an upcoming post.
Alternatively, using an orbital sander without the sandpaper and holding it on the sides of the mold works quite well if the mold material isn’t too soft.
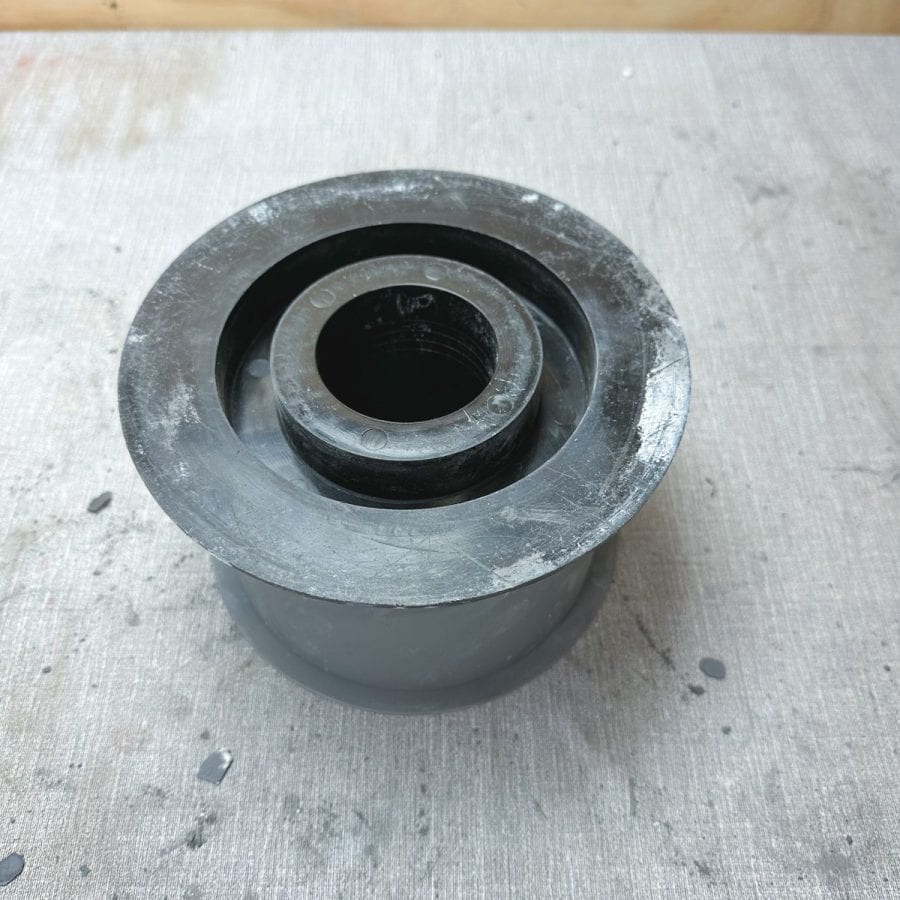
Concrete Tabletop Fire Bowl Silicone Mold:
This is a great mold. It comes with an outer shell made of hard plastic.
With many larger molds, a hard shell is necessary for extra support to keep the softer silicone sides from bowing from the weight of the heavy concrete.
I found this mold to be of an excellent quality. It also comes with a mold for the lid to put out the fire. The lid is the same size as the hole.
For other good quality concrete molds, check out this article with a list of unique silicone molds you can buy. And this article has great tips and advice on buying molds.
Getting that close to the flame seems dangerous to me, so you would need tongs to place it over it.
Feel free to make the lid that comes with the mold if you intend on using tongs. Instead, I just use my handy DIY concrete brick to put out the flame. It’s perfect for this.
Binder Clips:
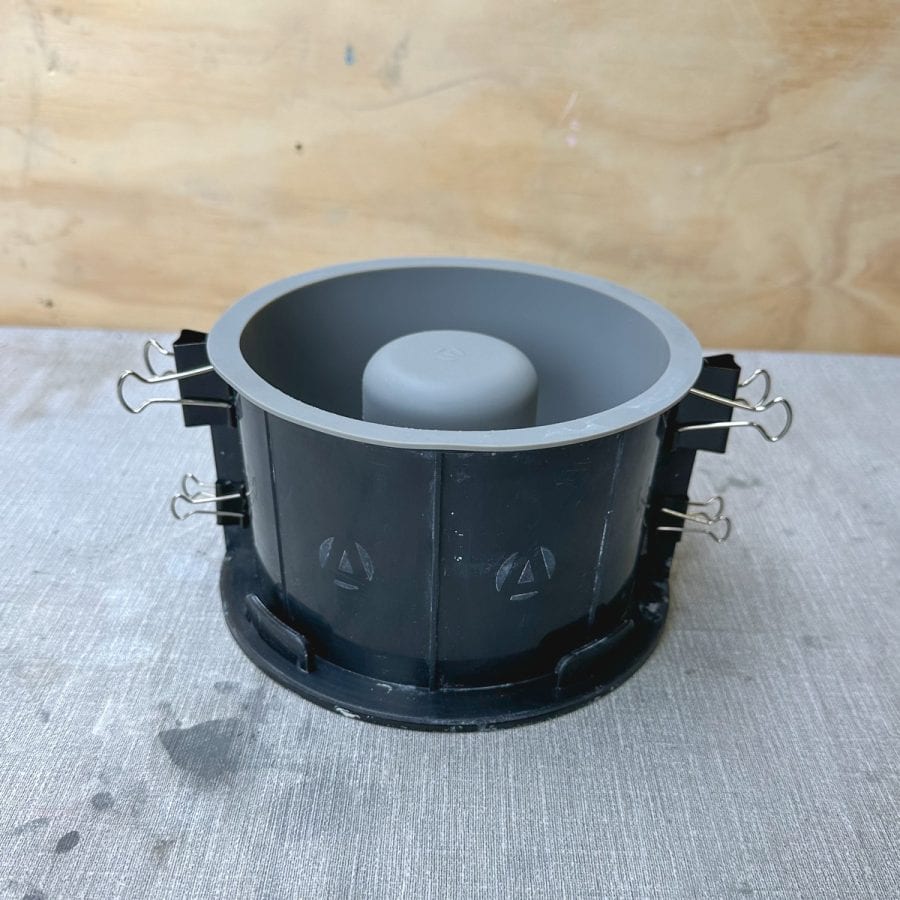
Hot Tip! The plastic screws and bolts holding the outer shell are difficult to screw and unscrew.
If you have paper binder clips, I recommend skipping the screws and using those instead. It will save a lot of hassle and time. I will be doing this from now on.
Tutorial Steps For How To Make A DIY Concrete Tabletop Fire Bowl
Step 1. Prep The Mold
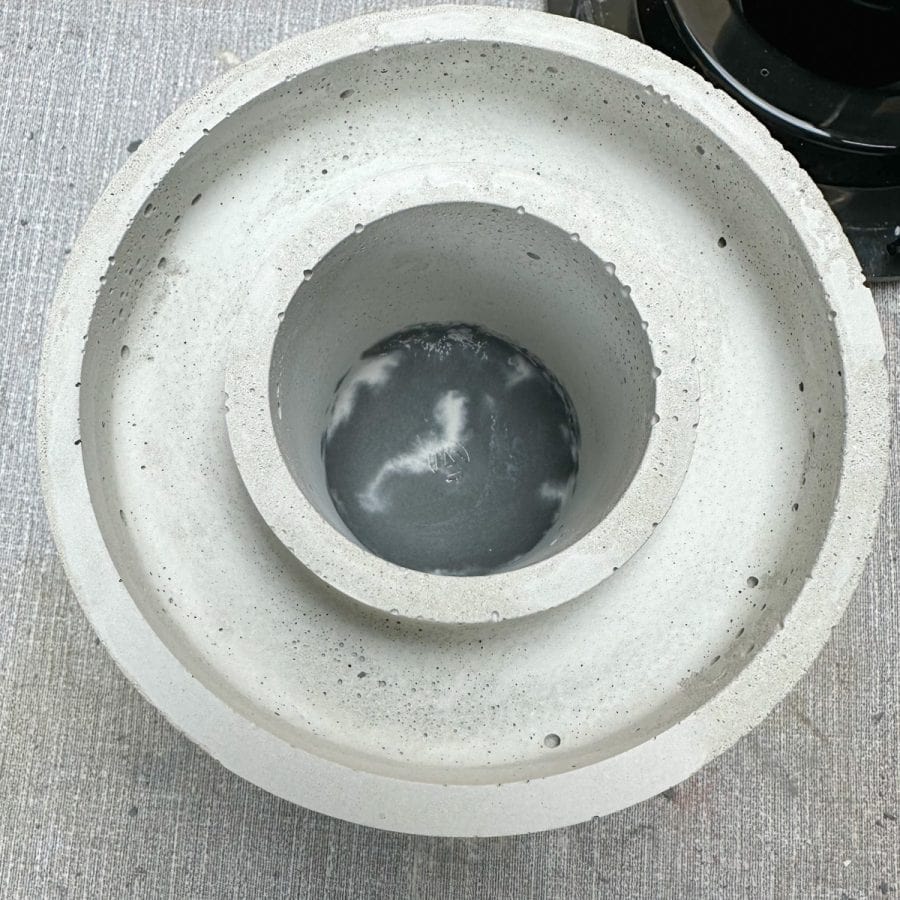
Note: The instructions from the manufacturer say to lubricate the mold. And against my better judgment, I did lubricate the mold on the first fire bowl I made.
As I expected, it resulted in lots of tiny pinhole bubbles on the surface of the concrete. So, I don’t recommend using lubricant.
The larger holes are a result of it setting too quickly for me to properly vibrate. This is rectified in the tutorial steps using very cold water.
The second one I made was easy to remove from the mold without any lubricant, and it had a very smooth finish.
First, to prepare the silicone mold, remove the stainless steel insert underneath the plastic shell’s bottom.
Then tighten the 4 plastic screws and nuts on the shell holding the fire bowl mold together.
Step 2. Color And Then Mix the Cement
The manufacturer states you’ll need 3 ½ lbs of cement mix. I’m pretty sure this is fuzzy math.
Not trusting this entirely, I made my first tabletop fire bowl with just under 4 ½ lbs of cement just in case that measurement was off.
Yet it fell short, and I had to quickly mix another small batch.
It was about 5 ½ lbs. So that works out to about 6 measured cups. A little over that should have you covered.
For those who don’t have a kitchen scale, this comes to X cups of dry mix using the recommended brand.
Since this is a large amount of cement mix to handle, use water straight from the refrigerator (keep it in a pitcher) or put ice cubes in your water. It will allow you some extra working time.
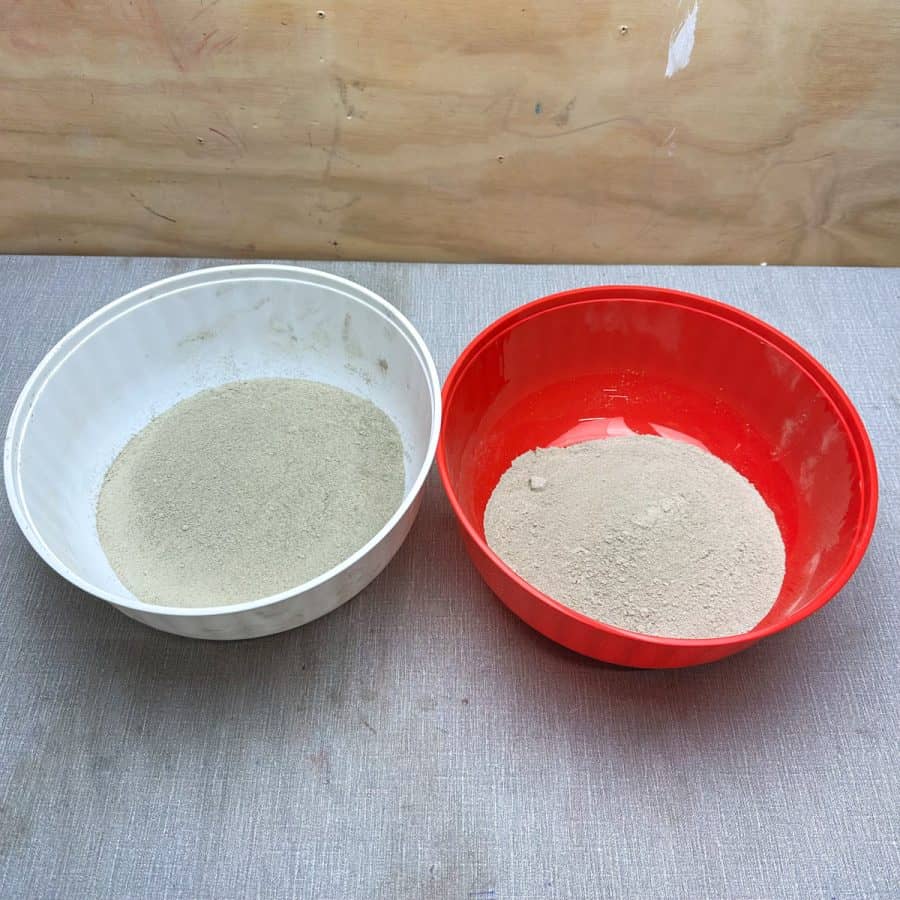
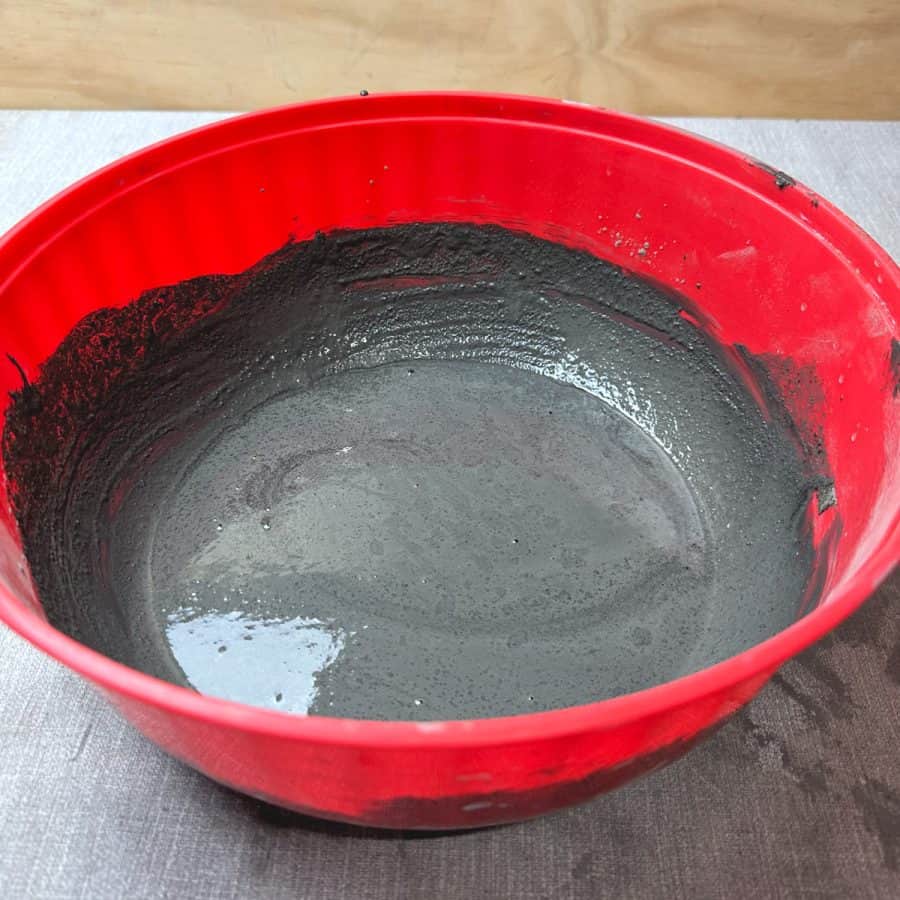
Whether you will make the concrete fire bowl with an ombre/marbling look, one without added color, or one with a single color, you should mix this in two different bowls for easy mixing.
For non-colored fire bowls or one-color bowls:
Add the 5 ½ lbs of mix to a bowl, and then add the pigment color of your choice into the cement. Don’t add water yet.
Combine this thoroughly. Or skip the colorant altogether. Do not add more than 7 tablespoons of pigment in total. More than this will weaken the concrete.
Now separate the mix into two different bowls to make mixing easier. Add water to one and mix it to a thin brownie batter consistency, then do the same to the next bowl.
Then, combine the two together again. The reason for combining these back again is that you may have more water in one bowl, which will cause a distinct line or color change on your finished fire bowl.
With the ombre fire bowl colors, this won’t be noticeable if it happens.
To create the black and white ombre two-tone effect:
Notes about marbling:
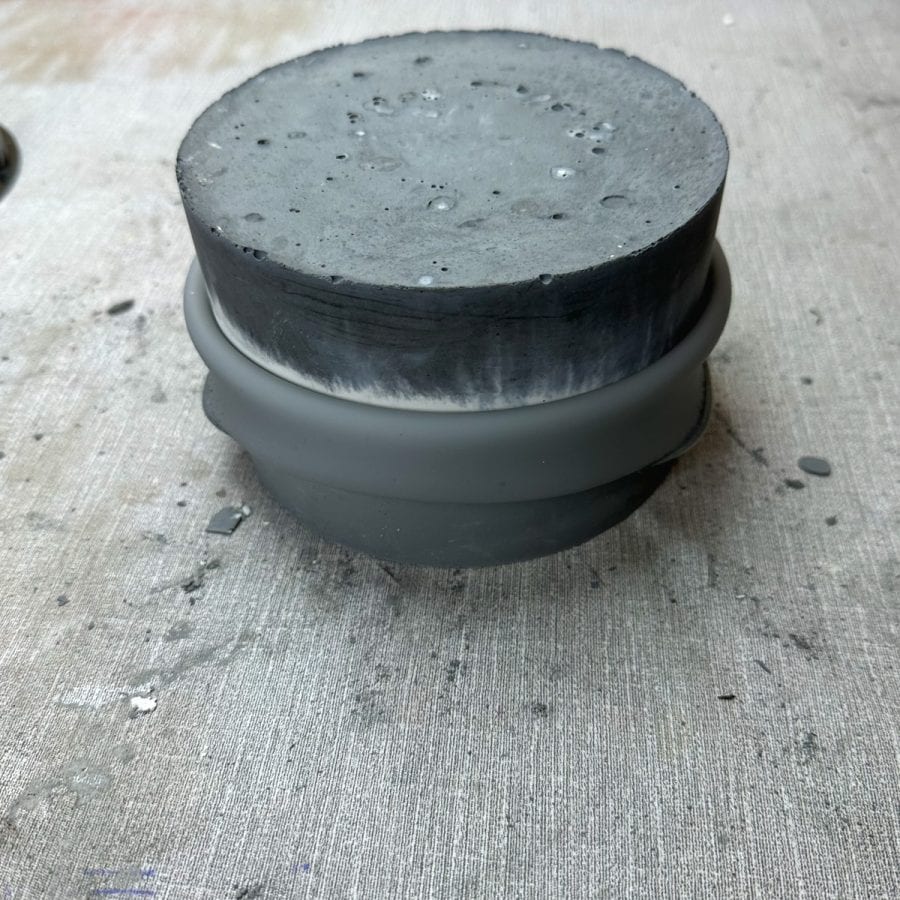
Remember, this is reverse casting, so the first color poured into the mold will be at the top of the finished fire bowl. I added the white first and then the black.
Typically, the second color added (black) would slide down quite a distance into the white just from gravity and especially from vibrating.
This is why I compensated and used more white and less black mix (⅔ was white).
But because the white set so quickly, it was semi-hard and didn’t allow the black to slide down much.
If the white had set at an average rate, this fire bowl would have appeared to be half black and half white.
First, use very cold water to give yourself extra working time.
Decide how you want the color proportioned. Assuming you want it to look like mine, add all the cement to one bowl first.
Then divide it so one bowl has about ⅔ of the dry mix and the other ⅓.
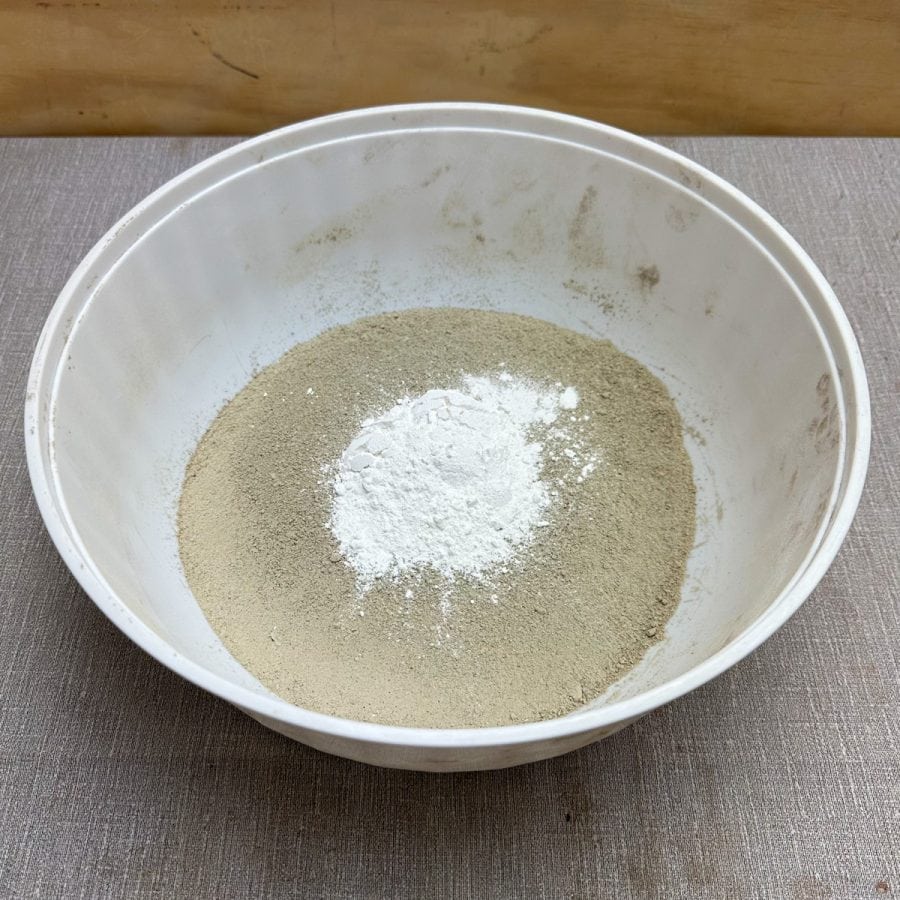
Add 5 tablespoons of white pigment to the bowl with ⅔. Do not add more than this, or it will weaken the mix.
Adjust the coloring accordingly for a lower white cement proportion.
Mix the dry cement and white pigment well. Don’t add water yet.
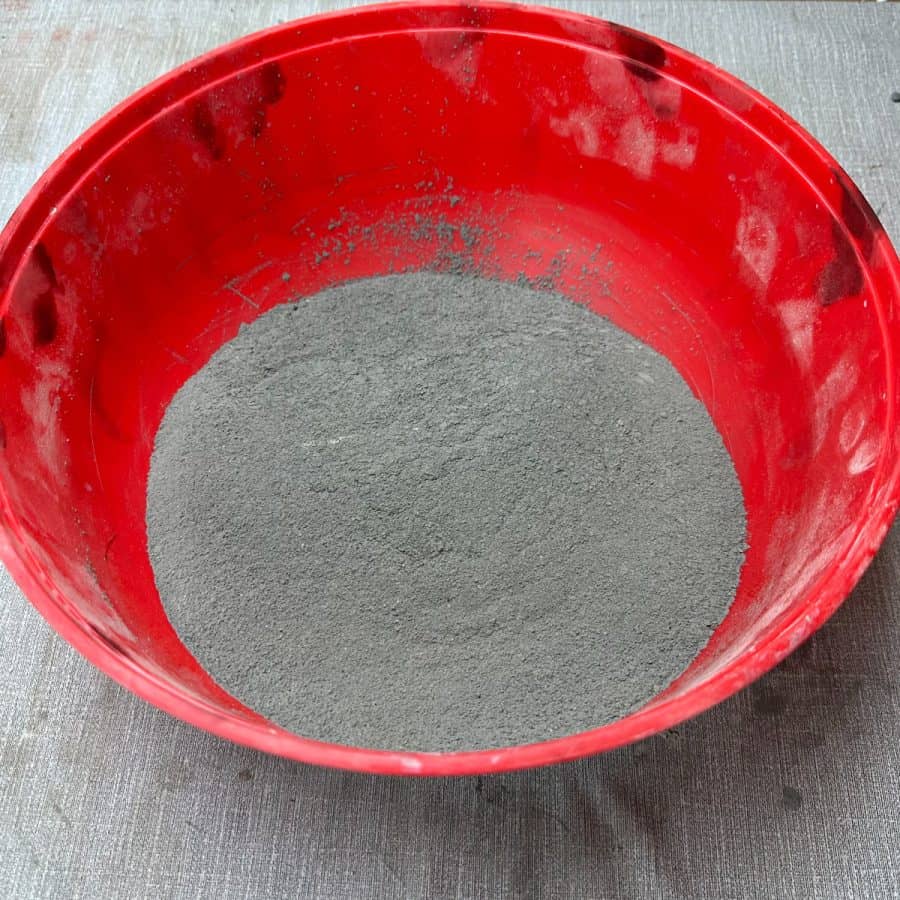
Then, mix the second bowl of cement with the black pigment. I used about 2 tablespoons.
Don’t add more than this. Combine well, but don’t add water yet.

When both colors are well combined with the dry cement, go ahead and add water to the first color going into the mold (the top color of the finished fire bowl).
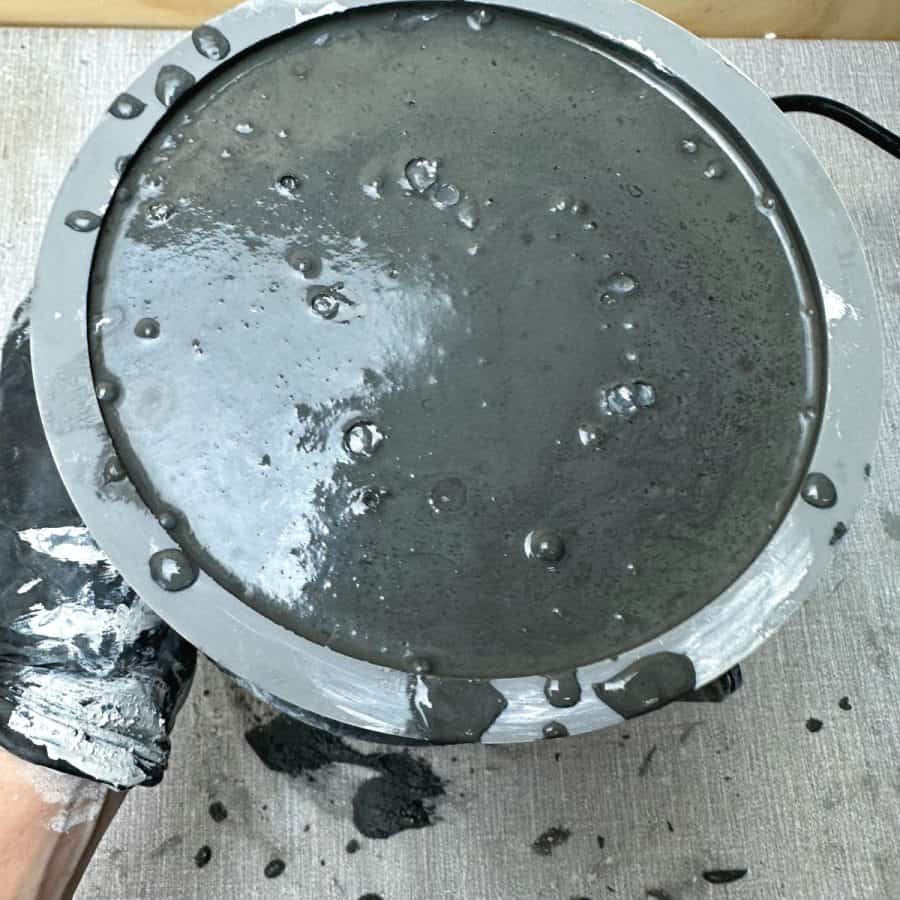
The right consistency of the wet cement mixture should be like a thin brownie batter. The photo above shows the consistency needing a little more water.
I took the pic just before I added a touch of water. This was an okay consistency, but more fluidity is better.
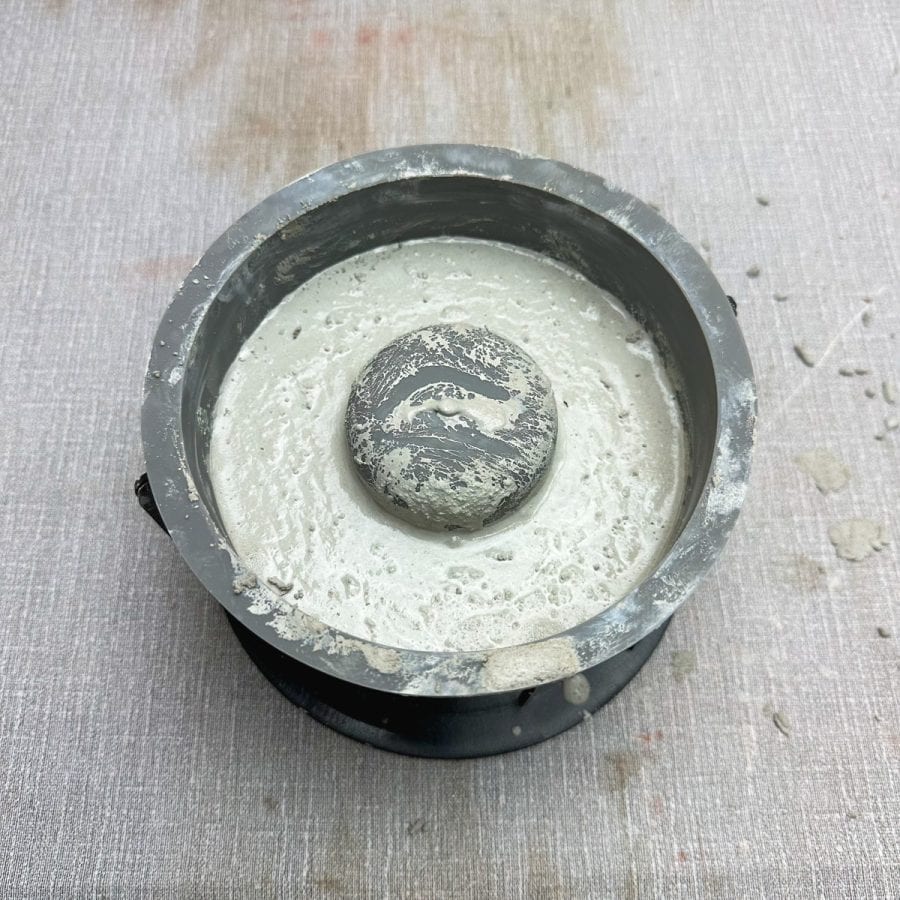
Pour it into the mold and then shake and tap it for about 15-20 seconds to help it settle and release some of the bigger air bubbles. Please don’t do it longer than this.
Now add water to the bowl with the second color and pour that in.
Shake and tap the mold and continue vibrating until the air bubbles on the top stop rising, or slow quite a bit.
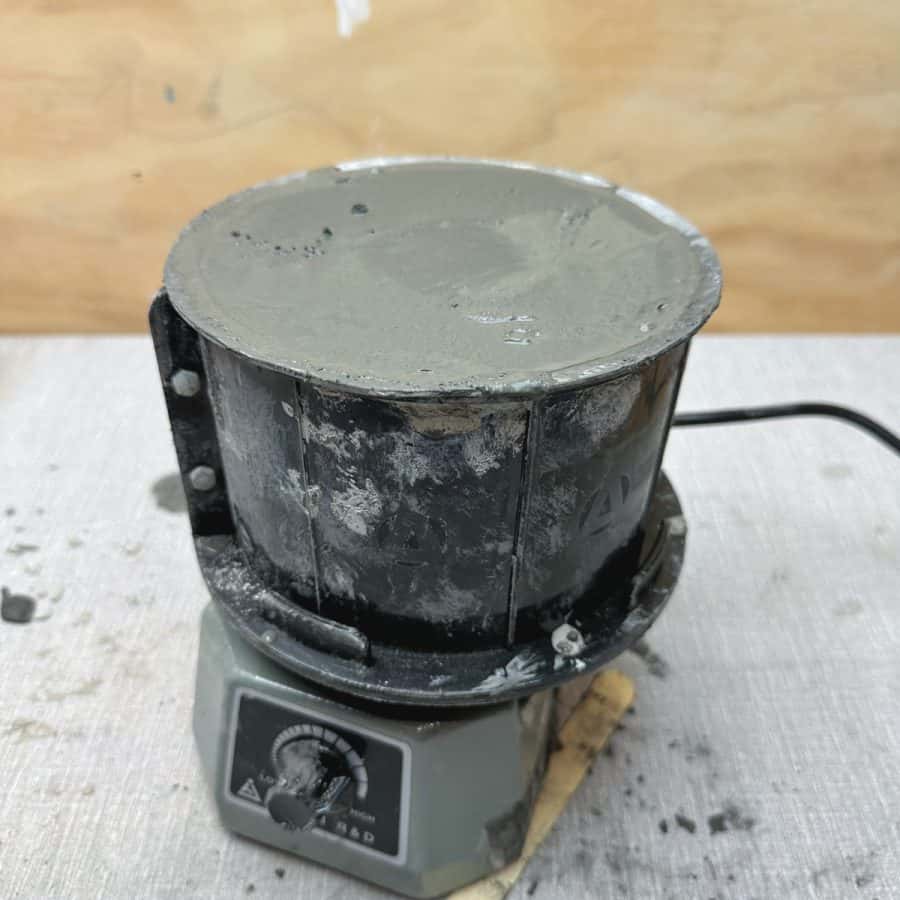
If you have a vibrating machine, use that or an orbital sander without the sandpaper.
Let this cure for about 3 hours. The mold should not be warm to the touch when it’s ready to demold. It should be cooler than lukewarm.
Note: This is longer than the typical cure time for this mix, usually about an hour.
The reason for this is that the mold cavity walls are very thick and will take longer to cure.
Step 3. Demold The DIY Concrete Fire Bowl
Remove the binder clips or screws and nuts from the fire bowl shell that holds the soft silicone mold together.
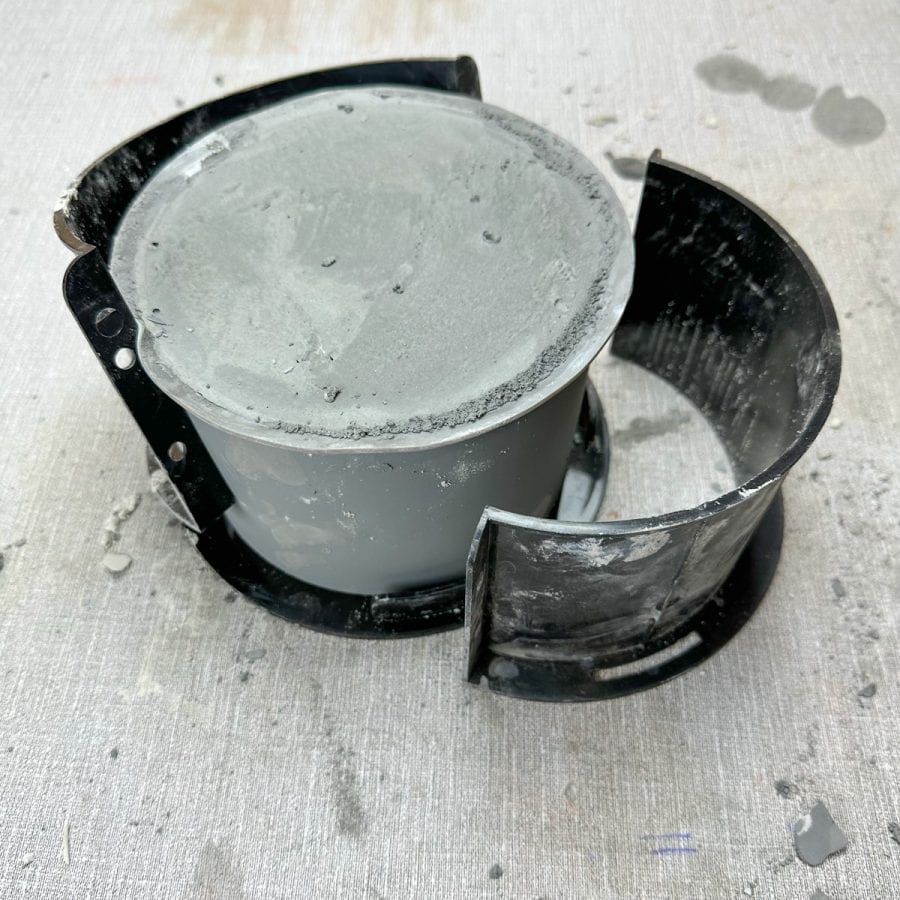
There are slots on the sides of the shell where they attach to the hard plastic bottom.
Lift each side off where the slots are, turn the mold on its side, and pull out the hard plastic bottom. This leaves you with just the soft silicone mold.
Now, gently unroll the sides from the bottom until only the inner piece is left inside.
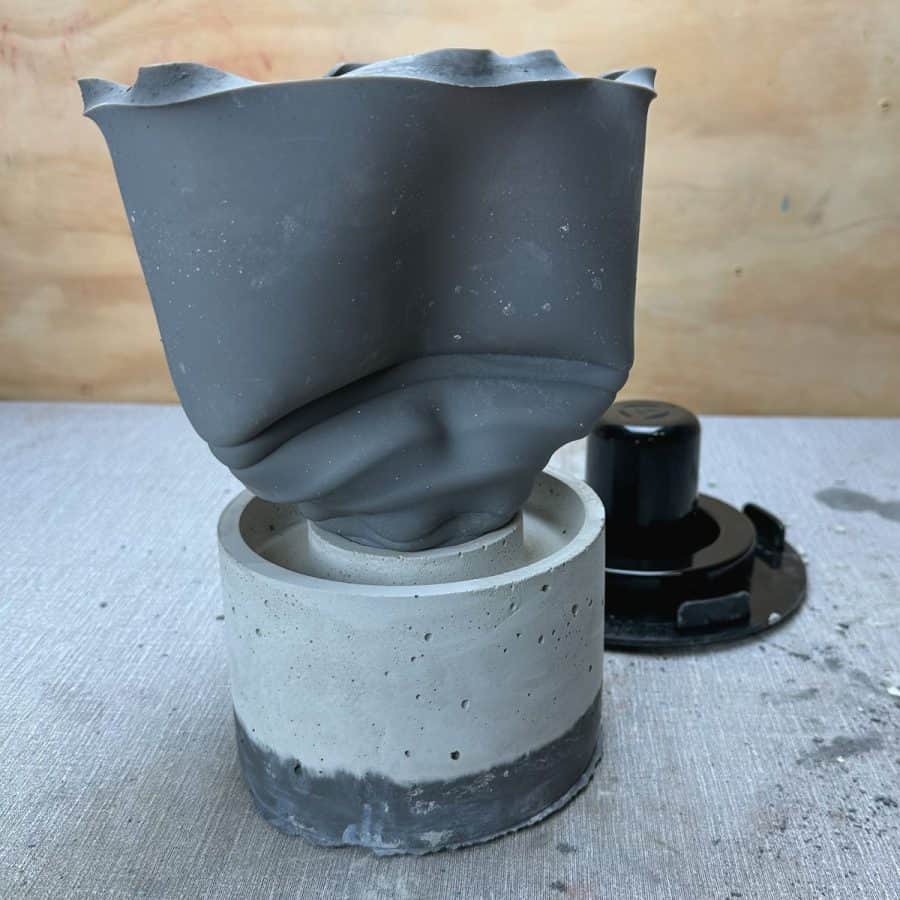
Then grab the sides and twist and pull; the inner piece should come out easily.
Now, carefully push the fire bowl through the mold.
The bottom and bottom edges will be rough, so be sure to sand those.
Be sure to wash the mold with soap and warm water after demolding. Dry it and put it back into its shell.
This type of mold should be stored like this so it doesn’t lose shape, and you can reuse it multiple times.
Step 4. Seal Your Concrete Table Fire Pit Bowl
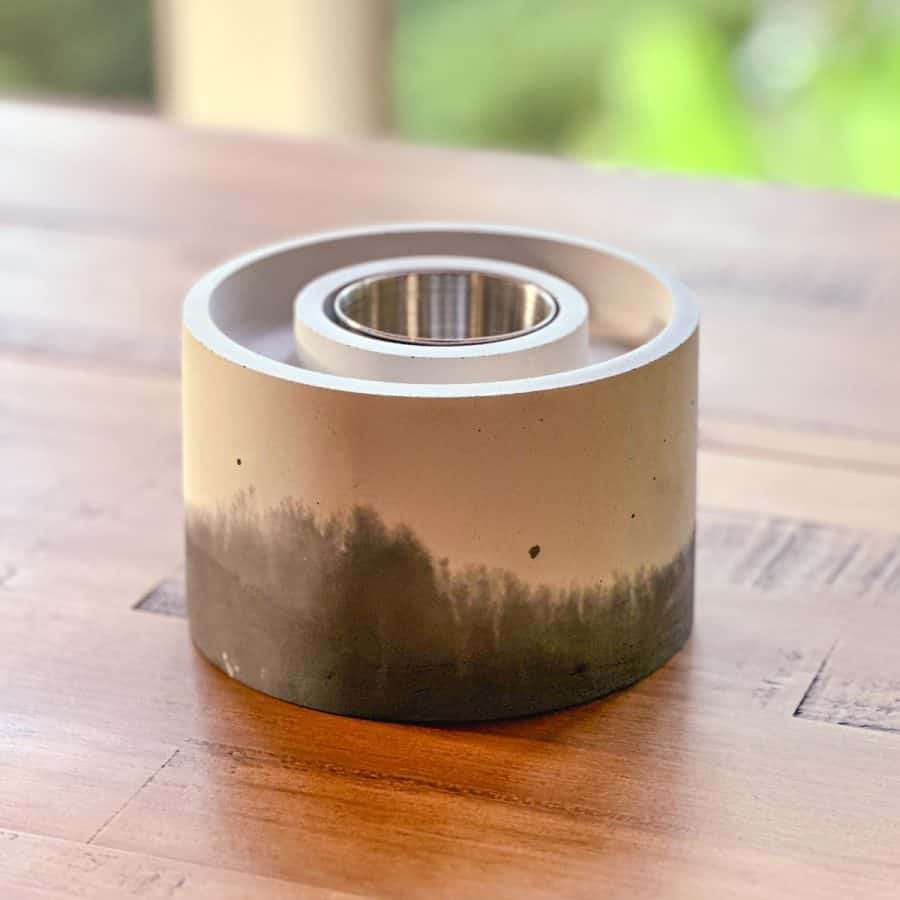
Use a concrete sealer to protect the fire bowl from stains and outdoor elements. I recommend sealing it twice.
Once the sealer has cured, the fire bowl is ready for use. You may want to consider adding adhesive felt or cork to the bottom of the bowl to help prevent scratching.
Add small river rocks to the top groove. Then light the fire bowl.
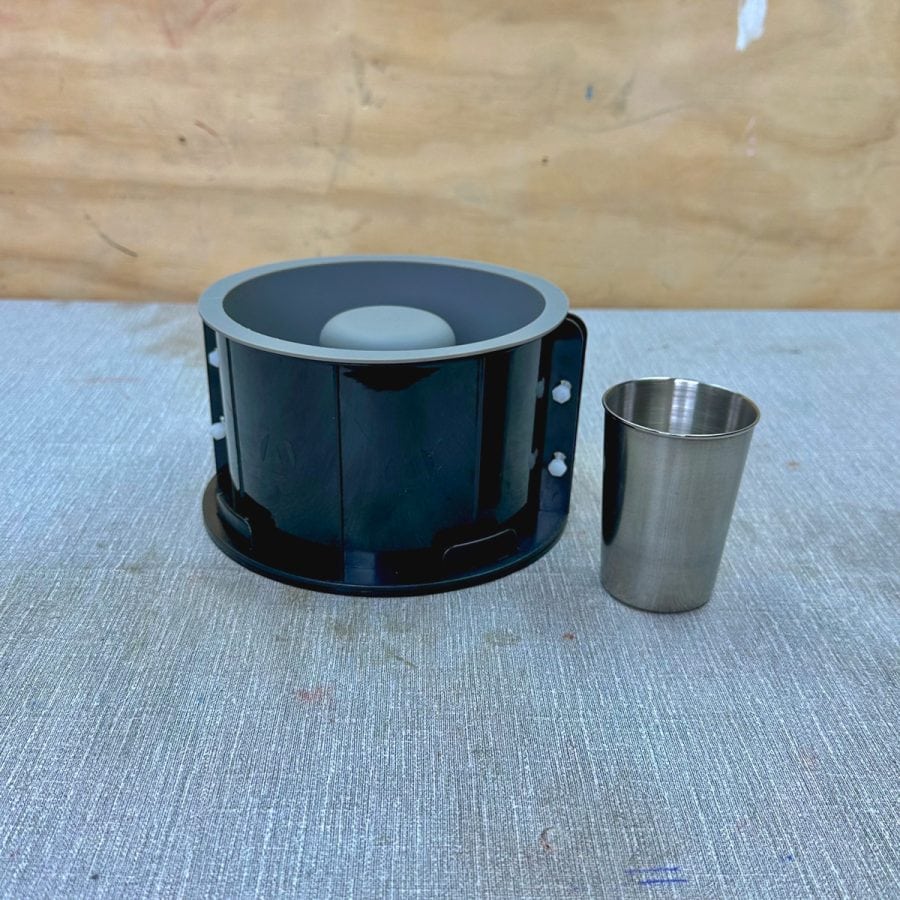
To light the bowl, the fuel source the manufacturer recommends is Isopropyl alcohol (I used 70%). Add that to the stainless steel canister, then place that into the center of the bowl.
Use a lighter with a long neck and put the flame directly onto the rubbing alcohol.
Now, you can enjoy a beautiful glowing fire in your outdoor space.
For other concrete projects you may love, check out this large bowl, and this awesome side table. Does your patio need redoing? Might as well make the whole thing a smash!
Don’t forget to Pin it for later!

Don’t forget to Pin it for later!


Where do you get the stainless steel canister? It’s not listed in your supply list.
Hi Shay,
The canister is supplied with the mold! 🙂
Hello, for clarity, given that the stainless steel canister is a part of the function of fire pit, is this a one time use mold. Btw your crafts are beautiful…
Hi Cathie,
Thank you!
The canister is needed to hold the alcohol for the fire. You can make tons of copies of this, but you would need to find additional containers for the fuel. It isn’t anything special except stainless steel, you would just need a similar size.
Just love how you explain everything so simply, and in great detail- thanks
Hi Lynette,
You are welcome!