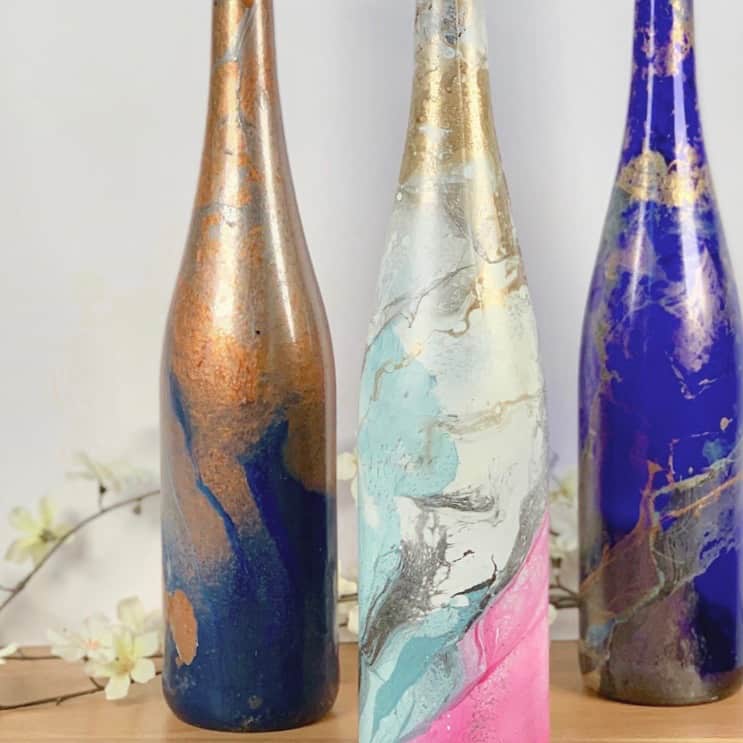
DIY Hydro Dip Bottles With Spray Paint (Cheap & Easy)
Here’s a fun tutorial for how to DIY hydro dip bottles with spray paint!
Put your creativity to the test, while having so much fun, to see what amazing results you can achieve using this cool process of water transfer printing.
In just four simple steps, you can create the prettiest marbled bottles for your own home.
What is hydro dipping (water immersion printing)?
If you aren’t familiar with it yet, hydro dipping is simply the process of immersing three-dimensional objects into water that’s coated with paint.
This produces complex patterns as the objects are manipulated through the water.
The Best Paint To Use To DIY Hydro Dip
It’s important to get the right paint for hydrographic dipping.
You can get a hydro dip kit that is made for hydro dipping, but these are pricey and really not necessary.
They don’t involve special printing equipment, but you’ll pay a premium for specialty paints.
I haven’t used a hydro dip kit, but with the results you get with just a tub of water and regular acrylic spray paint, I don’t see why you would pay the premium.
But, the kind of paint you need to use for proper hydro dipping is acrylic spray paint
A brand that is widely available and I find works very well is Rustoleum. And whether you choose Rustoleum or not, gloss and metallic colors seem to work best.

However, in addition to those, I often use satin, just because I really like some of the colors.
You may want to check out this tutorial to see how you can also make beautiful hydro dipped vases – or even dipped concrete planters!
How Shape Affects The Design On A Hydro Dipped Bottle
Flat surfaces will grab the pattern on the water differently than a curved or rounded object.
Once you get the hang of the actual process, you’ll learn how different shapes and angles will take to the patterns on the surface of the water.
In the tutorial below, I have shown detailed photos of how the different angles and twists affect the hydrographic designs.
Get ready to have a lot of fun by following these simple DIY instructions.
Some of the links on this page have been provided as a convenience for finding materials. These links may also be affiliate links. As an Amazon Associate I earn from qualifying purchases, at no extra cost to you.
I only recommend products I’ve used and loved, unless otherwise stated. Click here to read my full disclosure policy.
DIY DIFFICULTY LEVEL | Easy
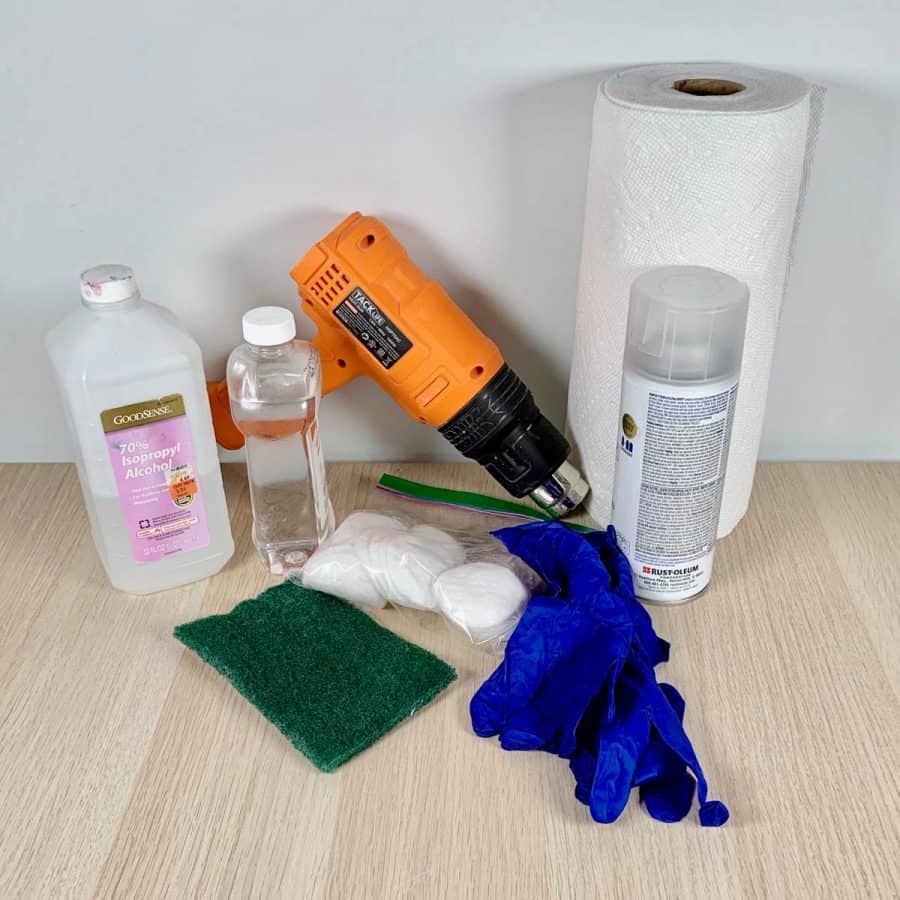
DIY Hydro Dip Bottles With Spray Paint Materials List
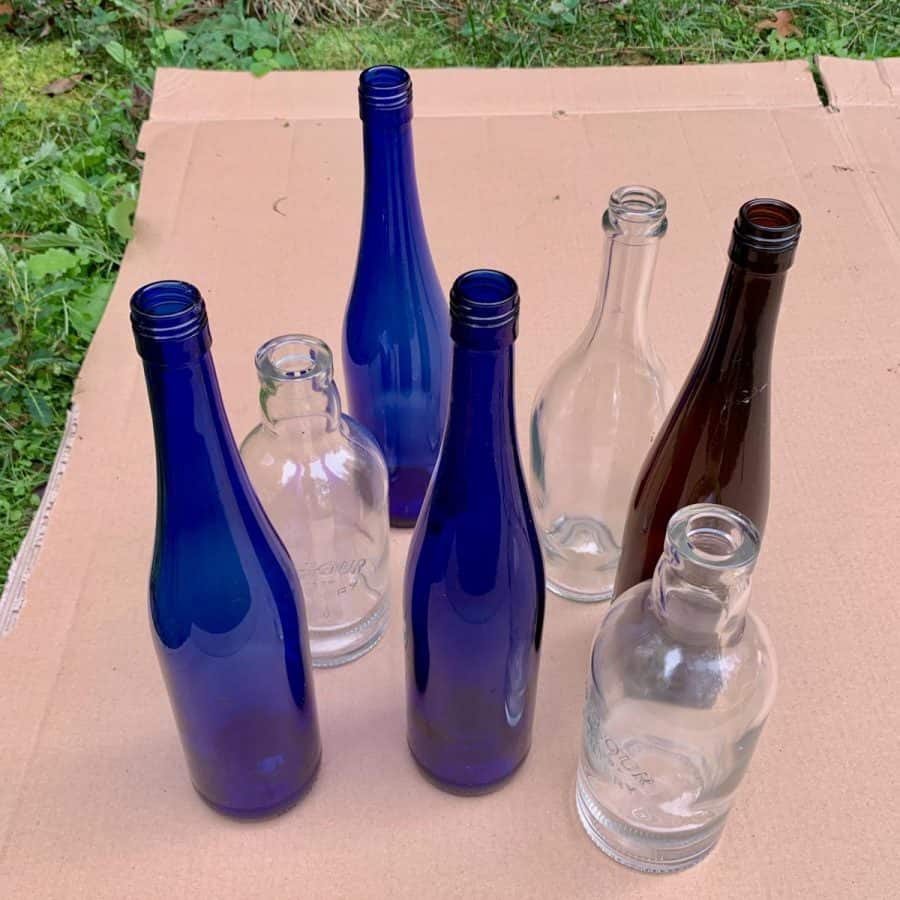
- Wine bottles or liquor bottles
- Light duty nitrile gloves*
- Multiple colors of acrylic spray paint
- Acrylic spray paint for base coat- white, off-white or other
- 5 gallon bucket or a large plastic bin*
- Paper towels
- Sponge with green scrubby side
- Drop cloth (optional)
- Acrylic top coat– clear
- Heat gun (or hair dryer)
- Goo gone or mineral oil
- Rubbing alcohol
- Cotton balls or pads
Materials Notes:
The bucket/ bin you use for when you DIY hydro dip bottles needs to be taller and wider than your bottles.
My bin was way too short for the wine bottles and I wasn’t able to get as good of a pattern on them as I wanted.
I recommend the bin be at least 2 times wider and several inches deeper.
When I dipped these, I did them the same day that I hydro dipped some vases and used the same plastic container which was suitable in size for the vases, but not the bottles.
I used a wine cork opener as a handle for the first bottle, but don’t recommend this. It was just easier using my fingers as the opener made maneuvering the bottle awkward.
Tutorial Steps For How To DIY Hydro Dip Bottles With Spray Paint
Step 1. Remove The Labels And Clean the Bottles
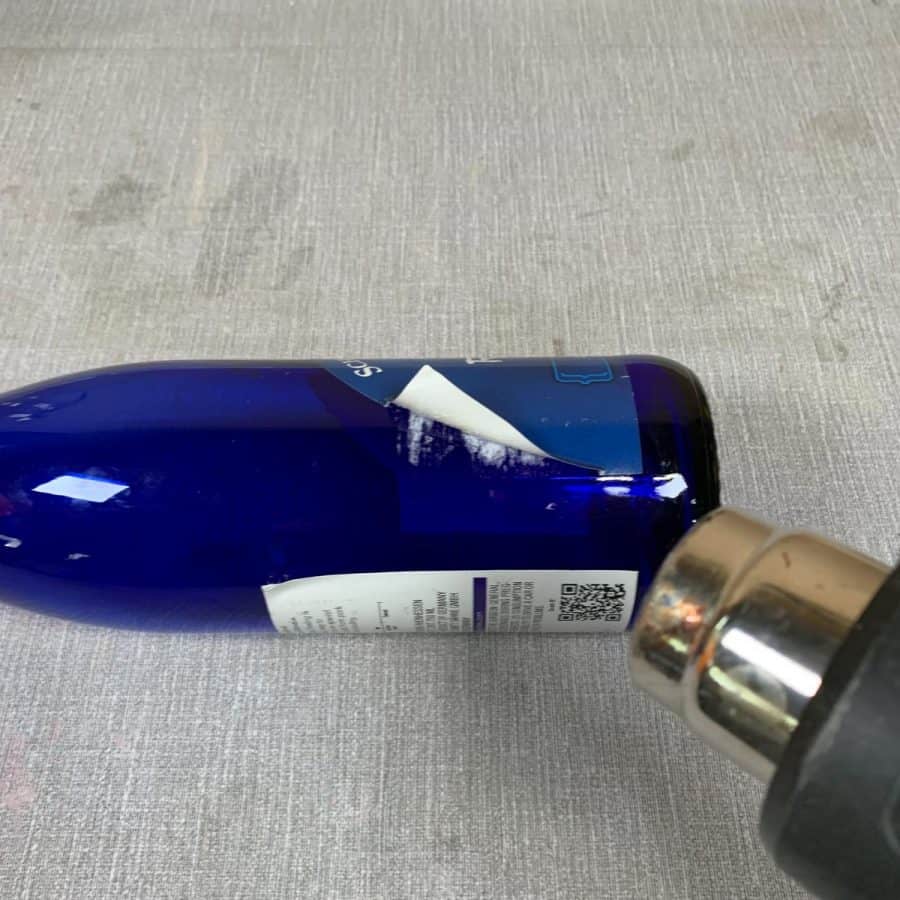
Remove the labels from the bottles. The easiest way to do this is to use a heat gun. In some cases, it can be magical, but not all label glue is created equal.
First, turn the heat gun on medium and run it over one side of the label for about a minute. Be really careful because the glass will get extremely hot.

Turn off the heat gun and carefully lift off a corner with your fingernails.
As I said, some labels may be glued with glue that just doesn’t want to let go, so it can be difficult.
If your label gives you trouble, then stick the bottle in a bucket of water for a minute and repeat.
This may take up to 3 passes to remove the label. Don’t forget the one on the back and if there’s one at the neck of the bottle too.
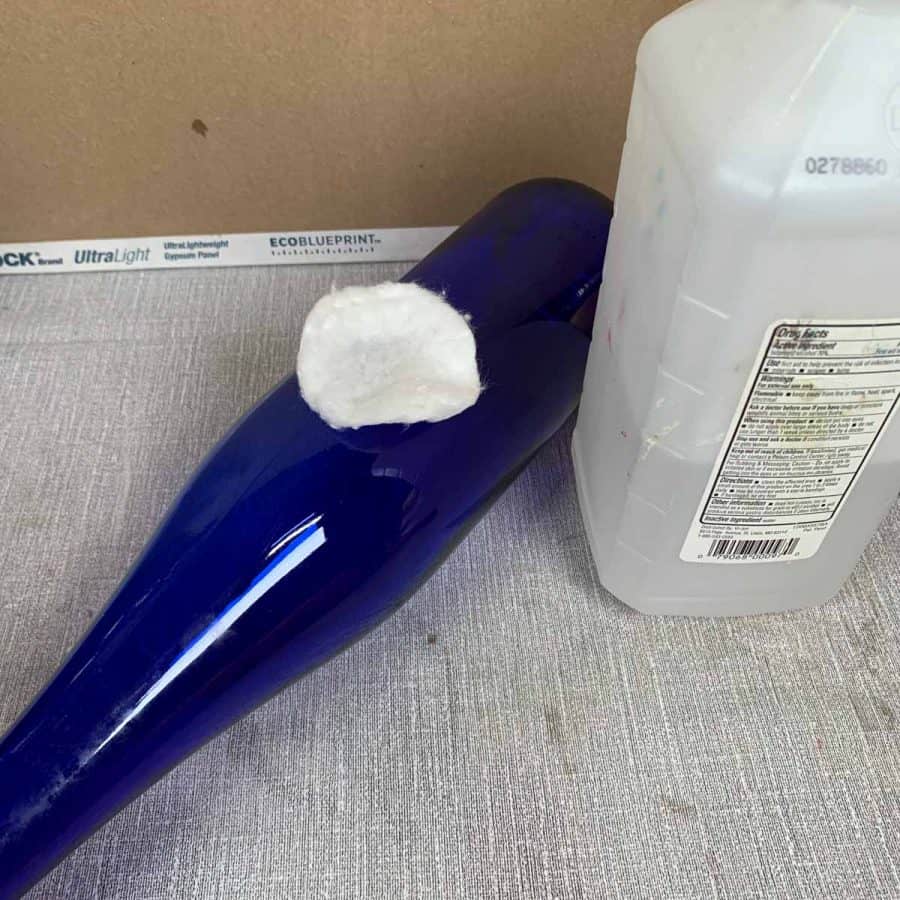
Clean up the adhesive residue with oil like mineral, baby or vegetables or use goo gone. An old toothbrush is very helpful with this.
Once the adhesive is gone, use rubbing alcohol to remove all the oil.
You should also wash the bottle with dish detergent to make sure it’s completely clean before you apply the base coat.
Be sure to dry it before moving on to the next step.
Step 2. Prime The Bottles Using A Spray Paint Base Coat

Apply a base coat of spray paint to each of the bottles. You typically see a white base coat, but the base can be any color.
Most often you see the base is painted white, but I love the look of a colored undercoat that’s been hydro dipped.
Step 3. Hydro Dip The Bottles
Once the base coat is completely dry (at least 30 minutes after applying) you are ready to begin hydro dipping.
First, fill up the bucket with cold water. I just used my garden hose.
Next, shake up the colors of spray paint that you want for your first hydro dipped bottle.
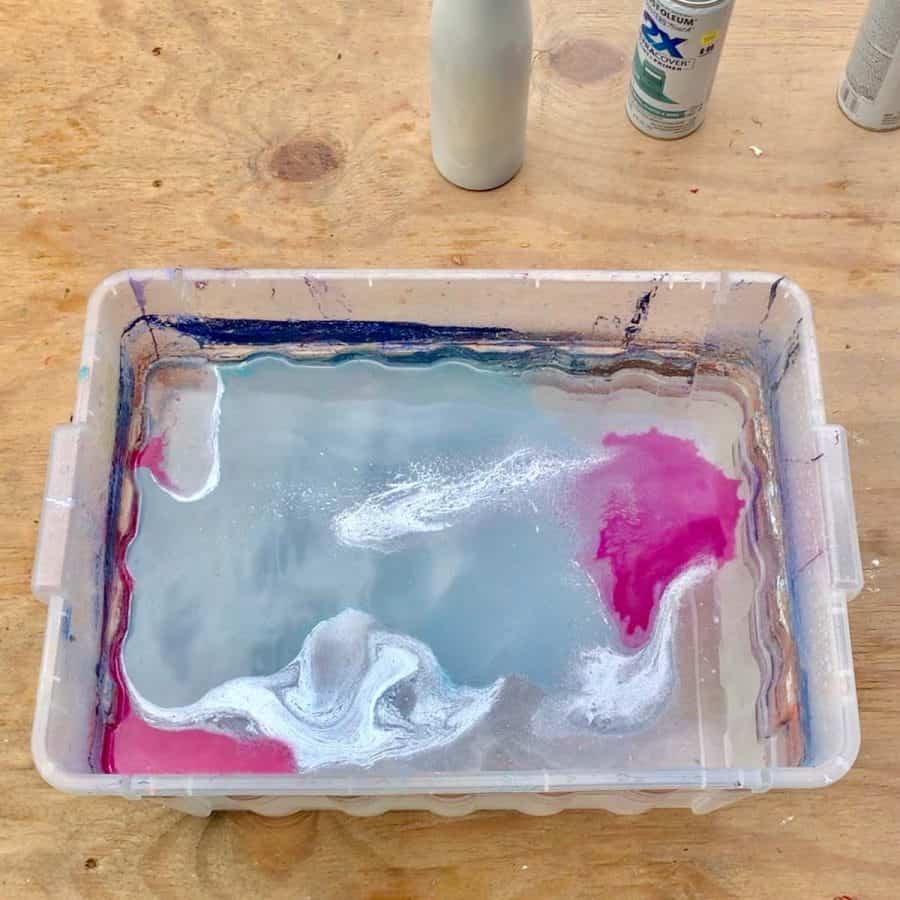
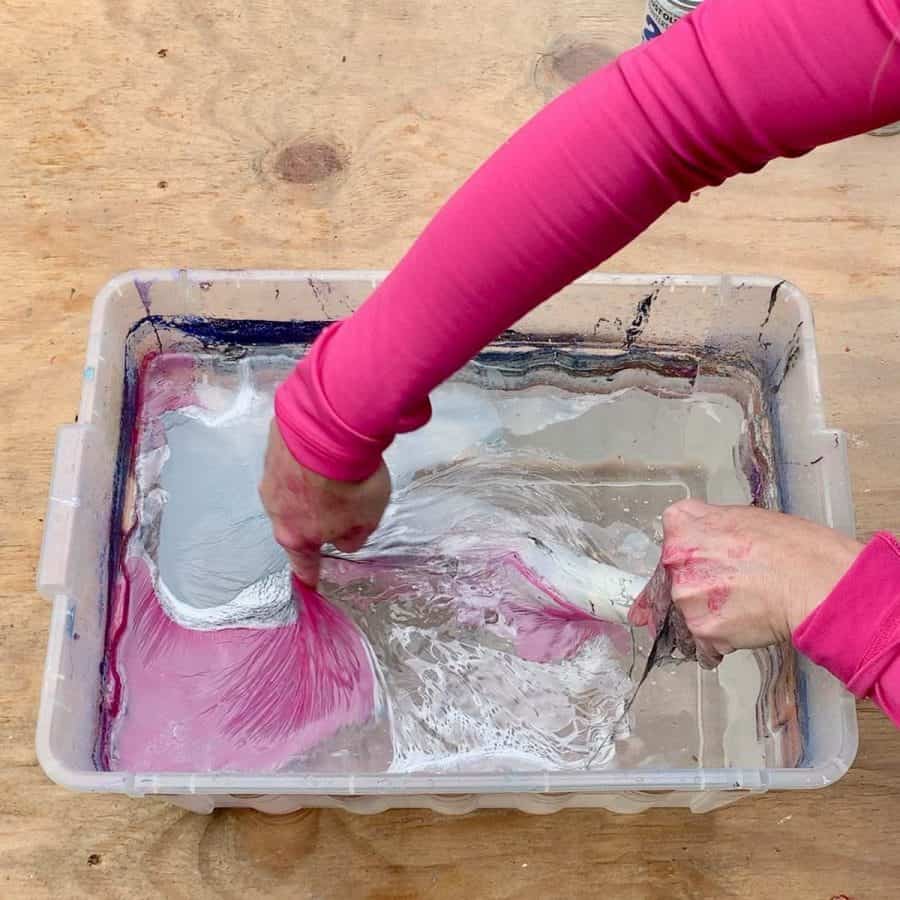
Begin spraying the surface of the water slowly and in light coats. There are different ways to create the marbled look, each resulting in a different effect.
You can spray circular patterns or linear ones. The circles can be concentric, within each other, using different colors.
You can also use paint sticks to create trippy swirls.

Check out the dummy not wearing gloves. ?
After the dipping colors and pattern have set, take the bottle and slowly immerse it into the water. As you do, you can go straight down or twist it.
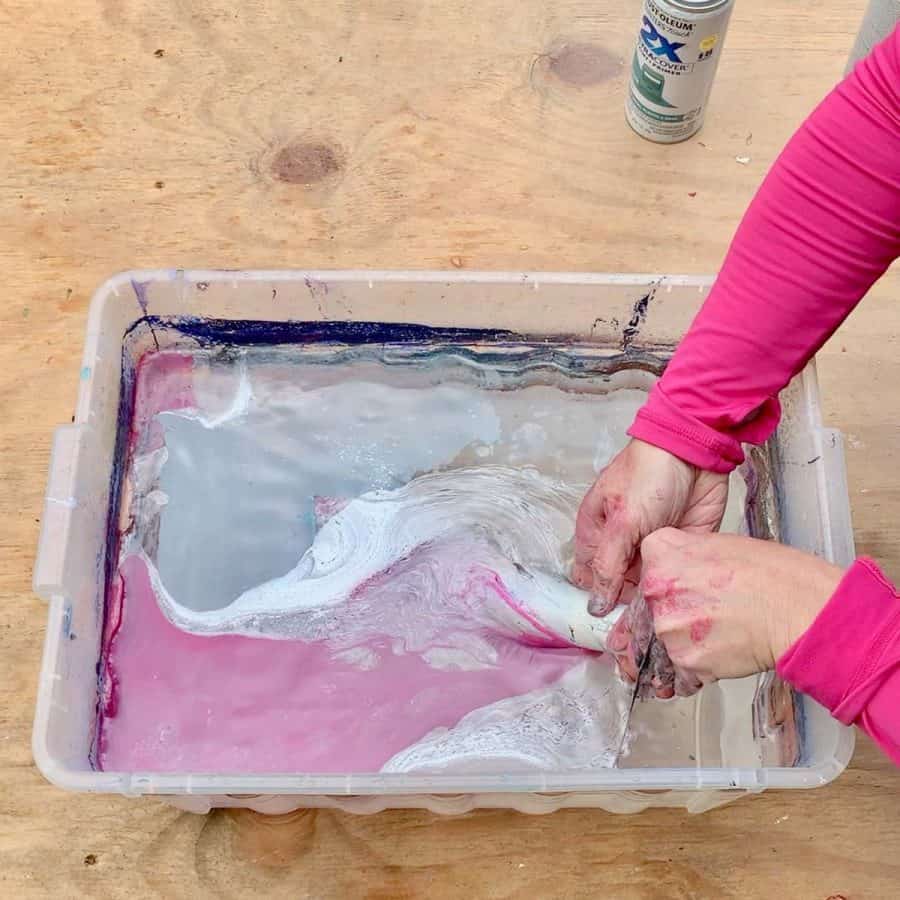
Twisting it will create more swirls and pushing straight down generally gives you linear marbling effects.
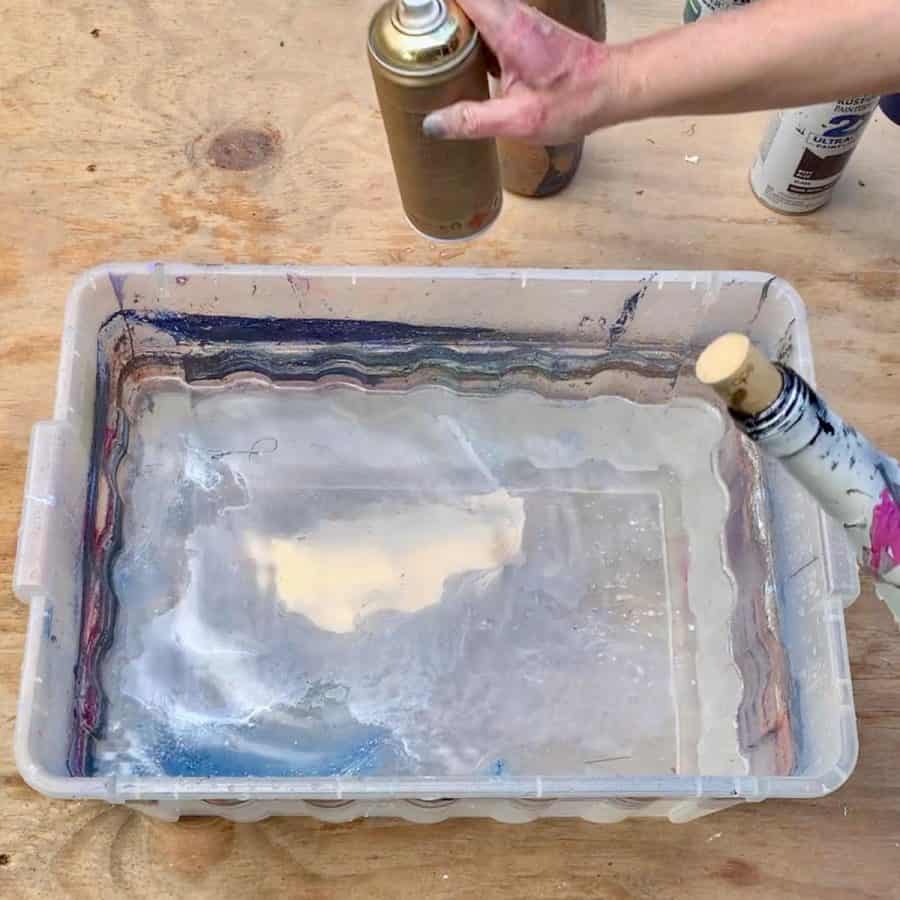
Once the bottle has been fully immersed into the water, you will need to bring it back out, but before you do, you will need to wipe away the paint from the top of the water.

The reason for this is that the remaining paint is mostly broken up bits and is stringy. It usually looks best when these bits are not sticking to your bottles.

The patterns are a little bit psychedelic, right? Speaking of, if you love the groovy 60’s, you may also love our Trippy adult coloring pages. Perfect for a rainy day.

Set the bottle aside to dry.
Before moving on to your next hydro dipped bottle, it’s best to refresh the water in the hydro dip container.
This will help get rid of the old bits of paint. I found that a green scrubby sponge helped with this.
If you feel you have some areas that didn’t get enough coverage or you want to add another color, then you can do a second dip.
The paint should be dry before you do another dip so that the paint can adhere properly to the already dipped surface.
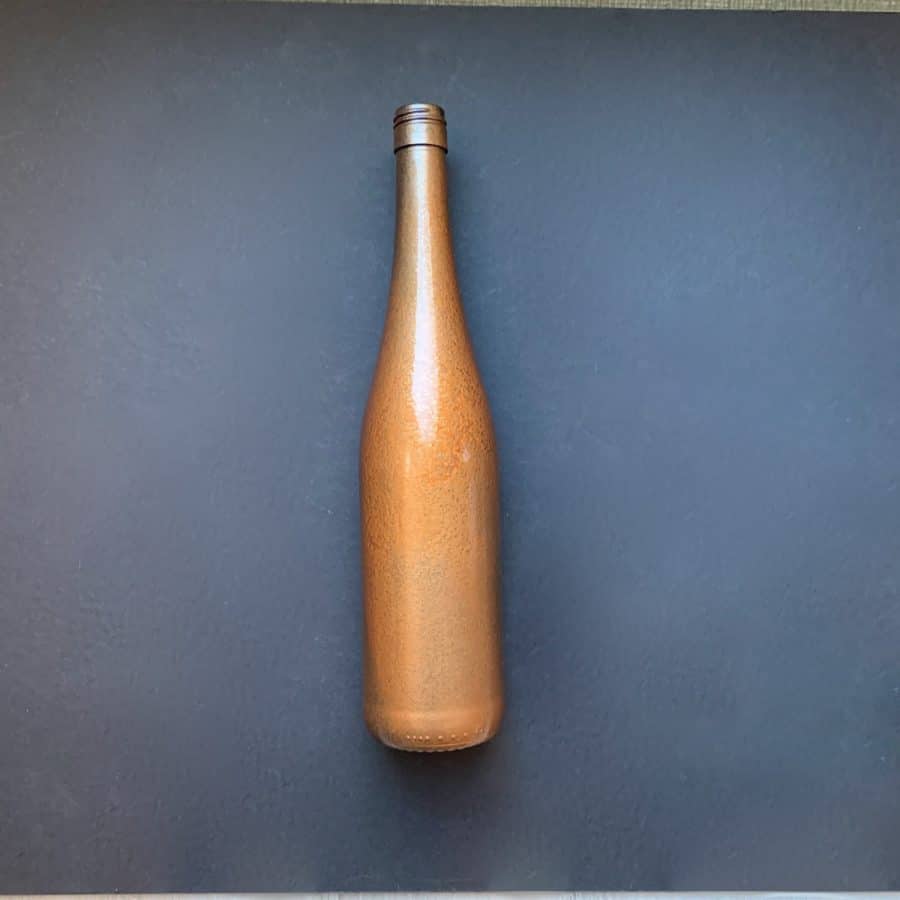
Once the bottle is dry, just respray the surface and dip it again. For this second hydro dip, I added metallic gold to the neck of the wine bottle.
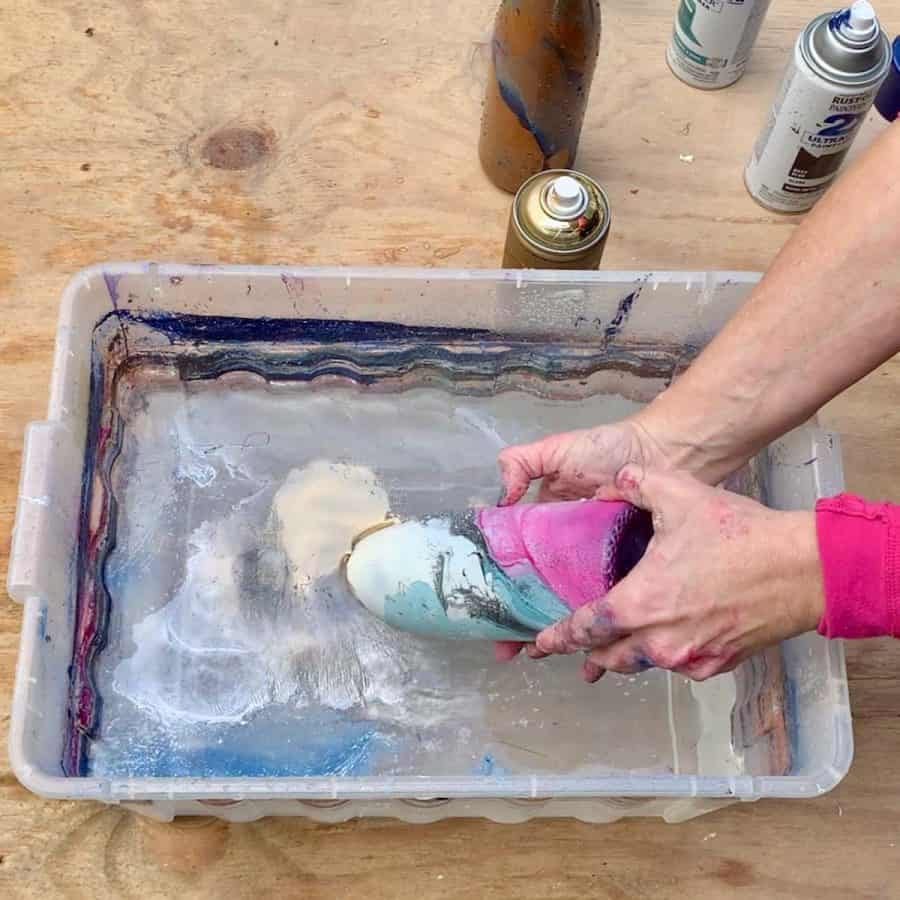

Note: For this particular dip, I intentionally didn’t let it dry.
I did this because having done this before, I knew what to expect next with this metallic gold. The Montana paint is acrylic paint, but also a lacquer so the lacquer will have better adhering abilities.
The wine bottle still had water droplets on the outside of the bottle and so when the drops reached the gold paint on the surface of the water, the lacquer grabbed around the droplets. This gave it a really neat crackled/ hammered effect.
After you hydro dip all the bottles, they need to dry fully before you coat them with the top coat sealer. I waited a full day to make sure all the moisture was gone.
Step 4. Apply A Protective Finish To The Hydro Dipped Bottles

Now that the hydro dipped bottles are dry, spray them with a clear coat. I recommend applying two coats to get the best protection from scratches.
Don’t forget to Pin it for later!

DIY Hydro Dip Bottles With Spray Paint
Materials
- acrylic spray paint
- large plastic container
- glass bottles
- rubbing alcohol
Tools
- Please see the full materials list above the tutorial for details and links.
Instructions
- Remove The Labels And Clean the Bottles To Prep Them For The Base Coat
- Prime The Bottles For Hydro Dipping Using A Spray Paint Base Coat
- Hydro Dip The Bottles Into A Large Plastic Bin Of Water
- Apply A Protective Finish To The Hydro Dipped Bottles To Protect Them From Scratches


How do you dispose of the water and paint residue afterwards as I believe it is not advisable to pour down a domestic drain.
Hi, the paint is acrylic so it can be dumped outside. If you don’t want it on your grass or dirt, you can use a screen to sift the paint from the water and throw it away. I happen to have a deep gravel area under a porch where I can easily dump mine.
Did you put a base coat of paint on the bottom of the bottle or just leave it without paint.
I can’t wait to do this!
I put a base coat on the bottom too or the hydro dipped paint would have come out a different color there and may not have stuck properly.
You’ll love it!
What happens if you do not put a base coat on the bottle prior to dipping? I have some bottles that are colored and I would like to maintain that color.
Hi Polly,
It’s been years since I did this, but I believe the base helps the paint stick better. However, if you look at the bottle with the most blue and is somewhat transparent in some areas, that was a wine bottle that was transparent blue to begin with and I didn’t paint a base color to that. As long as you use the brands and gloss or metallic paints I used and linked to, you should be okay.