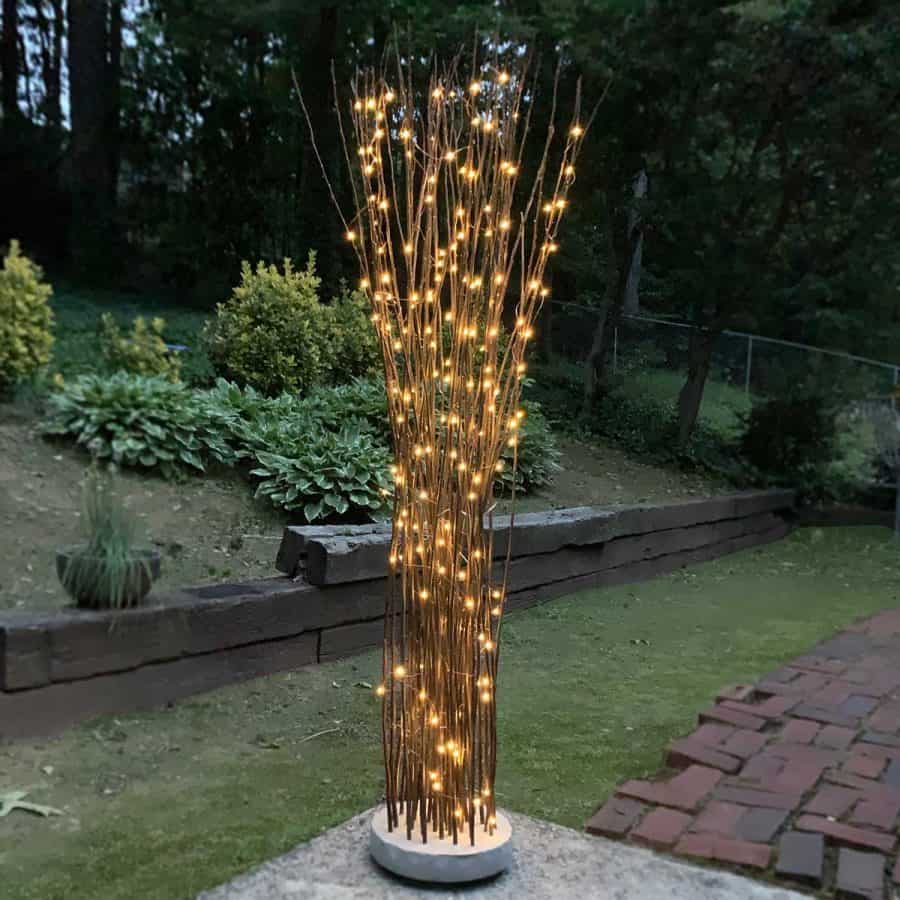
DIY Twig Lights Stand (in a Floating Concrete Base!)
Make your own patio DIY twig lights stand with a floating concrete base.
Here’s another way to decorate your patio, porch, or path- add a DIY twig lights stand.
Make a DIY twig lights stand, using concrete, and make it float! Decorating with branches is a great way to utilize nature.
There’s a bunch of steps and materials, but it is actually pretty easy to make this lit branch stand.
How do you make lighted tree branches? We basically use dried Ikea Torka branches and get them to stand vertically, by using foam and concrete to support the twigs.
My first attempt didn’t involve using the foam and that version failed miserably.
I had tried using the foam previously but I wasn’t able to get the twigs to stay in place.

After the initial failure, I tried creating the holes with a Forstner bit that was sized just slightly too small and the support was perfect.
Here’s a bonus, you can also make this DIY twig light stand for inside too/ or instead.
If you make this for your indoor decor instead of outdoor decor, you can skip adding a layer of urethane spray and use plug-in LED fairy lights instead of solar lights.
And after you make the floating foot, just use a piece of felt fabric to cover the bottom of the foot and use adhesive spray to glue it into place!
Here’s another solar light tutorial where I made fake concrete rocks to hide round, ground lights!
Some of the links on this page have been provided as a convenience for finding materials. These links may also be affiliate links. As an Amazon Associate I earn from qualifying purchases, at no extra cost to you.
I only recommend products I’ve used and loved, unless otherwise stated. Click here to read my full disclosure policy.
DIY Difficulty Level | Easy
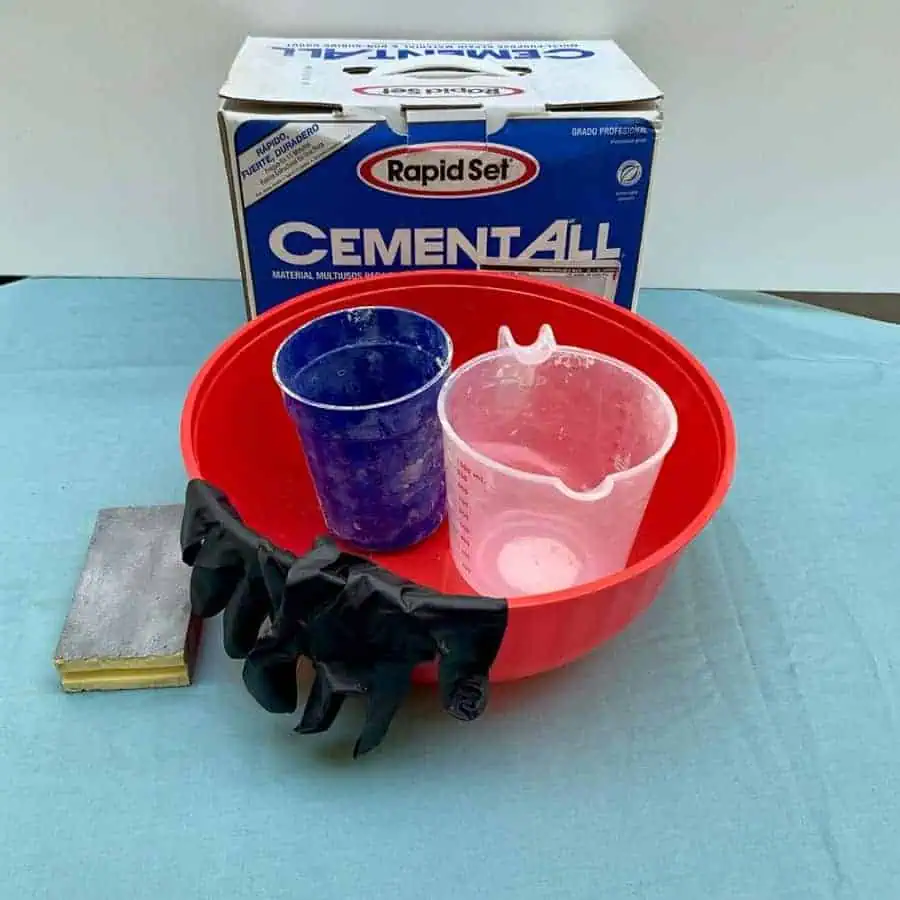
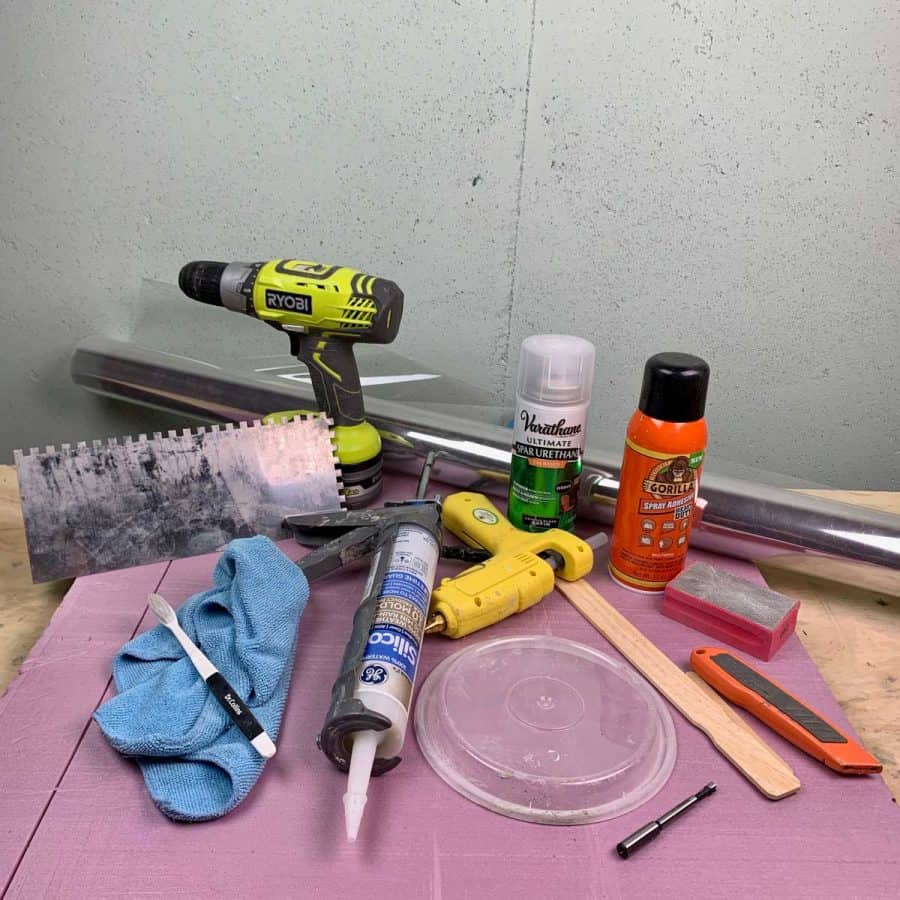
Materials For A DIY Twig Lights Stand
- Sand Topping Mix and Cement All if desired (for the floating foot-see Step 12)
- Disposable bowl
- Disposable cup
- Durable nitrile gloves- I like these because they are so durable, you can rinse and reuse and end up costing less in the long run
- Safety glasses
- Safety mask rated for silica dust
- Craft knife and/or box cutter (I used both)
- Spray adhesive
- Acetate roll or large sheets
- 12” concrete tube form
- Box cutter with fresh blade
- Ikea dried twigs/branches
- 2 pack of LED fairy Solar lights (or if making for inside, use plug-in fairy lights)
- Urethane spray- exterior
- Square trowel
- Foam insulation board
- Power drill with ¼” Forstner bit* the bit really does need to be a Forstner
- Silicone caulk
- Soft toothbrush
- Microfiber cloth
- Craft stick
- Paint stick
- Blue tape
- 4 large buckets
- 7-8” diameter lid from a container (for the floating foot)
- Felt fabric- optional- for an indoor diy twig lights stand
Before starting the tutorial, it may be helpful to read my article comparing the different concrete mixes and sealers– Cement & Concrete Crafts Tests!
Another important article is Making Cement Crafts Techniques & Tips with info on cement materials, mixture consistencies, demolding, safety and clean up!
Tutorial Steps For DIY Twig Lights Stand
Step 1. Charge The Solar Lights For The Twigs

Bring your solar lights outside, flip the charging switch on, and place them in full sunlight.
This will allow them to be fully charged when you are finished with making the stand.
Step 2. Protect The Ikea Twigs From The Elements
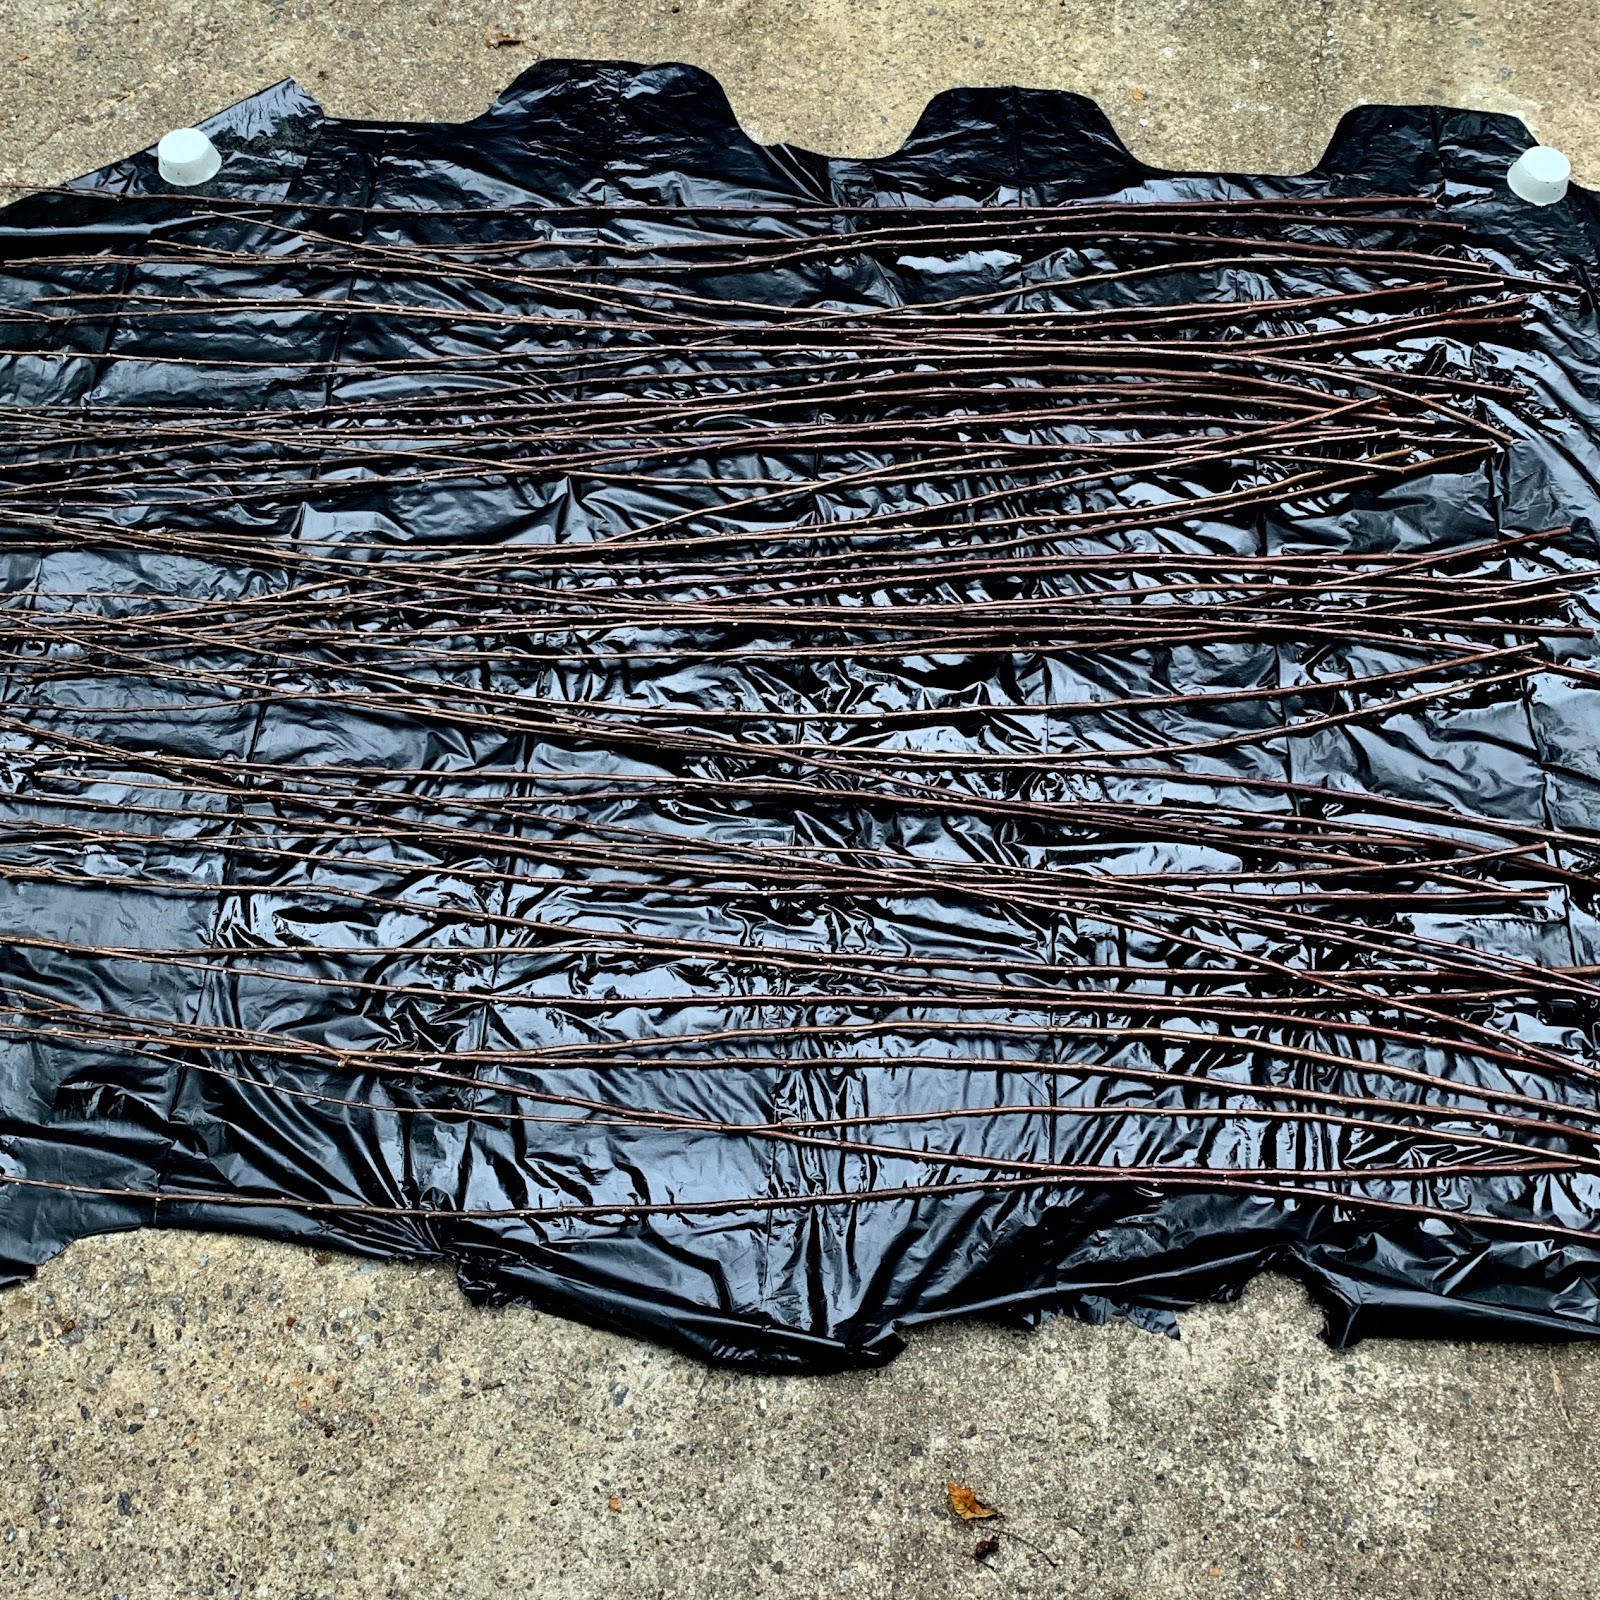
Ikea’s twigs come with a protective finish, but for twigs that will be outdoors, you will want to add a little more protection.
Lay the branches for this twig lights stand, out on a tarp and spread them so there isn’t much overlap.
Use the urethane spray to coat the twigs on one side. Once they are dry, flip them over and coat the other side.
Take care to not spray the coat on too thick or you will end up with sticky twigs.
If you are interested in another neat outdoor solar lights project, you may want to take a look at the Wine Bottle Solar Lights tutorial.
Step 3. Cut The Form Tube For The Concrete Base

Mark 2” down the concrete form tube and around the tube in several spots.
You may want to use masking or painters tape to connect the lines to give you a straight line to follow for cutting.

Now with a box cutter, carefully score the line- don’t cut through yet. I took 2 passes before cutting.
You could also use a hacksaw to cut this, but I find the box cutter to be more accurate.
Step 4. Add Smooth, Waterproof Material To The Tube Ring Mold
We are going to add acetate to the inside of the cardboard to give the sides of the concrete a nice shiny look. Use the X-acto to cut a piece of acetate at 2” and 40” long.


Next, use spray adhesive to glue it to the inside of the tube and trim the excess at the top.
Step 5. Create The Base For The DIY Twig Lights Stand Mold
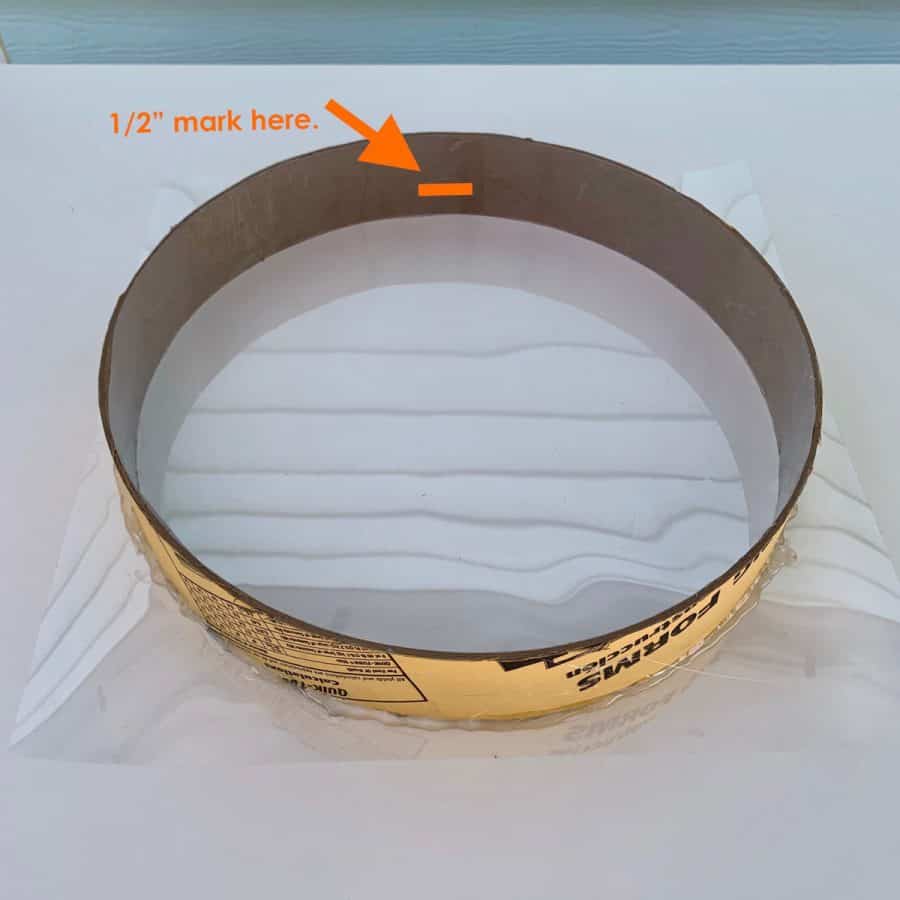
Cut another piece of acetate to about 13 x 13” and then use hot glue to glue the cardboard ring to the bottom of it, and from the outside.
Next, use a Sharpie and mark a ½” from the bottom of the tube- on the inside. Make this line obvious to see because it will be your stopping point for the first layer of cement.
Now place the ring onto a rigid board, like a piece of plywood, and then place it on the ground.
Step 6. Trace And Cut The Twigs Support Foam

How do you get tree branches to stand up? Use the foam insulation to secure the branches in place, then cement them into place.
First, take a piece of the insulation foam board and draw a circle approximately 10” in diameter onto the foam.
This leaves you an inch of space around the perimeter because you don’t want to get too close to the outside edge.
Hint: A Home Depot large bucket is 10” at the bottom, so if you have one, use that to trace it.
Now cut out the circle with a craft knife.
Step 7. Create The Branch Support Holes
Your bundle of twigs probably has about 50 twigs. The foam board will act as support for keeping the twigs upright.

Use a power drill with the ¼” Forstner bit and drill holes in the foam board. First place another piece of foam underneath the circle you are drilling.
It also helps if you create a flag stop. To do this, take a piece of blue tape and check where on the drill the foam ends. Now wrap the tape around the bit.
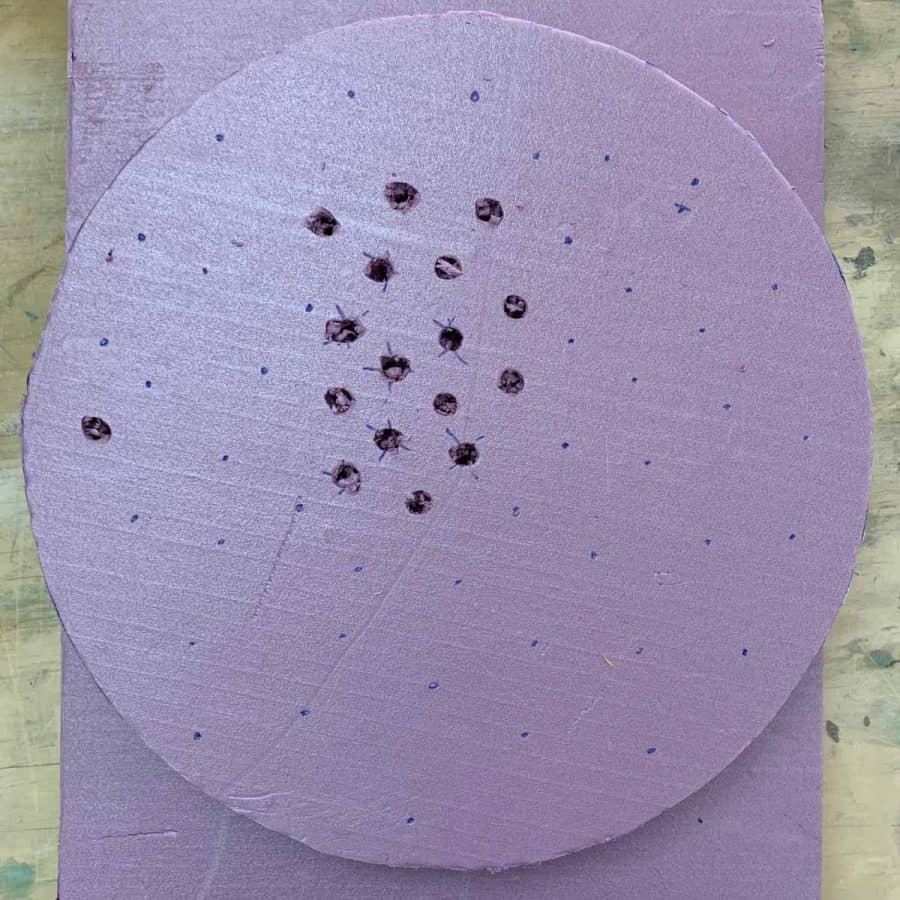
You’ll see in the photo above, at first I didn’t pre-draw the twig locations, but half way through I realized my holes were going to be close together.
So that’s when I realized drawing it out first was better. I crossed out the holes that I didn’t want to use for placement.
The ¼” holes will be a tight fit for the branches, which is what we want. However, not all Ikea twigs are the same.
The ones I used previously for the Privacy Fence had larger bases and weren’t as straight, so you may want to confirm that the ¼” bit hole fits your twig tightly, and if not, size appropriately.
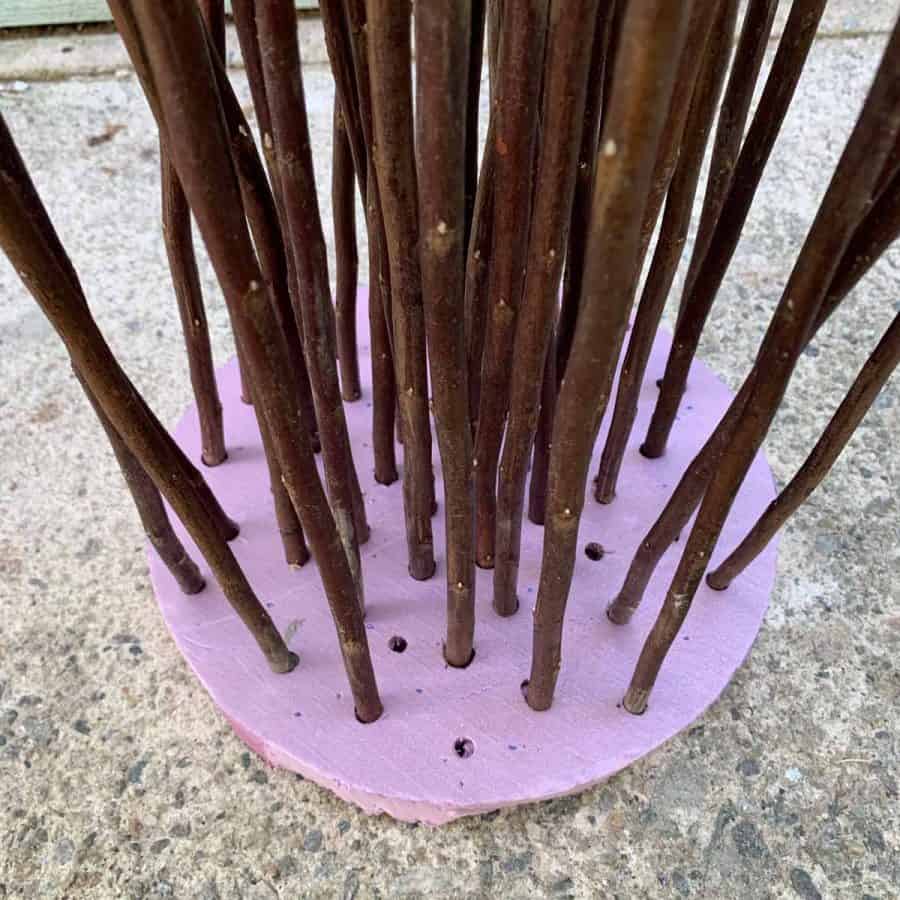
Once you have the holes drilled, place the foam onto the ground and push the twigs through.
You may need to twist them within the hole to get them in.
Stop when the twigs hit the ground- you don’t want them to come through, the twigs should naturally stop where you need them to.
Adjust the twigs so that they are facing/bending the direction you want them to finally end up being.
You will still have a little bit of flexibility in manipulating their direction after you cast the concrete.
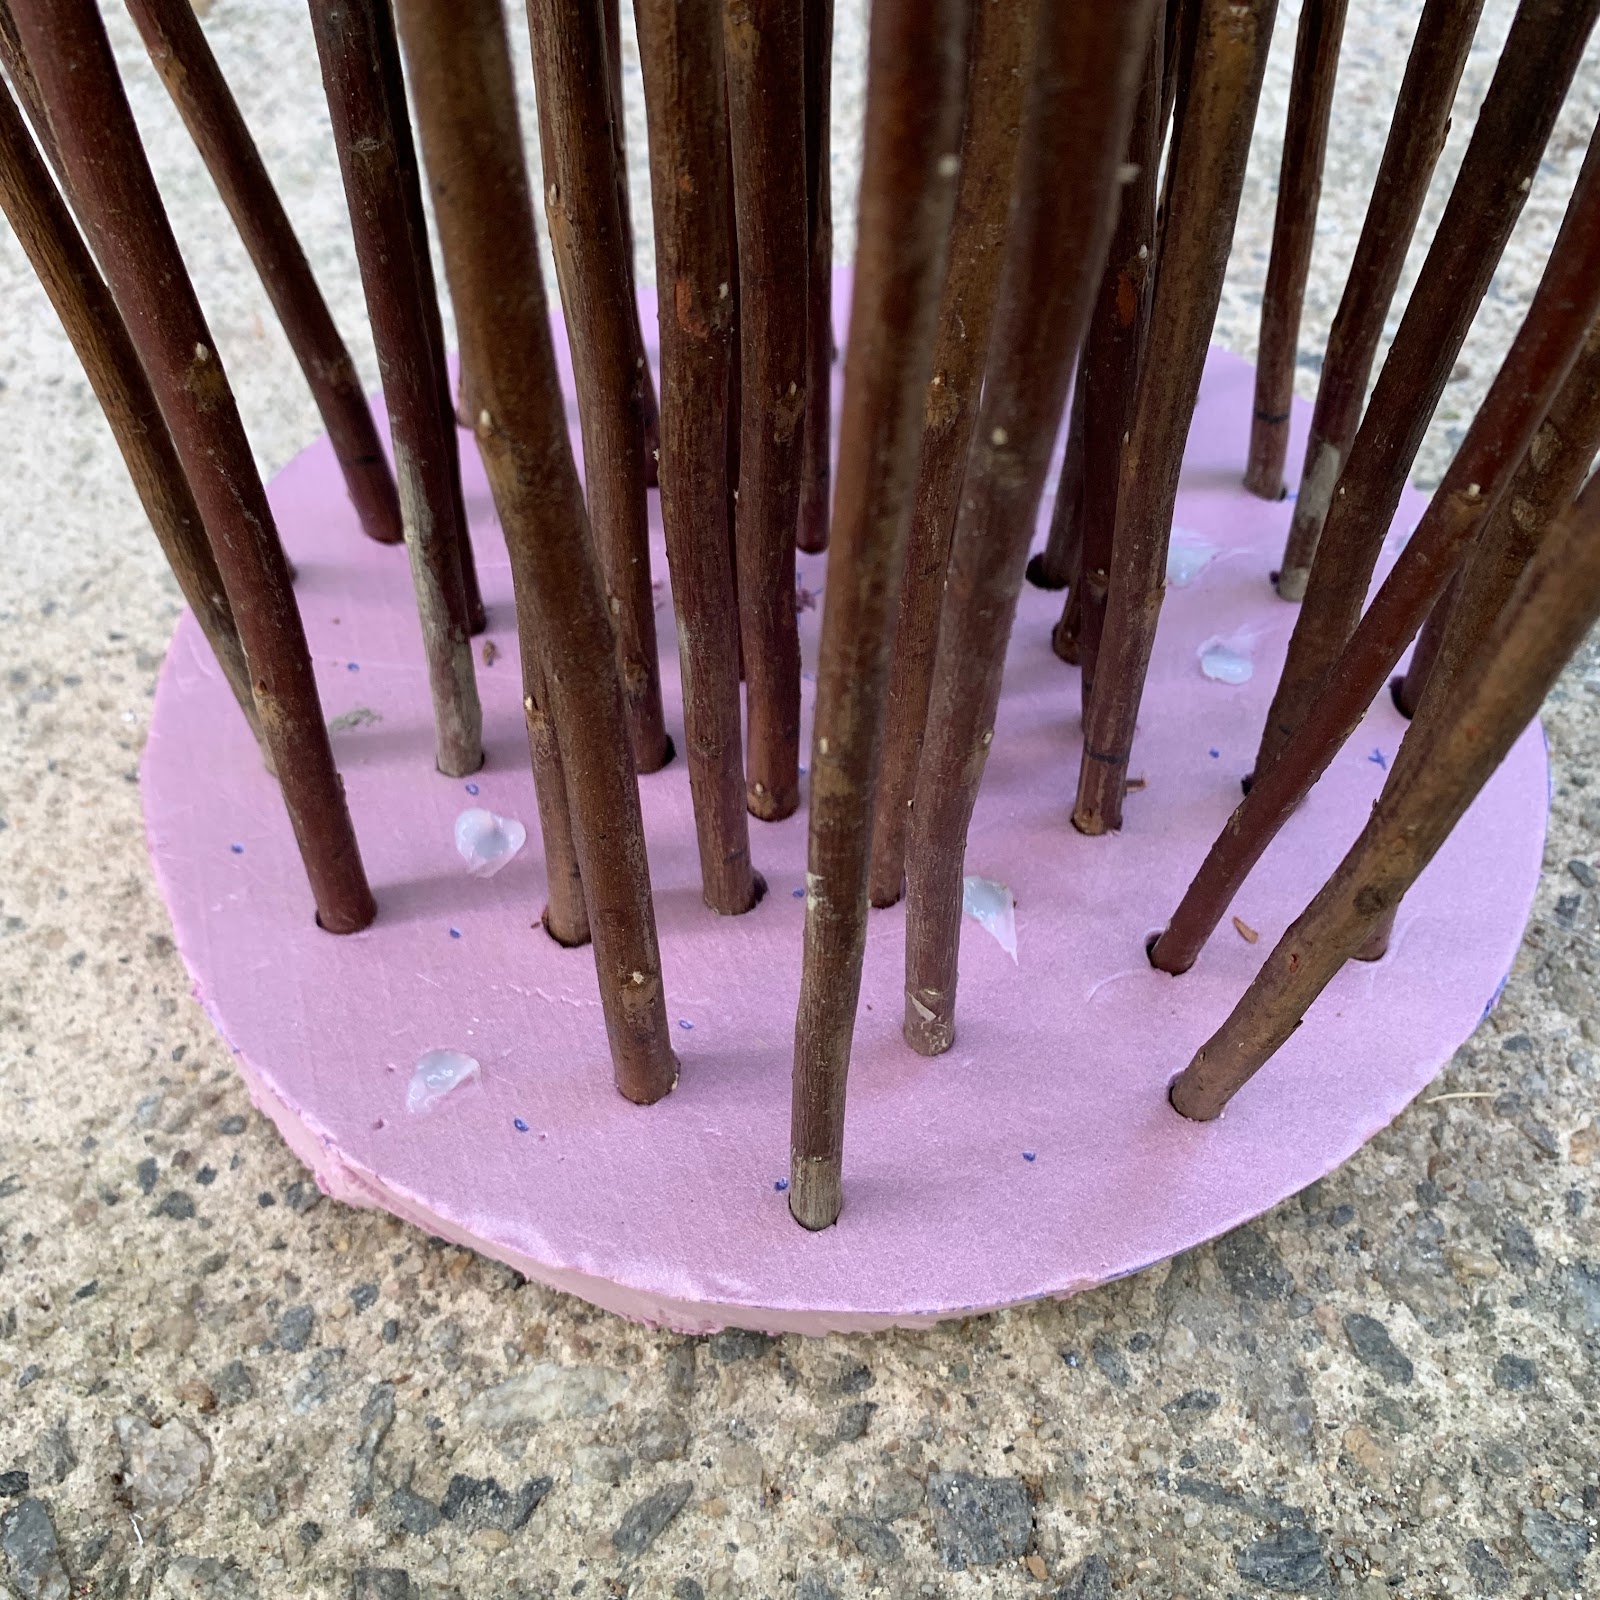
If you have any holes that you ended up not putting twigs in, use silicone caulk to fill them.
I had several holes I didn’t use and I believe that if they weren’t filled, it would have caused either large air bubbles, divots or pucker marks
Since some twigs are probably positioned close together, use a craft stick to place the silicone onto the holes.
Step 8. Provide Support For Straightening The Branches
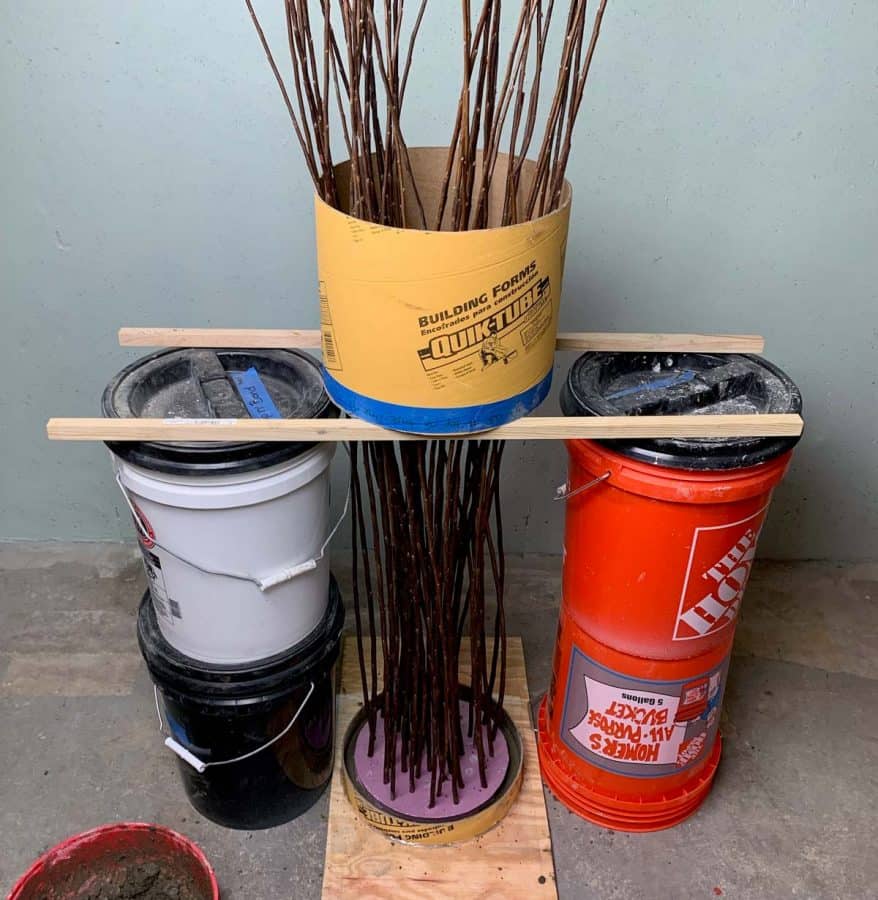
Okay, so I know this looks CRAAAZY, but… it will make life easier.
Set up a couple of towers. This needs to be set up in the location that you will be letting the stand cure.
The tube will help a great deal in keeping the twigs out of your way while casting the concrete, as well as provide additional support in keeping the branches straight while the cement is setting.
Stack 2 buckets on top of each other and each side of the twigs.
Now take two pieces of scrap wood and set them across the buckets. The tube will rest in these.
Next, place the remaining piece of tube carefully over the twigs.
My remaining tube was shorter than yours probably is, so you may need to tip the twigs forward to get the tube over them.
Step 9. Mix The Concrete And Cast The Twig Lights Mold


Mix the concrete to a formed consistency and pour it into the cardboard ring.
Fill it to the ½” mark and then place the foam with branches inside and centered. At this point, vibrate the mold by lifting and tapping the board on the ground.
You’ll do this again after you cast the rest of the base mold.

Now continue adding the rest of the concrete. I used a paint stick to help push the concrete in between the more inner twigs.

Use a trowel to level out the concrete on top.
Vibrate this again to help release air bubbles.
This is a bit trickier now that the branches are in place, but the way I did this was to hold the support tube and twigs with one hand and then lifted and tapped the plywood again until most of the air bubbles released.
Let this cure for at least 2 days.
Step 10. Demold The DIY Twig Lights Stand
Demold the branch stand by first pulling off the acetate, then carefully make a vertical slit through the cardboard ring with a box cutter.


You probably have some leftover concrete at the bases of your twigs. If so, then use a soft toothbrush to brush off the concrete.
Next, use a microfiber cloth to rub off the remaining concrete. The microfiber did a pretty impressive job with this.
You can use a little water if you’d like, but this will come off when it rains.
Sand any rough edges on the base with a #220 grit sanding sponge.
Step 11. Create Centerline For The Stand’s Foot
To create the floating look, we will add a second small base to the bottom.

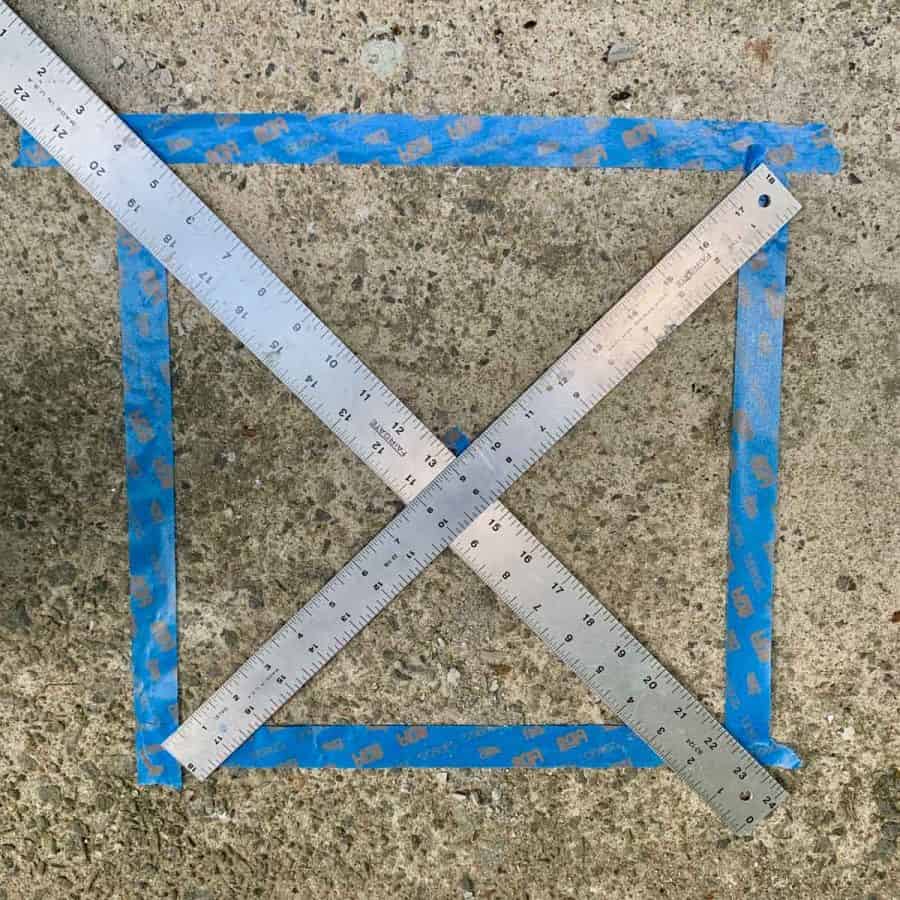
First, you’ll need to find the centerline of the twig stand.
Place the stand or the remaining cardboard tube on the ground and use blue tape to mark a square around it while running right up against the sides.
Move the twig stand or tube and then take two rulers and cross them diagonally to form an X. Place a piece of tape where they meet. That’s your center.
Step 12. Cast The Floating Concrete Foot

For the foot of the stand, I used Cement All to shorten the waiting time and was able to remove the base mold after a couple of hours.
You can use that or the Topping Mix if you aren’t in a hurry.
Mix the cement to a thick milkshake consistency and pour it into the container lid.
Let it mound up. Now place it on the center mark, next take the branch stand and place it over the center.
Use the blue tape lines to guide you. Let this cure and then when cured, lay the twig stand on its side and pull off the lid.
*Don’t forget, if you want to have this twig lights stand in your home, glue a piece of felt to the foot’s bottom. Use plug-in LED fairy lights instead of the solar lights.
Step 13. Add The LED Solar Twig Lights
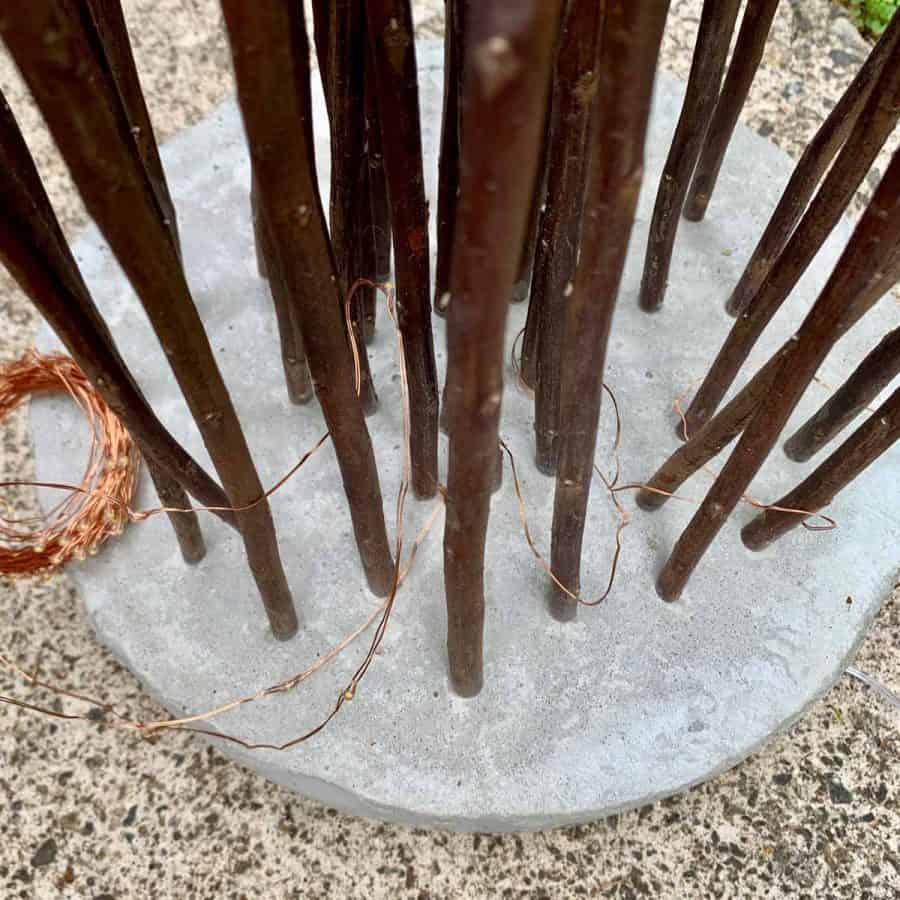
Now string the solar lights throughout the twigs, starting with the solar panel end and at the bottom.
Decide how much slack you need for the panel so that it gets ample light.
Laying it right next to the stand may end up blocking some solar rays, so think about where the panel can be best placed.
Now weave the lights in and around the branches. Don’t unroll the lights, it’s easier to hang onto the roll and not let it unwind more than you need to.
Thread the actual roll in between the twig. I went in and out at the bottom, more horizontally, until the roll ran out around the middle.
Then I used the second roll of lights for the upper portion. For these, I wrapped them more vertically around every other twig.
When you’re done, place these outside for the ultimate porch or patio decoration!
For more easy patio ideas, check out this inspiring list of DIY patio ideas.
Don’t forget to Pin it for later!

DIY Twig Lights Stand In A Floating Concrete Base
Make a DIY solar twig lights stand that is flaoting! Use cement to hold the twigs in place. A great outdoor decor idea for the patio or porch.
Materials
- Ikea branches
- Concrete
- LED solar fairy lights
- Cardboard form tube
Tools
- Please see the full materials list above the tutorial.
Instructions
- Place The Solar Lights In The Sun For A Day To Charge Them
- Protect The Ikea Twigs From The Elements BY Spraying Them With Urethane
- Cut The Cardboard Form Tube Which Will Be Used For The Concrete Base
- Add Acetae To Create A Smooth, Waterproof Material To The Tube Ring Mold
- Create The Base For The Diy Twig Lights Stand Mold Using Foam Insulation Board
- Trace The Ring Mold And Cut The Foam Supporting The Twigs
- Create The Branch Support Holes With A Drill
- Provide Support For Straightening The Branches With Caulk
- Mix The Concrete To A Mud Pie Consistency And Cast The Concrete
- Demold The Concrete DIY Twig Lights Stand Base
- Create A Centerline For The Stand’s Foot
- Cast The Floating Concrete Foot With A Plastic Lid As The Mold
- String The Led Solar Twig Lights Through The Ikea Branches


Could I use natural sticks of wood for this?
Hi Eleni,
These are natural sticks, but they have been dried. Just make sure they are dried and protected with a urethane so they don’t rot.