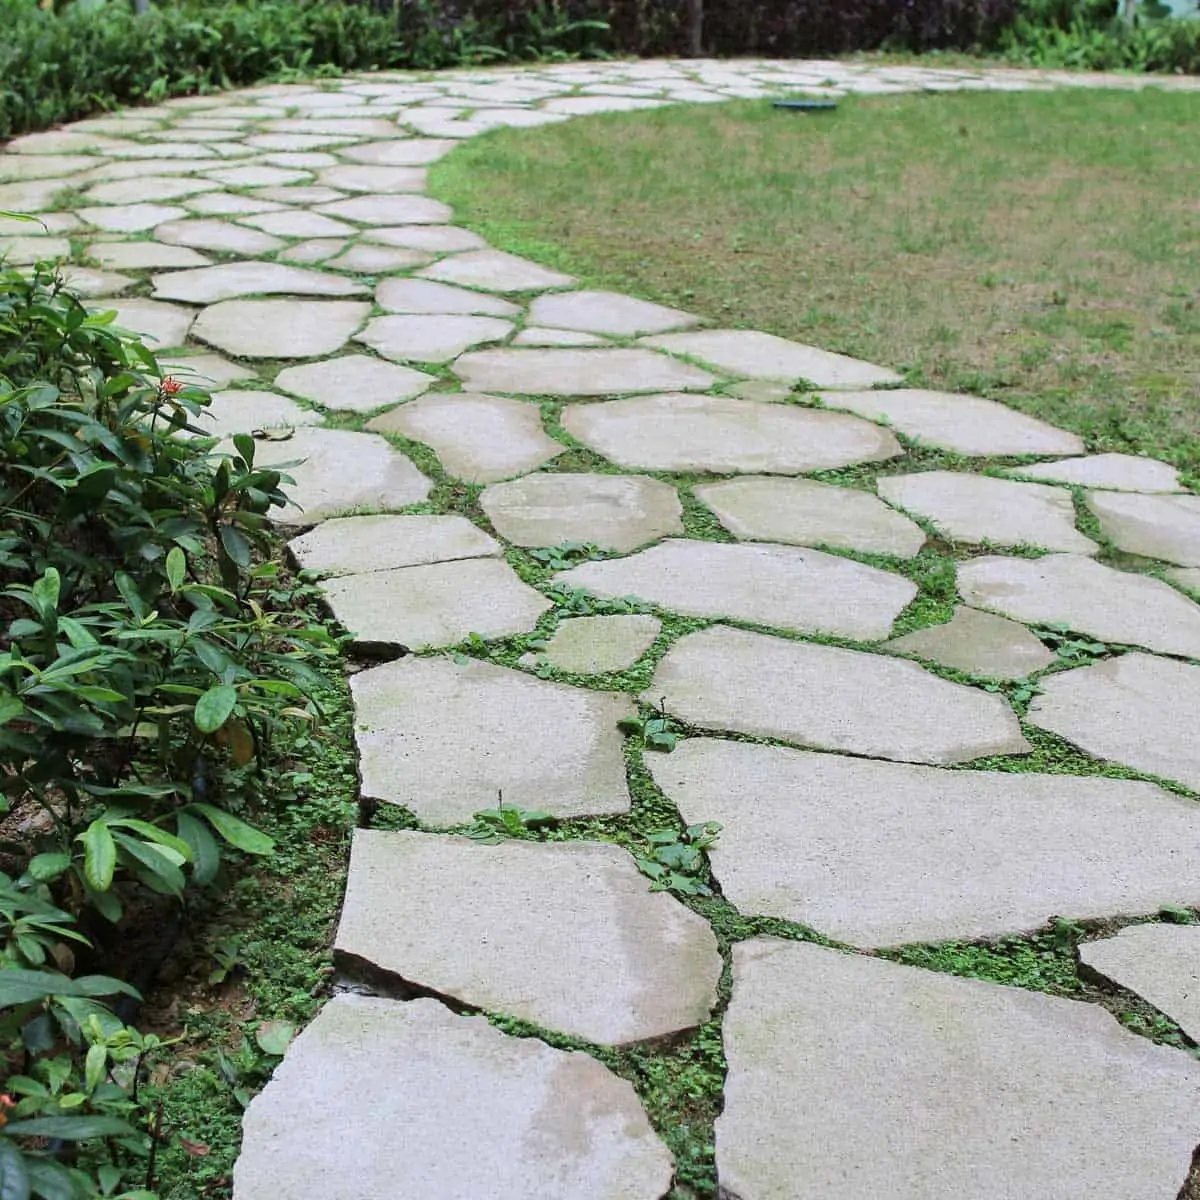
How to Make a Flagstone Walkway in Your Lawn
A flagstone walkway is a great way to add charm to outdoor space while being very functional. It’s perfect for a garden path or to connect you to different spaces throughout your yard.
DIY DIFFICULTY LEVEL | Moderate
This tutorial is full of tips on how to create the pathway in your lawn, where you currently have bare soil or grass.
And when you want either moss or grass between the stones to fill the gaps.
If you prefer to use gravel or sand between your stones, you will follow a different method than this tutorial because it will require using other base materials.
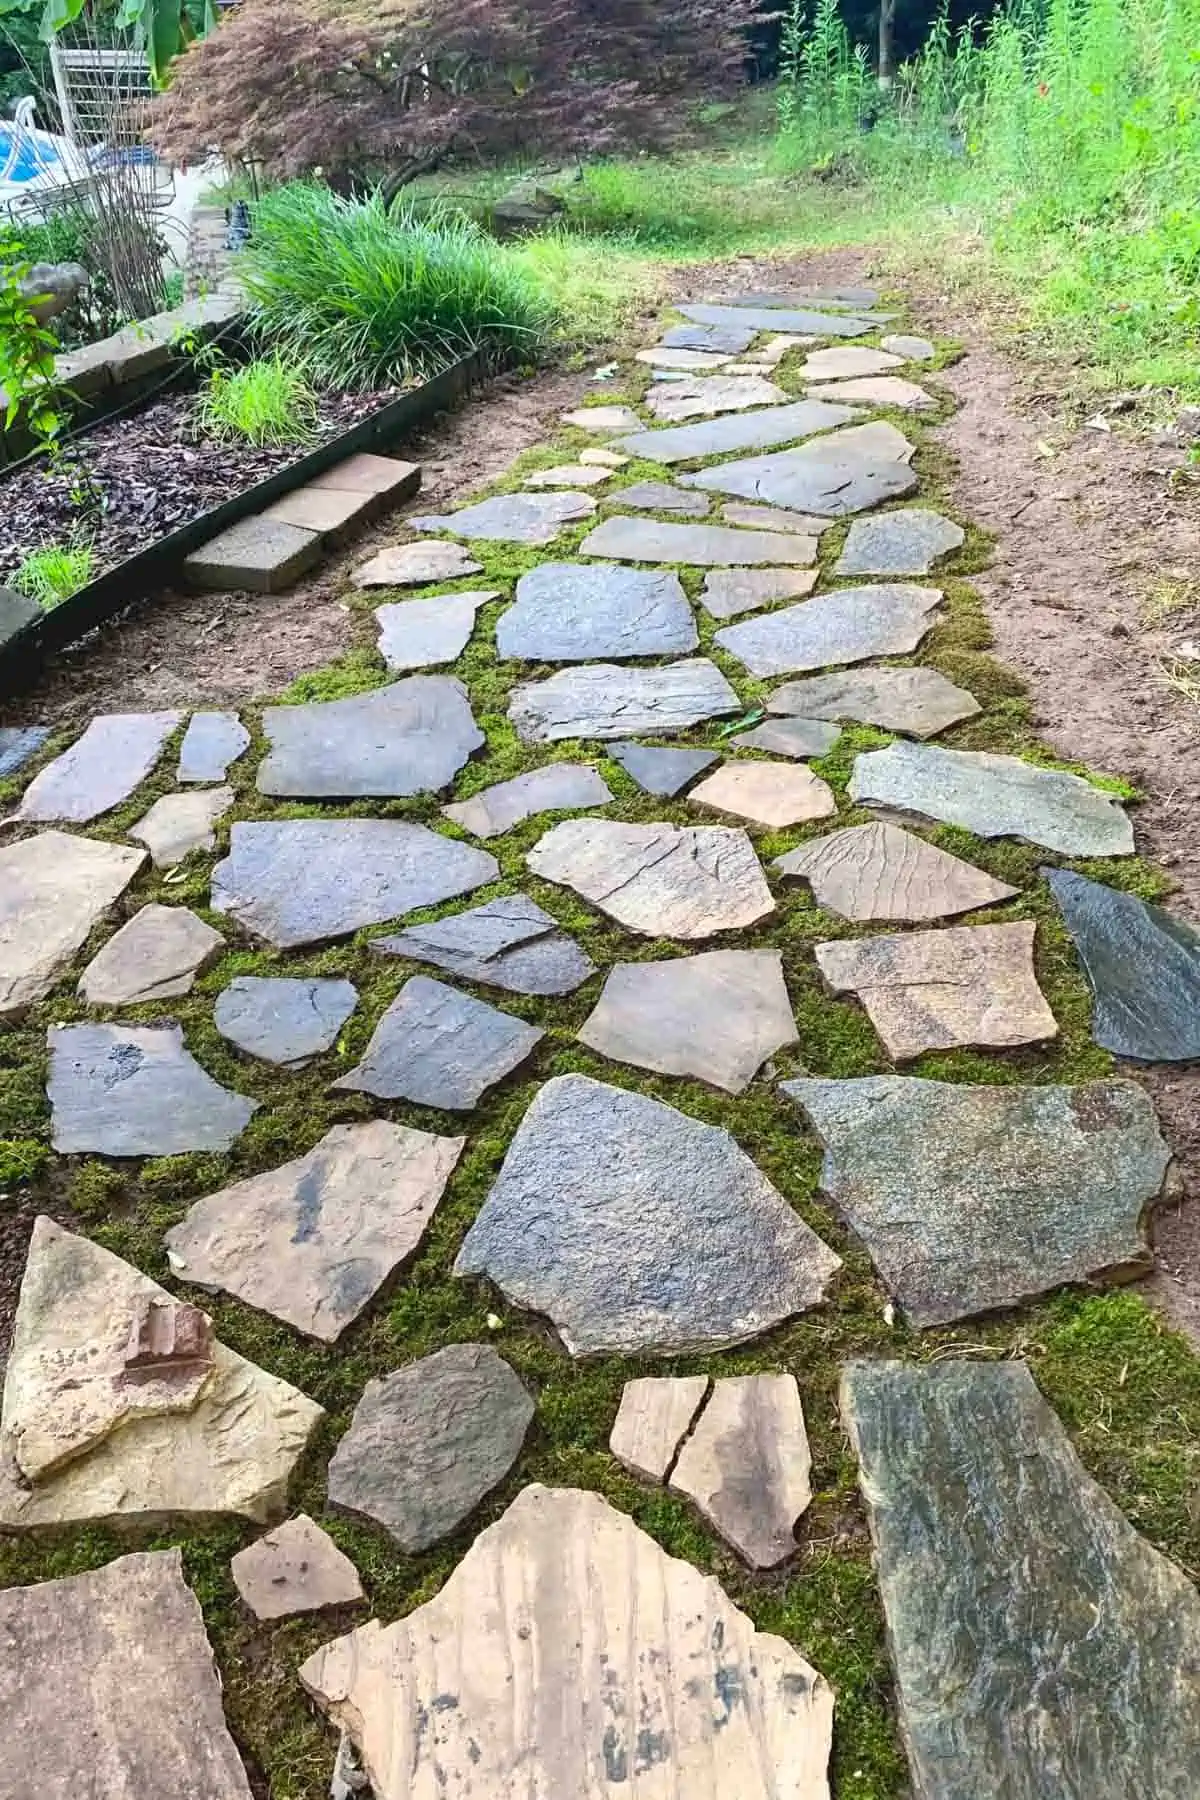
This type of flagstone walkway uses more of a freestyling process, with the end result being a more natural look.
Making your own flagstone path can be a weekend project if you have the right weather conditions and stamina.
It’s best to work on your path when it’s not too hot or sunny, and the ground is relatively soft but not wet.
Unfortunately, I had none of these ideal circumstances, so I devised a few hacks to get it done. I’ll show you what to do in ideal conditions and not-so-ideal conditions.
Things To Consider Before You Make A Flagstone Walkway
It’s important to know that there are different methods for laying flagstones depending on the surface the stones will be on and your goals.
In my case, this is a basic garden path, and it will not get heavy foot traffic.
That is important because it serves the primary function of keeping my feet dry while I inspect the gardens and stroll through to enjoy them.
If the flagstone walkway you are planning will get heavy foot traffic because it will be the main pathway, you should look into alternate methods for setting the flagstones.
Where do you get flagstones?
You can purchase them from a local nursery or a stone yard. In addition, there are other rock types you can use in place of flagstones, such as fieldstones.
For more information on what materials you can use for stepping stone pathways, you can check out my handy guide.
It goes into depth and will also help you decide whether to have these installed by a professional –Guide to Buy or DIY your stepping stones.
The typical cost of flagstone without labor is $2.50-6.00 per sq/ft.
Check out these 17 DIY Cheap Path ideas for other unique path inspiration.
What can you put in between these stones?
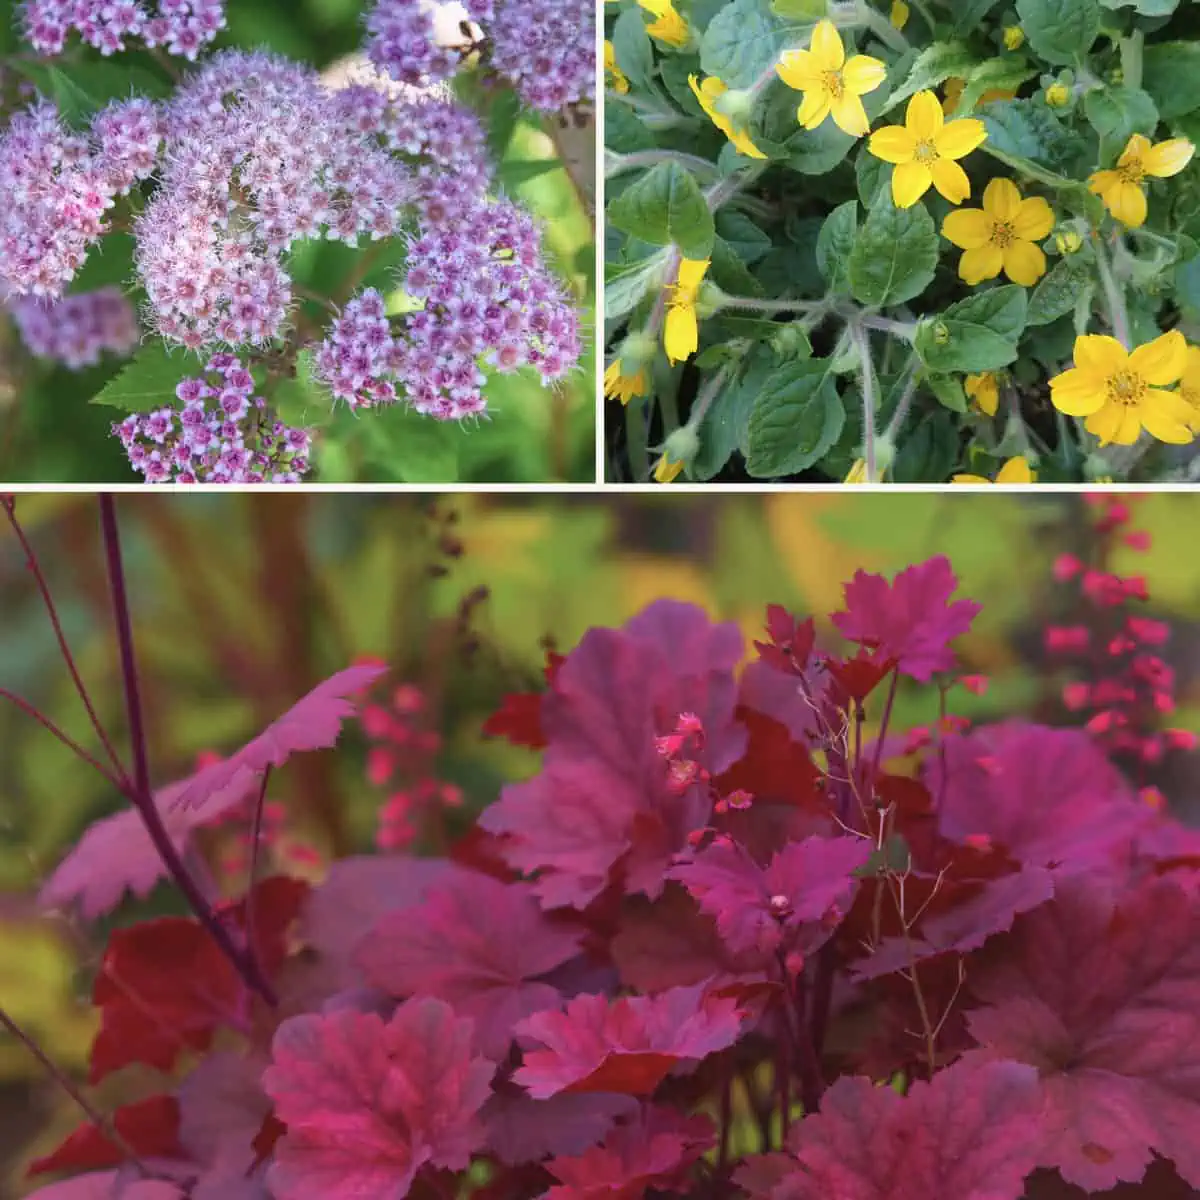
Other types of groundcover that are good for placing between flagstone or pavers are creeping phlox and creeping thyme, if in full sun.
Pea gravel, polymeric sand, gravel, or marble chips can also be used.
Any of these materials are also a good choice for using between the joints of a flagstone patio.
Why use flagstone over concrete pavers?
Concrete pavers are flat on the bottom, so they don’t lend themselves well to direct placement on the natural curves of dirt.
For instance, I needed to fully level the ground and use a paver base with my paver patio DIY project.
But for the flagstone path, the unevenness of the bottom surface worked to my advantage for this project.
It was easy to utilize the thicker ends of the flagstone to help level the ground where it dipped. This wouldn’t have been achievable with a flat paver.
Before creating the path, you must choose what material will fill the gaps between the stones.
If you decide to have moss or grass, you should avoid using a paver base like granite dust or sand.
Both moss and grass will struggle to grow with these substances underneath them.
Some of the links on this page have been provided as a convenience for finding materials. These links may also be affiliate links. As an Amazon Associate I earn from qualifying purchases, at no extra cost to you.
I only recommend products I’ve used and loved, unless otherwise stated. Click here to read my full disclosure policy.
Materials For Making A Flagstone Walking Path
- Shovel
- Bow rake
- Hand spade
- Work gloves or gardening gloves
- Nitrile gloves
- Garden cart and/or wheelbarrow
- Garden hose
- Hosehead attachment with a shower, jet and mist setting
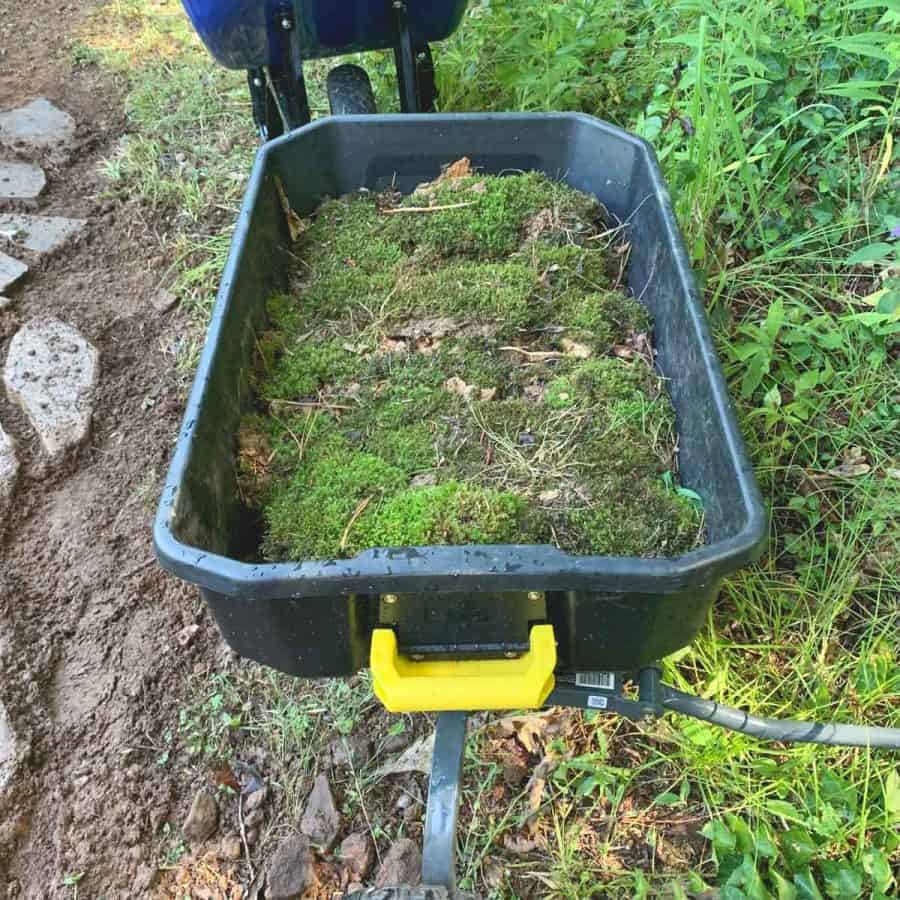
- Moss (ideally transferred from another closeby area)
Optional:
- Rubber mallet or hammer
- Chisel
- Safety goggles
Materials Note:
The optional materials are listed in case you want to shape your stones for a more perfect fit.
If you have large pieces, they may also be easier to work with in smaller pieces. Tapping these with a mallet and chisel will break them.
I didn’t do any shaping as I was working with smaller pieces, but in Step 5, there’s a link to a YouTube video showing you how to shape them.
How To Make A Flagstone Walkway –Step by Step Tutorial
Step 1. Remove The Sod Layer

Garden Planner!
Printable PDF Download
$2.99
Everything you need to plan your garden.


This will subscribe you to my newsletter where you’ll get updated when I have a new post, or tips and tricks. You are free unsubscribe at anytime.
First, use a shovel to remove the top layer of the grass throughout the entire area. Going deep enough to lift the roots and weeds is essential.
I recommend clearing an additional 6-8″ beyond the pathway area to help ensure weeds don’t creep into the path later.
Some of this will also depend on how much moss you can acquire.
If you are purchasing moss and have the budget for it, the further beyond the path that you can extend the moss, the better of a weed barrier you will have.
When removing the sod layer of grass, place it in a wheelbarrow or garden cart.
Preserve as much dirt as possible to use as backfill in a second cart or wheelbarrow.
Step 2. Loosen The Soil and Lightly Level The Ground

Caption: rocky, dry, hard-packed clay soil. We are experiencing very abnormally dry conditions, but fortunately, not in a drought.
If you are working with dirt that is very dry, heavy packed, and/or rocky like mine, then you should dampen the area before proceeding
I strongly recommend doing this a few times and waiting until the following day so that you can flatten the site with more ease.
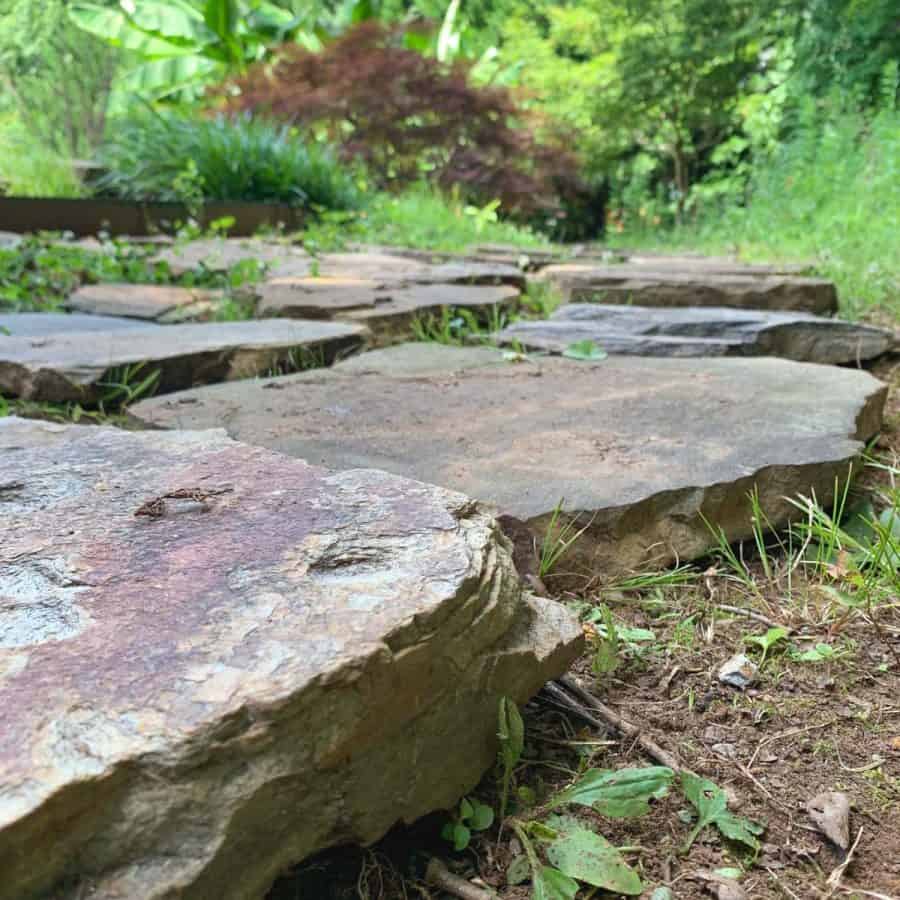
You don’t need it to be entirely level because, as a natural stone, they aren’t level.
So some will be thin, some thick, and some will be both thick and thin, all in one stone.
I had some pieces as thick as 4 ½” and some under ¾”. Of course, my stones were repurposed from the area where the gravel garden now is, so not all may have been flagstone.
However, even if you purchase actual flagstones, you will have a fair amount of variance in thickness.
In some cases, the unevenness will be to your advantage, and you can place the thinner end where your ground is raised and the thicker end where it dips.
For flattening the area, the goal is to remove bumpy spots, and if you have a place with an annoying slope that you prefer to be flatter, now is the time to do that.
In the beginning, I made the mistake of trying to work with the soil when it was dry.
However, I figured out during one of the following steps that dampening it made all the difference in being able to work with it.
If your soil is already reasonably damp or soft, you can take the bow rake and run it over the whole area.
Use a shovel to take those spots down if you have big lumps. Again, preserve any extra dirt.
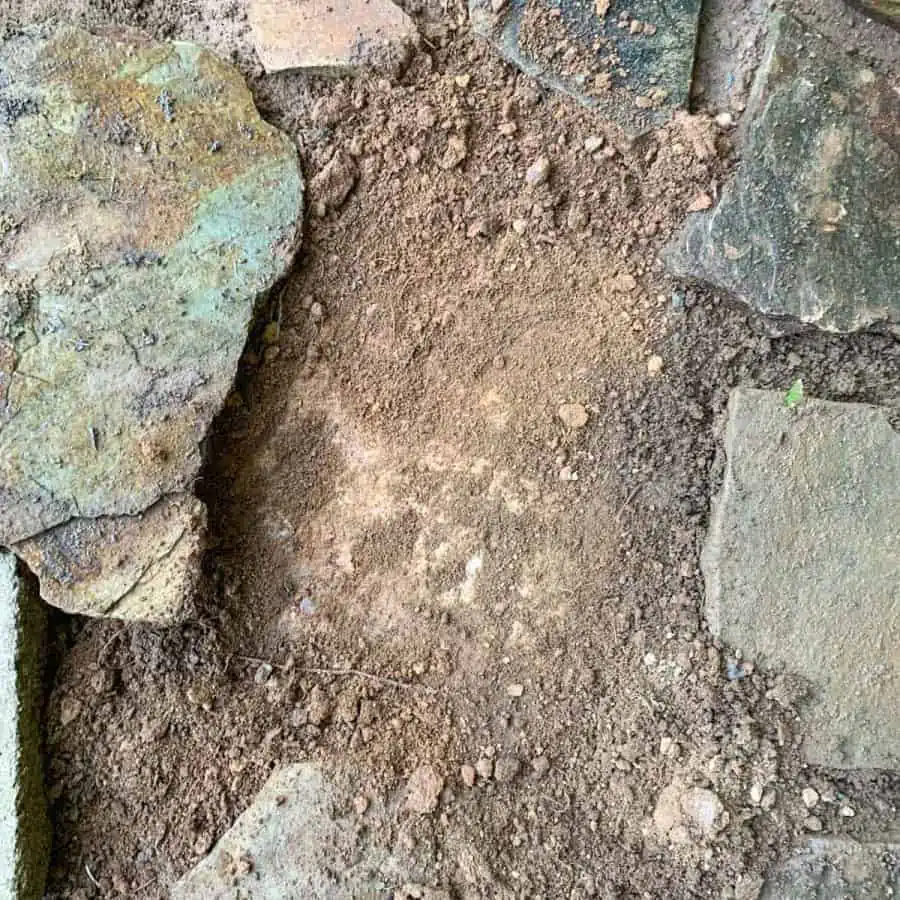
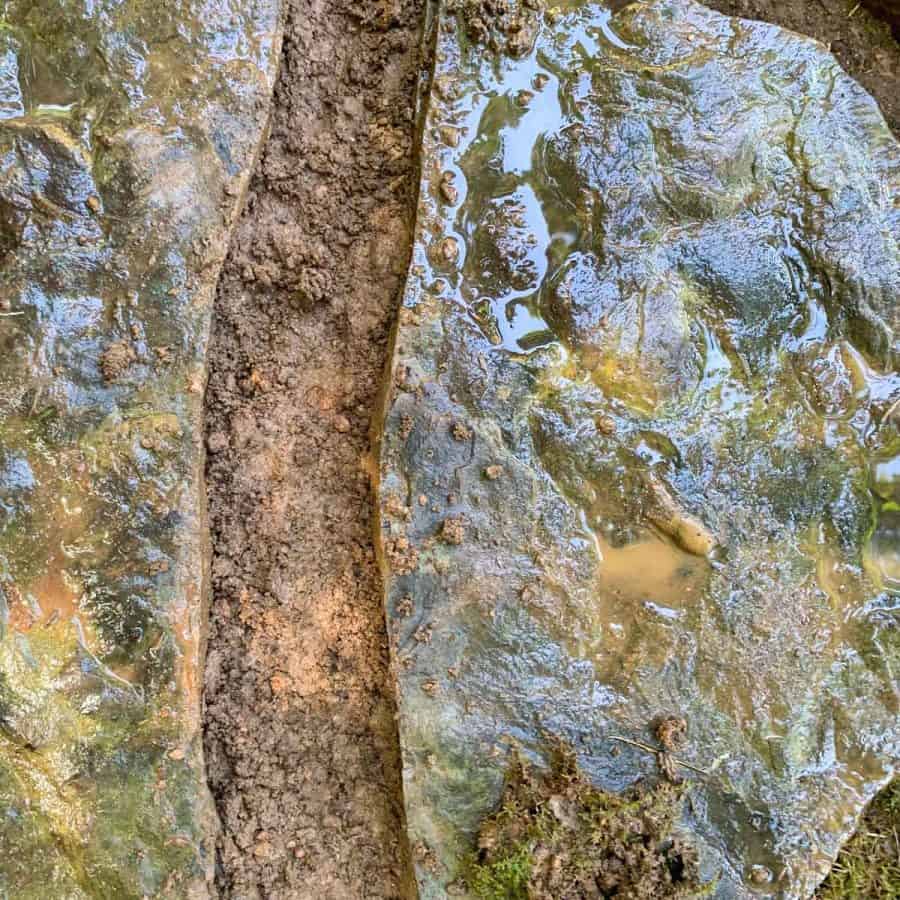
If you have dry or heavy clay soil, take your garden hose, put it on the shower setting, and spray over the entire walkway area in sweeping motions.

You don’t want to create a mudslide, but you want to slowly let the water sink down because you need stable soil. The muddy mess above is way too wet.

And here is the right amount of moisture.
Depending on how dry conditions have been, you may need to make several passes over the dirt path, and you may need to do it more than once.
For example, I needed to do this twice, both morning and evening, and then again the following day before beginning the next step.
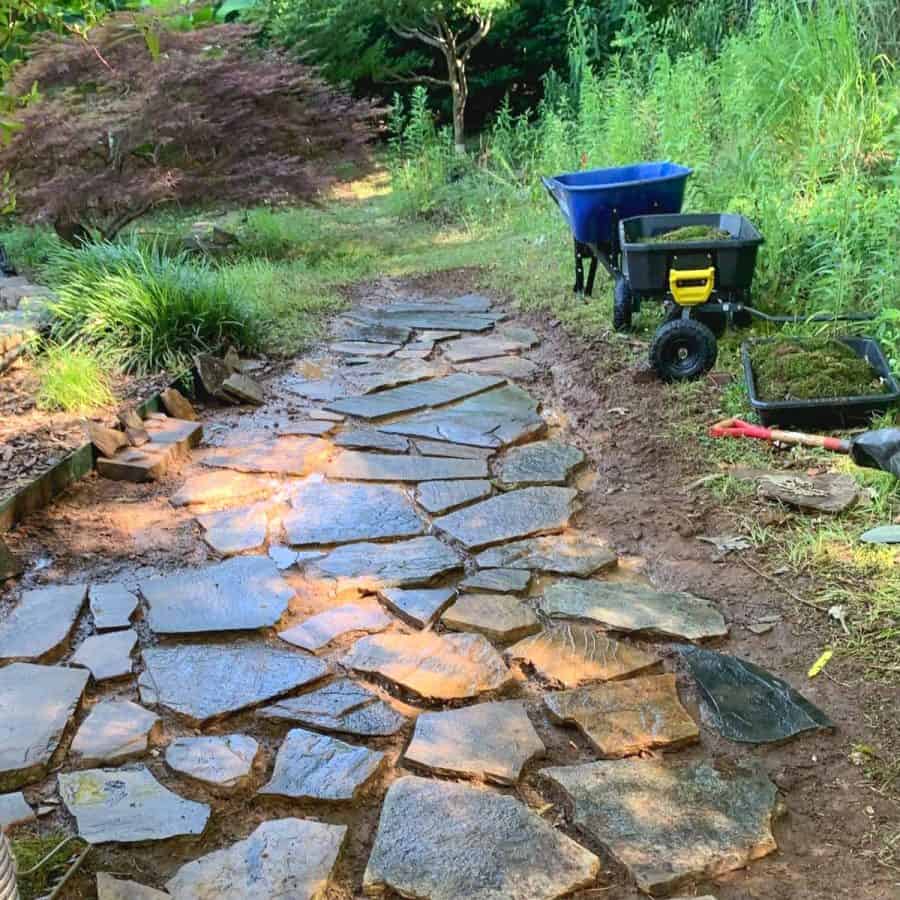
Step 3. Create The Walkway Layout
Now comes the fun part, creating the path pattern with the flagstone pieces.
The first step is to decide the overall shape of the path. Consider whether it will have straight edges or some natural curves.
This area of my yard is wildly natural, and I wanted the stone path to have a more informal design.
The way to get this was to have it taper in spots and broader in others, along with bends and curves.
It’s a good idea to use a shovel and mark a line in the ground where you want the outer edges of the path to be.
Making a borderline will be helpful if you have enough stones. Otherwise, you’ll fall short of your borders.
Unfortunately, I wasn’t sure if I’d have enough flagstones to get to where I wanted the path to end.
And it turned out I didn’t, so I had to rework the last section and part of an outside edge to get the look I wanted.
Now with your outside edges marked, start the layout from one outer edge and focus on only one section at a time.
A 5 foot section is a good amount to work with at a time.
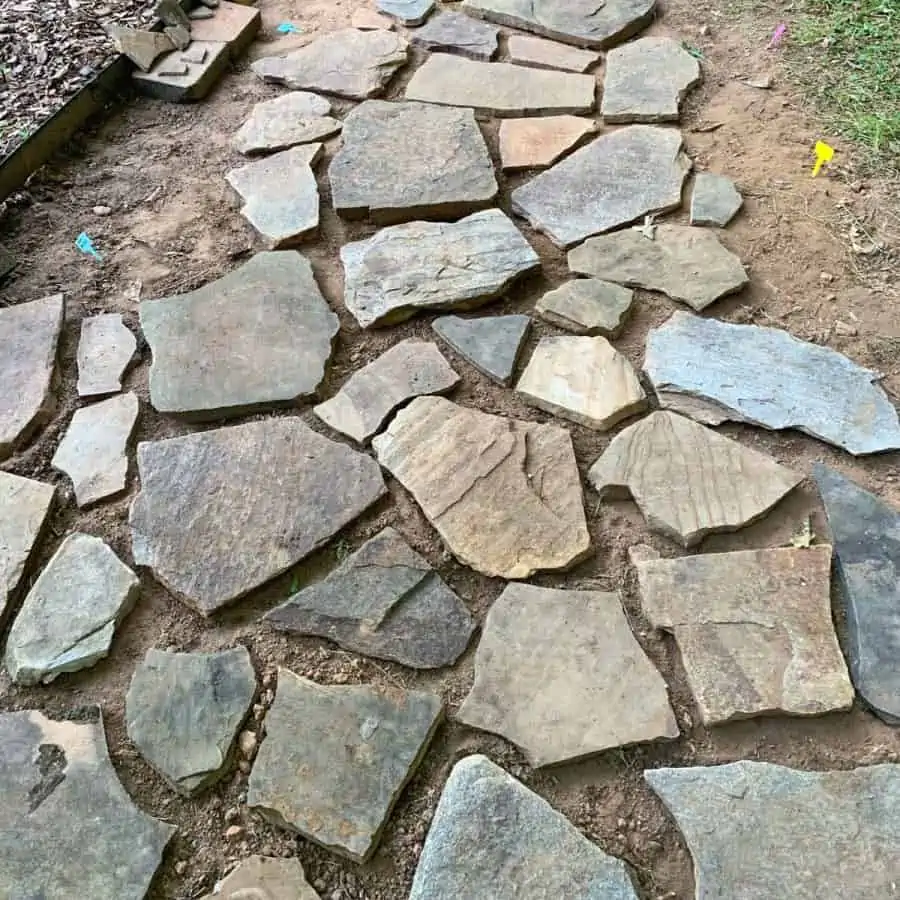
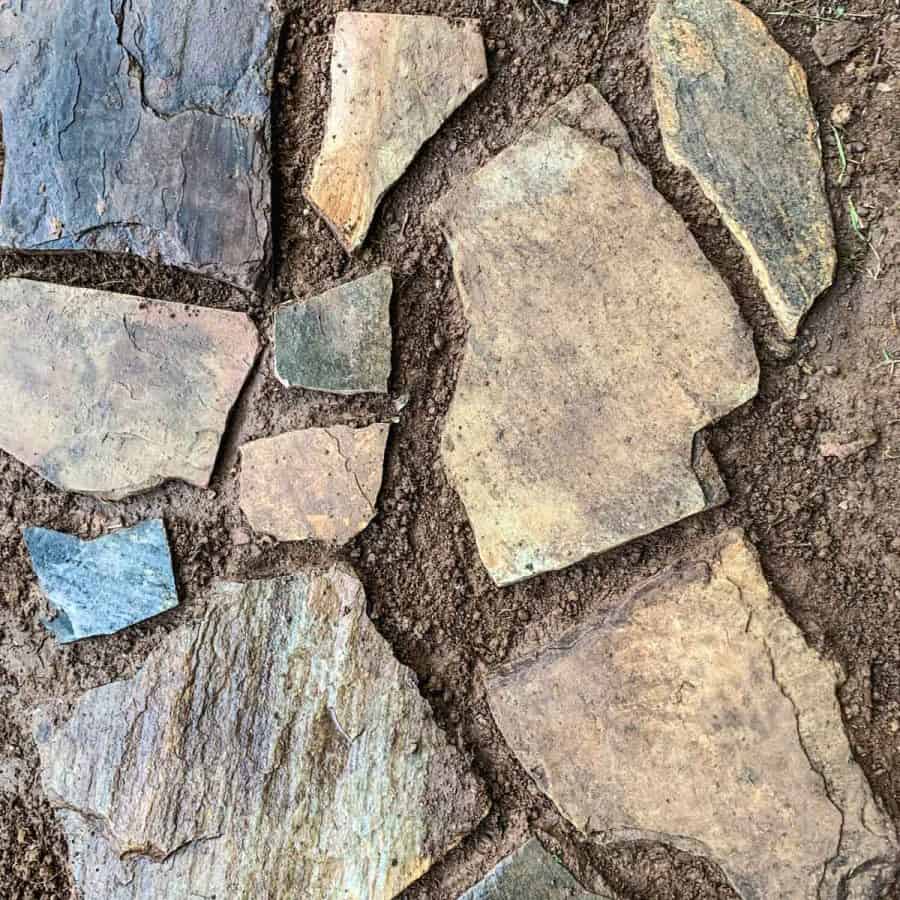
Next, to create the pattern for the path, look at the different shapes and determine what direction to point the stones to get the best fit.
Ideally, your goal is to get the pieces to fit like a jigsaw puzzle. The joints/gaps can be anywhere from 1″ -6″ and still look great.
If you are working with larger pieces and have the luxury of being able to break them, then your breaks will naturally have a perfect shape and fit.
Here is the link to the YouTube video I referred earlier for how to shape flagstones with a chisel and hammer.
If you want to work with the stones without breaking them, fit the shapes of the flagstones together as they are.
Moss and grass are visually forgiving when it comes to larger gaps, and they can make the path more appealing.
So if you can’t find the perfect fit, it’s okay. It’s not going to make the flagstone paany less attractive.
Once you have laid the stones in your desired pattern, take photos before securing the flagstones in place.
You will be replacing and fitting the pieces one by one, but sometimes you will need to remove adjacent pieces.
So referencing a photo will help if you want to get it back to the same layout.
Flagstone Path Tips
Step 4. Set The Stones In Place
With the layout final, set the flagstones into position. Hopefully, the soil is still soft and easy to work with.
But if it has dried in the meantime, re-water it. And a reminder to not let the ground get so wet that the top layer becomes muddy.
* You may need to repeat the watering under the stones when you move them to set them in place.
Only the very top 1/16″ layer of dirt was damp. Before I could set it in place, I needed to moisten the area that the stone had been covering.

To help with this, I recommend pulling a few stones at once and then spraying the ground.
When doing this, be sure to lay the stone in the same position and direction when you remove it so that you remember the angle it needs to go back in at.
And also reference our photos if needed.
You can wait 10 or 15 minutes for the water to penetrate past the top layers or go ahead and set the first stone.
Then, when you get to the next ones, the ground should be in good condition to work with more easily.
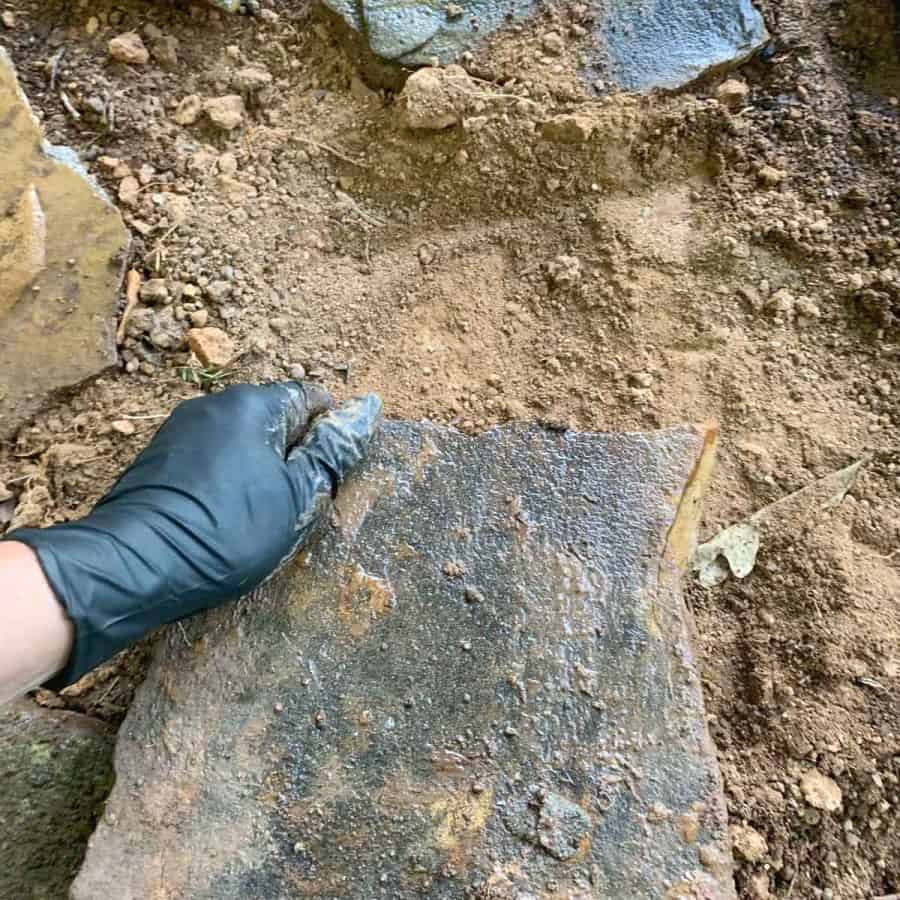
When setting the stones, the easiest way to do this is to shimmy them into place.
Here I’m shimmying the stone, but I took it before realizing I needed to dampen the ground thoroughly.
It takes talent to hold the phone in your mouth to take a photo 🙂 Or laziness because I didn’t feel like going through the hassle of setting up my tripod.
Having the right amount of moisture in the ground made the process quicker.
When you encounter thicker pieces, you will likely need to recess them into the ground. Use a shovel to dig out a couple of inches of dirt.
If you need to dig deep, you’ll probably need to moisten the deeper soil layers again.
I recommend you use the hand spade and drag it sideways across the ground to scrape any high spots. Then shimmy the flagstone into place.
In my experience, some stones were a big pain in the you-know-what to get in. Others went in on the first try.
The more cooperative your soil, the easier this will be. One problem you may run into is rocks.
If you hit a rock, even the tiniest rock, the flagstone will roll on it, causing it to rock back and forth.
You will need to remove the rock(s) or build up the dirt around it to cover it.

You will sometimes need to add dirt underneath the flagstones in some areas since they are uneven.
And now the extra dirt comes into play. So grab handfuls of that and push under the gaps.
Step 5. Plant The Moss Pieces
This tutorial is specific to planting moss between the stones, but planting pieces of sod grass is probably similar.
For the moss, the ground should be slightly damp but not wet, like it was for you to set the stones.
I procured my moss from a sweet neighbor who was kind to respond to my request for moss in our neighborhood Facebook group.
She was landscaping parts of her yard and said she had some moss I could rescue.
You will need to build up the sides of the flagstones a bit before the moss goes in.
Part of this is to help secure the stones so they don’t move as much over time.
The other reason is that it’s better if the moss isn’t super recessed. Unfortunately, I couldn’t find good official information on this.
Still, based on my experience with my paver patio and the marble chips I used to fill the gap, I know that having the final material be slightly recessed works out better than flush or too recessed.
The reason is that having it too recessed will trap debris that may get stuck permanently. Also, this will kill the moss, which needs air and light.
If it’s flush, it’s okay, but it may be a little better for drainage if it’s just under the flagstone.
When deciding how much to recess the moss, you should consider your surrounding landscape.
For instance, my flagstone walkway area is next to a big wooded hill. There’s plenty of water runoff that will drain onto this location.
If I add enough dirt to make the moss flush with the stones, I will risk mud running onto the stones and the moss.
It’s really the bottom of the moss where it touches the soil to be aware of.
I added enough dirt to hold the stone, anywhere from ½ to a couple of inches.
However, not so high that the top of the moss would come up much higher than the stone.
I also made sure the sides of the path were planted with moss to help slow soil erosion.
As you can see in the photos, the right side is at risk for a mud event.
I’m in the process of getting more moss, which I should try to carry up to the grass/weed/flower line to prevent that.
Place either handfuls or spadefuls of dirt around the stones and between the gaps. After you add the soil, you are going to press it down.
So add more, knowing it will be somewhat packed. The moss will attach better to relatively firm soil rather than very loose.
The photo above shows how it looks before pressing it down.

Press it in after adding the extra soil.
To plant the moss, ensure the ground is moist, but take care there isn’t any standing water.
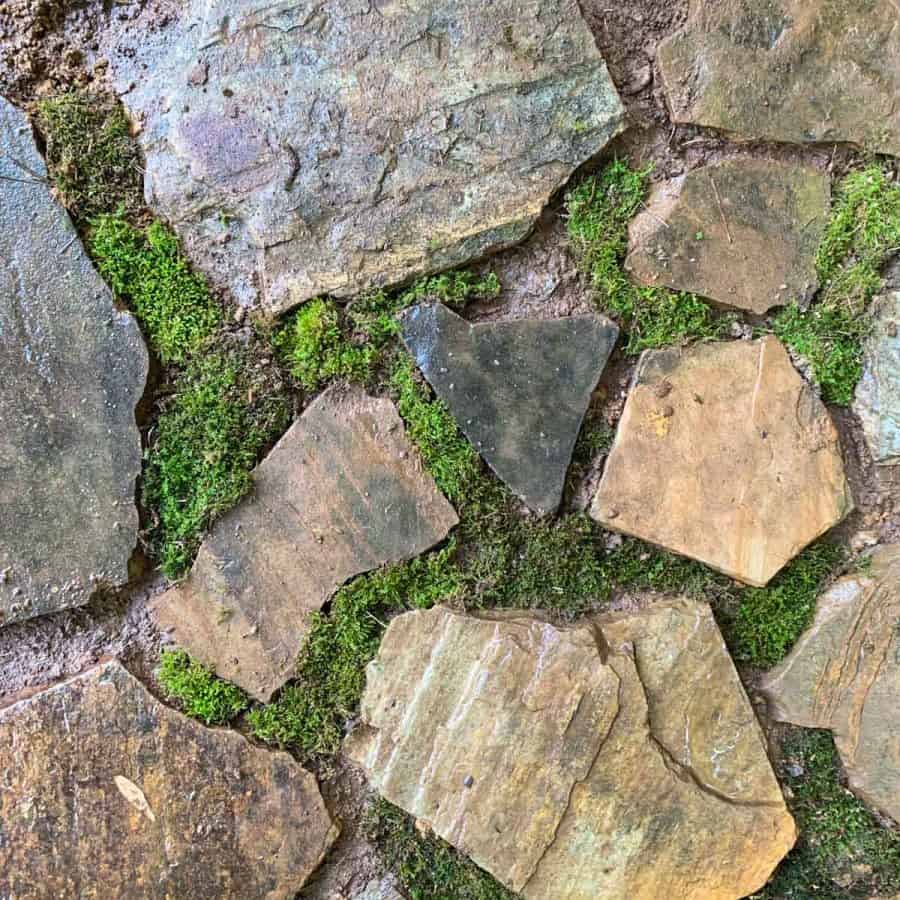
Next, tear off moss strips the size of the gaps and lay them into the crevices, so they are making contact with the soil.

You need to press it firmly into the soil, or it will not take hold. You can do this as you go or after laying all the moss.
I found it easier to do it all at the end because I could walk on it to press it in some areas, and for the rest, I used my hands.
Also, if you don’t have a lot of moss, you can leave spaces in between, and the moss will fill in.
One caveat is that the moss type you have must be a sideways growing moss.
Some mosses only grow upright and won’t fill in. So it’s good if you can identify your type and then look up to see if it’s a Pleurocarpous type (sideways growing).
I like the PlantSnap app for identifying moss and other plants.
After the moss has been firmly pressed, mist it on the mist setting.
It should be watered daily for about three weeks because that’s approximately how long until the rhizoids have (essentially rooted) into the ground.
You can test this by lightly tugging at it. If it doesn’t lift, then it has set.
You can find more details and a full tutorial on how to transplant moss to other areas of your yard to expand it (outside stepping stones).
Also, I made a cinder block bench a few months before putting in this flagstone path, if the bench had been a little smaller, it would have been perfect for putting at the end of the path. –Just another idea for things to do with your flagstone path!
If you want to compliment your flagstone walkway with other cool rock ideas, check out these 21 unique rock landscaping ideas.
Or how about making your own concrete bricks for a path, or to line a garden bed?
How to Make A Flagstone Walkway In Your Lawn
Make a flagstone walkway in your lawn and fill the gaps with moss or grass. Bring function and curb appeal to any outdoor space with a garden path.
Materials
- Bow rake
- Shovel
- Garden cart
Tools
- Please see the full materials list above the tutorial for details and links.
Instructions
- Remove The Sod Layer Using A Shovel
- Loosen The Soil and Lightly Level The Ground And Knock Down Bumpy Areas
- Create The Flagstone Walkway Layout By Dry Fitting The Stones
- Set The Flagstones In Place To Secure Them
- Plant The Moss Pieces Between The Flagstones
FAQ For Making Flagstone Walkways
What’s the benefit of a flagstone path?
Flagstone pathways and any type of stepping stone paths are great for rainy areas.
The material type between the stones will help water drainage during heavy rains and reduce soil erosion.
Can you lay flagstone directly on the ground?
Yes, you can lay flagstones directly on the ground on top of the dirt. However, it’s best to set them in the soil, so they don’t move over time.
There may be some slight movement when there’s rain, but the materials that will fill the joints between the stones will help reduce erosion.
What do you put under a flagstone path?
You can place flagstones directly on a soil base or use stone dust or a bed of sand.
You should only use sand or stone dust if using stones to fill the joints.
If you plan to use grass or moss, it’s best to avoid these and let dirt be the base material.
Don’t forget to Pin it for later!

Don’t forget to Pin it for later!


This is a wonderful tutorial! Very helpful and inspiring. I am thinking about doing this type of path and this tells me all that I need to know, with excellent photos to make it even more clear. I am thankful for this and for the many other helpful hints I have gotten from “Artsy Pretty Plants” as I play around with rocks and cement in my yard.
Thank you Katrina! 🙂
Hi Ellen, I love this project! I’m not sure how long ago you did this- how is it holding up? I’m thinking of doing this in my backyard. Thank you!
Hi Bettsi,
Oh, my gosh, I love that you asked this question. It’s holding up amazingly. Nothing has moved. All the flagstones are still where I placed them. And the moss I put between them is still alive. I have a few broken flagstones because these were very thin and we had to have our septic tank inlet replaced so a big tractor had to ride over them multiple times to do the work, and it broke 3 of them. Other than that, I’m super pleased with the results. It’s been just over a year. But there’s no indication that anything would change.
go for it!
Thank you! I feel very encouraged!