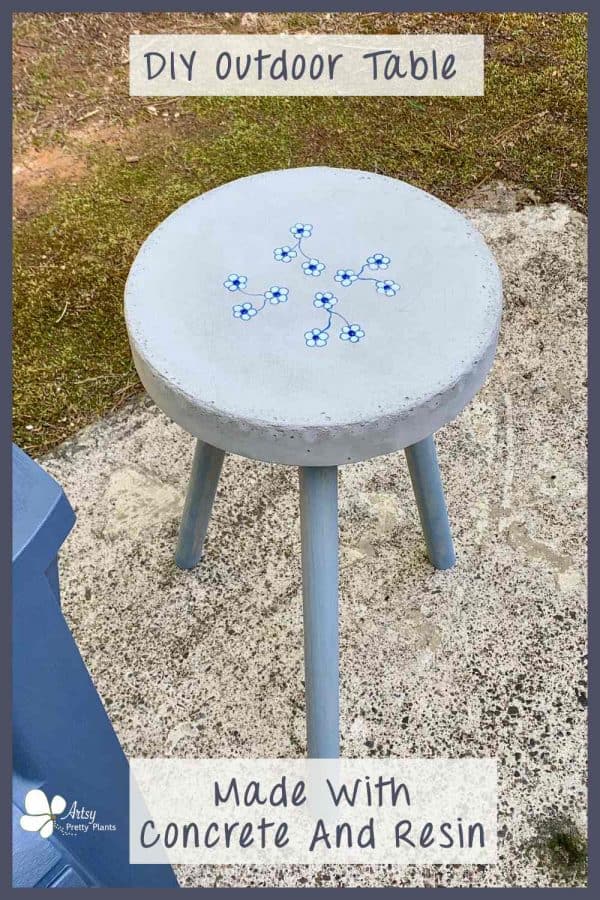
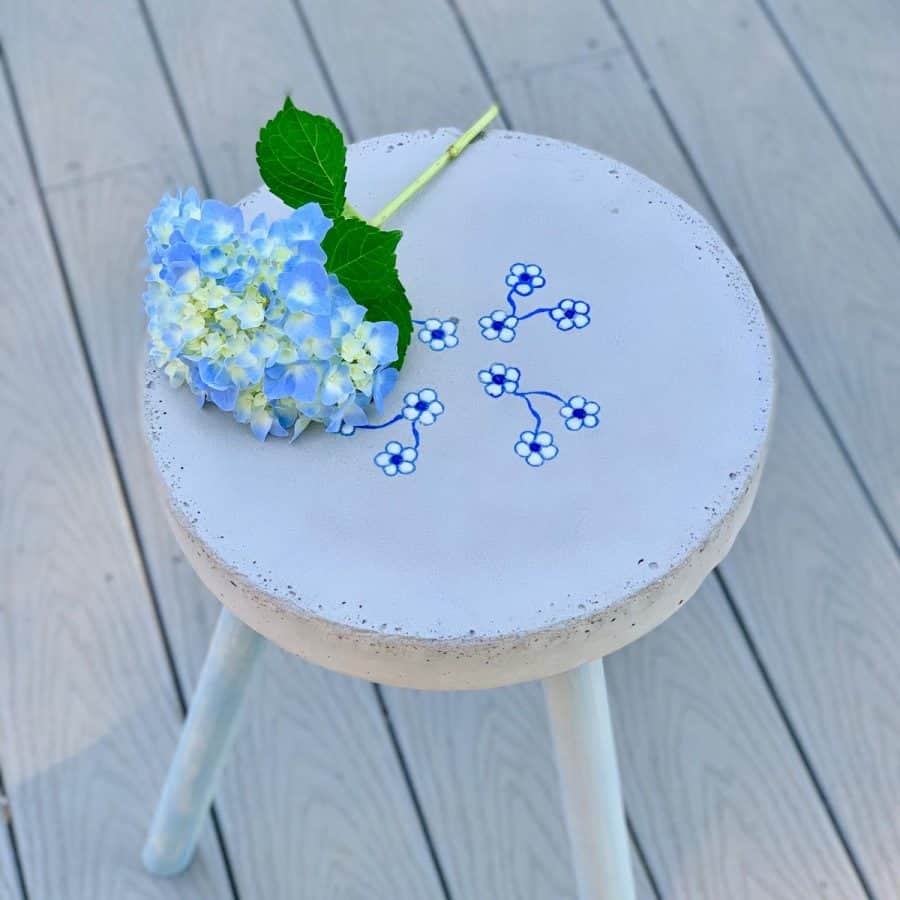
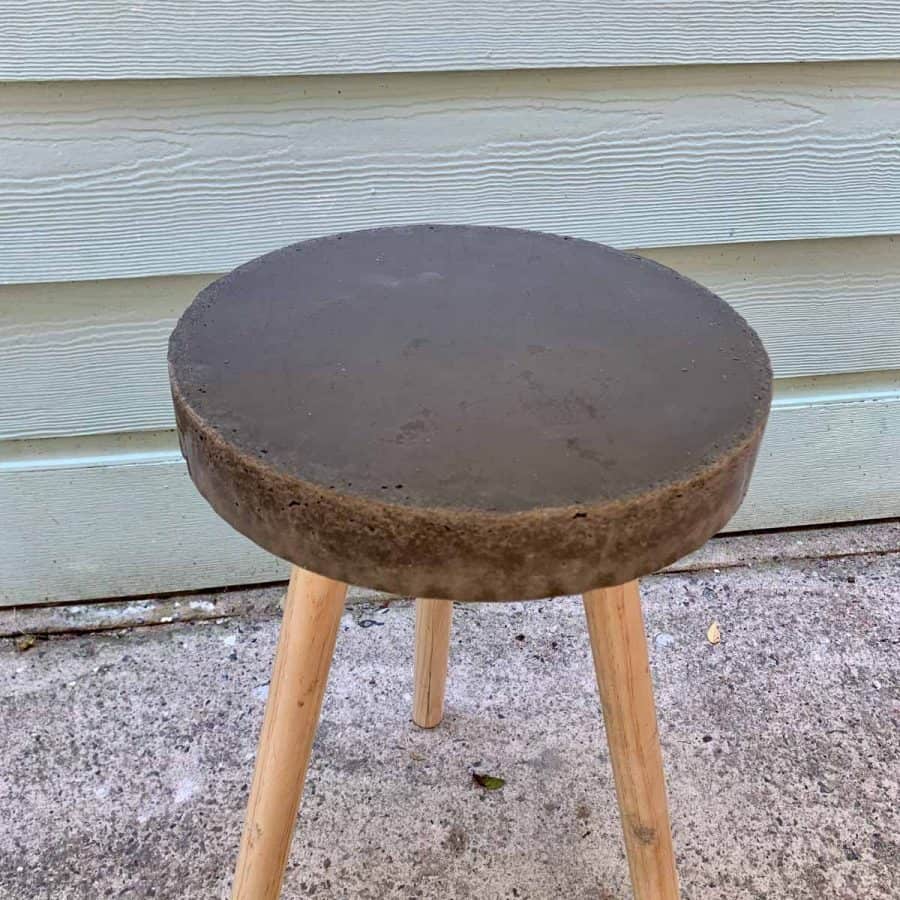
Outdoor DIY Concrete Side Table
How to make a DIY concrete side table and that can also be used for a stool for outdoors.
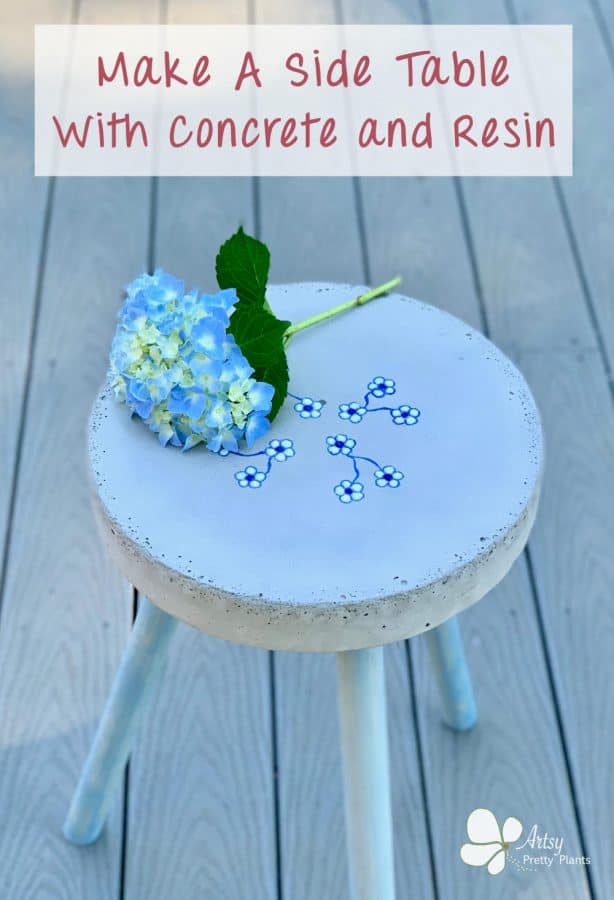
A fun two for one solution for when you need extra seating or extra tables. Download a free printable to make the flower design!
Here’s the first in a series of outdoor concrete decor projects with this same flower design.
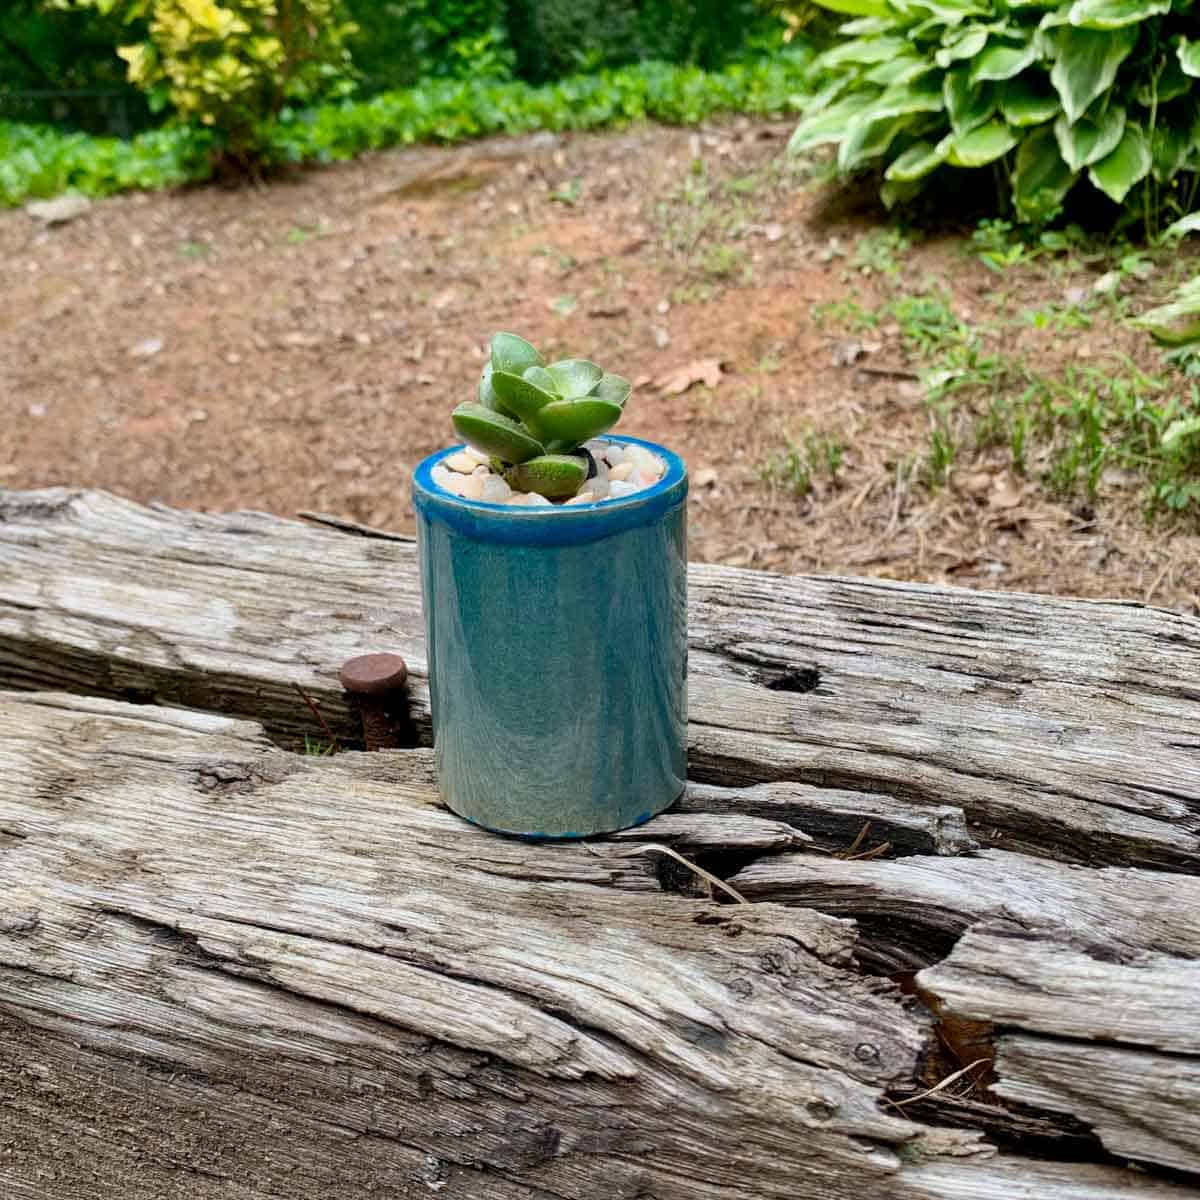
Just another way to liven up your outdoor space!
These projects will all combine a bit of resin painting so you can get the flower design. If you haven’t done it before, it’s actually pretty easy.
What I love most is the raised -3D look you can get using resin to paint with.
And I have a free printable so you can trace the flowers, so you can really use any type of paint if you don’t want to use resin.
My second choice would be enable paints. They will be very weather resistant and be nice and glossy.
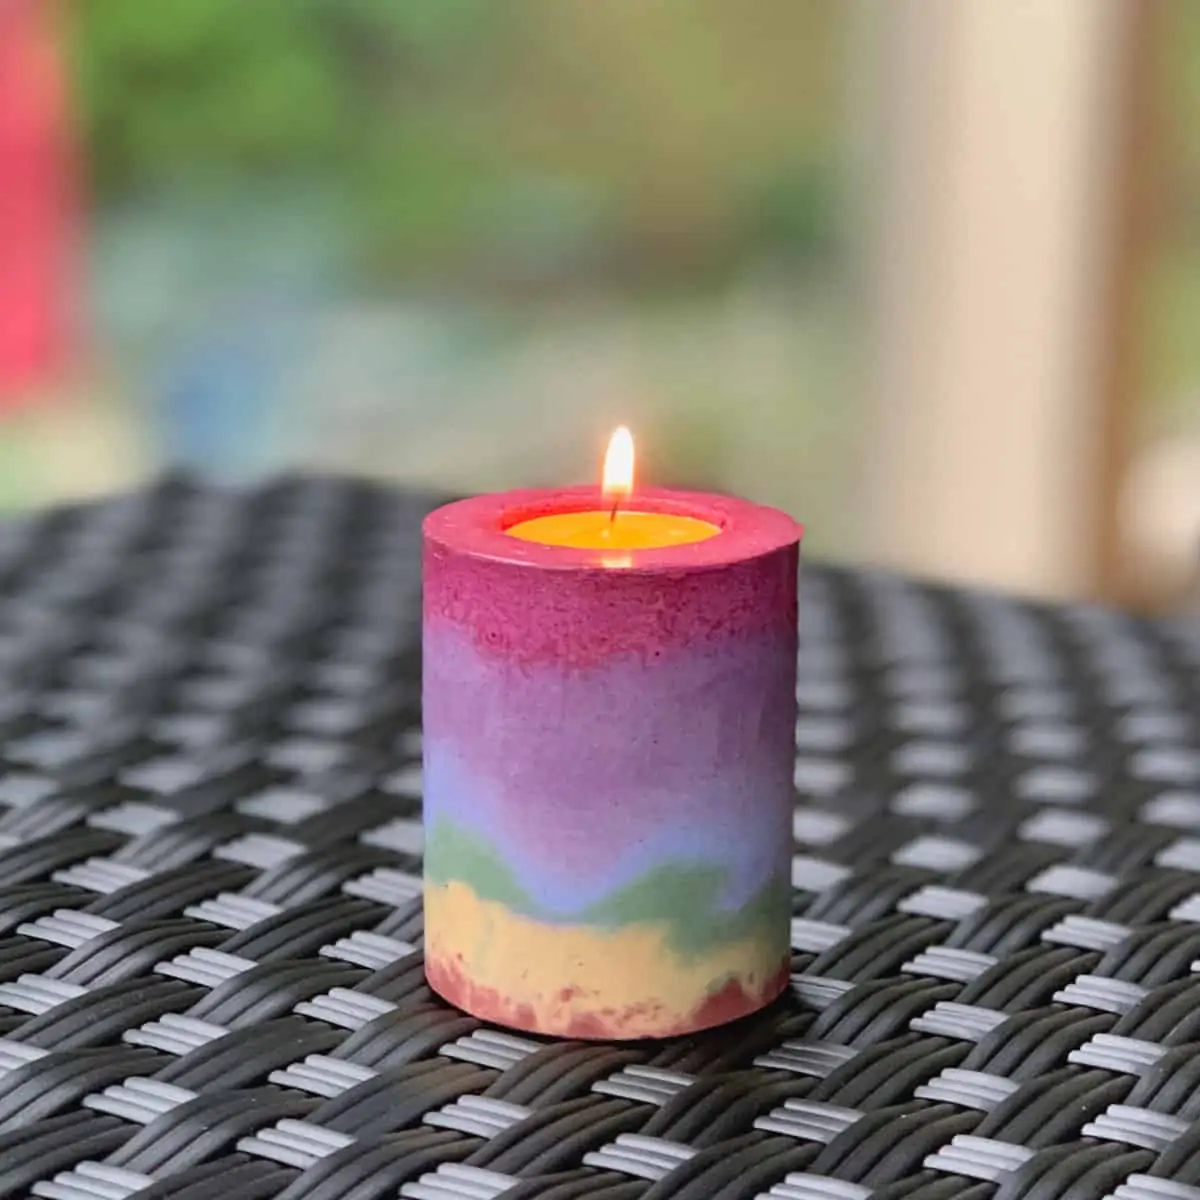
For another great outdoor concrete piece, check out this easy concrete fire bowl for your tabletop.
Some of the links on this page have been provided as a convenience for finding materials. These links may also be affiliate links. As an Amazon Associate I earn from qualifying purchases, at no extra cost to you.
I only recommend products I’ve used and loved, unless otherwise stated. Click here to read my full disclosure policy.
DIY Difficulty Level | Moderate
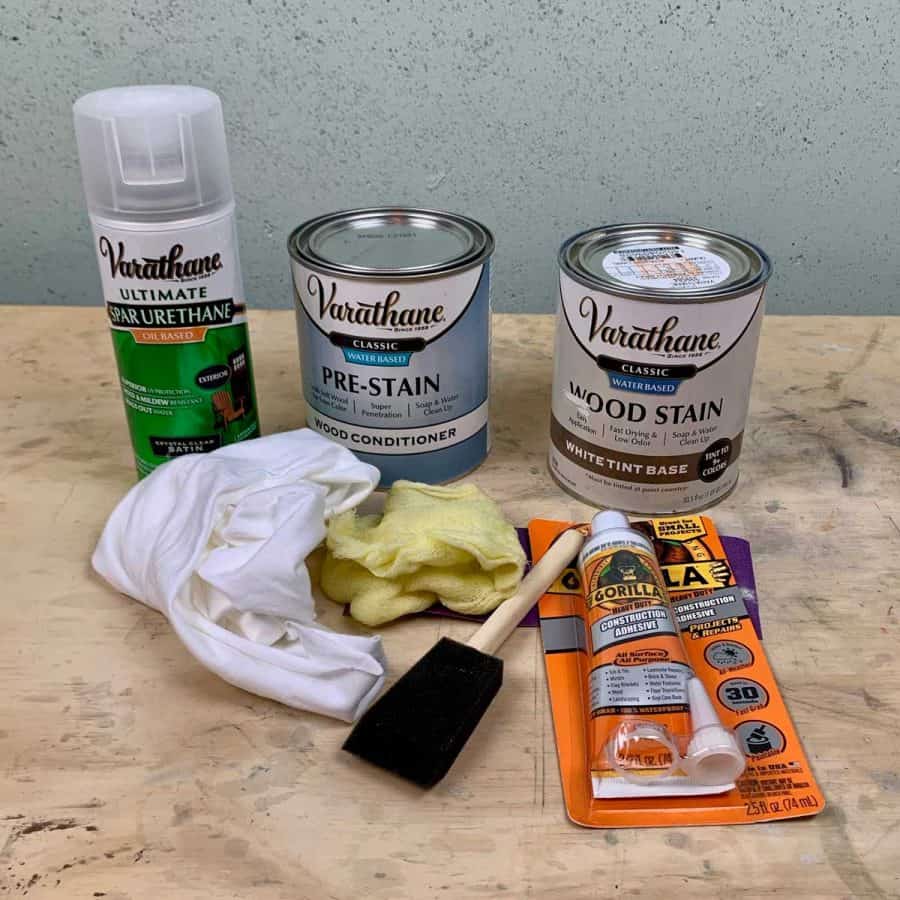
Materials For An Outdoor DIY Concrete Side Table & Stool
- Sand Topping Mix
- Disposable bowl
- Disposable cup
- Durable nitrile gloves– I like these because they are so durable, you can rinse and reuse and end up costing less in the long run
- Safety glasses
- Silica rated dust mask
- 12” concrete tube form
- 72” pine dowel at 1 ⅛” diameter
- Square/flat trowel
- Aluminum flashing roll
- Blue tape
- Hot glue gun
- Spray adhesive
- Acetate sheets
- T-square with cork backing
- Box cutter with fresh blades
- Foam insulation board
- Silicone caulk
- Small level


Legs For The Side Table & Stool
- Miter saw
- #220 sandpaper
- #200 Grit diamond sanding sponge (or regular 220 should be fine)
- Wood stain- french grey, water based
- Wood conditioner
- Lint cloth
- Rags
- Construction adhesive
- Urethane spray– optional
Resin Painting Supplies
- Transfer paper
- Epoxy resin 2:1
- Resin colorants- opaque
- Sharpie Oil Marker- extra fine, blue
- Craft sticks
- Plastic yarn needle and/or toothpicks
- Q-tips
- Resin mixing cups
- Tiny plastic cups for divvying up colors (Dollar Tree has great ones for this)
- Rubbing alcohol
- Plastic lids or wax paper

Before starting the tutorial, it may be helpful to read my article comparing the different concrete mixes and sealers– Cement & Concrete Crafts Tests!
Another important article is Making Cement Crafts Techniques & Tips with info on cement materials, mixture consistencies, demolding, safety and clean up!
Tutorial Steps For An Outdoor DIY Concrete Side Table & Stool
Step 1. Make The Mold For The Concrete Side Table Top
Use the straight factory cut edge from the aluminum flashing to provide you with a guide that you can be confident is straight.
First, cut a piece of flashing that is at least twice the circumference of the tube.
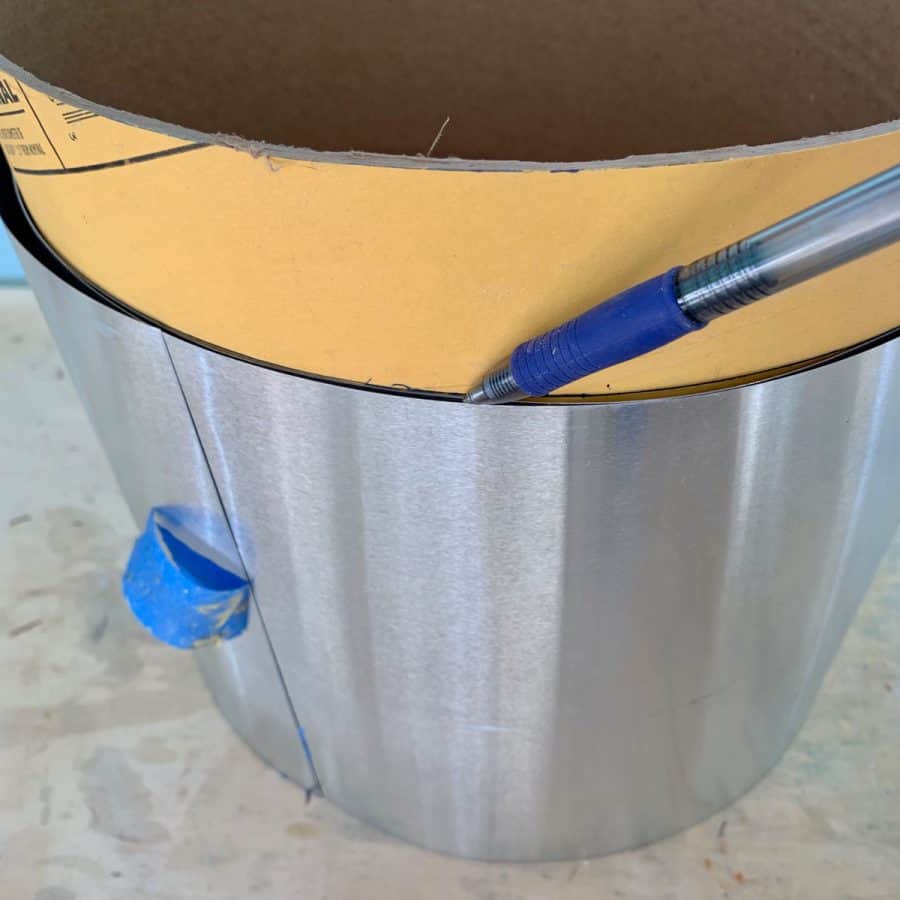
Next, measure 2” from the end of the tube and place a tiny mark on 3 opposite sides.
Now wrap the flashing around and line it up where you marked the 2” and make sure the flashing lines up perfectly with itself where each layer overlaps.
Mark your line around the tube.
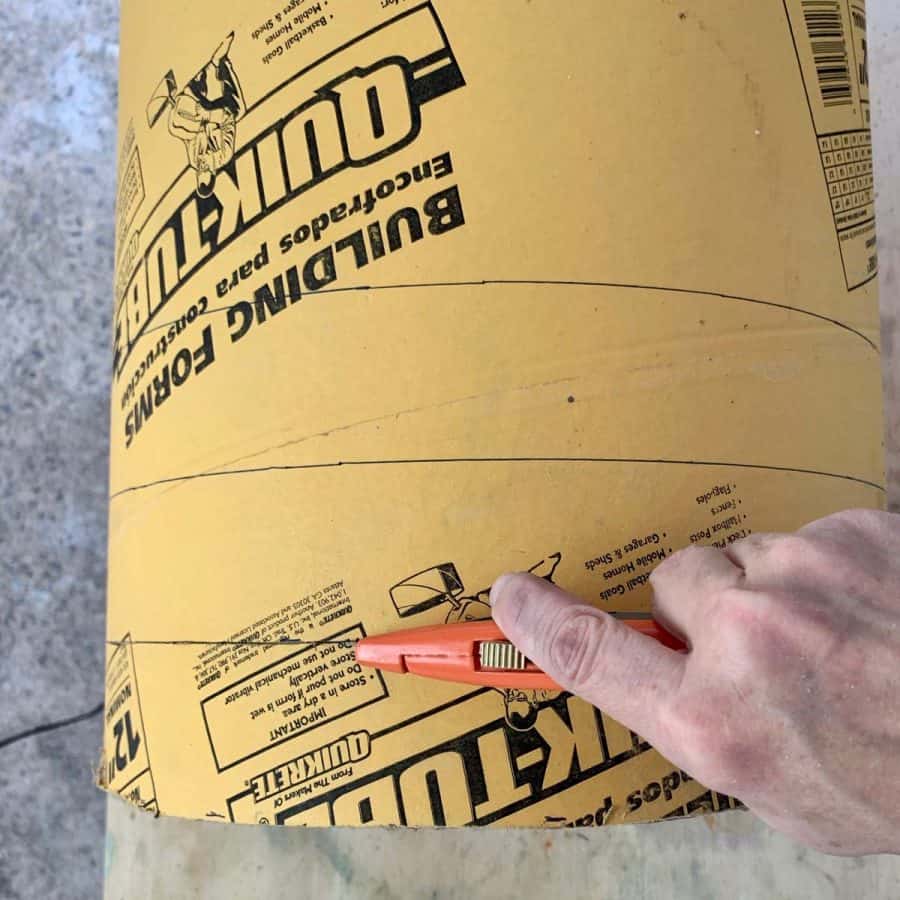
Now with a box cutter, carefully score the line- don’t cut through yet.
I took 2 passes all the way around before starting to cut, which took multiple more passes. Make sure you are using a fresh blade for this.
Step 2. Line The Inside Of The DIY Concrete Side Table Top Mold

Use acetate to line the cardboard ring, to give the sides of the concrete a smooth finish.
With a t-square and the box cutter or craft knife, cut a strip of acetate that is 2” wide and 40” long.
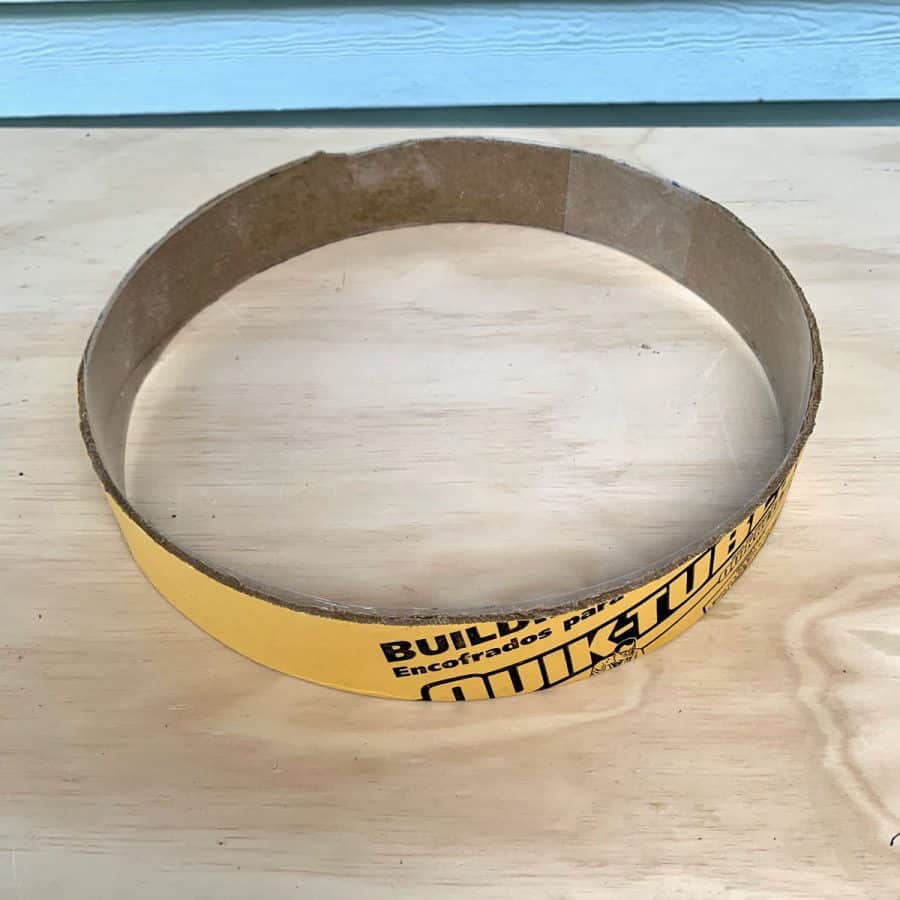
Next, use spray adhesive to glue it to the inside of the tube and trim it if there is any excess at the top.
Step 3. Trim The Dowel To Leg Size
Cut the dowel into three pieces at 24” each, using the miter saw. Now sand each leg with #220 grit sandpaper.
Step 4. Angle The DIY Side Table & Stool Legs
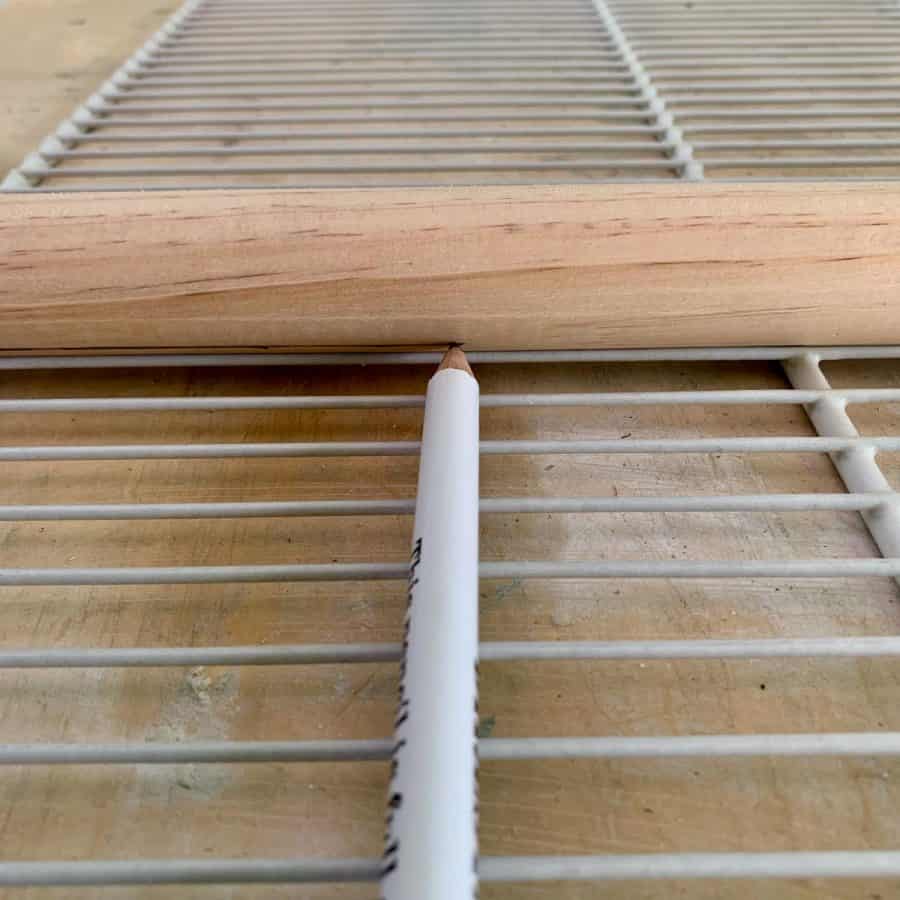
Next, you will cut both ends of each leg so that they are parallel to each other. First, you’ll need a reference line, so place the leg between two long points or a groove so that it doesn’t roll.
I had a spare piece of wire shelving and used that. If you have a table saw, the v-groove is perfect for this.
Now take a pencil and place it flat and run it along the length of the dowel.

Next, set the miter saw to 15 degrees and then put the dowel onto the platform and place it so that the line you marked is on the side facing you and in the middle (not inward like mine is in the photo).
Clamp the dowel and then make your cut. Now slide the dowel down so that you can cut the other end, parallel to the first cut.
With the line still in the middle and facing you, clamp it and make the second miter cut.
The long line you drew should now be marking the shortest edge on one end of the leg and the longest edge on the other.
To help you in the following steps, also make a mark opposite those so that the short and longest edges are marked.
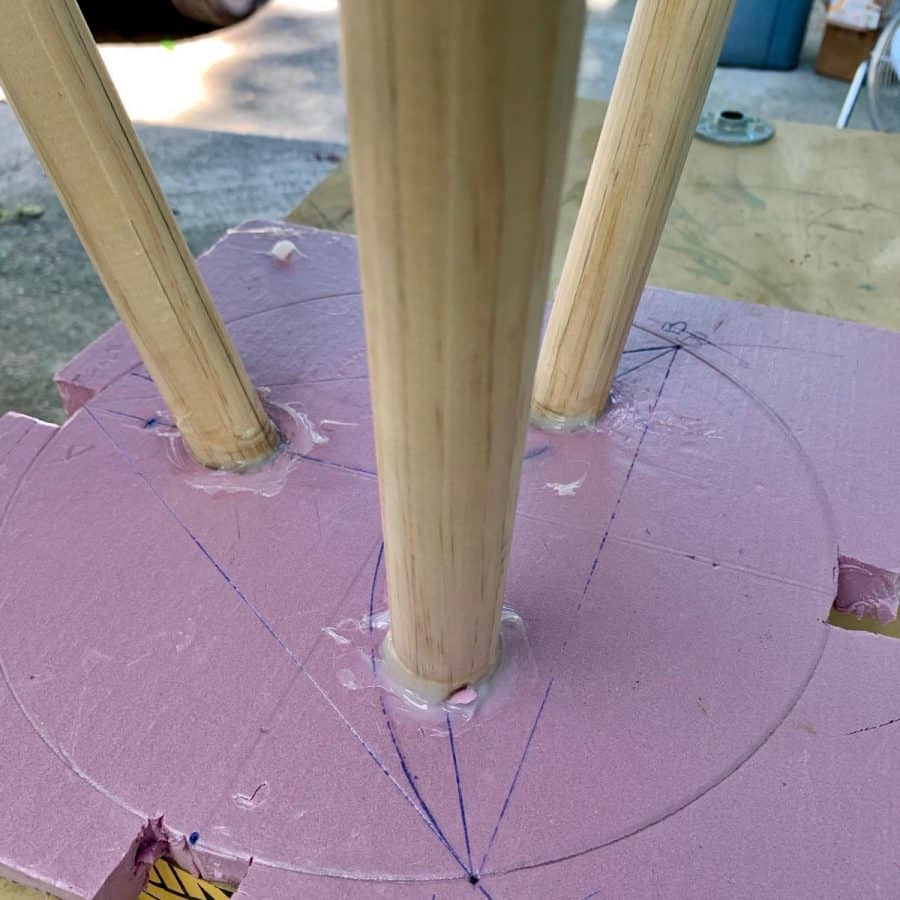
Step 5. Create The DIY Concrete Side Table Legs’ Support
The foam will help situate and support the legs so that they can be placed into the concrete at ¾” from the bottom of the mold and also at their 15 degree angle.
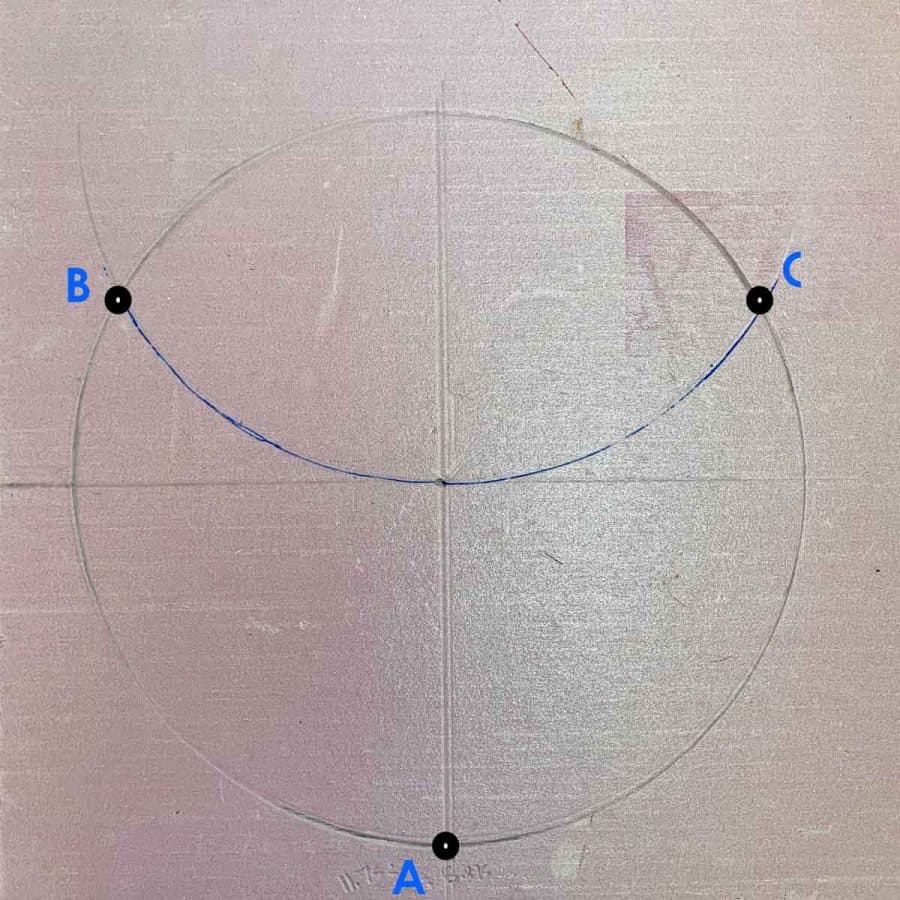
The legs will be equal distances apart, in a shape of the triangle, so we need to draw an equilateral triangle.
To obtain the points for the triangle, take the cardboard ring and place it onto a piece of foam insulation board.
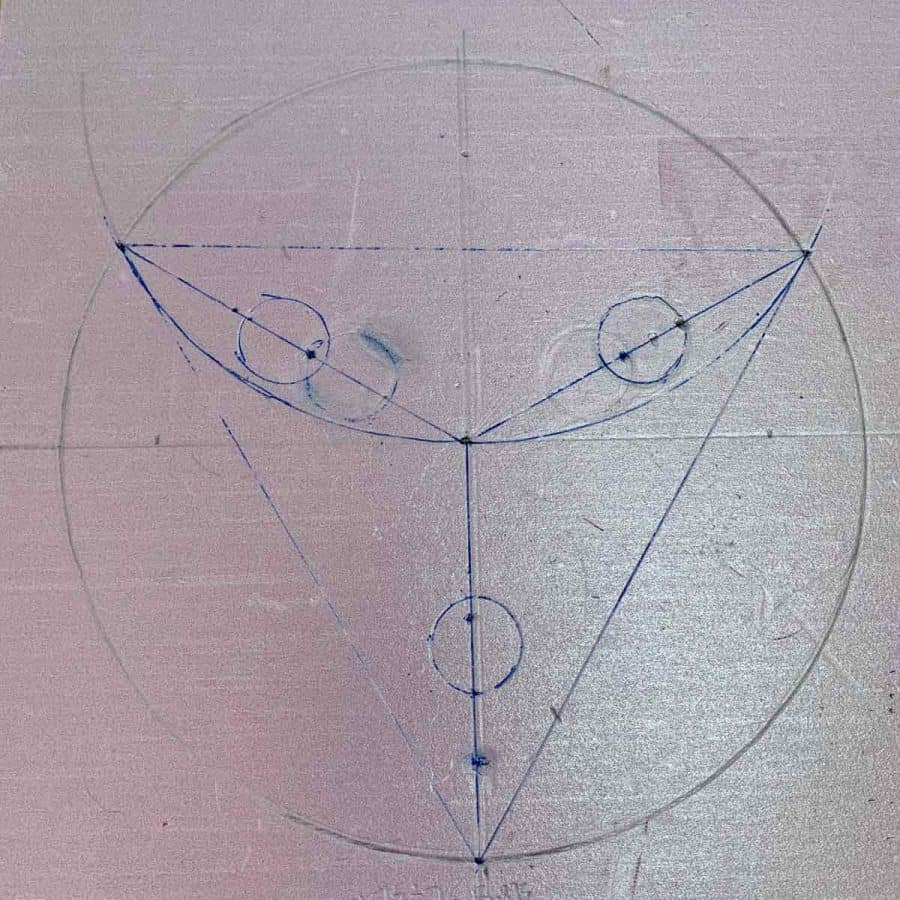
Trace the inside of the ring and then measure the circle at its widest points to obtain the center, then draw intersecting lines and mark where they meet.
Next, take the ring and place one edge at the center mark and trace it again.
The two points where the circles overlap are points B & C of the triangle. Point A is the very top of the first circle.
Draw a line between each point to get your triangle.
Next, from each A, B and C point, measure inward 3 ¼” and mark that.
This is where the inside and the longest edge of the concrete side table legs will be positioned.
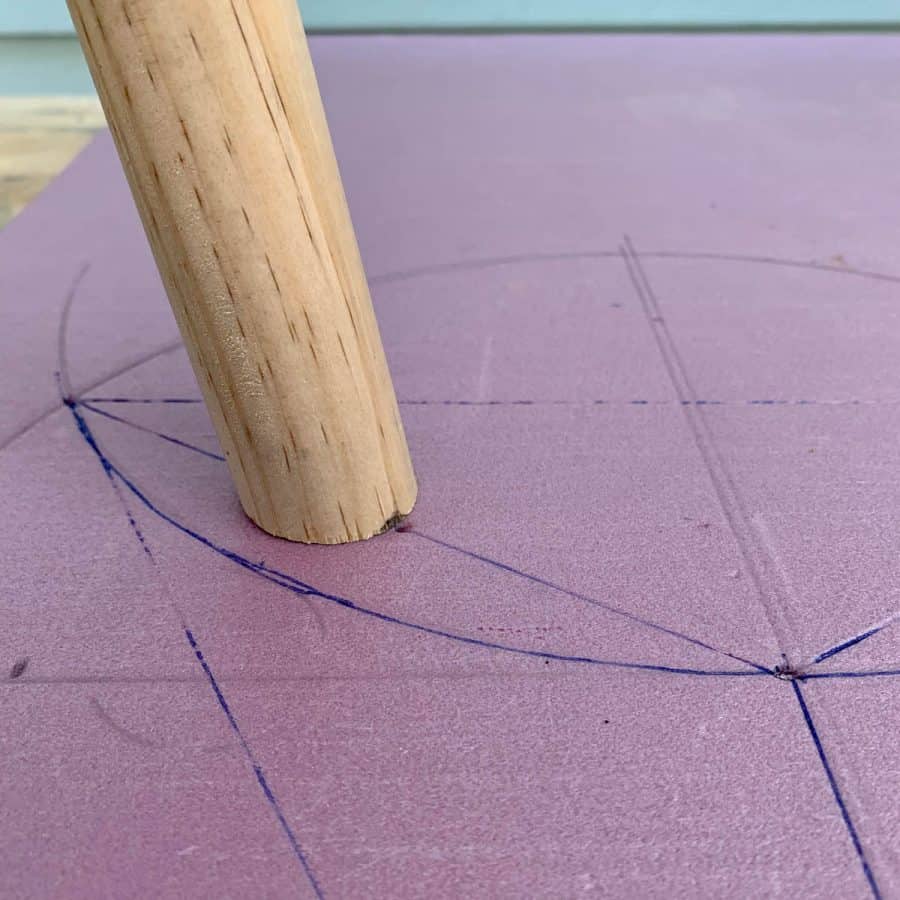
The end of the legs that have the A, B and C marks will be facing so that the long edge is pointing outward.
Place a leg at one of the points so that the long edge hits this mark and is centered on the line.
The short edge will also be centered on the line. Now trace the leg and then do the same for the other two legs.
Use a craft knife to cut out the circles for the legs.
Next, draw a square around the circle, leaving 1 ½” of extra space, so the square will be 13 ½” on each side.
From the widest parts of the circle, measure 1 ½” from the edges and then draw the square. Cut out the square with the craft knife.
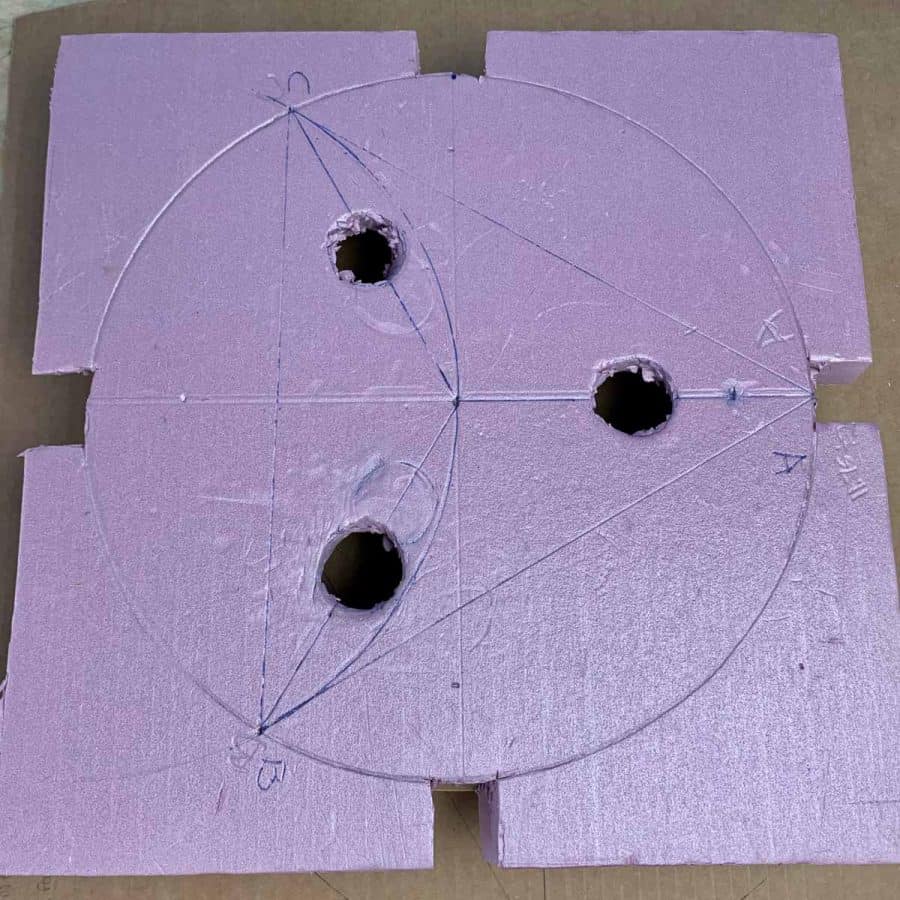
Make the notches that will help you line up where the foam support and legs will be placed when inserting into the cement.
These are basically acting as registration marks.
Just notch out about an inch of foam at the ends of each intersecting line (the widest parts of the circle).
Step 6. Add The Base For The Stool Seat Mold

Cut a piece of acetate to about 13 x 13” and then use hot glue to glue the cardboard ring to it, from the outside.
Then place the ring onto a rigid board, like a piece of plywood- this will help you vibrate the cement and transport for curing.
Step 7. Place The Legs Into The Foam Supports

Write the letters A, B and C on one end of each leg- these will correspond with your A, B and C points on the foam and ultimately will be the edge that is placed on the ground.
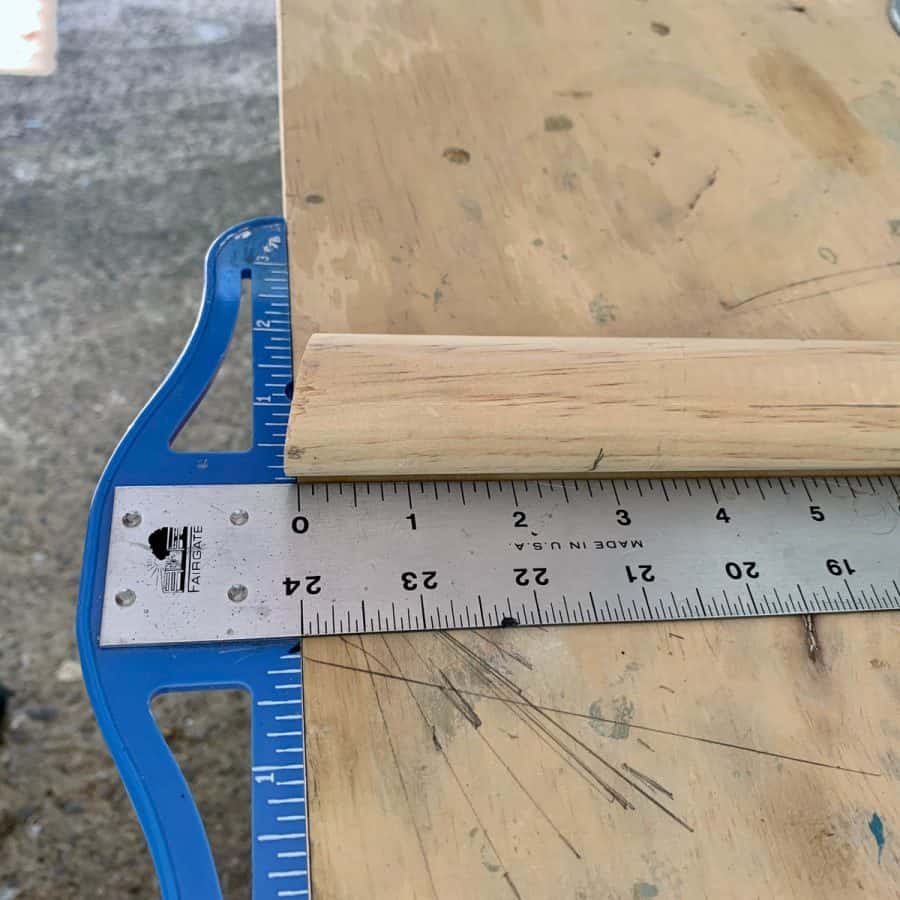
On the opposite ends, line up each edge so that either first the short sides are flush with the edge of your table, then measure and mark 2 ¼” next, do the same for the long edge.
Next, insert these into the foam holes at corresponding letters. T
he holes you cut are straight and the legs are angled so you will have a bit of angling to get the legs positioned properly.
Use your work surface to place the legs against to keep the ends flat.
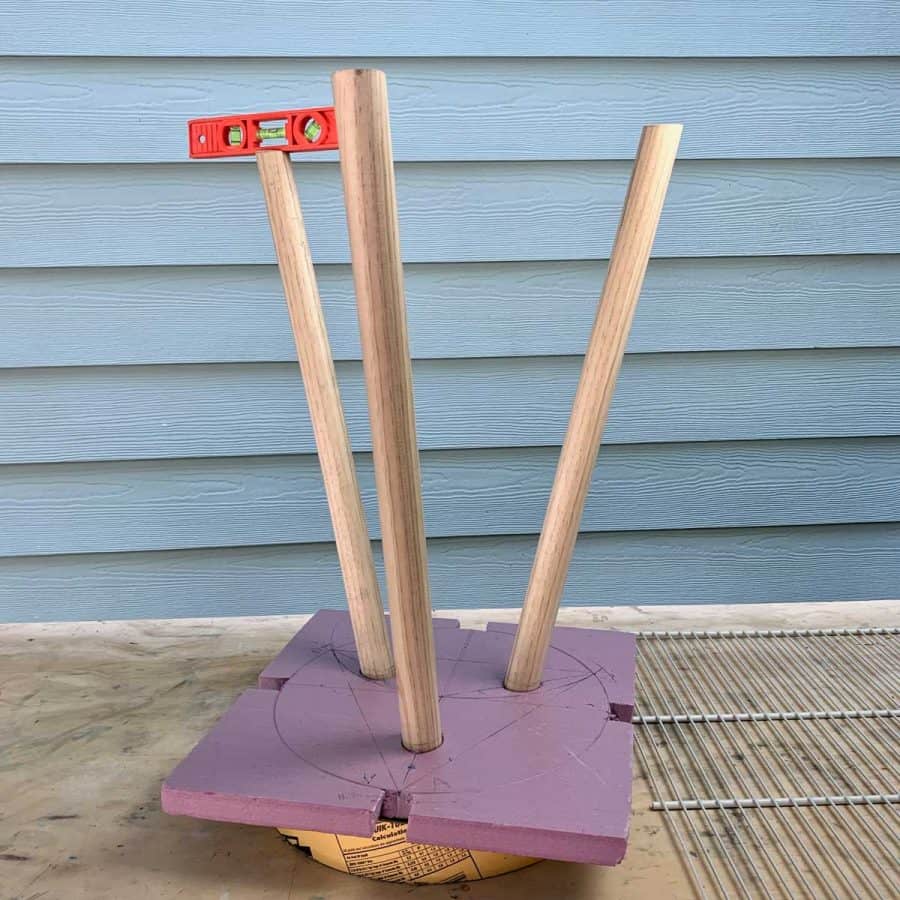
Use a small level to get the ends level. Check it both front to back and side by side. For the moment, just get it close.
Once close, take the silicone caulk and caulk the legs into place. Check again to make sure your legs are still level.
Step 8. Mix The Cement And Cast The Side Table Top/Stool Seat
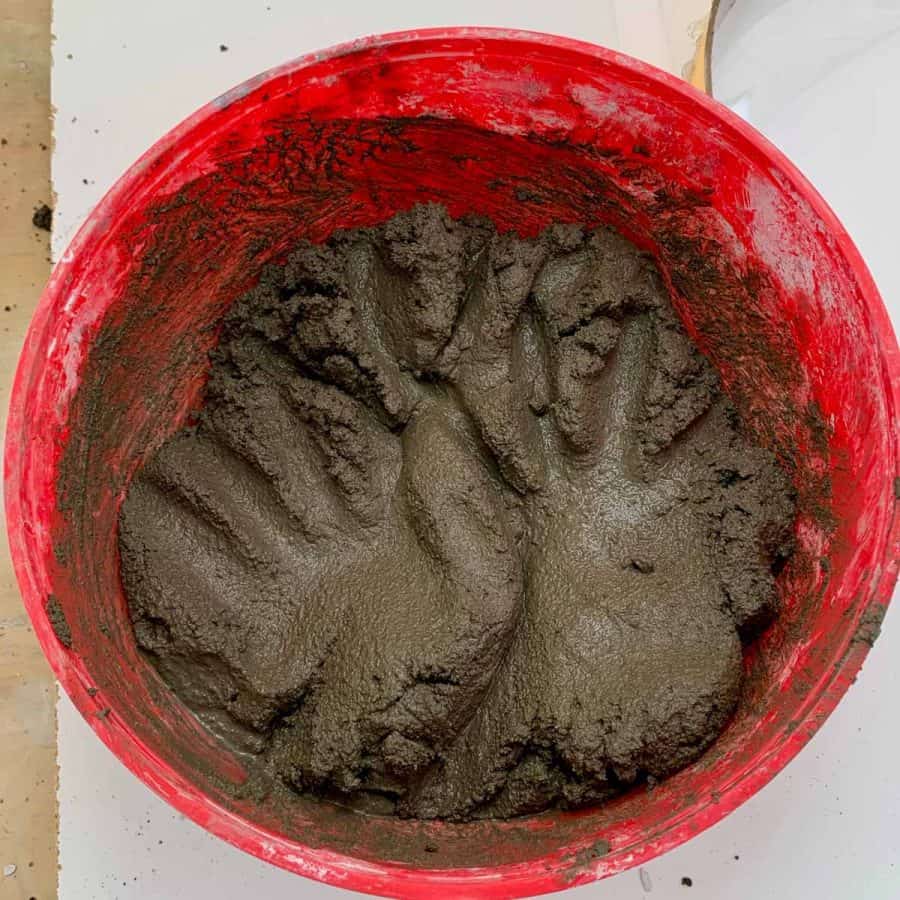

Mix the cement to a soft mud pie consistency. You will need about 12 cups of mix for this.
Pour the mix into the ring mold and then to help level the cement and release air bubbles, lift, shake and tap the board up and down on the work surface.
I did this for 2-3 minutes. Now take the foam support and insert the legs into the cement.
Position the legs so that your registration notches line up with the edges of the cardboard ring- which will make the legs centered.
Tap and vibrate a little bit more and then place the side table casting in the spot where it will cure (if it’s not your current work surface).

This is your final chance to get the legs positioned nice and level. I found that I needed to add some weights to some of the legs to help support them in one direction or another.
You’ve got a bit of time here before the cement sets too far, so take your time in getting these level.
Let the cement cure for 2 days.
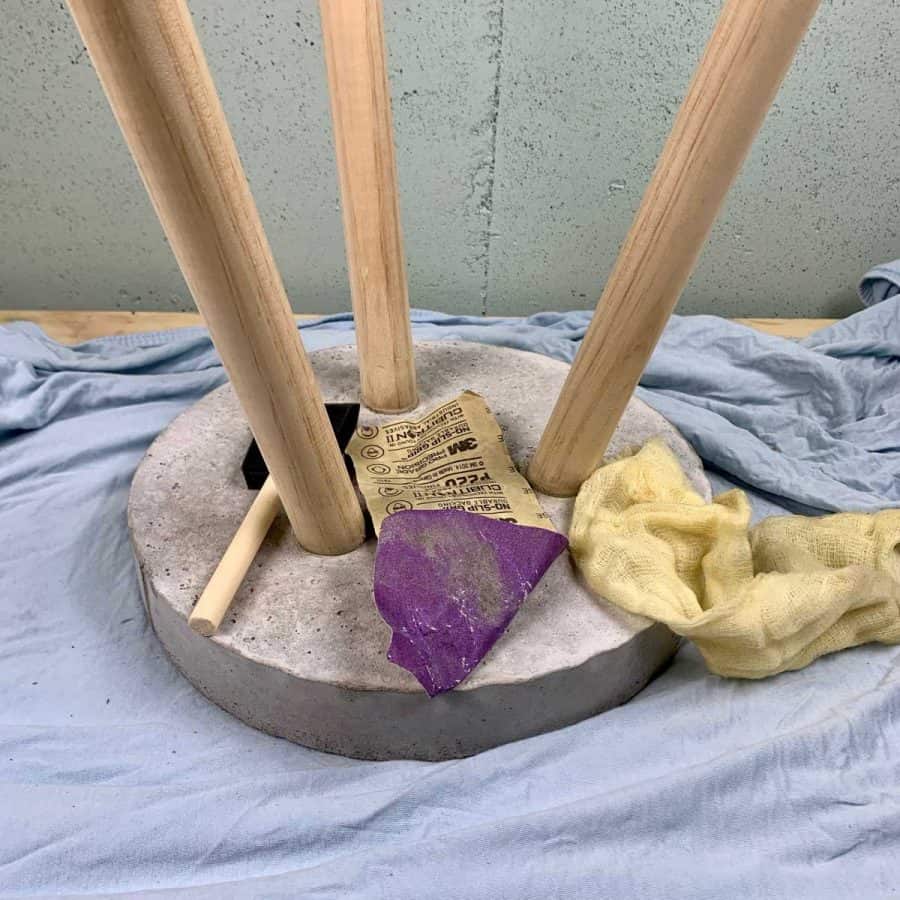
Step 9. Demold The Concrete Side Table Top
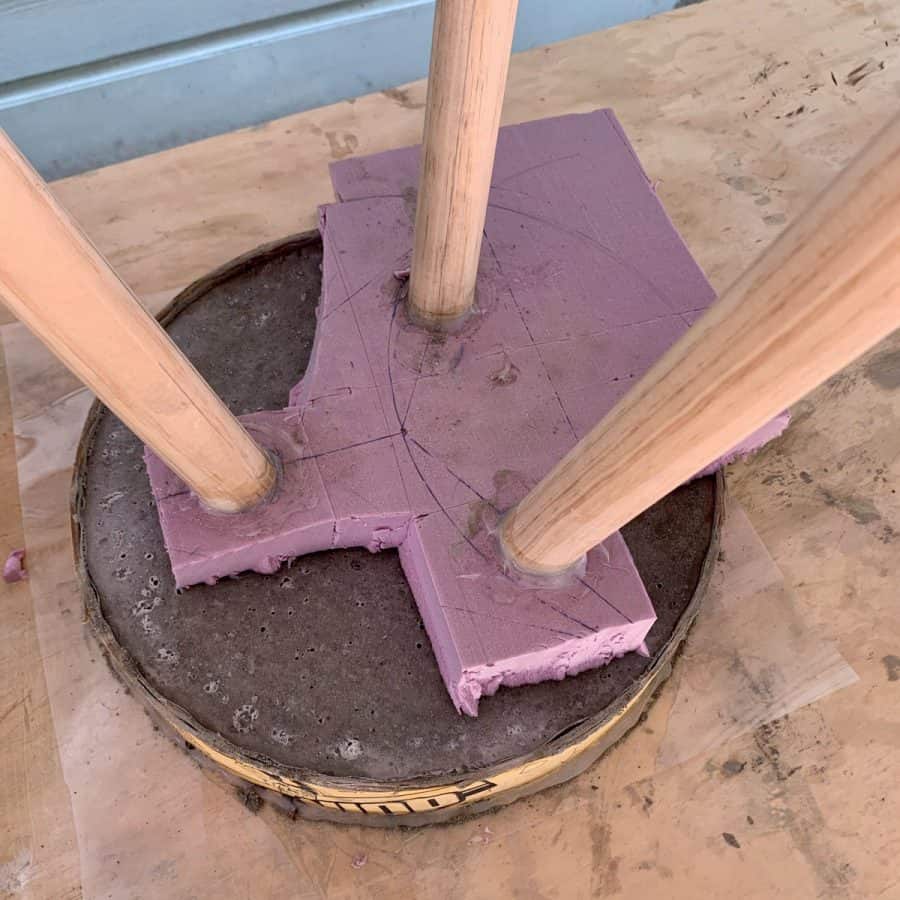
First cut off the foam. Notch out the areas between the legs, then cut in toward the legs and pull the foam off.
Next, place a towel on the work surface and gently turn the table onto its side so the side of the seat is on the towel.
Peel off the acetate, and then flip the table back over so the seat is downward on the towel.
Make a slit up the side of the cardboard with a box cutter and peel it off.
Sand any rough edges with the #200 grit diamond sponge.
Step 10. Glue The Legs
I have had inconsistent experiences with submerging wood into concrete.
More often, the wood never moves, but occasional it does. It’s possible that the 1 ½” of concrete that these are covered by, isn’t quite enough.
There was some expansion and contraction going on and the legs became a little loose about a week after I demolded.
The legs don’t fall out of the side table top, but nevertheless, I prefer them to be secure.
I applied the adhesive after I already stained the legs, but I think it’s best if you do this before.
To secure these, use a tube of construction adhesive, and apply it to the top of the leg where it meets the concrete and the sides.
This will dry in 10-20 minutes, but it will need 24 hours to fully cure.
Step 11. Stain The Side Table Legs
With the table still upside down on a towel or soft drop cloth, apply the pre-conditioner.
Pine is notorious for having a raised grain that causes streakiness when a stain is applied,
so apply a pre-conditioner before staining. Just stir it well, then use a foam brush to brush it on.
After 3 minutes- or per the manufacturer’s instructions, wipe it off with a rag.

Now stir the wood stain and follow the manufacturer’s instructions for applying.
The next day, I followed this up by spraying a urethane spray onto the legs for extra protection.
After reading this tutorial, if you want more outdoor seating inspiration, check out these 19 outdoor chair tutorials and this cute cinder block bench!
Step 12. Draw The Floral Design Onto The Side Table
The DIY concrete side table top is quite thick and will retain moisture for at least a couple of days after demolding and it needs to be dry before you paint it.
So from the time you cast the table top/ stool seat, to the time it’s ready to paint, it is probably going to be at least 3 days.
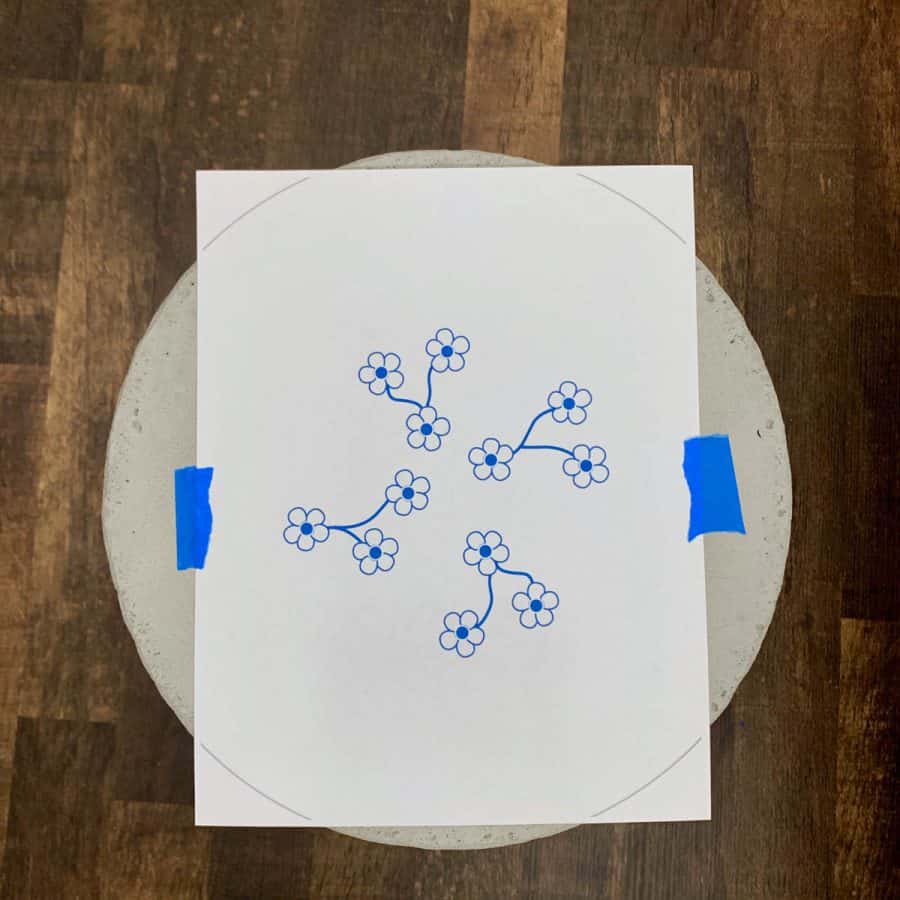
Once dry, use the form below to get the flower design download to print the flower table top design.
The design will fit 8 ½” x 11 paper, but you’ll notice the sides of the circle are cut off, but there’s no design in that portion which will help with lining it up on the table top.
Use the transfer paper and place it so that the shiny side is facing the side table top and then place the print on top of the transfer paper and tape that into place.
Place the print out on top of the tracing paper and line it up with the table top.
I found it easiest to trace this with a mechanical pencil. Take your time and be sure to trace only the blue outlines.
Double check that your transfer marks are visible before tracing the whole design.
Remove the papers and then carefully retrace the outlines with the Sharpie paint marker.
Step 13. Paint The DIY Concrete Side Table Top / Seat With Resin
Hint: Rubbing alcohol is one of the better ways to help clean up resin.
I keep a dish with about ¼ cup next to me and use it to dip paper towels into, or even my fingers when resin gets where it shouldn’t be.
I also keep a few cut up squares of wax paper or plastic lids to use to wipe off excess resin.
Paper towels cut into squares are very helpful as well.
For more information on working with resin, you may want to check out Resin Obsession.
I made two other concrete projects where I painted with resin, so you may want to look at the Cement Grinch Tile and the Concrete Gift Tags.
Use craft sticks to mix the resin at a 2:1 ratio. I recommend painting the centers of the flower to start, to make it easier.
You will only need a tiny bit of resin for this. I had just a little more than needed and used 5ml of hardener and another 10ml of the epoxy (15 total). Be sure to stir this for 2 full minutes.
Painting this will be much easier if you wait 20-30 minutes after mixing. Around 15 minutes check the thickness.
This is because the resin will thicken and give you better control. Adding the color will thin it slightly, and so I find it a bit quicker if I let it thicken before I add the color.
The perfect thickness is when it has just started getting a bit stringy. Test this mixing it for a couple of seconds and lift the craft stick up.
You should see a tiny string. If you see a lot of strings, then it has gotten too thick and will be too difficult to work with, so keep an eye on it.
Once thickened, add a tiny bit of color. You don’t want to add too much or you could have trouble with it curing.
Just dab a toothpick in the color, then dab it into the mixed, thickened resin. If it’s too light for you, then repeat.
If it’s too dark, then dab a new toothpick into the white and back into the resin mix and then stir.
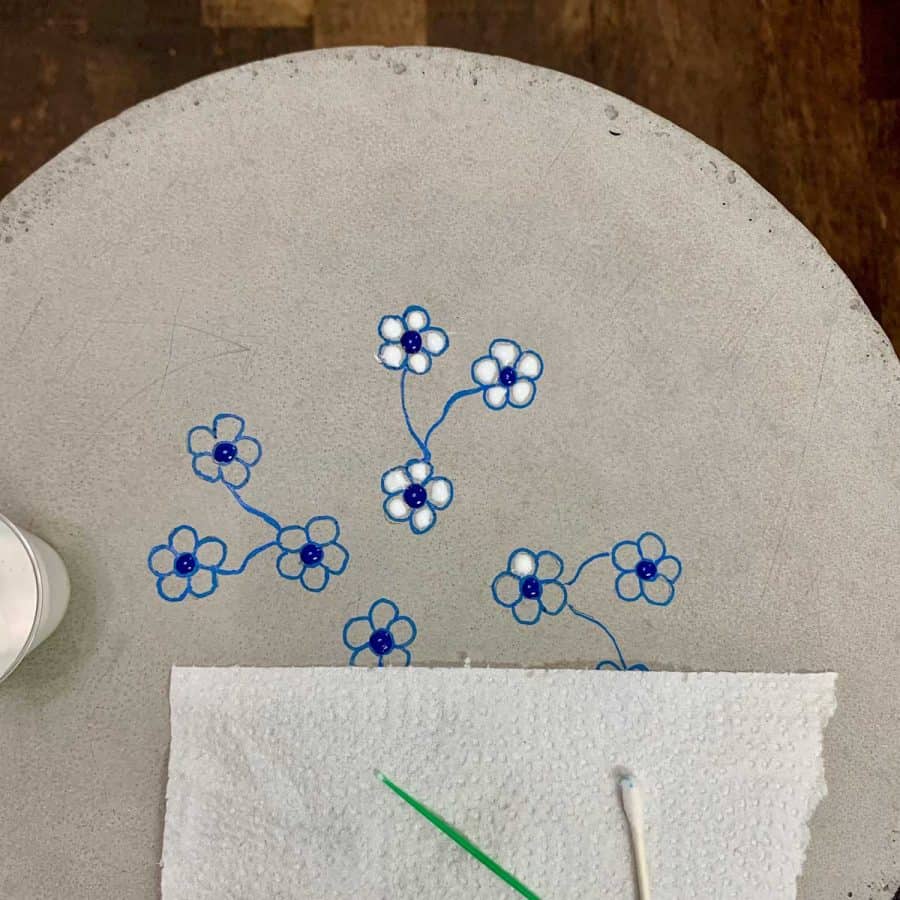
When the color is how you want, use a toothpick or yarn needle ( I used both) and dab it into the resin.
When you pull the toothpick back up, the resin should be just a little stringy. This means it has thickened the right amount.
Let the resin mound up just a bit onto the tip of the toothpick.
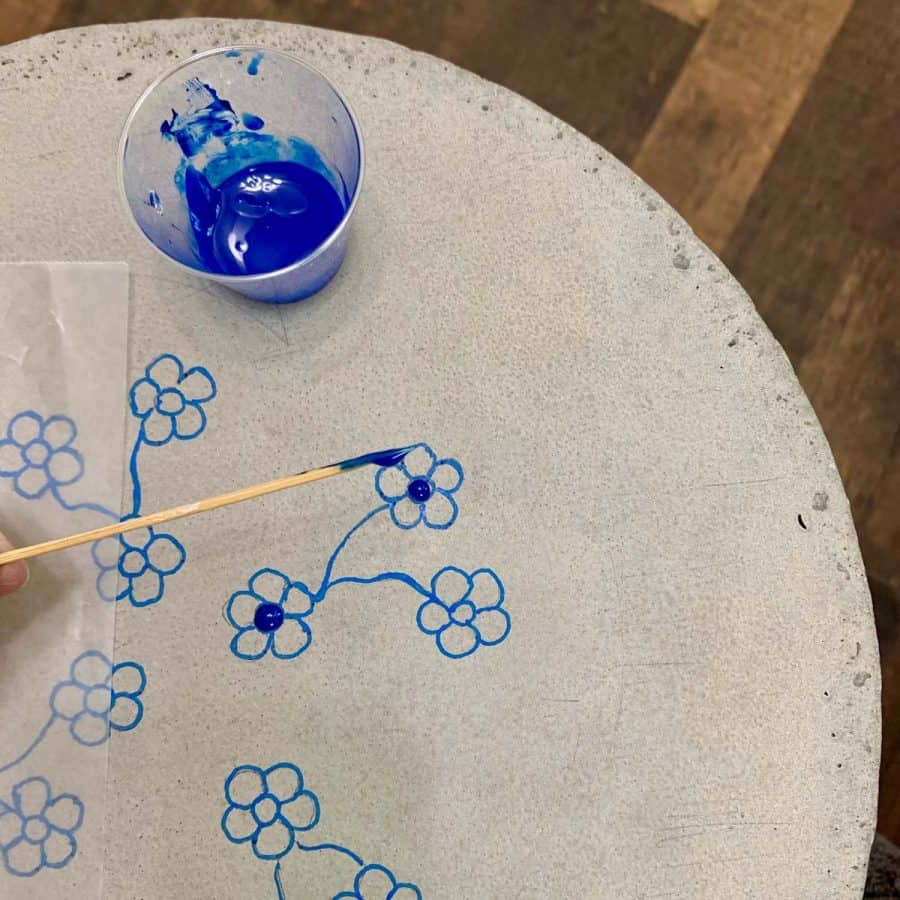
Now dab the flower centers with the mounded resin. Let it mound up onto the center spot.
To avoid strings when you pull it away, just twist the toothpick around a few times.
When painting this stool/ side table, you’ll want to stay well within the outlines you drew.
The resin will sort of self-correct and spread out a touch, so if you push the resin right up to the lines, then it may go over the lines.
Once the blue inner part has cured enough that it doesn’t transfer to your finger when you touch it, go ahead and mix up new resin for the white petals.
Depending on climate conditions, this should be about an hour.
When your done, set your side table out on your porch or patio. Check out this list of 40+ easy DIY patio ideas for more inspiration.
Don’t forget to Pin it for later!