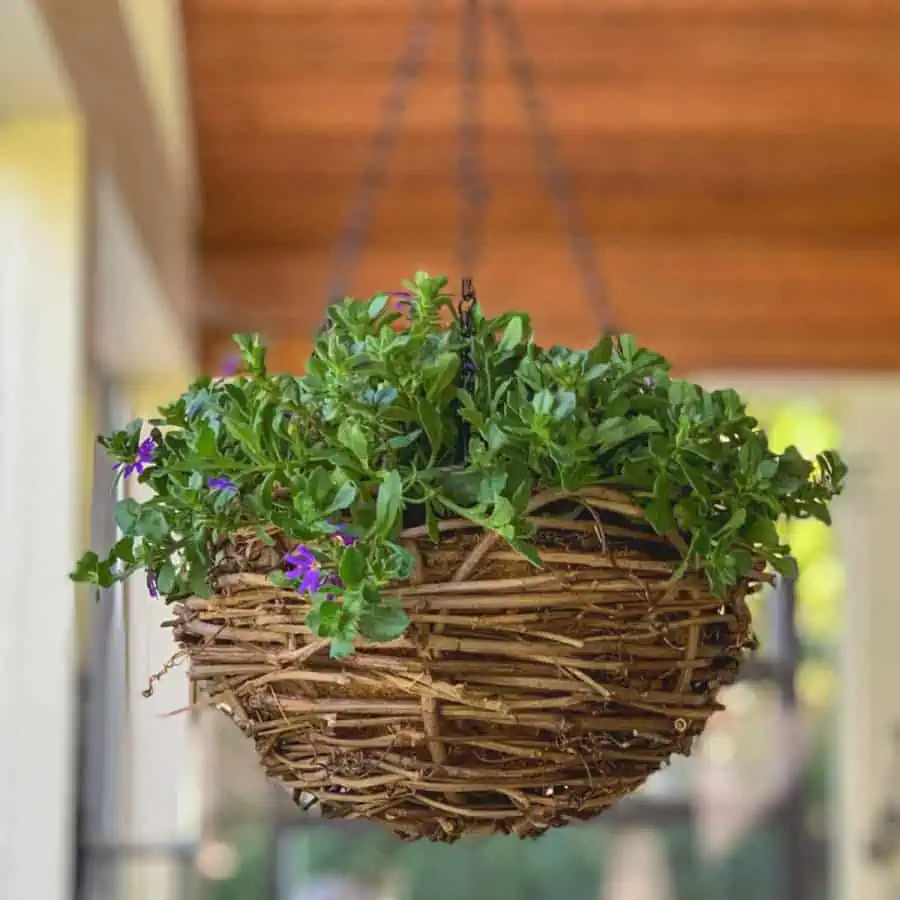
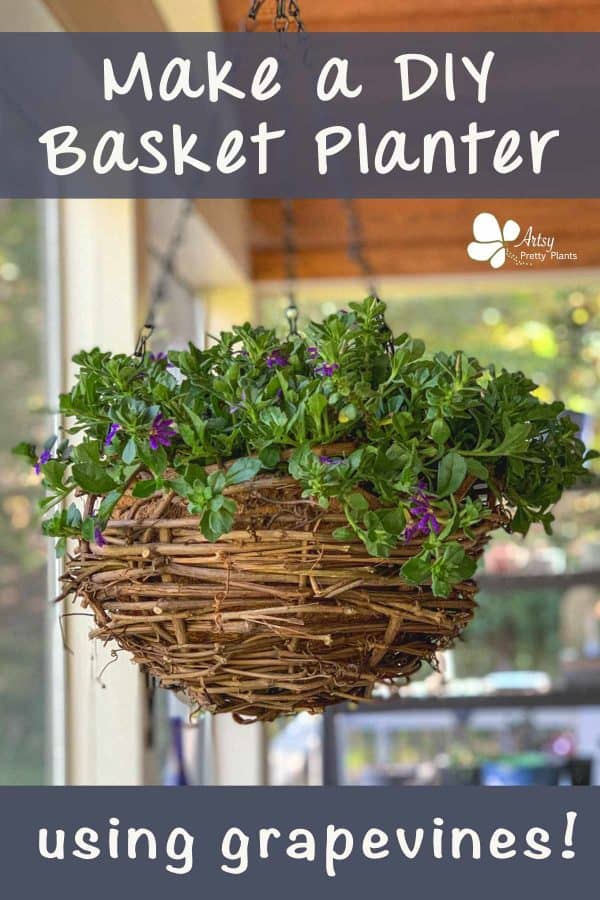
DIY Hanging Grapevine Basket Planter
I’ve got a great tutorial for a hanging basket planter you can make that uses materials you can find in nature, or even in your own backyard.
DIY DIFFICULTY LEVEL | Easy
What a great way to utilize invasive vines to make a cute hanging grapevine basket planter.
A hanging planter is a great way to add plants to a small space.
And the best thing about using grapevine is that it’s more appealing to look at than wire baskets.
If you don’t have grapevines, there are alternatives. Carolina jasmine, honeysuckle, bittersweet, and Virginia creeper are good grapevine substitutes.
Take care not to pull poison ivy vines accidentally –leaves of three, let it be; –if it’s hairy, be weary.
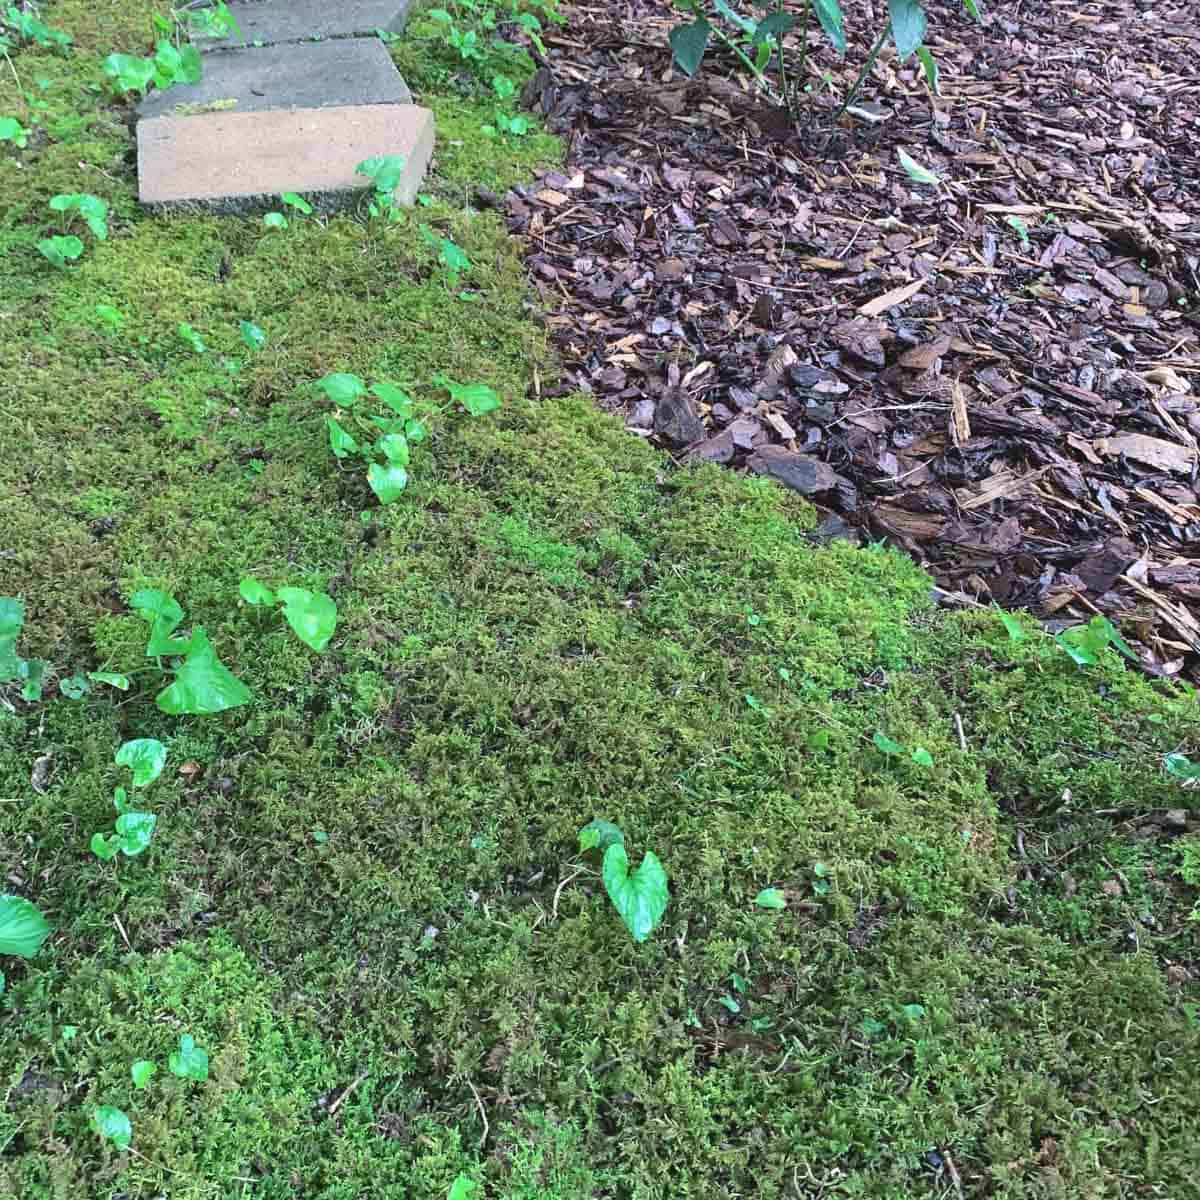
We purchased our home last year and have been desperate to get shade closer to the house.
This past winter, I noticed a small sweet gum tree growing naturally in the perfect location to give us shade right where we want it.
I know, I know- sweet gum balls, yuck. We’ll live with it. They grow fast, and they get very big.
So when I noticed recently that a wild grapevine plant had started to smother it, I knew pretty quickly it was going to have to come down.
And as a craftsperson, I had a few ideas for putting it to good use!
Before removing the vine, I waited to see if grapes developed because I wanted to ensure the birds got their share.
Still, I also had to balance it with keeping the tree healthy. Last month, there was still no sign of any fruits developing, so I pulled that sucker down.
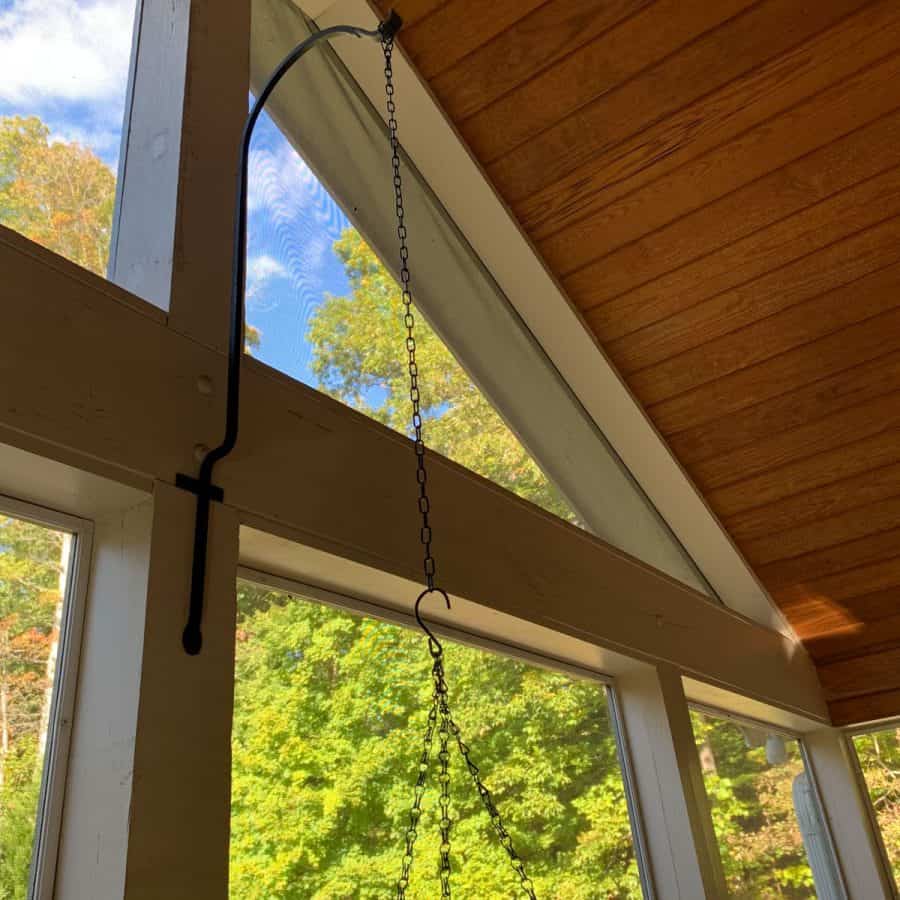
Anyway, this brings me to this hanging grapevine basket planter! It’s perfect for this big plant hanger rod on our porch that the previous owner had installed.
And I bet you’ve got lots of good spots for one of these, so let me show you how to make one!
You can also use these vines to make a grapevine wreath and pendant lighting like a grapevine ball with string lights inside.
For another cool planter using materials from nature, check out this driftwood planter, and flowers made with Sweetgum ball pods. You may also be interested in these cute wine cork planters made upcycled from natural materials.
Some of the links on this page have been provided as a convenience for finding materials. These links may also be affiliate links. As an Amazon Associate I earn from qualifying purchases, at no extra cost to you.
I only recommend products I’ve used and loved, unless otherwise stated. Click here to read my full disclosure policy.
Materials List For A DIY Hanging Grapevine Basket Planter
- Grapevine
- Pruning shears
- Gloves
- 5 gallon bucket
- Coco liner
- Scissors
- Planter hanging hardware
- 3’ extension chain- optional

DIY Hanging Grapevine Basket Planter Tutorial Steps
Harvesting The Grapevines For Making A Hanging Basket Planter
The best time to harvest grape vines is while there is still new growth. But also consider whether wildlife relies on them for food during the fall before harvesting.
However, suppose you have invasive vines killing trees or have a fungal disease like powdery mildew. In that case, it’s a good idea to pull them soon.
The new growth starts as soon as early spring or in the summer.
You need living vines and the bark should have some color still, rather than be grey. It would be best if you had living vines.
To tell if they are living, look at the bark. It should still have some color, rather than grey. Young vines are best.
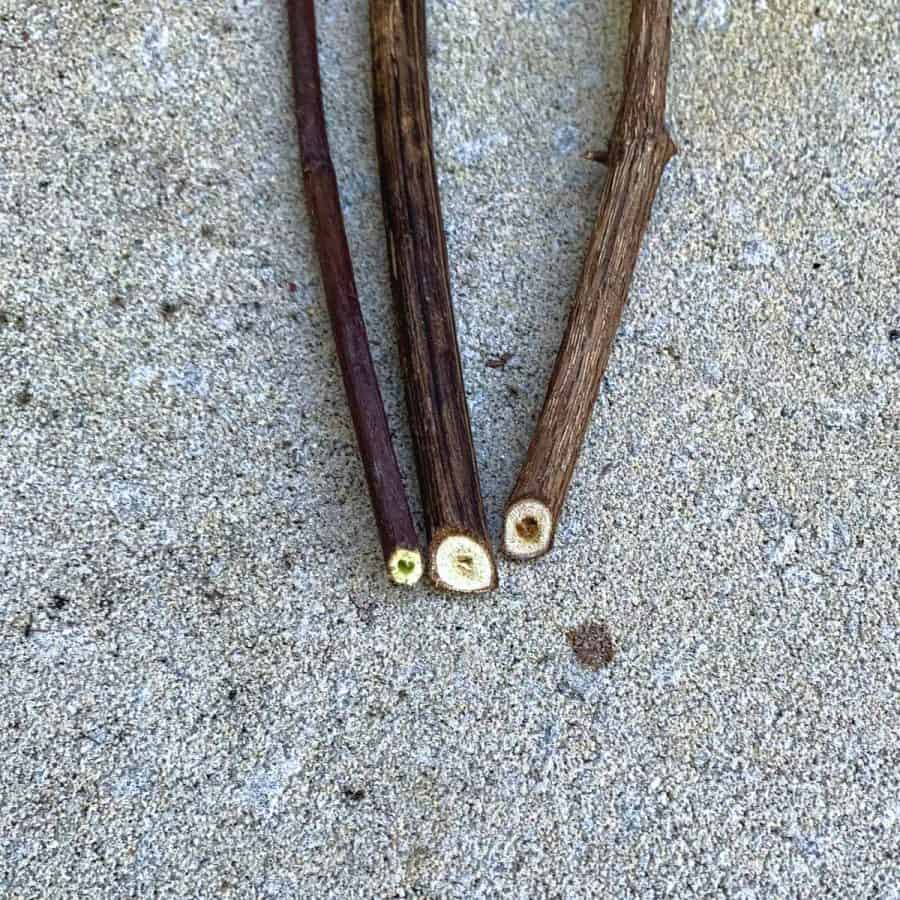
If you bend one lightly and it snaps, it’s not fresh enough to use for a basket planter. You can also tell when you cut them the inner core should be green and not brown.
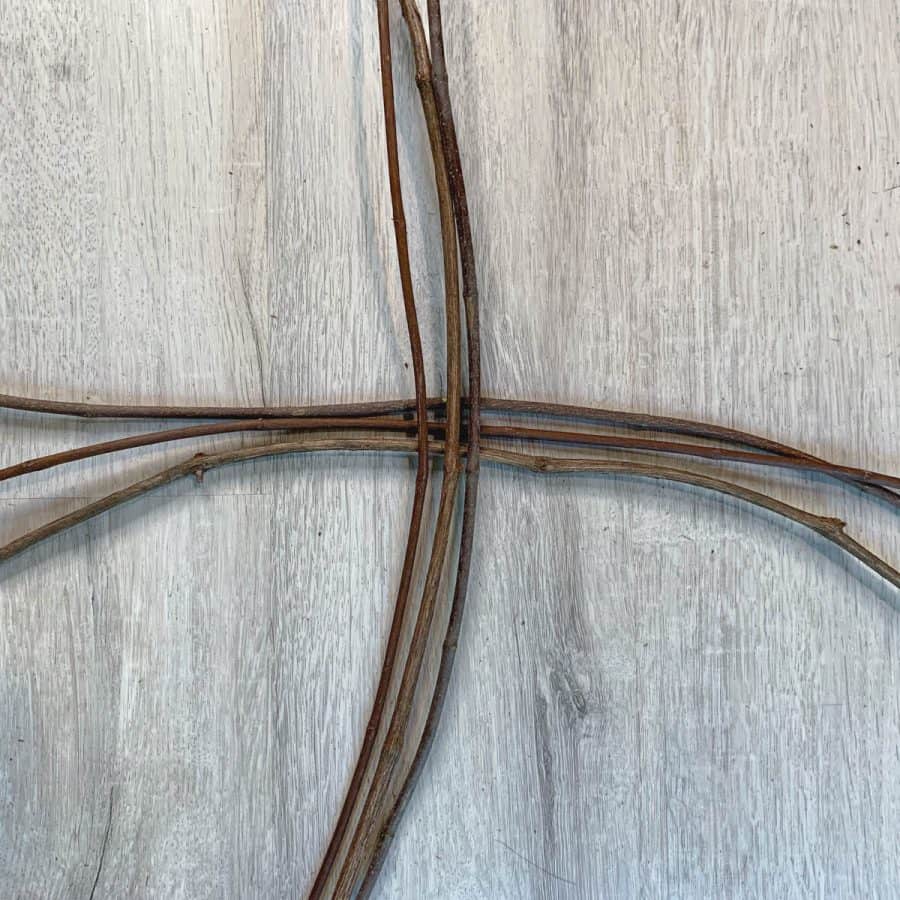
In the photo above, the vine on the left is the freshest. The one on the right is too old and dry, but I could still use the thin end of it for part of the basket.
If it doesn’t feel flexible when you pull it, it will not be flexible enough for the basket.
If you can’t find flexible vines, you can also soak them before making your basket. It’s often worth doing to be safe.
When you gather the vines, try to wind them tight enough that you can fit them in the bucket. If they are too brittle for this, you will need to soak them in your bathtub.
Fill the bucket or your tub with water and soak them for 2-24 hours. The length of time will depend on how flexible they are when you harvest them.

Before soaking the vines, remove the leaves. Please start at the thin end of the vine and pull backward on it, toward you, with your hand cupped.
This should pull off all the leaves at one time.
Also, wearing gloves throughout this project is a good idea to avoid splinters.
Cut the vines where they split into new branches, so you have long, single pieces.
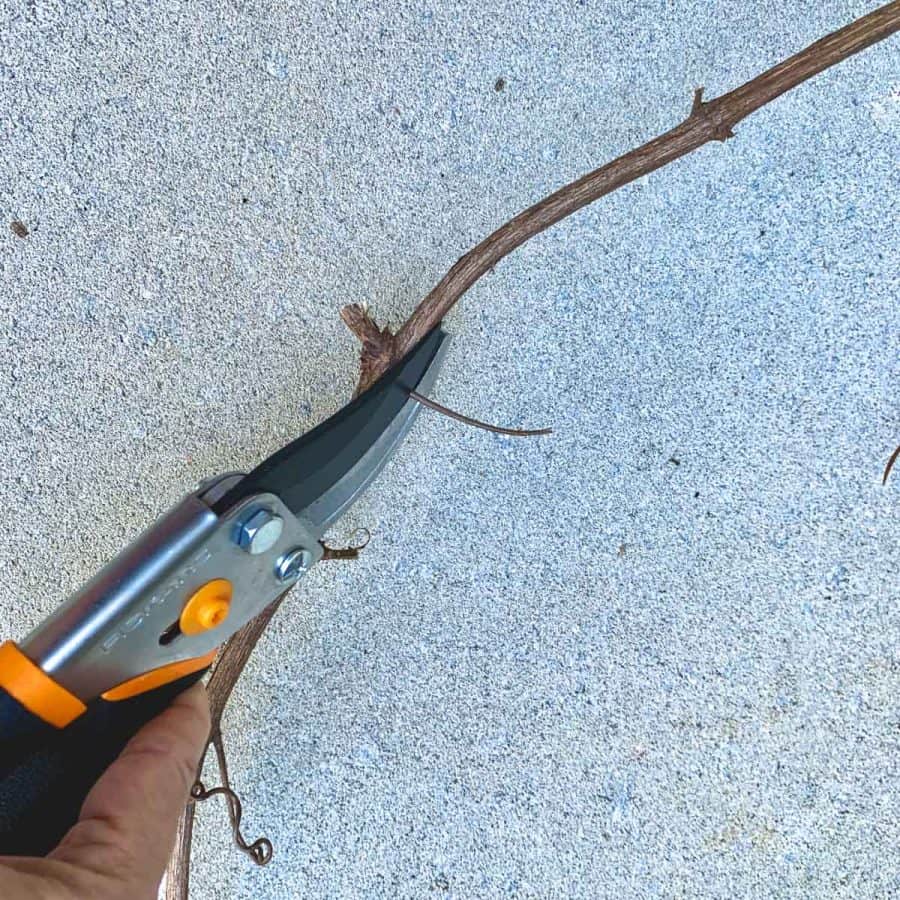
Also, remove any side shoots. Please note I didn’t remove the tendrils.

It is a design choice of whether or not to remove the curly tendrils from the vine.
It’s easier to weave without them, but I left most of mine on the vine because I prefer the natural look.
Of course, you can remove the tendrils after you have finished if you decide you don’t want them or want less of them.
Step 1. Cut The Support Pieces For The Grapevine Basket Planter
Note: I struggled to find helpful tutorials when I prepared to make this basket. So, my basket doesn’t have the correct number of spokes (support structures).
I recreated the photos for the first two steps so you’d have the proper visual with the correct number of spokes. The rest won’t affect the tutorial.
I just ended up with a basket with vines not evenly woven. I explain further down in this step why the number of spokes matters.
The basket has support pieces and woven pieces. These support pieces keep the woven ones in place and are called spokes.
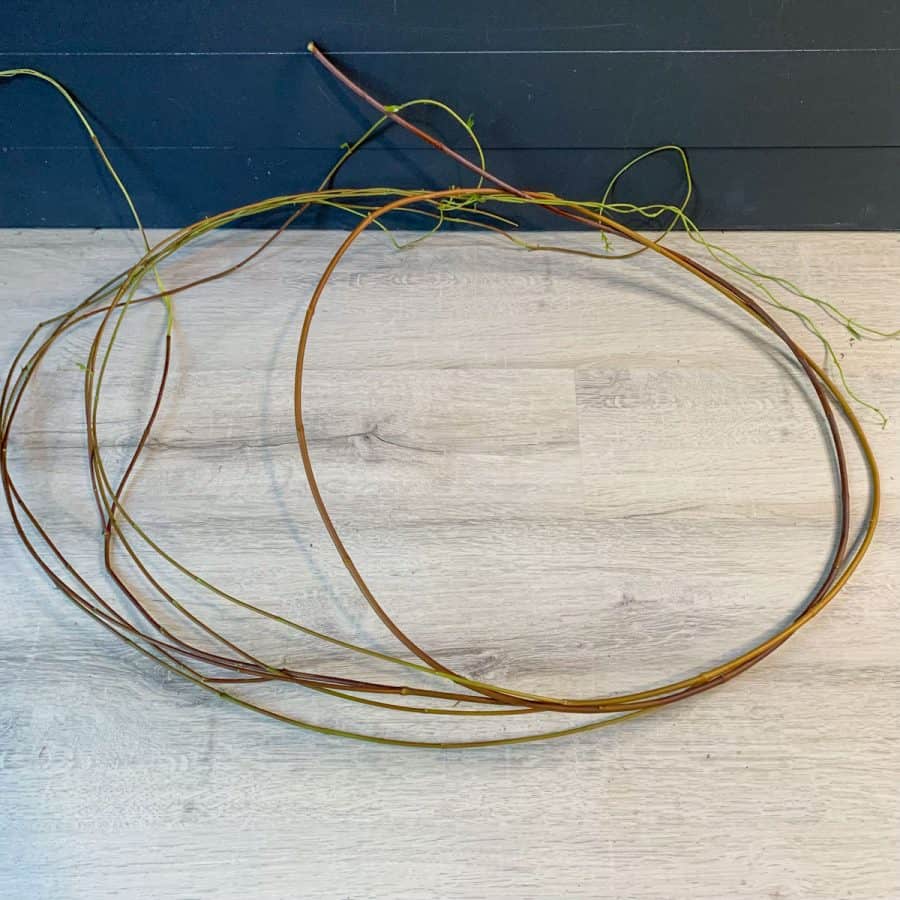
You will need six pieces of grapevine for the spokes, which need to be the same length.
To know what length you need these to be, you must first decide what size you want the basket. I chose a height of 7″ and a width of 9″.
So you will then follow a formula. Multiply your desired height by 6 (for the six spokes).
And then, add the desired width to get the spoke length. (height x 6)=X (+ width)= each spoke length
So in my case, with my desired 7″ high and 9″ wide, the formula is (7 x 6)= 42 (+ 9)= 51 inches.
Picking the right grapevine pieces for the spokes will make a big difference in how easy it will be to weave the planter basket.
The straighter, the better, and they should also be quite flexible and on the thicker side, about ¼-⅜”.
Once you find these pieces, trim them to the length determined by the formula.
Note: I had trouble finding straighter pieces of vines, so the harsh bend in a couple of them made it difficult to keep the basket from bowing on one side.
Step 2. Secure The Support Pieces With The Grapevine
There are two parts to weaving this hanging basket. The first part is tying the spokes together.
Use a very pliable and strong yet thin vine for this part. I chose to use Carolina jasmine vine for this.
The reason was that I was afraid I’d run out of grapevine before finishing my basket, and I had plenty of the jasmine vine.
It also bends very easily. And since it is rather plain looking, I wanted to save the grapevine pieces for the more visible portion of the basket planter.
First, lay the spokes on your work surface and separate them into two sets of three.
Cross one set over the other set and center them so you have the same lengths on each side. This gives you a total of 12 spokes.
You can weave in a clockwise or counterclockwise pattern, whichever is easier.

To start, weave the vine over the top of a set of three vines. And then under the bottom of the next set.
Then continue in the clockwise pattern and weave over the next set and under the last one.
You will repeat this two more times so you have three wraps completed.

Now tuck the end of the vine in and trim it if necessary.
You will now switch the pattern and wrap to alternate each spoke individually and continue in an over-under pattern.
However, since you have an even number of spokes, this won’t create a true over-under pattern, which you need for the rest of the basket.
So to deal with this, you must cut one of the spokes. You need to cut one near the place you ended your last wrap.
Also, be sure to cut the one that is in the middle of the set, right where the wrapped section is.
Note: This is where I had trouble. The tutorials I researched were unclear about when, where, and if you should cut this piece.
So I ended up with a basket with an even number of spokes during the weaving process.
Unfortunately, this doesn’t give you a nice-looking weave because you can’t alternate the over-under weave.
The lack of clarity from tutorial to tutorial is also because weaving methods will vary and depend on the type of support used in basket making.

So now, after cutting a spoke, you have 11 instead of 12, giving you the odd number required for this type of weaving and support method.
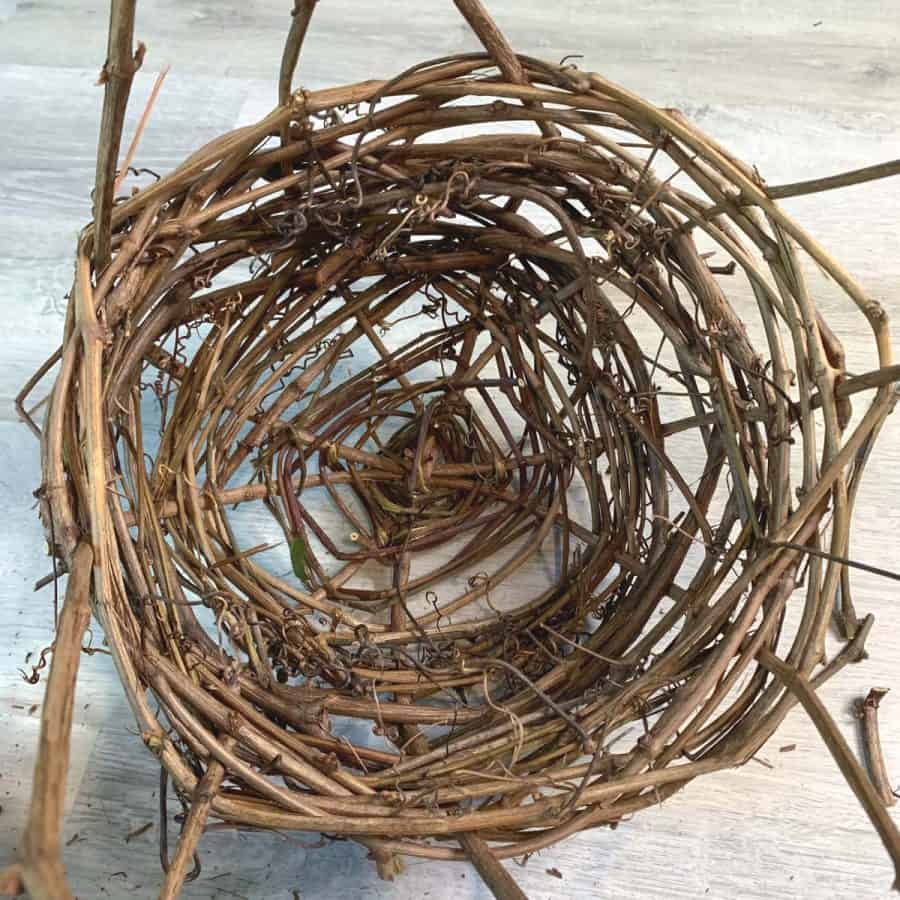
Step 3. Make The Bottom Of The Basket Planter

Now with a regular-sized vine thickness, start with the narrow end and weave in between each individual spoke.
The pieces you weave now will become the bottom of the basket. So the width you wind before you create the walls will determine the width of the basket.
I recommend stopping a little more than an inch short of your desired width since the basket has tapered sides.
Pulling back an inch or so should come closer to giving you the correct overall width.
After each weave, when you reach the end of a vine, tuck it in where you can, ideally, so the end is inside the basket. Then start the next vine where you left off.
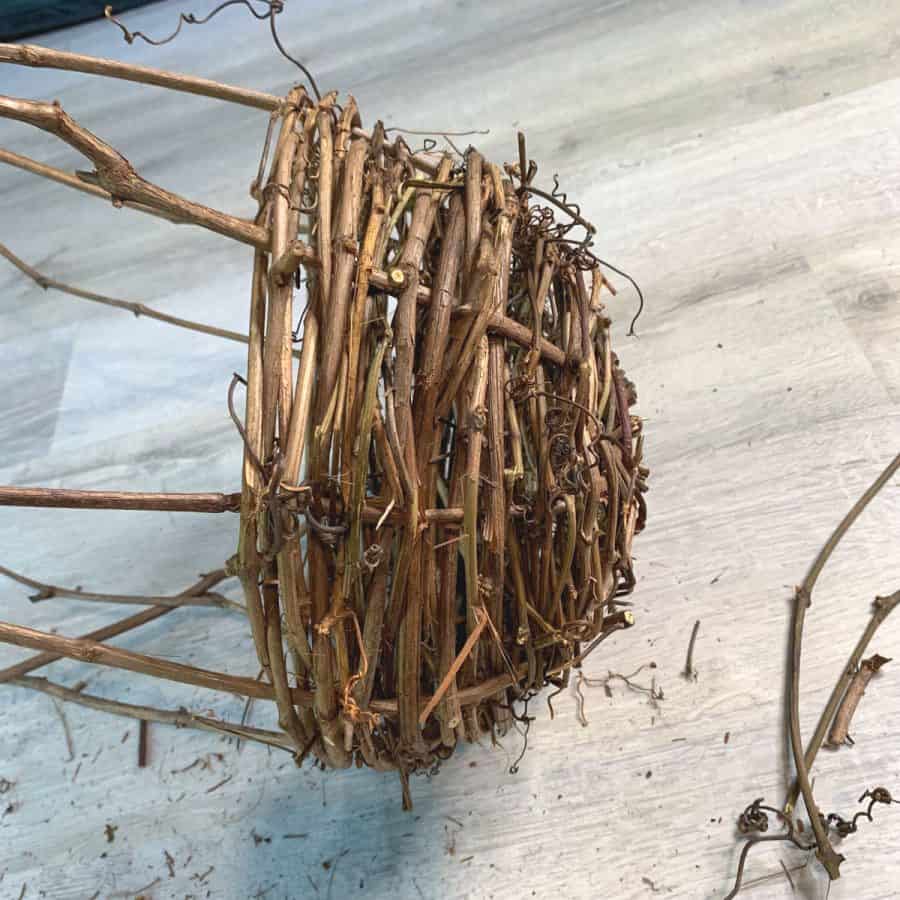
Step 4. Prep The Sides Of The Planter For Weaving
Once you reach the width desired for the bottom, gently bend the spokes upward to form the side walls.
Take care when you bend them so they don’t crack. You may notice that the spokes turn more naturally in the opposite direction from the side facing you when you weave.
In other words, when I did this, the spokes tended to bend downward, so I turned the bottom upside down and then bent the spokes upward. So please don’t force it. Instead, bend them in the direction they tend to curve.
If you crack a spoke, you should be able to replace it by sliding a new one next to it.
It won’t make a perfect basket, but it will still look good and perform well. It will look at least as good as mine with all of its flaws.
Step 5. Weave The Hanging Planter Sides

Once the spokes are angled upward –ideally, they are standing up at about a 45-degree angle.
Wind the vine around the sides and repeat the same over under the pattern.
My spokes did not want to bend this much, so if this happens, continue to form them while weaving.
It takes a bit of wrangling but is very doable. After a few wraps, they should hold in the correct upward position.

As you wrap, keep pushing down on the vines to get them close to each other.

You may notice that due to the grapevines’ natural shapes, you cannot avoid leaving some gaps.
However, you can easily fill the gaps with smaller pieces of the vine. You can fill them in as you go or wait until after you have finished the sides.
I filled in one before I finished the sides. First, slide the narrow part of the vine into the gap.
Next, push it halfway through the middle of the gap, and then weave half in one direction and the other half in the other since the spokes are closed, and you don’t have any flexibility.
When filling gaps, it is easier to work with pieces that are about 12-18″ long. These get tucked in the same as any other piece.
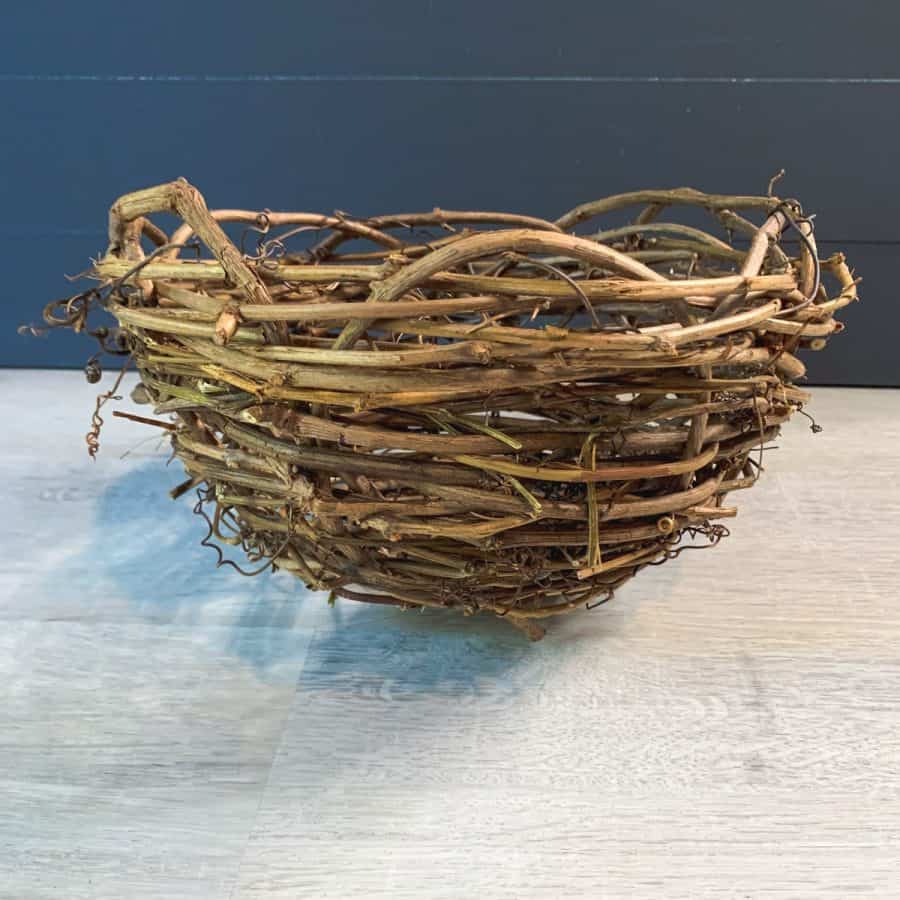
Here’s what my basket looked like with only filling in the one gap– better already.
And this was after I finished the sides and filled the rest of the gaps.
Step 6. Finish The Top Rim Of The Grapevine Basket Planter

The remaining length of each spoke gets tucked in. First, check to see if you need to trim them.
Each spoke will get tucked into a spoke that is two spokes away from it. So not immediately next to it, but the one after that.
To know if it needs trimming, bring each spoke over without tucking it in and see if it will extend past the bottom of the basket.
If it does, cut it to stop at the bottom. When you tuck the spokes, they should stop right to where the sides and bottom meet.
Then work your way around the top and tuck each one (skip every other) into the same spot and push it down to the bottom.

Step 7. Prep The Grapevine Basket For Hanging
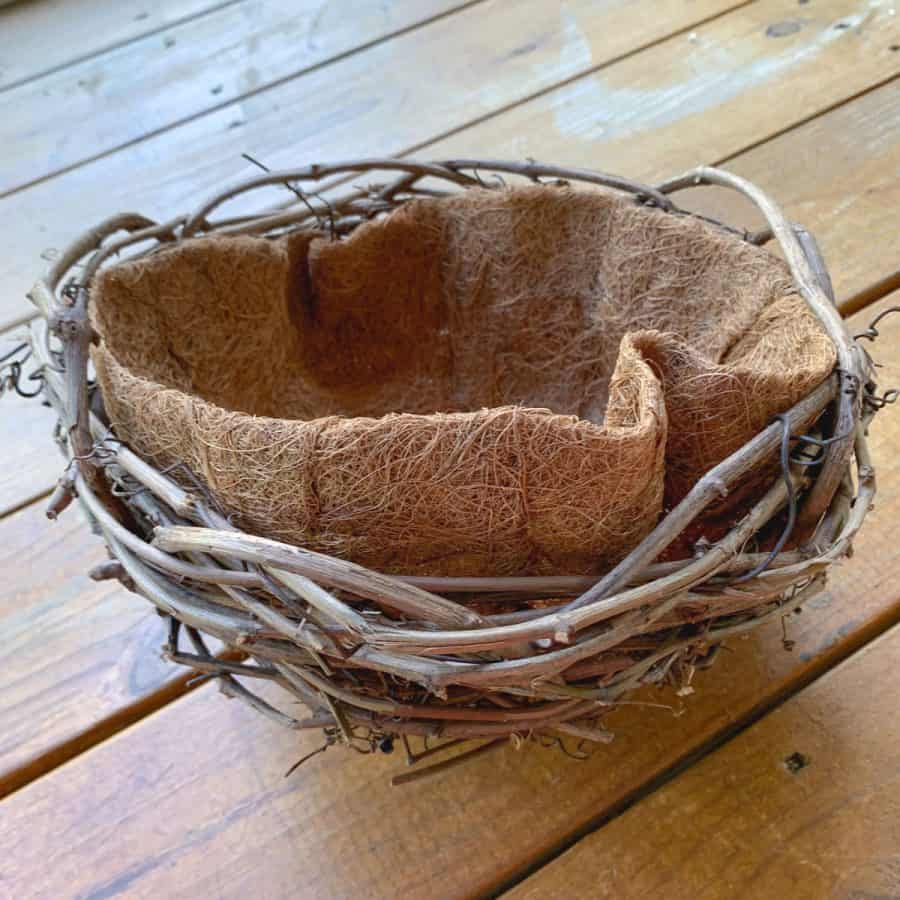

Place the coconut fiber liner into the basket and trim it to fit with scissors, if necessary.
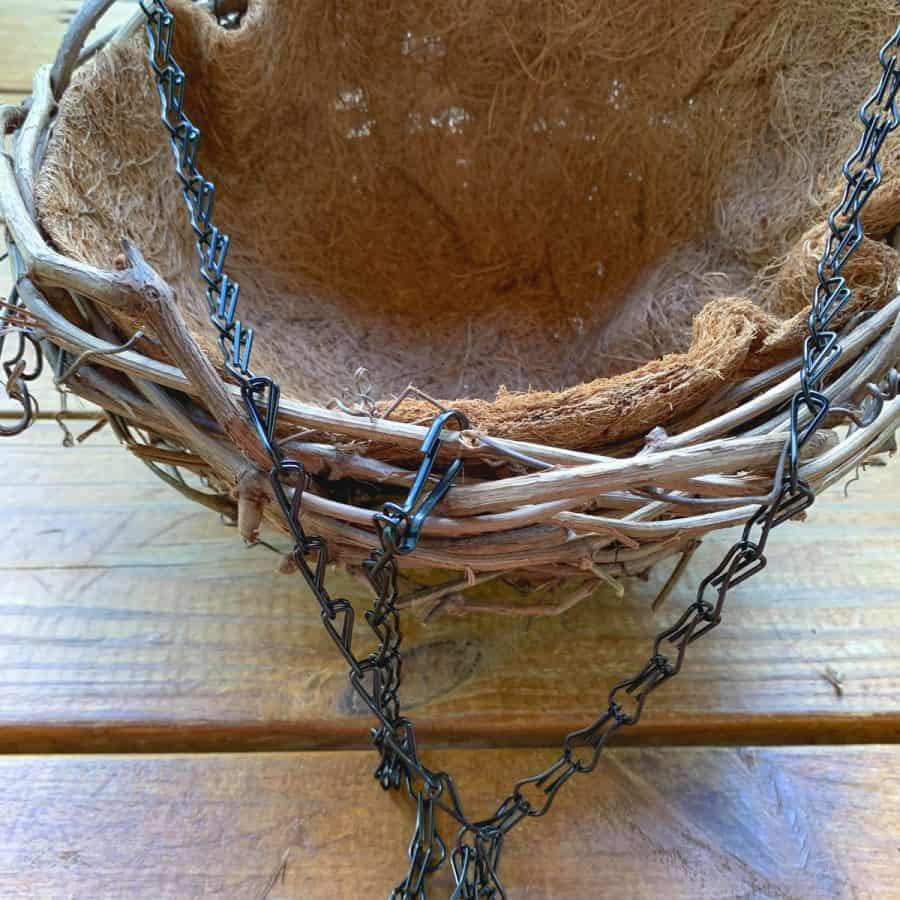
Attach the hanging hardware clips to the sides of the basket. Again, you’ll need to find sturdier pieces that won’t pull out.
These pieces will be in the middle area of a vine, not near a tucked end.
To check this, lightly tug on a few pieces to ensure you’ve got a side piece that is fully secured, then attach a clip to that piece.
You may find it difficult to open the clip wide enough to fit the vine. In that case, use needle nose pliers to hold the clip open.
Do that for the three chain clips that attach directly to the basket.
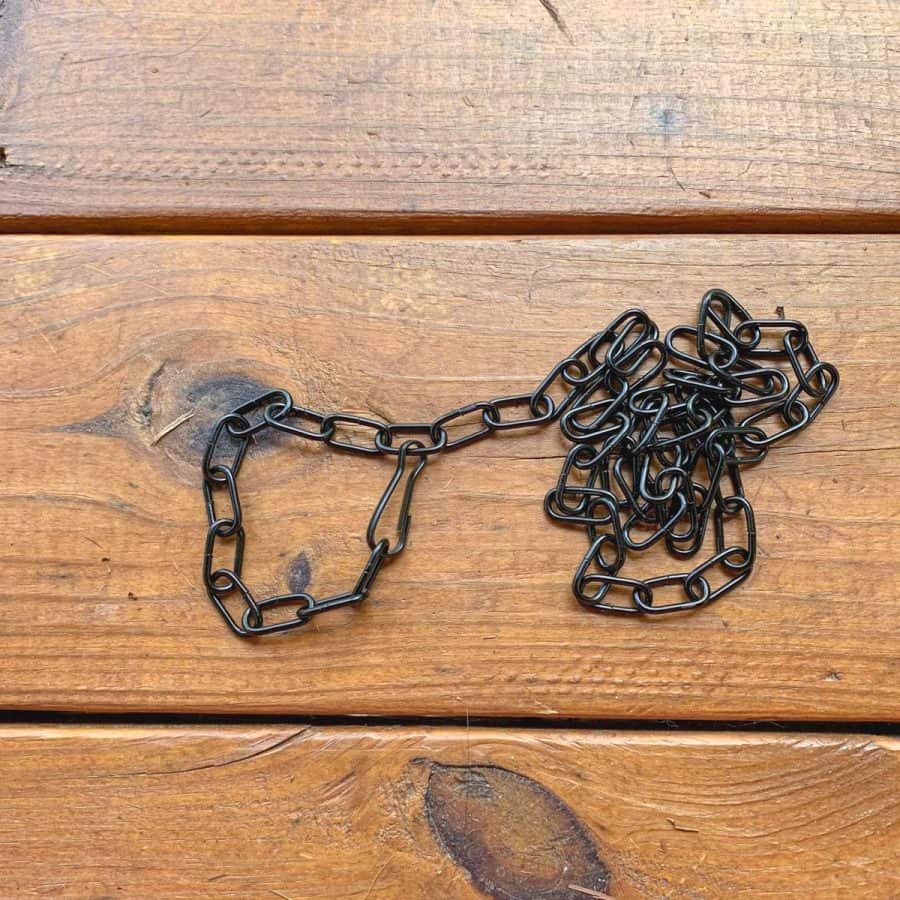
The hardware allows the planter to hang 18″, but I needed it to hang lower- for a total of 36″, so I bought an extra piece of chain 2 ½’ long.
It comes with an s-shaped eye hook, and the idea is that you connect that hook to the wall or ceiling.
The hardware comes with enough sets to hang four baskets.
And since I only needed one, I instead used the s-shaped eye hook to connect the long chain to the basket chains.
I then used an extra clip from one of the sets to create a loop at the other end of my long chain. Then I attached that to the hanger hook attached to the wall.
Step 8. Add Plants To Your Natural Grapevine Hanging Planter
While my porch never gets any full sun, it gets a tremendous amount of bright light all day.
The flowers I bought, Scaevola, are full sun, but fingers crossed, they will still get a few blooms.
Remember, if you use the coco liner, change it out each year. If you have annuals in the planter, you likely will remember to anyway.
Do you want lots of ideas on what the best plants are for hanging in a basket planter? Here’s an article with a list of 25+ perfect trailing plants, for both indoor and outdoor plants.
Don’t forget to Pin it for later!

Don’t forget to Pin it for later!
DIY Hanging Grapevine Basket Planter
How to make a hanging planter basket using grapevines. A step by step tutorial for a DIY planter using natural materials.
Materials
- Grapevine
- Pruning shears
- Gloves
- 5 gallon bucket
- Coco liner
- Scissors
Tools
- Please see the full materials list above the tutorial for details and links.
Instructions
- Cut The Support Pieces For The Grapevine Basket Planter With Pruning Shears
- Secure The Support Pieces With The Grapevine With An Over-Under Wrap
- Make The Bottom Of The Basket Planter By Alternating The Grapevine Weave Over and Under
- Prep The Sides Of The Planter And Bend The Spokes To Angle Them Upward
- Wrap The Sides Of The Hanging Planter With The Over-Under Weave
- Finish The Top Rim Of The Grapevine Basket Planter By Tucking The Spokes
- Prep The Grapevine Basket For Hanging And Connect The Hardware
- Add Plants To Your Natural Grapevine Hanging Planter

So amazing and impressive Ellen. We’ll done!
Thanks Sara!
That’s coincidental – I just looked at how to harvest some of the grasses I see around here to also weave a basket. Decades ago I made grape vine wreaths and they were fun. Great job!
Hi Barb,
It’s an interesting hobby, and definitely a skill to learn. I just made a wreath with the vines too- coming shortly. Don’t you love that you can make things with nature that surrounds you? Like your cool eco-printed fabrics!