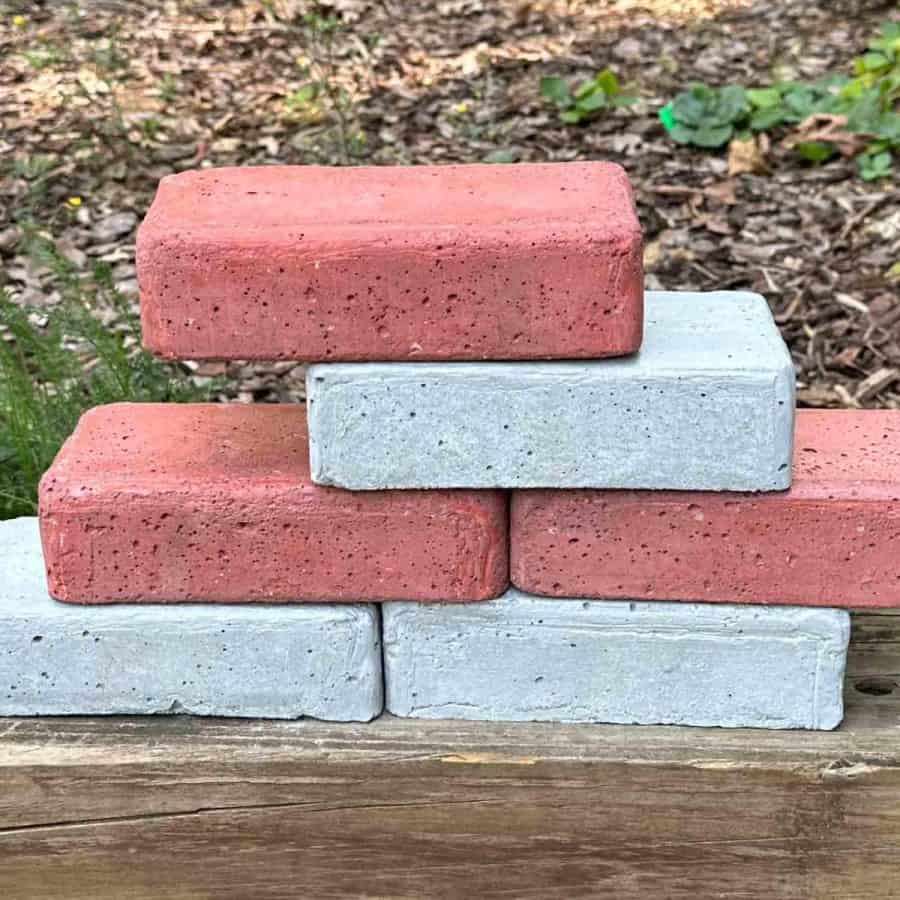
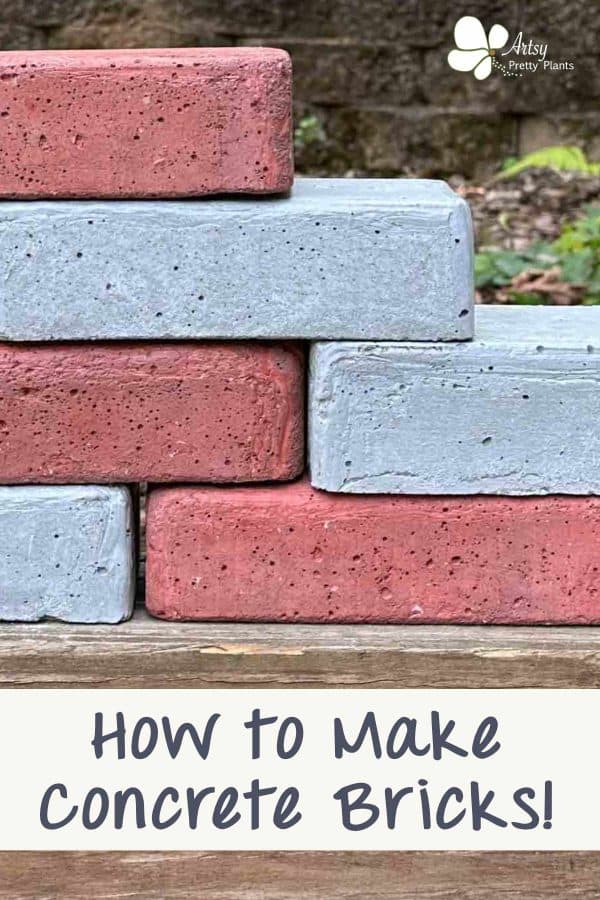
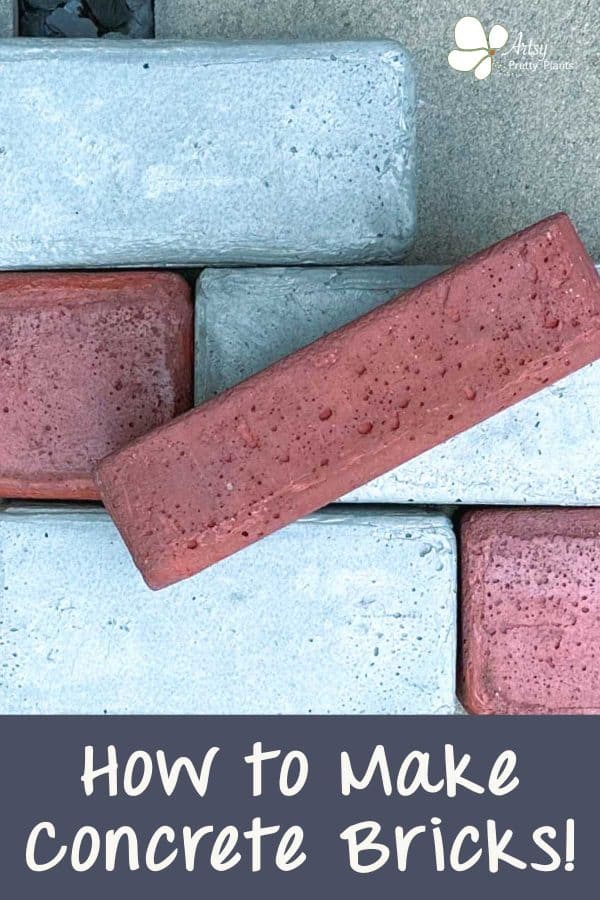
Make DIY Concrete Bricks (That Look Real)
Finally! The tutorial that provides the solution to your burning question about how you can make DIY concrete bricks!
Why make a concrete brick, you ask? There are many reasons to make your own bricks.
You can use them in place of concrete pavers or to fill gaps where you may have missing bricks along a path, patio or brick wall. Or how about using them to line your garden beds?
Or perhaps you hadn’t heard DIY concrete bricks are all the rage in home decoration as door stoppers?
Making a rectangular form the size of a brick using concrete is easy.
But making a rectangular form where the final result is an authentically shaped older, worn-looking brick, rather than a brick with sharper square corners, was a bit more of a challenge.
However, with the combination of a few different materials, it is easy to do. Read on for the detailed instructions in the tutorial below for how to make concrete bricks.
Some of the links on this page have been provided as a convenience for finding materials. These links may also be affiliate links. As an Amazon Associate I earn from qualifying purchases, at no extra cost to you.
I only recommend products I’ve used and loved, unless otherwise stated. Click here to read my full disclosure policy.
DIY DIFFICULTY LEVEL | Easy
How To Make DIY Concrete Bricks List Of Materials
- Concrete mix
- Red colorant
- Disposable bowl
- Plastic cup for scooping mix
- Durable nitrile gloves
- Safety glasses
- Safety mask– rated for silica dust
- 24×24” Pink rigid foam insulation board
- Disposable blade cutter– snap off
- 100% silicone caulk
- 2” nails with wide head
- An old brick- or similar (optional)
- Diamond sanding pads or low grit sandpaper

By the way, a few other DIY concrete path tutorials you may like are these large stepping stones, a mosaic stepping stone, and pavers that are stamped!
How To Make DIY Concrete Bricks Tutorial Steps
Step 1. Cut The Pieces For The Forms To Hold Your Concrete Bricks

The size of the bricks will be 7 ½” x 3 ½” and 2 ¼” thick to match the sizes used since the 1920s.
Using a 24” foam insulation board, you can make 2 bricks at a time. You could technically set this up to make 4, but you couldn’t vibrate the mold without it coming apart.
This mold should be reusable for at least 3 castings.
The first step will be to cut 3 pieces from the outside edge that are 7 ½” long by 2 ¼” wide.
Cut so the long edges on one side are the factory edges of your board. This ensures you have straight lines.
Next, cut the two end pieces 10” x 2 ¼”. Again with the long edges along the factory edge on one side.
Cut the base piece at 11 x 10 ½” from the area you just cut the 7 ½” long pieces (non-factory edges). The base doesn’t need the edges to be straight.
The dimension accounts for an extra 1”to give you enough space to caulk the outside and provide extra leverage to make it easier when you demold.
Step 2. Fasten The Mold
First, mark a 10×9 ½” square within the 11×10” base piece. Then trace the locations of each piece onto that.
The three short pieces will butt up to the two longest pieces. Space the dividers so there are 3 ½” between them.


Label the locations of each piece on the base with a letter- A, B, C, etc. And mark the corresponding parts they match up to. It’s also a good idea to add arrows so you know which direction the pieces should be facing.
You probably won’t end up separating the whole mold, but having them marked will ensure you’ll know how they fit back together –just in case.
Use nails as a first step for fastening the mold pieces together. Each piece will have two nails where they connect.

Start from the bottom and press two nails into the base board up into one of the long sides and near each end.
Take care to avoid accidentally pushing the nails into the mold cavity openings.

Now do the same with the rest of the pieces, except for one of the long edges. You’ll fasten this after caulking since it will be easier to create the mold indents in the next step and caulk without it in place.
Then place 2 nails into the side of each edge to secure them.
Step 3. Add Character To Your Bricks
Since you are casting this in reverse, the concrete cast against the base part of the foam board will be the top of your brick. The bottom will be the concrete that will sit at the top of the form (exposed to air).
So to give the top the natural nicks and roughness of an older brick, create indents in the base piece of foam

If you have a brick, press it into the foam base. If you don’t have a brick, anything with a rough surface will work –a rock, a piece of paver stone, or the bottom of another concrete piece with a rough texture.
I used another piece of concrete, one of my test pieces for this project, as my “brick.”
You may need to rock it back and forth in the cavity to get the indentation details to come through. I also pressed the corner of my “brick” into the middle bottom of the mold in a couple of spots to add more character.
You don’t need the marks to be too deep. The concrete bricks will still grab the details with just slight indents.
Plus, each time you make another casting, it will naturally get more scratched and pick up some more character.

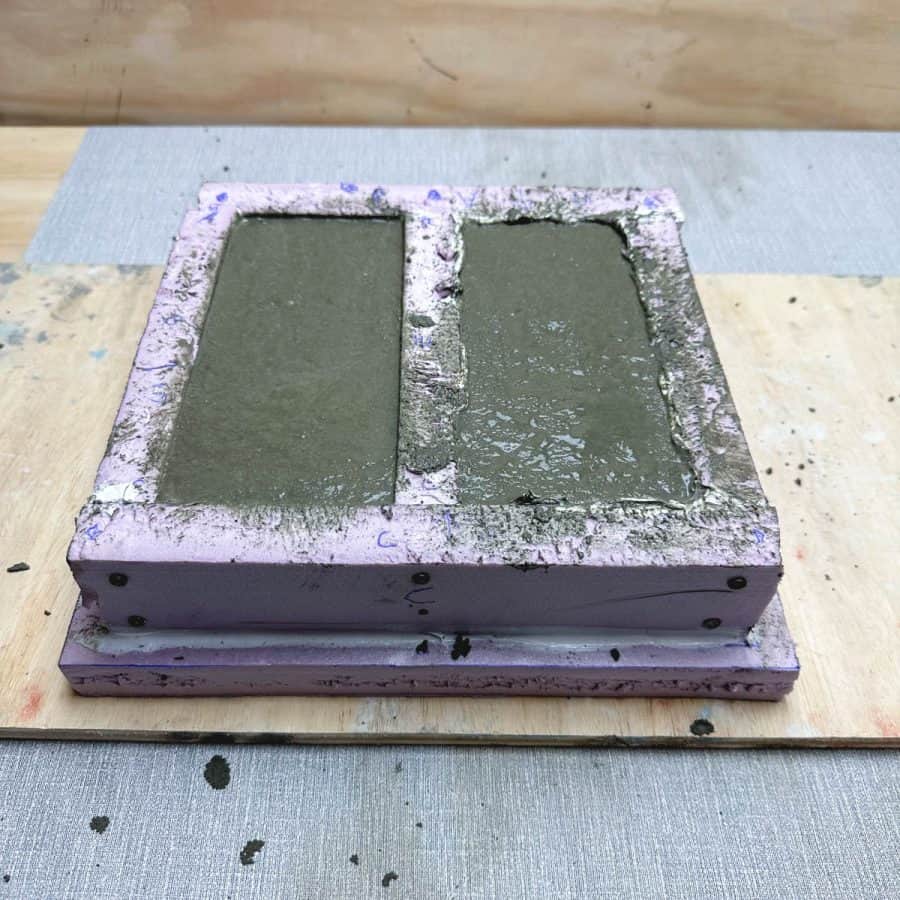
Next, caulk the inside of the mold cavities. The wider the curves, the more rounded your bricks will be. Be sure to caulk each edge and the corners.
Note: You may wonder if the caulk is necessary. It is required in two ways. One is that you don’t want the concrete to leak.
The other is that although you can shape some of the brick by sanding, sanding still doesn’t fully offer as authentic of a look as the curve of the silicone does.
Expert Tip! Whether your caulk lines have a wide curve or narrow, try to ensure the top and bottom edges gradually flatten so they are level with the pink foam. This is so you don’t end up with a groove created by the silicone instead of a curve.
When you finish caulking the corners, go ahead and fasten the remaining long-edge mold piece and caulk it.
If you intend to view these bricks from the side, round the bottoms. If you notice, on the cavity on the right, I added a bead around the top.
It turned out not to be necessary as these were easily sandable and were easier to curve that way than with the caulk.
The top bead was somewhat difficult to do and didn’t fully achieve the look. So skip the top bead of caulk, and you will sand it after instead.
In addition to caulking the inside, I recommend caulking the outside of the walls to add extra precaution to help prevent leaking. But if your foam edge piece cuts were nice and straight, then you may be okay without doing this.
*You will need to wait about 24 hours for the caulk to cure before it will be dry and strong enough to cast the concrete.
In the meantime, place a piece of scrap plywood that is similar in size underneath it. It will help with vibrating in the next step.
Step 4. Mix and Cast The Concrete
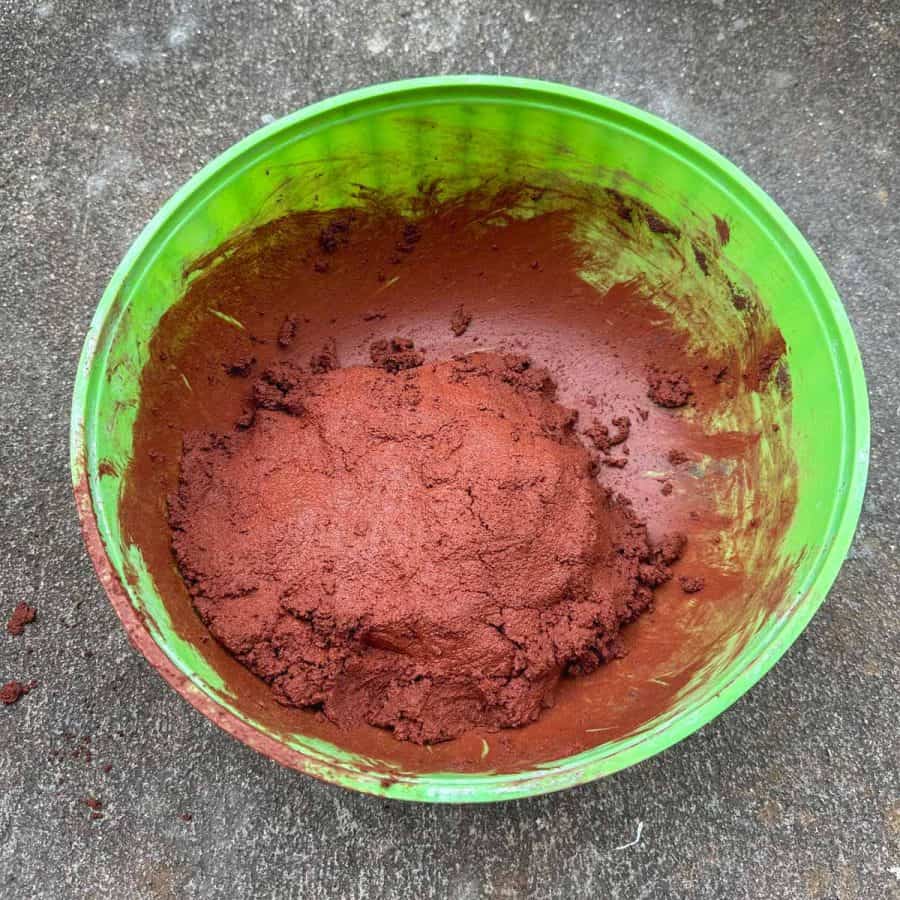
I used about 5 or slightly more cups of dry mix for 2 bricks. For adding the colorant, it will be much easier to get a uniform mixture if you add the red colorant to the dry mix– before adding the water.
I added about 3 tablespoons of color, but the color was definitely at the saturation point. It was likely more color than necessary. The red I linked to in the materials list won’t fade as my colorant tests over time have shown.
Please note that when adding red to the grey dry mix, it will look like you don’t have enough colorant. But trust me, once you add water the color will be greatly enhanced.
Hint: It’s hard to compare a photo with real life, but if you start with 2 or 2 ½ tablespoons, then once mixed with water, if your color looks like mine, your brick should turn out as red as mine.
But it’s also okay if you want to be safe and add 3 tablespoons.
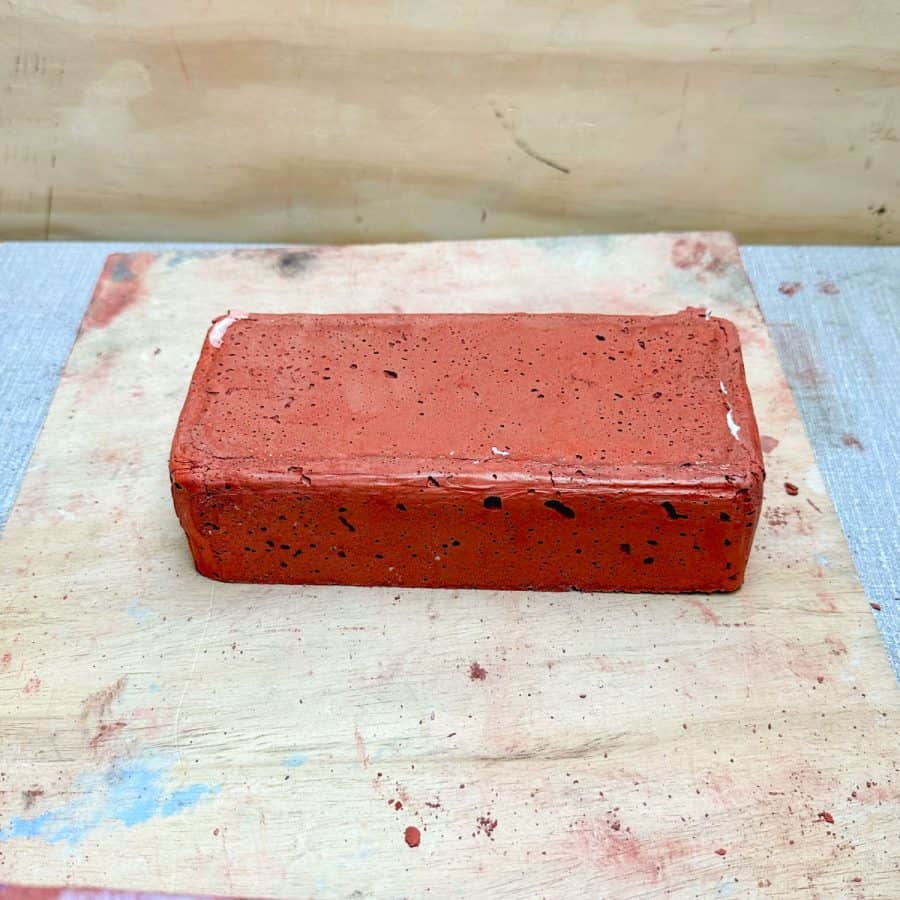
Now when adding the water, don’t add too much water. Go slowly when adding it. You should add as little as possible.
As in my photo above, you want just enough for the concrete mixture to hold together and not crumble apart.
This photo is from the first time I cast the bricks when I didn’t use the red colorant.
Place the concrete mix into the cavities. Shake the base to let the mixture settle.
You’ll need to vibrate this to eliminate air pockets and hopefully avoid some large pinholes.
To vibrate, carefully lift the board and tap it on the work surface and use your fist to tap it with your fist from underneath.
Take care that the mold doesn’t slide off the plywood. Rotate each side of the mold as you do this.
Let this cure for about 24 hours.
Expert Tip! Keep your concrete bricks out of direct sunlight and wind during this curing and drying process.
Step 5. Demold The Concrete Bricks

To take apart the mold, remove the nails from one long edge, where the dividers are, and from the bottom of the edge.
Then peel the edge back, but keep it attached to the base. You’ll notice the caulk lifts off one of the bottom or edge pieces and remains intact with the other.
Pull up on the bricks to remove them from the mold cavities.
If you plan to make more than two bricks, try to keep the caulk intact as much as possible to keep the lines of the mold cleaner and the bricks looking good when repeating your castings.
The ideal situation is that the caulk stays in place and intact, or you will start getting extra caulk lines on your bricks. However, as I mentioned before, these can usually be sanded off fairly easily.
Sand the rough edges on the bottom of the bricks (the concrete is exposed to air inside your mold).
I used my diamond grit pads for ease and speed, but any low-grit sandpaper will do the trick.
You can also round your top edges more if you need to on top, or if you need to smooth any caulk lines, just take it slowly in these areas to make sure you like how this looks.
To make more castings, please move on to the next step. Otherwise, skip to Step 7 for sealing information.
Step 6. Make More Brick Castings
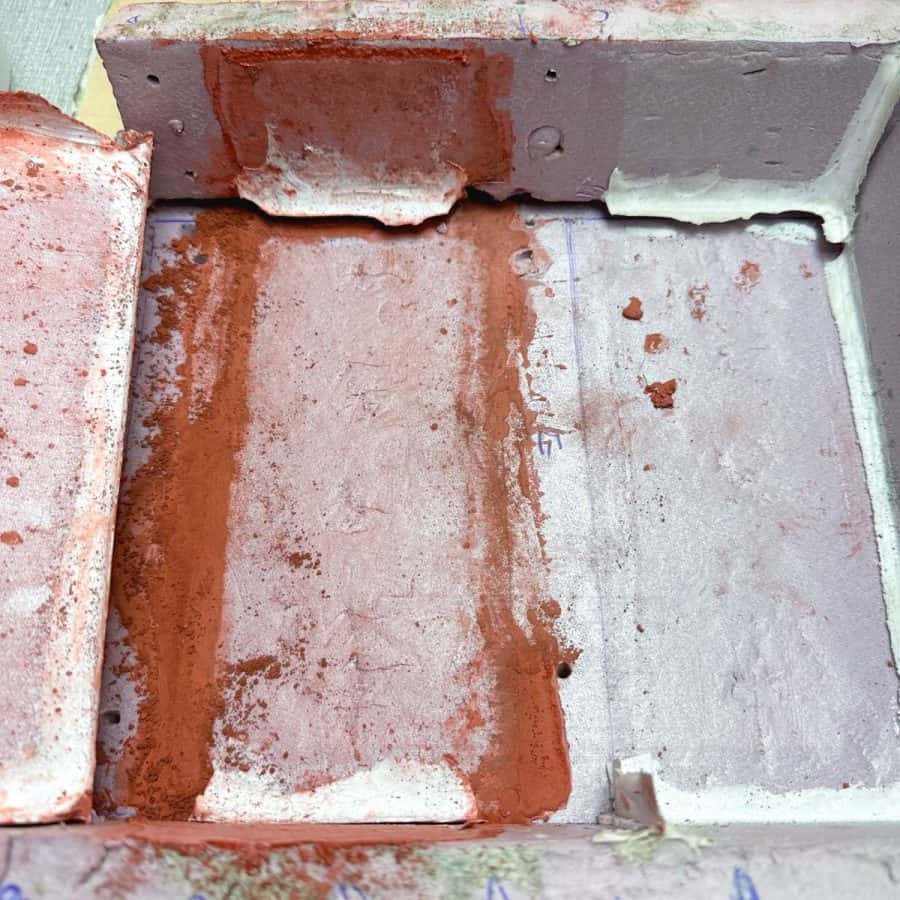
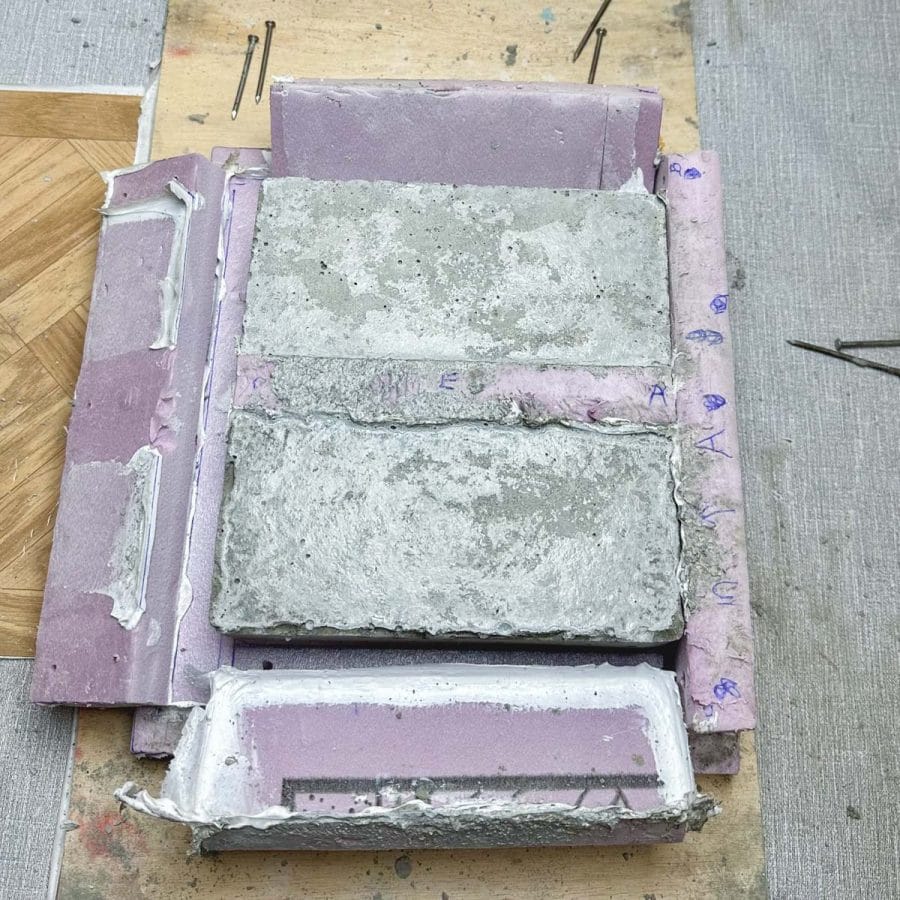
This photo shows the mold’s appearance after removing my second casting (just on the left).
You can see how much caulk lifted off. After the first casting, the only caulk that lifted was the center divider and one long edge.
After this casting, the caulk didn’t want to lay flat when I went to cast my 3rd brick.

Compared to the grey brick in the first casting, you can see some obvious lines where the caulk is trapped on the red brick.
But it was very easy to sand the lines down. I used 100-grit paper at first, just lightly, and then a 220 grit.
To repeat any casting of your concrete bricks, the first thing to do is wipe off any leftover concrete left on the foam with a wet paper towel.
Then reinsert the nails into the foam pieces. If some are pretty loose, you can create a new hole.
Once the sides and base are back together in good shape, you can mix the concrete and repeat from there.
With each casting, vibrating becomes more challenging as the mold form has lost some strength, and you’ll need to be more gentle.
So expect that you’ll have some extra pinholes, but they seem to fit right in with the brick look.
If you are wondering, you can recaulk the mold, but I don’t think it’s worth it considering the time. I think the easiest way is just to sand these.
Step 7. Seal The Bricks
I recommend you seal your concrete bricks to help protect them from the elements. It will help protect them from stains if you are placing them outside.
This is especially if they are in contact with bare ground since they may get discolored from the soil.
Sealing is highly recommended if they will be indoors so you don’t have concrete grit and dust continually rubbing off them.
Any sealer will do, but I like this one. I use a foam brush and “paint” the sealer for this type. Apply a second coat 24 hours later if you’d like.
You may also love this easy concrete garden orb tutorial!
Don’t forget to Pin it for later!
DIY Concrete Bricks
Make authentic-looking DIY concrete bricks! An easy tutorial for making bricks to fill in pathway gaps or line your garden beds with.
Materials
- Concrete mix
- Disposable bowl
- Plastic cup for scooping mix
- Durable nitrile gloves
- Foam insulation board
Tools
- Please see the full materials list above the tutorial for details and links.
Instructions
- Cut The Pieces For The Forms To Hold Your Concrete Bricks
- Fasten The Mold Using Nails With Large Heads
- Add Character To Your Bricks And Make Indentations Into The Mold
- Mix and Cast The Concrete- Use Red Colorant And Don’t Add Too Much Water
- Demold The Concrete Bricks Carefully. Try Too Leave The Caulk Intact
- Make More Brick Castings Follow The Steps Starting From Fastening With Nails. Don’t Reapply The Caulk.
- Seal The Bricks With A Concrete Sealer And Brush


enfin la recette de la fabrication de nos propres briques ! je pense qu’avec ces explications, il y a plusieurs possibilités quant à la forme et l’épaisseur de nos briques. j’ai bien hâte de débuter… merci