DIY Grapevine Wreath With Lights
In this tutorial, I’ll show you how to make a beautiful DIY grapevine wreath with lighting. It’s a simple and fun craft project that brings a warm ambiance to your front door or fireplace mantel.
With the holiday season around the corner, it’s time to start thinking about decorating.
And I love to incorporate natural items into my home decor. And Christmastime lends itself to all kinds of options.
I’ve seen some beautiful grapevine wreaths, so I decided to take advantage of the wild grapevines growing in my yard to make my own wreath.

A grapevine wreath is so much fun to make, and if you’re short on time, it’s a perfect DIY project because you can make one quickly.
You may be wondering, what other vines make good wreaths?
Grapevines aren’t the only material you can use. Other vines that make good wreaths are bittersweet, clematis, wisteria, English ivy, and honeysuckle vine.
But, if you can’t find vines growing wild in your area, local craft stores also sell them.
Another project I made with grapevines is this cute hanging basket planter. And sticking with the utilization of items from nature, here is a bouquet of flowers made from Sweetgum tree balls.
Some of the links on this page have been provided as a convenience for finding materials. These links may also be affiliate links. As an Amazon Associate I earn from qualifying purchases, at no extra cost to you.
I only recommend products I’ve used and loved, unless otherwise stated. Click here to read my full disclosure policy.
DIY DIFFICULTY LEVEL | Easy
List of Materials For How To Make A DIY Grapevine Wreath
- Wild grapevines
- Pruning shears
- Gloves
- LED Fairy lights battery-powered
- Scissors
- Hot glue gun and glue
Materials Note:
The lights are 16′ long, but I could easily trim them. See step 5 for how to cut them.
Lights that are shorter come with batteries that only last a few hours, which is why I opted for the longer length.

A DIY Grapevine Wreath Tutorial Steps
First, decide what size you want the wreath to be. The size you want may depend on where you’re putting it.
For instance, if you decorate your front door with it, make sure it’s an appropriate size.
Next, there are style considerations. Some wreaths are twisted and tight. Some are twisted and loose.
This results in a different look than the type of wreath I made. In my opinion, a twisted wreath is more formal looking, whether it’s loosely formed or tight.
My informal, rustic wreath is just slightly easier to make.
Step 1. Harvest The Wild Grapevines For Your DIY Wreath
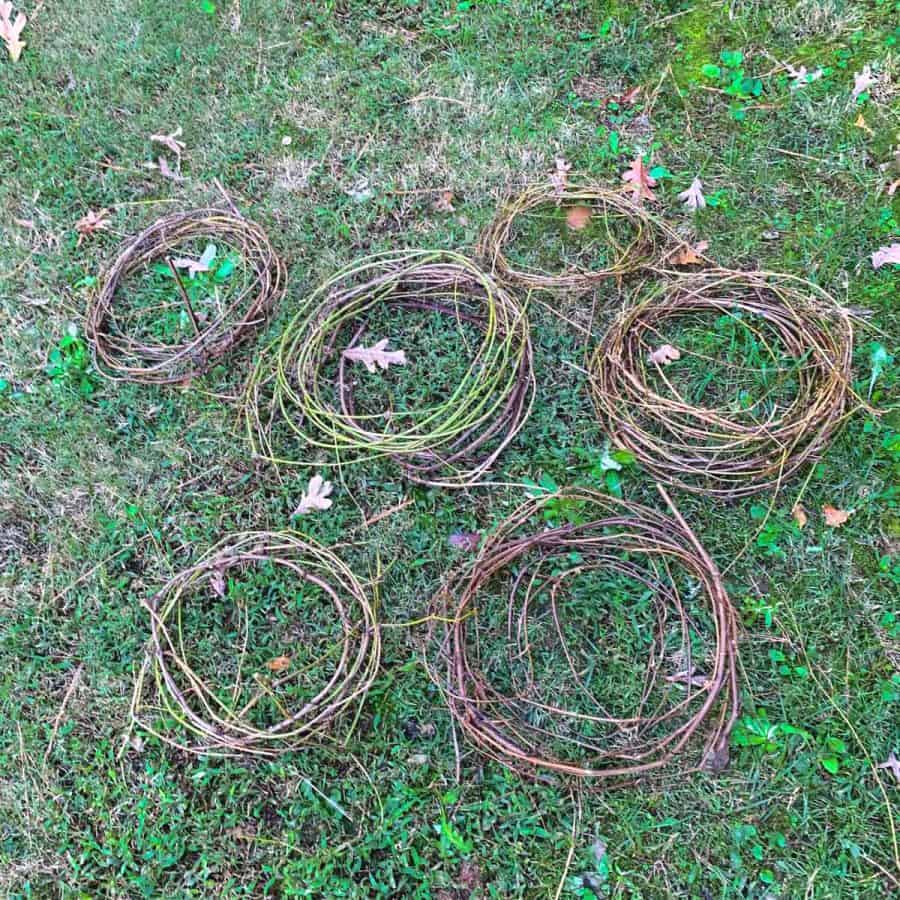
Gather the grapevines. You’ll need reasonably long vines. It will take several runs of grape vine to make the wreath.
My best guess is that I used at least 30 feet, and my wreath measures 18″ in diameter and about 3″ thick.
Harvesting grape vines when they are alive and still pliable is best, but also, please consider the wildlife that may depend upon the grapes for food.
For more wreath inspiration, here are 41 ideas for fall wreaths and a wine cork wreath with decorative Christmas elements.

From an ecological perspective, there are two things I took into consideration.
One is whether or not it was smothering a tree, and two is whether or not it is providing a food source for wildlife.
The grapevines by me are wild and not so tasty. Some of the wild grapevines were growing over dead trees, so I left those areas uncut so that the birds could have food during the fall.
By the time the berries are gone, the vines here are brittle, so I prefer getting them earlier than in the winter when the berries are gone.
Plus, most of the vines I pulled were very young and hadn’t produced any berries.
The best grapevines to pull for making a wreath will be relatively fresh.
An old vine will be brittle and snap and shouldn’t still be green like new vines.
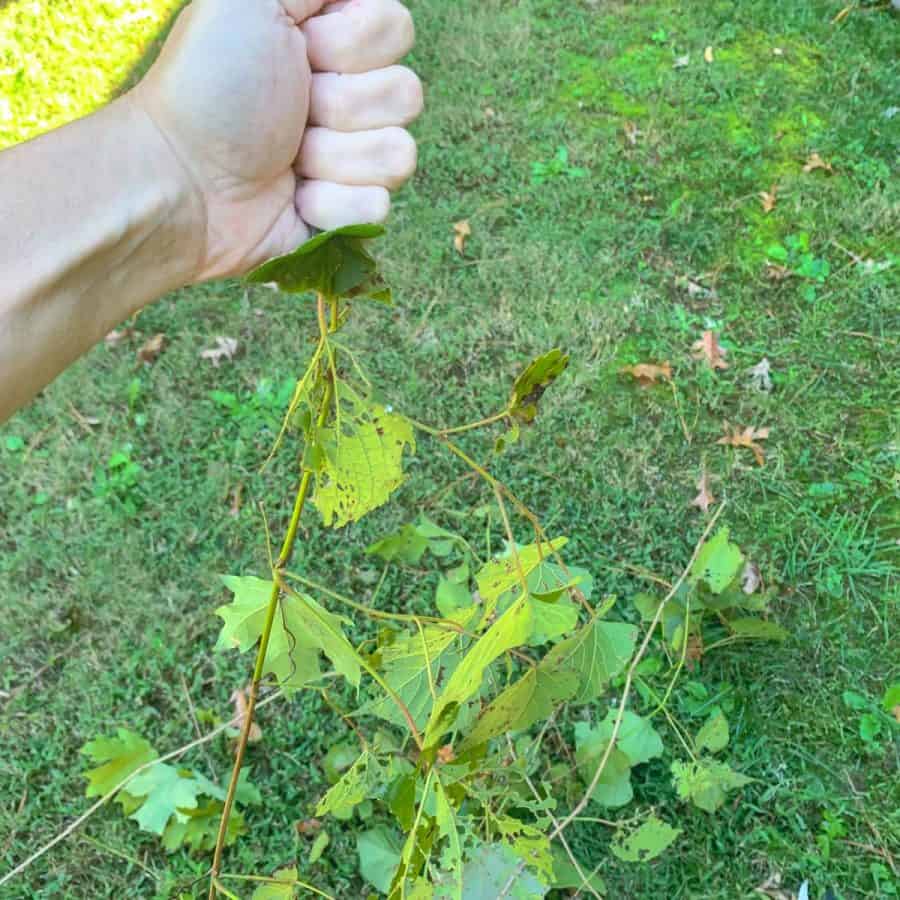
To harvest the vines, use pruning shears to cut the vine near the ground or where it starts to be about ⅜” thick.
Once you cut it, you should be able to pull the vine free from the tree. I had some pretty gnarly vines and had to snip off some of the lower dead branches from one of the trees to get one of my vines free.
Step 2. Store The Vines

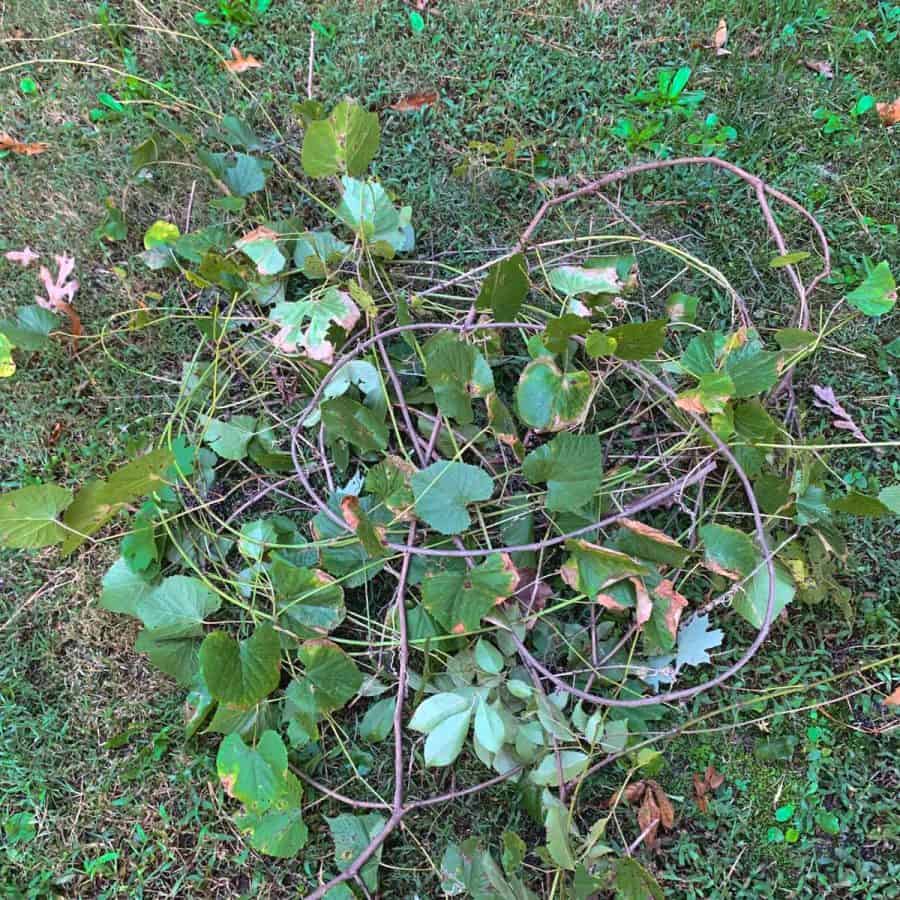
What Not To Do: Don’t leave the leaves on when you coil the vine and place it inside the bucket.
Remove the leaves soon after you pull the vine. It will be easier. I made an even bigger mistake by letting the vines soak in water with the leaves on them.
This made them especially difficult to remove, plus the leaves decayed before I was ready to start the project, which left a slimy build-up on the vines.
I had to wipe them down and let them sit in the sun to get the slime off, not to mention the smell.
The best way to remove the leaves is to pull them off backward, much like if you’ve ever removed rosemary leaves from the twig.
Start from the narrowest part of the vine and cup your hand around the vine. Then bring your hand toward you to pull them off in one long swoop rather than one at a time.
Now start coiling the vines tightly enough to fit inside the bucket. If your vines are too brittle for this, jump down to the next step.
Press each section of vine down into the bucket until you reach the top. With my vines very compressed, it was just enough for me to complete my wreath.
It may be possible that it’s been very dry in your area, and the vines are too brittle to wind tight enough to get into a bucket.
If that’s the case, then wrap them loosely to transport them. You will soak them later to soften them.
Now, depending on how wet the weather has been, these vines may be flexible, so if you plan on making your wreath now, you are all set.
However, if you make them later on, you will be able to soften them. See the next step for how to soften the grapevines.

Step 3. Prep The Vines For Wreathmaking
If your grapevines were brittle and could not coil them, you will need to soak them now.
Loosely wrap them enough that you can transport them. Fill your bathtub with water and let the grapevines soak for a minimum of two hours and up to 24 hours.
Once they are flexible, either store them following the previous step of coiling them and placing them into the bucket (without water) or make the wreath now.
If you previously coiled your vines, you can store them this way for a couple of weeks or soften them to begin making the wreath.
To soften them, use a garden hose to fill the bucket with water and let it sit for 2-24 hours.
The time needed will depend on how flexible they are before you soak them. After soaking, you can let them dry a bit before using them.
My grapevines were still flexible enough to use after allowing them to dry a full day, but any longer would have dried them out too much.
Step 4. Wrap The Grapevine To Form A Wreath Shape
I love the wild natural look of the tendrils, but if you prefer a wreath without them, remove them with pruning shears.
However, you may need to use floral wire to help hold the vines in place if you remove the tendrils.
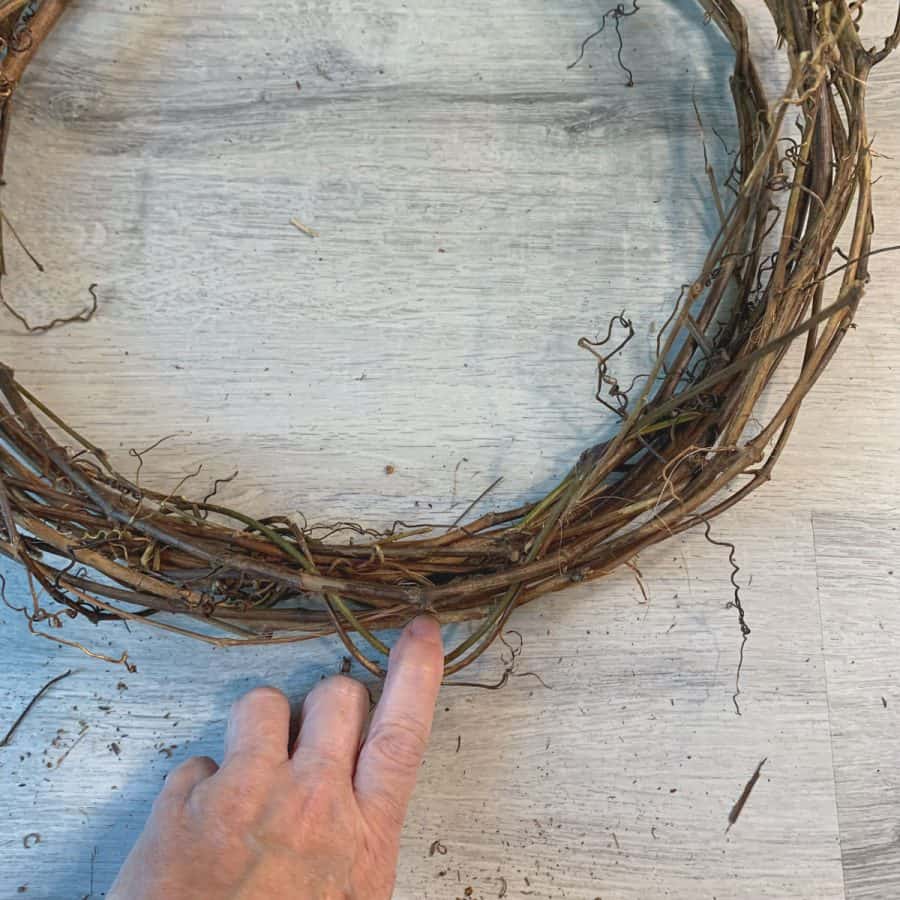
A wreath will look more rustic if you keep the main vine and all the extending branches intact.
However, you will need some small flexible side pieces to help keep the beginning parts of the vine in place.
Sometimes it works out that one of these connected side branches falls at the right spot, and you can use one of those to secure the starting point.
However, I would cut off a few flexible vine pieces about 8-10″ long to be safe.

To make an informal rustic wreath, take the thickest part of the vine and hold it in your hand.
Then, wrap the vine into a circle at the diameter you want the wreath to be.
You will wrap it a couple of times until you can tuck the end into one of the pieces.

This starting end will slip easily, so this is where you can use a side piece of the vine to wrap around it to help secure it or use one of the pieces you cut off. I needed to use a separate piece of vine for this.
You may need to secure another piece on the opposite side, but after that, you can start winding the vine around in circles.
Again, you aren’t weaving the grouping of vines in and out of the ring. Instead, coil it the same as you did when you stored it in the bucket.

As you reach the ends of the thinner branch, you will need to tuck some of them into the main part of the wreath.

Or in some cases, you may still need to wrap one of the cut pieces around them to secure them. You will do the same if you need more strands to make the wreath thicker.
Just stick one end into the wreath and weave it through a few strands of the wrapped vine to keep it in place, then continue winding around it.
At this point, you will want narrower strands because the thicker pieces don’t look as nice on the outside of the wreath.
When finished, tuck in the last vine strand and any other loose ends you see.
Step 5. Optional- Add Lights To The Wild Grapevine Wreath
If you want to make a lighted grapevine wreath, then take the fairy lights and wrap them around it.
It’s easier to wrap the lights around the wreath by weaving them inside, around, and back in a zigzag pattern.
However, I prefer how they look when they are wrapped loosely around the wreath –one wrapped around the outside of the entire wreath and one inside the ring.

To do it that way, use the tendrils to help hold it in place or tuck a small portion of wire under a strand where needed.
Start from the end with the battery pack since these are trimmable. You will trim from the very end of the vine.
Be sure to consider how or where you will hide the pack, so you leave enough room between the battery back and where it connects to the wreath.
To trim it, use scissors to cut the copper wires. I recommend using a dab of hot glue on the ends to keep them from untwisting or fraying and getting caught in the wreath.
Here are some other ideas for what you can decorate your new wreath with:
- pine cones
- dried leaves
- white flowers
- natural items
- green leaves
- ornamental birds
- Red crafting berries
For other ideas on what to make for Christmas, check out this amazing list of tutorials for Dollar Tree crafts and these cute wine cork tree ornaments that are planters!
Don’t forget to Pin it for later!

DIY Grapevine Wreath With Lights
A DIY tutorial for how to make a grapevine wreath in a few easy steps. A beautiful holiday decoration to illuminate your front door or fireplace mantel.
Materials
- Wild grapevine
- Pruning shears
- Gloves
- LED lights
- 5 gallon bucket
Tools
- Please see the full materials list above the tutorial for details and links.
Instructions
- Harvest The Wild Grapevines For Your DIY Wreath Using Pruning Shears
- Store The Vines Coiled In A 5 Gallon Bucket
- Prep The Vines For Wreathmaking BY Soaking Them In Water
- Wrap The Grapevine To Form A Wreath Shape BY Coiling A Group Of Vines
- Optional- Add Lights To The Wild Grapevine Wreath By Wrapping Around The Wreath And Trimming The Extra Length