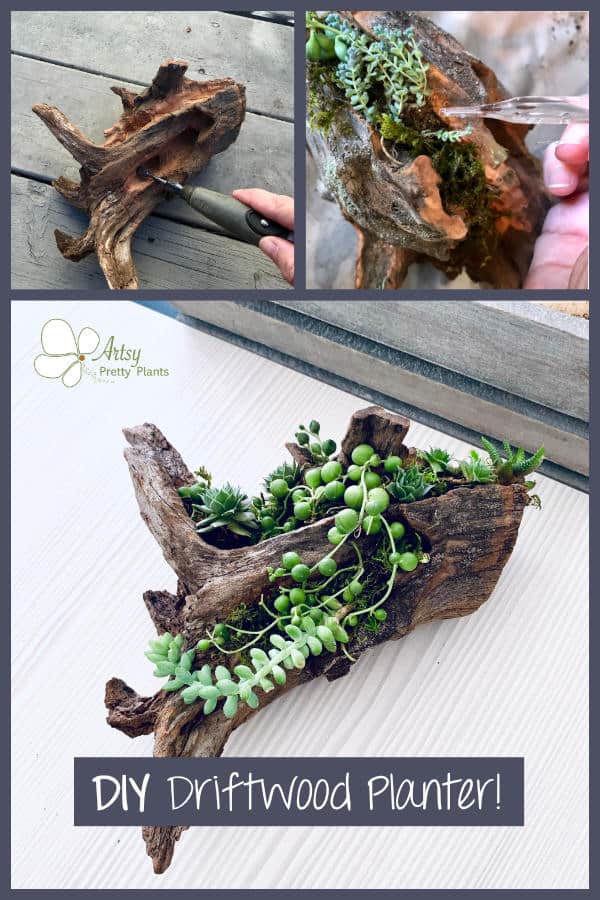
DIY Driftwood Planter (From a Cedar Tree)

How to make a DIY driftwood planter by re-purposing from nature.
Don’t have driftwood? Substitute with a cedar tree trunk or any old rotted wood.
Okay, I bet you are wondering how you grow plants in driftwood.
The way plants grow in driftwood is because of the natural grooves and nooks in the wood. These provide enough depth for plants to grow.
And succulents are a great choice for a driftwood planter because many succulents have shorter roots and don’t need a great amount of depth to grow.
Air plants are also perfect, don’t be afraid to use those in this planter too.
So how come I’m using cedar instead of actual driftwood? Here’s the story, I have a lot of woods behind my house and am fortunate that there are trails I can walk on.
On my walks, I kept seeing trunks of cedar trees that had been cut down at some point because they were dying or dead.
They had rotted from the ground and were easy to pick right up and I thought they were beautiful and unique looking and they reminded me of driftwood.
I don’t have easy access to driftwood so I thought I would take advantage of the cedar tree trunks and use them as ‘driftwood planters’.
And by the way, driftwood planters are sometimes referred to as log planters or even branch planters– so there ya go.
The only drawback to these is that cedar is an incredibly hard wood, so carving out deeper divots for planting the succulents was a little challenging.
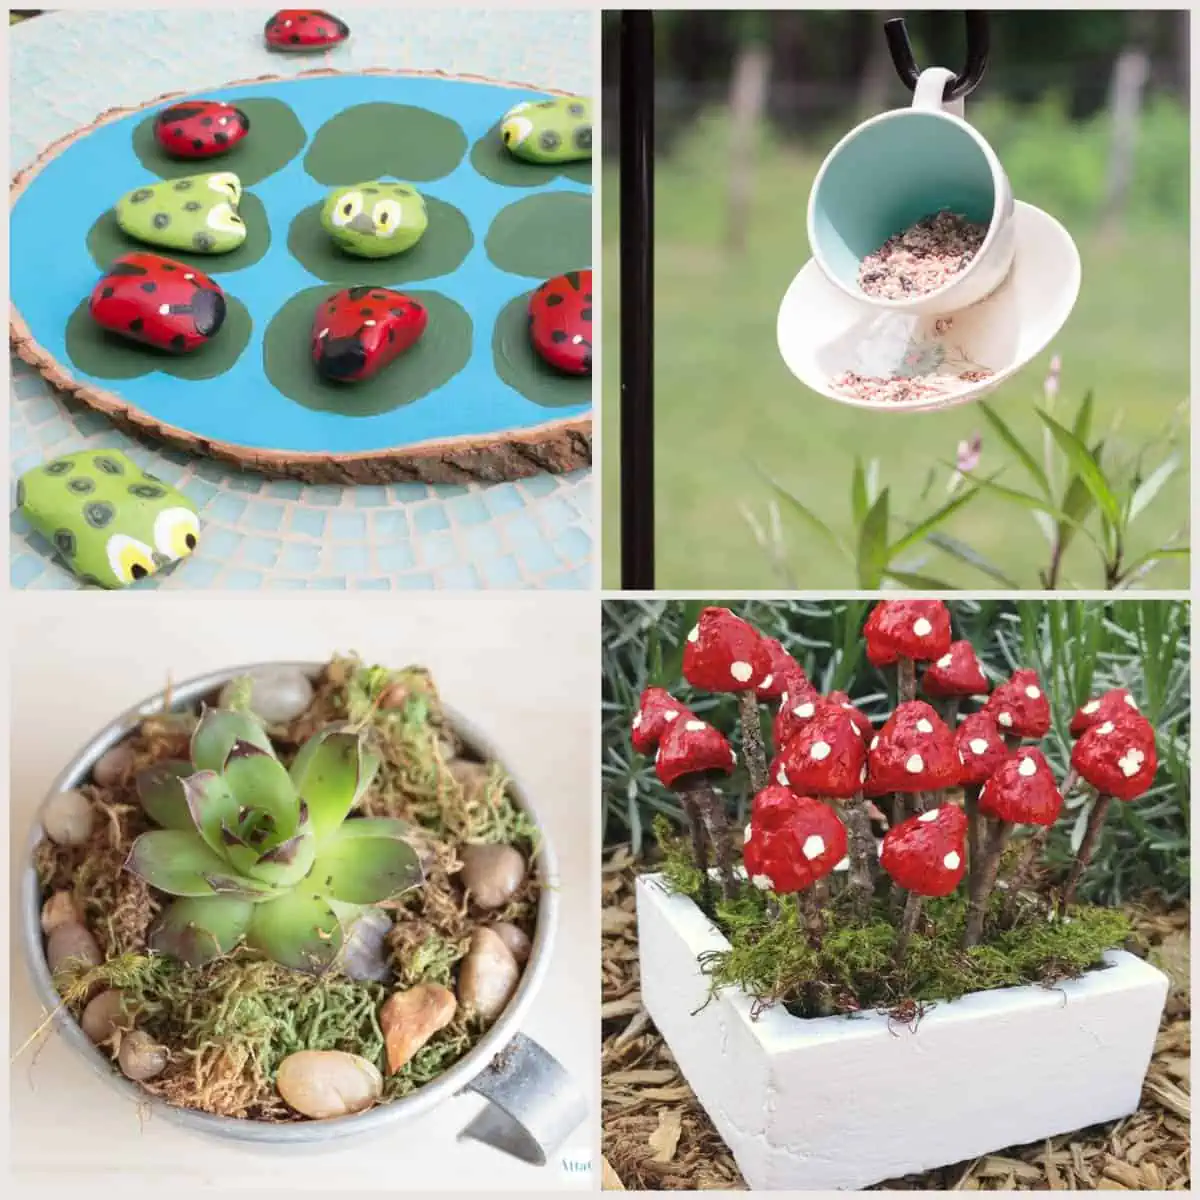
I make lots of planters so if you haven’t seen them and you want to check out some unique planter projects, then check out these tutorials:
Cinder Block Planters
Wine Cork Succulent Planters
27 DIY Wood Planter Tutorials
DIY Self Watering Concrete Planter
Hanging Basket Planter made with grapevines
Some of the links on this page have been provided as a convenience for finding materials. These links may also be affiliate links. As an Amazon Associate I earn from qualifying purchases, at no extra cost to you.
I only recommend products I’ve used and loved, unless otherwise stated. Click here to read my full disclosure policy.
DIY DIFFICULTY LEVEL | Easy
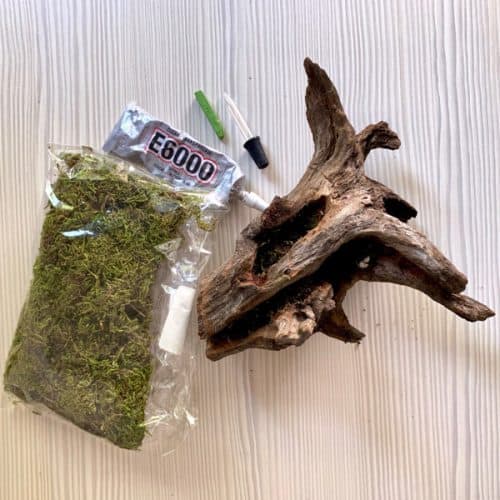
Materials For Making A Driftwood Planter
- Cedar tree trunk
- Assortment of succulents
- E6000 glue
- Moss
- Chalk or pastels
- Eye dropper
- Soil (may be necessary for deeper grooves)
Tutorial Steps For A DIY Driftwood Planter With Cedar
UPDATE: ONE YEAR LATER
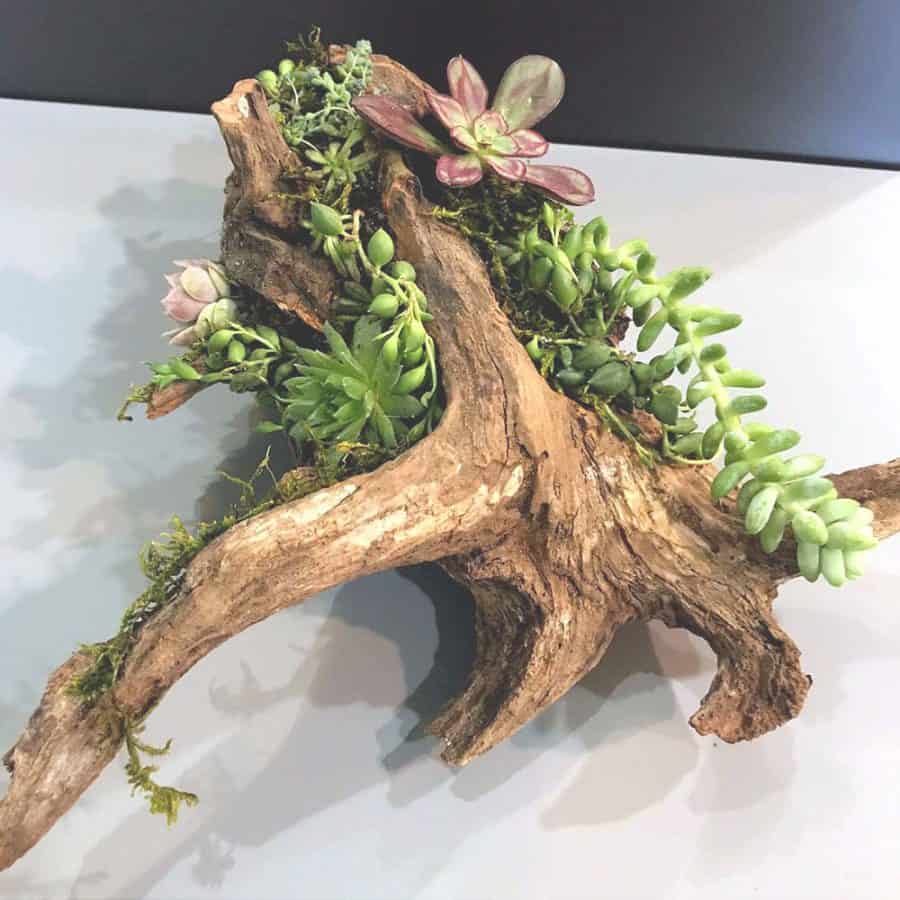
I’ve now had this succulent driftwood planter for a year.
And during that year, I was pleased to discover after looking back at these photos, that out of the 8 or so types I planted, that there were only two types of succulents that didn’t make it.
The succulents that gave me trouble are the same types that give me trouble in regular planters as well.
I am seriously lacking a green thumb, so that’s a testament to the hardiness of these plants being planted on this type of planter.
I ended up moving across the country early in the year and I was worried the plants would get damaged in transit, so I temporarily re-homed the succulents to a large container for transport.
The other reason for the update is that after seeing how well the succulents did even in the shallow spots, I realized the grooves don’t require much depth.
So I was able to eliminate a step and downgrade the difficulty level from moderate to easy!
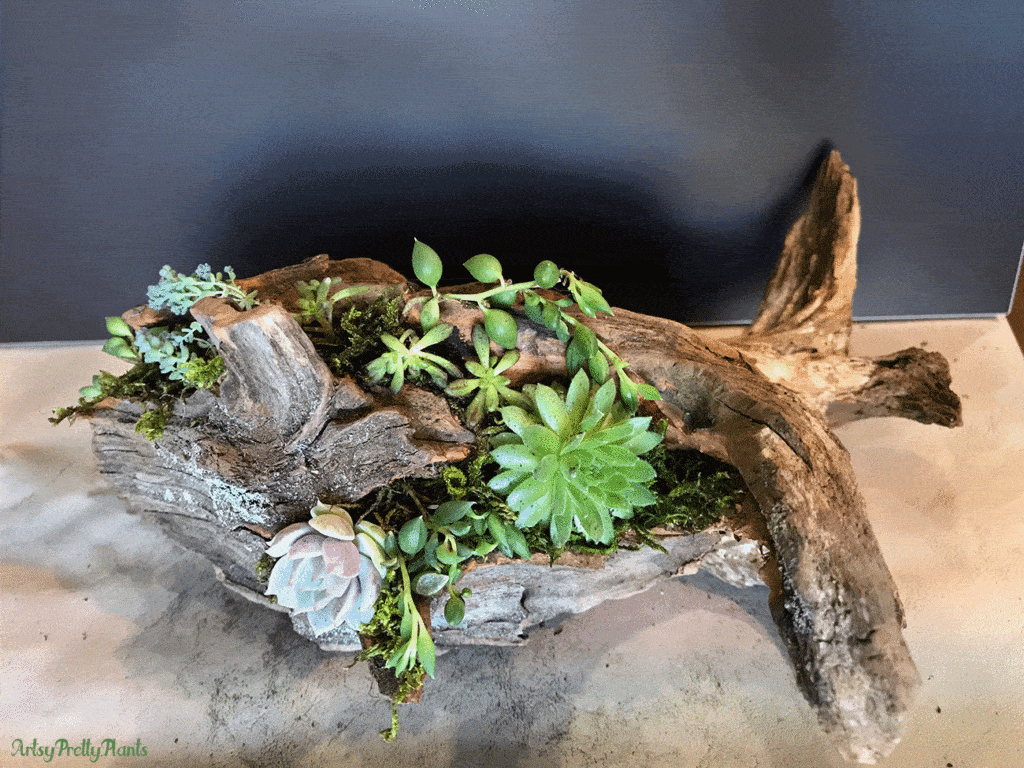
I’ve updated some photos, showing my newly planted cedar driftwood planter.
Step 1. Choose The Wood For Your Planter

Choose a piece of tree trunk that has broken off from a dead cedar tree or other. I have quite a few of these dead trunks around my house.
Just look for one that is visually interesting and had some natural grooves.
The grooves are important and will allow you to skip Step 4 if they are deep enough.
However, you really don’t need much depth to plant the succulents, a groove about 1/8″ – 1/4″ will be enough for most succulents to take root.
If you can’t find a piece of ‘driftwood’ that is already separated from the cedar, then you may need to use a chain saw to cut the tree trunk off from a fallen tree.
Step 2. Prep The Cedar Driftwood
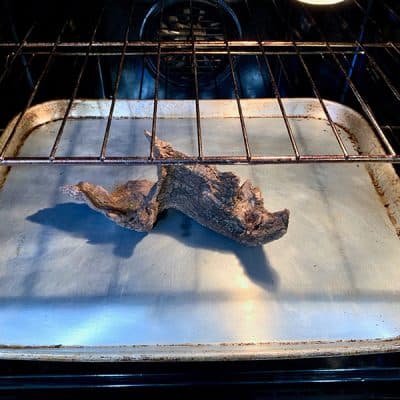
The trunk likely has insects in it, so the way to kill them is with heat. First, start by rinsing the dirt off the trunk.
I did this in the winter, so I just rinsed it in the bathtub and spot dried it where the water puddled up in the grooves.
Now turn on your oven to 250 degrees, I didn’t bother pre-heating.
Put the trunk on a tray to help keep your oven clean, in case more dirt comes off and then let it bake for about 2 hours.
Please keep an eye on it to make sure it isn’t burning, I set a timer for every 20-30 minutes to check on it.
Finally, after a couple of hours, remove it and let cool down.
Step 3. Determine The Locations For The Succulents

Mark out the locations where you want to place the succulents, using the pastel or chalk stick.
Step 4. Drill Shallow Grooves (if necessary)

As it turned out, I probably didn’t need to deepen my cedar grooves as much as I did.
If you think you need some depth, then create some depth using a Dremel with a cutting bit and just hollow it out a little more in the areas you have marked for planting the succulents.
It would be a good idea to clamp the cedar in a table vise while doing this in case the trunk slips.
I recommend cleaning up any undercuts that you may have created.
Remember, you only need a depth of 1/8 – 1/4″ to allow your plants enough space to attach their roots.
If you don’t have deep enough grooves you can also build up the moss a bit to hold the stems to the planter.
Step 5. Prep the Moss

Since dry moss is very brittle and difficult to manipulate, making it a little moist will allow you to work with it more easily.
Briefly wet the moss with water, then wring out the moss and put the moss aside for now.
Step 6. Prep The Succulents For Planting


Carefully remove the succulents from the containers, and then shake off the soil and trim back some of the roots.
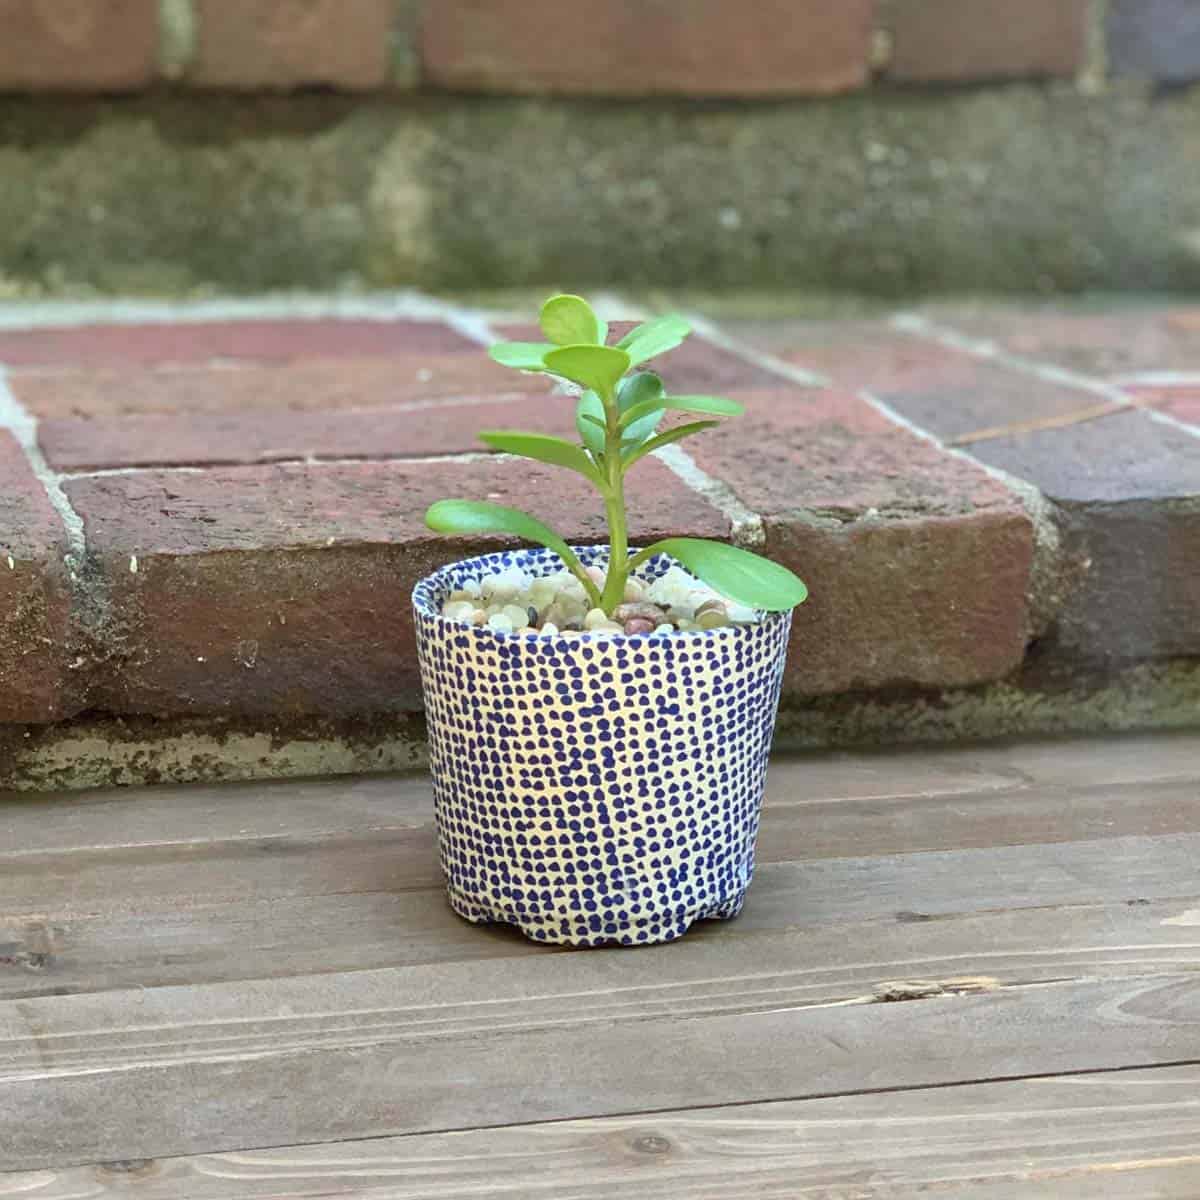
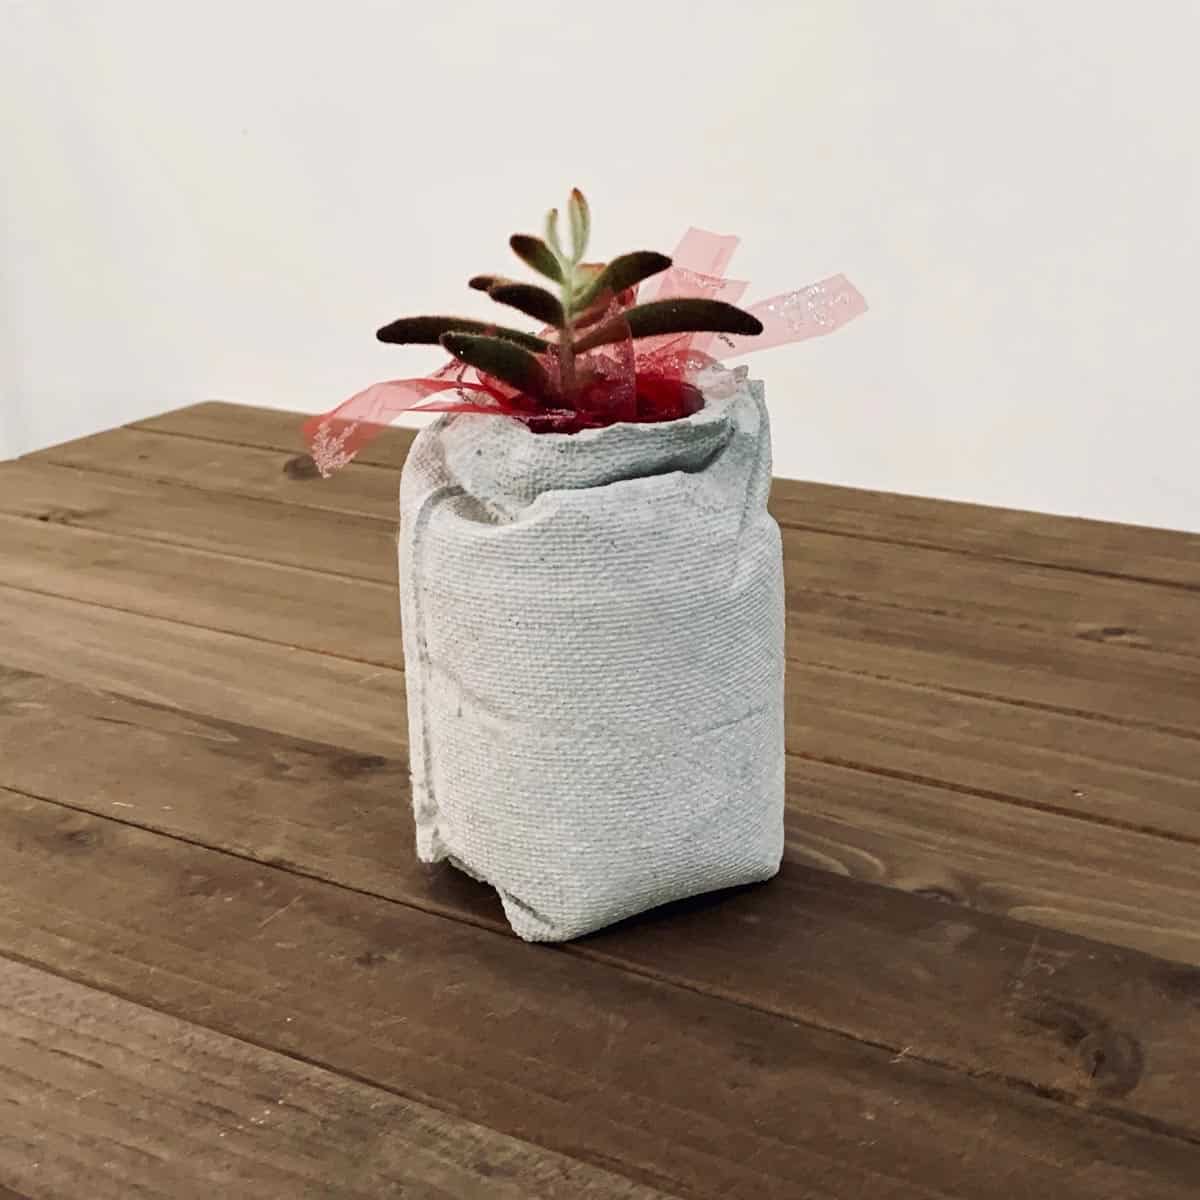
For a couple of other unique succulent planters, check out the cement sneaker planter or this pretty pink cement planter.

You don’t want them to be longer than your nooks are deep. In some cases, you may have little to no root.
In that case, you can secure the succulent by pressing some moss on top of the stem.
Step 7. Adhere The Plants To The Planter

Squeeze a little bit of glue onto the locations of the cedar driftwood you are planting and start by planting the moss. I definitely recommend the E-6000 glue. I think it’s the best glue for adhering plants to driftwood.
You can also just dip the moss in some of the glue and stick it on the trunk.
If some of your grooves are deeper than an inch, you can add a bit of soil underneath the moss. The glue is waterproof and will adhere to the wet moss nicely.
Step 8. Anchor The Roots Into The Driftwood

Next, start planting your succulents. Just dip the stems into the moss that has been glued. It’s okay for the stem to get glued.
The moss itself should anchor the plants. However, if the roots are a little dry, then they may not be as cooperative when trying to manipulate them.
Help anchor those using the eye dropper.
Continue working your way around the cedar trunk until you have your plants looking the way you want them.
I advise holding off a few days before watering so your plants can get used to their new fancy home in the Cedar DIY Driftwood Planter!
For more planter fun, here’s a list of 50 ideas for painting clay pots.
For more information on growing succulents, take a look at World Of Succulents.
Don’t forget to Pin it for later!

DIY Driftwood Planter Made With Cedar | Succulent Planter Tutorial
How to make a driftwood planter for succulents using cedar or any old wood. An easy step by step tutorial for this unique DIY planter idea.
Materials
- Old wood or actual driftwood
- Succulents
- Moss
- Glue
Tools
- Please reference the FULL materials list above the tutorial.
Instructions
- Choose Your Driftwood Or An Old Tree Trunk Or Branch Wood For The Driftwood Planter
- Prep The Cedar Driftwood To Kill Insects By Heating It In The Oven
- Decide The Locations For The Placement Of The Succulents
- Create Deeper Grooves For Planting, (If Necessary)
- Moisten The Moss
- Prep The Succulents Tips To Be Planted In The Cedar Driftwood Planter
- Glue The Plants To The Diy Driftwood Planter
- Anchor The Roots Into The Cedar Driftwood By Using A Moss Overlay


I like this planter. I love growing things. In the past I had flower gardens. I have arthritis so I cant garden like I did. This could be something I could do. I have not grown succulents before. I will have to learn how. Thanks for the thought.
Hi Joy,
Thank you. Succulents are actually easy -relatively-09 to grow. Most succulents seem to be quite forgiving, you just need a good amount of light. Also, in this tutorial I used a drill to create larger holes, which you wouldn’t need to do if you pick driftwood pieces with deeper grooves. I used what I found in the yard so my selection was small. Most of the plants on the driftwood lived a year and probably would have kept on going, but I had to replant them into a large pot with other succulents when I moved and those are still living. Give it a try!
Your post was like a eureka moment for me. All this time I never thought of using a little waterproof glue, especially when getting things started. I can’t wait to try this. I have a big old piece of a branch that also stands in well for the driftwood. Won’t fit in my oven but it will stay outside. Thank you!
Karen,
Eureka moments are a good thing! I couldn’t believe how easy this one was.
Love this but how do I kill bugs and insects in larger pieces of wood that won’t fit in to the oven?
Hi Netty,
Unfortunately that’s one I don’t have an answer for. I don’t know how large your wood is, but there are some clay studios with large kilns. Maybe they would be willing to help you out. Other than that, I’d say make nice with a wood mill. Sorry, there’s probably not great solutions to that one. ?
There’s a process of soaking in a bleach/water solution for 5 days (changing the solution every day) and then letting it dry in a cool dark place for 1-2 weeks. That will sanitize and kill all bacteria and bugs. You should be able to soak even larger pieces in a large plastic tub. You can find directions on Pinterest.
I have a large piece of driftwood that has been in my garage for 10 years. Do I still need to dry this in the oven if I intend on keeping it inside?
Hi Danne,
It may still have bugs in it. If you look closely, do you see any powdery dust coming from it or around, or underneath it? Sometimes that’s an indicator of bugs. You also may not need to do the oven routine. It may not be a big deal if there are bugs in it, unless you think it will creep you out knowing some might be in there. ? It’s probably not a big deal, mine was soaking wet and rotting when I found it.
Does the glue kill the plant?
I would love an update on the growth
Hi Shirley,
It actually doesn’t because you are more of gluing the moss and then sticking the roots into that. I have made this twice and the first time, the plants did amazingly well. For some reason, the rosettes don’t do as well, but Burro’s Tail and String of Pearls do great apparently. The second time I had them in a spot where they actually got too much sun and some of the plants dried out. Two years later, the two plants mentioned above are still in good shape.
How do you keep the wood from rotting? I have the same cedar pieces and I’m afraid it won’t hold up! I want to preserve the wood better. Any ideas?
Hi Colleen,
It depends on how old and rotted it is. I probably used an old toothbrush or wire brush to scrape off any surface stuff before putting it in the oven. The oven will dry it and should stop the rotting. I didn’t have further rotting and it’s been 3 years since I made that (and it’s always outside, but in the sun). If the piece is really thick, it may take longer to dry out. In that case I would keep it in the oven for longer. You’re basically “kiln drying” the wood.
Can you use shellac to shine up driftwood that will not kill air plants or succulents
Hi Donna,
Technically you could, the shellac itself isn’t going to harm them, but the shellac is going to make the driftwood non-porous, thus removing the ability of the succulents to hold onto moisture. The open pores of the wood, allows water to get in and helps keep the roots moist. You’d have to use a lot of moss and hope the succulents wouldn’t dry out. It could be tough.
Hello Ellen! Thank you so much for posting so much helpful info!!! I’m hoping to make a succulent planter out of rocks with cool holes in them. Should I use the oven method even for the rocks? If so, do you think it’s safe at the same temp and time as you recommended in the post?
Thanks!!! 🙂
Hi Amy,
No, don’t put rocks in the oven. They could explode. I mean a low temp could be okay, but there’s no reason to to do anything with rocks. The only reason I baked the wood was because of the potential of tons of miniature bugs and to slow down decay. You won’t have that with rocks. You are good to go!
OMG! I’m so glad I asked!!!! Thanks for the quick reply! I really appreciate it!
-Amy