How To Transplant Moss & Expand It In Your Yard
Today I’ll show you, step by step, how you can easily transplant moss in your yard to expand its growth.
Moss is a magical ground cover loaded with benefits. And if you already have some moss in your yard, love the look and feel of a lush moss carpet, and want a yard with less maintenance, then you’re in luck.
Not everyone’s yard is suited for a moss lawn, but it can be a great choice for accent areas like rock gardens, shady areas or trouble spots where other plants struggle to grow.
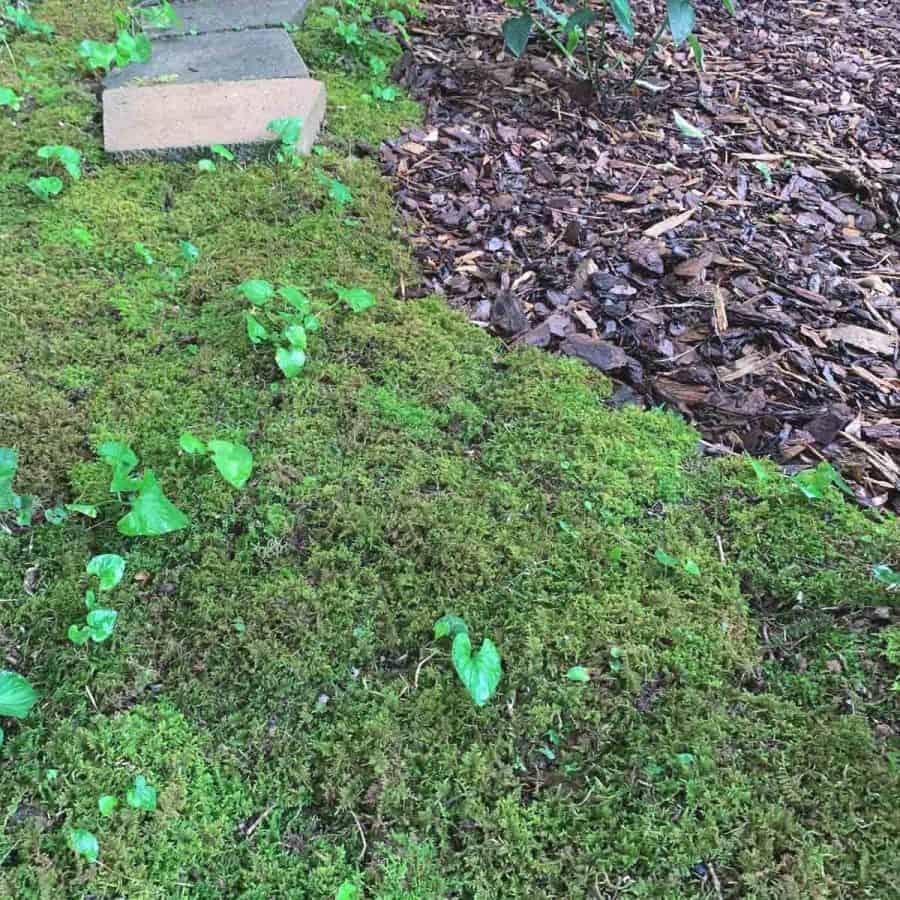
The moss I transplanted had been growing inside a garden bed.

Now don’t get me wrong, I would love a moss garden. However, the moss on the left side of this garden bed ends up dying.
It dies because in late June it gets full sun, so by transplanting, I can prevent it going to waste.
Okay, if you’ve gotten this far, you’re with me –moss makes for the perfect ground cover, and its natural beauty is obvious.
But there are so many other amazing and important benefits to moss!
Here is an article with other ideas for shady ground covers, to check out later.
The Benefits of Promoting Moss Growth
Moss is a Natural Weed Barrier
Due to its density, moss is very good at preventing weeds from growing into it.
Erosion Control & Flood Mitigation
Moss can hold up to 20 times its weight in water.
If the ground is dry and stormwater runs through your property, the moss will act as a filter and slow down the absorption of water, which prevents your soal from becoming oversoaked.
Moss is Deer and Pest Resistant
Deer have no interest in eating moss, and neither does any other animal.
Ecosystem Benefits
Mosses are habitats for beneficial insects and not habitats to non-beneficial ones.
Low Maintenance
Moss doesn’t need fertilizer. It doesn’t require much weeding, and doesn’t require mowing. Once established, it will be unlikely to require watering.
Moss is a Cleaner of Air
Sphagnum mosses are Bryophyte type mosses and there are over 200 species of these sphagnum mosses!
They have more air cleaning properties than all the tropical forests in the world combined.
Sphagnum moss types will absorb pollutants in the air, allergens and the number one driver of climate change– CO2, and purifies them.
Fact: Did you know that mosses are the oldest living land plants?
Things to Know Before You Transplant Moss
Moss doesn’t have seeds. It has spores, which is why transplanting is the best way to grow it quickly.
The easiest way to transplant moss is from within your own yard and within areas containing the same soil, moisture and light conditions.
If you have a shade-loving moss and transplant it to an area that gets more sun than shade, the moss may not successfully transplant. If it does transplant okay, it may not thrive or live very long.
The same problem can arise if moss gets transplanted to a soil type with a different pH. There are some species of mosses that prefer to grow in acidic soil and some that prefer alkaline soil.
If you are transplanting moss from areas with different conditions, then the first step will be to determine what species of moss it is and what conditions it grows best.
You should also know that mosses grow in different directions. There are types of moss that grow sideways (Pleurocarpous) and types that grow upright (Acrocarpous), these upright growers won’t spread.
So if your goal is to expand the amount of moss in your yard through propagating, you will need sideways growers.
Fortunately, these types are quite common. I used, Delicate Fern Moss, Thuidium delicatulum. It is a common moss in the US and spreads easily.
In ideal conditions, it will double in size in about a year.
If you get the moss from a location other than your yard and don’t know what type of moss it is, then a plant identification app may be helpful.
I use an app called Picture This, which I find identifies most plants accurately.
Where to Get Moss for Propagating
First, it is illegal in the US to take moss from any protected parks or forests –whether it’s at the federal, state or local level.
The best place to get moss is from your yard or from a location as close to your yard as possible.
To legally harvest it, try to obtain it from someone you know on private property.
If you have neighbors with property on a large wooded area, then this might be a good opportunity.
You can check areas where new neighborhoods are being built. Just be sure to get permission first from the owner or developer before attempting to rescue the moss.
Other places to look are abandoned areas or parking lots, again with permission.
When taking moss from any property, be sure to remove it sustainably.
The way to do this is to remove it in patches, like in a checkerboard pattern, which gives it the abilty to grow back in.
Moss can be purchased from suppliers in large sheets for transplanting.
If you purchase moss from a big box store, it’s possible that the moss has not been harvested legally.
According to the renowned moss expert, Annie Martin ( Mossin’ Annie) of Moss Acres, many big box stores that sell moss sheeting are acquiring the moss from suppliers who are harvesting it illegally.
An additional problem with the third party acquisition is that sometimes the moss species is misidentified and marked incorrectly.
This means that you may unknowingly transplant it to an area in your yard where it can’t survive.
You can purchase it directly through Moss Acres, considered one of the most reputable sources for good stewardship for harvesting moss.
Moss Transplanting Methods
If you have a couple of years of gardening experience under your belt, then you’ve probably already propogated some plants.
Propagating moss is very much the same, only it can actually be easier because there is less digging involved on the front end and potentially no digging on the back end.
There are two different methods for transplanting moss. One involves small hand-sized pieces, called fragmentation, and the other is the sheeting method.
If you use a regular-sized shovel, the moss will probably come off the ground in sheets.
If you use a hand spade, you are likely to end up with the hand-sized pieces.
Regardless of method, the best time for transplanting moss is in the early-mid spring or in the fall.
Propagate Moss Using the Sheeting Method
With the sheet method, you will lay the pieces down and butt or weave the ends together.
In order to encourage the moss to fill in, you would just leave the pieces separated in a checkerboard pattern, with blank spaces in between.
Moss doesn’t have a root system. It has rhizoids that anchor it to the surface. So to secure the moss to the ground, you simply walk on it afterward.
Details on how to transplant moss this way are in the tutorial below.
Transfer Moss In Your Yard With The Fragmentation Method
If your moss comes off in small pieces, you will find more tearing of the moss and fuzzy fragments that come off.
You’ll lay the hand-sized pieces on the ground the same as you would in the sheeting method of moss transplanting, but these smaller pieces will be more susceptible to blowing away in the wind.
The larger of the small pieces will be fine, but the smaller ones will need help. To secure them you can use twigs to pin them to the ground.
You can use the fuzzy shredded pieces that came off to help fill in between the fragments and use twigs to keep them in place.
There’s also another method for transferring moss that uses a slurry mixture. It has mixed reviews. Because of that, I won’t go into detail in this post.
However, I have information on that in the FAQs on transplanting moss that are below the tutorial.
Where Else Can You Use Transplanted Moss?
A few other places you can use moss that look great, is to line between any pavers, or mixed in with ground cover plants, or butting a gravel garden.
Really, moss looks fantastic, interwoven with most types of rock landscaping and of course along any garden path.
You can even use it indoors, if it’s preserved moss, like with these beautiful indoor moss wall art panels!
Since you appreciate the ecological benefits of moss, you may also be interested in reading my article about the importance of native plant gardening.
Some of the links on this page have been provided as a convenience for finding materials. These links may also be affiliate links. As an Amazon Associate I earn from qualifying purchases, at no extra cost to you.
I only recommend products I’ve used and loved, unless otherwise stated. Click here to read my full disclosure policy.
DIY DIFFICULTY LEVEL | Easy
Materials for How to Transplant Moss in Your Yard
- Square-headed shovel
- 4-prong cultivator (or similar)
- Wheelbarrow or garden cart
- Garden hose sprayer with mist or shower setting
- Leaf blower
Tutorial Steps for How to Transplant Moss Within Your Yard
The Background Story
Shortly after moving to our new home, I started acquiring plants thinking I’d plant them any day now.
Here I was a little more than a year later and a few dozen still potted plants, some quite angry.
I needed to quickly prep three garden bed areas that hadn’t been used as gardens in years. Two of these were half-covered in moss.
And knowing all the benefits of moss and all the places I can repurpose it to make my lawn prettier and gardening life easier, I wanted to make full use of it.
I decided to transplant the moss to the area directly behind one of the beds. This area was hard-packed dirt and weeds.
This was all part of a grander plan for this upper level area of the yard. This now joins up with a flagstone pathway that runs behind the new garden beds.
And the flagstones even have moss growing in the gaps. This moss I rescued from a neighbor’s yard before they replaced it with grass sod!
I do have a fair amount of moss in my yard, and eventually I’ll divide it and propagate it to place along the sides of the flagstones to fill the path.
Step 1. Remove the Moss From Its Current Location
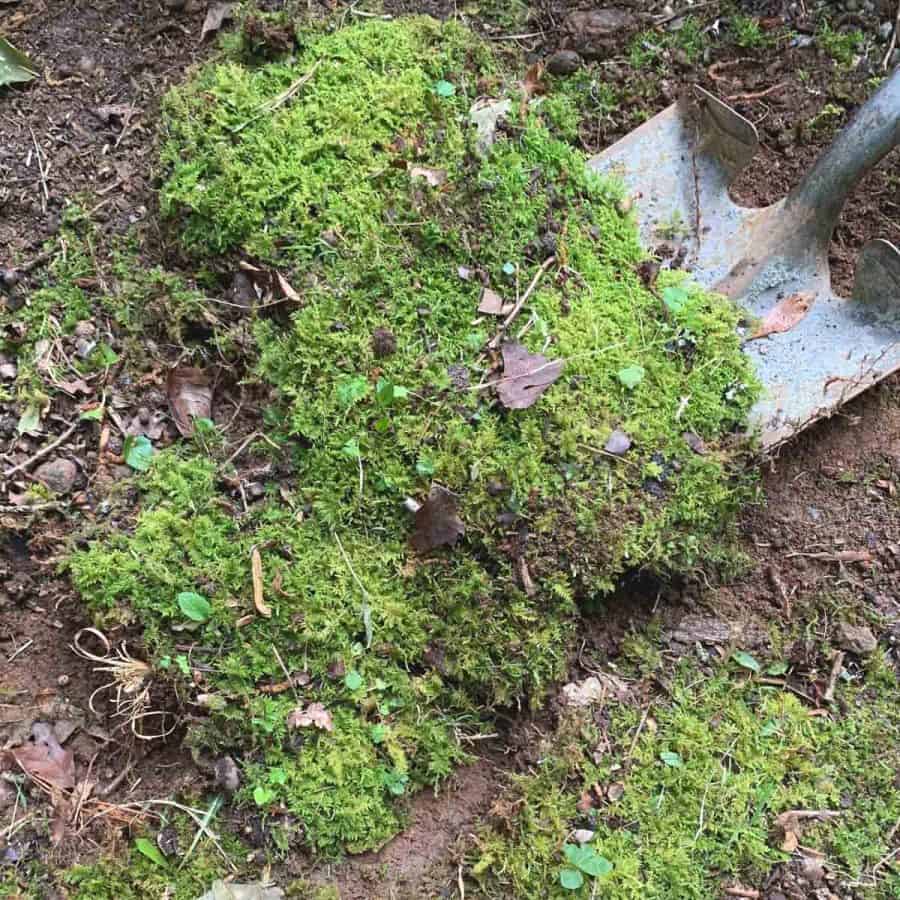
Use a shovel or a hand spade to pry the moss from the ground. The moss will have a better chance of successfully growing if you remove it in larger sheets.
A shovel will make it easier to cut the moss in the larger sheets than the spade will.
I forgot we had a square-headed shovel and used a regular pointed head one.
Despite this, I was able to get decent-sized sheets. My biggest pieces were probably about 20”x 15”.
Just lift it like you would with sod. You only need to separate the soil about 1″ below the moss.
I went slightly deeper since I was removing weeds with it that I didn’t want to leave in the bed.
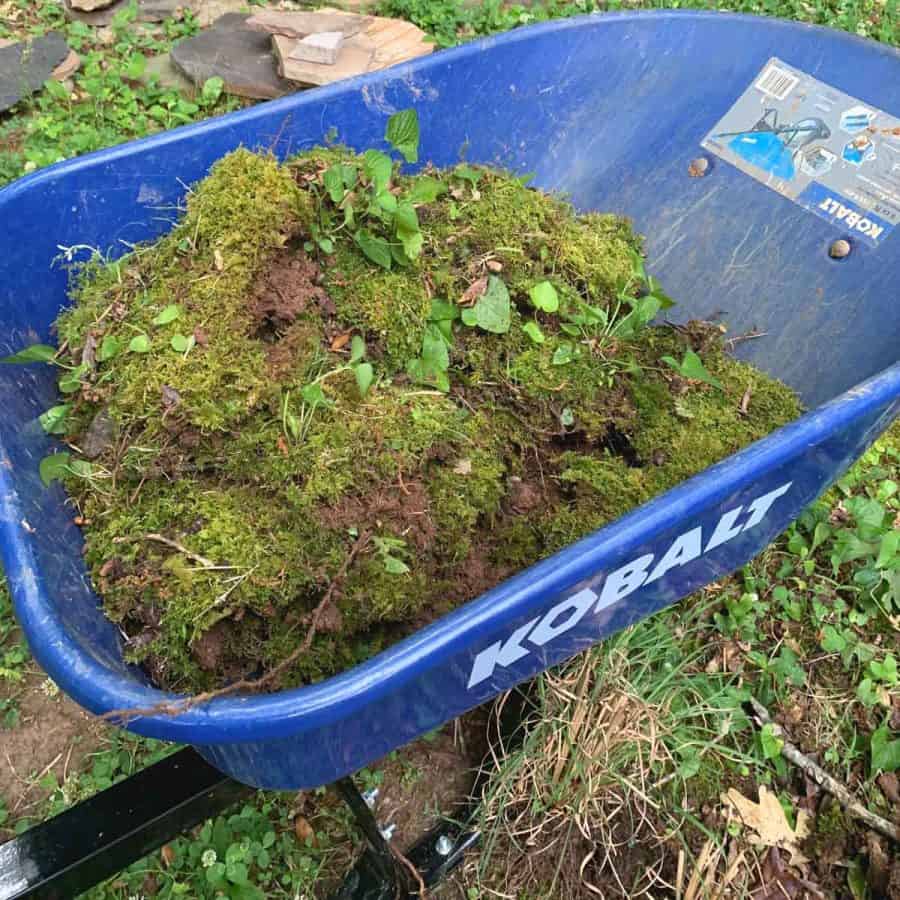
You can lay the sheets stacked on top of each other. I placed mine in a wheelbarrow for easy transport.
I used the wheelbarrow because I hadn’t gotten my garden cart yet. The cart would have made this even easier because I couldn’t transplant the moss the same day.
You see, if you are unable to transplant the moss the same day that you remove it, you will need to keep it in a shady place- totally out of the sun.
Because of that, I had to do some extra hauling work down a hill and back up again later.
By the way, skip the temptation to pre-soak the moss. If you can’t transplant the moss right away, you can mist it lightly each day.
And I do mean lightly, it’s okay if it dries out. I just found it easier to work with when it’s just the slightest bit damp.
You may notice I left the wood violets growing in the moss.
I did that because I want to encourage their growth in this area behind the new garden bed –despite the fact I know I’ll also be weeding some out over time because of it.
If you have weeds growing out of the moss, you can pull them now or after laying the moss on the ground.
Note: If you weed after transplanting, be sure you hold your hand over the sheet to keep it firmly in place while pulling the weed out.
Step 2. Prep The Soil For Freshly Transplanted Moss

Remove all the weeds from the area you are transferring the moss.
Once you have weeded the area, use a leaf blower to blow away any debris from the surface. Avoid using a rake because a rake will loosen the soil.
If the soil happens to be naturally loose, then pack it by walking on it.
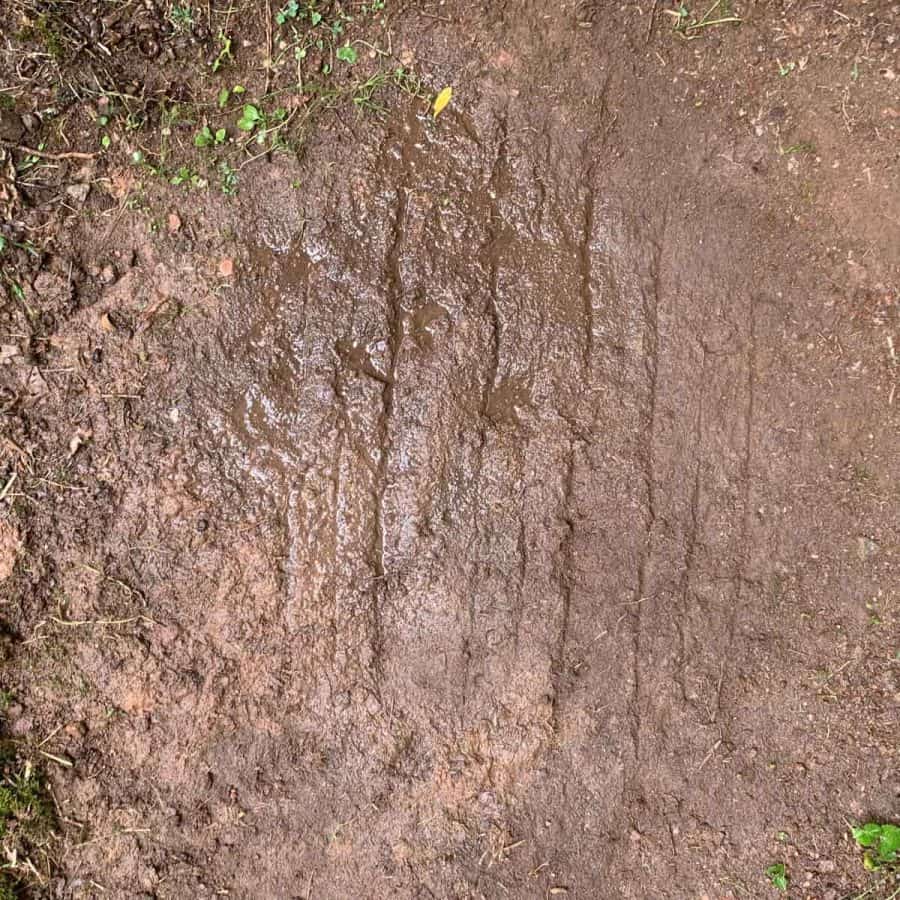
Step 3. Slightly Roughen The Surface of The Soil
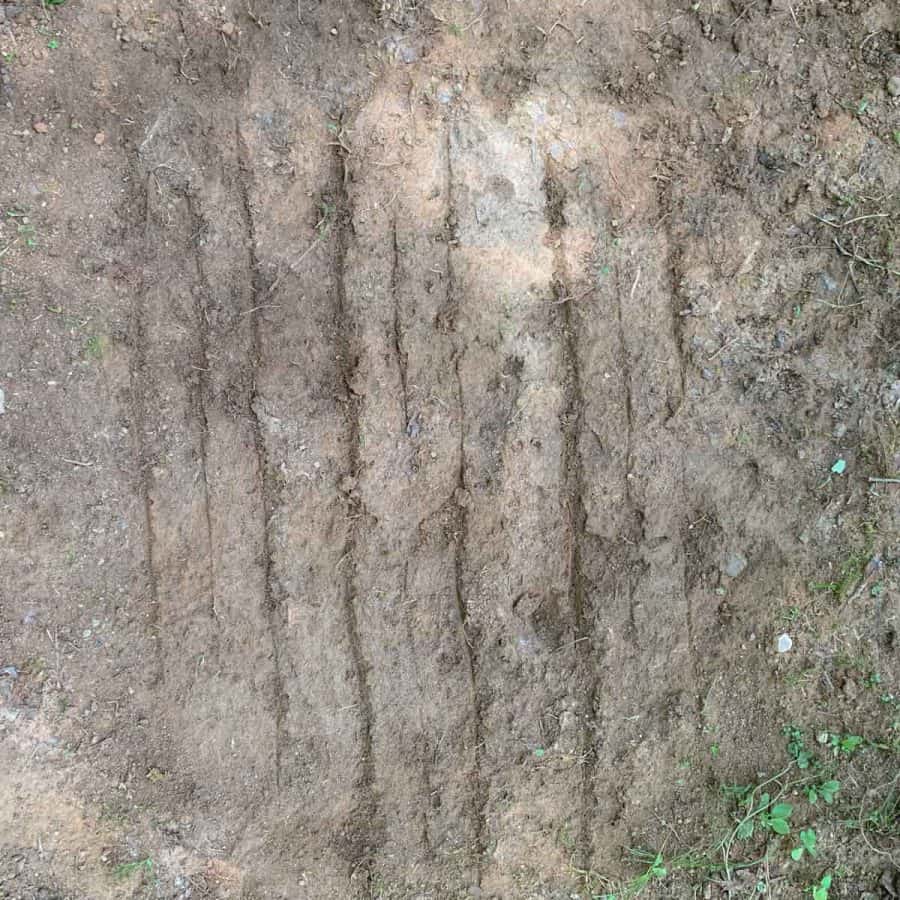
Use a cultivator to lightly scratch lines across the surface of the soil. My lines in the photo are deeper than they need to be.
The reason for doing this is that it will allow for better adhesion. If you’ve ever done any tile work, it’s a similar principle.
To help the tile stick better to the mastic, you would use a trowel to create grooves in it.
The air gaps provide better suction between the mastic and the tile. It’s the same with the moss and soil.
Now wet the soil thoroughly.
Step 4. Lay The Moss

Lay the moss sheets on top of the prepared soil.
I mentioned earlier that you can lay these with gaps in between so the moss can fill in over time. Or butt them together to have them filled-in without having to wait a year or so.
I had plenty of moss to accomplish what I needed to, so I did not leave gaps.
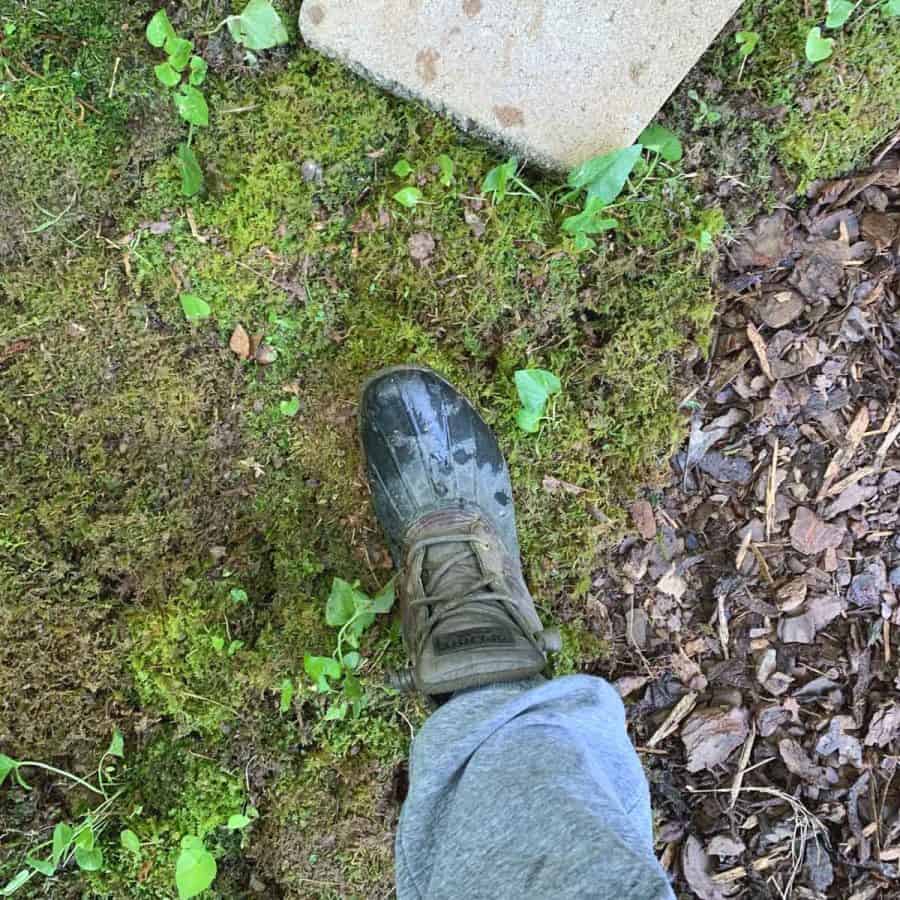
Next, walk on top of the moss to press the sheets into the soil. The important thing is that you make good contact between the moss and the soil’s surface.
Be sure to hit the seams where the pieces butt together or where they end if you are leaving gaps.
Once you have pressed the moss firmly into the soil, spray it with a garden hose on the shower or mist setting.
Saturate it thoroughly, but not to the extent that you have standing water.

How to Maintain Newly Transplanted Moss, and After
Regular Watering
Water the moss at least once a day until it has established itself. You may need to do this twice day in a hot or drier climate.
To check if the moss has established itself, lightly tug on it. If it stays in place, then it has set. Establishing can take several weeks.
Don’t water during hot temperatures (over 80 degrees), or during the hottest time of the day or in high humidity because this can lead to rot or fungal growth.
Morning watering is best. And again, take care the moss isn’t sitting in standing water.
Weeding
Pull weeds as they come up. Hold the moss down with one hand so the moss doesn’t come up while pulling the weed with your other hand.
Leaf Removal
Removing leaves from the moss is very important in the fall, but use a leaf blower instead of raking. Moss will rot under leaves and die.
Overwatering will more of a concern than underwatering after the moss has established itself. You are better off letting the moss dry out than over-watering it.
If it does get dry, it will go dormant and revive again when it gets enough moisture.
For more resources on growing mosses for your lawn or garden, check out the book The Magical World of Moss Gardening by Annie Martin
FAQs for Transplanting Moss
What’s the best moss for using between patio pavers or flagstone paths?
Fern moss and Hypnum moss are the best for pathway applications because they are low to the ground and quick at spreading. They also can handle a lot of foot traffic.
What does moss need to survive?
Moss will need at least some shade. The amount of shade will depend upon the species –and moisture. Moisture is a necessity for moss to survive.
Does moss survive winter?
Yes, moss that naturally grows in a cold climate, even with snow, will come back as things warm up.
Does moss need dirt to grow?
Moss grows easily on any dirt, no matter the quality.
But it also can grow on almost any substrate, including on rocks, concrete, and logs. It can attach itself to almost any surface– even sneakers!
Can dried moss come back to life?
Many types of mosses can come back after drying completely, and they can even thrive. One type is Star Moss, also known as Twisted Moss.
How do I grow moss on rocks with a moss slurry?
Some people find success growing moss using a blended moss slurry. It can be successful for growing moss on rocks or concrete.
There are mixed results with this method, which I have not tried. But this article has a tutorial showing you how using a cup of buttermilk, with a moss mixture and a spray bottle.
And you may also be interestied in learning about what the different methods of composting are, or about its pros and cons.
Don’t forget to Pin it for later!
How To Transplant Moss & Expand It In Your Yard
For a more beautiful lush yard, you can transplant moss from one area to the next and expand its growth. Add magical curb appeal to your yard or garden.
Materials
- Square headed shovel
- Leaf blower
- 3 prong cultivator
Tools
- Please see the full materials list above the tutorial for details and links.
Instructions
- Remove the Moss From Its Current Location Using A Shovel
- Prep The Soil For Freshly Transplanted Moss By Removing The Weeds and Grass
- Slightly Roughen The Surface of The Soil With A Cultivator
- Lay The Moss Down In A Checkerboard Pattern


Hi Ellen, thanks for the memories. When I lived in Upstate NY I did exactly what you did – put moss in gardens that were too shady for real grass and many plants.
I loved the look, and it grew SO well. Your post brought back memories of lying on moss covered forest floors as a kid exploring nature. How I do miss it all. In Florida moss is very different of course…can’t really enjoy it like yours. Keep up the great work!
Hi Joan,
Argh, yeah I bet you miss that NY moss. I also lived there. I’m glad I could at least bring back some memories for you. :0)
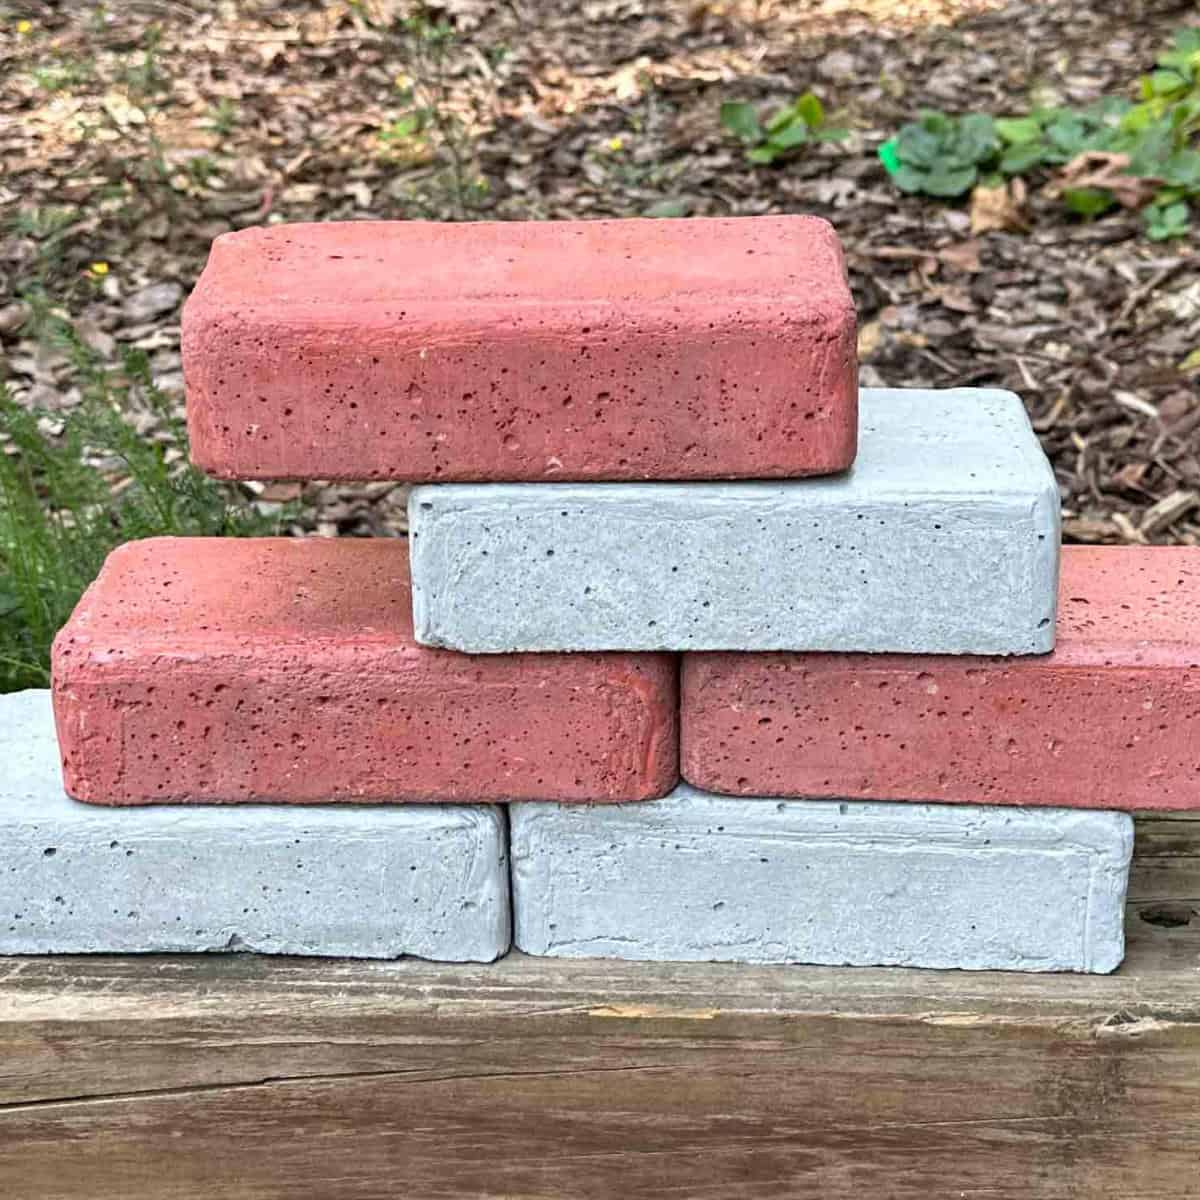
Great article! I have always been a lover of moss and have had some fails; especially the ‘slurry’ method. I have had success harvesting it from it’s favourite spots and using it to fill when planting my Concrete & Rocks Orbs. It holds the soil in place almost lie landscape fabric. Trying to get it to grow where ‘I’ want it is a bit more challenging (‘hate seeing those images where the have it growing as shape on a concrete wall, ya right!) Shade and moisture are the key I’ve found! It will however go dormant and can green up again… I also like it in my terrariums – perfect environment!
Hi Barb!
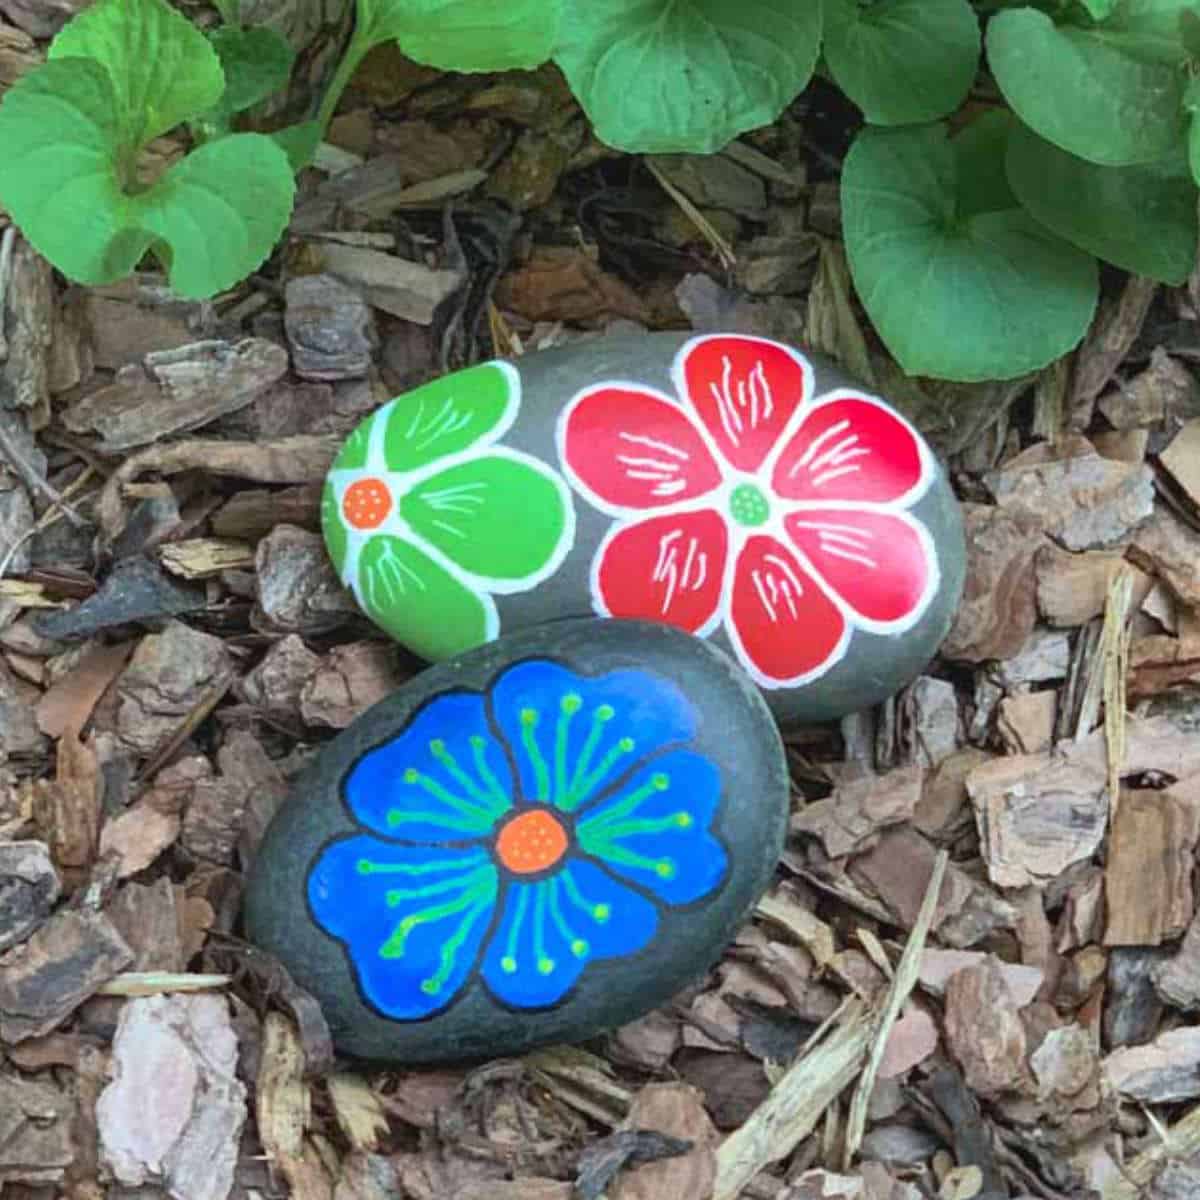
I’ve seen your post and am actually going to use it to try that on some rocks. I hope I can get it to work like yours!
Hi Ellen, so happy I found your site! I have a French garden with 4 rectangular boxwood boxes, and a lovely elevated statue in the center.Last week I hand pulled every blade of grass out of this area, and I am converting to a moss lawn. My lucky break is that I have a cousin blocks away who has half of her property covered in bright green moss , and she is not a fan of moss and said I could take as much as I need!!!The detailed information on your site is exactly what I needed.I can now proceed with some confidence ! I will touch base with you when I am finished. Wish me luck!! Lorraine
Hi Lorraine,
That’s great. Don’t you love having free natural resources! The hand pulling of every blade sounds not fun, but it will be worth it. I pluck on average about 2 new weeds a week. And it’s actually happening less often –not bad for 120sq ft of garden space. Let me know how it goes and good luck!
Hi Ellen, I am so excited to try this, thank you for posting it. We have clay instead of soil especially where I want to transplant the moss. I already see some growth in this area but I did want to just run this by you before moving the moss. Thanks!
Hi Keegan,
Yay! It works so well, I’m continuing to do it. You shouldn’t have a problem. We have clay soil too (I’m in Georgia). If the moss you have growing a bit in that area is the same type of moss, you’re definitely good. Most mosses are tolerant of most soil types, as I understand it. Good luck!
Hi Ellen! So far most of the moss is doing well but ants are making a mess in one area. Have you had this problem and if so, what did you use?
Hi!
What kind of mess are they making? Building nests?
Well, I did encounter a big ant problem, but that was because the sheets of moss I brought over from my neighbor’s had thousands of ants in them. But for some reason, they must not be the kind to build any nests- or make a mess. They haven’t done anything to the moss. I didn’t do anything to get rid of them. I’m a no-chemical person, so I just let the frogs, toads and anole’s have their snacks. :0) You can try diatomaceous earth. It’s not a chemical, but will kill all crawling insects –until it rains.
That’s so great that most of the moss is doing well! Gratifying, isn’t it?