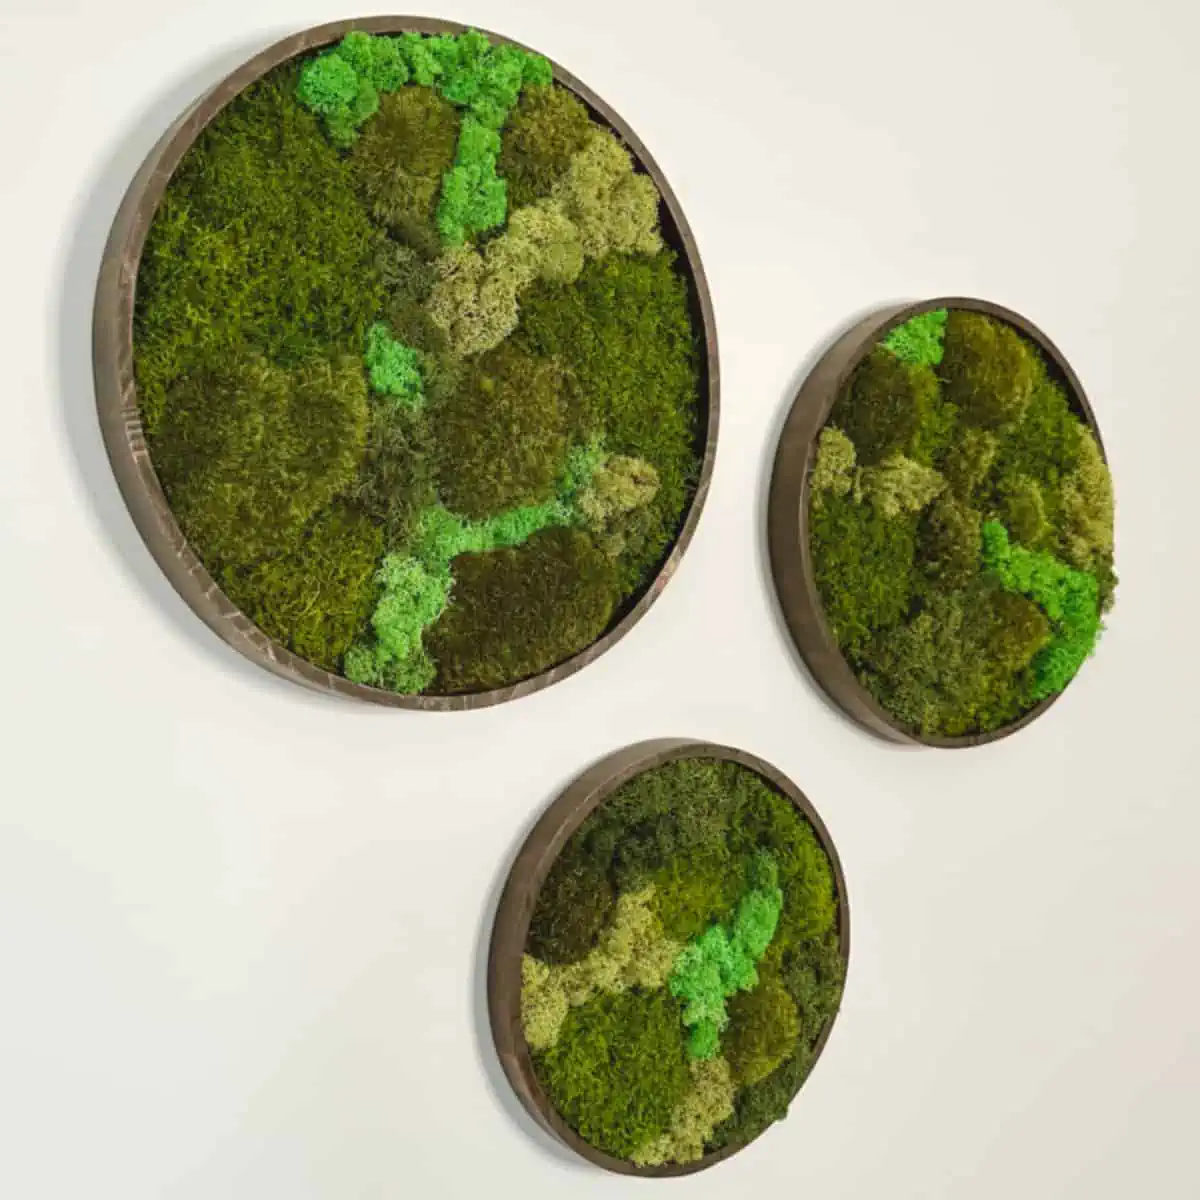
Make Beautiful Moss Wall Art (Easy DIY)
Here is how to make moss wall art and bring nature into your living space.
Moss is gorgeous and enchanting in natural environments, but gorgeous lush greenery doesn’t need to be confined to an outdoor space. Natural elements also look especially stunning in a living room.
A great way to bring the outside in is by creating unique DIY moss wall art. And this moss decor tutorial is full of helpful tips to make it easy.
What exactly is a moss wall?
A moss wall is a way of taking that appeal to create a vertical garden. It has become popular in home decor and is a big part of biophilic design.
There are outdoor moss walls and indoor moss walls. A living moss wall, sometimes called a green wall or living wall, will be an outdoor wall.
Mosses are living plants, and a true living moss wall is used for outdoor use. But the type for indoor use must be preserved, though it’s real moss.
There are different varieties of moss that can be used indoors. These preserved mosses are treated with a solution that stops the growing process. So it is no longer living and then colored with dyes.
Typical Indoor Mosses Used For Making Wall Decor
- Reindeer moss: an upright puffy, or pillowy like appearance
- Mood moss: round and clumps, with a wooly type of texture
- Sheet moss: lush and carpet like
- Pole moss: sometimes referred to as pin-cushion moss due to its mound-like appearance
To learn more about moss and caring for it, check out our FAQ at the bottom of the page.
By the way, if you love the look of moss, you may be interested in how I rescued some from a neighbor to make a flagstone path.
And if you have some moss in your yard, did you know you can transplant it to other areas or even help expand it? This article explains how to transplant moss.
If you like the look of this project, some of the inspiration came from two other circle art projects I made, like this one for yarn wall art rings and a 3D wood circle art project to go over my sofa.
Some of the links on this page have been provided as a convenience for finding materials. These links may also be affiliate links. As an Amazon Associate I earn from qualifying purchases, at no extra cost to you.
I only recommend products I’ve used and loved, unless otherwise stated. Click here to read my full disclosure policy.
DIY DIFFICULTY LEVEL | Easy
List Of Materials For How To Make Moss Wall Art
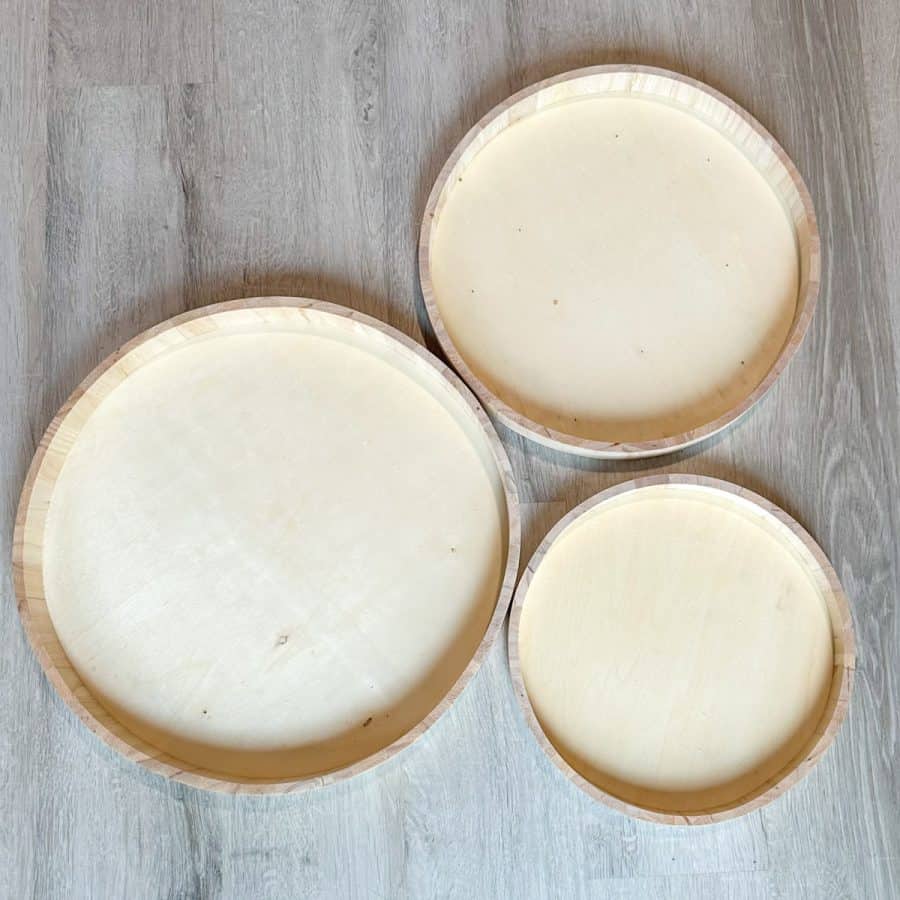
- Wood trays -3 different sizes
- Sandpaper 240 grit
- Tack cloth
- Top coat acrylic spray– satin
- Wood stain– water based
- Polyurethane clear– satin
- Staining brush
- Foam brush
- Craft sticks
- Scrap wood (plywood -about ¼”)
- Wood screws -small (6)
- Power drill
- Small drill bit and large ⅜” bit
- Screw driver
- Silicone bumpers (4)
- Neoprene foam ¼”
- Hot glue gun
- Glue sticks
- Preserved moss- Reindeer– 3 different colors
- Preserved moss-Sheet, Pole
- Nitrile gloves
- Pan head screws (3)
- Plastic drywall anchors (3)
Materials Note:
Hanging Hardware:
The sizes of the hanging screws will depend on the thickness of your scrap wood. I found a #8 or 10 thread width to be a good size.
Also, keep in mind that your drywall anchors don’t need to be the same match in length as the screws.
For example, with my ½” piece of plywood, I used 1 ½” screws with 1 ¼” anchors. Also, I recommend using a drill bit that is ⅜” to fit most common screw head widths.
Wood Trays:
The trays come as a set of 5, so you’ll have two extra. The moss I linked to is the smaller sizes, so if you want to make more of these, you can buy the larger amounts.
Neoprene Foam:
The foam is wonderful and much better to work with than the cardboard I used.
It cuts like butter, saves tons of time and almost as much money in the cost of the tons of extra glue sticks you won’t need to use, because you just peel and stick it to the base.
You still will need a fair amount of glue, so keep extras on hand. My best guess is 4-5 of the extra long/wide sticks. (See my note in Step 6)
And just a heads up, the moss is not inexpensive, but if you were to buy the moss wall are set, rather than make it, you would pay three to four times as much.
It really is a deal. The quantities of mosses I linked to in the material’s list are the minimum needed to get the project done, but you will have extra Pole moss (the mounded type).
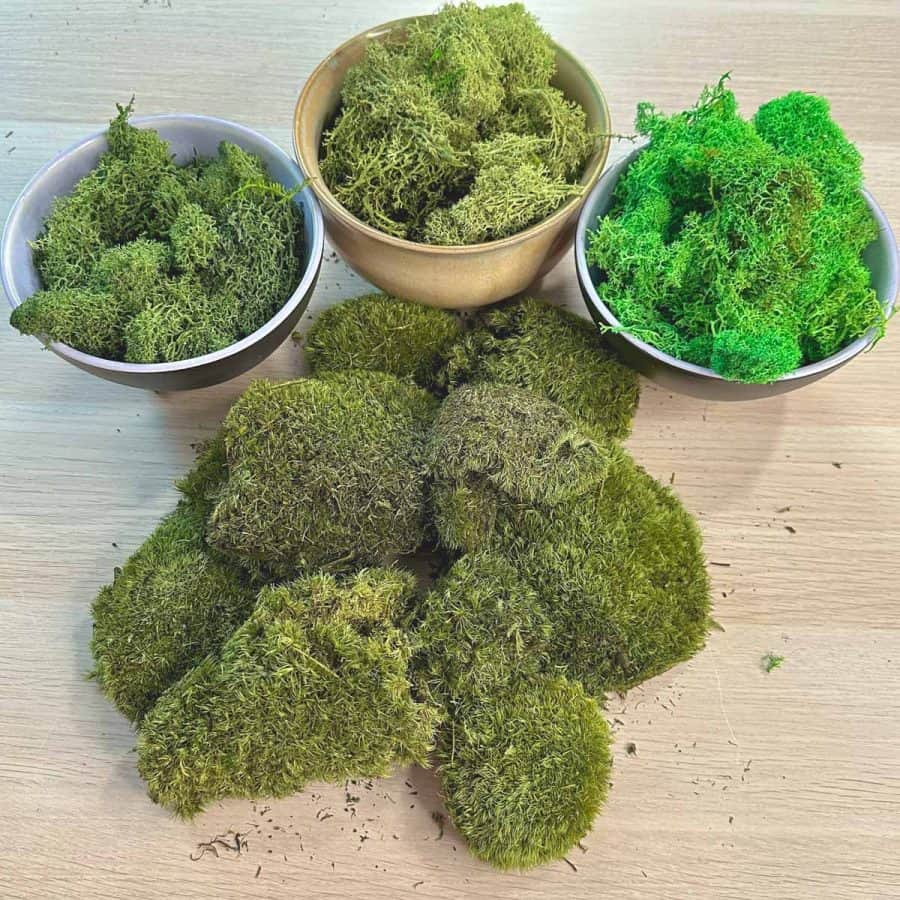
3 colors of Reindeer moss in bowls and piles of Pole moss. 
3 colors of Reindeer moss and Sheet moss.


Tutorial Steps For Making DIY Moss Wall Art
Note: The larger trays are especially deep, and you need to conserve the amount of moss you use.
Unfortunately, it was after I finished the project that I came up with the idea to use foam to build up the base of the trays instead of cardboard.
I took a separate photo later to show the foam until the steps I added the moss.

Use sandpaper to sand the top edge and around the outer rim.
Step 2. Stain The Trays

Use a paint brush to apply the stain to the top and outside edges. Also, stain the inside edge since part of it will be visible.
Staining the back is a good idea, too, since the outer edges may be slightly visible from the sides. The inside bottom doesn’t need to be stained since the foam will cover it.
But coat it with the acrylic spray to help protect the wood. You’ll do this in the next step.
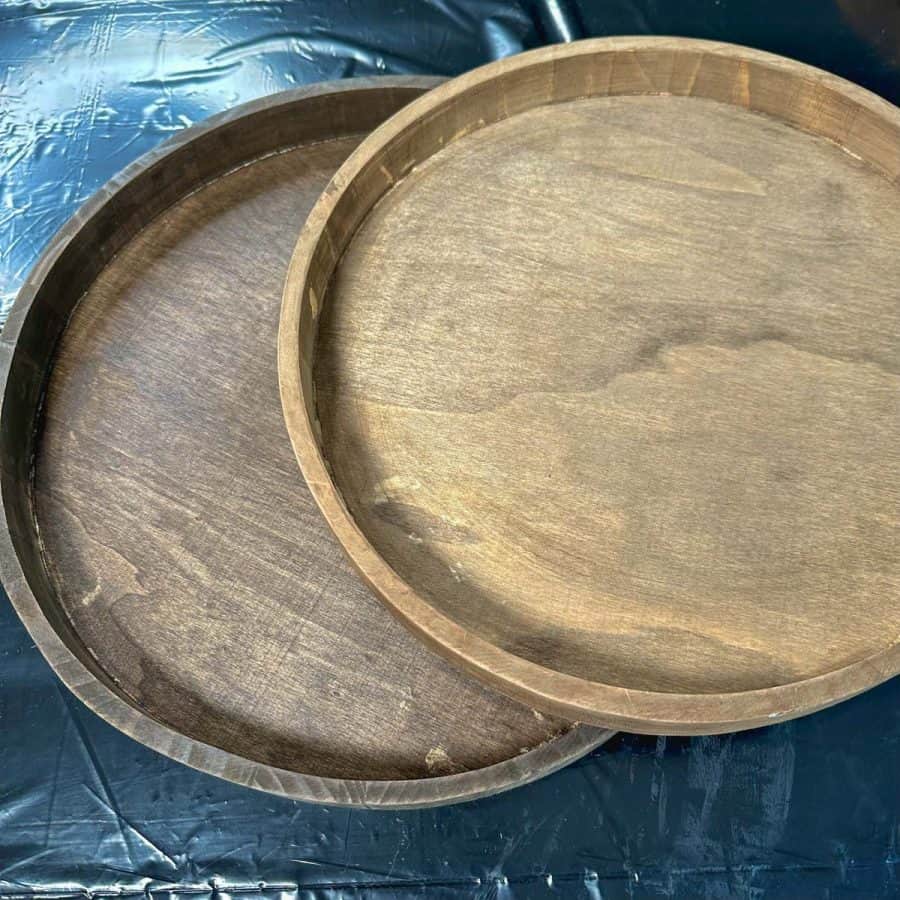
I recommend applying two coats of stain. The photo above shows the difference between one and two coats.
Reminder Note: I stained the bottom of my trays because I only came up with the idea to use the foam to build up the base after I finished the project. Staining the inside bottom isn’t necessary.
Step 3. Apply The Protective Clear Coats
Once the stain is dry, use a foam brush to apply two coats of clear polyurethane to the top and outside edges.
I was tempted to only apply one coat, but after testing, the color depth was much nicer after two.
Use the acrylic spray top coat instead of the polyurethane for the inside and outside bottom to save time.
Step 4. Make The Hanging Mount Support And Screw Hole
The backs of the trays are pretty thin (about 3/16″). You will reinforce them before you hang them.
To do this, cut 3 pieces of scrap plywood into approximately 2″ x 2″ pieces.
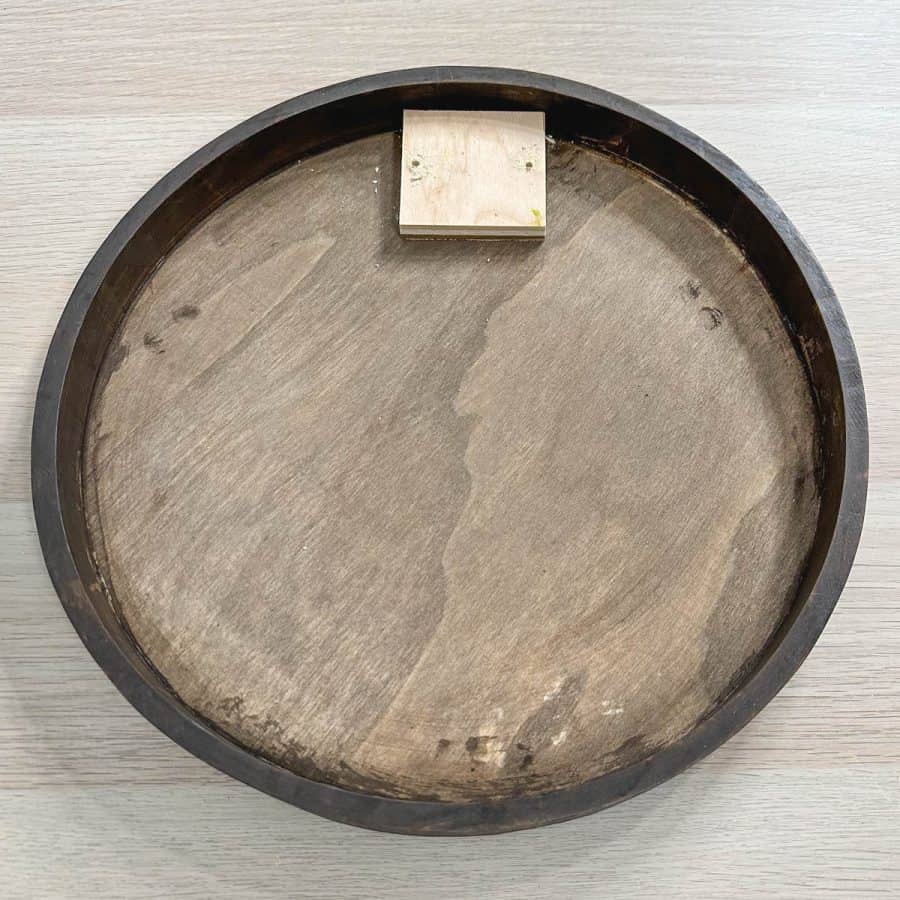
Then drill pilot holes for the two screws that will secure the plywood to the tray bottom.
Take care when drilling the holes, so you don’t crack the thin wood in the bottom of the tray. When you drill this, be sure to drill the holes from inside the tray.

When screwing in the screws, do it from the back of the frame. Take care to hold the scrap wood firmly against the backing of the tray to give it some resistance.

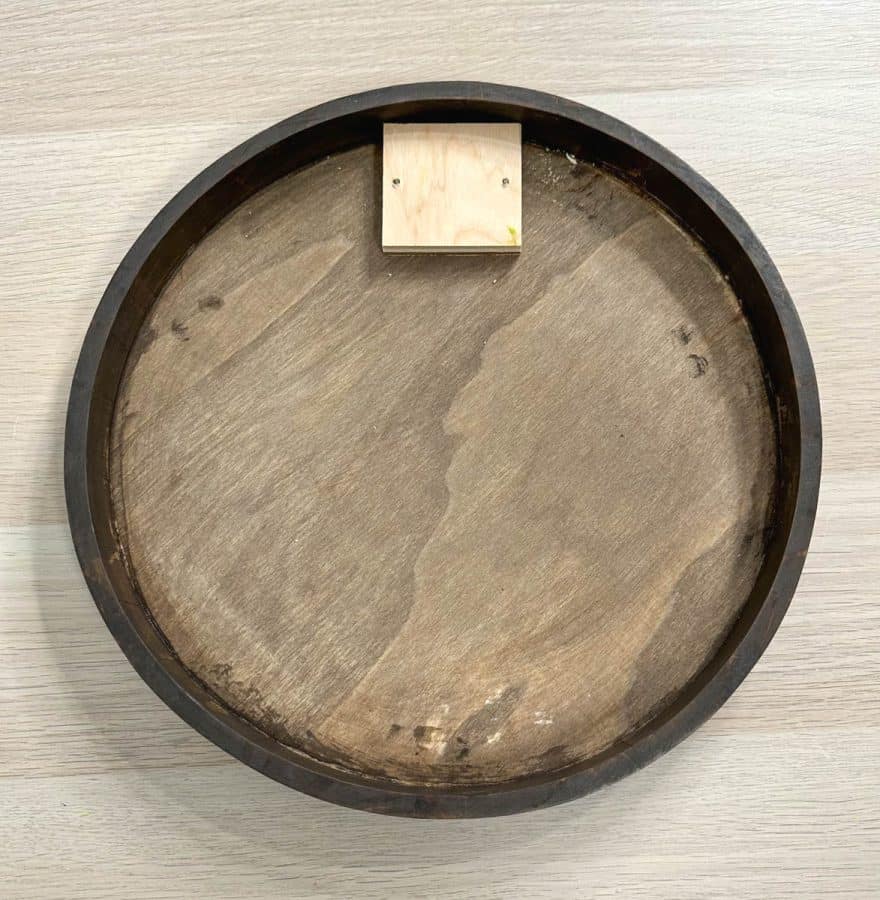
Now, drill a hole from the back side of the tray for the hanging screw.
Just be sure your hole is wider than the head of the screw you will use to hang the moss art on the wall. I recommend a ⅜” bit to fit most screw head sizes.
Step 5. Add Wall Bumpers
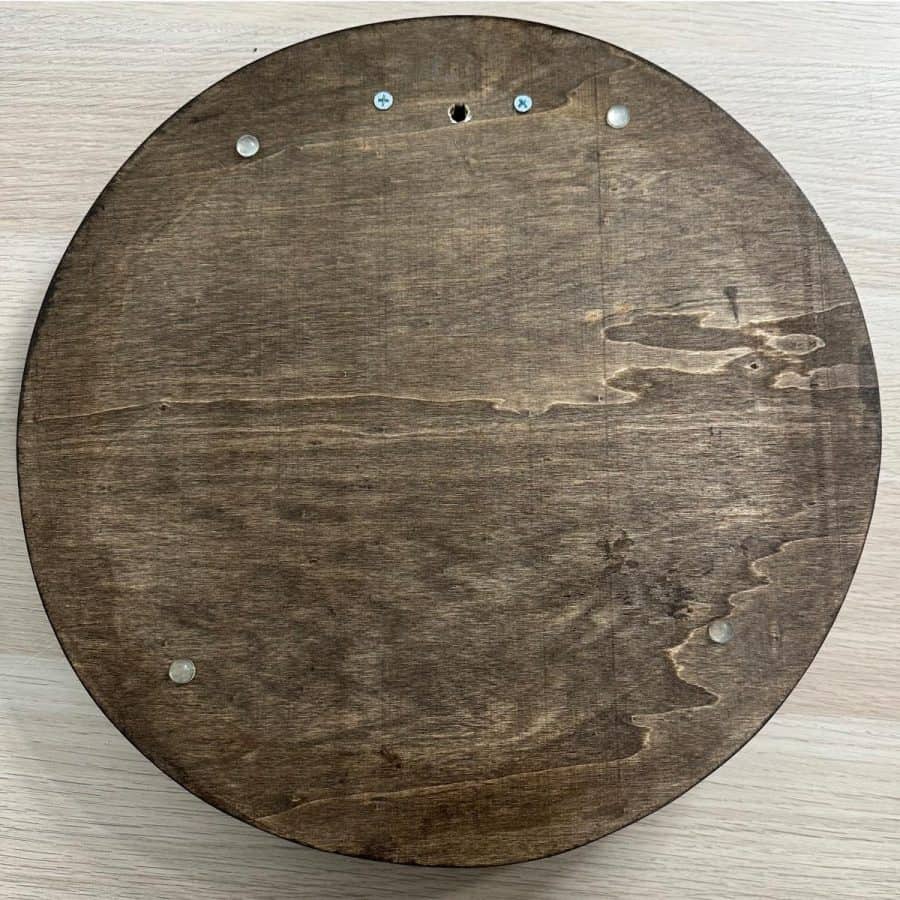
Add 4 bumpers to the back. This will help keep the tray straight and flush on the wall and protect your wall. Place them about an inch from the edge at each corner.
Step 6. Build Up The Bottom Of The Tray
The sides of each tray are different heights depending on the tray’s diameter. The larger the tray, the taller the sides.
To avoid using extra moss, you will build up the bottom of the trays. The smallest tray may not need building up, but you will want it for the medium and large ones.
Building the tray up will save you from wasting extra moss. With my thin cardboard build-up, I had just enough moss to complete the 3 trays.
However, I did have extra of the mounded Pole moss. And if I had used more of that, I would have had extra of the others, but I didn’t want to have too many moss mounds.
Unfortunately, it was in hindsight that I thought about using foam.
And with all the pieces of cardboard, I went through 14 sticks of glue! So ignore the cardboard in the photos. You will be gluing to the foam.
The ¼” thickness of the foam I recommended in the materials list is perfect. It will save you money on the glue and a lot of time.

Cut the foam to size and cut out for the area where the plywood scrap wood is. Then peel off the adhesive backing and attach it to the tray bottom.
The largest tray may need a second layer. However, I recommend adding the moss to that tray last and then decide if it needs the second layer of foam after you have played with the moss layout.
Even if you use the extra layer, you will have some extra scraps that you can use to build up the design a little higher in a few spots if you wish. I didn’t need to go thick on the build-up.
Step 7. Plan The Design Of Your Moss Wall Art
Now for real fun! First, put on gloves. The moss has a lot of dye and does stain your hands and anything else it touches.
Additionally, you should protect your work surface with a plastic cloth or newspaper.
Also, the gloves may help protect your hands from hot glue burns. I didn’t wear gloves initially, and my gun is a high temp one without a low setting, and I got a few blisters from burns.
Get the moss types and colors organized by dividing them into separate bowls.
Then start playing with a design layout. I had a general idea of how I wanted my moss wall art to look, so I just placed the different colors and textures onto the tray and played with the arrangement until I liked the balance of the colors and textures.
To avoid the moss colors having the appearance of being randomly placed, I tried to keep colors in groupings.
And I created some lines of colors that flowed from the color and texture groups that usually extended from the edges or connected other colors or different textures.
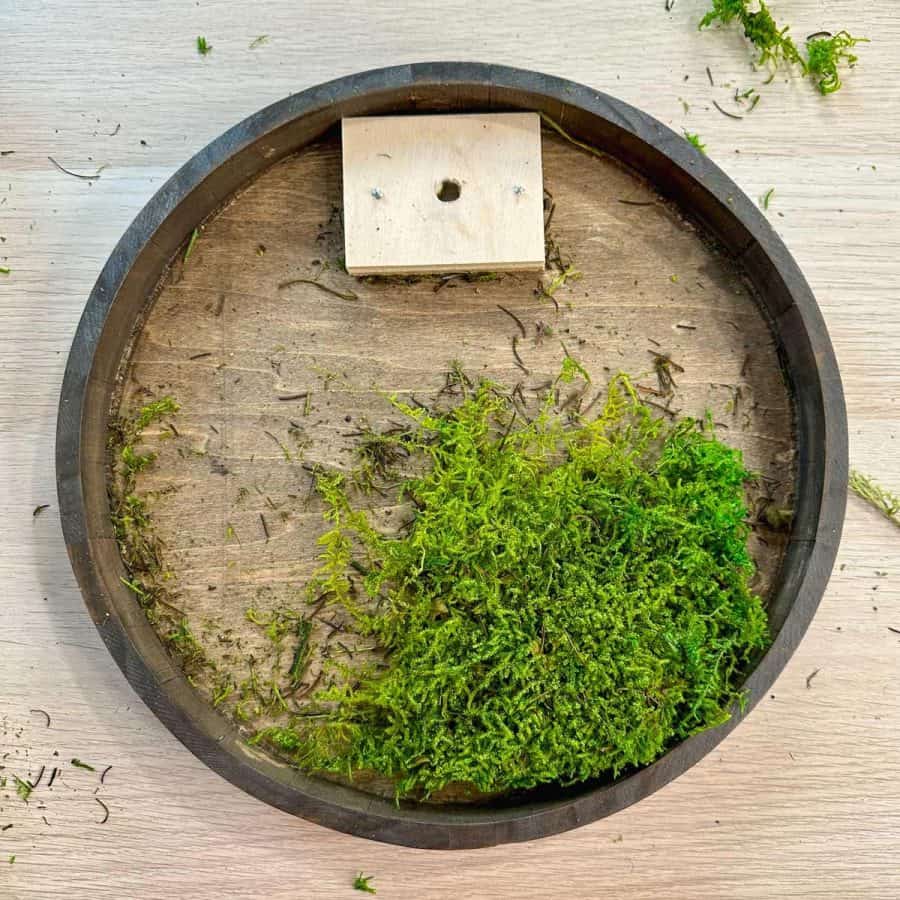
Reminder: You will have foam on the bottom of the tray at this step.
To start the loose layout, I began with the Sheet moss. Pull the Sheet moss apart into the general shapes and set the pieces into the tray.
Much of the sheet ran under the rest of the other types of moss. But there needed to be more to cover all of the 3 trays.
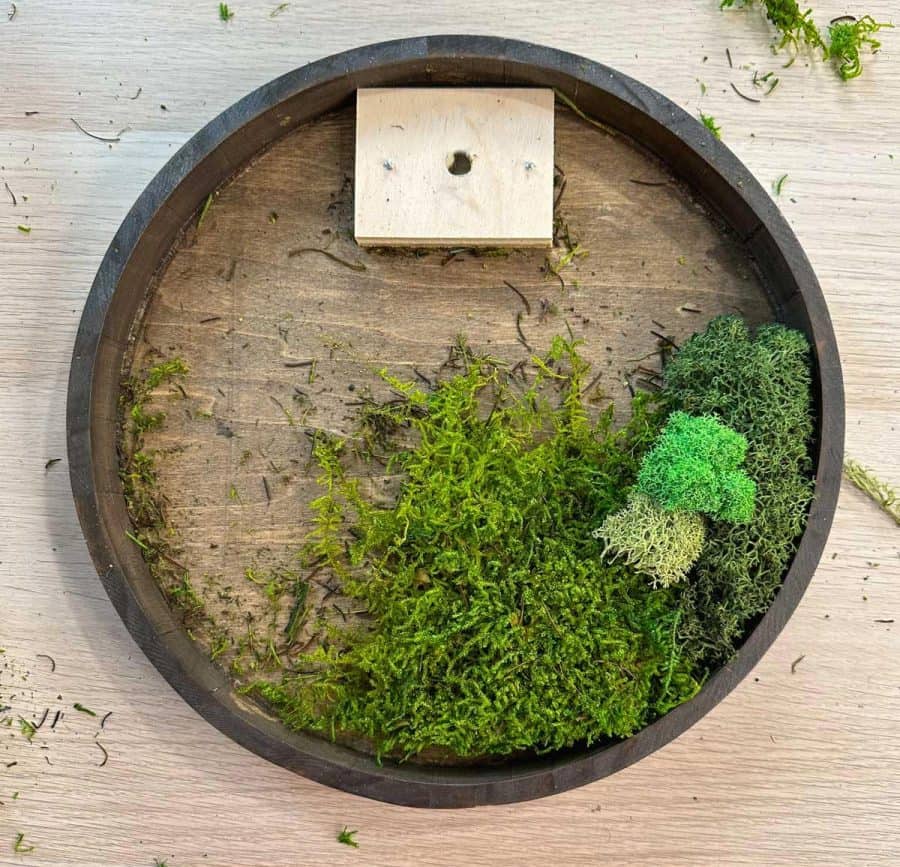
However, you don’t need it under each moss piece, especially the Pole moss mounds.
This type of moss is deep so that it can sit directly on top of the foam.

The puffy pieces are Reindeer moss. Some chunks of this moss are quite vertical and won’t need the Sheet moss underneath, like the Pole moss.
I ended up cutting the bottoms off of these to give it that small, round cotton ball-like appearance.

Continue until you have a design you are happy with. I recommend moving on to the layout of the other two trays before you glue any moss down.
The reason is that you want to ensure you have enough moss and the colors you need for each design.
Once you have roughly laid out all three designs, take a photo of each.
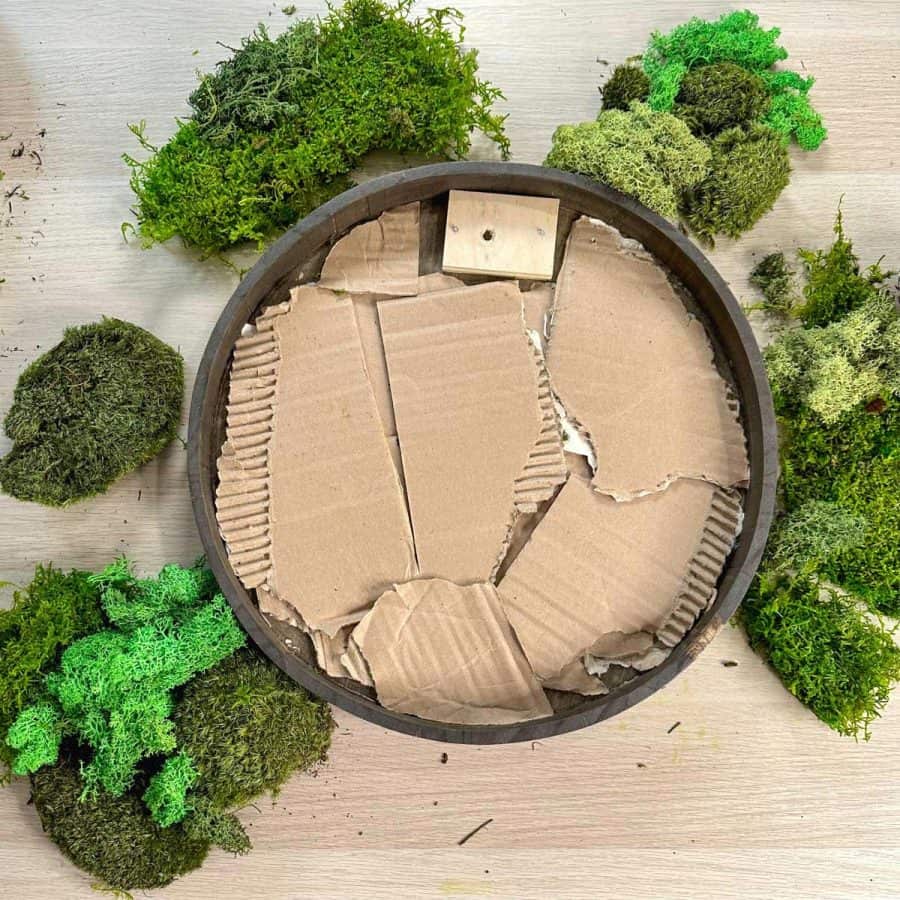
Reminder: Ignore the cardboard in the remaining photos. You will have foam there instead.
Then set two trays aside, and for the one you will start with, carefully remove each piece and set it directly outside of the tray, in the exact location it will go when you glue it.
Step 8. Glue The Moss To The Tray
Heat the glue gun, use the photo you took for reference, and start gluing the pieces to the foam.
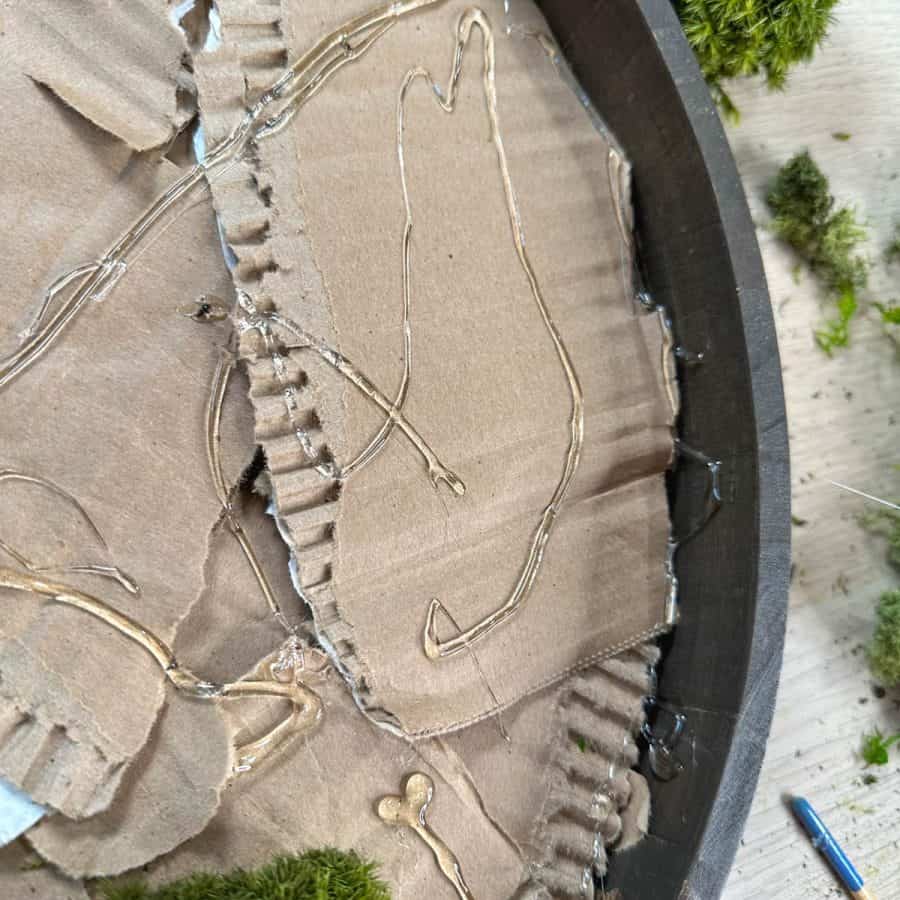

For the most part, it is easier to add glue to the foam, rather than directly to the moss.

The exception is the Pole moss. I just applied the glue directly to that.
Gluing the foam first will be less messy. Continue to add the moss little by little.

When you have pieces at the edge, use the tip of a paint brush or something you don’t mind getting glue on and tuck the sides of the moss.
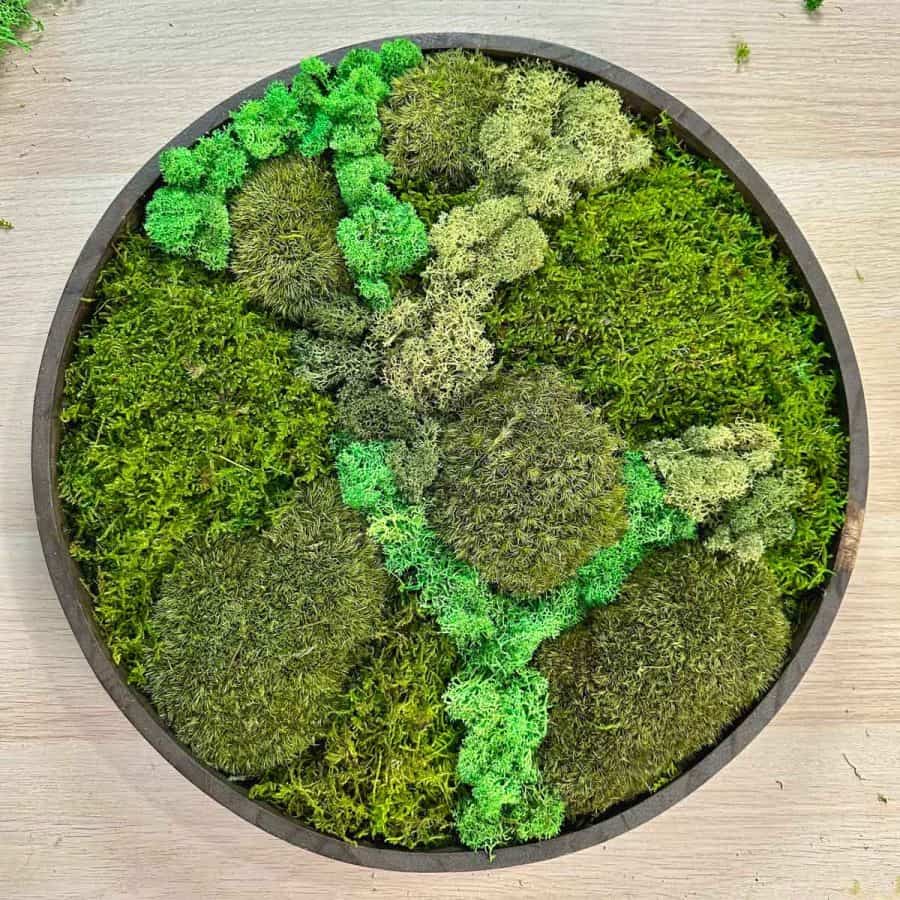
Step 9. Moss Clean Up And Final Details

When you have finished the DIY moss art, pull away any visible strands of glue.
Also, there are likely to be little pieces of leaf debris stuck inside some of the moss.
Carefully pull out any leaf stems or leaves. I found tweezers to be helpful for this.
You may also have some long, straggly pieces you wish to trim. Then when done, turn the tray upside down and gently shake it.
This will release any remaining loose debris, and if you have any pieces of moss that didn’t stick, it’s better to know now to re-glue it. I was happy to see that none of my pieces fell out.
Step 10. Hang The DIY Moss Wall Art
To hang the moss wall art, insert a drywall anchor into the wall.

Then take a screw, insert it into the hole, and let it hang in your hand. This is the depth you will screw in the wall.
Use a piece of blue tape as a flag to mark your stopping point. Then screw it into a drywall anchor, and place the moss wall decor hole over the screw.
See this article to see how to touch up moss wall art if it has become dried or faded.
And if you are inspired art and nature, check out this cheerful bouquet of flowers you can make by using the fallen balls from a Sweetgum tree!
FAQ For Making Moss Wall Art
How long does preserved moss wall art last?
The life span of preserved moss depends on exposure to sunlight. UV rays cause fading, so without direct sunlight, it could last 5-8 years before requiring touch-ups. Sometimes even longer.
How often should you water a moss wall?
For most types of preserved moss, you should not water them. Most of these contain dyes that will run.
These preserved mosses don’t require any watering. In fact, you should not water your preserved moss.
How do I care for my moss wall decor?
The most important way to properly care for your moss is to keep it out of direct sunlight. Any UV rays can cause it to fade.
Beyond that, do your best to keep it dust-free. I like to use my anti-static duster on it because it’s gentle.
What are the benefits of a moss wall?
An outdoor living moss wall is especially beneficial in urban areas because it produces additional carbon dioxide, which purifies the air we breathe.
An indoor moss wall is great for sound absorption. You’ll often see large moss panels installed mainly for this purpose. Even these smaller circles for wall art help with sound.
For another great nature craft, check out the grapevine hanging planter basket.
And you may also like this wine bottle vase wall art.
Don’t forget to Pin it for later!


DIY Moss Wall Art
Learn how to create DIY moss wall art in your home. With detailed step-by-step instructions, you can create your own moss wall with ease.
Materials
- Preserved Moss
- Wood trays -3 different sizes
- Sandpaper 240 grit
- Tack cloth
- Top coat acrylic spray
- Wood stain
- Polyurethane clear- satin
Tools
- Please see the full materials list above the tutorial for details and links.
Instructions
- Sand The Trays With Sandpaper
- Stain The Trays With Wood Stain
- Apply The Protective Clear Coats
- Make The Hanging Mount Support And Screw Hole
- Add Wall Bumpers To The Back Of The Frame
- Build Up The Bottom Of The Tray With Foam
- Plan The Design Of Your Moss Wall Art
- Glue The Moss To The Tray With Hot Glue, But Glue The Foam, Rather Than The Moss
- Clean Up The Hot Glue Strings From The Moss And Leaf Debris
- Hang The DIY Moss Wall Art On The Wall With Drywall Screws And Anchors


So pretty!