Easy DIY Concrete Coasters With Fall Leaves
Get into the autumn spirit with this easy tutorial for how to make DIY concrete coasters with imprinted leaves, painted with fall colors.
These handmade concrete coasters are the perfect way to accent your home decor for fall.
I never seem to have much fall decor, so I’m changing that this year by making my own concrete coasters with fall leaves.

The Easiest Way To Make Concrete Coasters
Last year I made homemade concrete coasters (linked below the materials) using a cardboard mailing tube, which was a great use as a concrete beverage coaster mold.
But using pre-made silicone molds is the easy way to make DIY coasters, and so this time, it’s the route I decided to take.
At first, I thought I would make square ones because I already had a square concrete coaster mold.
But I had forgotten how rounded the corners were, which made them less modern, so I opted for these round ones.
Aside from getting to make your own home decor, these are also a great gift idea.
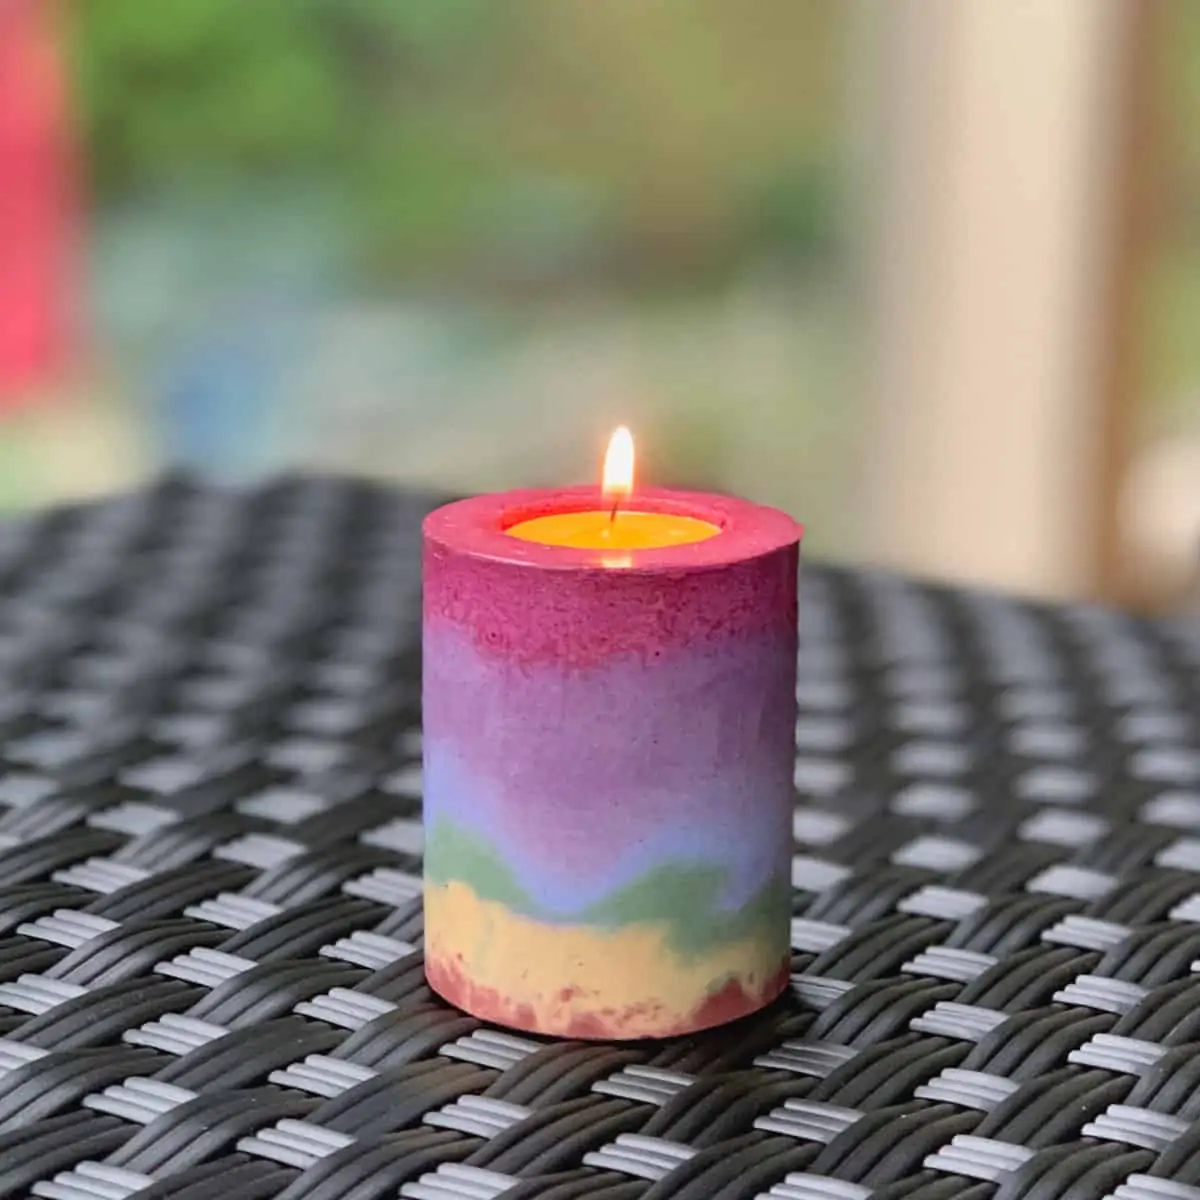
A couple of other concrete decor gift ideas are these concrete pillar candles and concrete candle holders for fall.
Jump right into this one, to see how easy these are to make.
Some of the links on this page have been provided as a convenience for finding materials. These links may also be affiliate links. As an Amazon Associate I earn from qualifying purchases, at no extra cost to you.
I only recommend products I’ve used and loved, unless otherwise stated. Click here to read my full disclosure policy.
DIY DIFFICULTY LEVEL | Easy
How To Make DIY Concrete Coasters With Fall Leaves Materials List
- *Sand Topping Mix
- Black colorant
- Disposable bowl
- Disposable cup
- Durable nitrile gloves–I like these because they are so durable, you can rinse and reuse them
- Safety glasses
- Safety mask–rated for silica dust
- Silicone coaster mold
- Spray adhesive
- Small fresh, green leaves
- #60 grit diamond sanding sponge
- Iridescent gold acrylic paint
- Orange acrylic paint–optional
- Paint brush with stiff bristles
- Soft cloth
- Matte concrete sealer
- Foam brush
- Cork bumpers

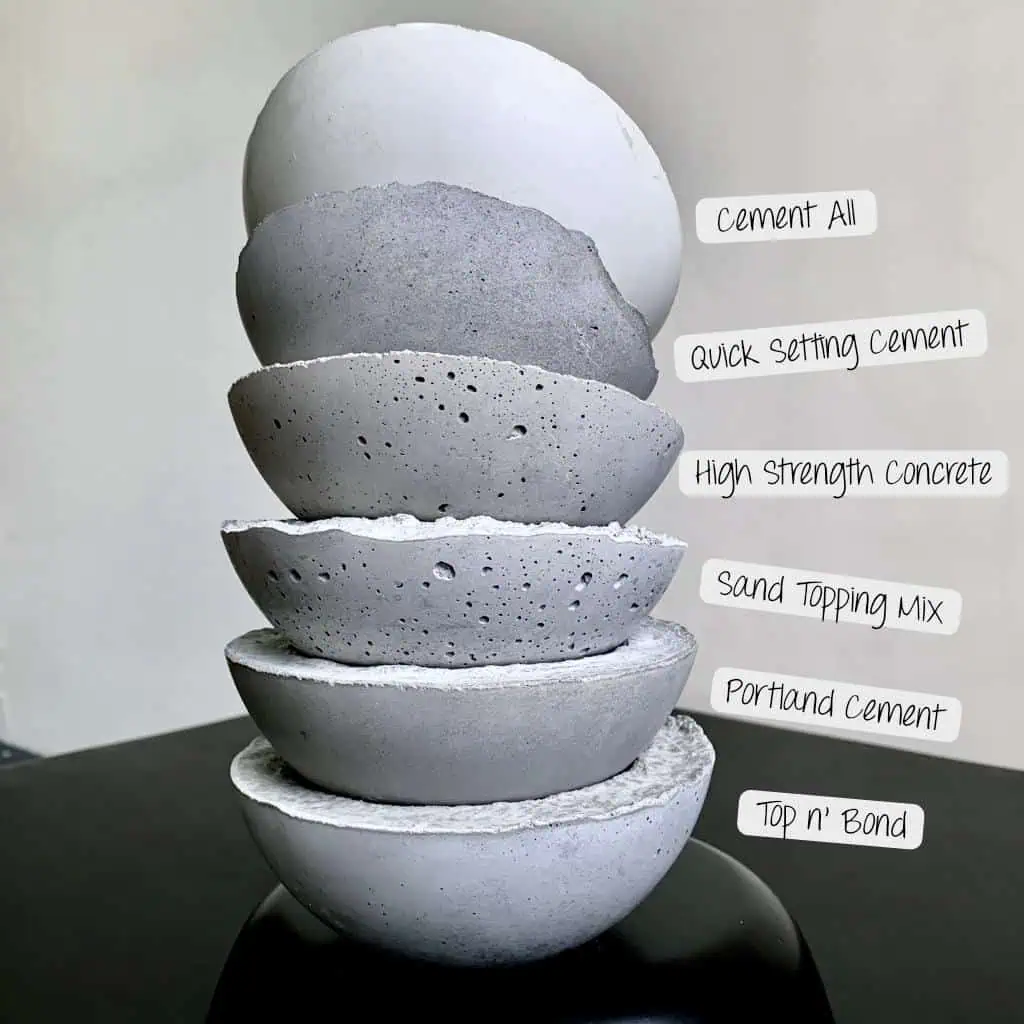
*Materials Note UPDATE: When I originally made these I used Cement All and not Sand Topping Mix.
I have since had trouble with water mark rings caused by from sweating from glasses.
This is likely from sanding the top to remove the scratches. I have not had any staining with my heavily used flower coasters, in which I used Sand Topping Mix.
Because of this, I have re-written the tutorial using Sand Topping Mix instead.
It actually saves you a step, but you do need to wait 24 hours before you demold this mix, instead of the 1 hour with Cement All.
Here are the flower coasters I made the year before this that I mentioned in the intro. And you’ll also love these concrete Kintsugi coasters with stunning gold lines.
How To Make DIY Concrete Coasters With Leaves Tutorial Steps
Before starting the tutorial, it may be helpful to read my article comparing the different concrete mixes and sealers– Cement & Concrete Crafts Tests!
Another important article is Making Cement Crafts Techniques & Tips with info on cement materials, mixture consistencies, demolding, safety and clean up!
Step 1. Find Leaves For Making The Concrete Imprint
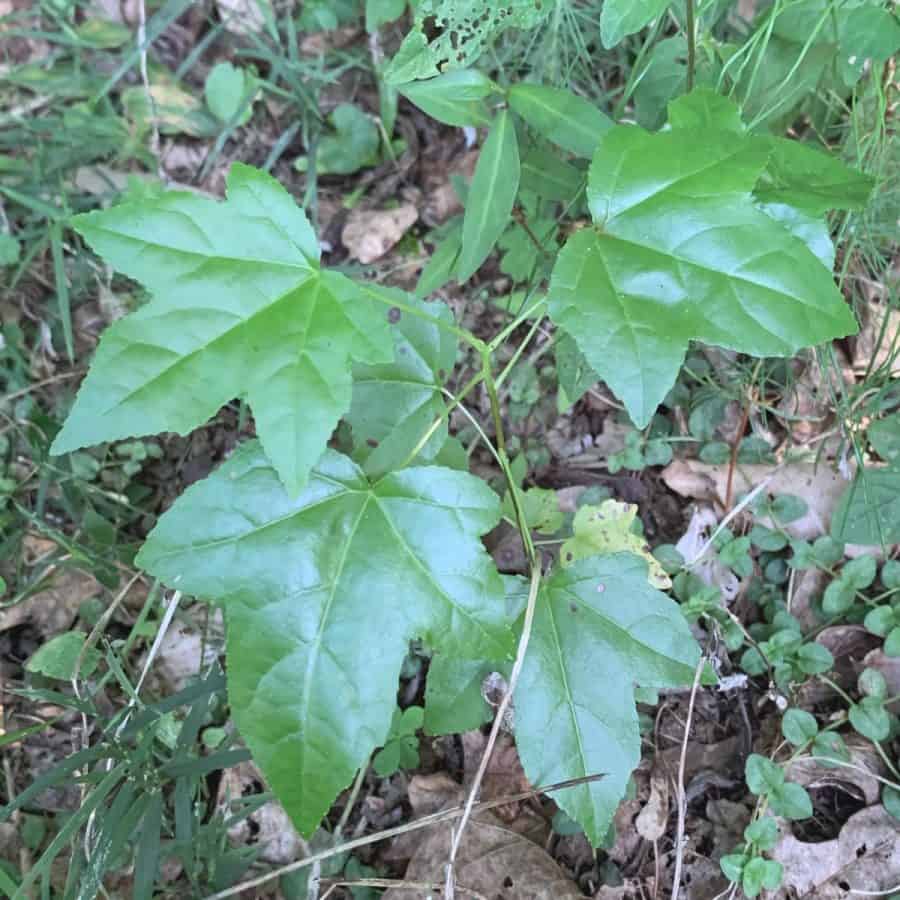
Take a walk around your yard or neighborhood park and look for the smallest leaves you can find.
Sometimes these will be stems growing from the grown that were seedlings.
The fresher, the better. If the leaves are a little old or dry, they’ll be tougher to remove from the cured concrete.
The leaves should be no bigger than 3” long because the silicone mold is 4”.
But if you are placing the leaf diagonally, you’ll have a little more room.
I like to leave a fair amount of empty space around the leaf so that it doesn’t overtake the whole coaster.
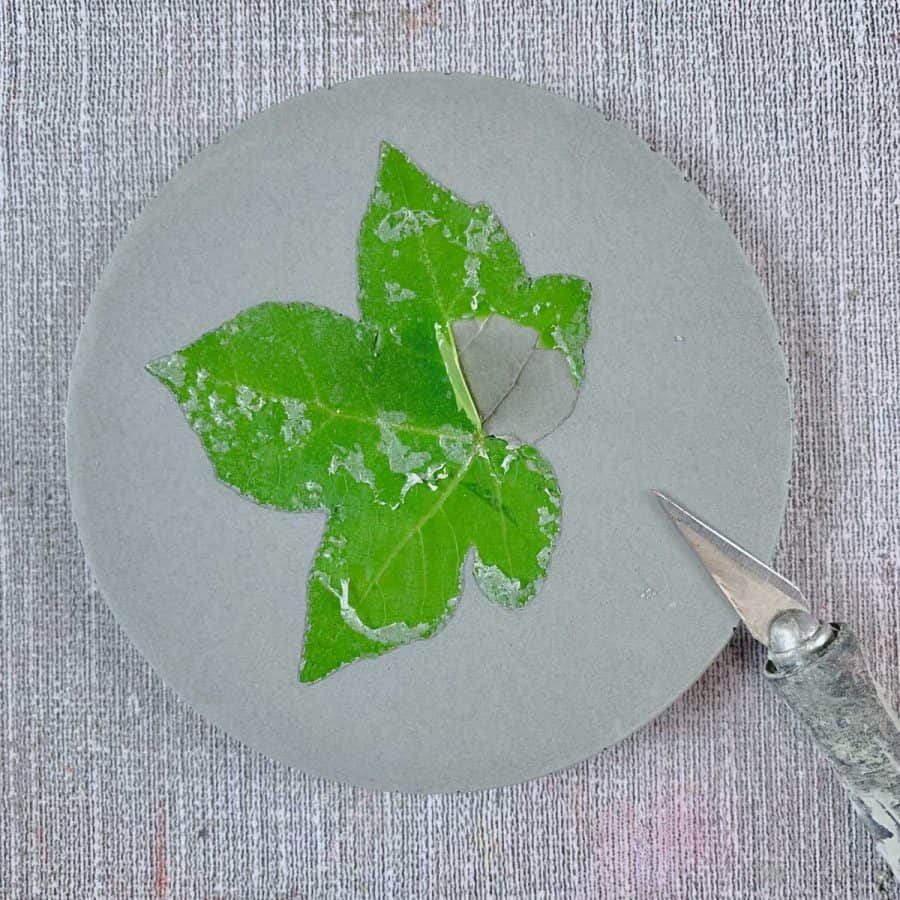
Step 2. Adhere The Leaves to The Concrete Mold

You will want the leaves face down when inside the mold so that the backside is facing you because the veins are stronger and it will leave a finer imprint.
You will use spray adhesive to glue each leaf to the bottom of the silicone mold.
Start by placing the face (smooth side) of the leaves facing up on cardboard on either newspaper or old cardboard.
Follow the instructions on the spray adhesive and then spray the entire surface of the front of the leaf.
And since spray adhesive works very quickly, I recommend only spraying the leaves two at a time to give you enough time to position them.
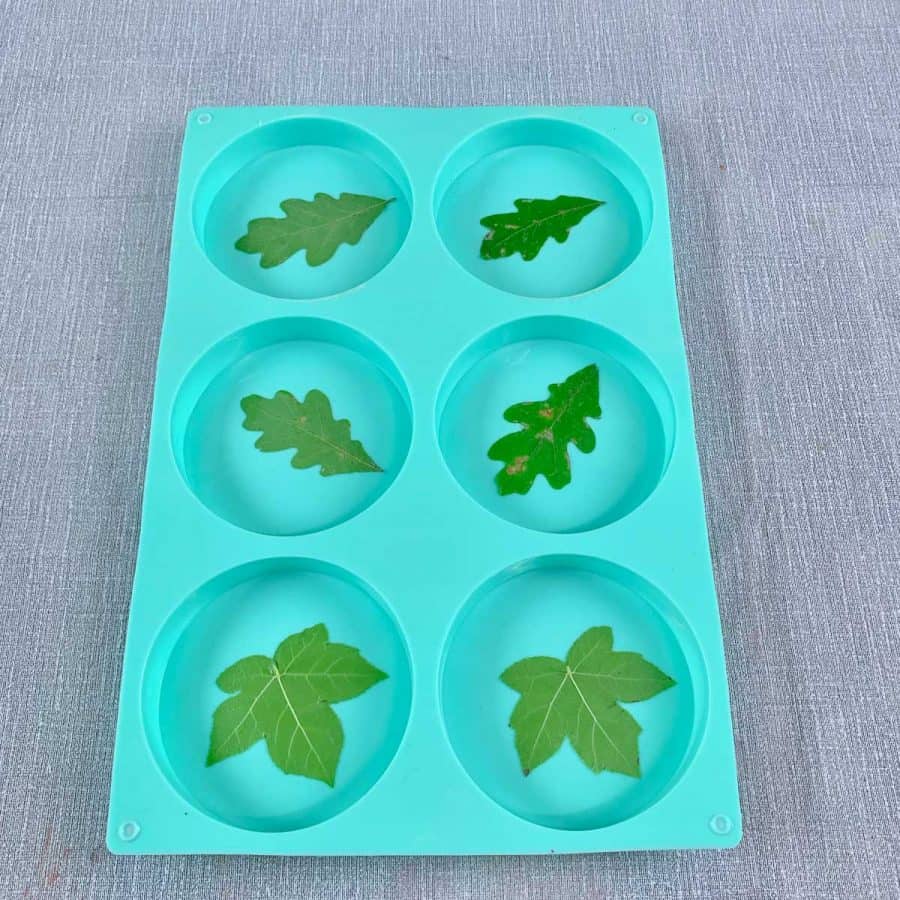
Carefully lift the leaves and place them diagonally into the concrete silicone mold cavities.
Position them first before pressing, then press firmly and be sure you have them fully flat against the mold.
If any part of the leaf is raised from the mold, the concrete will get underneath, which will make it difficult to remove.
Step 3. Prepare The Concrete Mold For Casting
First, place your mold onto a flat surface that you can transport, like a rigid board.
This will help you vibrate it after casting because the mold has soft sides.
The rigidity of the board allows you to vibrate it without deforming the soft sides of the mold while doing so.
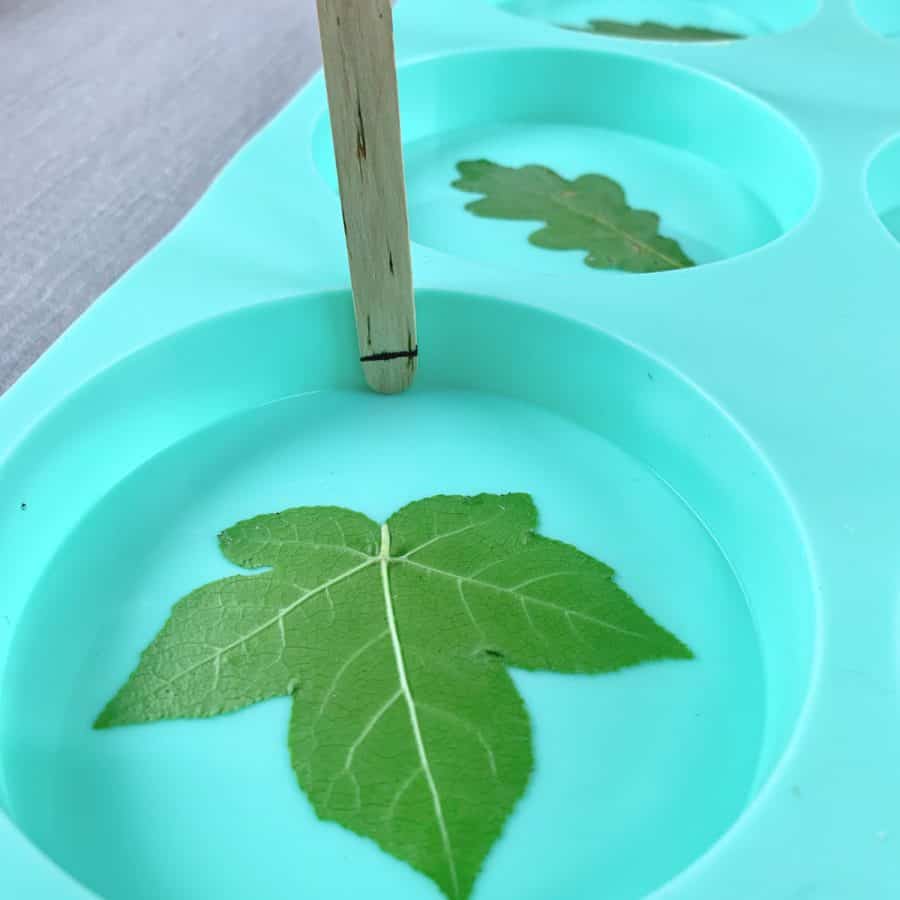
Now if you want thinner coasters like mine then make the thickness of the coasters about ¼”.
So place a ruler inside and measure up ¼” from the bottom and mark this with a permanent marker on the side of the mold.
This will be the stopping point for the cement.
Now if you prefer chunky-style coasters, then you can pour the concrete closer to the top of the mold.
You’ll see in the photo, I couldn’t find my ruler, but I had another coaster I could use as a guide.
I just marked a craft stick at the height of the coaster and then used that to make my marks inside the cavities.
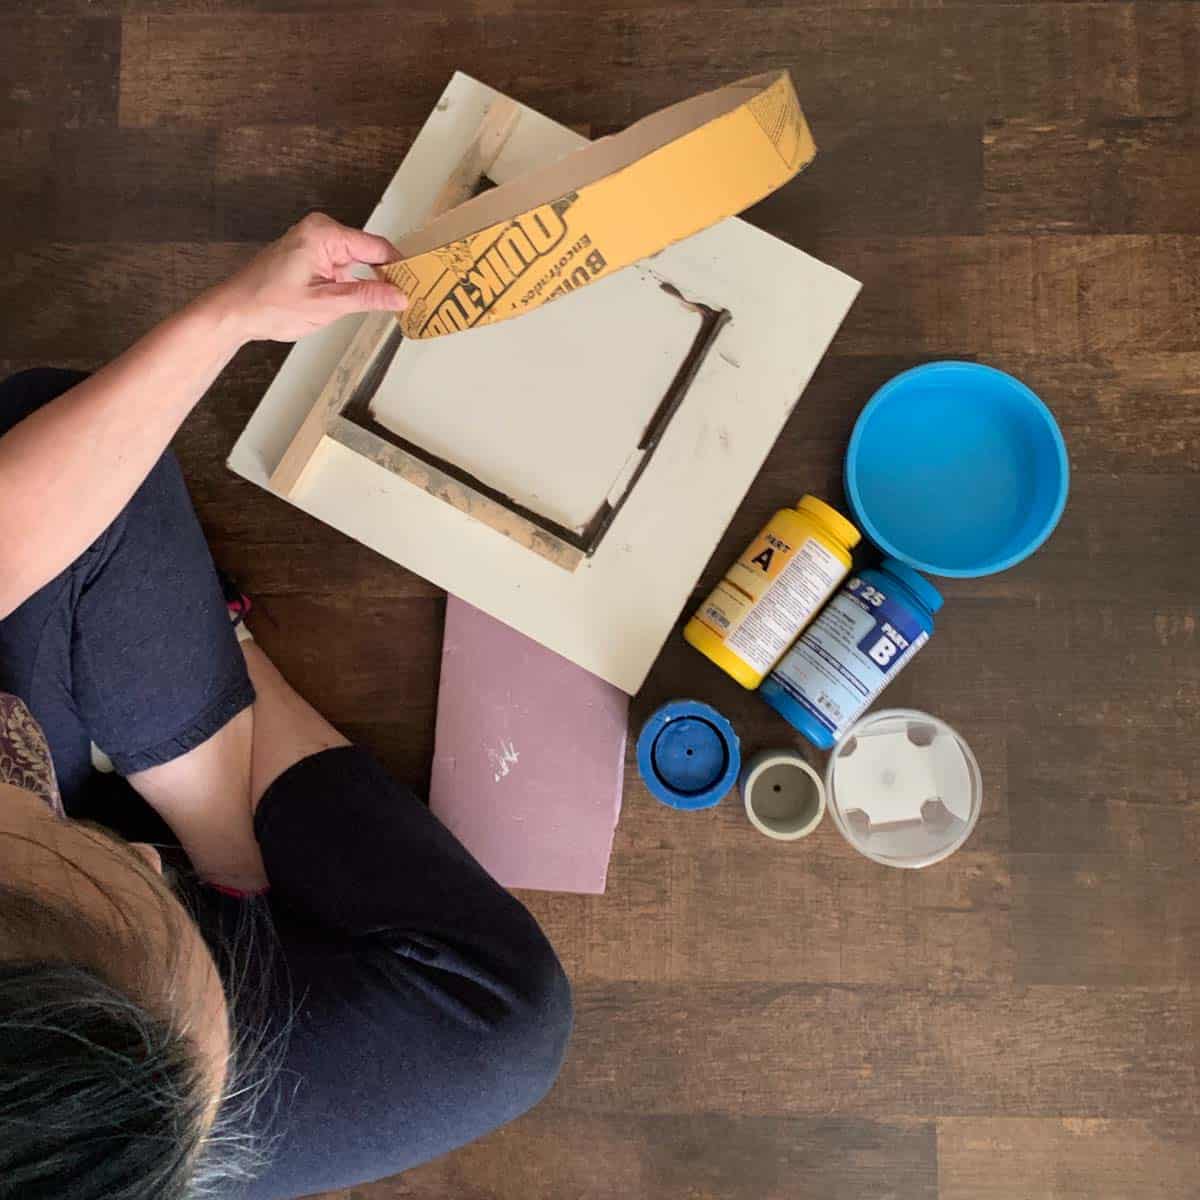
Step 4. Mix And Cast The Cement Mixture
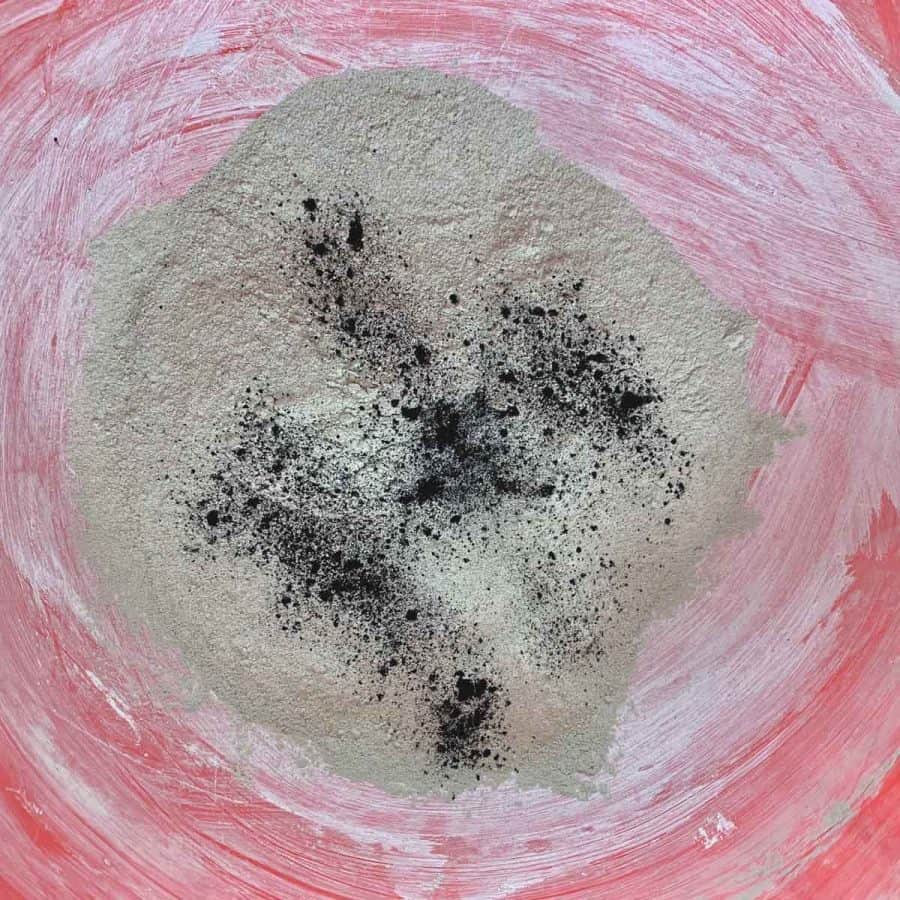
Add the dry concrete mix to the bowl and then add some black powdered pigment.
You can see how much I added here.
It can be difficult to tell how much you need and is a little easier when it’s wet, so mix the black in with the dry first and then add water.

Don’t forget to wear gloves when you mix concrete.
You will need to mix this to the right consistency, which is like brownie batter.
Once this is mixed well, check to see if you think you want to add more color.
You can see from my wet mix, what the color was–compared to the color they cured to. The dry piece will always be quite a bit lighter.
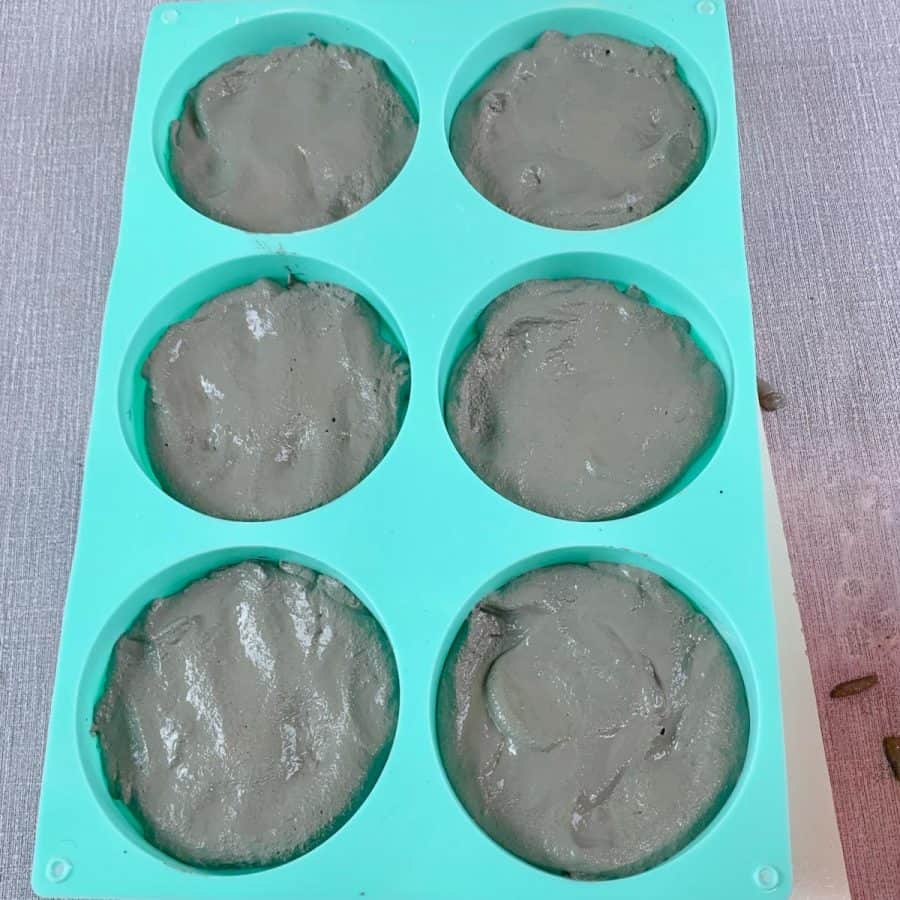
Double check that there aren’t any lumps and then scoop some mix into each mold cavity.
Give the mold a few shakes to settle the concrete and check to see if you need to add more, or remove some to meet your marked stopping points.

Once each cavity is filled to the line, use the board the mold is on and shake and tap it onto the table to get the mold vibrated.

You should see air bubbles rising to the surface of the coasters and once they slow down or stop, you can let this sit to cure.
I vibrated mine for about a minute and a half.
After vibrating, let these cure for at least 24 hours, depending on room temperature/climate conditions.
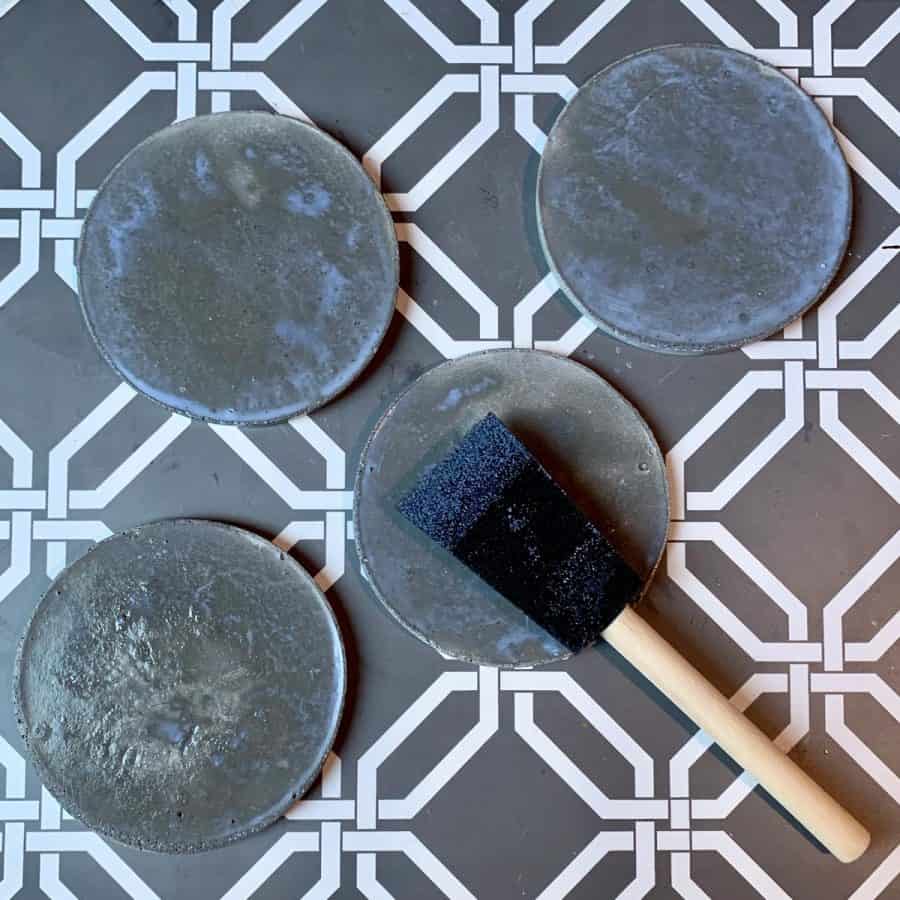
Step 5. Demold And Sand The DIY Concrete Coasters

Turn the mold upside down and then press each concrete coaster out of its cavity and then remove the leaves from inside the concrete.
Be sure to wash the silicone mold with warm soapy water when you’re done, especially because there will be some adhesive residue stuck to it.
Some of these leaves you may be able to lift with your finger to peel them out.
For others, you may need to get an edge started by using the backside of the X-acto knife blade to lift up a corner.
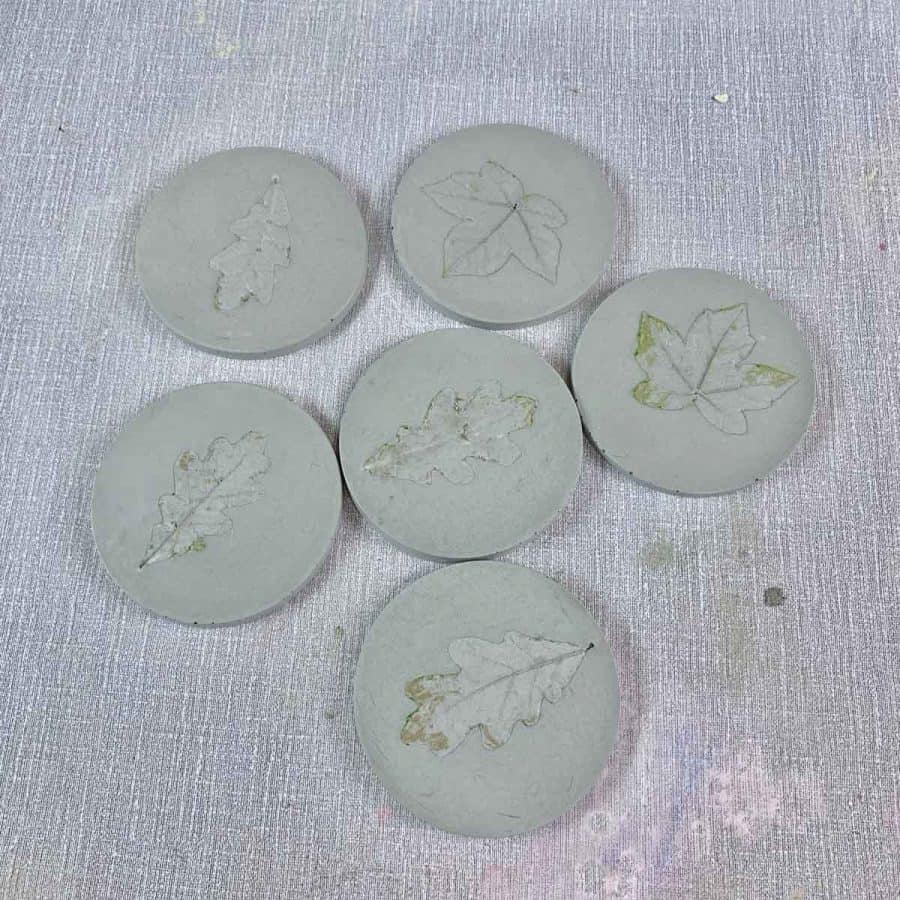
Take care not to scratch the coaster while doing so. You may have a little debris leftover from the leaves.
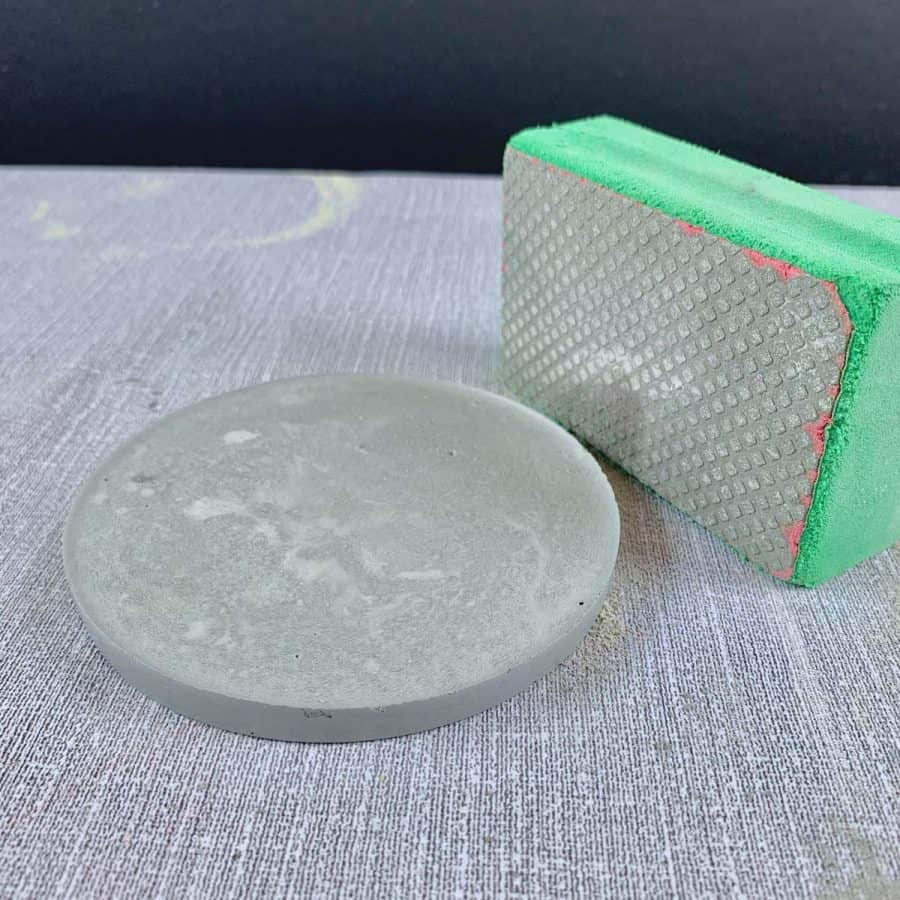
Now sand the sharp edges on the bottom and make sure they are sanded well enough that they are flat and don’t wobble.
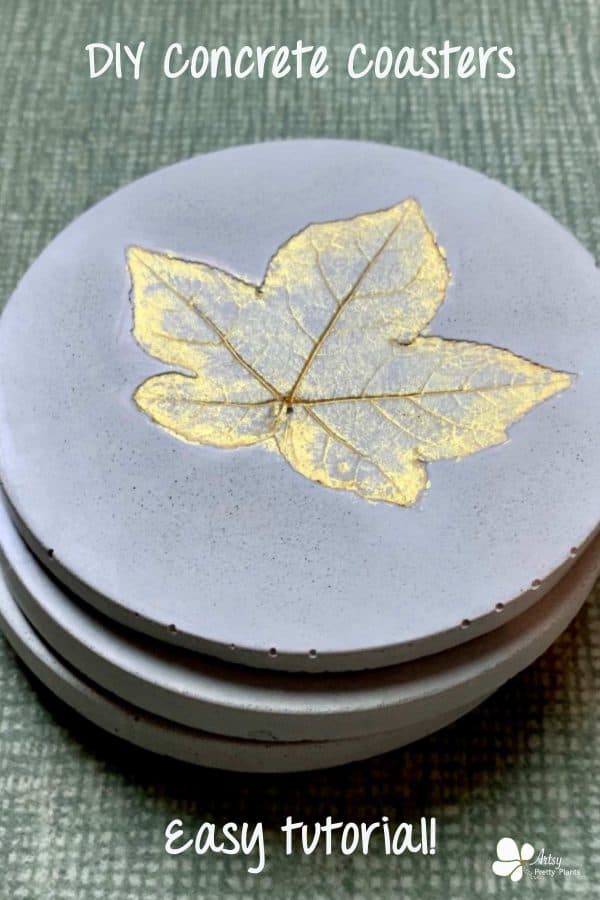
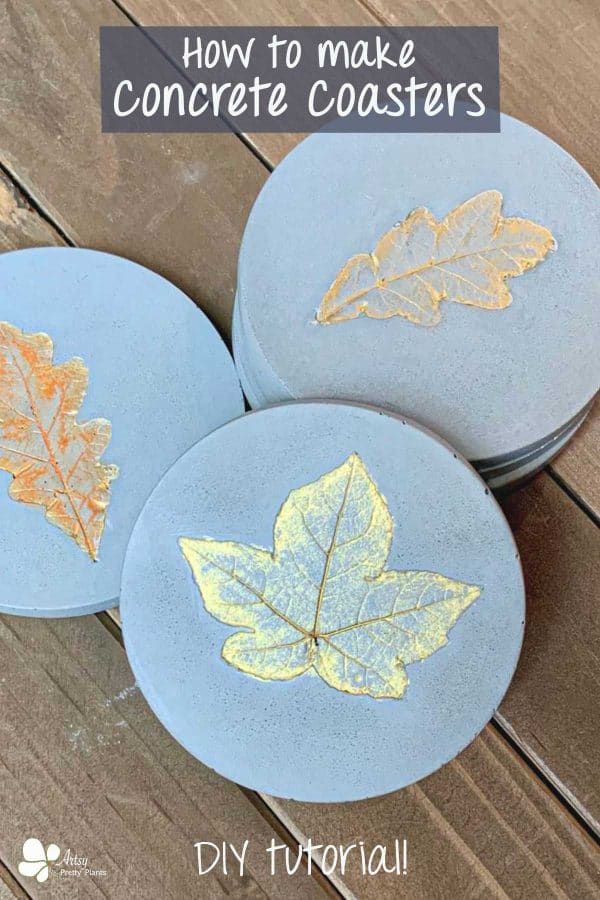
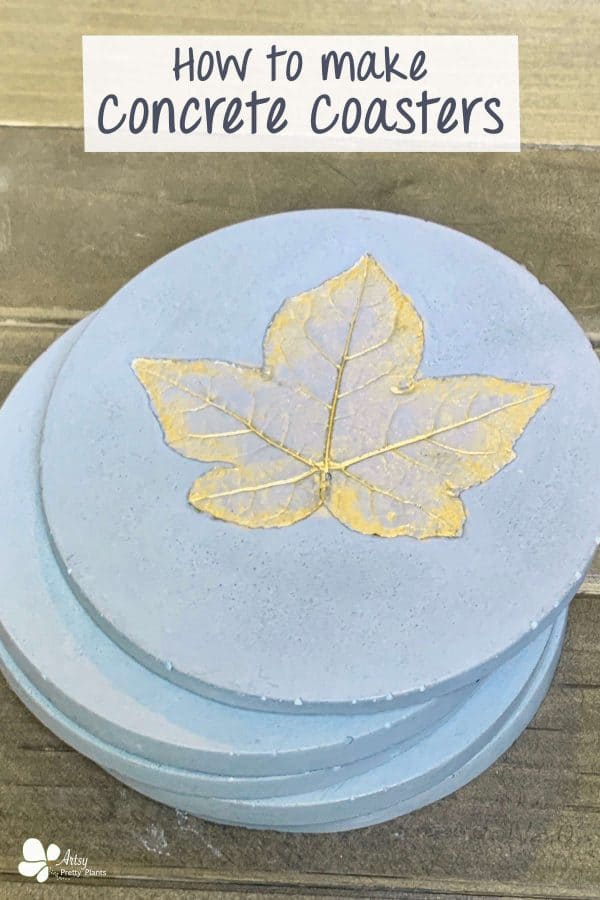
Step 6. Paint The Fall Leaves With The Acrylic Paints

To paint the concrete coasters, first place a little dab of gold paint into the paint tray, then paint the leaf with a dry brush–don’t dip the brush into water.
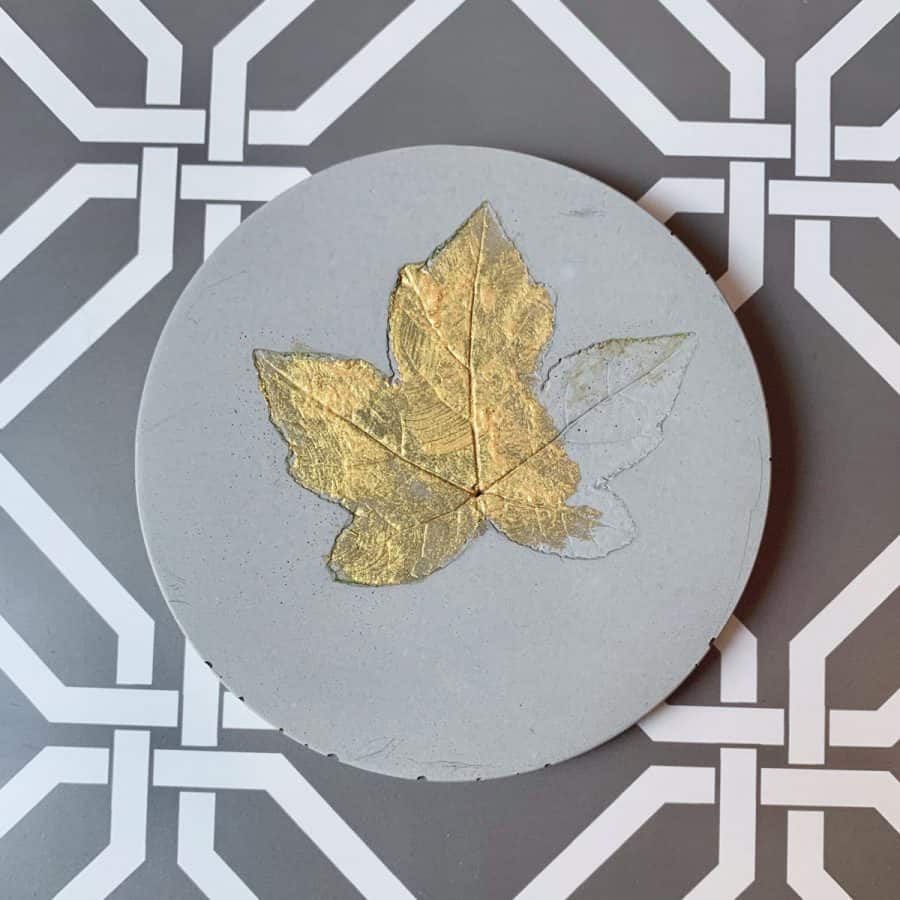
Just tap and dab it on the leaf, taking care to get the gold into all the veins.
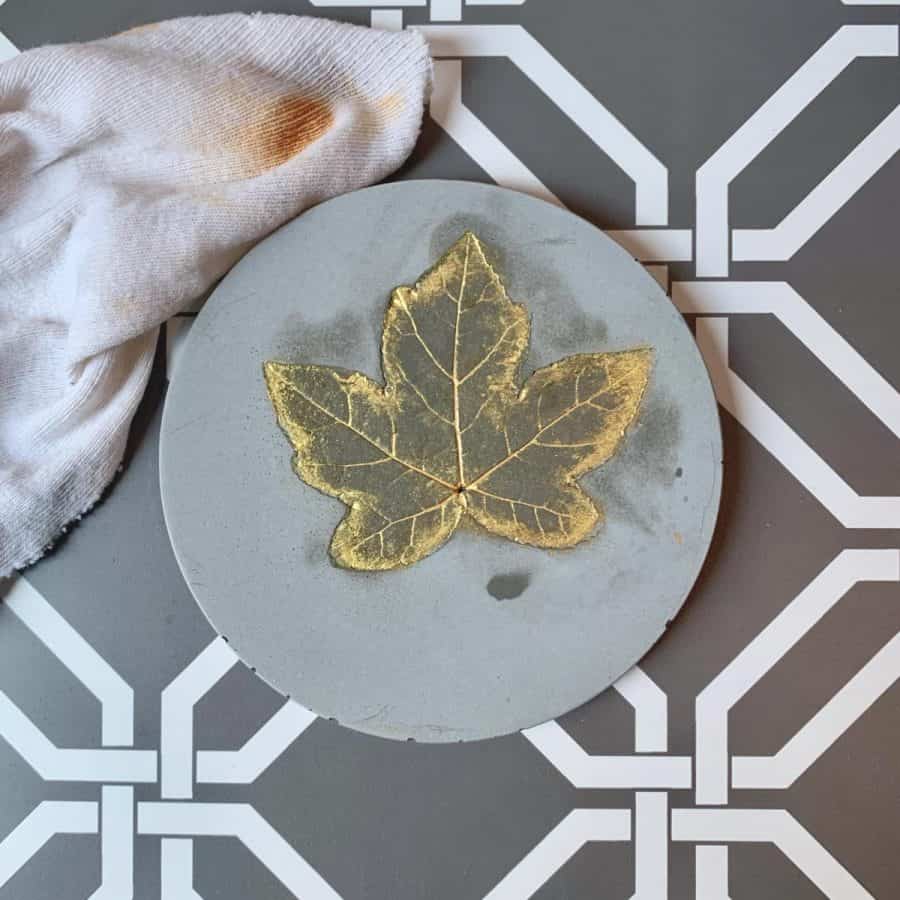
Now take a soft cloth and dip it into some water. You only want the rag to be damp.
The paint has probably mostly dried already, so take the cloth and rub it over the painted concrete.
The harder you rub, the more paint you’ll remove so how much you rub will depend on how dark you want the gold paint.
The good news is that this is something you can play with. If you don’t like the way it is turning out, you can rub it all off.
I recommend letting it fully dry first though before deciding.
The reason for this is because when you first do this, the wet areas of the concrete will be dark, which will look different when it dries.
If you want to add orange, then after the concrete from the gold has partially dried, dab a little bit of orange on a dry brush.
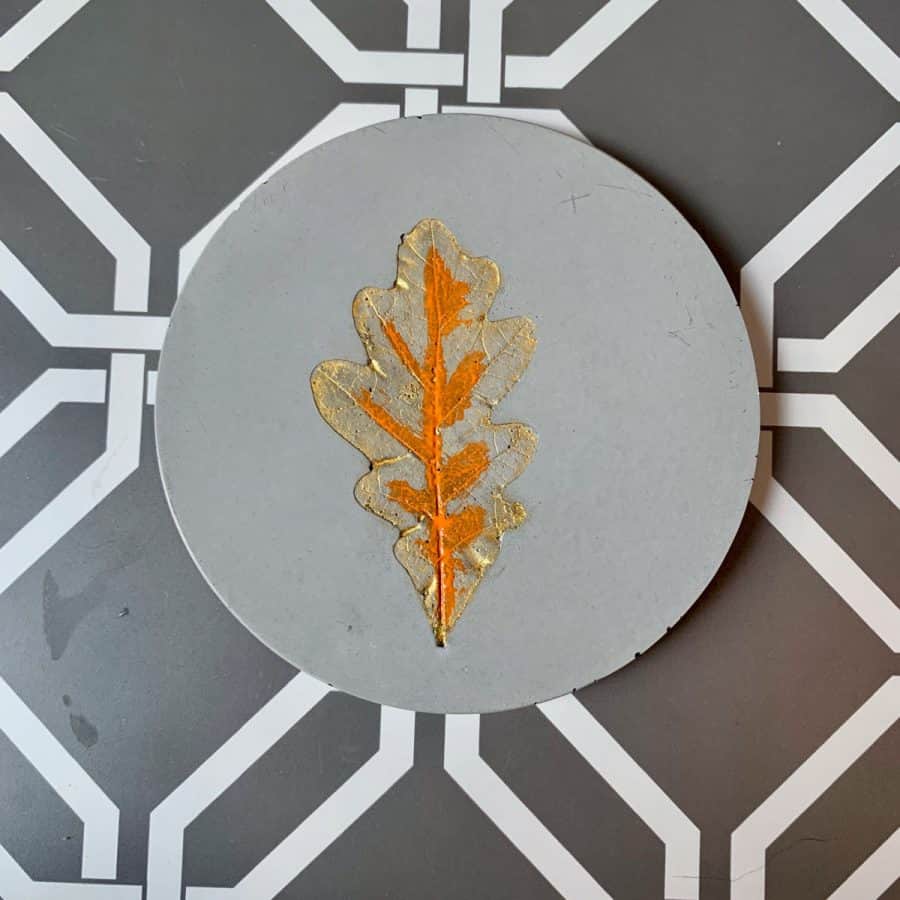
I placed my orange through the center of the leaf and its lobes (the pointy parts).
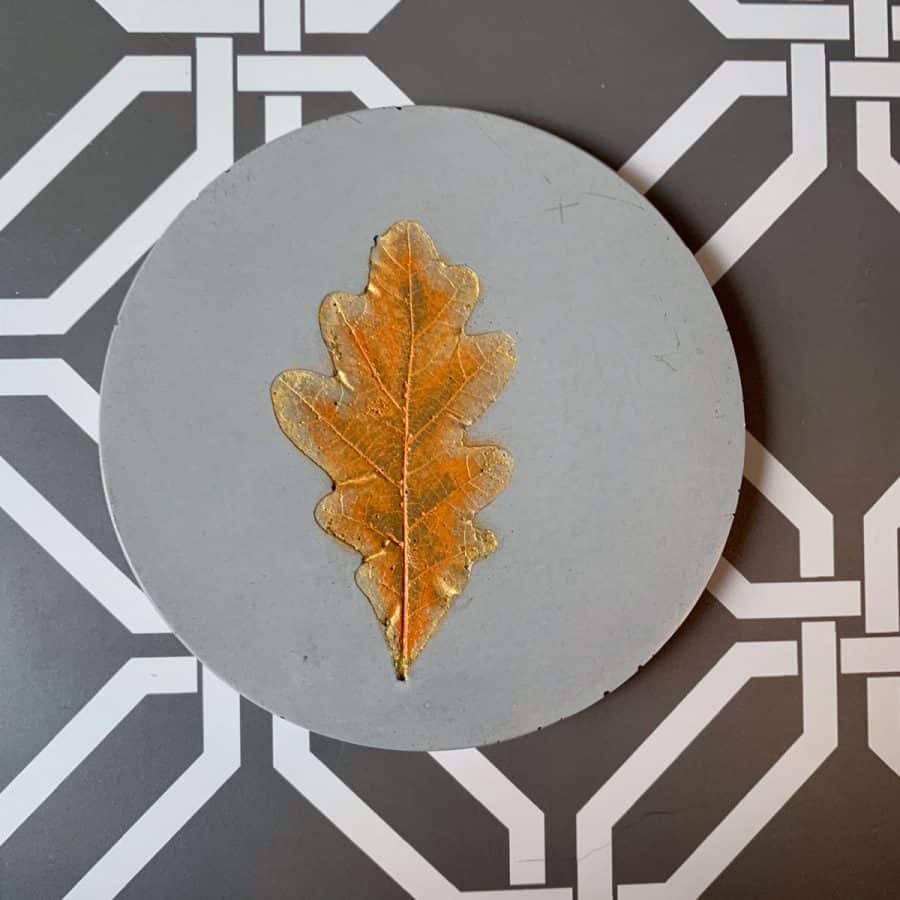
Now use the damp cloth to first blend the orange in and then you can rub it off.
If you got paint on the non-leaf area of the coaster, you can sand it off with the wet sandpaper.
But you need to wait until the paint is dry, because you’ll need to rinse off the coaster after and you don’t want to rinse off the paint inside the leaf.
Step 7. Seal The Coasters To Protect The Finished Product
Once the paint on the concrete coasters is completely dry, and the concrete itself has been demolded for at least 6 hours, you can seal them with the acrylic concrete sealer.
It’s especially important the paint is dry as you don’t want to accidentally rub any off as you are applying sealer, so it’s best to wait until the next day to be safe.

Pour some of the sealer into a small bowl or a cup and use the foam brush to apply the sealer to the coaster.
Sometimes the brush marks will show when using a foam brush or any brush, so instead of using that to brush the sealer on, I recommend using a soft cloth.
Take the cloth and dip it lightly into the sealer and then rub the sealer in.
This dries fairly quickly, so I first sealed the back side of each coaster.
Then after about 5 minutes, I was able to seal the top and sides of each.
To give the coasters extra protection from stains, I like to apply a second coat.
If you use my sealer, then you should wait a minimum of six hours before recoating.
I have the flower concrete coasters I made a year ago and this is how I sealed them, using the same sealer and none of them have any staining.
However, they have not been tested with red wine, as I am a white wine drinker. :0)
The sealer should be fully absorbed and completely dry before moving on to the final step.
This should be safe to do after about 2 hours.
Step 8. Add Protective Pads To The Bottoms Of The Concrete Coasters

Adding a cork bottom will help prevent scratches on your furniture.
Just peel the sticker off of a cork pad and place four of these around the bottom, spacing them equally apart.
You will place them fairly close to the edges, but not right at the edge because then they will be visible.
Now flip them over and enjoy using your new coasters, under your favorite beverage!
Here are 10 other easy ones that are perfect beginner concrete crafts projects.
And you may want to complement your new coasters with this amazing concrete serving tray!
Also, if you love autumn and want to get inspired by fall decor in nature, take a look at our list of the best fall trees for vibrant color!
Don’t forget to Pin it for later!
Easy DIY Concrete Coasters With Leaves
How to make concrete coasters with fall leaf imprints. DIY fall decor that's easy to make with this step by step tutorial.
Materials
- Cement
- Black pigment
- Silicone mold
- Gold Paint
- Sealer
Tools
- Please see the full materials list above the tutorial for details and links.
Instructions
- Find leaves for making the concrete imprint–look for freash young leaves to make releasing them from the concrete much easier.
- Adhere the leaves to the concrete mold with spray ahdesive and make sure they are flat against the mold.
- Prepare the concrete mold for casting and measure up 1/4" and mark this thickness.
- Mix and cast the cement mixture into the mold cavities and be sure to vibrate the mold.
- Demold and sand the diy concrete coasters. Remove the leaves from the conrete and be sure to sand the sharp edges at the bottom of the coasters.
- Paint the fall leaves with the acrylic paints. Use a soft damp cloth to rub the paint off to get the best effect.
- Seal the coasters to protect the finished product. Use a soft cloth to avoid brush marks and be sure to double seal these to protect from stains.
- Add protective pads to the bottoms of the concrete coasters. Place them toward the edges, but set in some.

I love these! Do you have a link for the silicone molds?
Thanks Lyn. Yes, it’s listed in the materials and it’s linked.
Hello-
I can’t seem to contact you any other way. I must be missing it. Anyway, I took your class at the DIY makers convention online and was unable to download the guide and tutorial. I have checked spam and it is not there either. Please help.
Hi Jami,
Did you get my email? Are you all set?
Thank you for the lovely project samples. Your imagination for the simple, yet your great work is an inspirational and motivating factor
to duplicate the samples for many of my friends to enjoy and admire. You are always credited for your well-deserved work.
Hi Emil,
You are very sweet. Thank you for the kind words!
I just finished painting the leaves in the concrete trivets that I made and they are beautiful. I’m wondering if the concrete sealer that you used for your trivet project is appropriate for the use on trivets. Is there a sealer I can use that will not be affected by hot objects that would be placed on a trivet?
Hi Cindy,
The trivets sound lovely! Hmmm, I don’t know for sure. If it were me, I would make a couple of quick test pieces and test either Easy Seal or a countertop wax for concrete. I have tried Van’s. It’s possible the wax could be heat resistant, since people tend to put hot pots directly on their counters, but I wouldn’t do it without testing first. I’m not directly aware of a heat resistant sealer, but that doesn’t mean they aren’t naturally. Sorry, wish I could answer that with a definite answer for you.