DIY Concrete Pillar Candle Holders
How to make your own DIY concrete pillar candle holders with a fall theme to decorate your fall table on a budget.
And concrete candle holders really do make a delightful home decoration.
It’s one of those handmade items that guests have a hard time believing didn’t come from a store.
I have two sets of DIY candle holders right now in my living room and even an on the porch (linked above the tutorial).
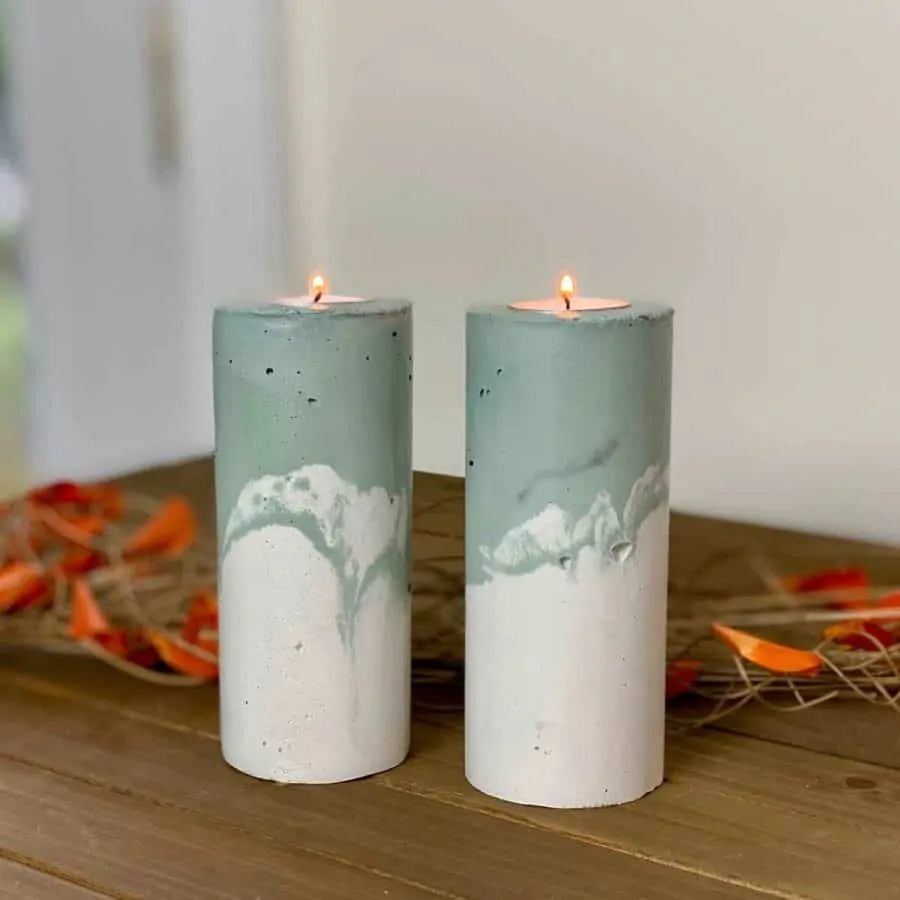
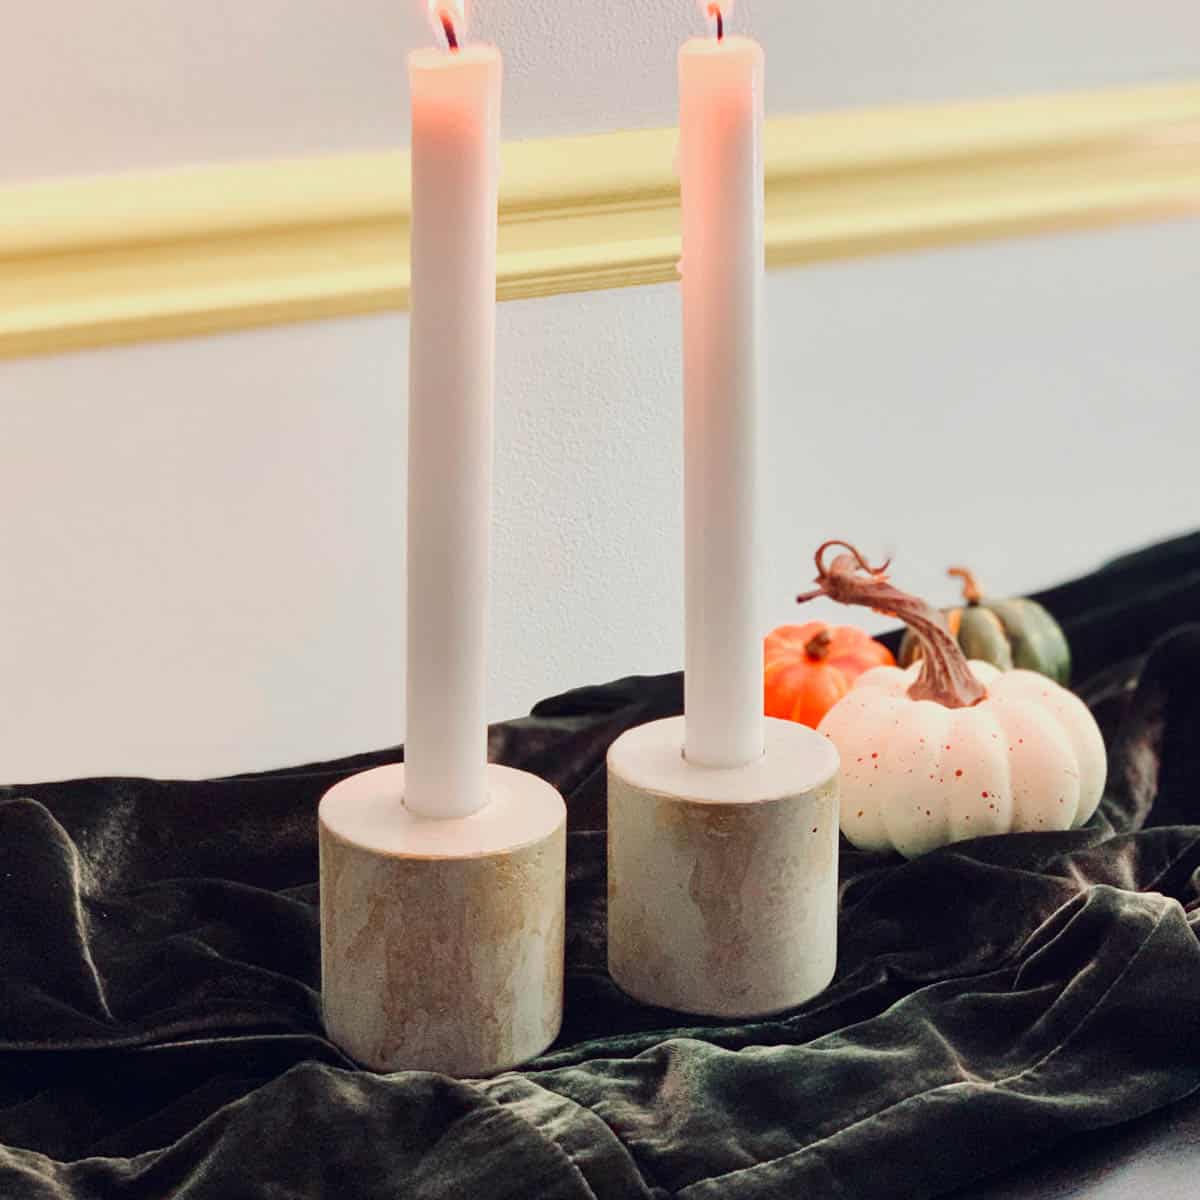
But I think these sage-colored fall ones are my favorite candle holders to date.
But here’s the catch!
After making multitudes of concrete tutorials, it baffles me how a project that has such basic elements and contains steps I’ve done a hundred times- could just inexplicably fail.
And this was one of them. Every time I cast the concrete, about an hour into curing —it would crack!
I knew it wasn’t that my mixing and curing conditions were too warm–which could cause the concrete to set too quickly and therefore crack.
And my mix was fresh and I wasn’t using too much water.
So what was it?
I thought maybe the mix I was using was maybe a poor choice because these DIY concrete pillar candle holders are 5” thick (in height).
Here are some vibrant rainbow colored ones I made that were only 3 ½” tall. And these Christmas candle holders are also shorter.
That’s a lot thicker than any project I have made using this mix.
Well 5 days later after changing up variables one at a time and still no answers, I sat staring at these and it hit me like a mack truck!
Of course! It was the aluminum candle holders that I used as the inner mold!
I had run into this before using large pieces of aluminum which caused a reaction with the wet concrete, but these aluminum candle holders were so small, it just didn’t occur to me.
Now in the past, it didn’t result in cracking, but it did give the concrete a ruddy appearance due to excess sweating/condensation during the curing process.
The solution was to use only the candle- without the holder to act as the insert placeholder. Well, I think it was worth it all. Didn’t they turn out beautiful!
After this tutorial, you may be interested in checking out the tutorial for the round concrete Christmas candles. There’s even this air-dry clay one.
You may also love these round cement candles with a metallic finish.
By the way, if you’re interested in making candle holders from any other material, then take a look at this list of 45+ candle holder ideas.
Some of the links on this page have been provided as a convenience for finding materials. These links may also be affiliate links. As an Amazon Associate I earn from qualifying purchases, at no extra cost to you.
I only recommend products I’ve used and loved, unless otherwise stated. Click here to read my full disclosure policy.
DIY Difficulty Level | Moderate
Materials For DIY Concrete Pillar Candle Holders
- White cement
- Disposable mixing bowls (2)
- Disposable cup
- Durable nitrile gloves– I like these because they are so durable, you can rinse and reuse and end up costing less in the long run
- Safety glasses
- Safety mask- silica rated
- Smartwater bottles 20oz size (2)
- Disposable cup or dish for mixing paint
- Craft stick
- Spray adhesive
- Piece of aluminum flashing
- Blue tape
- Packing tape
- Acrylic paint- black, green, yellow and blue mixed together- will give you sage if you can’t find a sage green paint. Please don’t use just any acrylic paint. Some paints cause cracking.
- Hot glue
- 100% Silicone caulk and caulk gun
- Tealight candles
- Utility knife
- Acetate sheet
- Concrete sealer
- Foam brush
- Smooth tiles or smooth, hard boards (2)
Materials Note
White cement may not be be available in your area. If so, check out this article with information on how to make your cement mix white.
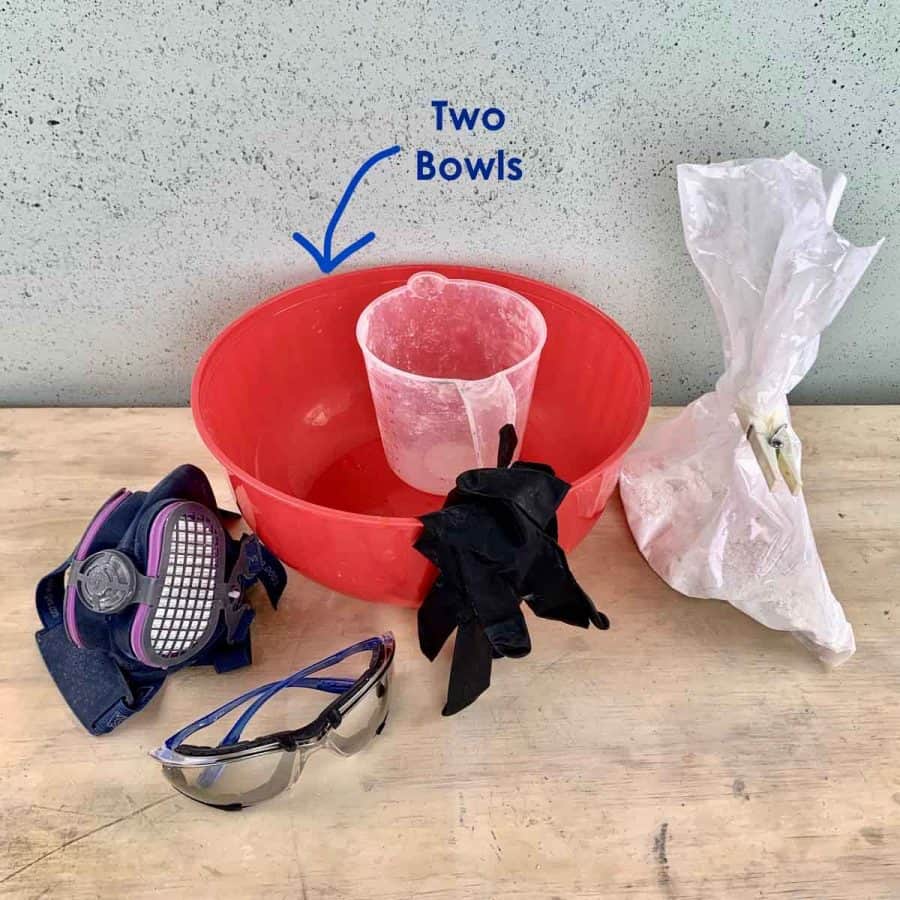
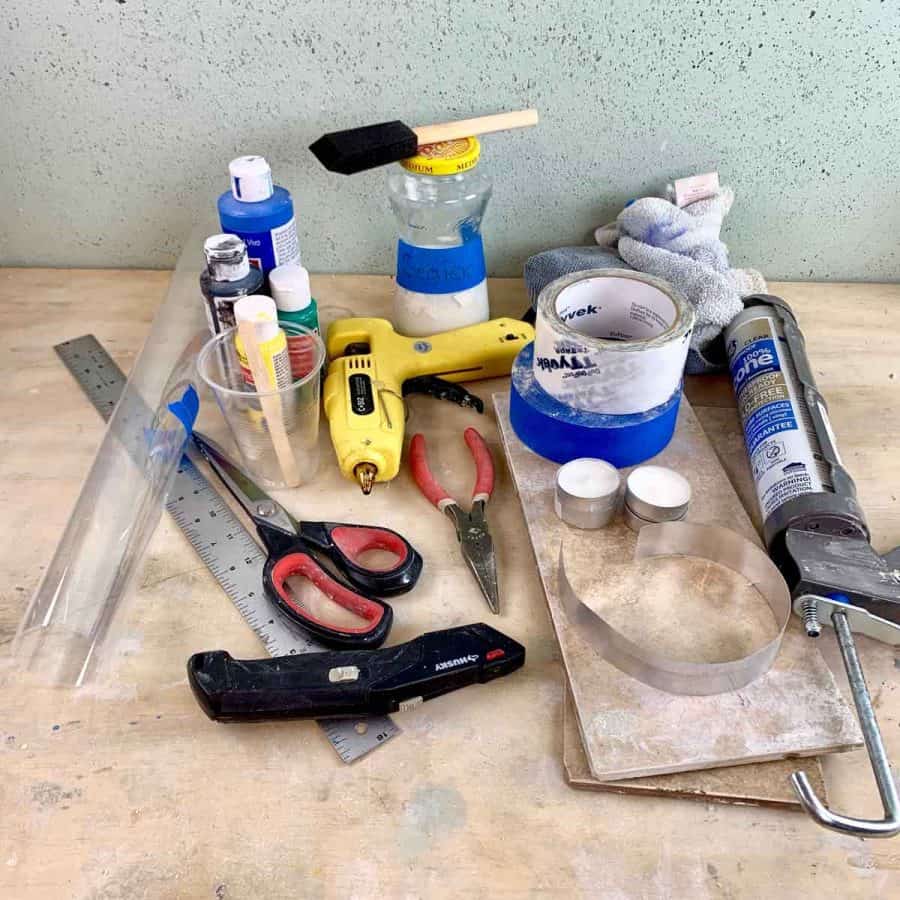
What not do do:
Don’t use hot glue in place of the caulk because the concrete will leak through and you’ll risk getting cracks.
Don’t leave the holder inside the mold when you cast the concrete.
The aluminum will react with the concrete and crack these DIY pillar candle holders and cause sweating, which will make it have a ruddy texture.
Before starting the tutorial, it may be helpful to read my article comparing the different concrete mixes and sealers– Cement & Concrete Crafts Tests!
Another important article is Making Cement Crafts Techniques & Tips with info on cement materials, mixture consistencies, demolding, safety and clean up!
And this is the outdoor pillar candle holder I mentioned in the intro, and the other set of DIY concrete candlestick holders which has gold accents.
By the way, here’s a big list concrete candle holder ideas that you may want to take a look at next!
Tutorial Steps For DIY Concrete Pillar Candle Holders
Step 1. Prep The Bottle To Make Your DIY Pillar Candle Holder Mold
You’ll need to cut open the bottles at the top and bottom.
I made my pillar candle holders 5 ¾” tall and made my bottom cut just above the rounded area where it bevels at the bottom and then measured 5 ¾” up the bottle.
Just make sure you stop before the top of the bottle tapers.
It’s important to make a straight cut because you will be caulking the bottle to an acetate sheet base and if it’s uneven, then the concrete will leak out of it.
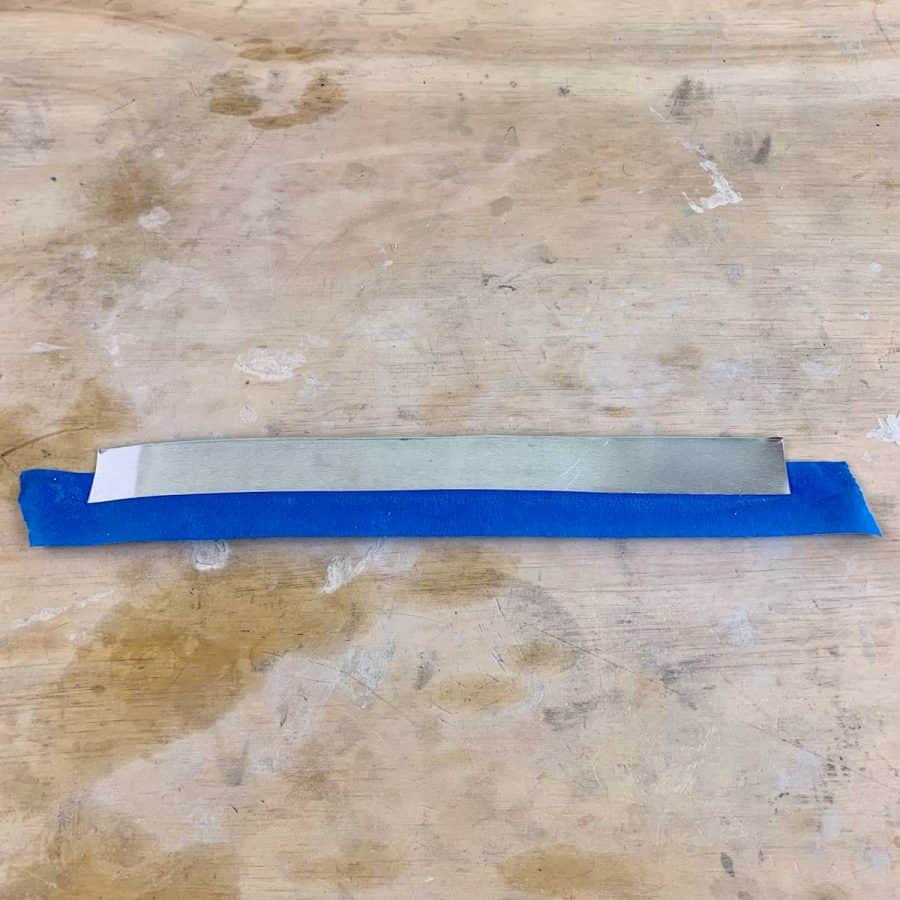
I found the easiest way to make a straight cut is to take a piece of aluminum flashing and essentially use it as a straightedge.
To do this, cut a strip of aluminum flashing that is about 1” x 12” and make sure the long edge is a factory cut edge so you can be certain that it is straight.
Then take a piece of blue tape that is several inches longer than the flashing and tape it along the strip.
Let it overlap the non-factory cut edge by at least a few inches.
This will help keep it from slipping while you are cutting.

Start at the bottom of the bottle and use a utility knife to carefully score around the bottle. Then cut through the bottle and around.
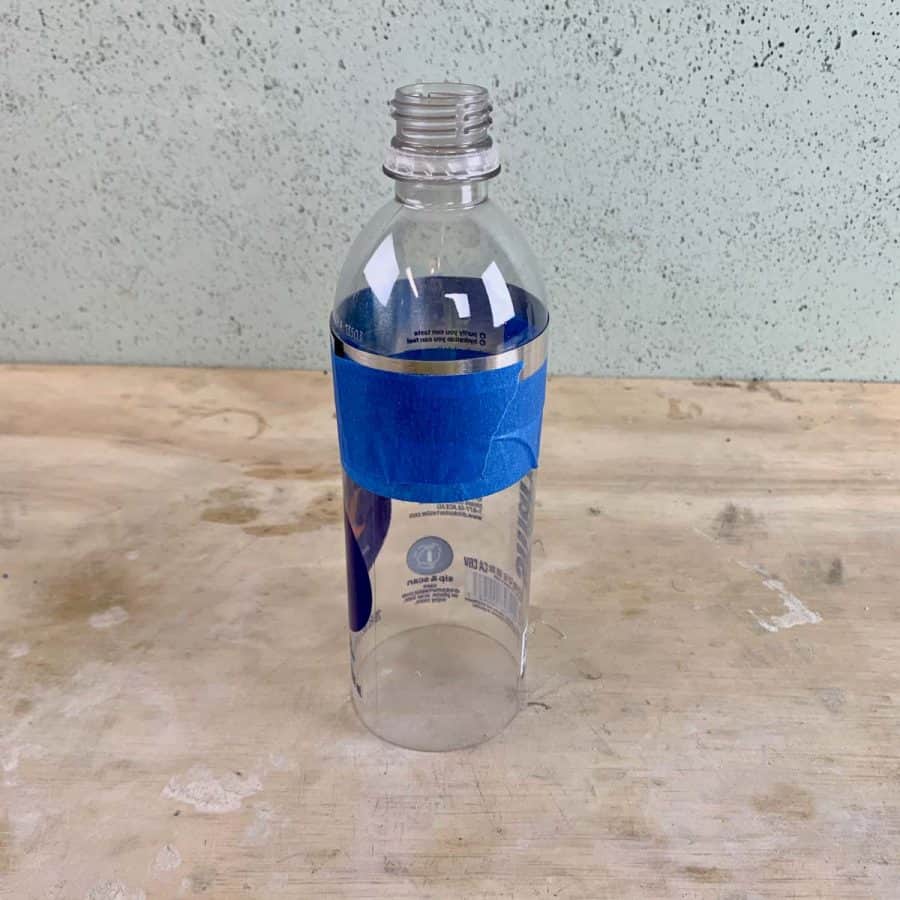
Be sure to hold the utility knife right up against the metal as you cut.
Now do the same for the top of the bottle.
Step 2. Prep The Inner Concrete Mold

Our goal here is to use the candle as the insert mold for the candle holder.
The reason is that we can’t use the holder itself because it is aluminum. The aluminum will react with concrete while it’s curing.
Since the candle is smaller than the holder, we need to build it up to be the same diameter.
So first measure the height of the aluminum candle holder. Mine was ½” (some tealights holders can be taller or shorter).
Cut a strip of acetate that is the height you measured and make it about 18” long.
The candle itself is going to be a little shorter than the holder. It is also shorter than the strip you are cutting. This is okay, we will fill this in during the next step.
Next, take the candle and remove it from the aluminum holder and wrap the acetate strip around the candle (not holder) three times.
Trim the excess length and tape it with a thin strip of packing tape. Now your candle should be the same diameter as the holder.
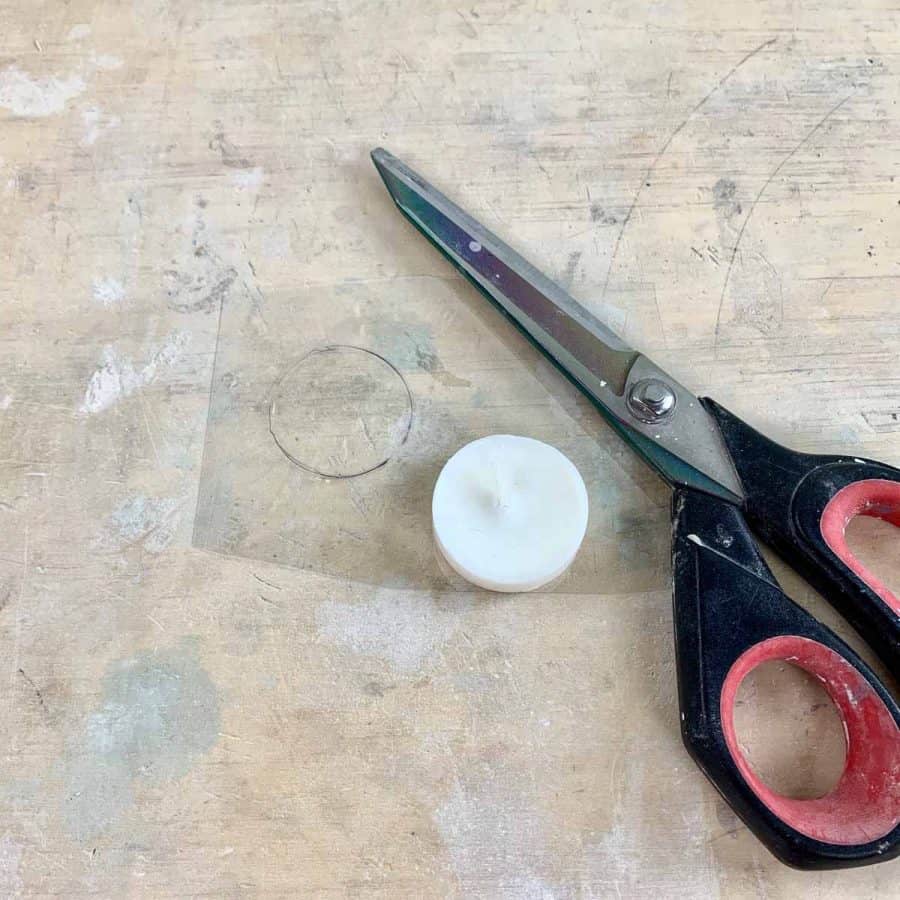
Next, trace the candle on a scrap piece of acetate and cut it out. This will help keep a cleaner line and be easier to remove after curing.
Step 3. Make The Concrete Candle Bases
Cut two pieces of acetate about 4×4”. Take the two pieces of smooth tile or something else you have that is smooth, and spray the tile with adhesive spray.

Now lay an acetate sheet on each tile or smooth board.

There will likely be empty space from the top of the candle to the top of the strip.
To remedy this, heat up a glue gun to a low temp and fill this in so the glue is flush with the top of the strip.
Now take this and flip it over and stick it to the middle of the acetate sheet base. Next, take the circle you cut it out and insert it over the top of the candle.
It should fit right in between the taped acetate, but if it doesn’t, it’s okay. It doesn’t need to be a perfect fit.
Step 4. Seal The Bases With Caulk

We want to prevent the concrete from leaking from the base.
This pillar mold is tall and the wet concrete will be heavy so leaking can be more of a problem than in shorter molds.
If the concrete leaks, it will create voids that will cause pitting or even cracks.
So instead of using hot glue to seal the mold to the base, like I have in some other tutorials, this time we will use silicone caulk.
Another advantage of silicone caulk is that it will provide cleaner lines when you demold.
The only drawback to the caulk is that you have to wait until the caulk is dry before you cast your concrete mold.

This can take up to 3 hours depending on the thickness of your bead and climate conditions.
First, take the water bottle and place it over the glued candle and eyeball it so that it’s centered.
Now use the caulk gun and carefully caulk the bottle into place. The bottle will want to slide around on the acetate, so just go slowly.
Try to avoid getting silicone on the area between the candle insert and the bottle. This will allow you to have a cleaner look.
Even though my bottles moved out of position a few times, I was easily able to reposition it without getting silicone inside this area.
After you have caulked around the bottle, hold the bottle in place with one hand and with a gloved finger. Then smooth the caulk to ensure it fully packs around the bottle.
Let the caulk set, 1 ½ -3 hours. When you check to see if it has fully set, just push on the caulk.
If it’s spongy in your thickest part, then you need to wait a little more. Mine was fully set after 2- 2 ½ hours.
Repeat this for the second bottle.
Step 5. Prep The Concrete Setting Location
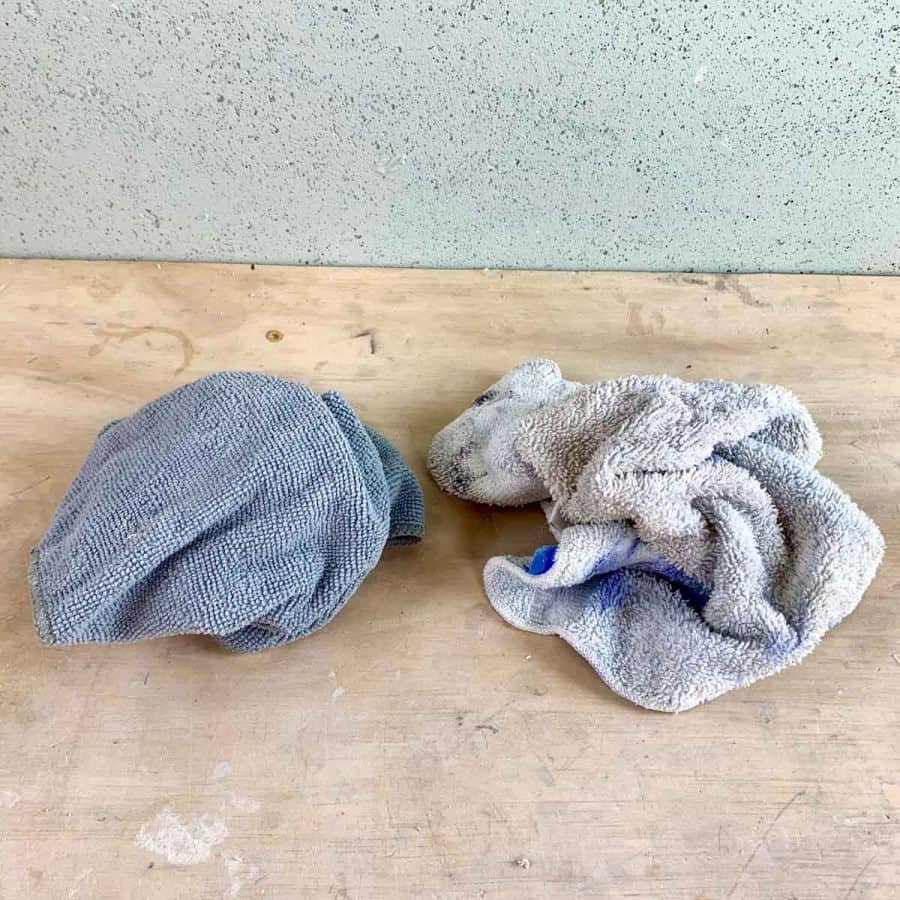
In order to get the angled effect with the marbling, you will need to lay the candles at an angle just briefly.
I found rags to be a great way to prop these while working on them.
So take some rags and place two mounds of them on your work surface and move on to the mixing step.
Step 6. Mix The Paint Colors

Get the paint ready before adding it to the concrete crafts mix.
If you are combining multiple colors, go ahead and mix the colors now and set it aside. I used about 2 tablespoons of paint total for both candles.
To achieve a sage green color, I mixed green, blue, green, yellow and black.
Step 7. Mix The Concrete
I made my candle holders so that the green would be at the top when finished.
I did this because I wanted the candle to contrast with the concrete, rather than having a white candle on white concrete.
To do this, you’ll need to cast the green concrete first since the first color you cast is ultimately going to be the top of the DIY concrete pillar candle holder.
This concrete candle will be easier to cast if you mix all the cement now – both colors and for both candles.
I recommend mixing a little more than what you think you need.
Note: Make sure you are using cold water to mix the concrete.
This will give you a little extra working time which is helpful since you are mixing half of it with paint and it takes a little more time.
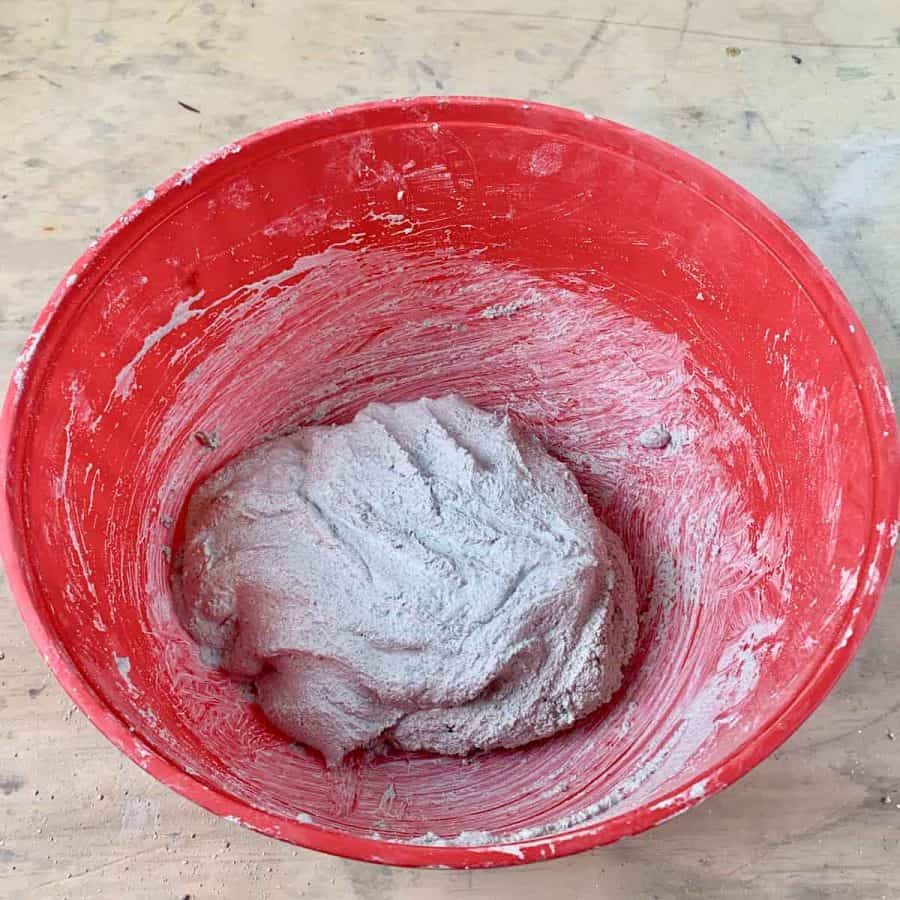
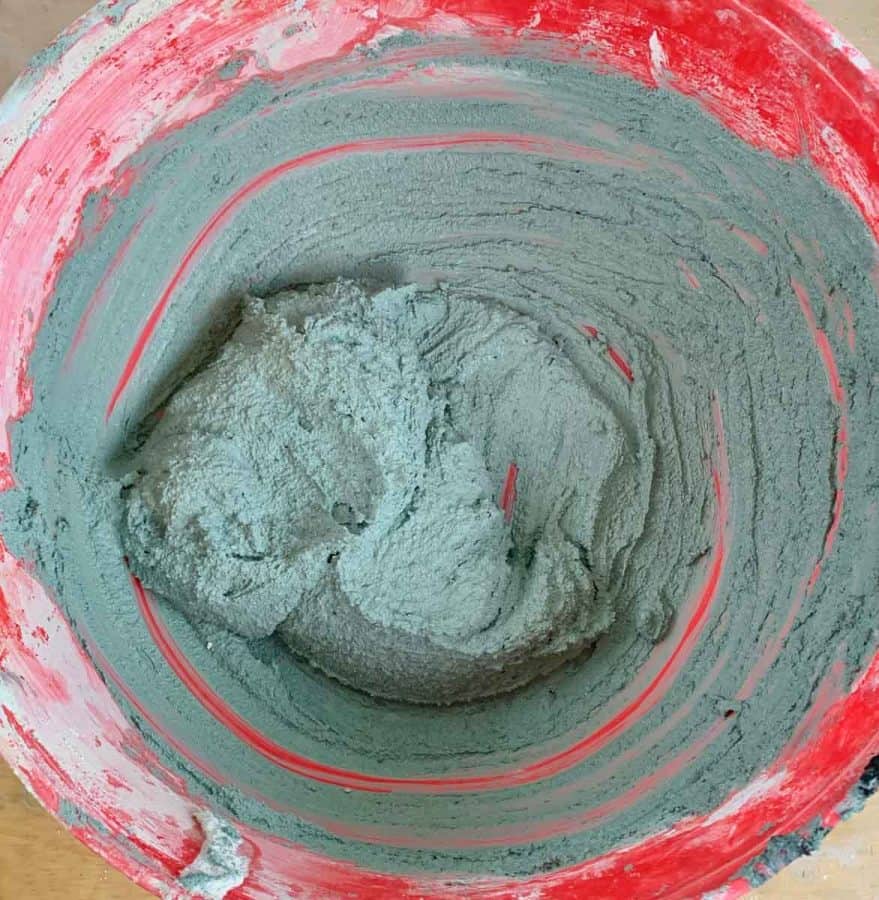
Mix the concrete to a thick, but scoopable- nearly pourable consistency. I took this photo just before I added a little more water.
You will be dividing the mix into the two bowls with one for the colored concrete and one for the white concrete.
You will want twice the amount you see in the photo since you will be dividing it.
I recommend proportioning it so that a little more than half is reserved for the colored mix.
The reason is that if you are short, you will have a tough time remixing and achieving the same color.
You can always make more of the non-colored mix if need be.
After dividing, add the sage colored paint to the bowl that has more mix and mix it well.
Keep in mind that the color in your bowl will dry lighter, so adjust by adding more black if necessary.
Sometimes the paint can make the mix a little chalky and might thicken it. If so, then go ahead and add a little more water.
Step 8. Cast The Marbled Concrete Pillar Candle Holders
At this thicker consistency and with a small opening, I just scooped it up with my hand and glop it into the mold.
Fill it about half way with the green mix and then vibrate the mold.
Take care to not separate the caulk from the bottle or the acetate while vibrating and keep tapping until the air bubbles release.
I found it helpful to hold the bottle with one handle while tapping with the other.
Just do this for less than a minute, you’ll vibrate it again after you cast the white concrete.
If you end up with some smearing of concrete on the inside edges of the bottle, consider wiping some of it off because it will show up when you pour your second color.
I wiped off mine but only near the open top.
I let some smears remain that were closer to where the green sat because it would help create the natural marbling effect one the white is added.
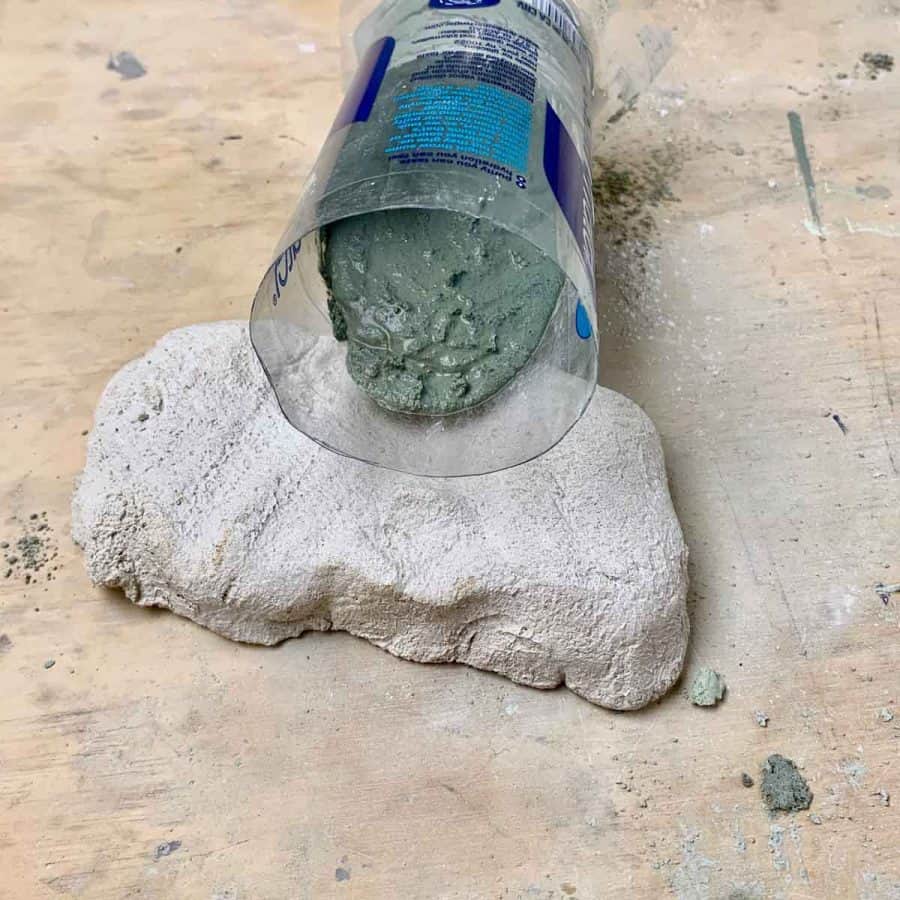
Now tilt the bottles at an angle and prop them up onto something, they will only be there a few minutes.
If the concrete stays in place and doesn’t flow to an angle, just take a craft stick and drag it forward so that it creates an angle.
Test to see if the white can now be added. Do this by standing the molds back up straight.
If the concrete retains that angle you created then go ahead and add the white.
If the green concrete slides down and levels flat when you tilt it, then angle it again and wait a few more minutes.
Don’t let it set too long before adding the white.

If you want to see another fall themed concrete tutorial, you may be interested in the DIY Concrete Pumpkins.
After adding the white, make it level at the top and continue vibrating and tapping the tile on the table top. With this concrete mold being so tall, you will need to vibrate it a little longer than most pieces.
I tapped my tile up and down on my table and tapped the sides of the bottle for probably 3 minutes.
Let the pillar holders cure. If you are using the same white cement I linked to in the materials, then you will be able to demold in about 16 hours.
Step 9. Demold The DIY Concrete Candle Holder
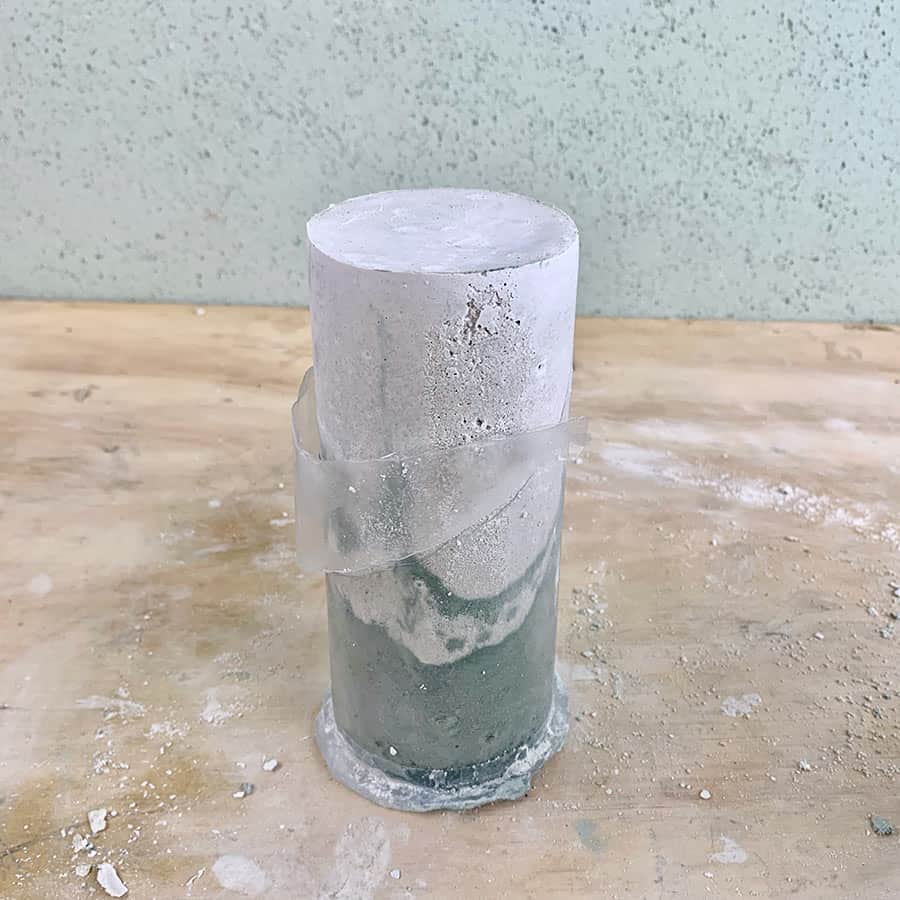
Once cured, carefully make a slit at the open part of the mold, using the utility knife. Peel it off the bottle.
Sometimes the plastic sticks to the cement when demolding. If this happens with yours, just make another slit, then peel and repeat.
When you get to the bottom, lift up on the acetate and pull the DIY concrete candle holder off the tile.
At this point, you should be able to pull the acetate off altogether. Then just make a slit through the caulk and pull the rest of the plastic off.
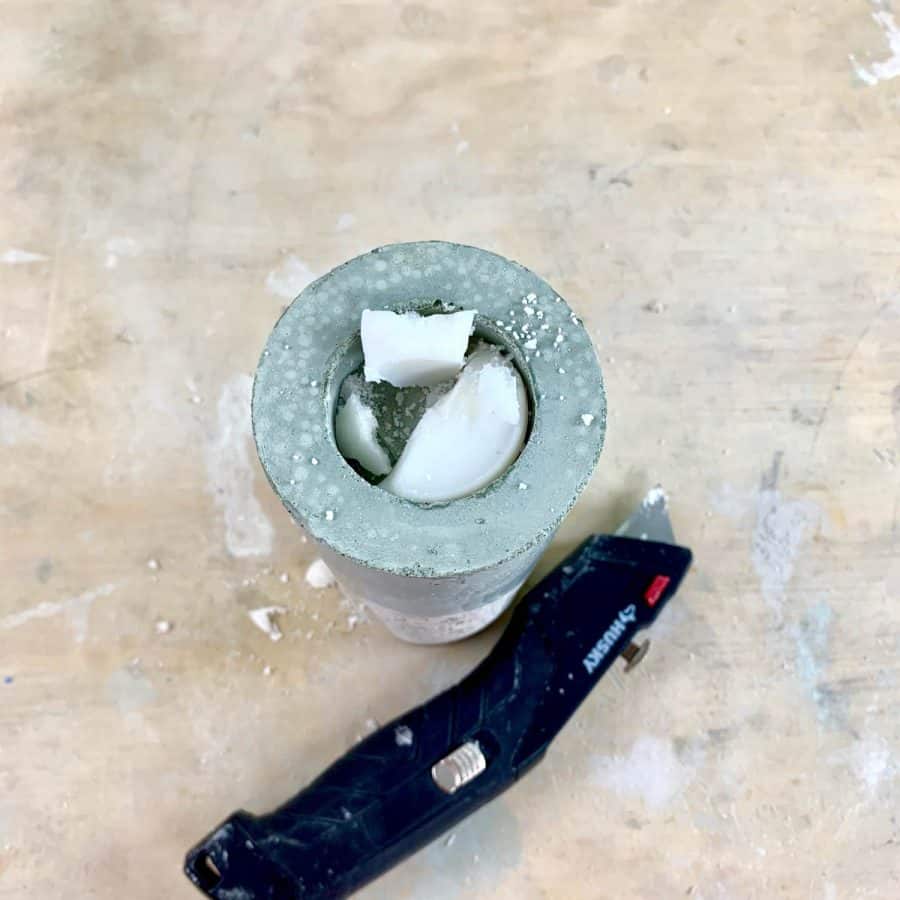
To get the candle out, use the utility knife to cut through the wax.
You may have to dig it out a little, just take care to keep the blade pointing away from your fingers and body.
If necessary, use the pliers to grab hold of the packing tape that surrounds it. When everything is out, you should have a nice clean hole for the candle holder.
Test to make sure the candle holders fit. If it’s a little tight, you can sand the sides of the hole.
Step 10. Seal The Concrete Candle Holder
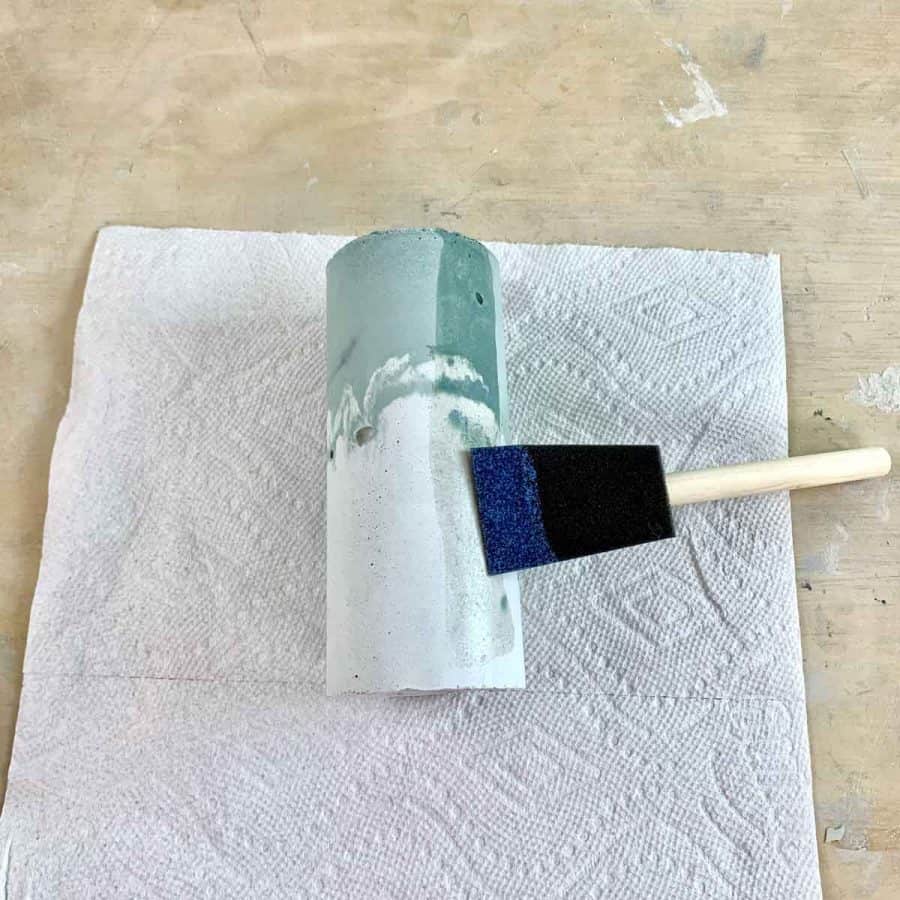
I typically don’t seal my concrete crafts- especially planters since I prefer that they are somewhat porous to help with drainage.
However, I strongly recommend sealing these candles to prevent the oily wax from staining the concrete. So use a foam brush and apply a coat of concrete sealer to the whole candle holder.
Let this dry per the instructions on the sealer label, the really a second coat on the top since it’s most vulnerable to wax spills. You should let the sealer fully dry for about 24 hours before lighting the candle.
Now set these out on your fall tablescape and watch your guests marvel over your beautiful DIY concrete pillar candle holders!
If you want to see another way you can decorate for fall–take a look at this tutorial for making concrete coasters with shimmery gold leaves.
Don’t forget to Pin it for later!



Hi Ellen. Peter here from UK. Thank you for a really interesting project.
I am trying to find a simple way of creating concrete cylinders (like drainpipes) about 18 inches long. My first thought was to I try and wrap a sheet of rolled out concrete round a piece of existing pvc piping, then smooth off the joint. I was hoping there may be another method. Your advice would be very much appreciated. The rapid setting cement in UK tends to be a little grainy and more grey than white☹️ Many thanks.
Hi Peter,
What diameter are you thinking? I don’t recommend trying to mold around them unless aesthetics isn’t important for this. I’m sure there probably is a better method. What are these cylinders going to be? Do they need to be hollow inside?
So pretty – glad you hung in there and figured it out!
Thanks Sara. The picture doesn’t do it justice, it’s actually even prettier in real life. I’ll get better photos of it one day.
Another great project Ellen!!
Thanks Jen!
Dear Ellen!
Thank you for your thoughtful and thorough instructions, I’m new to concrete planters making and your blog helped quite a bit to understand the basics.
In thia post yih mention that metal would give ruddy appearance to finished concrete. Regarding this effect, I remembered that I encountered very beautiful effect on planters which looked like a cracked (many little cracks of different sizes) marble, with two colored mixed in the concrete. Wish I could attach a photo here. Please, let know if you know what I mean and if you have any idea to get this kind of design working, I would appreciate it a bunch!
Thank you ?
Hi Tati,
I think I know the effect you are mentioning, but I don’t know how to get it. It looks similar to some of the effects I get when hydro dipping, especially when I use a metallic paint that has oils in it. I did that here with concrete- https://artsyprettyplants.com/diy-hydro-dipping-concrete-planters/. And on these with glass- https://artsyprettyplants.com/hydro-dip-vases-diy/ https://artsyprettyplants.com/diy-hydro-dip-bottles/. The best I can think is that they are using two pigmented concretes and possibly spraying the molds with spray paint when wet to get this effect. I know I had another reader try this and came close to achieving the look –if it’s what you are describing.
I hope that helps.
Ellen