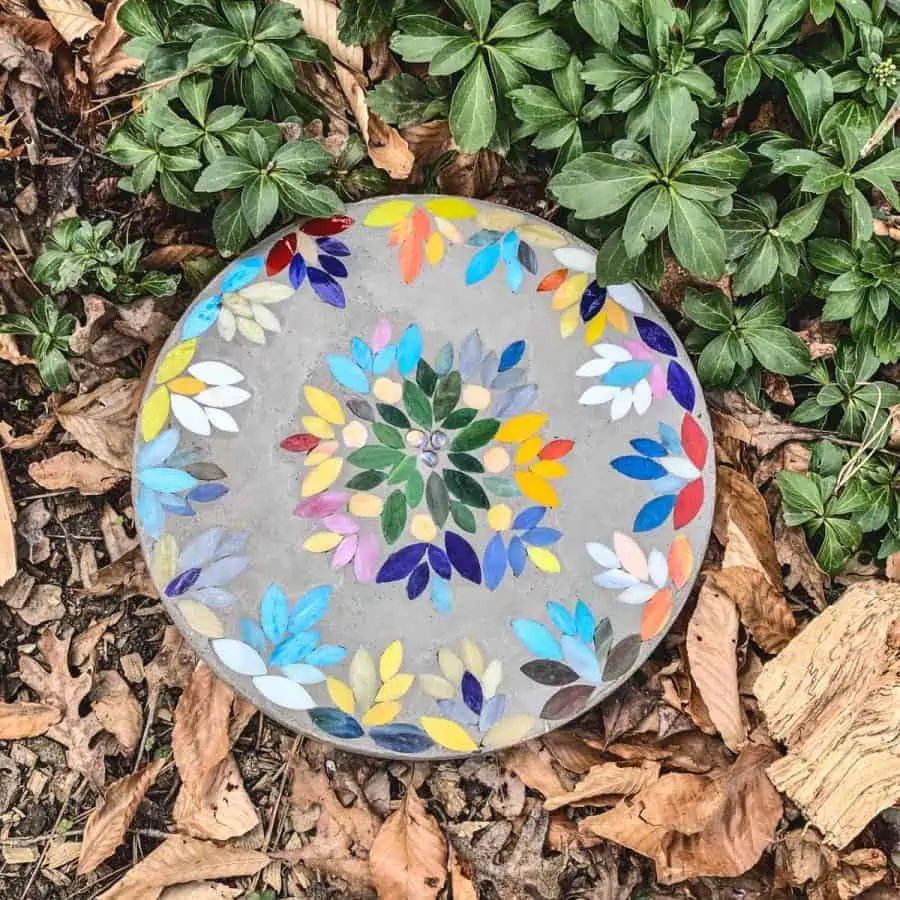
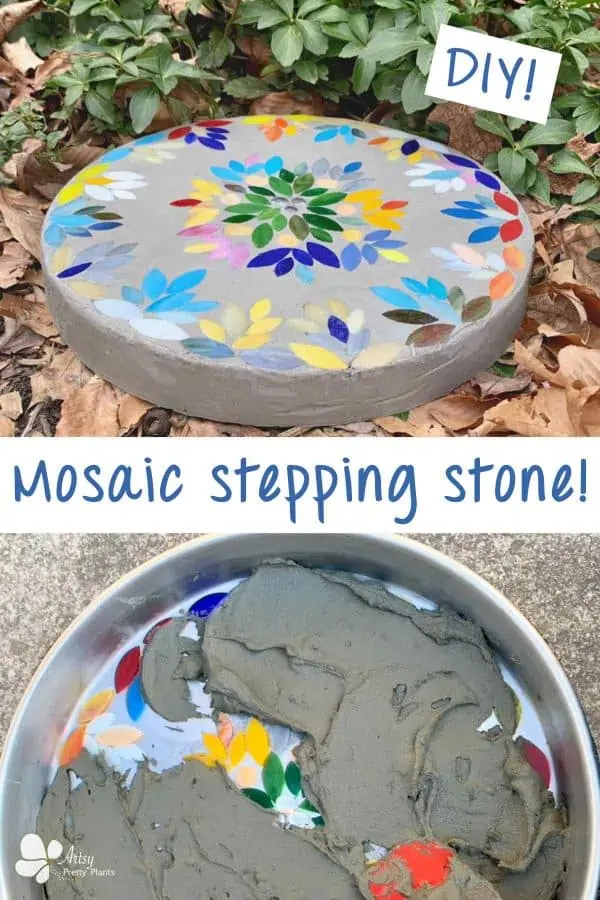
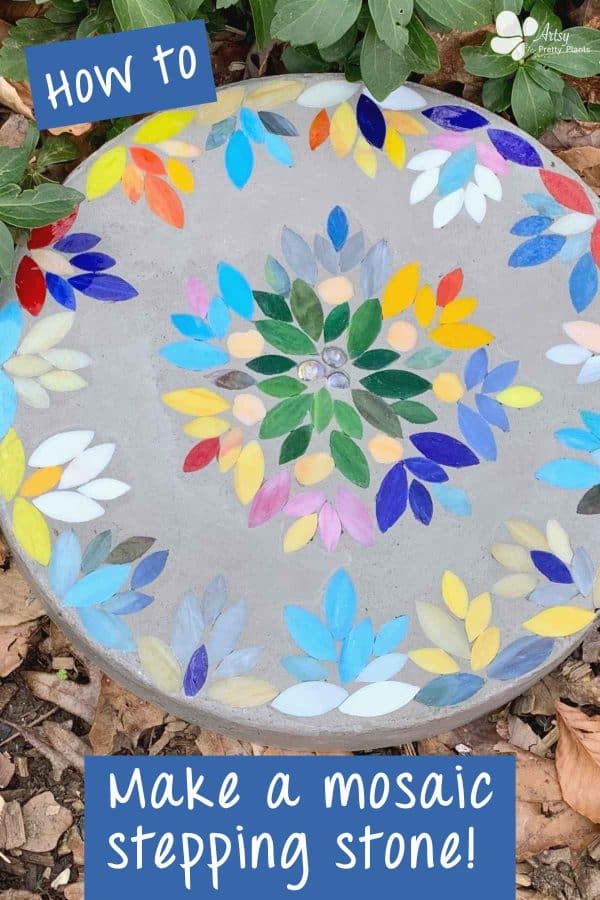
Make a Mosaic Stepping Stone: Fun DIY Garden Art!
Today, I’ll dive into how you can make a mosaic stepping stone, a perfect little project to add character to your garden.
DIY DIFFICULTY LEVEL | Easy
Whether you’re looking to brighten your yard, add some flair to your garden space, or create a special memorial for a beloved pet, a decorative stepping stone is a fun and artistic solution.
Mosaics can provide decorative warmth and cheer to a standard concrete stepping stone and open up a world of creative possibilities with an array of decorative materials.
Techniques for Making Stepping Stones With Mosaic Glass
Choosing the correct method is an important consideration when embedding mosaics into your concrete, as it is a primary factor in how it will look when finished.
Direct Method
This method is the most well-known —you directly apply mosaic tiles onto the surface of your stone. Start with a store-bought or homemade stone, then apply mortar to adhere the tiles to the stone.
Indirect Mosaic Method
Alternatively, the indirect (or reverse) method involves laying out your design in reverse at the bottom of your mold.
This technique, my personal choice, ensures a smoother, more refined finish, like the sleek look you get in cast concrete. The secret? Using contact paper to secure the tiles in place allows for an easy flip during demolding.
Since I went into this project without prior experience with tile mortar, it was a gamble, but it worked beautifully! For a closer look at how this indirect method unfolds, refer to the images in steps 3-5.
If you’re familiar with my concrete planter or candle projects, this reverse technique will feel right at home. It’s my go-to for achieving a professional appearance.
Though the stepping stone in the main photo is pictured against a pile of greenery, it now resides among the eclectic mix of homemade stamped pavers in my DIY gravel garden.
For those intrigued by more garden path ideas, explore 17 ideas for cheap ways to make paths, including a stepping stone project mimicking natural stone and a comprehensive guide to the pros and cons of buying vs making stepping stones.
To continue with the process of creating a mosaic stepping stone, check out my tutorial below.
Some of the links on this page have been provided as a convenience for finding materials. These links may also be affiliate links. As an Amazon Associate I earn from qualifying purchases, at no extra cost to you.
I only recommend products I’ve used and loved, unless otherwise stated. Click here to read my full disclosure policy.
Mosaic Stepping Stone List of Materials
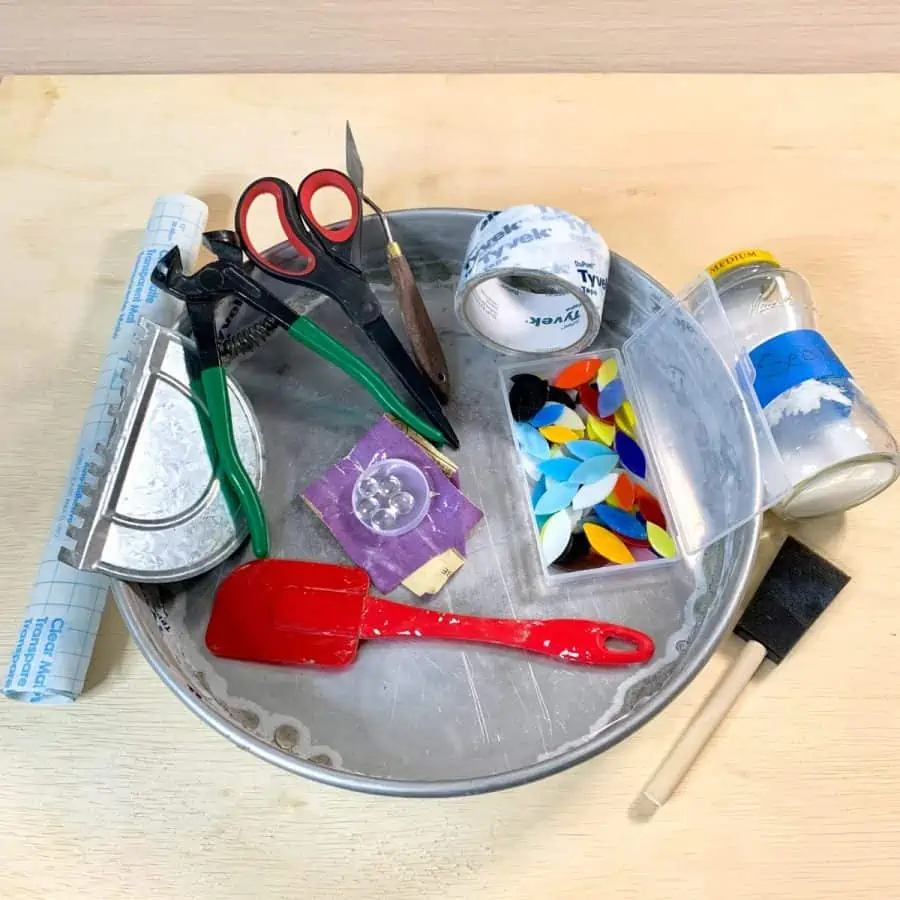
Materials Tips
A few notes when shopping for materials.
After the tutorial, don’t forget to check more fun garden art like this big concrete mushroom and cute concrete gnome!
Make A Stepping Stone With Mosaics
Make sure you work on a flat surface, the glass tiles are a little slippery. You may also want to protect your work area from anything or anyone that can bump into it.
In fact, it’s a good idea to take photos during the process while you layout your mosaic design.
This is a precaution in case someone does knock into it, you’ll have something to reference. If you’re a cat person, you’ve probably already taken this into consideration. ;o}.
Step 1. Prep The Contact Paper
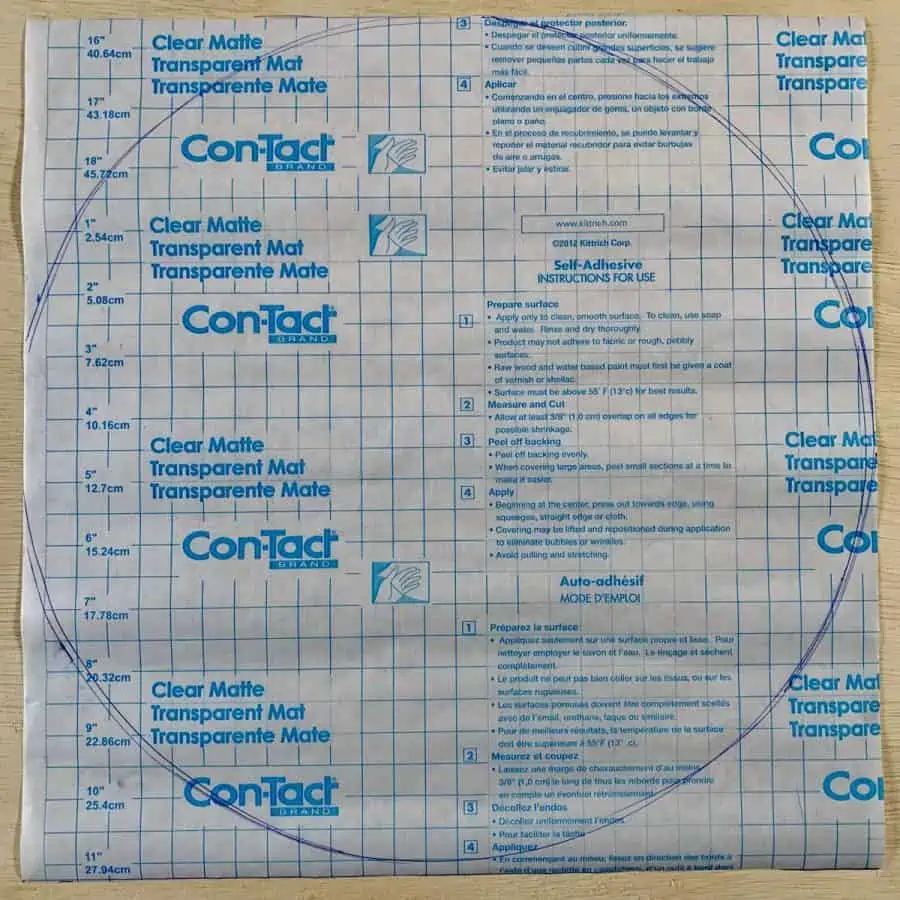
First, trace the bottom, outside of the pan onto a piece of contact paper and cut the circle out. Place it inside something flat to help flatten it to make it easier to position in a later step.
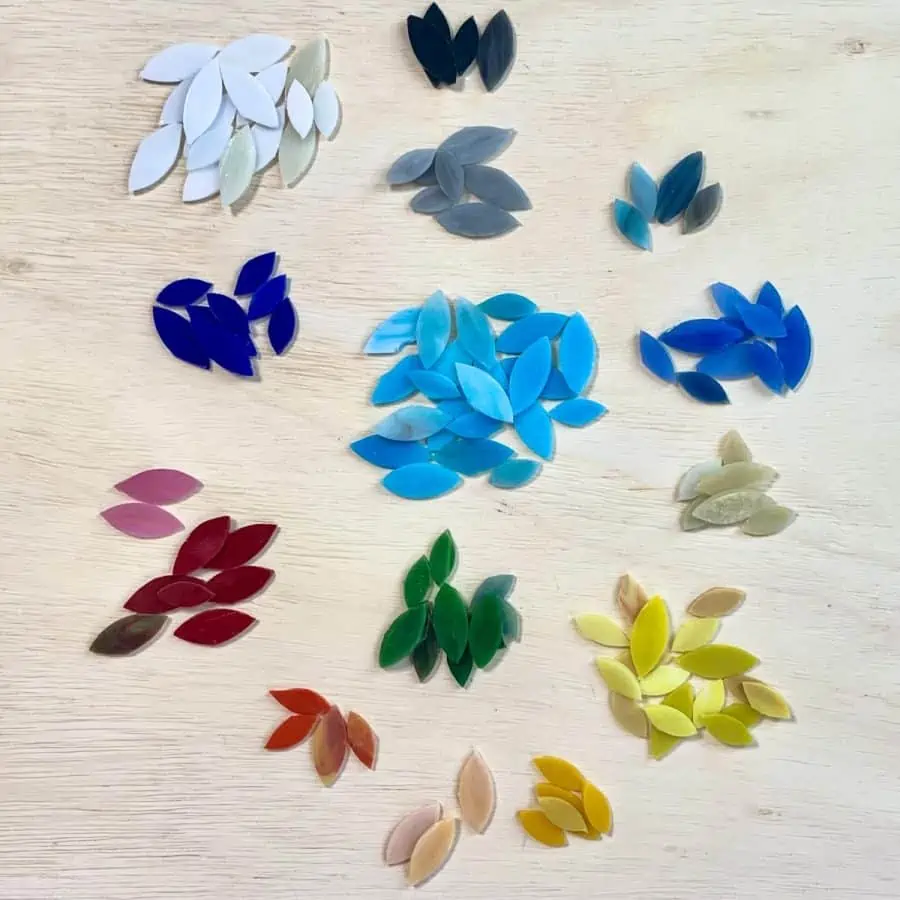
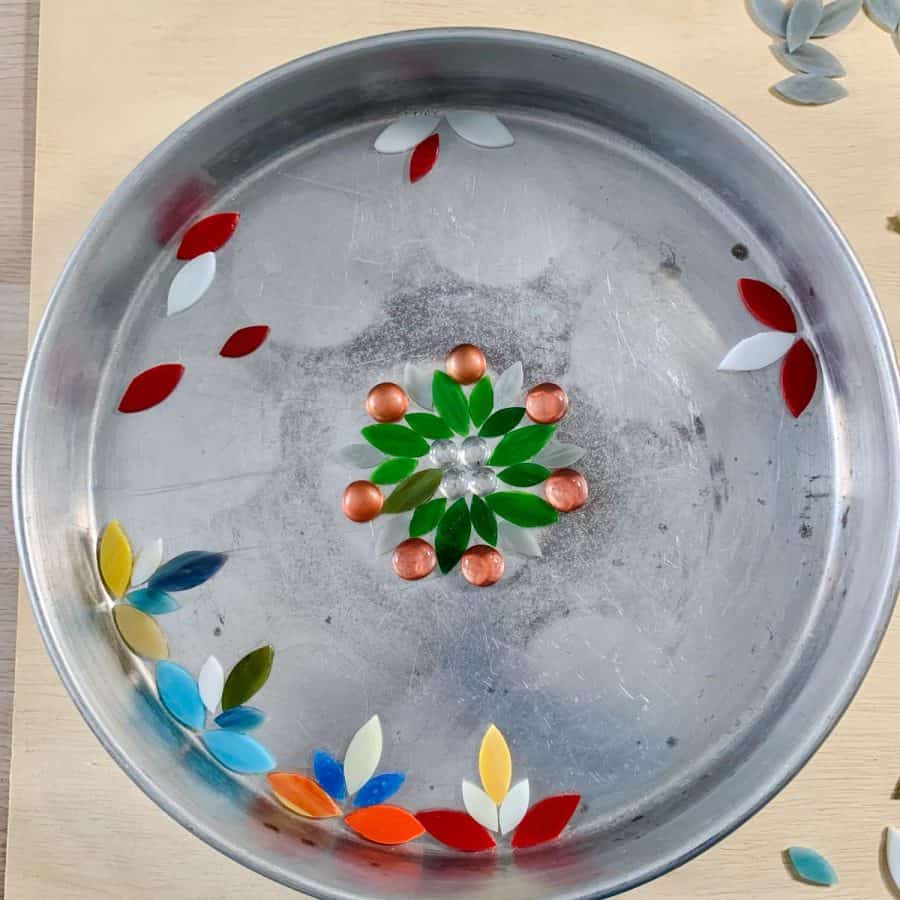
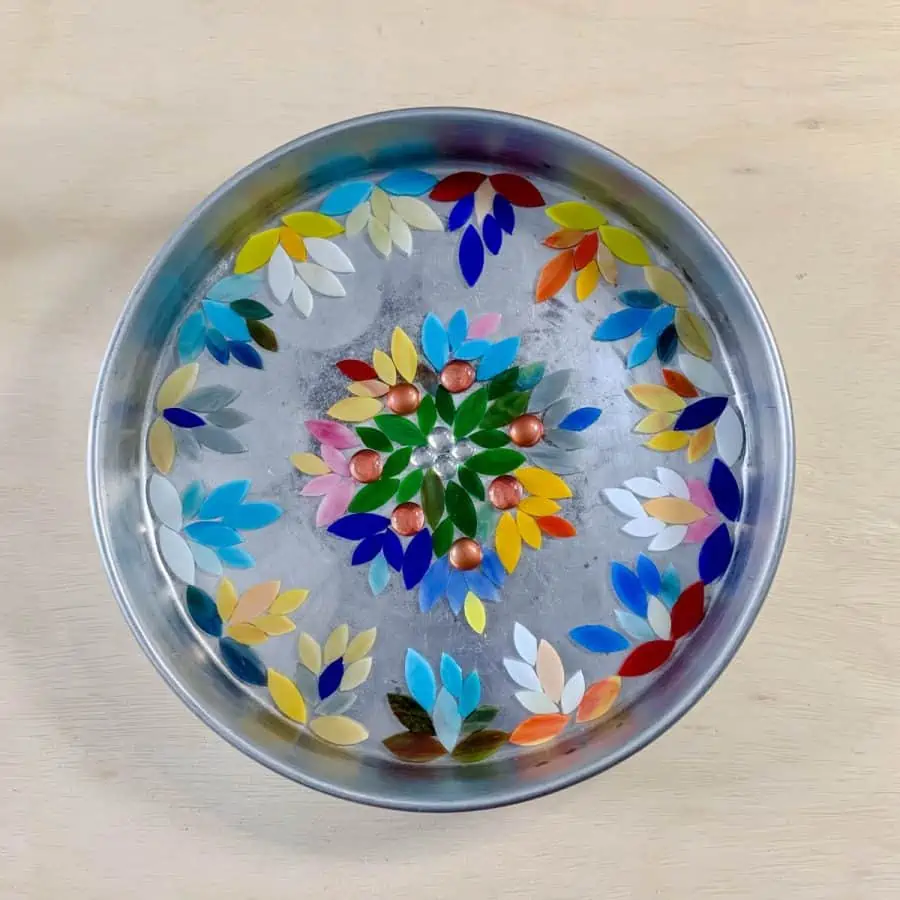
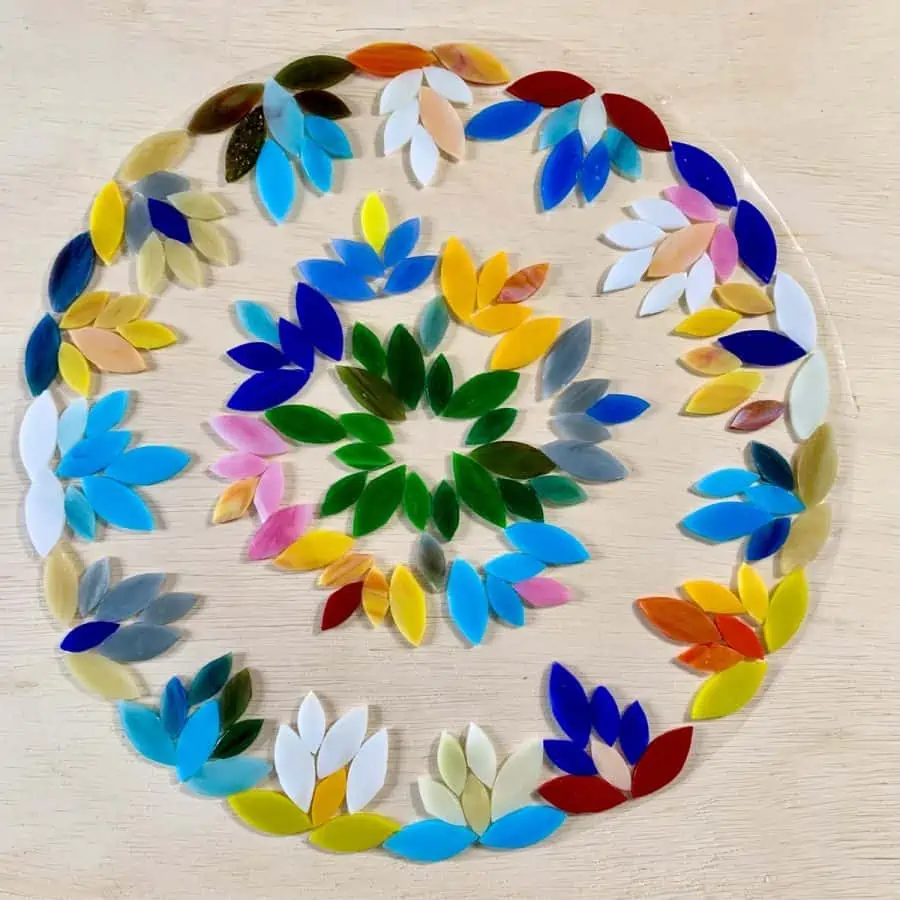
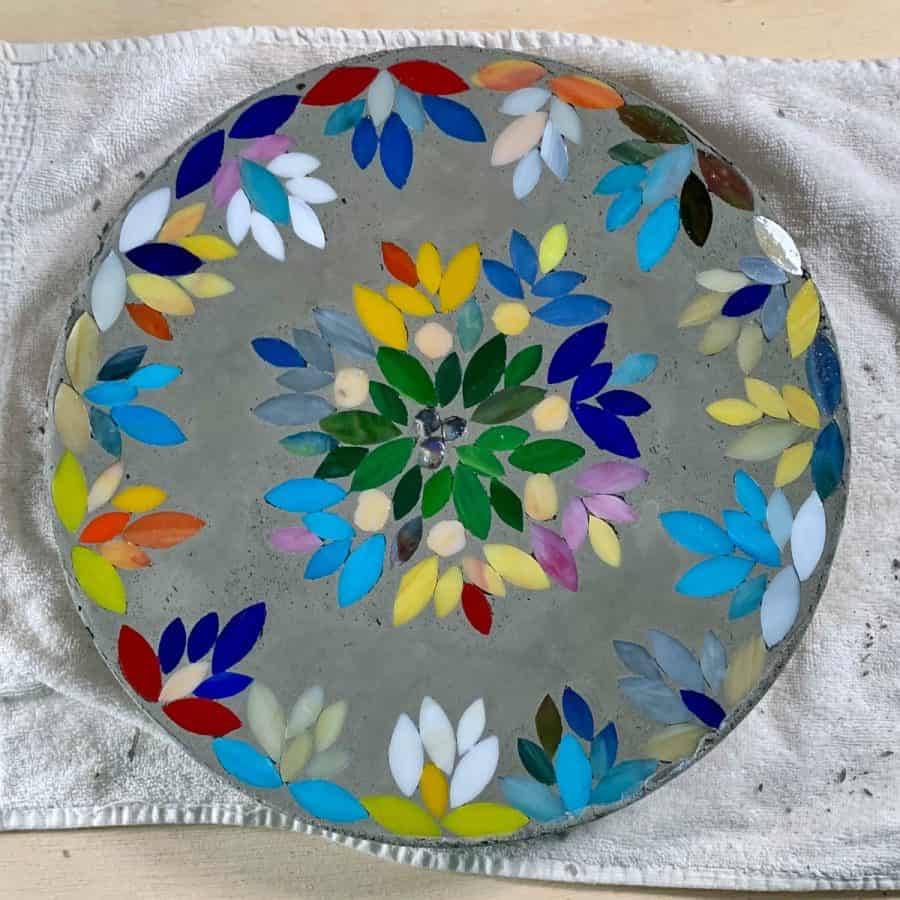
Step 2. Create The Design
First, separate the tiles into color groups.
Create a mosaic pattern by laying the pieces into the pizza pan. You can choose to fill the entire pan with mosaic tile pieces or leave it so that you have some negative space.
Note: You may notice that many of the glass tiles have more variation on one side.
If you remember, I mentioned in the intro, what you are looking at when you lay down a piece is what your final stepping stone will look like.
So the side of the tile you choose to lay face up is what you’ll see in the end.
The nice thing is that you don’t really have to think about it. Just trust that it’s going to work out exactly how you are designing it.
If you are adding glass gems to the mosaic, then keep in mind that these are much thicker than the tiles.
This means you will only be able to use the smaller ones successfully because the bigger ones are too rounded to stick well to the contact paper. This causes mortar to run underneath.
I didn’t realize there wouldn’t be a solution for this until I was adhering the contact paper to the tiles. And as it was, the small ones did let some mortar run underneath, but it was only a little bit and I was able to chip it away.
FYI- You will end up flipping these gems over at the end of the next step otherwise, they will be reversed.
If you would like to fill the entire space with tiles, this is better accomplished if you use a tile chipper to create custom sized pieces, however, this will take considerably longer.
Using a wider variety of shapes may provide more flexibility.
How long it will take for the first step takes will depend on how long you hem and haw over your design. ;0}
I redesigned it several times until I found the layout that I was satisfied with, which in the end was probably a little more than 4 or 5 hours.
Step 3. Secure The Mosaic Pattern To The Adhesive Paper
I really thought this is where everything was going to fall apart on me.
I couldn’t imagine that all my glass pieces weren’t going to move around on me as I placed the contact paper, but they didn’t!
There were only a few pieces that slid slightly out of position and it was easy to reposition them afterward.
So take a breath, this should go smoother than you’re probably thinking.
Take the contact paper out that you cut. If it is still curling on you, then roll it in the opposite direction and then let it unroll and do that a few times.
It’s not a big deal if it still curls, it just makes it a little easier to start attaching the paper if it’s being somewhat agreeable.
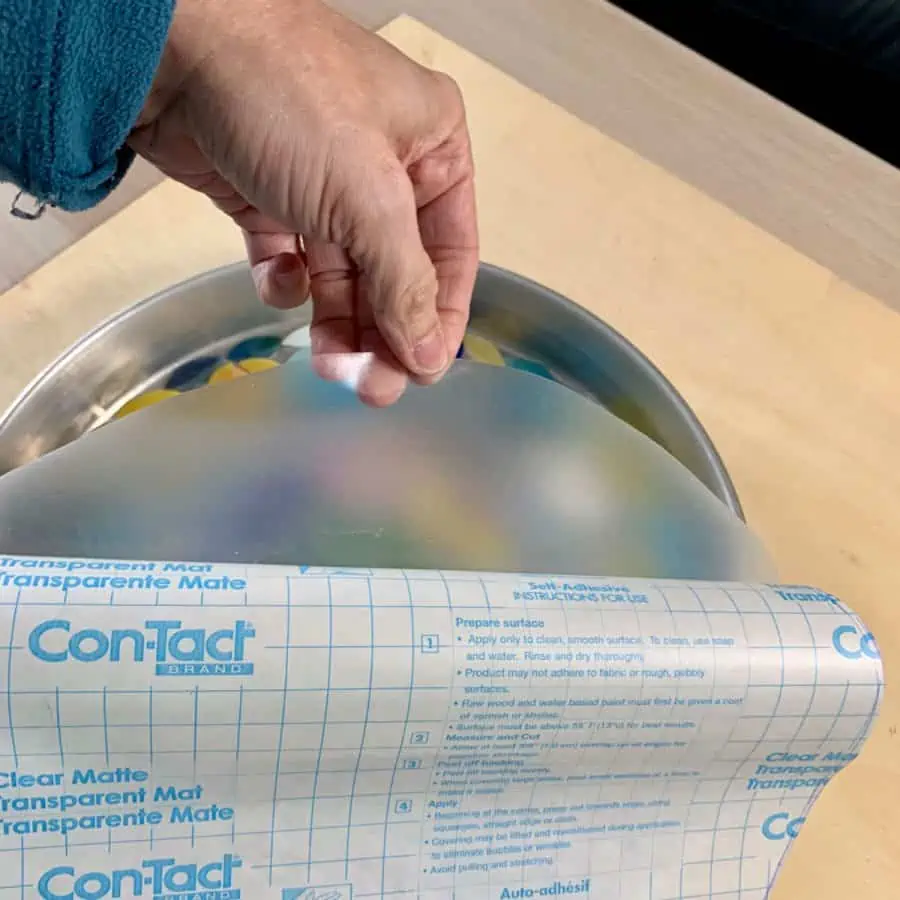
First, lift one edge of the paper and pull it away from the sticky side of the contact paper.
Pull it back only about 4 inches and then place the sticky side at the top edge of your design.
Try to lay the paper down evenly at one time across the mosaic pieces.
Now hold the roll with one hand while pressing firmly on the tiles to stick them in place.
Once they are firmly stuck, you can slowly keep peeling back the paper, pressing down on the tiles as you go.
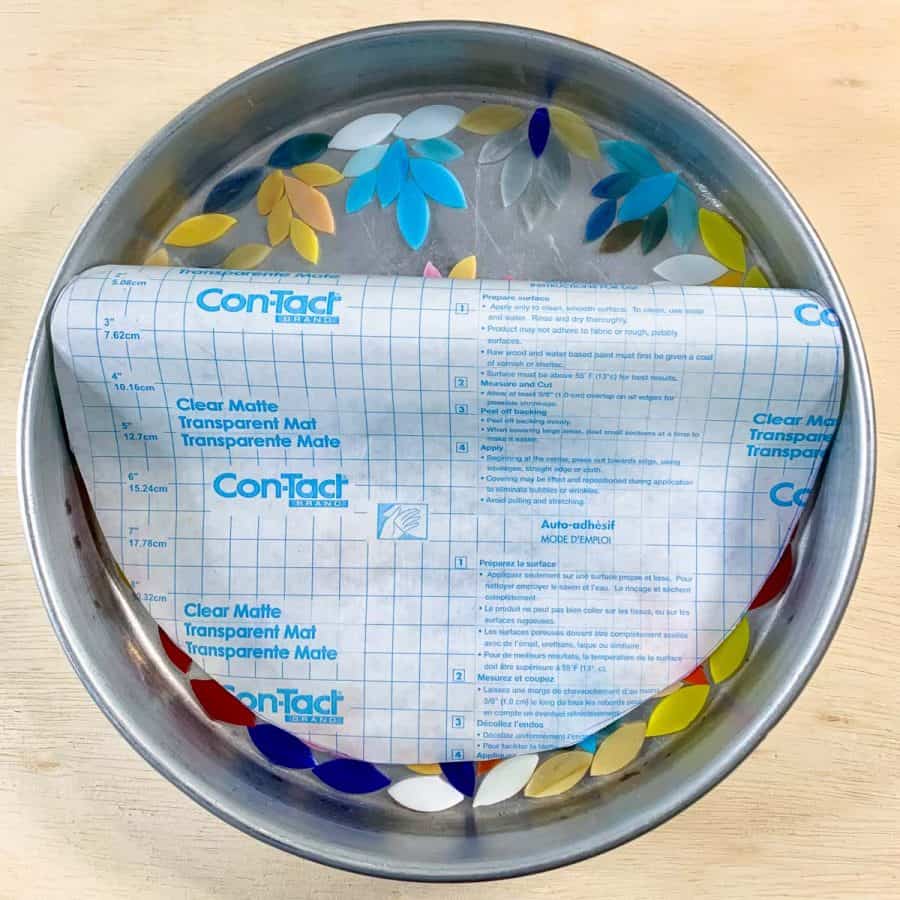
Now lift the contact paper with the tiles out of the pan and flip them over and place them tile side up on your table.
If you see that some of the tiles were moved out of place, just lift them off the contact paper, reposition them and press them back on the adhesive.
If you used the small glass gems, then remove them now and turn them over so that the rounded side is sticking to the paper and the flat side is facing you.
Keep the tiles on your table for now and move on to the next step.
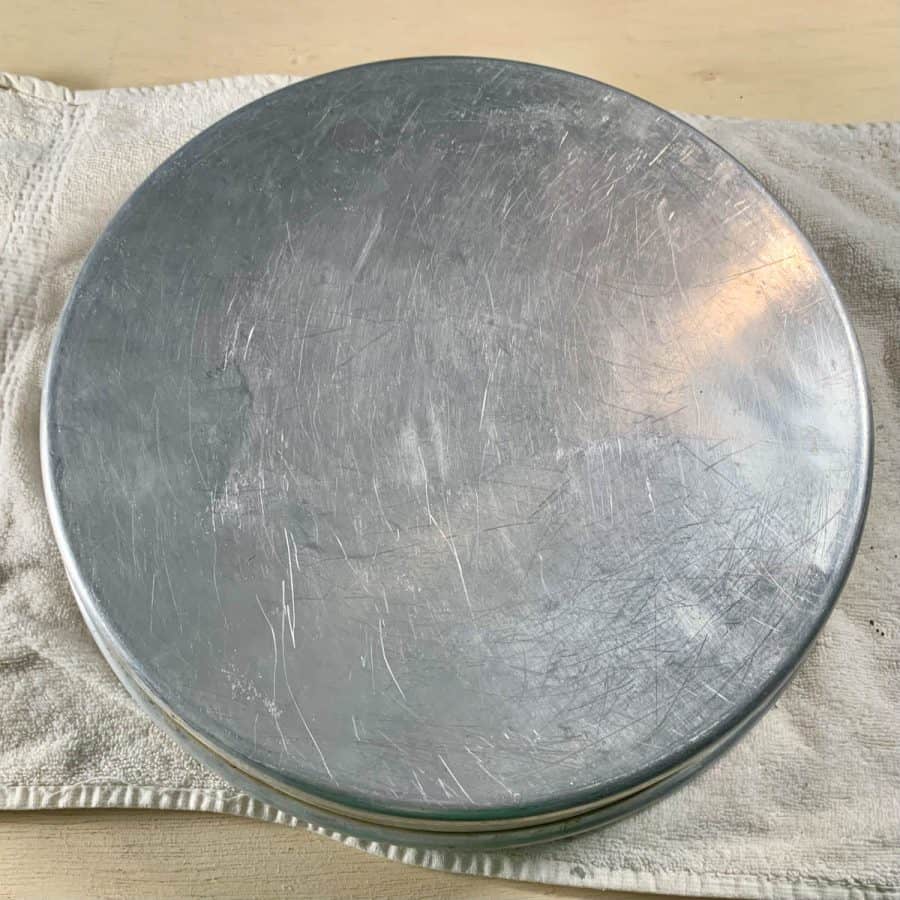
Step 4. Prep The Pan For The Thin Set Mortar And Concrete
To help keep the sides of the stone smooth, as well as allow the stepping stone to come out of the pan easily after it’s cured, you’ll need to add a slick surface to the sides.
I don’t recommend using a lubricant because it can cause discoloration and create tiny bubbles. Instead, use packing tape along the sides.
Unfortunately, I forgot to do this before mortaring so I had to push the mortar away from the edges to be sure it wouldn’t stick.
This caused the concrete during Step 6 to cover some of the tile edges. Placing the tape now will prevent that.
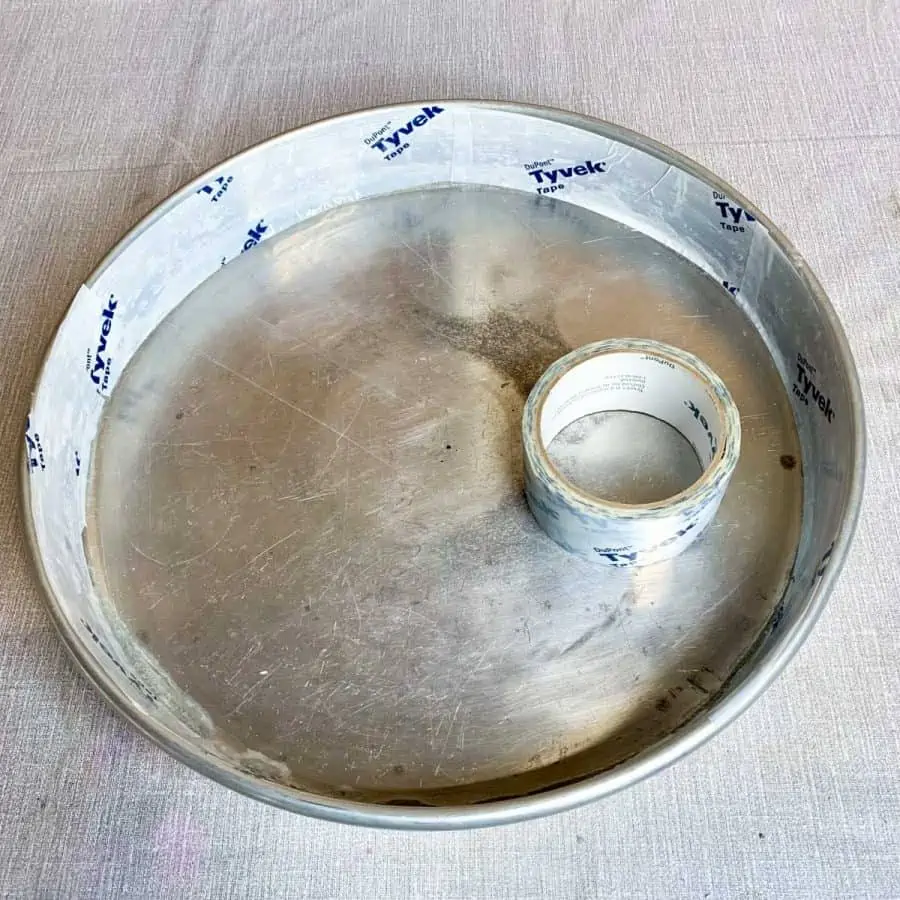
Cut pieces about 6 inches long and tape the sides, ensuring you meet the bottom corner and get close to the top.
Also, make sure you overlap at the seams a little and smooth any wrinkles in the tape.
The reason for only using 6” pieces is because the edges of your pan probably have a slight slope.
This allows for a tight fit, where if it was all one piece, there would be a gap between the tape and sides causing the stone to be lopsided.
Garden Planner!
Printable PDF Download
$2.99
Everything you need to plan your garden.


This will subscribe you to my newsletter where you’ll get updated when I have a new post, or tips and tricks. You are free unsubscribe at anytime.
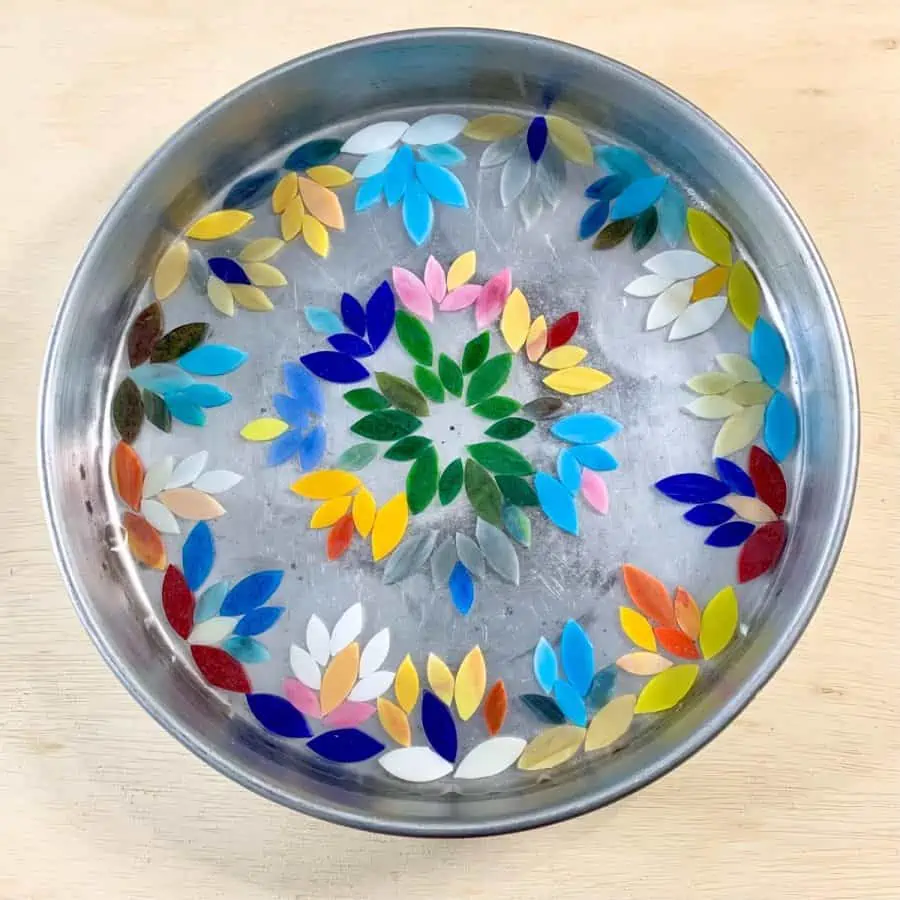
Now you can set the tiles with the contact paper back into the stepping stone mold with the contact paper touching the pan and tiles facing you.
And if you used glass gems, now is the time to place them back into the design, but make sure the rounded side is stuck to the contact paper and flat side facing you.
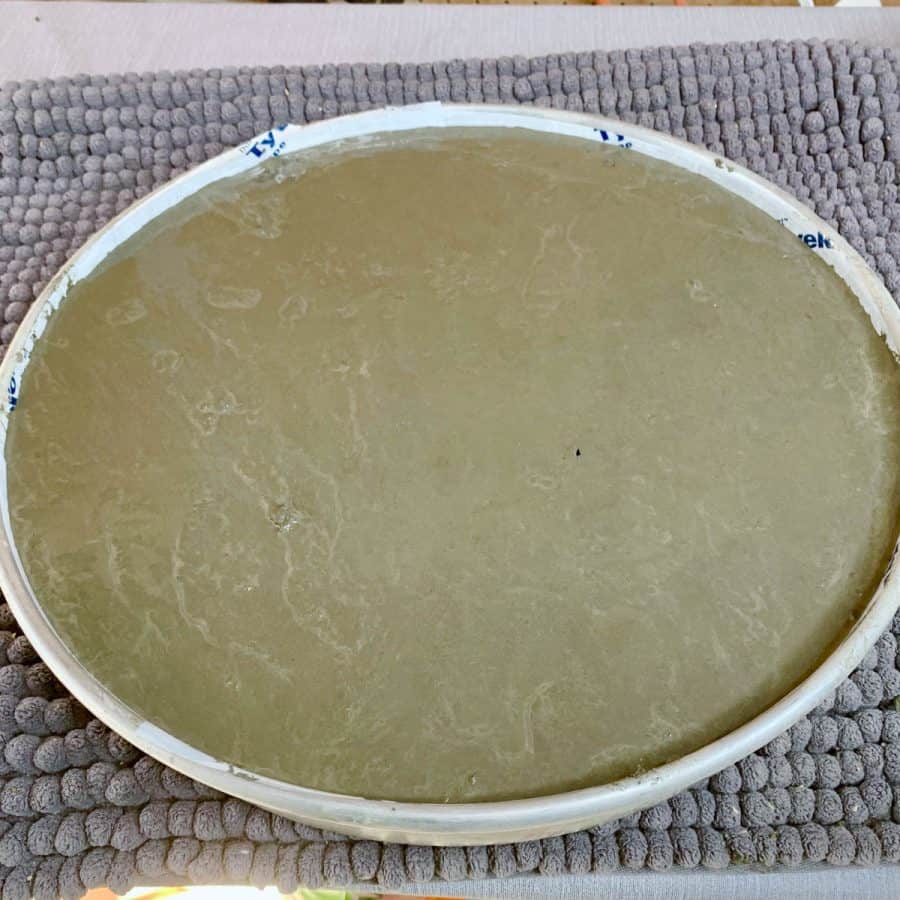
Step 5. Apply The Mortar Mix
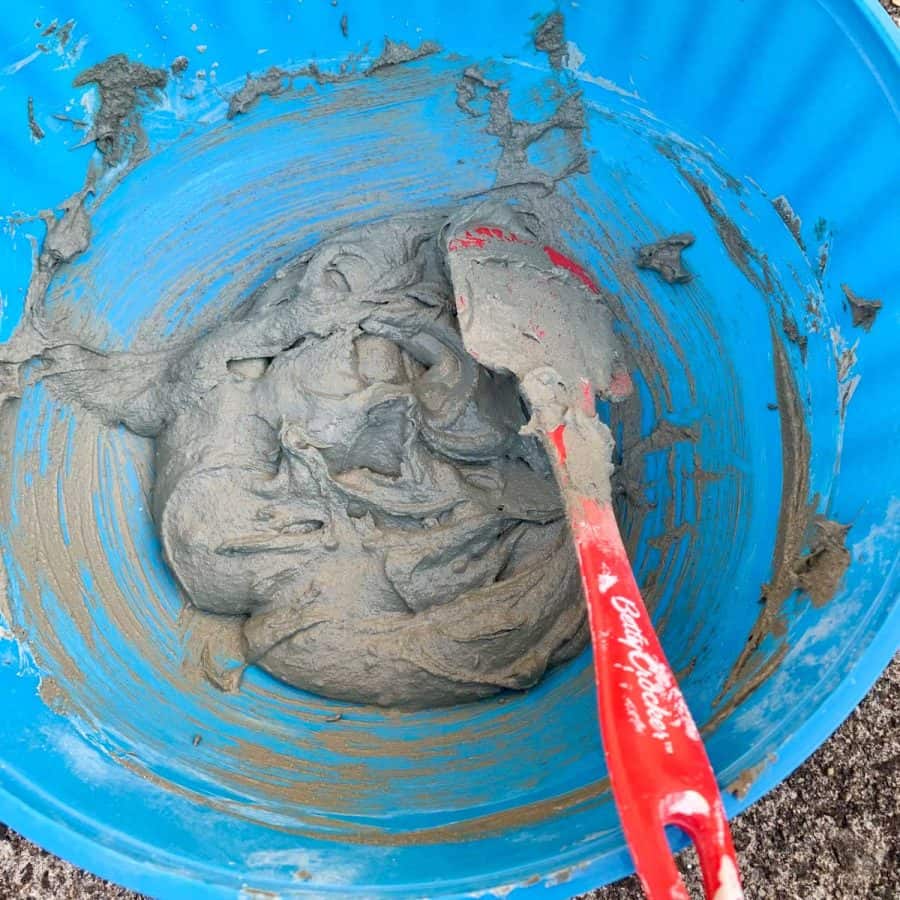
First, put on your protective gloves. Then add about 2 ½ to 3 cups of the thinset mortar to a large bowl, and mix the water in.
Blend them until the mix is lump free and the consistency is like brownie batter.
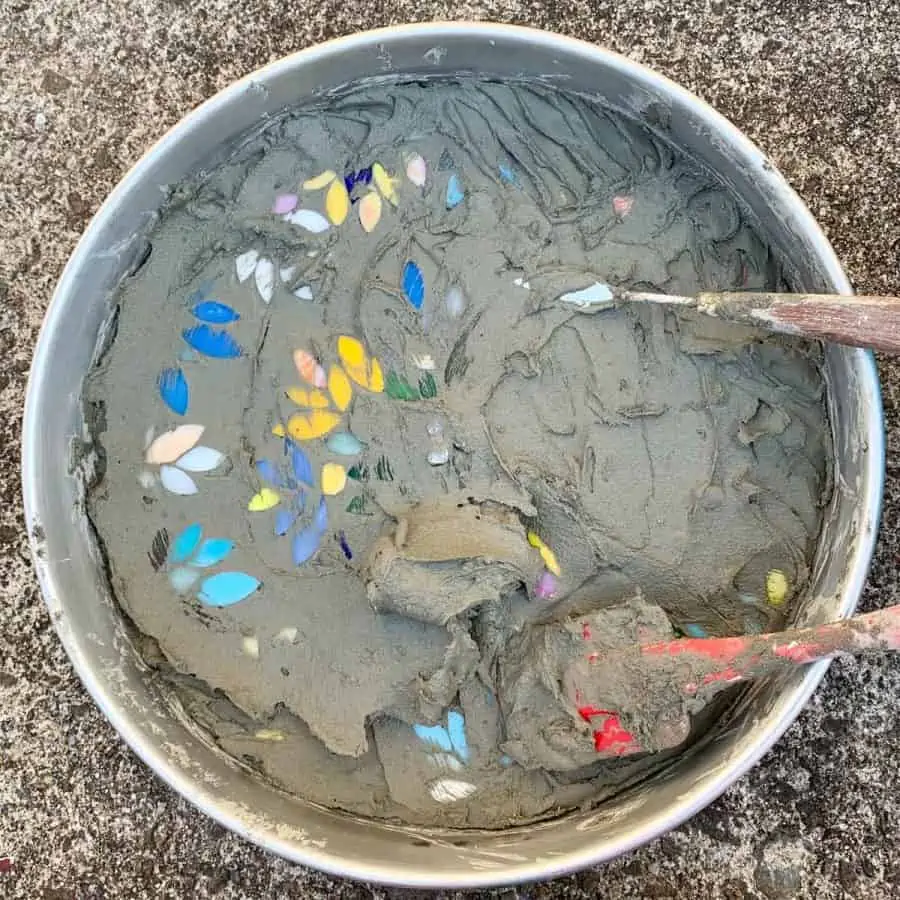
Next, spread the mortar onto the tiles using a spatula or putty knife.
The spatula does a good job of getting the mix into the spaces between the tiles.
However, if you are using a putty knife, then you may need to employ the help of a flexible palette knife to make sure the mortar gets down in between each of them.
Be sure to get the mortar coated on evenly, you should have a ⅛” covering the top.
It’s helpful to create grooves across the surface so that when you pour the wet concrete in the next step it has more surface to grip onto.
If you have a trowel, use that to create grooves, otherwise, you can use whatever tools you have.
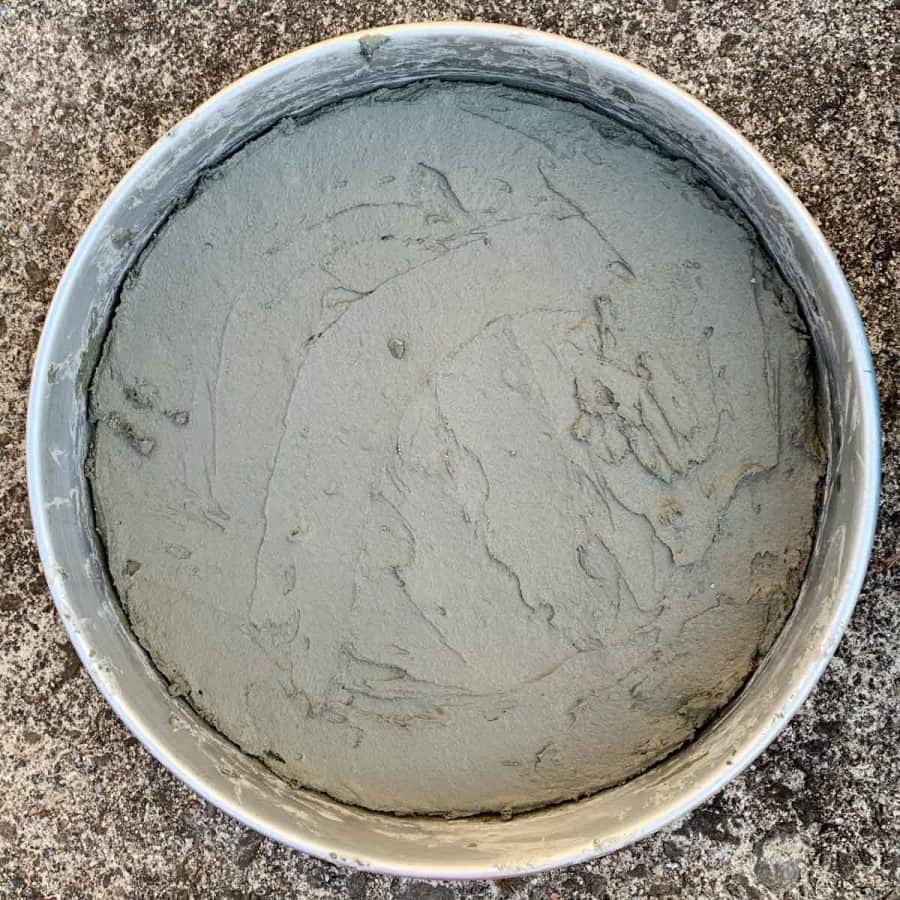
Set the mortared stone aside to cure as close to room temperature as possible, out of direct sunlight. It will need close to 48 hours, or more to cure.
* Tip: Don’t get tempted when it’s cured to lift it out to look at it.
It’s fragile, plus if you don’t get it back in the exact same spot, you’ll risk it not fitting perfectly and this will allow the possibility of concrete overlapping some of the edges of the tiles.
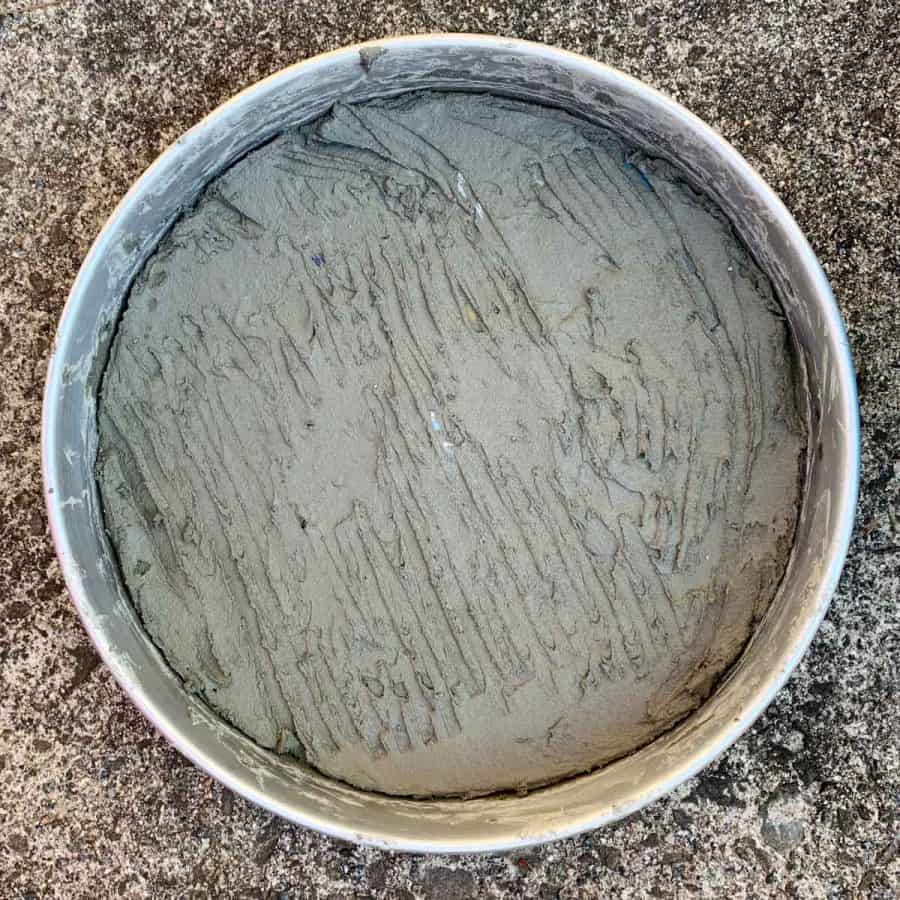
Step 6. Cast The Concrete
Place a soft cloth next to your mixing area, you’ll need it shortly.
First, combine the concrete mix with water until there are no lumps. The right consistency is like a mud pie. Since I used portland cement, I mixed in a ratio of 1:1 or cement to sand.
I believe I used 4 scoops of cement and my scoop holds 2 ½ cups. If you are using the Sand Topping Mix, you may need almost double since the 4 scoops of sand account for half the volume of mix I had.
Pour half the mix into the mold to cover the cured thinset and then place the pan on the soft towel. Shake and tap it to vibrate it now while it’s not too heavy and is manageable.
The cloth will be a safety measure to protect the fragile mortared tiles. Once you see air bubbles rise and release, then add the rest of the mix and vibrate again.
You may not see many bubbles rise, but that’s okay, that’s why you did this with the first half of the mix.
Since the stone is about 2” thick, I recommend waiting at least 36 hours before demolding.
Waiting longer is safer because it allows for the concrete to gain more strength.
Step 7. Demold The Concrete
Gently push the sides of the pan away from the stepping stone, all the way around the pan. You should see the concrete release from the mold.
Next, place a soft cloth on a table and carefully turn the pan upside down while holding one hand over the stone so that it doesn’t slip out.
Once the pan is upside down, lift it away from the stone.
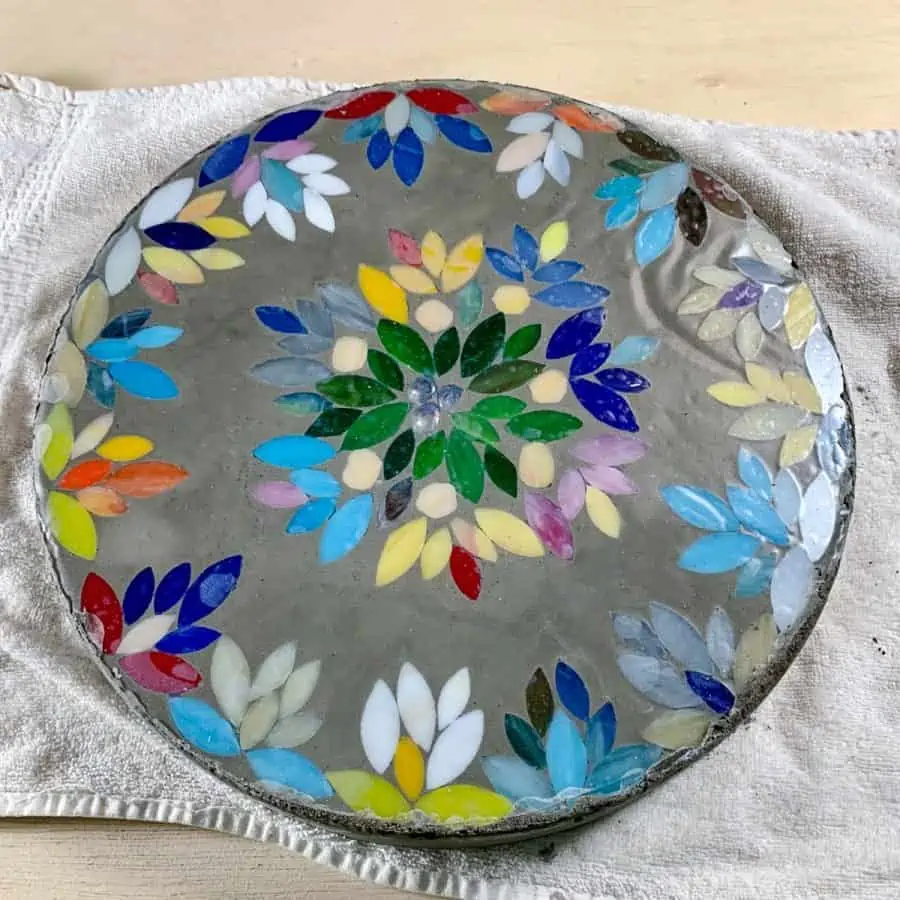
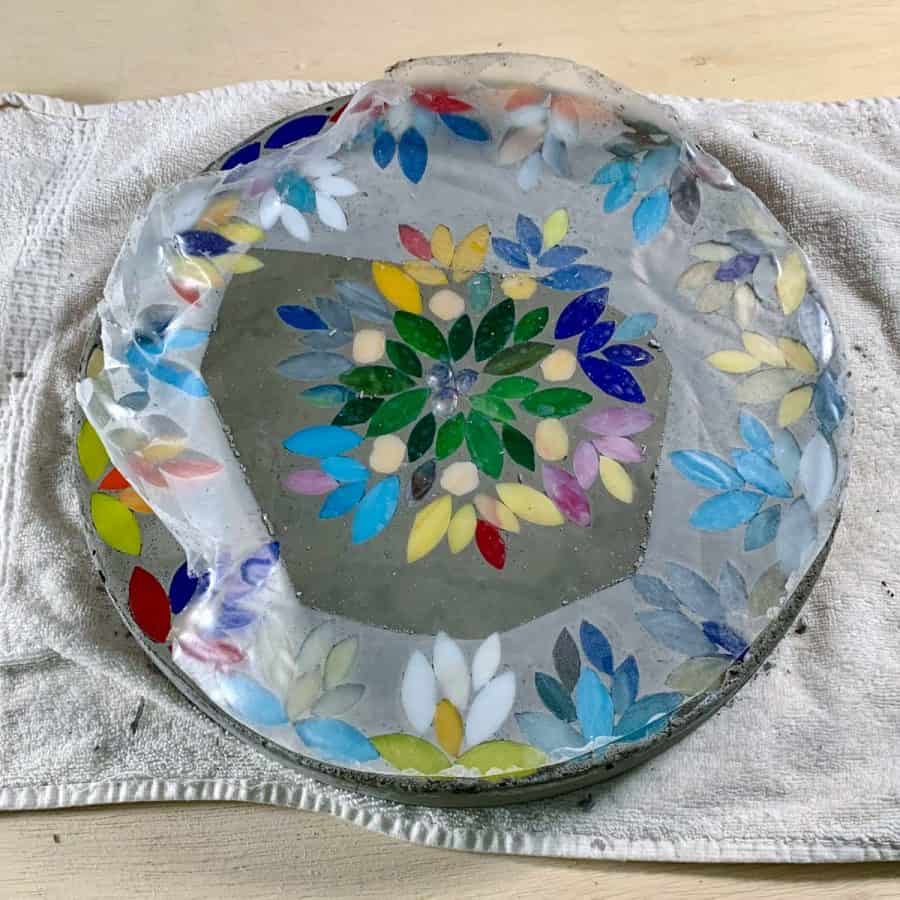
You should have the stepping stone free of the pan, so go ahead and peel the contact paper off.
It’s easiest if you lift it off starting from the edges, then pull it from the middle so that it all comes off in one piece.
Step 8. Sand And Seal The Concrete Stone
You may notice from the photo that casting the concrete against the contact paper makes it exceptionally smooth!
If you have any rough edges, you can sand them with #220 grit sandpaper.
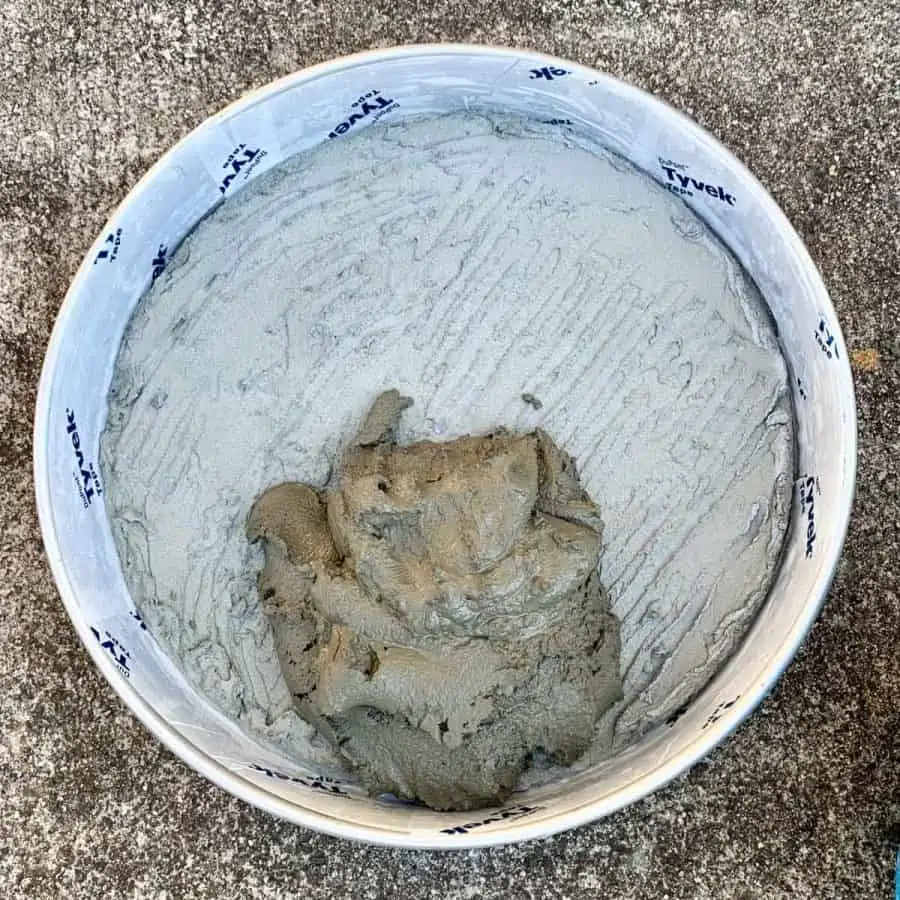
I had one spot where the concrete didn’t fill in completely and left an air pocket hole. And because it was at the edge of a tile piece, I was concerned it would become brittle.
To remedy this, I mixed up a slurry (a very thin mix) of cement and sand to fill in the hole.
To seal or not to seal: You may know that I don’t usually like to seal concrete. I discuss why in this post about sealing concrete planters.
I sort of regret sealing this. The stepping stone really doesn’t need to be sealed, the reason for doing it is to help protect the face from looking weathered a little longer.
The issue with sealing this is two things. One is that the sealer will leave a little bit of a film on your tiles. You can remove most of it using acetone and a q-tip, but it’s tedious and you do have scrub a bit.
The other is that you’ll see brush marks from the sealer, which normally you can blend in some with a cloth but the nature of the design makes it difficult to get in between everything.
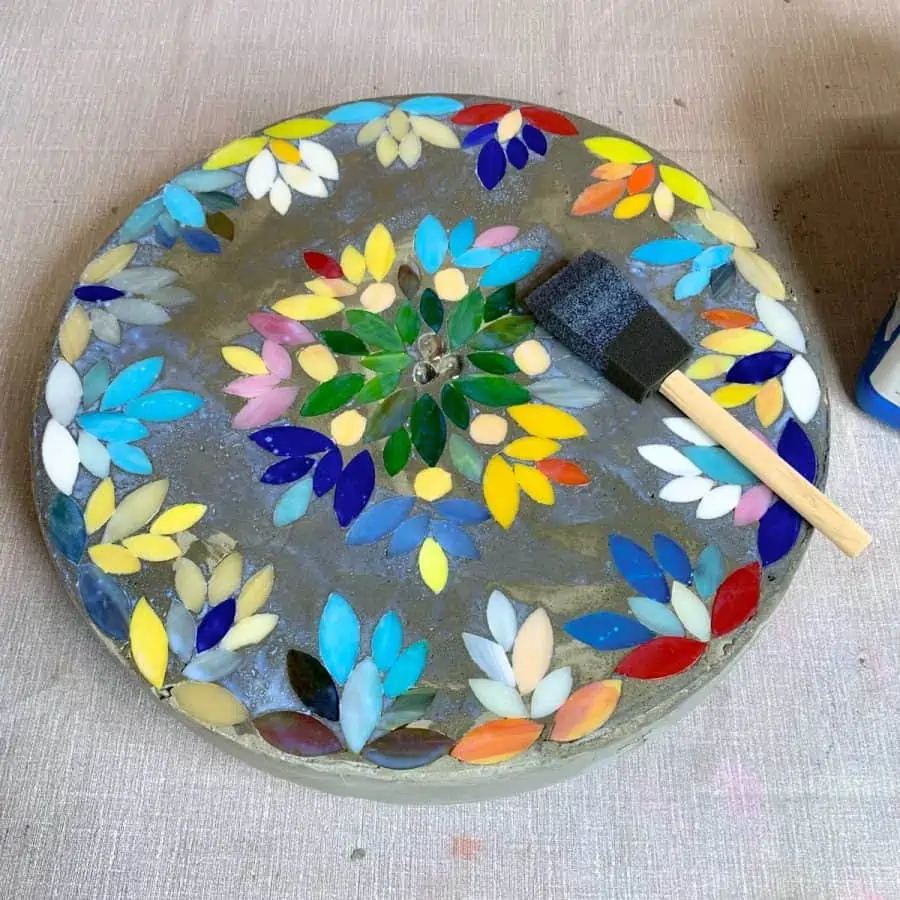
If you choose to seal the stepping stone, use a cloth to wipe the stone free of dust first.
Next, use a foam brush to apply a thin coat of sealer to the top. Before sealing the sides, wipe the sealer off of the top of the tiles with a cloth or paper towel, then you can seal the sides.
Now go back over the tiles if you want with acetone and a q-tip to remove the film from the sealer.
One coat of sealer should be sufficient, but if you want to apply a second (assuming you are using the sealer I listed in the materials), then you’ll to wait a day to apply a second coat. I only applied one coat.
Now place the mosaic stone in your yard or garden and enjoy!
For more garden art projects, check out the concrete butterfly puddler, concrete orb, and bird bath.
Don’t forget to Pin it for later!
Make a Mosaic Stepping Stone: Fun DIY Garden Art!
Materials
- sand topping mix
- mosaic glass tiles
- aluminum pizza pan
- baking spatula
Tools
- Please see the full materials list above the tutorial for details and links.
Instructions
- Prep The Contact Paper
- Create The Mosaic Stepping Stone Design
- Secure The DIY Mosaic Stepping Stone Pattern To The Adhesive Paper
- Prep The Pan For The Thin Set Mortar And Concrete
- Apply The Mortar Mix
- Cast The Concrete
- Demold The DIY Stepping Stone
- Sand And Seal The Mosaic Concrete Stepping Stone


I love this stone. Just beautiful! I am going to try this process next time I make one.
Whenever I go to a thrift store, I look for metal pans and glass or plastic bowls and vases for stepping stones and mushroom molds.
Thanks Lyn! It really was a surprisingly easy method. Such fun.
I love the mosaic stone. The contact paper method is one I’ll keep in mind, even if its for other things like leaves (crazy leaf lady here ?)I had made s stepping stone with the glass pebbles imbedded, and for some reason ??♀️ the glass has shattered/cracked but still stayed in place. I wonder if the force of winter cold did it? I wonder how yours will last… but then again I am in Canada!
Hi Barb,
Thanks! Yeah, maybe expansion and contraction of the concrete and the glass couldn’t move with it. I’ve had concrete crack due to glass, but not the other way around. I’ll update if I see cracks.
Could you do this just with concrete, and skip the thinset mortar? (What is the benefit/purpose of the mortar?) I’m considering doing this as a school project with kids and would like to streamline/simplify as much as possible since we’ll be doing 24 stepping stones!
Hi Eliza,
It sounds like a fun school project! You can, but the mortar is thinner and gets into the spaces better. It will have a more refined appearance. The concrete alone will work too, I just recommend not having the mosaics tightly spaced because you may not be to get the concrete to go in between them. Keep about 1/4 distance between the tiles and ou should be fine. Make sure you have a flexible spatula to push the concrete in between the tiles. Good luck!
Can you fill the entire stepping stone with the mortar instead of doing part of it with concrete?
Hi Sarah,
It will fall apart. The mortar isn’t made to hold together at a thickness beyond 1/8 of an inch. It might work for up to 14″ but, no mortar for tile isn’t made the same way concrete is.