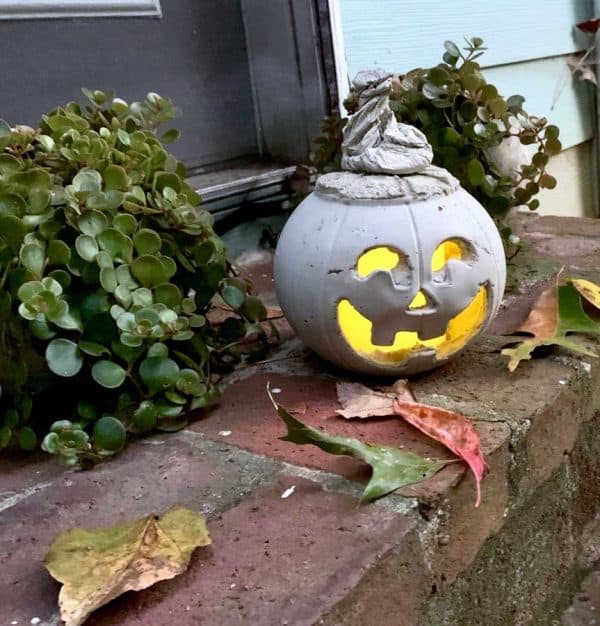
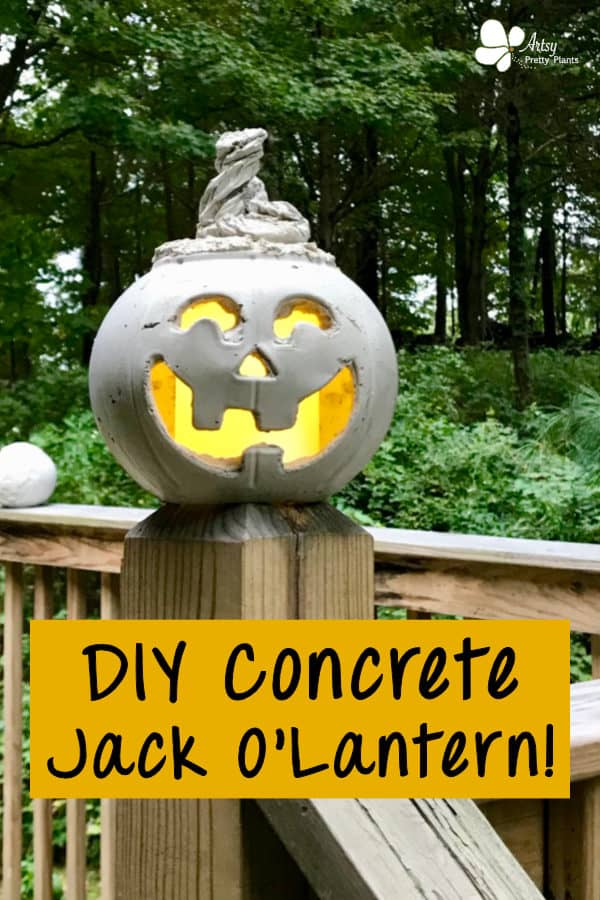
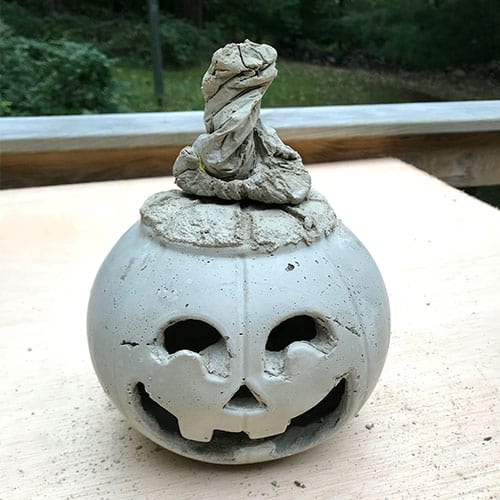
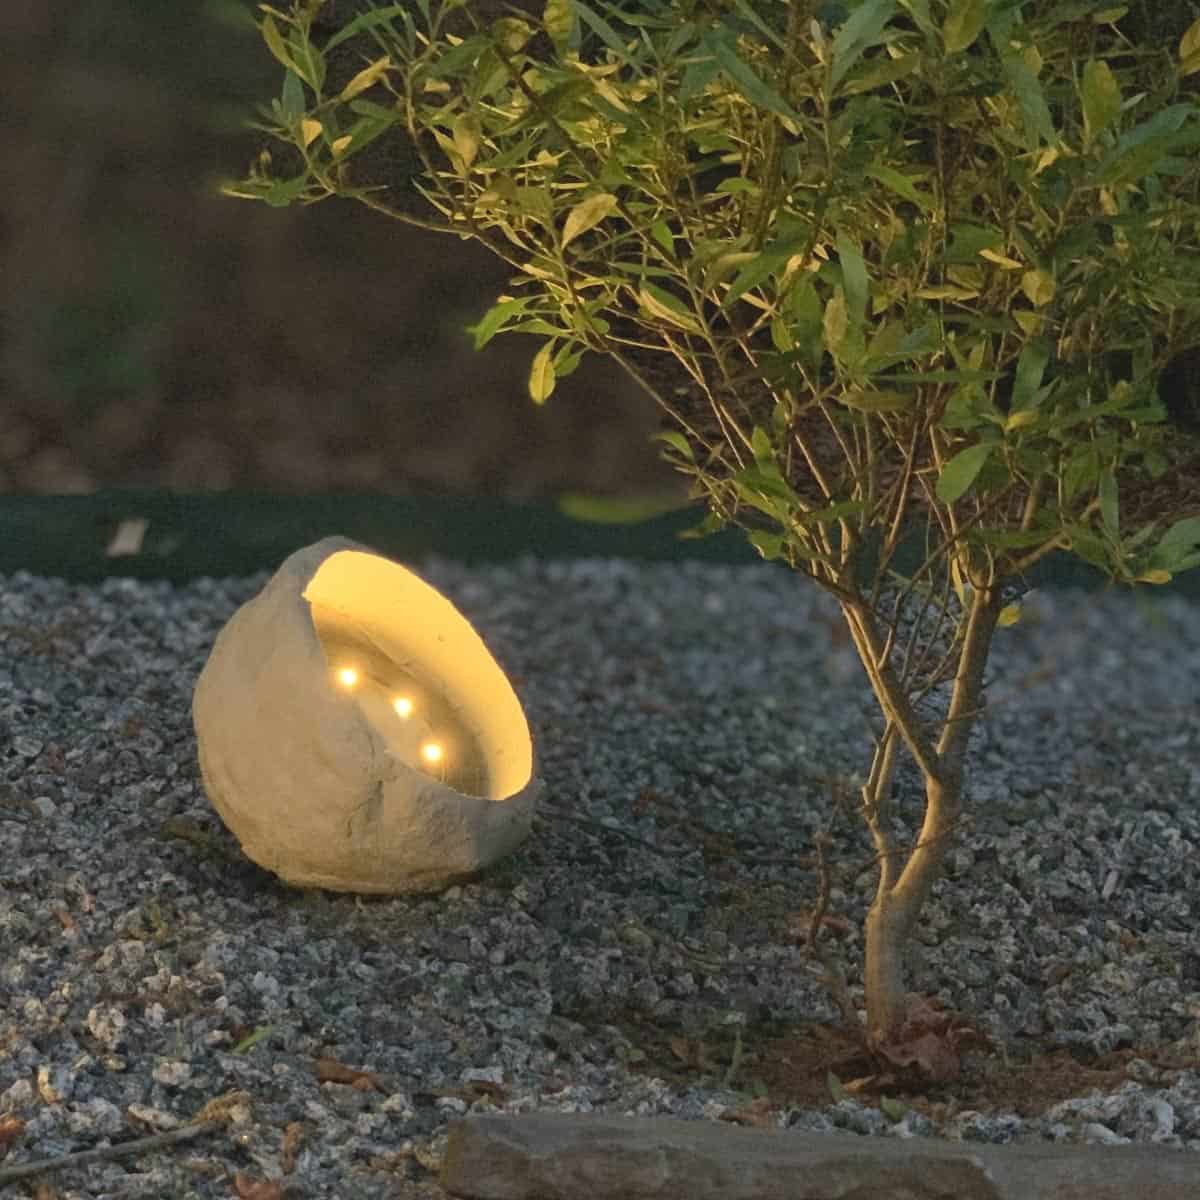
DIY Cement Jack O’ Lantern
Make a spooky cement Jack O’ Lantern for Halloween out of using a plastic pumpkin.
So how do you make concrete pumpkins? Well there are two great ways to make pumpkins from concrete.
The first is to use pantyhose and string as a mold- like I did here in my DIY Concrete Pumpkins with a fancy twist.
The other way to make a homemade concrete/cement pumpkin is by using a hollow plastic pumpkin for a mold.
Making these concrete pumpkins this way makes it much easier if you want to add a light inside so you can have a cool Halloween Jack O’ Lantern.
By the way, if you’re feeling like carving a regular pumpkin, here’s a really cool carving tutorial of a cat Jack O’ Lantern. And here are 67 free cat carving patterns for pumpkins.
For more seasonal DIY’s, check out this list of 50 different Halloween lawn decoration ideas with tutorials.
What Not To Do:
Don’t decide to forego gloves for mixing cement on any of these steps.
Although I know what happens, this is what I did for one of the steps and had lovely pin sized holes on my fingertips where the skin melted away. Live and learn-again ;).
Some of the links on this page have been provided as a convenience for finding materials. These links may also be affiliate links. As an Amazon Associate I earn from qualifying purchases, at no extra cost to you.
I only recommend products I’ve used and loved, unless otherwise stated. Click here to read my full disclosure policy.
DIY Difficulty Level | Moderate
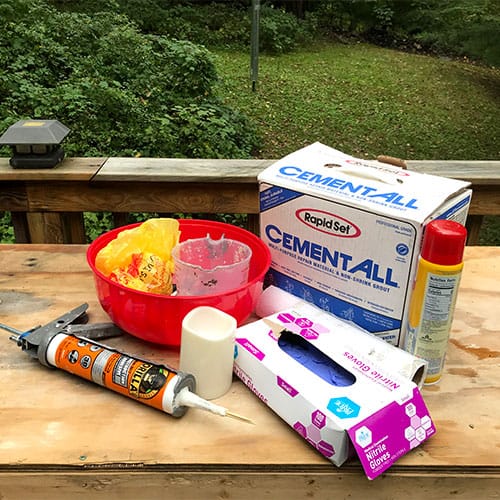
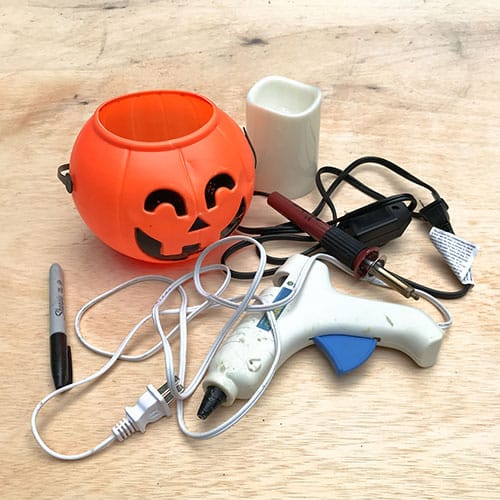
Materials For Making A DIY Cement Jack O’ Lantern
- Plastic pumpkin to use as the concrete mold
- Latex/nitrile gloves- lots of them
- Disposable mixing bowl
- Disposable measuring cup
- Wide mouth cup or bowl to fit pumpkin top
- Battery operated outdoor candlelight
- *Heat gun- if you have one, otherwise use the heat tool listed next (Updated 10-13-19)
- Heat tool with razor blade head fitting
- Plastic bag
- Scissors
- Permanent marker
- Hot glue
- Glue gun
- Paper towels
- Construction adhesive
- Vegetable oil spray
Before starting the tutorial, it may be helpful to read my article comparing the different concrete mixes and sealers– Cement & Concrete Crafts Tests!
Another important article is Making Cement Crafts Techniques & Tips with info on cement materials, mixture consistencies, demolding, safety and clean up!
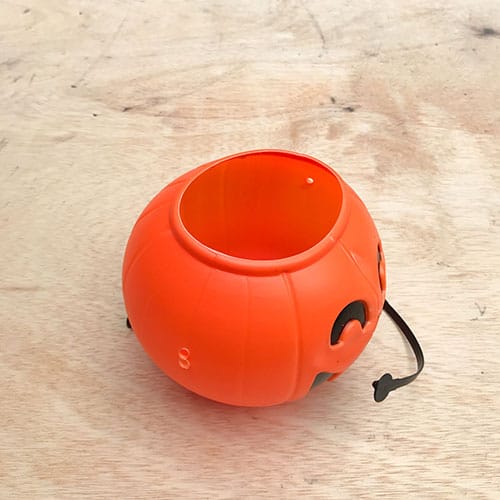
First, remove the plastic handle from the pumpkin by just giving it a tug.

Next, mark out the hole for the light on the bottom of the pumpkin by tracing around it with the marker.
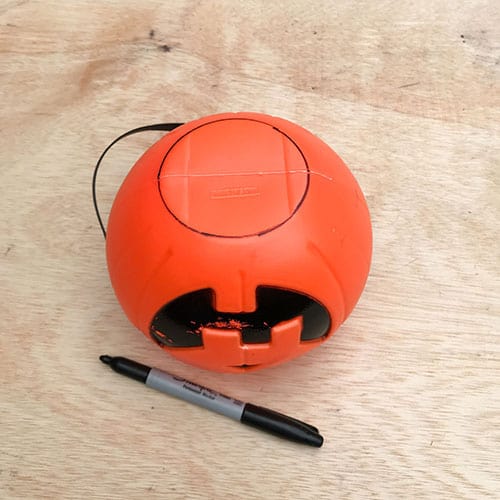
Step 2. Create A Hole In The Bottom

Cut a hole in the bottom of the pumpkin to fit the candle. For this, I used a heat tool, but a sharp utility knife would work too.
Start by making the cut just outside the line to allow the candle to fit easily. Do this outside the line using a little pressure and a bit of a sawing motion.
Please be careful and cut away from your body and your fingers! Once you have the hole cut, carefully punch it out through the bottom.
Make sure the LED candle fits.
Step 3. Cut Out The Rest Of The Pumpkin Parts
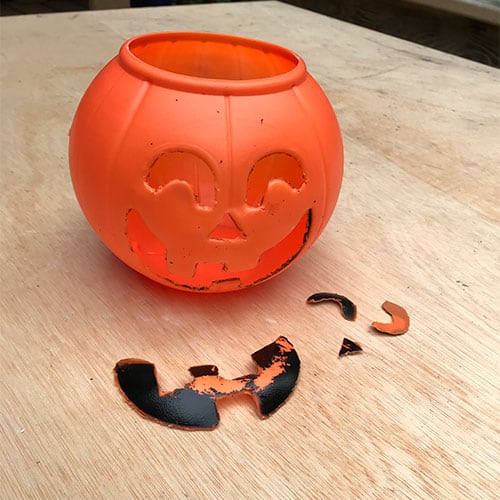
Do the same for the eyes, nose and mouth of the pumpkin. Go slowly here so you don’t tear through the parts that need to stay intact.
The plastic in the face is thinner and will cut easily.
Step 4. Fill In The Pumpkin Mold Handle Holes
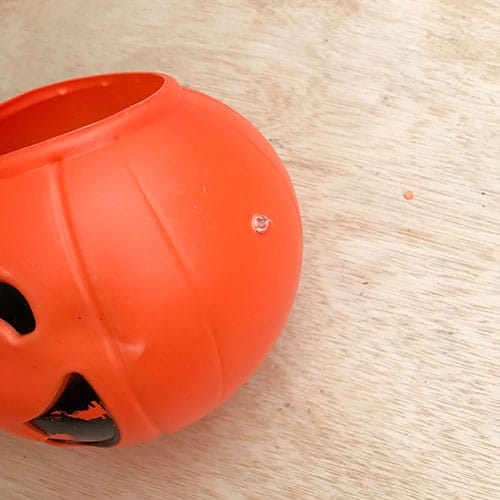
Use the hot glue gun to fill in the side holes where the handle was. Just put a small dab on both holes.
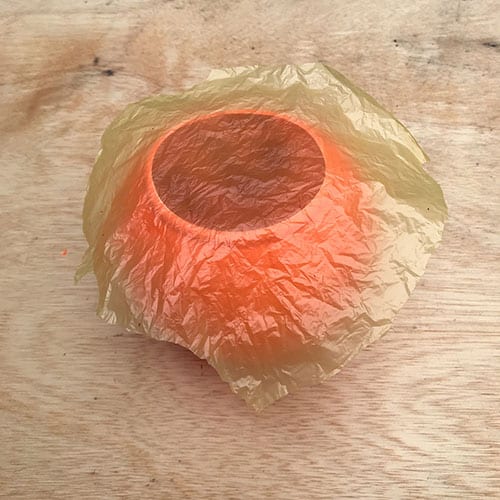
This bag will prevent the cement from rolling out when you coat the inside.

Use a paper towel to wipe off some of the oil around the edges of the bag where you will be gluing it.
With the glue gun, place the hot glue about ¼” from the edge and start to attach the cut bag to it.
Keep going until it is glued all the way around.
You may want to do a second run of glue to be sure it won’t leak. Then trim off any excess plastic, if there is any.
Step 5. Make Your Cement Mixture For The Cement Pumpkin
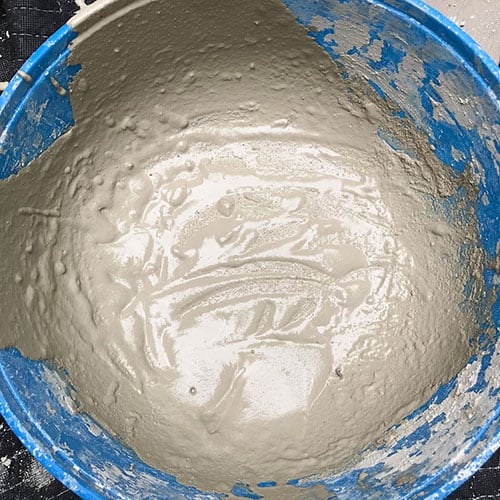
If it’s not super pourable, that’s okay, you can scoop up the cement and plop it in.
Allowing it to be a little thick, will give you more control when the coating the pumpkin.
For this project, I wanted the pumpkin to be more rustic to make it a little creepy looking.
To get this to happen, I left some lumps in the mix.
Leaving lumps will create air gaps which will give you some pitting.
Step 6. Pour The Cement Mixture
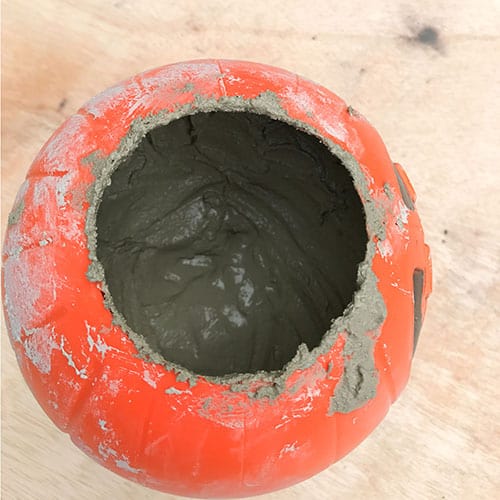
plastic is downward
Let the cement fill and puff out the plastic bag. If you miss some parts of the pumpkin, it’s okay this will be refined in the next step.
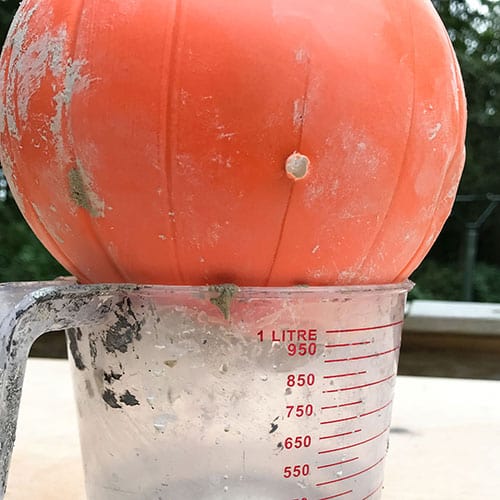
Let the pumpkin rest on the wide mouth container with the bag inside to let it cure properly.
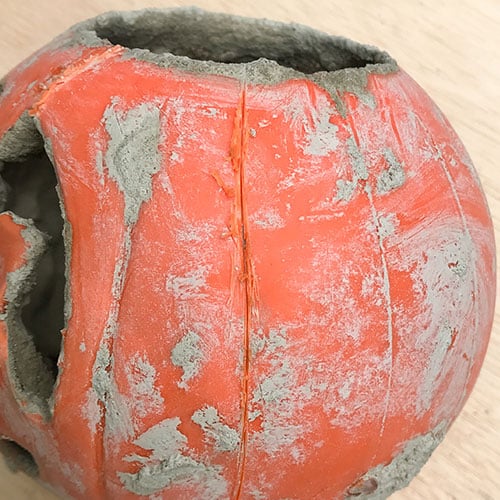
Using paper towels, wipe off any cement that has dripped over the edges of the openings.
This will make it much easier to de-mold (I made the mistake of not doing this as you can see in the photos).
Let it cure for an hour.
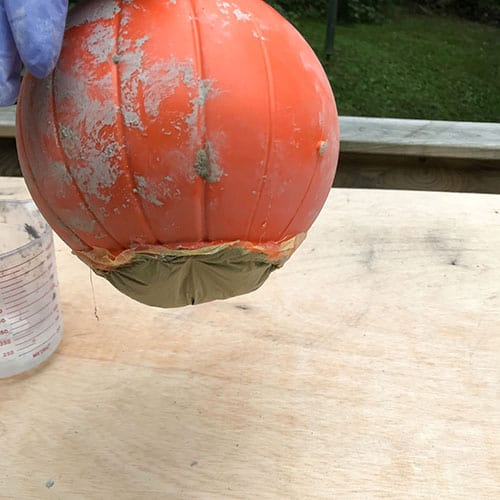
Step 7. Reinforce The Concrete Pumpkin Mold


Now,
Step 8. Demould The Cement From The Jack O’ Lantern

I used a heat tool to start removing the plastic because I didn’t have a heat gun.
If you have a heat gun, I recommend trying that first.
It will be a little easier than slicing it with the heat tool.
Just run the gun over the pumpkin back and forth to release the plastic from the cement.
Once you have a long slit to work with,
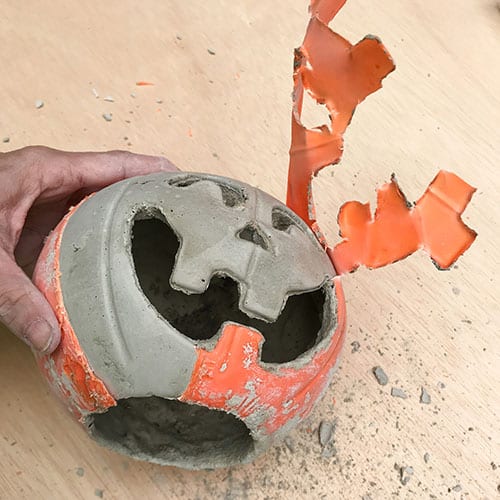
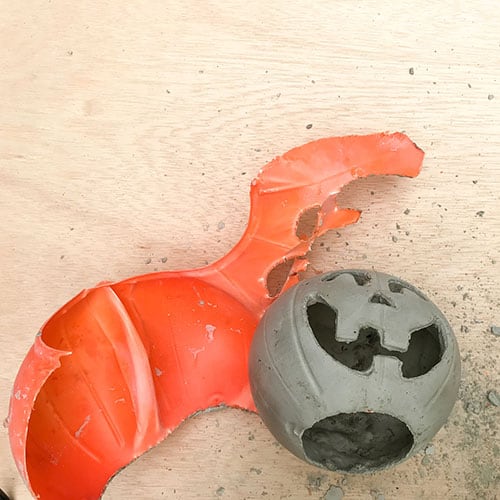
Once you get it opened far enough, you should be able to easily pull the plastic away like you are peeling an orange.
Step 9. Create The Base For The Stalk

Step 10. Make The Stalk
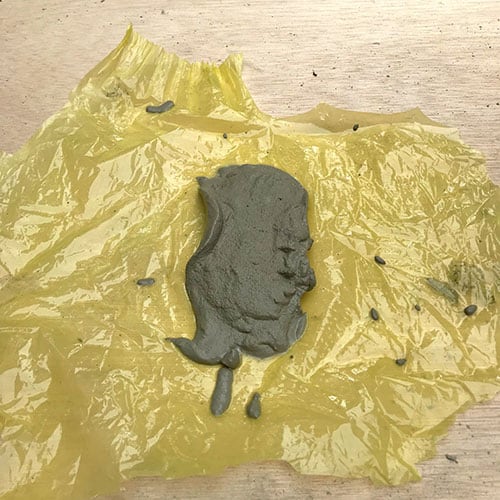

Twist the bag slightly and pull to make the pumpkin stem. Fold the bag over to hold the cement in on the bottom and tie a knot in the top.
I didn’t use vegetable spray for the bag this time because I was concerned it would make the bag too slick and not have enough grab to hold the cement in place.
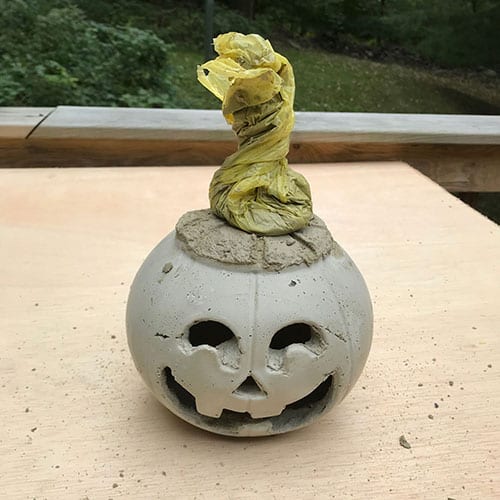
Step 11. Adhere The Stalk To The Cement Jack O’Lantern
** For another Halloween/fall concrete decor tutorial, take a look at these DIY concrete pumpkins that shimmer.
And for loads of fun and easy fall decor tutorials, you may want to check out 80+ amazing DIY Dollar Tree crafts for Fall.

Don’t forget to Pin it for later!


How did you keep the cement on the top from falling into the pumpkin while forming? Loved the idea. Stopped buying real pumpkins cause the squirrels like them so much.
Hi Laura,
Ha ha, I have had to stop doing all kinds of things because of critters- I get it.
Hopefully I’m understanding you question correctly – if you look at Step 7, I have a bag covering the top. I rolled the cement around inside, then used that wide cup to cradle the head so it would cure like that.
Does that answer your question? Let me know.