Modern DIY Yarn Ring Wall Art Hanging
A tutorial for how to use simple materials to create a modern design of an easy DIY yarn ring, wall art hanging!
It’s a great way to fill space on a blank wall and add a pop of color and sophistication to your home decor.
It’s a new year, and I finally resolved to put art pieces and pictures on the walls.

But, unfortunately, it’s been two years of living in this home, and we have yet to decorate!
Part of this is that I’ve become a commitment-phobe in my older age. But we also hadn’t finished painting the walls.
And since I wanted to make my artwork, it was important to choose the wall paint colors first so I would know what colors to use for wall art projects.
My design tastes lean very modern, so I went with a Mid Century Modern color palette, or at least as close as possible with the selection of yarn options available.
If MCM isn’t your thing, you could also go with a Scandinavian design and use more neutral colors of yarn.
I had seen geometric wall decor with these half circles or half moons in different patterns and colors on Pinterest.
And then I stumbled upon circular yarn wall hangings. And bingo!
Don’t forget to Pin it for later!

Best of all, I had just the right place for such a thing, fitting in perfectly with my upcoming interior design scheme.
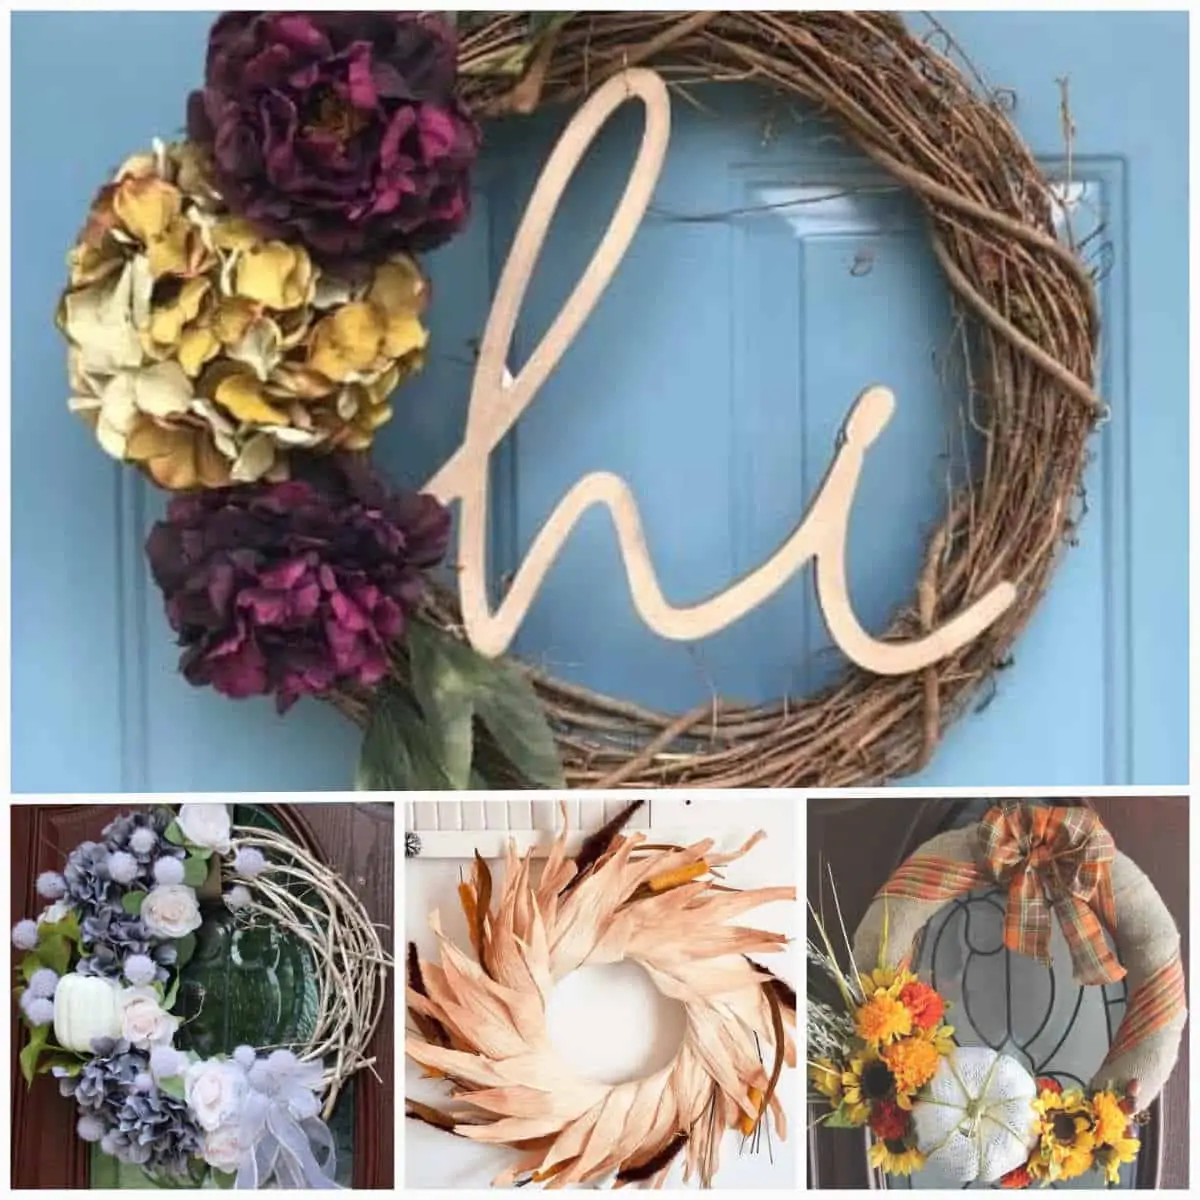
For another Mid Century Modern home decor project, check out this diy wall hanging tutorial for concrete tiles.
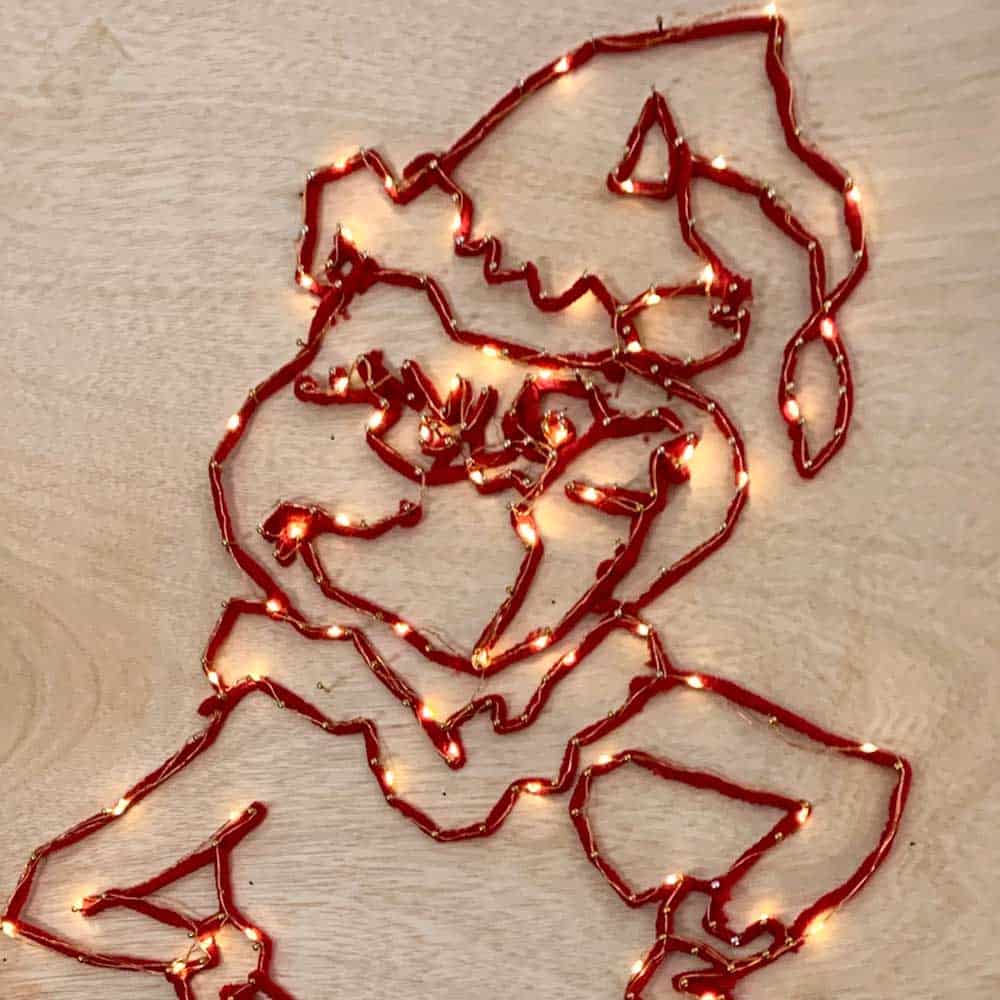
Also, shortly after I made these, I was inspired to make a 3D wood sculpture version! And these cool round moss wall art hangings were to follow.
Some of the links on this page have been provided as a convenience for finding materials. These links may also be affiliate links. As an Amazon Associate I earn from qualifying purchases, at no extra cost to you.
I only recommend products I’ve used and loved, unless otherwise stated. Click here to read my full disclosure policy.
DIY DIFFICULTY LEVEL | Easy
How To Make Yarn Ring Wall Art Materials List
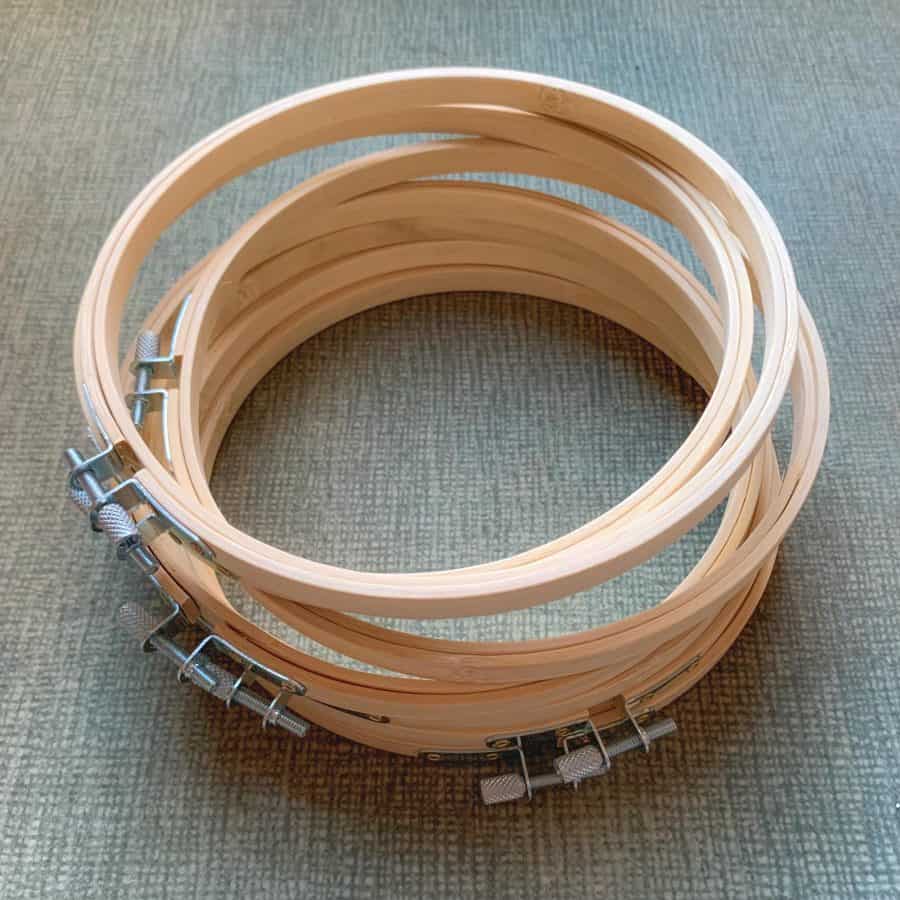
- 7” Embroidery hoops– 17*
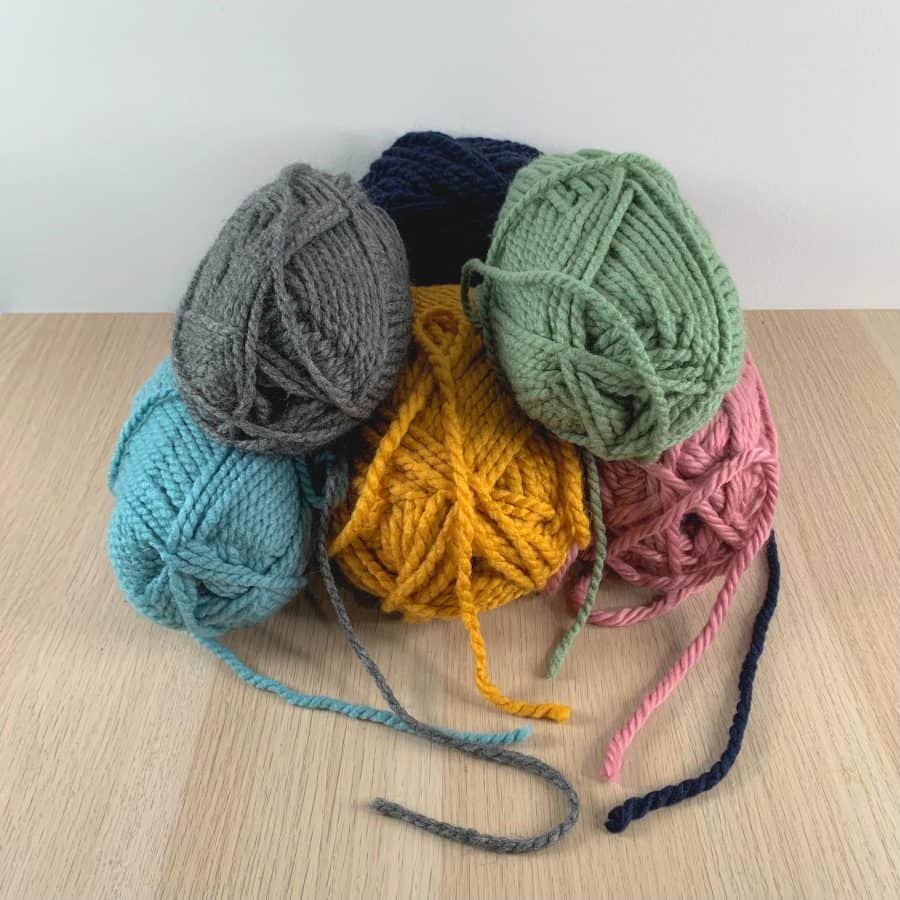
- Bulky/chunky yarn (8mm ideal)- 7 colors*
- Scissors- sharp
- Pencil
- T-square or ruler
- Double sided adhesive tape -strong*
- Hot glue gun
- Wall hanging strips -34 pairs
- Wall/floor laser level (optional)
Materials Notes
*Embroidery Hoops
I split the embroidery hoops purchase between Michaels and Amazon because it was the most economical way to get 17 of them.
However, it ended up being a mistake getting them from two different places because even though they were technically 7” rings, they were two slightly different sizes.
This caused the geometry to be off a bit and the rings don’t have a tight fit on the wall and instead have some gaps.
*Double-sided Tape
I’ve seen these yarn rings made by gluing the yarn the full way down instead of using double sided tape.
I tried this and found it was extremely difficult to not get glue all over the yarn. The double sided tape makes it really easy, but you do need to start and end the yarn with the glue.
The overall size of this DIY yarn wall hanging is 26 x 51”. So if it doesn’t fit your space, then either change the size of the embroidery hoops or modify the layout.
*Yarn Options
Check out your local craft store for yarn. Places such as Michaels, Joanns or Hobby Lobby, each have a wide assortment of colors.
Your yarn wall decor will go much faster if you use thicker yarns. Look for ones that say chunky yarn on the label or even bulky.
Acrylic is a better material than cotton because the ends of the yarn will unravel.
Tip: Use sharp scissors to keep the ends of the yarn strands clean and tight so they don’t get fuzzy.

Tutorial Steps For How To Make DIY Yarn Ring Wall Art
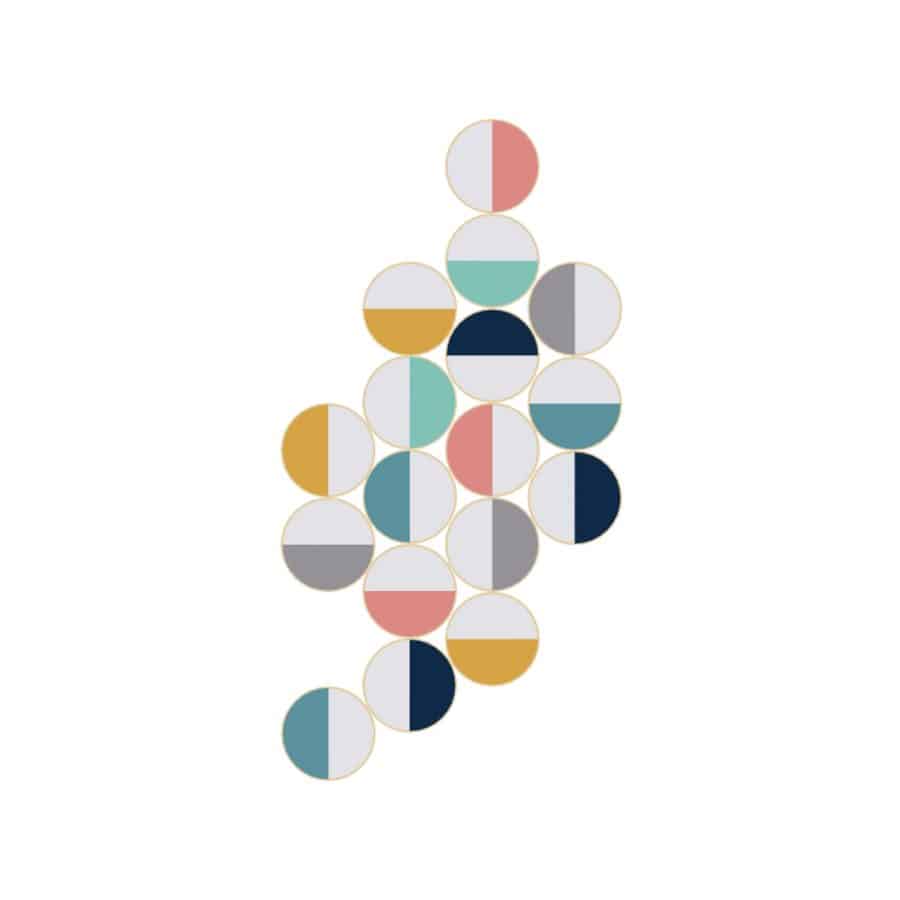
Choose the colors and layout for your wall art design. You may find it easier to make the rings first and play with the layout afterward.
Before making them, I had the luxury of using a computer design program to help design the layout and color placement.
To follow the design in this tutorial, you will need 17 hoops and 7 different colors of yarn.
Step 1. Mark The Halfway Point On The Embroidery Hoop
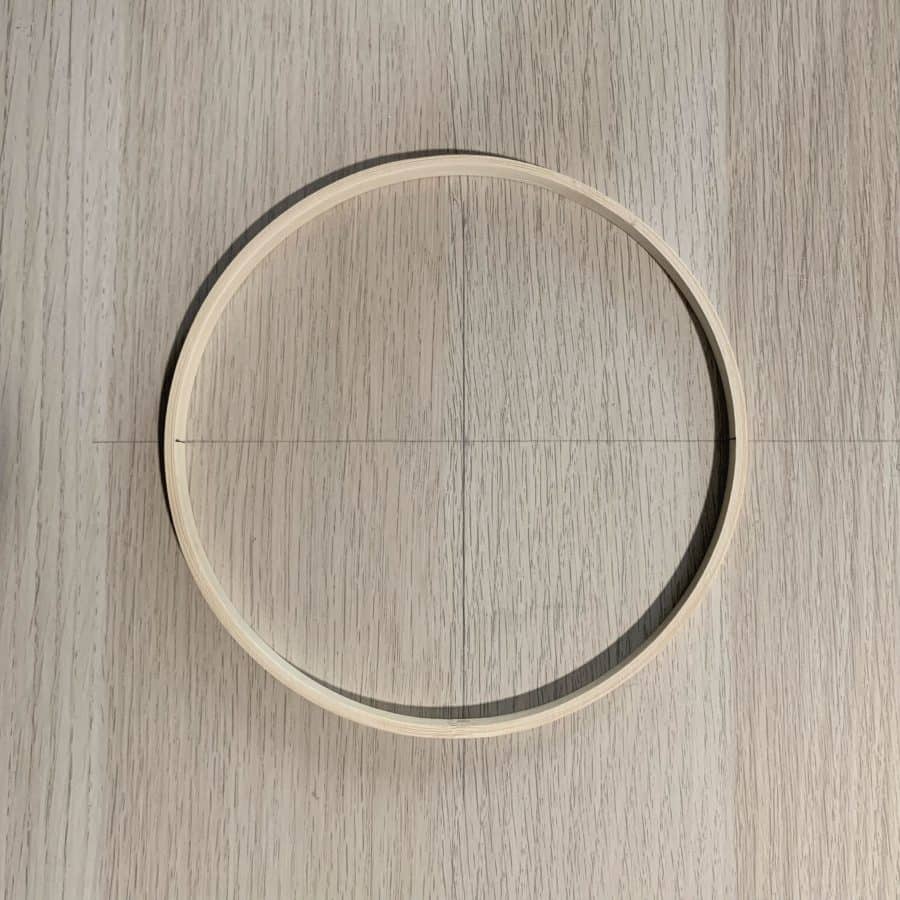
Use a pencil and a T-square to mark the halfway point on each side of the circle. I just drew a cross on my table (it erases easily) and then measured the ring to make sure it was centered.
After I marked it, I used it as a guide to mark the midway points for the rest of the hoops rather than measuring each.
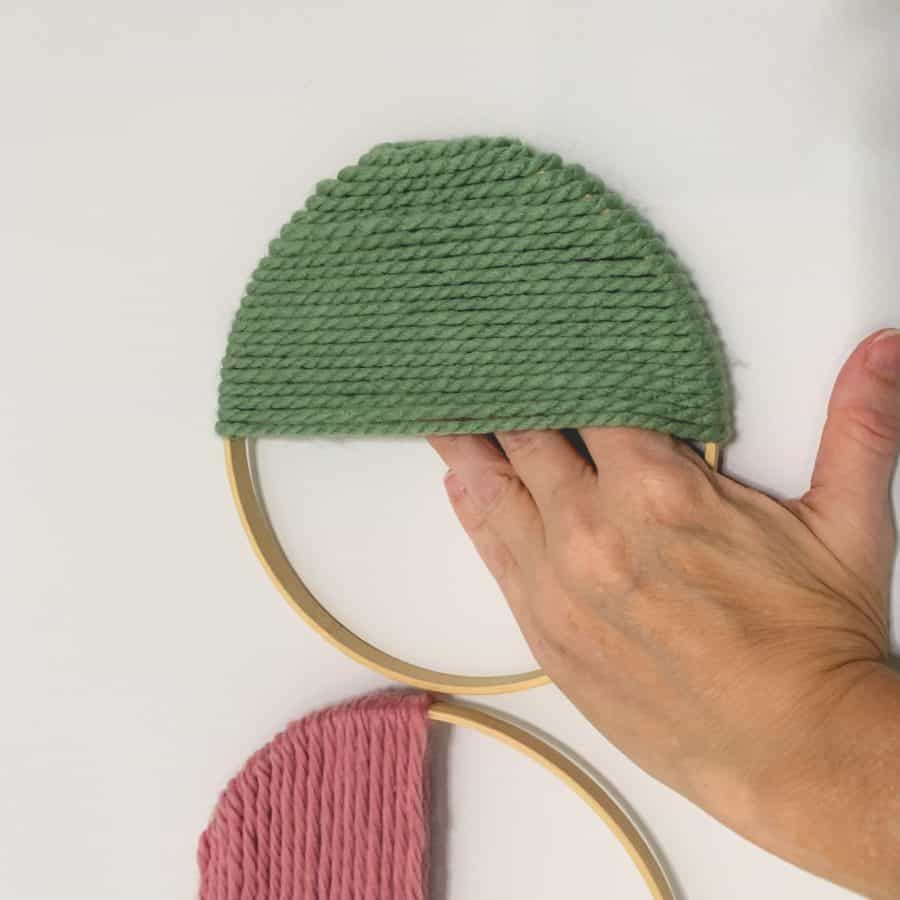
Step 2. Wrap The Yarn Around The Middle Of The Ring
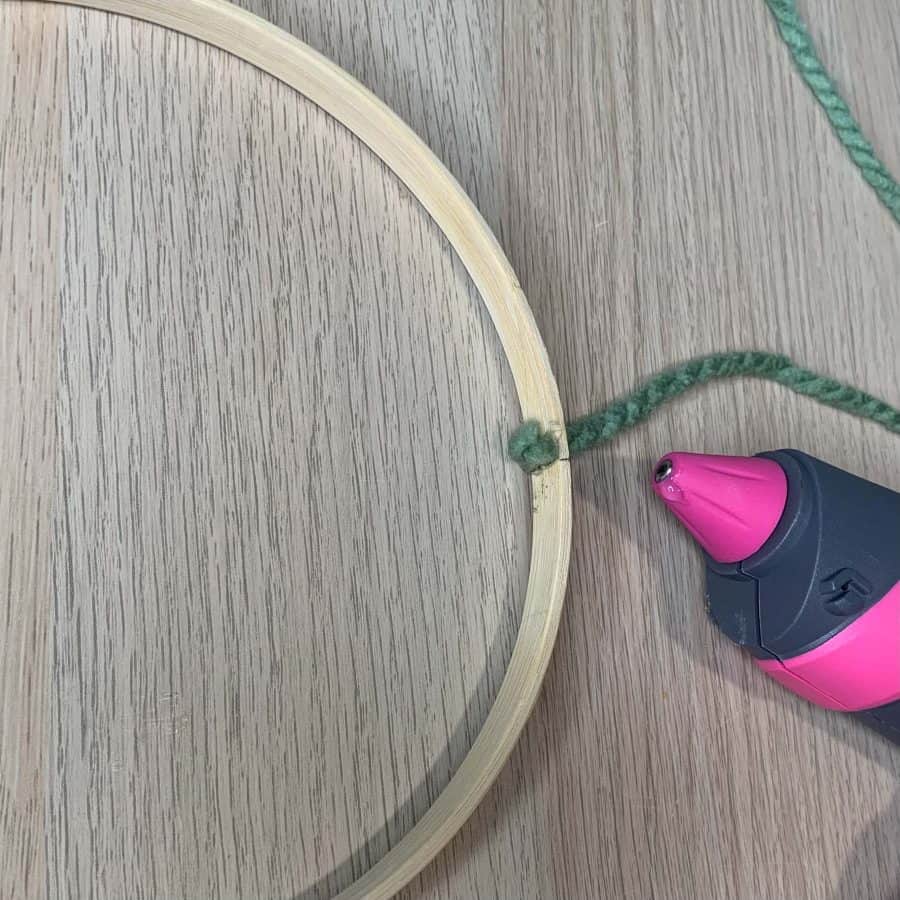
Heat the glue gun and add a dab of glue to the inside of one of the halfway lines.
Attach the string to the line, wrap it around the hoop, and keep the yarn wraps immediately next to each other.

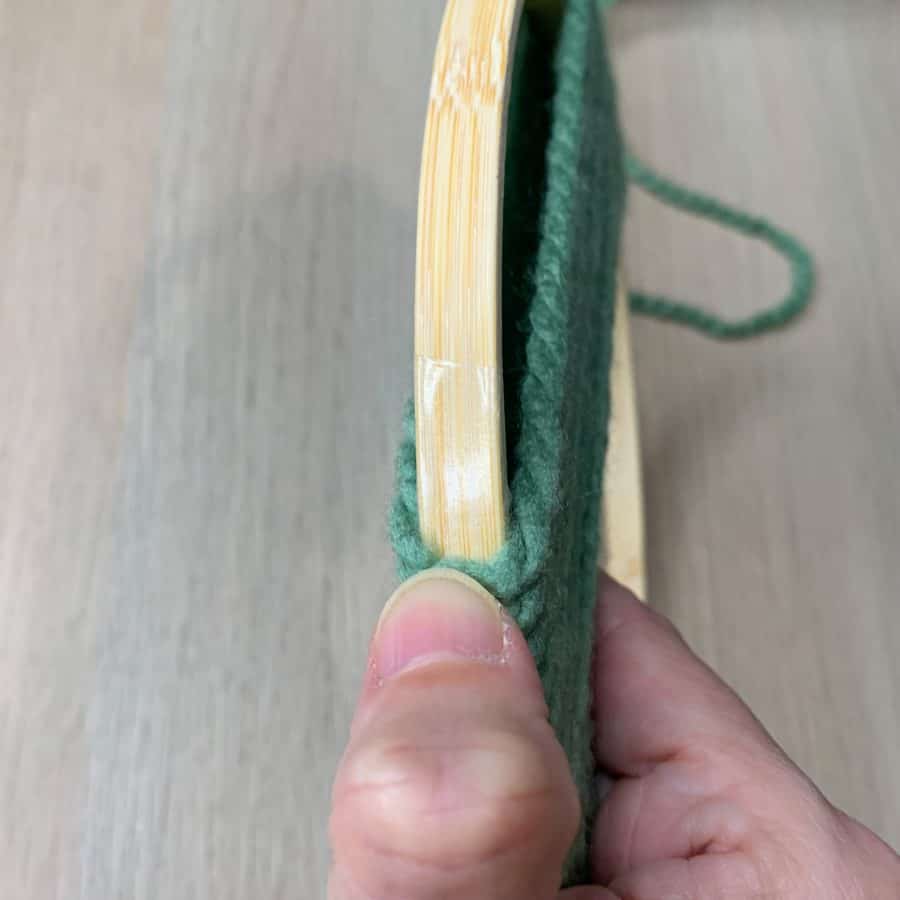
You should be able to get about five wraps before the yarn starts to slip. At that point, cut two pieces of tape approximately 2 ½- 3” long.
You will place it immediately below the 5th wrap, and it should stop so that the bottom 2 ½” of the hoop is exposed.
The tape is wider than the hoop, so when you apply it, center it, so it wraps both edges of the ring. This will make each yarn wrap secure.
Keep the yarn close together as you wrap, so there aren’t any gaps. Press each wrap to the tape to secure it before making the next wrap.
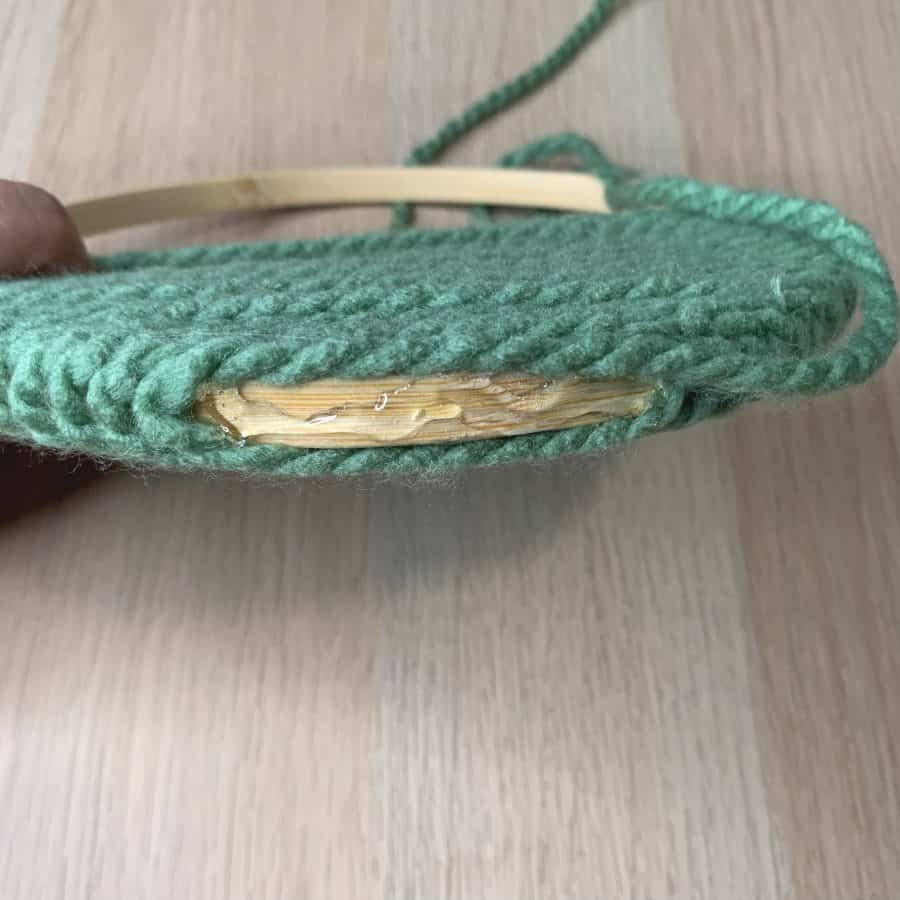
Step 3. Finish Wrapping The Sides
As you proceed down the hoop and it curves inward more, the yarn will slide slightly on the sides.
Again, the tape helps, but you will still need to push upward on the yarn as you wrap the sides.

Step 4. Secure The End Of The Yarn Ring
Once you get to the end of the tape, add hot glue to cover the bottom of the ring lightly.
Then wrap the yarn into an oval shape to close the opening and press it to the glue.
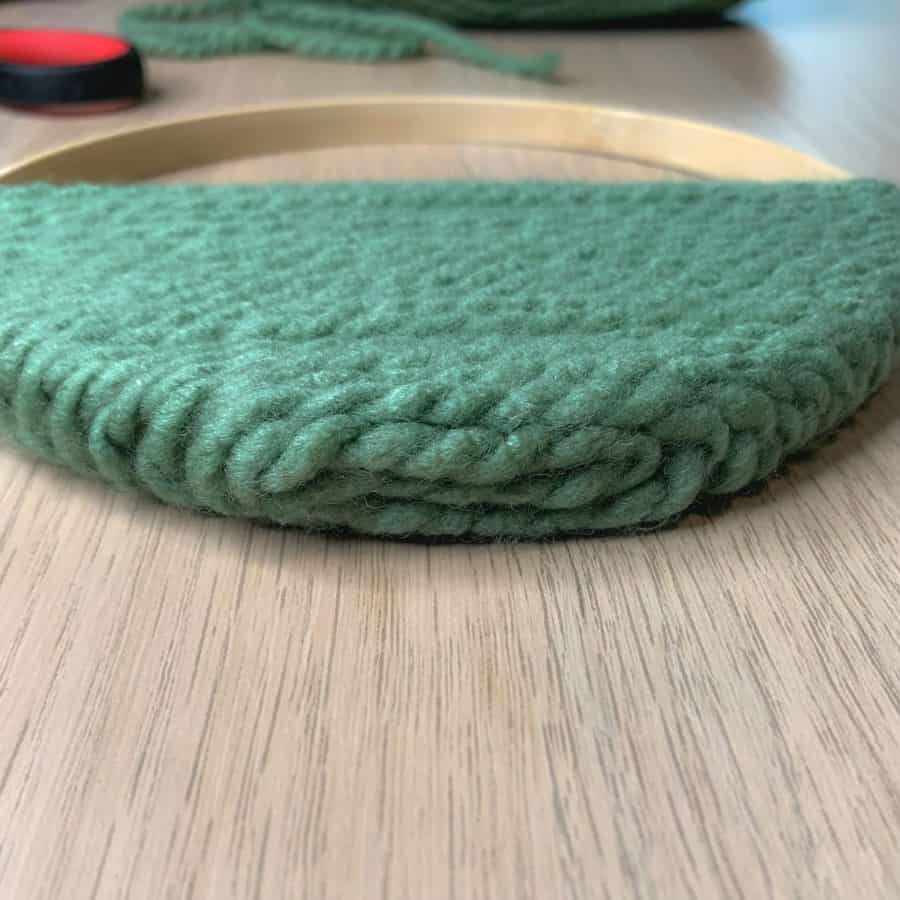
Finally, use scissors to snip the end.
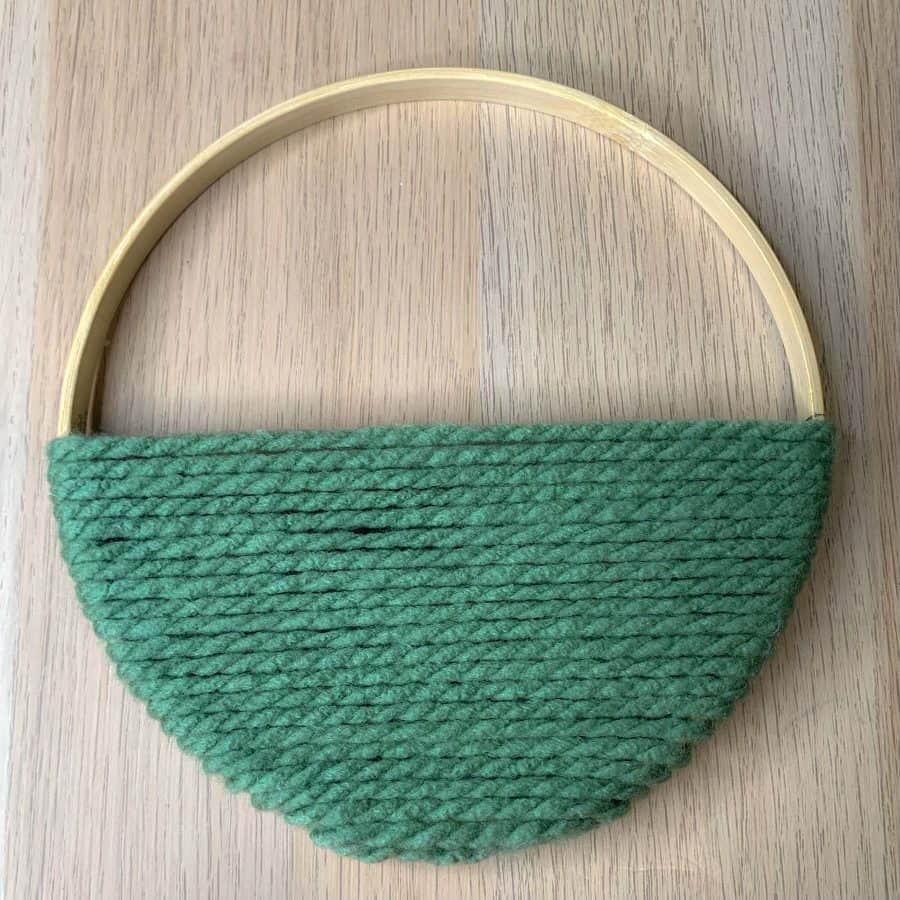

Repeat these steps for each yarn hoop.
Step 5. Attach The Hanging Strips To The DIY Yarn Wall Art

First arrange the yarn ring art on the floor, in the positions that will be placed on the wall.
If you followed my design, use the photo above as a reference.
*Next, flip all your yarn rings over so the back side faces you, where you can see the first glued piece of yarn.
You want to ensure you stick the hanging strips to this back side and not the front accidentally.
The strips will be challenging to remove from the yarn once adhered.

The hanging strips come in a row of four. So take the row of four and press them together to make two sets.
Ensure they are fully connected, and then split them into the two joined pieces. You’ll need two sets per yarn ring (17×2). Do this until you have 34 sets.
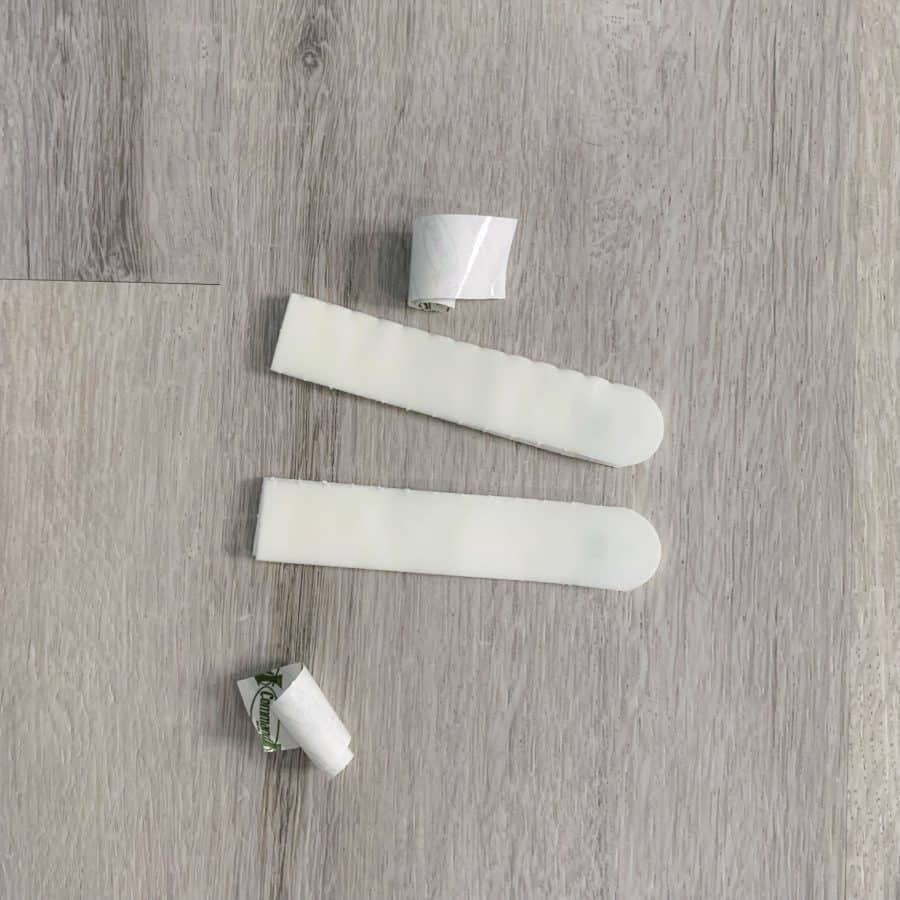
Peel off one side of the adhesive that came with each set of hanging strips. And repeat for all 34 sets.
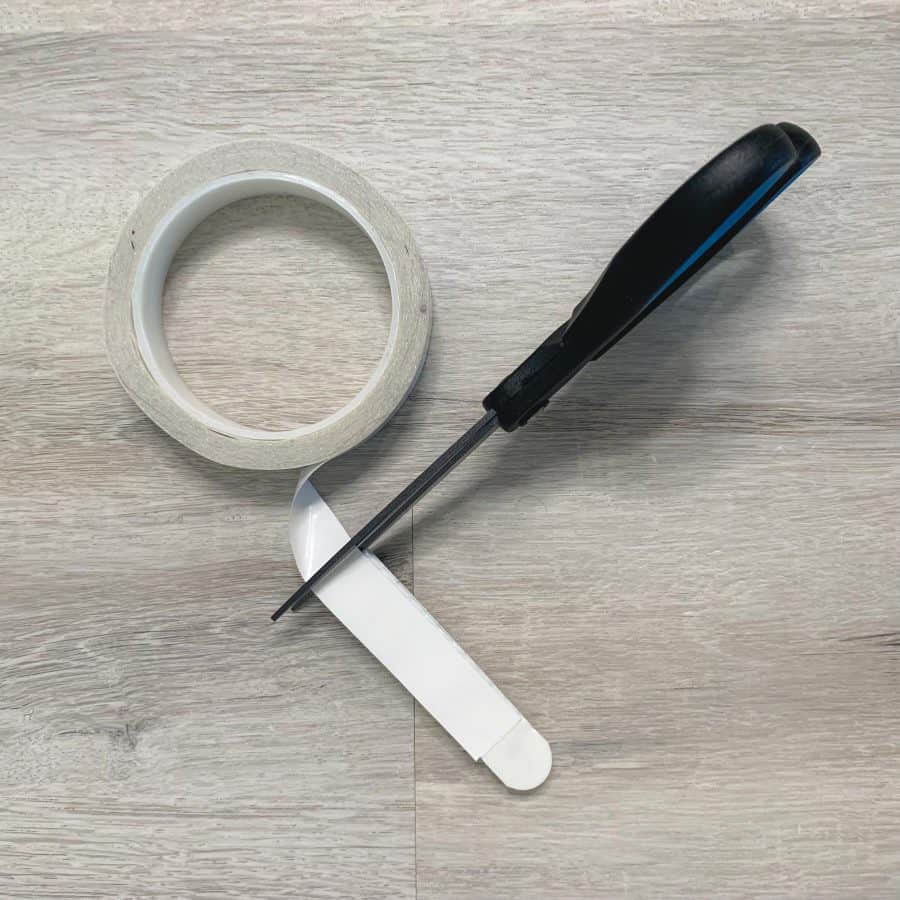
Then take a piece of the double-sided adhesive tape you used on the yarn hoops, press it to the sticky side of the hanging strip, and trim it to length. Again, repeat for each of the 34 sets.
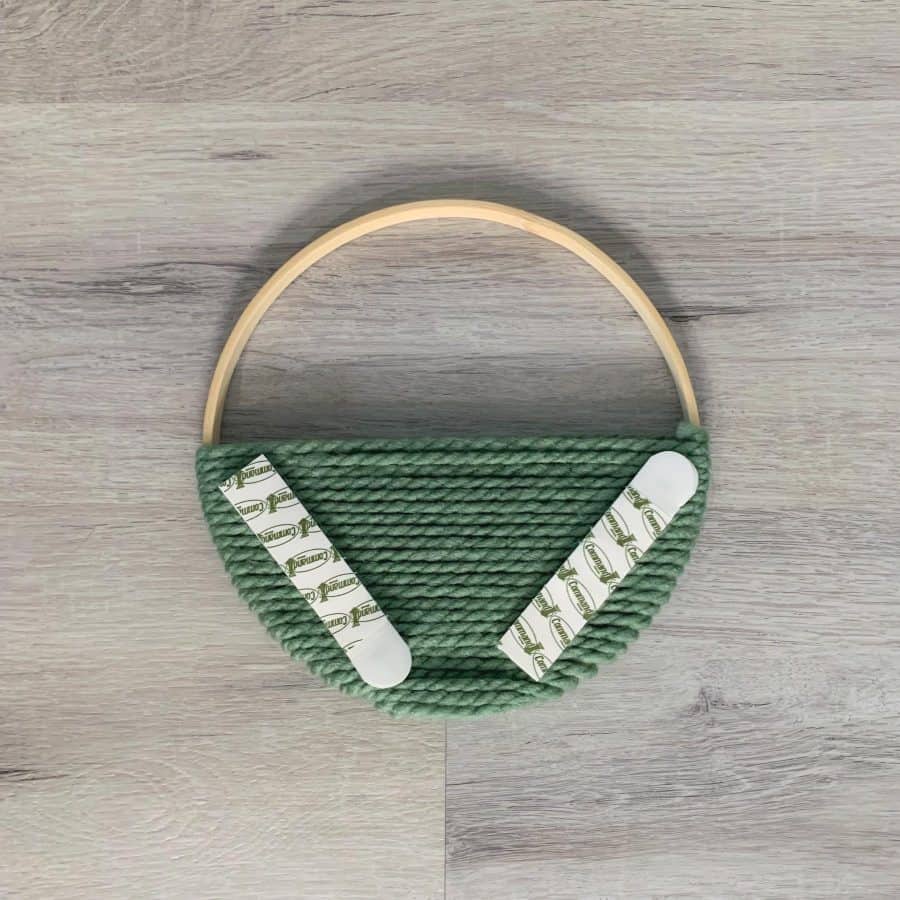
Press the sticky tape side to the back of the yarn wall hanging ring so that the hanger strip goes “across the grain” of the yarn while stretching across the widest point.
It will be on a diagonal, toward the outside of the hoop.
And repeat this for each of the rings.
Step 6. Hang The Rings For The Modern DIY Yarn Ring Wall Art To Your Wall

Use the laser level to find a straight vertical line on the wall where you want your yarn ring wall hanging to be.
If you don’t have a laser level, find a straight line by measuring the same distance from your nearest return wall.
Mark a point near the bottom, top and middle, and draw a light pencil line between them.

There are technically four vertical columns of yarn rings. Start with one of the middle rings in the longest column (column 3).
Follow the photo above to ensure you have the hoop facing the correct direction (left, right, up, or down).
Then pull off the backing for the adhesive strips, center the hoop on the line, and press firmly.
Press from the inside of the ring, so you don’t stretch the yarn on the outside.
I did this a few times, and it was fine, but it’s better to reach your hand inside to adhere the strips to the wall.
Move on to the next ring in the same column. Again, you can go up or down. Then repeat the same.
After you have finished with your first column (3rd in the design), work on the fourth column.
If you have different-sized embroidery hoops like mine, then mark another vertical line to follow.
If they are all the same, then you should be good to go by placing this next column so that the hoops touch the first.
After you finish the second column, place the third and then you can position and adhere the remaining yarn rings.
Don’t forget to Pin it for later!

Modern DIY Yarn Ring Wall Art Hanging
How to make a DIY yarn ring wall art hanging. A tutorial for creating modern art for your walls to step up your interior decor.
Materials
- 7” Embroidery hoops- 17*
- Bulky/chunky yarn (8mm ideal)- 7 colors*
- Scissors- sharp
- Pencil
Tools
- Please see the full materials list above the tutorial for details and links.
Instructions
- Mark The Halfway Point On The Embroidery Hoop Using A T-square And A Pencil
- Glue The End And then Wrap The Yarn Around The Middle Of The Ring
- Stick The Double Sides Tape To The Sides And Finish Wrapping Them
- Secure The End Of The Yarn Ring With Hot Glue
- Attach The Hanging Strips To The DIY Yarn Wall Art To The Back, On An Angle
- Hang The Rings For The Modern DIY Yarn Ring Wall Art To Your Wall Using a Laser Level As A Guide


Love this project! I’m a little way in, and gave up using double-stick tape. Maybe I’m not using the industrial strength stuff? The tape I bought just slid down the hoop. I’ve been toiling with a hot glue gun, basically every wrap, but that is messy and makes gaps. I wonder if you could do it painting a section of the hoop with tacky glue? Maybe that’s not immediately sticky enough?
Hi,
My tape was quite strong, almost too strong. But I think your idea to use a tacky glue should work. But if not, I did link to the tape I used in the materials list. Good luck!