Carve a Foam Pumpkin Using a Carving Pattern
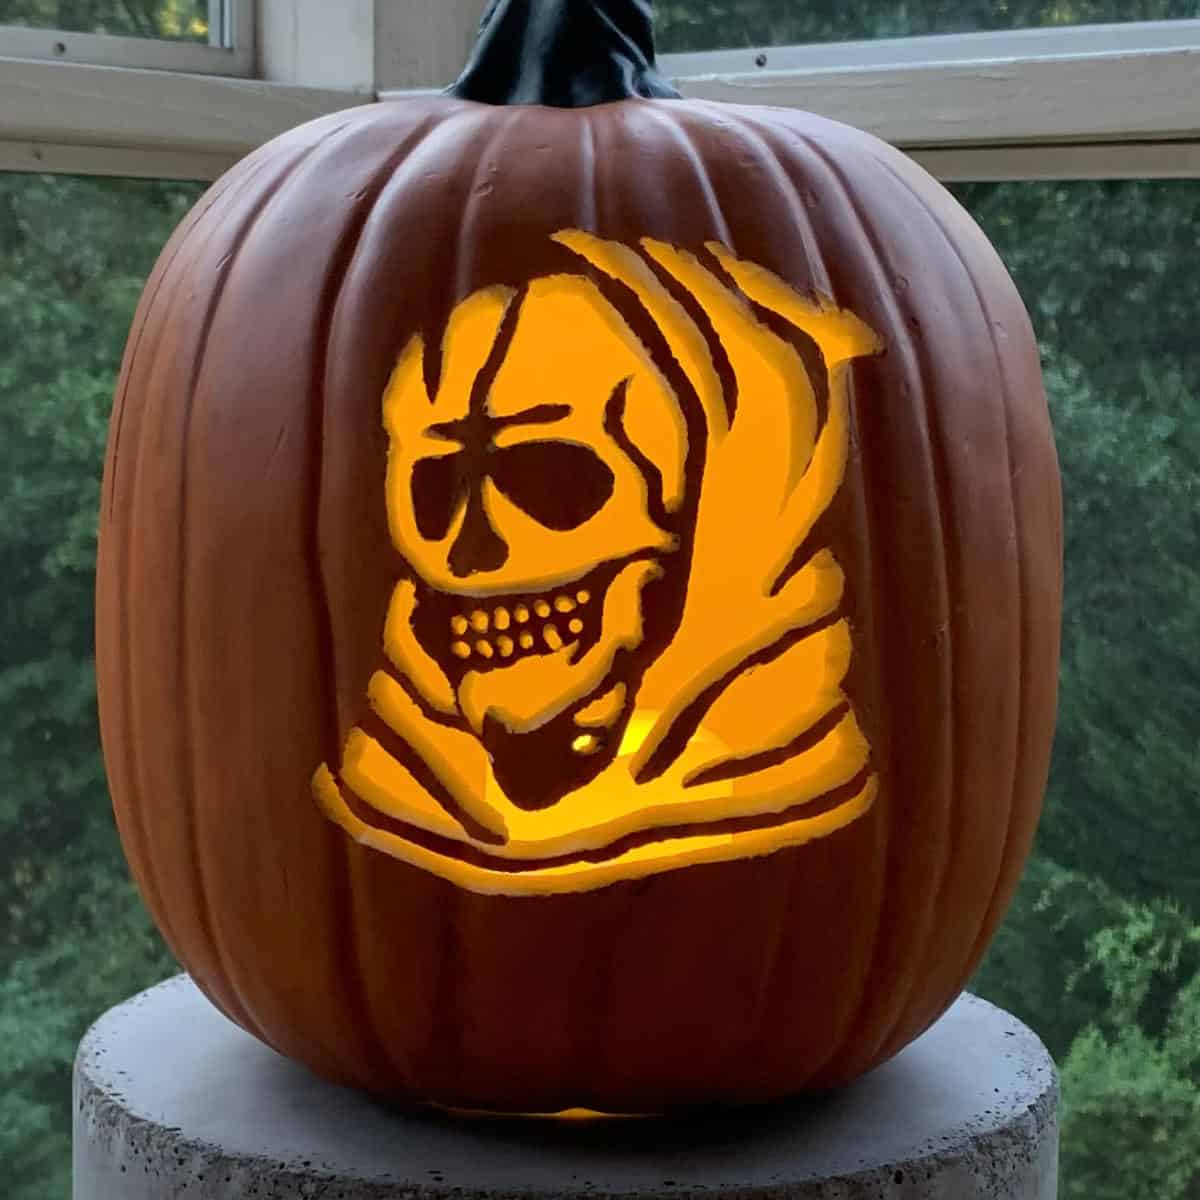
In this tutorial, you’ll learn how to carve a foam pumpkin to create a stunning Halloween Jack O’Lantern that will last!
Does this ring true? Your Halloween season gets super busy, and you’re always running around at the last minute trying to find the last remaining good pumpkin from the pumpkin patch.
Well, foam pumpkins are your answer, grab one now and save yourself the stress!
Why carve foam pumpkins instead of the real thing? The reason for using a foam pumpkin is that it will last year after year.
A real pumpkin may only last a couple of weeks or less. With a carvable foam pumpkin, you can start your design months ahead.
Where can you find a foam pumpkin? Foam pumpkins are found at craft stores- locally and online.
Typically the craft stores will have them in stock during the first week of August.

And please note that not all fake pumpkins are carvable. Therefore, you must look for a label that says “carvable.”
Carving foam pumpkins requires different tools than real pumpkins, and the best tool to use is a hot knife.
It’s easy and causes less mess than other carving tools. A Dremel is one carving tool I’ve seen people use, as they have a few carving bits that work well, but they make quite a mess.
They can be helpful, however, if you have a very intricate pattern.
Some of the links on this page have been provided as a convenience for finding materials. These links may also be affiliate links. As an Amazon Associate I earn from qualifying purchases, at no extra cost to you.
I only recommend products I’ve used and loved, unless otherwise stated. Click here to read my full disclosure policy.
DIY DIFFICULTY LEVEL | Easy
List Of Material For How To Carve A Foam Pumpkin
- Printer
- Regular white paper
- Ballpoint Pen
- Thumbtack
- Blue Tape
- Heat tool/knife
- Carvable foam pumpkin
- X-acto knife with extra long blade (optional)
- Nail file
- Dust mask
- Battery-powered candle
Optional: To Make The Fake Pumpkin Look More Realistic
- Paint tray
- Paper towels
- Cup of water
- Yellow paint
- Burnt umber
How To Carve A Foam Pumpkin Tutorial Steps
Step 1. Prep And Print The Pumpkin Template

The first thing you’ll need to do is to print a rough draft of the pumpkin pattern template.
You can find free skull patterns here, including the one I’m using in this tutorial. This is because you’ll likely need to resize it to fit your pumpkin.
Be sure to select black and white when you print, so you don’t waste colored ink.
For other options for free pumpkin carving patterns, we have:
- Star Wars
- Cute cats
- Witches
- Ghosts
- Unicorns (on our sister site)
- Classic pumpkin faces (on our sister site)
Note: Intricate designs like the skull I chose may require the use of additional tools like a Dremel, which I needed for the teeth area.
The rough draft is because foam pumpkins come in different sizes, and you want to be sure you size the template to fit the pumpkin.
So once you have the rough draft, cut around the outside of the digital image.
You want a general, single shape to see how it fits on the pumpkin. In doing this, you also want to choose the side of the flattest pumpkin.
If the image is too large, try decreasing the scale. Scaling it to 90% should be plenty if it was reasonably close. Try it at 85% or 80% if you are way off.
Once you have the size correct, you can use the draft or reprint at regular quality.
However, when you cut the shape this time, leave at least ½” of white space around it, so you can tape it to the pumpkin without covering any grey areas.
Step 2. Tape The Pattern And Trace The Outlines

Tape the carving pattern into place. If you have areas where the pattern isn’t touching the pumpkin because it’s too round, then make some tears at the edges to help the paper bend.
Keep in mind that you will carve the grey area. So the first step is to trace the outer edges.
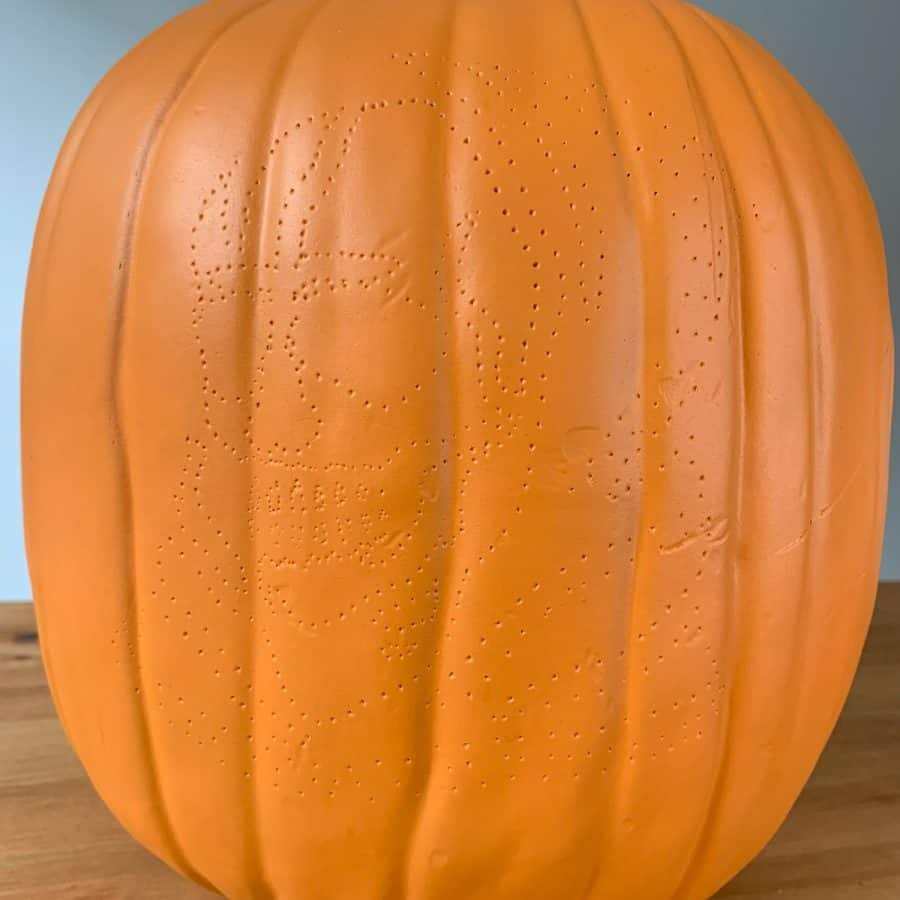
To do this, use a thumbtack and push it in and out of the paper and foam along the lines of the shaded area. This is a bit tedious but it will get the job done.

After creating the outlines, pull the template off the pumpkin. The pinprick marks can be light, so take a ballpoint pen and trace over the dark spots
And just a heads up that the pen marks won’t come off with acetone, so take care when tracing.
I didn’t realize this and had a little extra filing to do at the end to remove them.
Step 3. Carve The Foam Pumpkin
First, put on a dust mask. The melted foam is pretty nasty.
Also, there will be lots of tiny bits in the air when you clean the edges of the pumpkin in a later step.
It’s also a good idea to do this outside. It’s not a super messy project, but it’s messy enough, and the fresh air helps a ton.

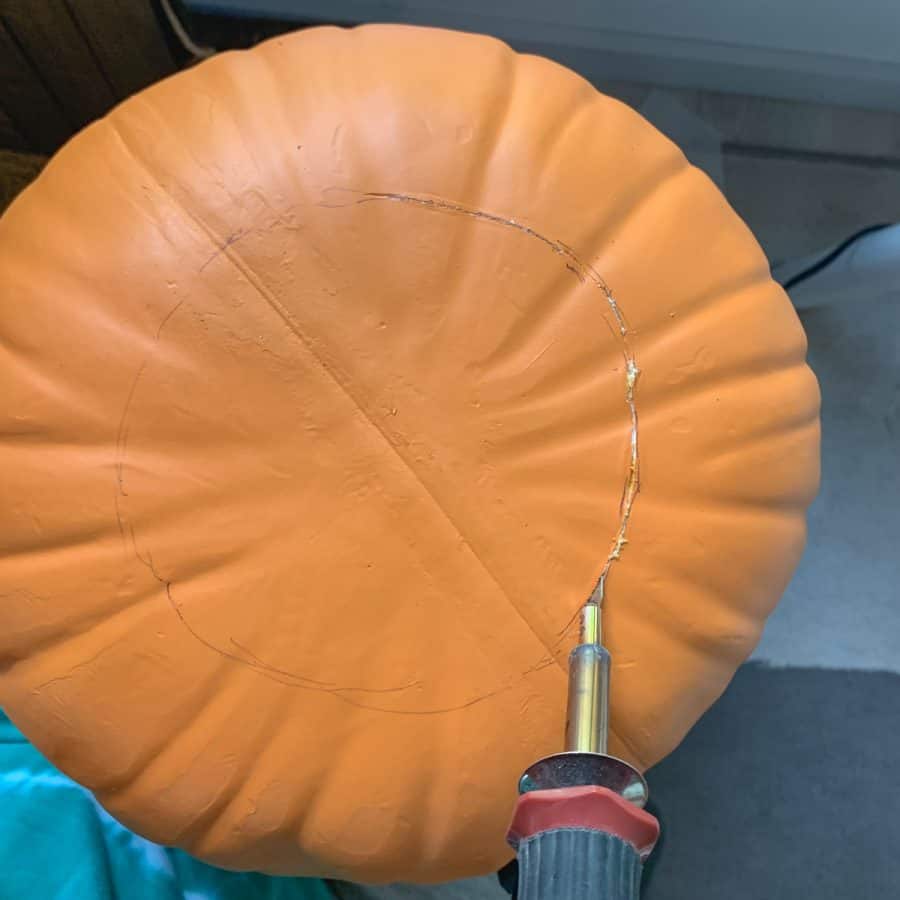
Next, heat the hot knife tool and be sure it’s fully heated for the best performance.
Hint: tape the holder to the counter top to keep it from sliding off.
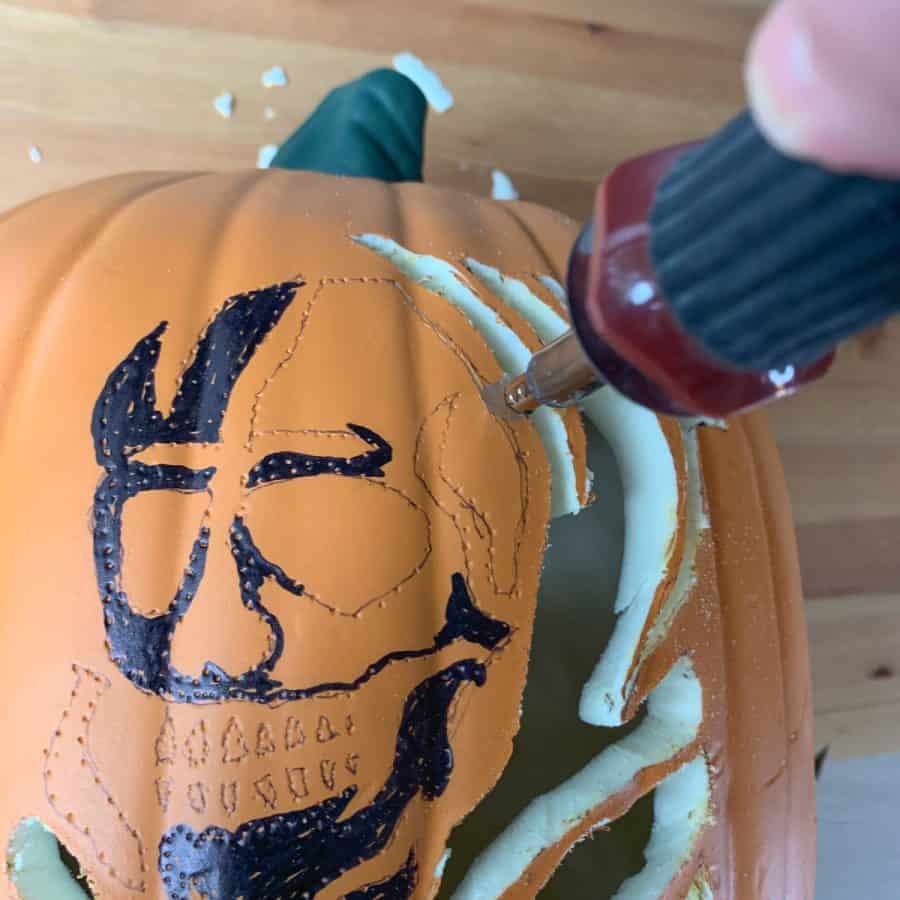
Note: You’ll notice I filled some areas with a marker because I was concerned I would cut the wrong areas.
If you need to do this, use the pen. The hot knife sometimes scorched the places where it touched the marker.
To carve, hold the blade straight, not at an angle, and take care not to press it so far that the ball at the top of the knife blade hits the pumpkin.
Don’t apply excess pressure. Just let the heat from the knife blade do the hard work for you.
It will melt the foam away while you slide the blade along.
Also, take care that you are sliding the blade rather than slicing it in and out like you would if it were a kitchen knife.
The blade shouldn’t come out of the foam until you need to turn a corner.

There’s also a ball at the point where the blade meets the knife handle.
This protrudes from the handle and will burn an indent if you let it touch the foam.
After you have finished slicing through the lines, you’ll likely need to remove the remaining pieces manually.
The blade may have left a small part of the foam intact. To do this, use an X-acto with a long blade or a kitchen knife to detach it.
The foam may still be wedged in there, so to make removal easier, I recommend you slice the pieces into smaller chunks and then gently push the pieces through.
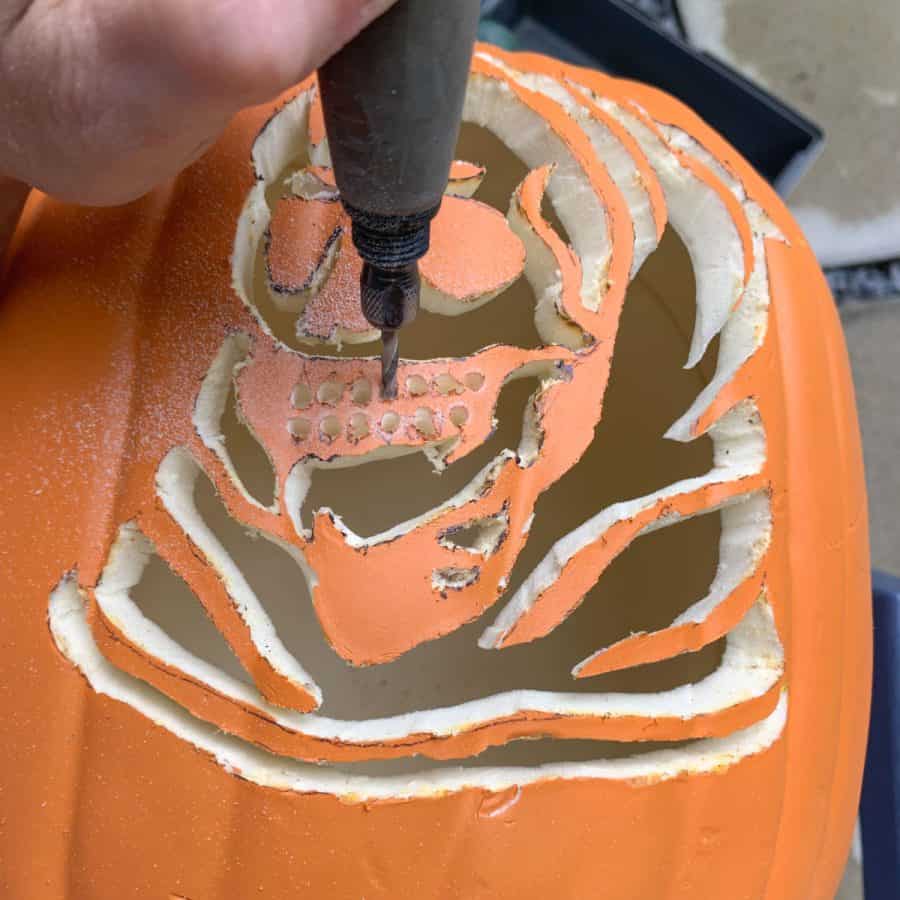
As I mentioned in the first step, if you chose a complex pattern, you may need to employ the help of a Dremel tool or even a power drill.
The teeth were smaller than the blade, so I used the Dremel with the smallest drill bit size I had, set it on low, and drilled through the teeth.
After you have finished carving the face, you can cut an opening for your light.
There are several options for lighting placement and types. If you use battery-powered tea lights, you’ll want to cut the bottom of the pumpkin.
A regular candle may require ventilation so consider cutting the top.
Alternatively, you can cut a hole in the lower backside to run a cord through if you want to light your pumpkin with powered lights.
And depending on the brand of pumpkin you buy, the bottom and top may be thicker than the sides.
I had to make several passes at the bottom, and also needed a little help and had to use my long blade X-acto to get through the extra thickness.
Step 4. Clean Up The Fine Details On The Carved Foam Pumpkin
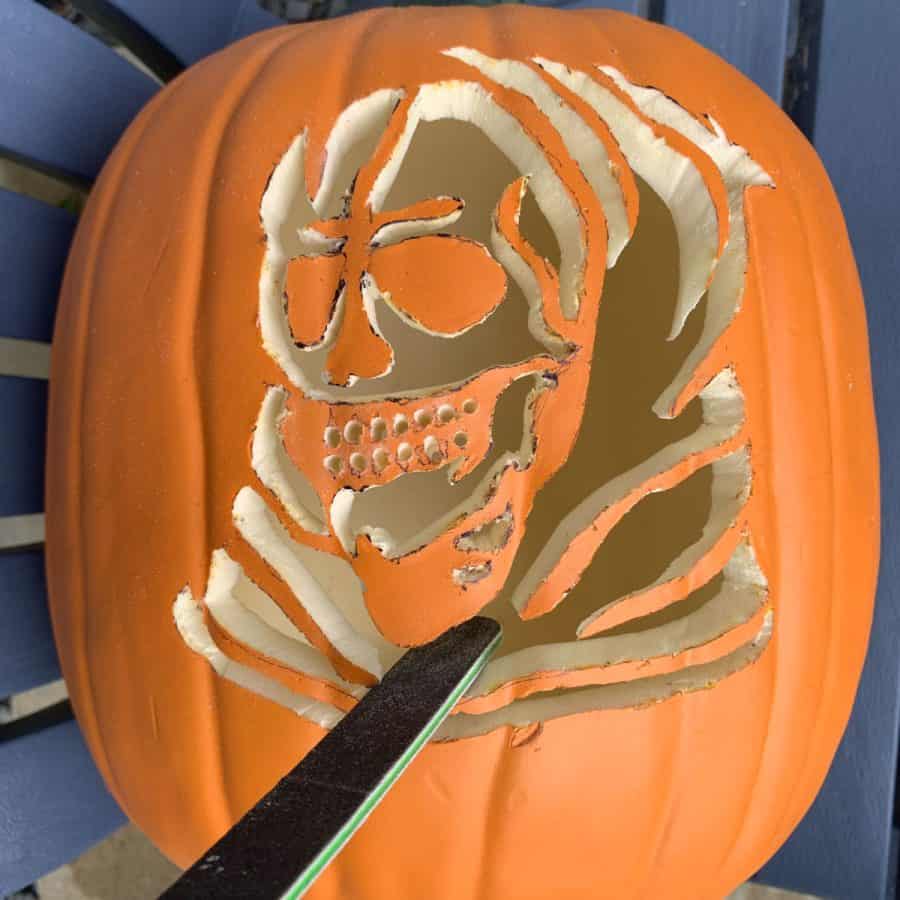
A nail file does wonders at cleaning up the white foam sides and the edges.
I used the rougher grit side on the white foam parts and finer grit on the edges where it meets the orange.
There was a fair amount of fuzziness on those edges I wanted to remove.
Hint: If you end up with a piece of foam that breaks off that wasn’t supposed to, you can use a push pin to reattach it from the inside of the pumpkin.
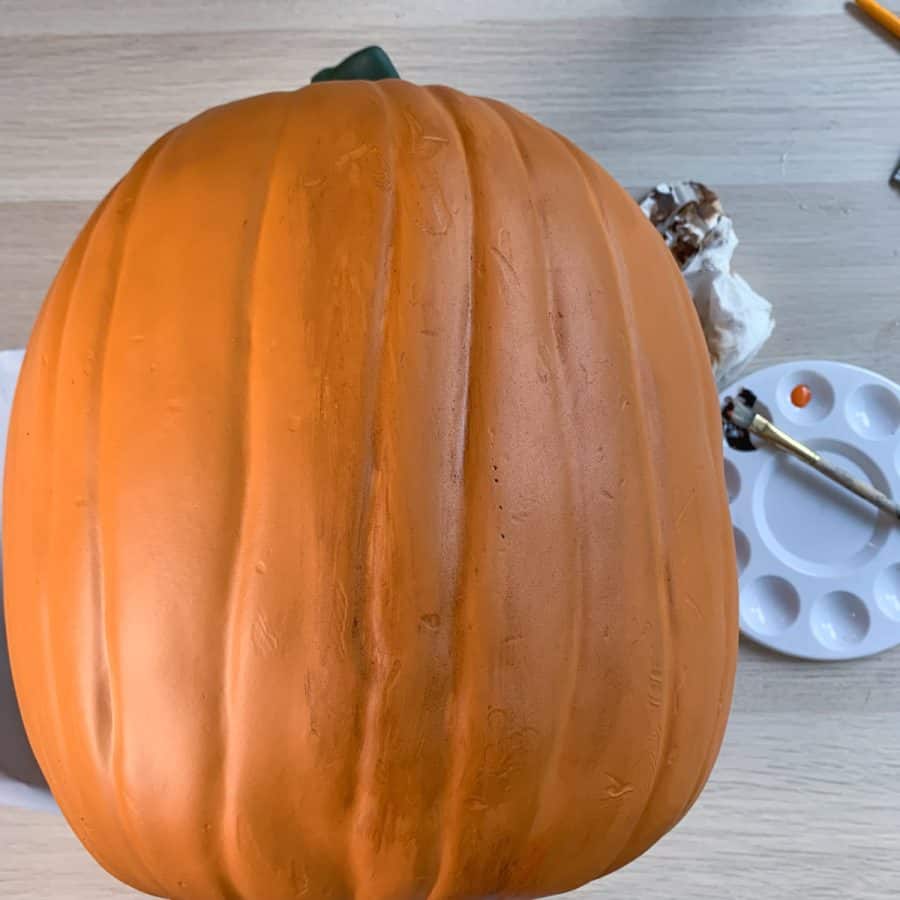
Step 5. Add Realistic Effects To The Pumpkin (Optional)
The plainly colored orange pumpkin was very monotone and didn’t look realistic to me, so I decided to add a few paint effects.
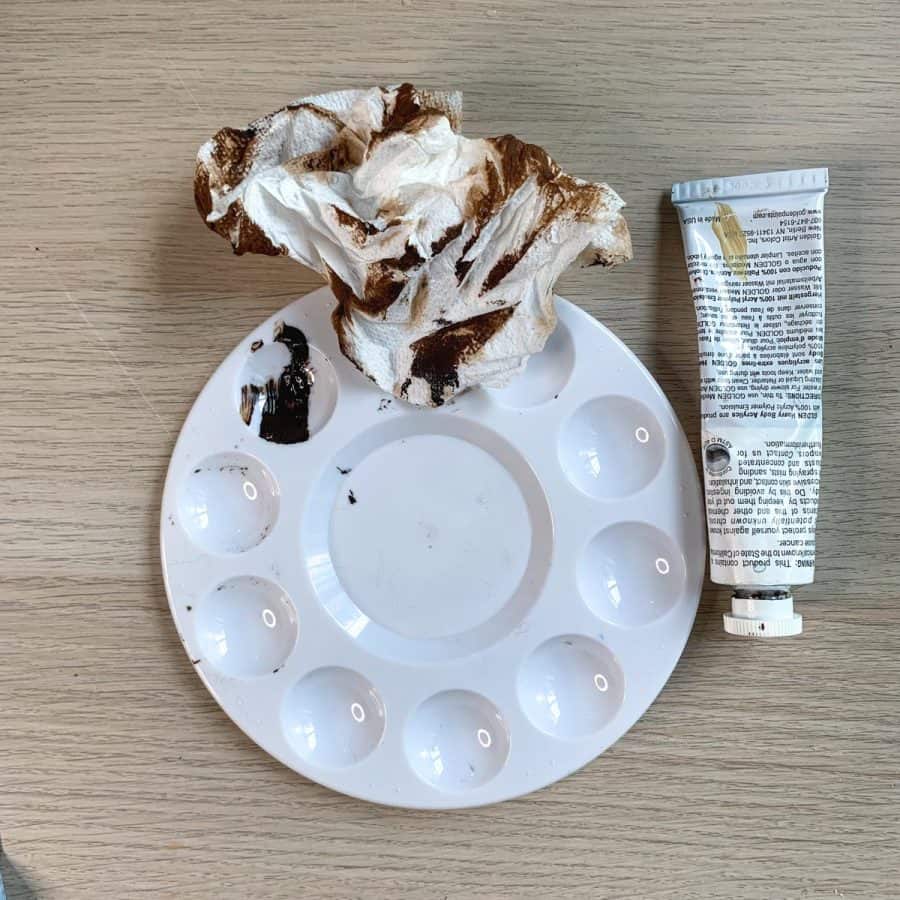
It was quick and easy. To do this, you’’ need some craft paint. Burnt umber works excellently for this.
Add a small amount into a paint tray, take a paper towel or rag, and dip it in the paint.
Next, add the tiniest amount of water to the paper towel and rub it up and down the pumpkin.
You have the flexibility to add more or remove some color with a wetter paper towel if you do it in the first couple of minutes.
Once you find the desired look, continue around the pumpkin. Take care around the face because the paint will stick to the edges
I mostly avoided getting paint near the cut areas.

Next, it’s time to fix the stem. This just needs a little more of the burnt umber with the same technique.
Once that dries, add a little bit of yellow to the tray.
Here I just used my fingers and dipped them, dabbed some yellow onto the stem at a few spots and rubbed it in. It really made the stem look real.
And that’s it. Now you can add whichever light you chose for your carved foam pumpkin, set it on the porch, and enjoy it year after year.
Don’t forget to Pin it for later!

How to Carve A Foam Pumpkin Using A Pattern
Carve a foam pumpkin using a pumpkin carving pattern. Make a Jack O'Lantern that last for years with carvable pumpkin.
Materials
- Carvable foam pumpkin
- Hot knife
- Nail file
- Dust mask
Tools
- Please see the full materials list above the tutorial for details and links.
Instructions
- Prep And Print The Pumpkin Template And Scale To Fit The Size Of Your Pumpkin
- Tape The Pattern And Trace The Outlines Using a Thumbtack
- Carve The Foam Pumpkin With The Heat Tool
- Clean Up The Fine Details On The Carved Foam Pumpkin By Filing The Foam
- Add Realistic Effects To The Pumpkin By Semi-Dry Rubbing Paint


Love Love Love this sooooooooo much ! Thank You for the excellent tutorial on this !