The Best Mix For Concrete Projects- How To Choose?
I’m going to explain how to determine which concrete mix is best for your concrete crafts and DIY project. There are some key things to consider that will help you understand when to use which mix.
I’ll provide some insight to make figuring this out a whole lot easier!
I’m asked this question all the time —”What mix should I use for making a planter?” (or substitute any type of project they might be working on).
And each time… I warm up my fingers and get ready to type the same question— “Can you tell me more about your project, for example; size, thickness, type of mold you are using?”
You see, these are the factors you’ll need to know to determine which concrete mix you should use.
So let’s start with the most basic and important point about concrete mixes. And if you’re wondering about what the difference is between cement and concrete, I talk about that here.
Hypertufa is another type of mix which I don’t go into here, but you can read more about the different mixtures and ratios in this large trough planter tutorial.
The Factors Determining What Is The Best Concrete Mix To Use For Your Project
Mixture Consistency
What consistency does it need to be to flow into the mold?
If the mix requires a lot of water to make it fluid enough to fit into the cavity your mold, and you end up adding too much water then you will have weakened your mix.
The amount of strength needed for the project will be vital in making the right concrete mix choice.
Mixes with large aggregate are going to be more difficult to work with, and in narrower molds they will require more water than they are specified for.
But in wide cavity molds, larger aggregate mixes will make the concrete stronger. They won’t have needed the additional amount of water added to make them workable.
There are mixes that don’t have large aggregate, but do contain a very high sand to cement ratio. These may be more difficult to work with than ones with a low cement to sand ratio.
So in concrete projects where you have molds with narrow spaces, having a higher ratio of cement will allow you to use less water because you’ll have more fluidity.
Concrete Aesthetic Considerations
Some of the links on this page have been provided as a convenience for finding materials. These links may also be affiliate links. As an Amazon Associate I earn from qualifying purchases, at no extra cost to you.
I only recommend products I’ve used and loved, unless otherwise stated. Click here to read my full disclosure policy.
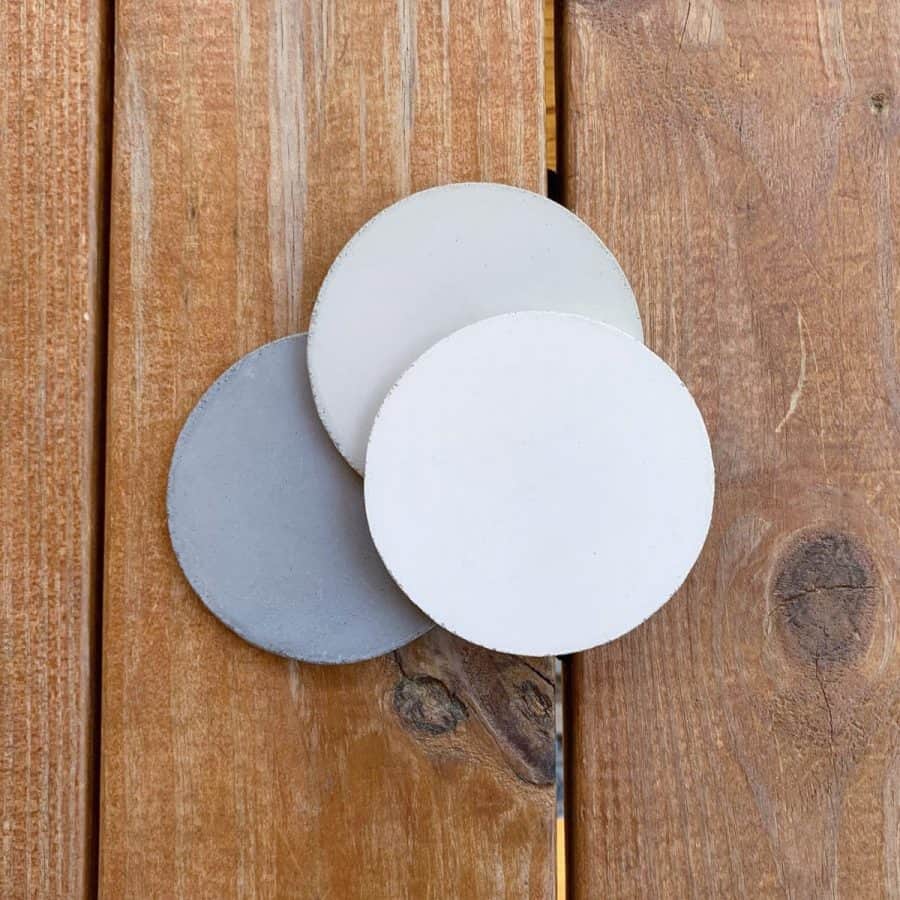
And finally, there are aesthetic considerations. Remember not all concrete is grey, nor smooth so aesthetics will also play a role in choosing what’s the best concrete mix.
The good news is that there are usually several good options for mixes, regardless of the project.
And when there is more than one good option, sometimes the concrete mix choice is just whatever you have on hand that will work.
If I have multiple mixes on hand, then sometimes I just use the one that will expire soonest, if I know it will work.
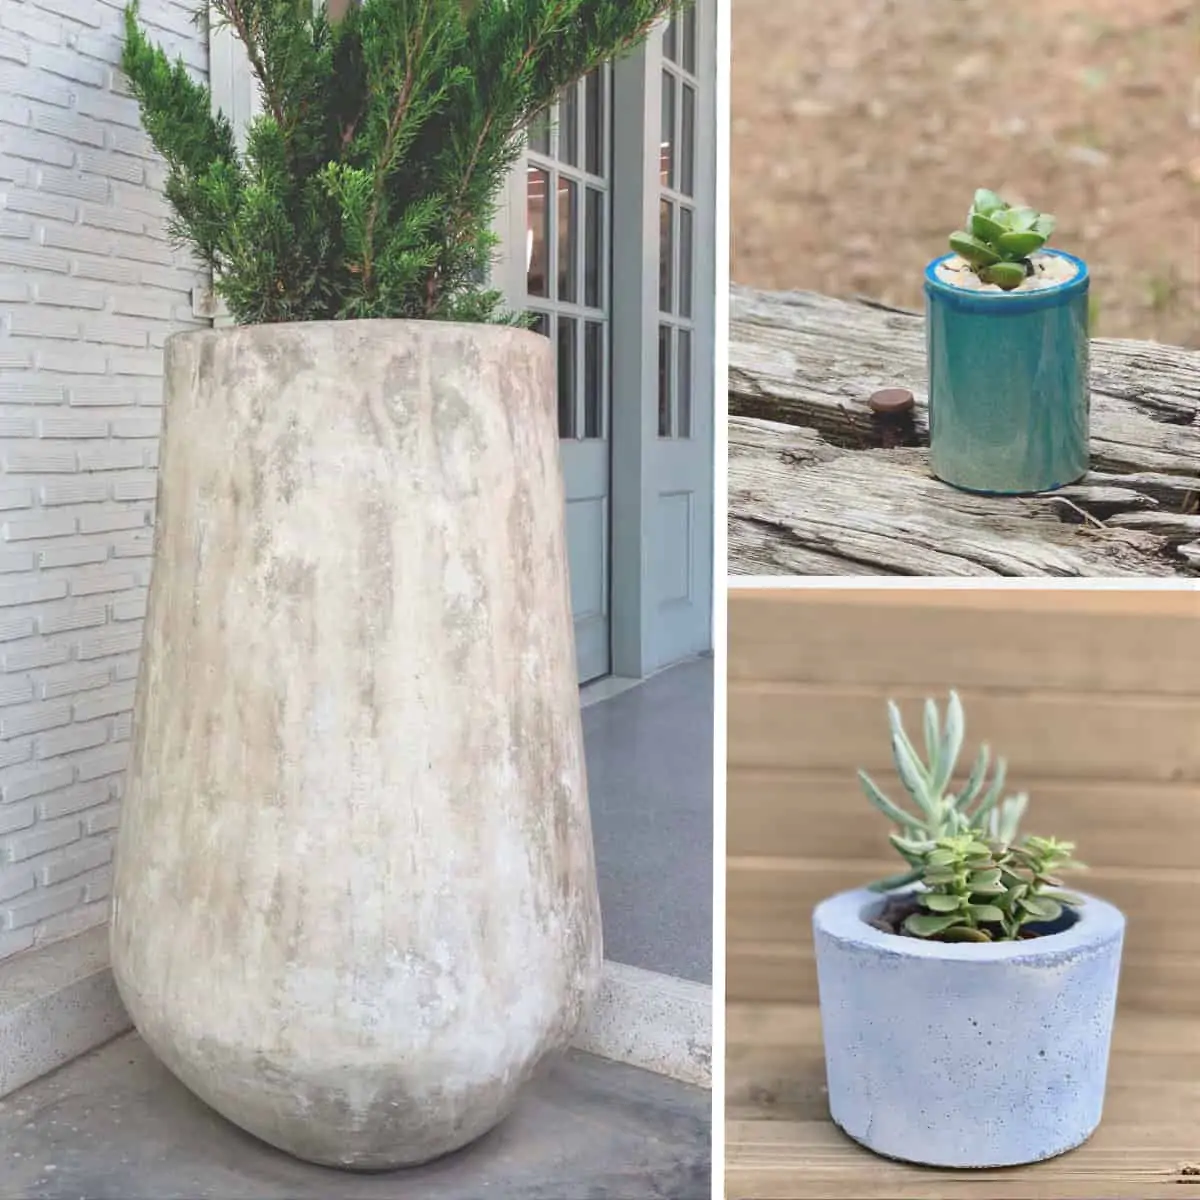
For comparison, here are examples of four different planter projects and why they would require different types of concrete mixes.
I’ll also go through some non-planter projects and explain the deciding factors for mixes for those as well.
I just found a mix I love, that’s versatile for most anything, and rarely fails me. So it tends to be my go-to product.
Note: The mixes mentioned in this post are common concrete mixes found in the US.
There are three major brands sold in the two main big home improvement stores here- they are Quikrete, RapidSet and Sakrete.
This is because (at least in my area), Sakrete’s mixes are only sold at Lowe’s, but Quikrete and RapidSet are at Home Depot, and that’s what I have closest to me.
If you are wondering, the reason Sakrete doesn’t get a lot of mention here is just that I have very little experience with it.
By the way, this article will help you out with recommendations on general best cement mixes outside the US and Canada.
Size Factors Considerations
Size is important because it is a direct factor in weight. And weight will go hand in hand with durability.
Large planters are great to use as examples. The heavier the planter, the more durability you will need.
Larger sized planter projects usually need thicker walls and bottoms. And as concrete planter sizes go down, the narrower you can go with your wall and bottom thicknesses.
Thickness of the walls and bottom adds weight to your cement project, and so more weight requires thicker concrete.
The thickness for durability will determine what size you need for your mold. The distance from the outer mold and inner mold insert will be a void. We need to make sure we can get the concrete or cement mix into it.
And this is where the workability/fluidity comes into play. Always use the least amount of water to achieve the most fluidity needed for filling the voids of your mold.
The Best Mix For Large-sized Concrete Planter Boxes
Let’s take a hypothetical example of a 2 foot wide x 2 ½ foot high concrete planter box. I haven’t made one this large yet, but would like to.
his would probably require planter sides that are about 2 ½” thick. A piece like this is going to be big and heavy and will certainly require durability.
The thicker sides will also be necessary to hold the weight of the wet soil inside.
The number one rule of thumb when choosing a mix is you must know the minimum-maximum thickness the mix has been specified for.
Each concrete manufacturer will specify on the label of the concrete mix, what thickness it is formulated for. So always double check the manufacturer’s specifications.
You can get this information by going directly to the website of the manufacturer and reading the datasheet for each specific mix.
I prefer looking online for their datasheets because it’s much easier than trying to read the tiny print in the stores.
If the specifications on the bag say for use of up to a thickness of 2”. Then you cannot use that mix for this project, since the walls on this project needed to be 2 ½”.
The label must indicate the thickness with a range that 2 ½” fits into, like 2-4”.

In this case, Quikrete 5000 is a good choice, as well as RapidSet’s Concrete Mix. Both of those have larger sized aggregate, which at greater thicknesses will provide better strength.
A good thing to know is that if you like working with products that have quick setting times. Like CTS’s RapidSet line, then you can always use their additive Set Control.
The Set Control is an additive that comes in a packet form (it’s only a few bucks). It gets mixed in with your water, before adding the water to the mix.
This additive will give you an extended working time with the product before it starts setting but still allows for a fast cure.
I don’t have experience with making a planter of this size yet, but I’m told it’s doable without reinforcement. However, it’s safer to add reinforcement to this.
Another recommendation for a planter of this size would be to use a layer of wire mesh to reinforce the concrete, but we’ll save details on that conversation for another day.
Best Mix For Medium-sized Concrete Planter Boxes
Let’s say you are making a planter that is 2 feet wide by 18” high and the walls are 1” thick. Now with a planter that is still quite sizable, but the walls are 1” thick.
Using a mix with aggregate that’s as large as the mixes mentioned above, will not work. The gravel would make it difficult to get the mix into all the voids and cause air gaps.
With smaller spaces, look for a mix that doesn’t have large aggregate. These mixes are usually called “cement”, “mortar”, “patching compound”.
The labels on these bags will often specify “for use for thickness from 2” thick to a feather edge”. That’s a good indication it’s going to be a finer mix.

RapidSet Mortar Mix is one of the best concrete mixes for a medium planter box. This mix is fine in texture but also has pea gravel in it.
The gravel is only up to about ¼” wide, so easily can fit into a 1” wide concrete mold.
It’s also nice because it has a quick set time and cures in an hour, with a nice smooth finish. Just note, this will cure to an off-white color.
Quikrete’s Sand Topping Mix is another very good choice for this planter. It has a high sand to cement ratio but doesn’t contain any large aggregate.
Oddly enough, the Mortar Mix is a little easier to work with, somehow more moldable. But for a planter this large, this isn’t going to be important.
It may come down to desiring or not desiring a quick set/cure time. Or maybe it’s color choice as the Sand Topping Mix Will cure grey and the Mortar Mix off-white.
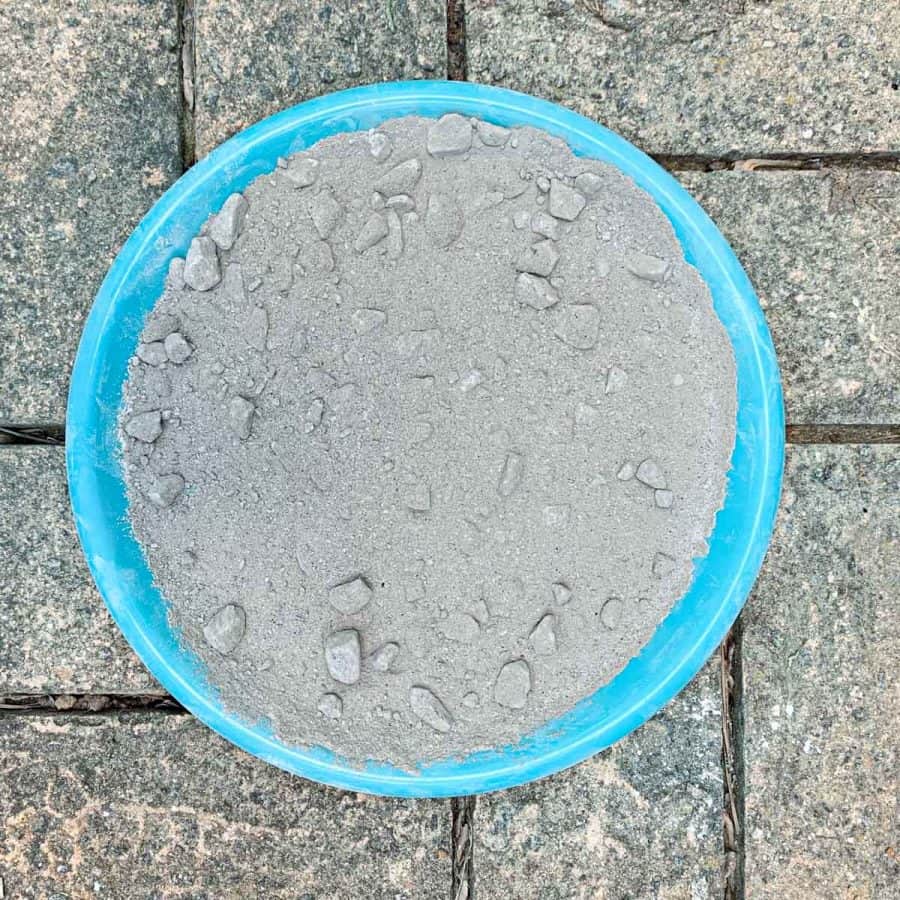
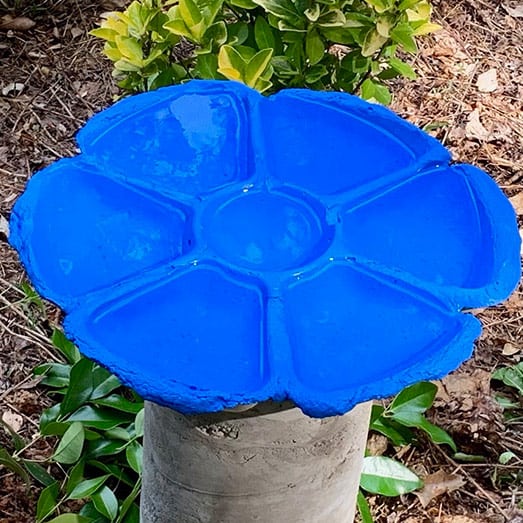
One more option to mention here is Portland cement. Portland cement is just plain cement- as discussed here in my Cement Tests article. In that article, I tested the differences between six different concrete mixes.
If you use Portland cement and mix it at ratio of 2 parts sand to 1 part cement, like I did with this large concrete bowl, that will also work.
This article is dedicated entirely to the ratio of cement to sand in portland cement. I tested five different ratios and each had different results.
For general smaller crafts, a 3:1 is best, but this article will explain better when to change up your ratios.
The Best Mix Concrete Molds With Narrow Voids
Concrete mixes are made with different compounds/minerals and are part of what makes a mix denser or less dense and both serve a different purpose.
Some mixes are so dense that they feel sticky and need more water to be fluid enough to get inside of a narrow cavity. Some are too airy and adding water makes them watery.
Either way, if you need to add more water to get them to work with your mold, then you’re asking for trouble and increasing the likelihood of cracking.
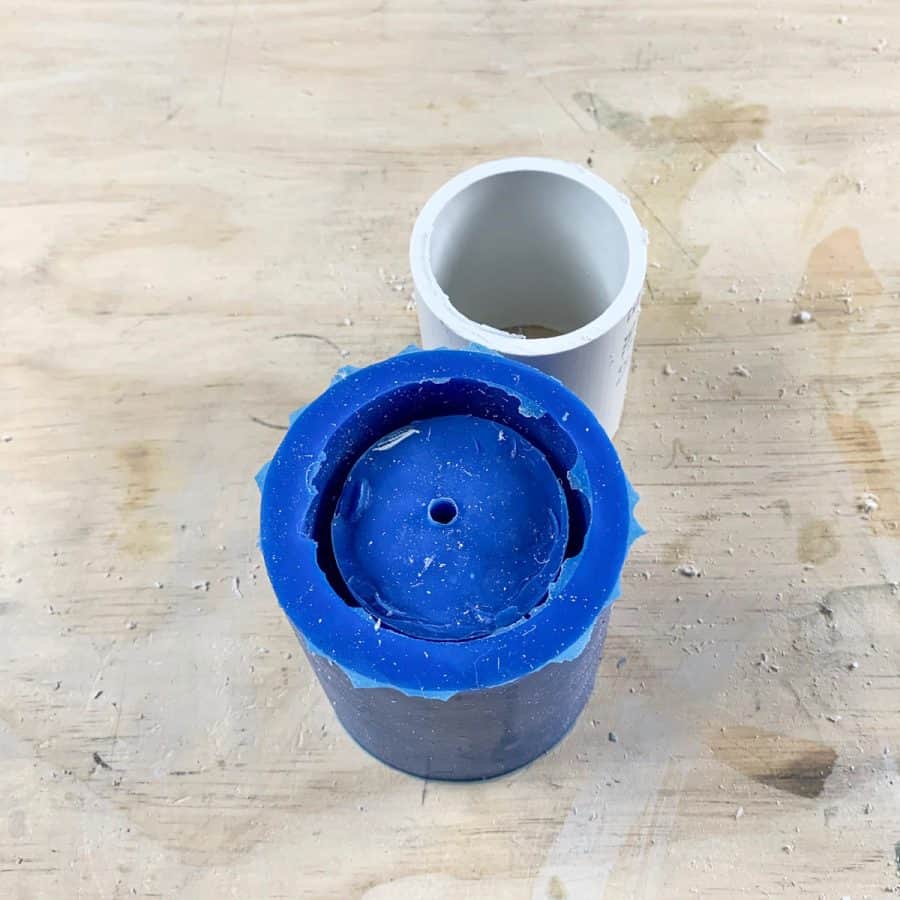
This silicone mold for a concrete planter had walls that were just under ¼” thick.
In addition, there was another factor that made low moisture content and good fluidity important.
The height of the mold vs the width was such that it applied quite a bit of pressure onto the cement when trying to demold it.
A mold like this will require a dense, strong mix that can also be fluid without requiring adding too much water. That’s why I used RapidSet’s CementAll.
CementAll has more cement than sand, and contains compounds that allow it to be very workable. It just never needs much water to be added to make it fluid.

It’s quite forgiving and has an incredibly high psi of 9000 when fully cured. That’s incredibly high strength.
PSI stands for pounds per square inch. It is the amount of compressive strength which you’ll find listed on every cement mix label.
For projects under 1”, you really can’t go wrong. It can go up to 2” without a problem, it just depends on what you’re looking for.
This is why I recommend it for most of my tutorials. It is a cement crafts project that’s pretty likely to succeed.
I have experienced cracking by trying to get mixes like sand topping mix and vinyl patcher into narrow molds.
The issue is that they require more water to get them fluid enough to fit inside of narrow voids.
The water you need to add is more than the mix can handle. Your next best bet is Portland cement and sand at a 3:1 ratio of cement to sand.
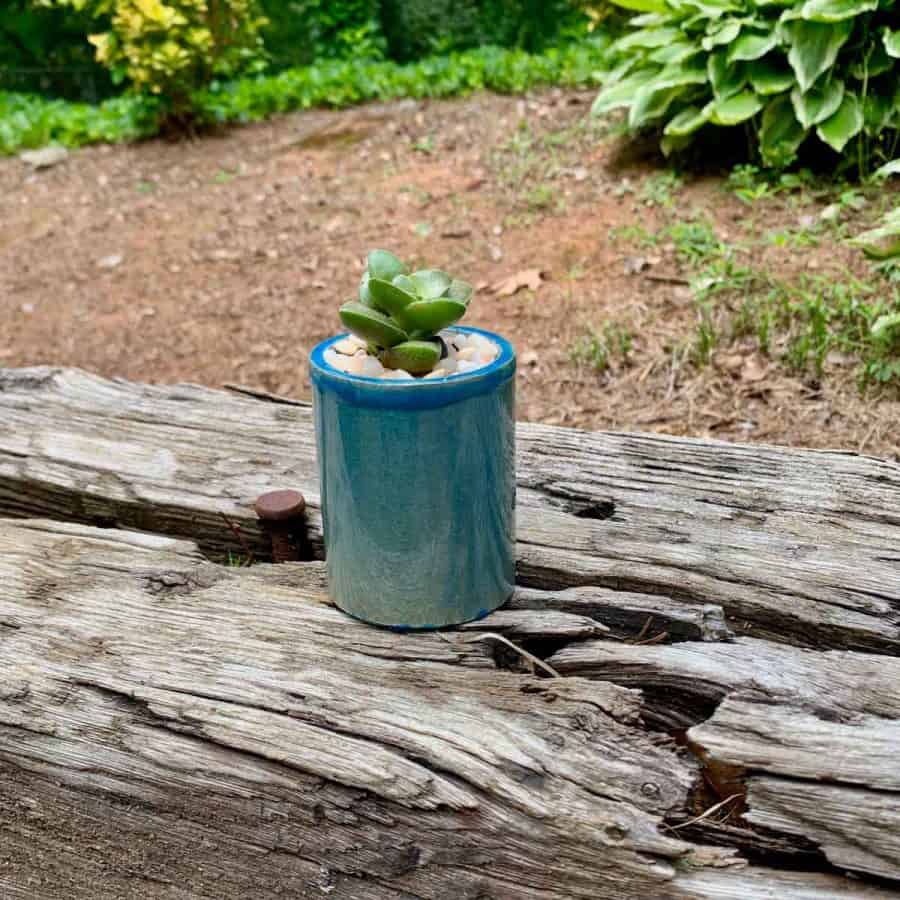
Best Mix For Planters With Wide Mold Cavities But Smaller In Size
You can get away with a mix that does contain aggregate, but just not too large. That’s because making this planter doesn’t require casting concrete into a narrow cavity.
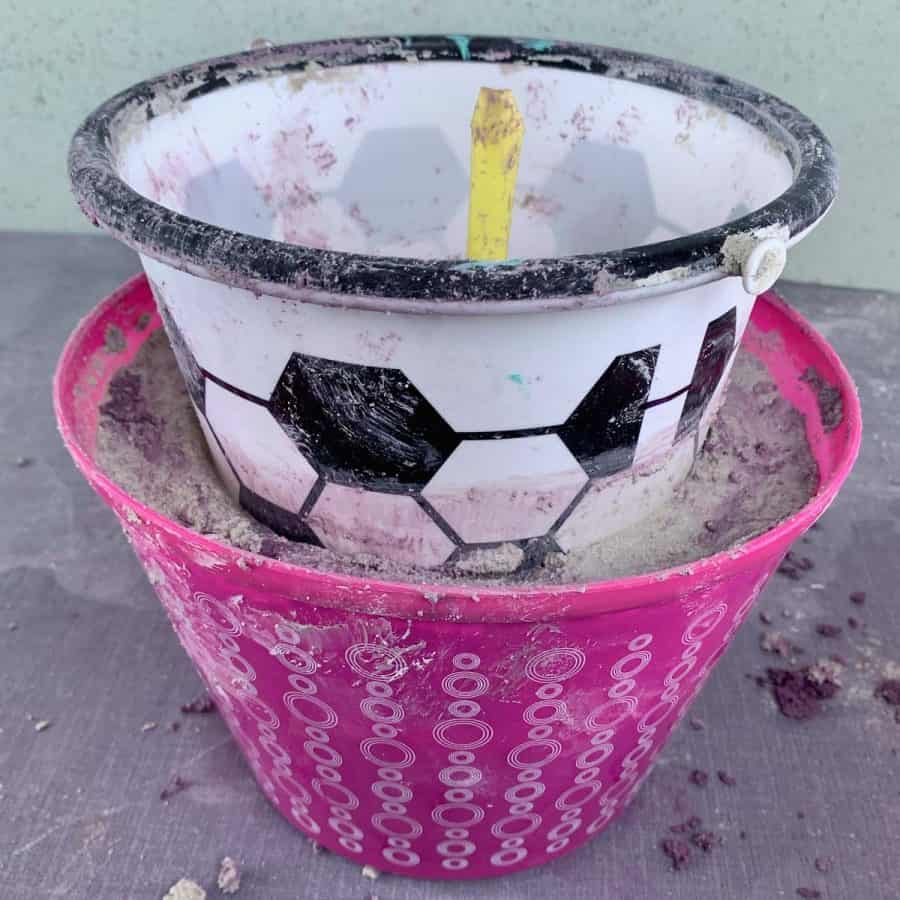
All I did was insert the inner mold into the wet cement mix in the outer mold.
My mixture was like a soft mud pie type of consistency. This gave me the flexibility of options for cement/concrete mix types.
The wall thickness was overkill since the planter was only 8×8″. The walls could have been thinner and so wasn’t important in the concrete mix choice.
I would have made the walls at just under ½” if I were making the mold from scratch.
These mixes could have been used:
- Quikrete Vinyl Patcher
- Quikrete Sand Topping Mix
- Glass Block Mortar Mix (white)
- RapidSet Mortar Mix
- Artminds White Outdoor Cement (white)
- RapidSet Cement All
- Portland Cement and sand
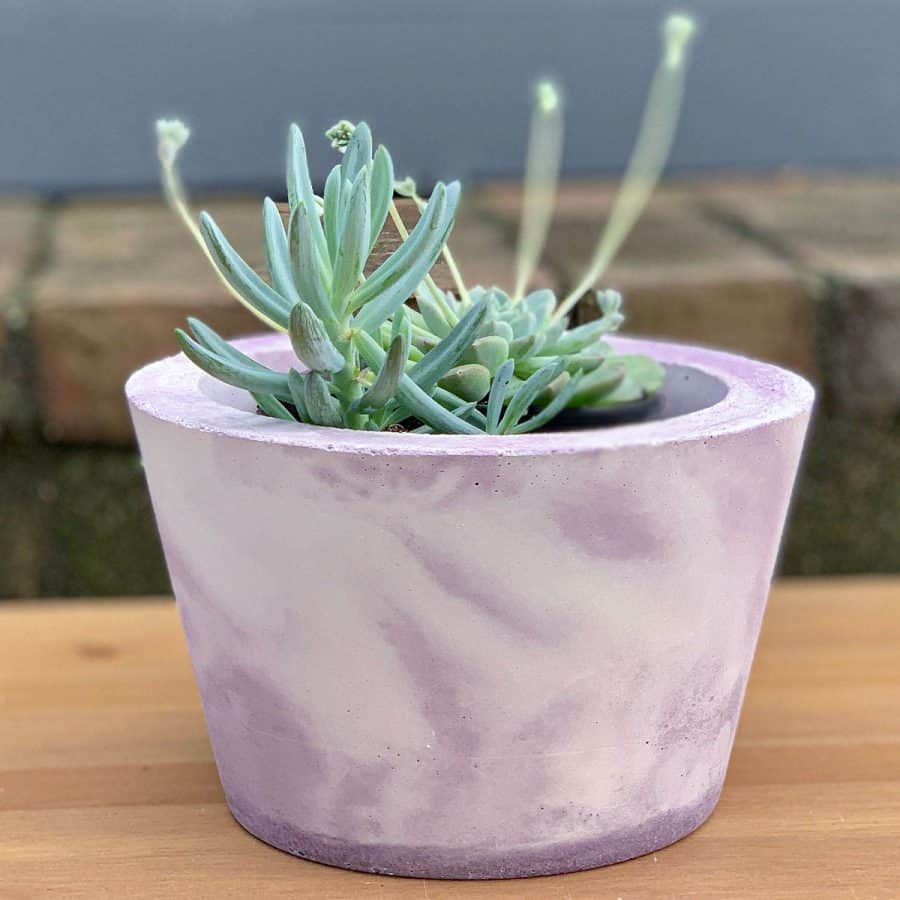
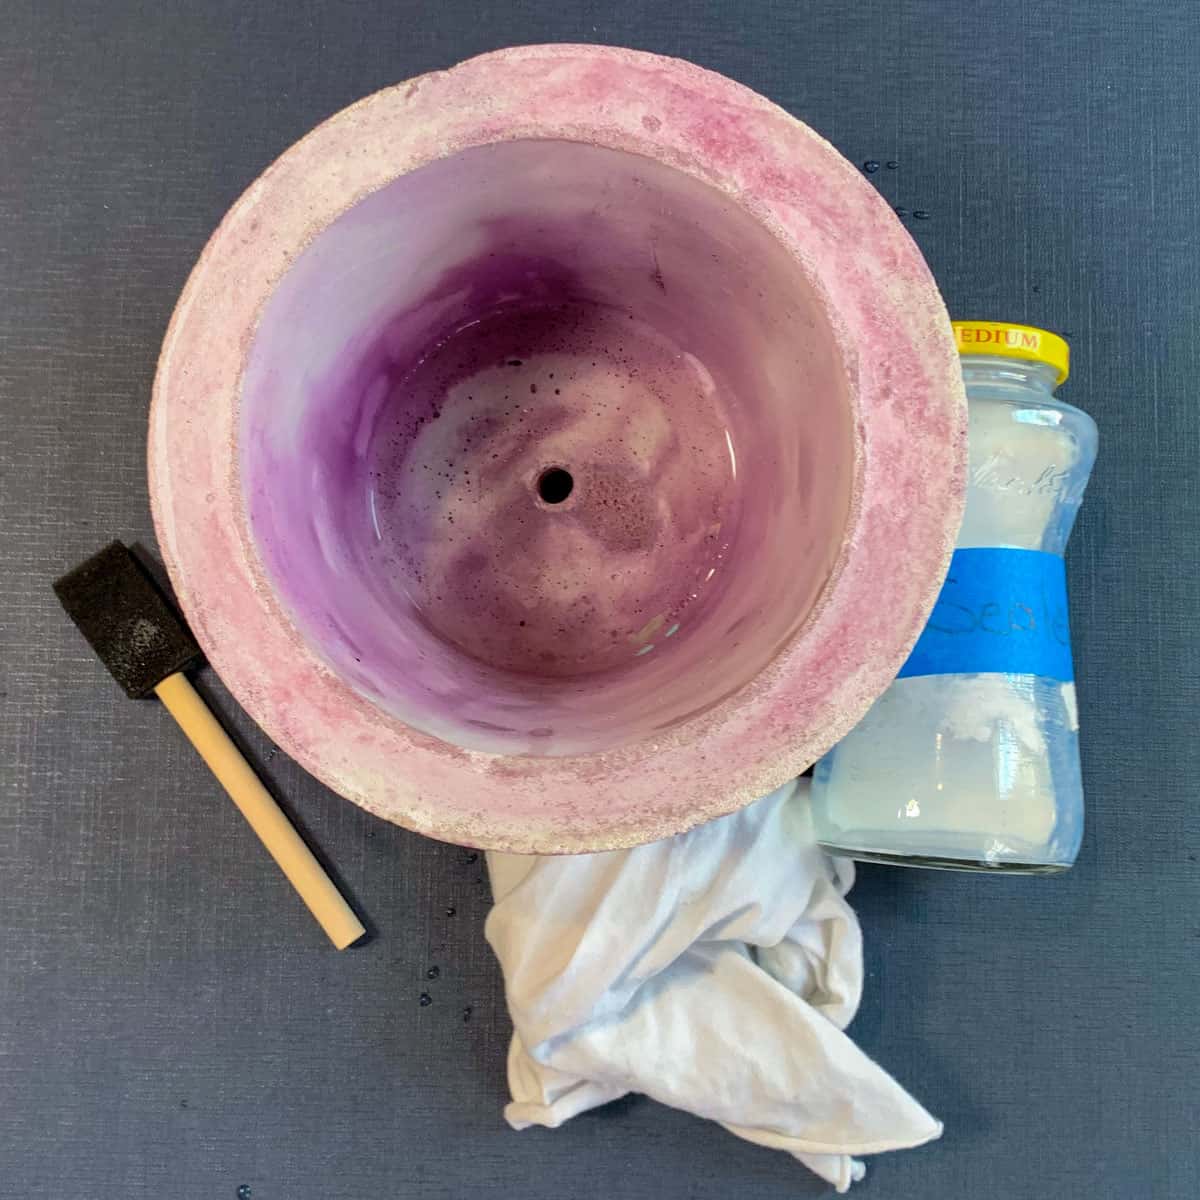
I wanted a white base to start with and since the goal of the project was to dye it with a fabric dye so I went with Glass Block Mortar Mix. I also had it on hand and needed to use it before the bag expired.
This Glass Block mix is tricky because it is airy and not dense. In smaller projects, with thinner walls, it is more prone to cracking because I have to add more water.
I didn’t need to add extra water since my walls were thick and so the mortar mix remained durable.
Best Concrete Mixes For Thick Structural applications
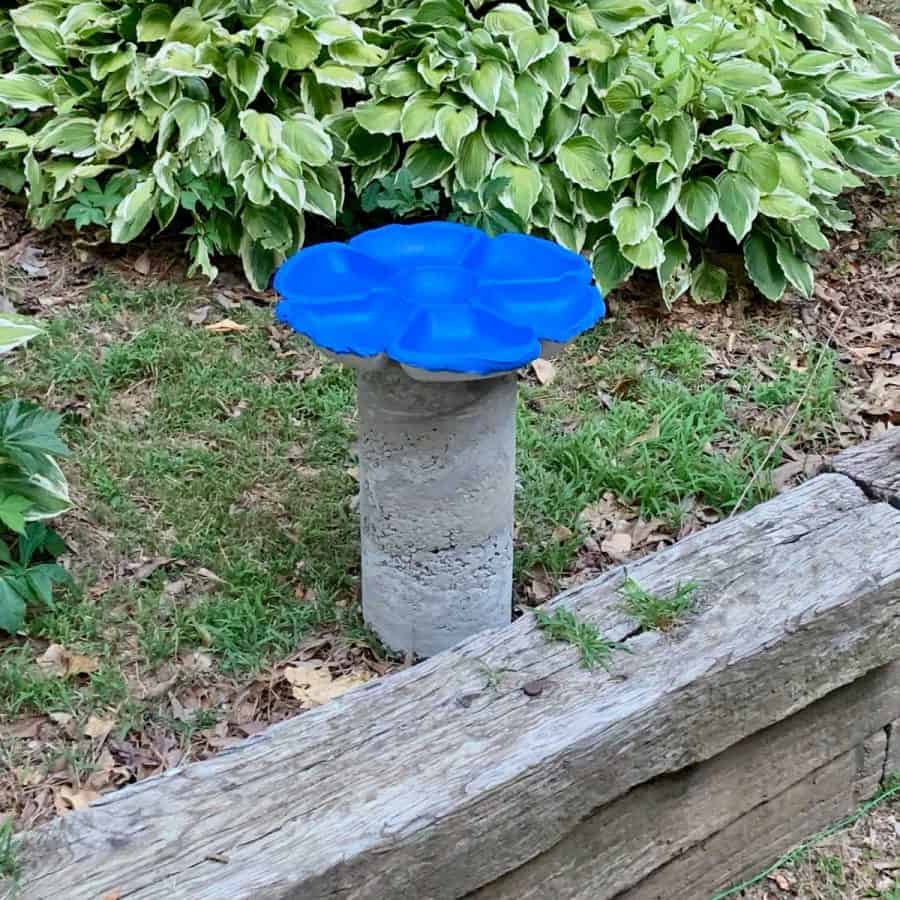
Or how about a column-shaped pedestal that is 8” in diameter, like this one in my DIY Concrete Bird Bath. Height and width are important in this mold, and by now, you know the drill.
We are looking for a mix that can be used in vertical applications such as pillar and structural support, as well as used at 8” thick.
Really, the tall support isn’t that important as it’s bearing no weight. But the concrete mixes that support those thicknesses will go hand in hand.
These mixes that are specified for wide thicknesses are going to have large gravel. And I don’t know about you, but I don’t have 3 days to wait for this sucker to dry before I get to use it.
Quikrete’s Fast Set Concrete Mix and RapidSet’s Concrete Mix, both with larger gravel- are great products for this.
They have the strength to hold the weight and will have quick curing times. RapidSet’s concrete Mix will have a nicer look.
And if aesthetics are really important, then you may want to use the Quikrete 5000 instead of the Fast Set for this project. The 5000 uses smaller gravel and has a higher proportion of cement to gravel.
The Best Concrete Mix For Small Slab Applications
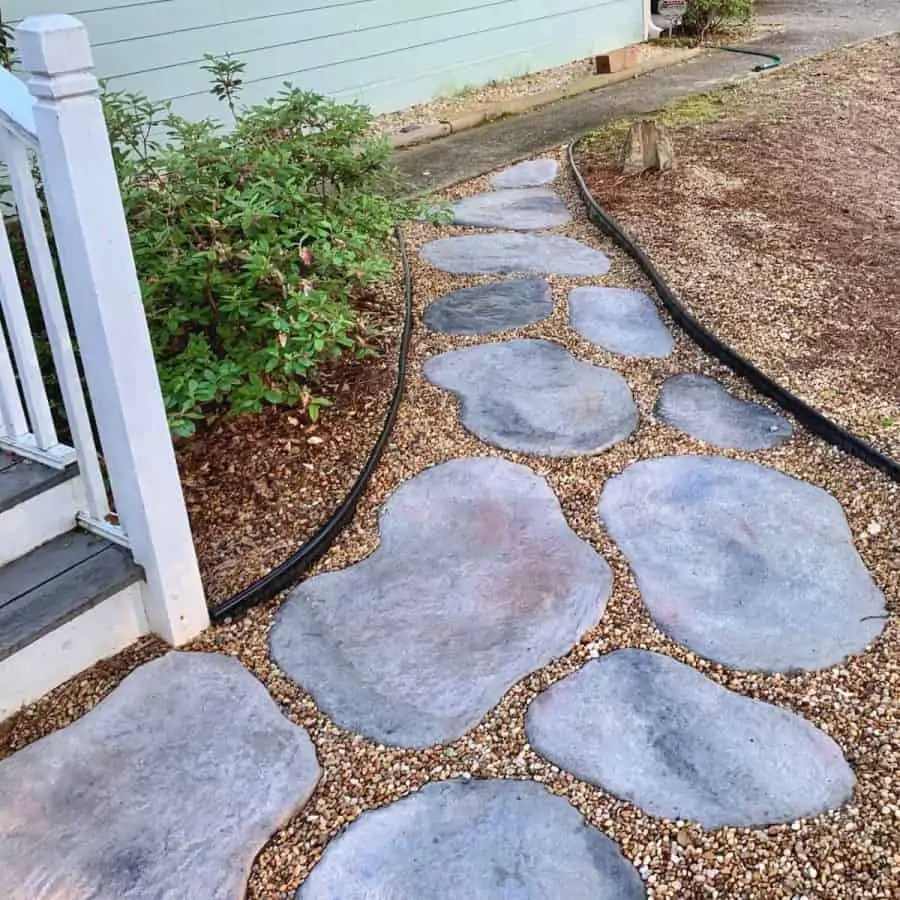
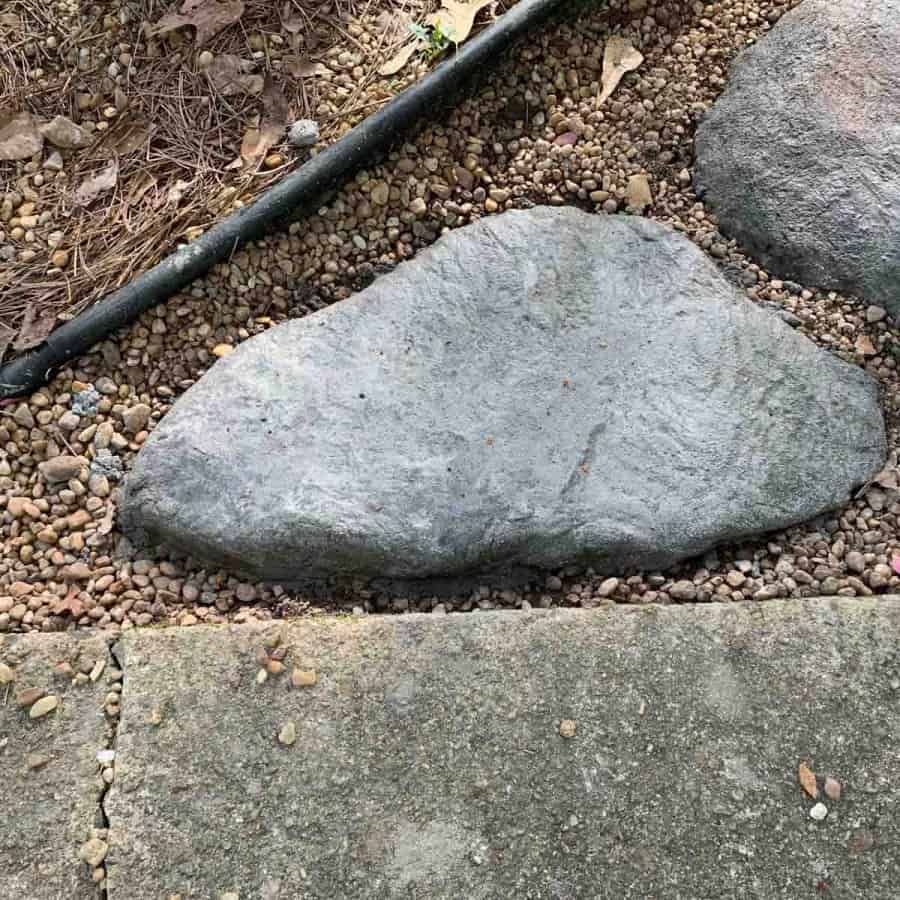
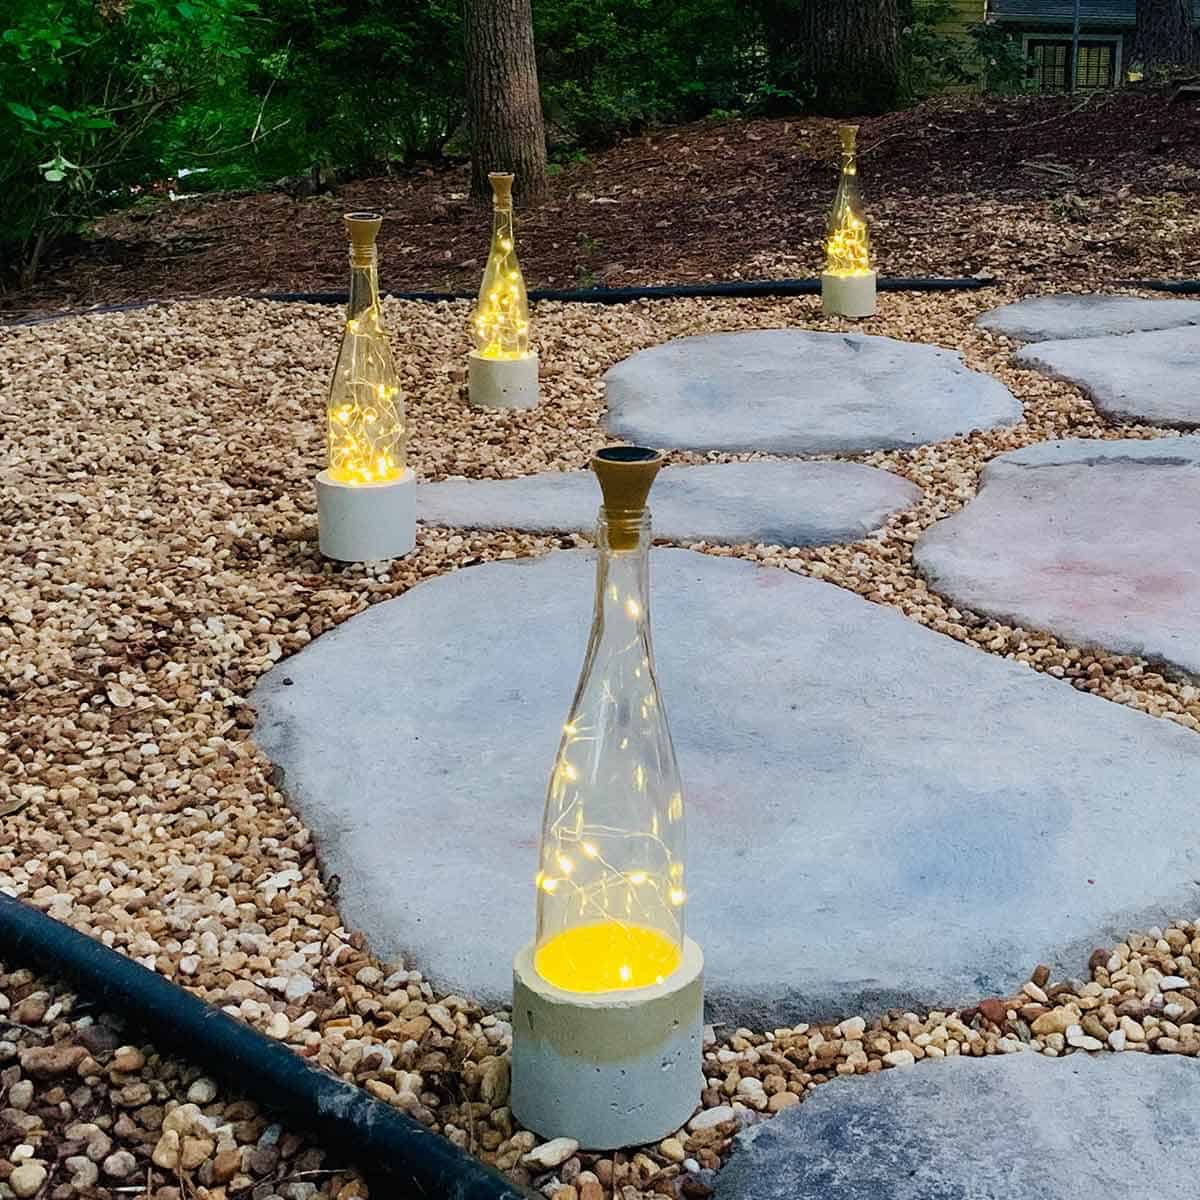
And last but not least, concrete stepping stones. Oh, there always seems to be so much disagreement on what concrete mix you should and shouldn’t use for these.
I’ve gone through the actual experience of making these DIY Natural Looking Concrete Stepping Stones and talked to a couple of different manufacturers as well.
They agree about the kind of product you should use- despite the naysayers out there.
I didn’t want to work with a mix that was going to have a quick setting time, since these stepping stones were so large.
So I used Quikrete’s Sand Topping Mix for the stepping stones. FYI- Sakrete also has a version of this called Topping mix.
Both of those manufacturers recommend this mix for making stepping stones up to 2” thick.
There may be a reason you need to make them thicker, but for any general application I can think of, 2” is sufficient.
If for some reason you need to go thicker, then you will need a mix that does have larger aggregate in it and is also rated for thicker applications.
If you are uncomfortable using the mix alone, you can add glass fibers for reinforcement or wire mesh, but neither manufacturer believes it necessary and in my experience, it wasn’t needed.
These concrete stepping stones were not cast in a pre-made mold, they were cast on-site. Basically, the ground was the bottom of my mold, I simply used vinyl strapping as the sides of the mold.
For this type of mold and thickness, the high ratio of sand to cement of the Sand Topping Mix is exactly what was needed.
I needed something with that mud pie consistency so it didn’t flow out of my vinyl straps and so that I could hand sculpt it.
This mix can actually show fine detail as well, as I’ve seen people cast this mix on top of large leaves to make stepping stones.
If you are looking to make pavers and are going closer to 1” or even 1 ½” thick, then another surprisingly good option is Cement All.
If you are pouring on-site, you’ll have to move fast since it is rapid setting and curing.
But if you are pouring into a pre-made mold, then this is a great pick because you can make a bunch of these in a short period of time and then take your time installing them.
Don’t forget to Pin it for later!

Don’t forget to Pin it for later!


Another great Saturday read totally LOVE that planter on the cover
Thanks! I wish I could say I made that tall planter. I used that photo to demonstrate an example of a very large planter, which I haven’t made yet, but hope to soon!
Hi Ellen I am hoping you can help me would love a cement mix I can use to mould around fome heads to make planters if you have one to help you will make me a very nanny.
Hi Michelle,
Are you in Australia? I’m only guessing based on your IP address. If so, then my Aussie readers tell me they like this: https://www.davcoaustralia.com.au/products/technical-mortars/surface-preparation/lanko-136-rapid-patching-mortar/. It’s what they use for this tutorial: https://artsyprettyplants.com/cement-balloon-planter/
If I were to sculpt cement around a foam head, the cement I used in that tutorial is what I would use to do it. It’s very moldable. It’s sold in the US, but sounds like the one linked above is the closest Australian equivalent. I hope that helps?
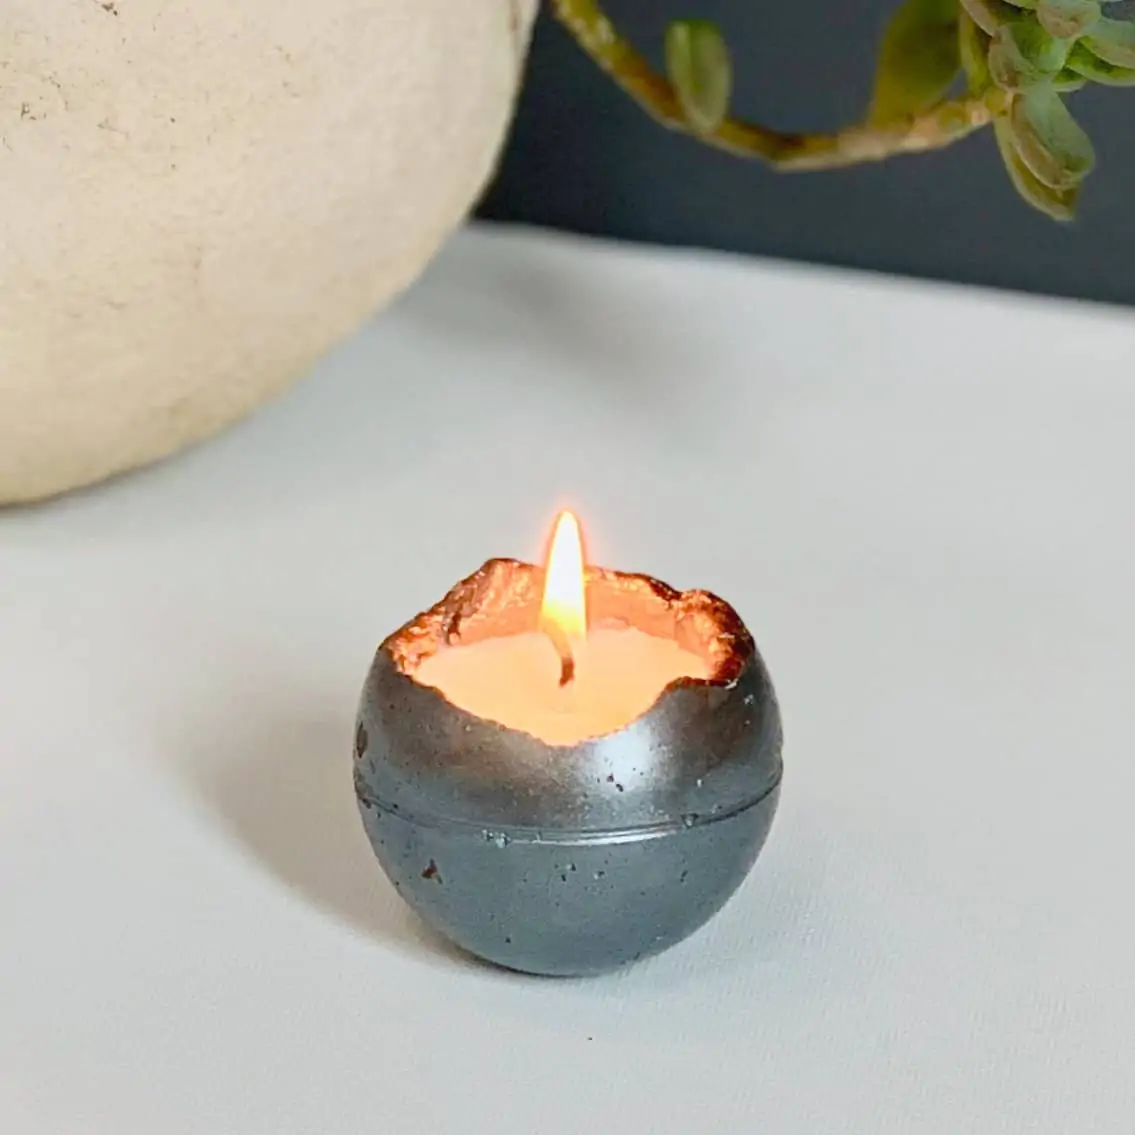
Hello Ellen hoping for a little help im in the UK and run a small candle business and want to make my own concrete/ cement candle containers i need a smooth finish i have no idea what to use cement concrete a mortar mix quick dry or not ahhhh pleeese help ive put a link to the silicone mould ill be using
https://www.etsy.com/uk/listing/934111818/candle-vessel-molds-concrete-cement?ref=yr_purchases
Hi Joanne,
I know this is often a problem for my readers outside of the US. I have been told by some in the UK, that Cement All is actually available there. The manufacturer is CTS and they supposedly do distribute in the UK, but I don’t know how widely distributed it is.
Cement All is the smoothest and easiest product I have found to work wit here in the US. However, if you can’t find it, then get portland cement. It is sold throughout the world. Portland cement will be as smooth as Cement All, but it will require that you mix in sand with it. Most portland cement products are grey, but some areas of the world can also find white.
There are a couple of different types of portland cement. You are looking for type II (Type 2). This may something on the label like, “used for making high strength repair mortars, concrete and for any other applications requiring Type I Portland cement”.
For your thin walled vessels, you will want to first try with a 3:1 ratio of cement to sand. You will want the low ratio of sand to get into those thin walls. Sometimes with silicone molds, you may experience cracking when trying to demold- due to the pressure. Be sure to let this cure for a very minimum of 24 hours. If you do experience cracking when demolding, then increase the ratio to 2:1.
I hope that helps!
Thank you so much this is a massive help xxx
Hello Ellen,
I have enjoyed reading your information and found it very interesting. I am making some concrete tiles to match the ones on my house. I have done an addition on and the company that sold the ones on my house are out of business so I have made my own mold and ready to pour the concrete. The tiles are 5/8″ thick x 4″ x 20″.
They have a grey and black finish on them that is very smooth and semi gloss. What would you recommend? They are two rows high and are exposed to the elements.Thanks in advance.