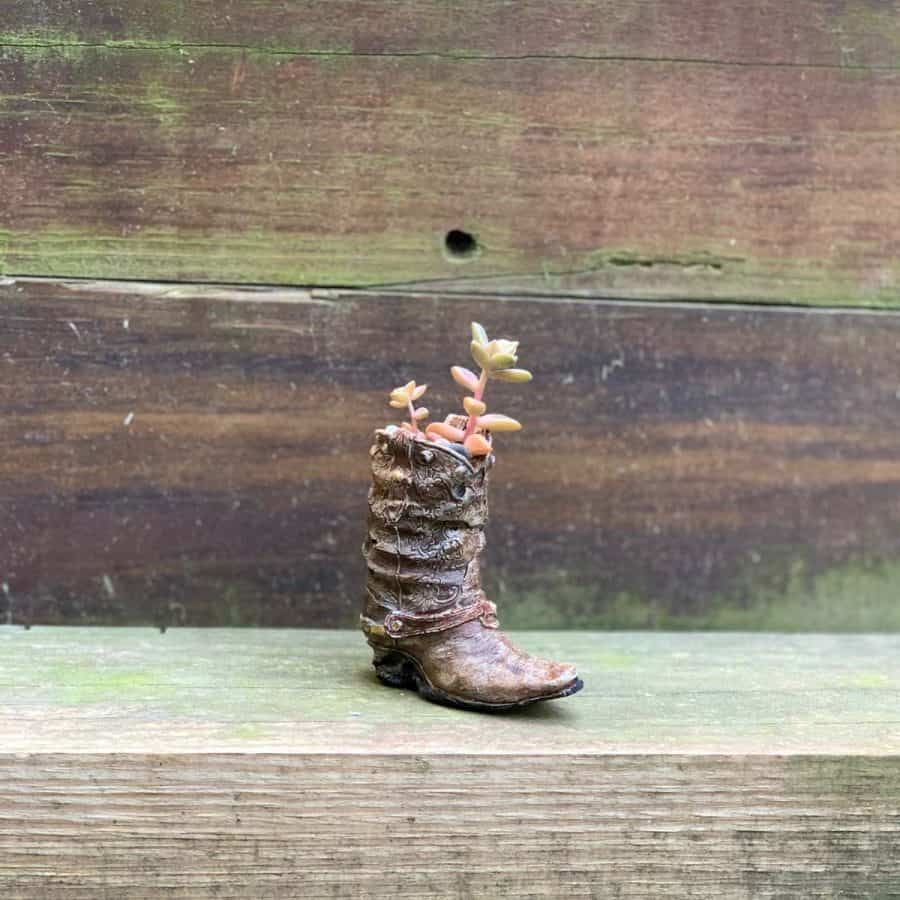
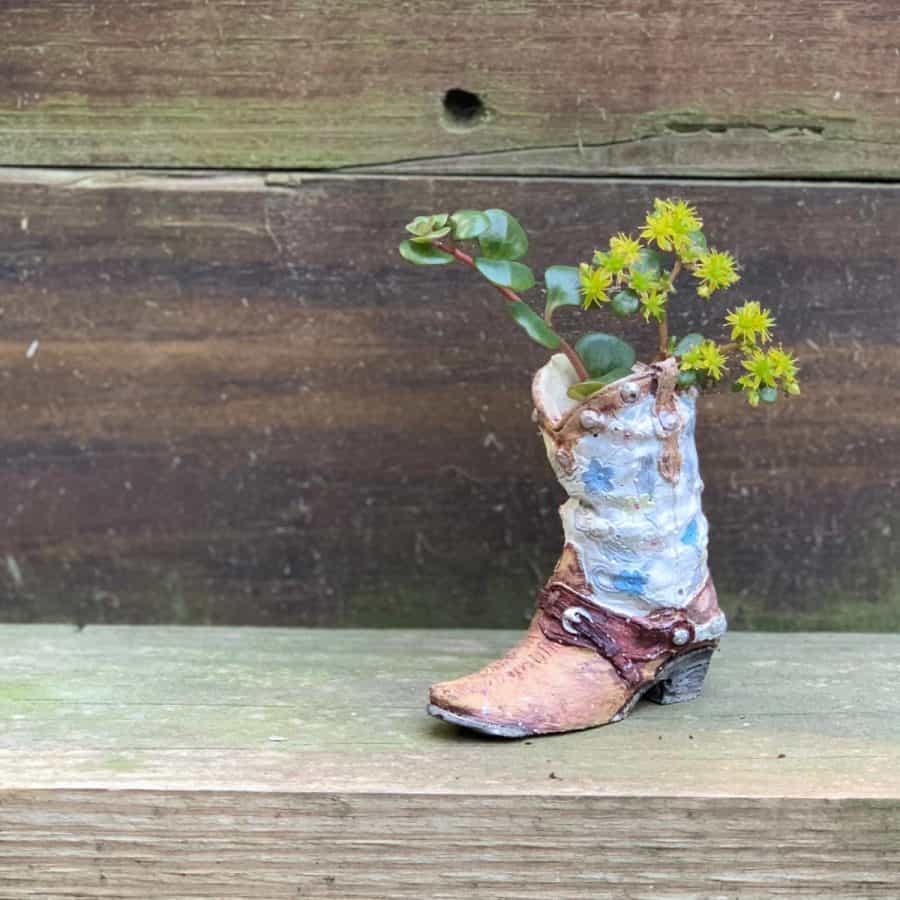
Concrete Cowboy Boot Planter (From a DIY Latex Mold)
Make a latex concrete mold and cast it to make a concrete cowboy boot planter.
Making a concrete mold out of liquid latex rubber is one of the best ways for creating a finely detailed concrete planter.
This cowboy boot planter has complicated lines, gaps and undercuts.
However, casting this and being able to demold with relative ease, can be done using this buildable liquid latex material.

My husband and I had a rustic wedding theme and the venue was a barn.
So of course, I wore cowboy boots with a fancy dress. I mean, you gotta be sensible with footwear, even if it is for your own wedding.
My sister found the most adorable poly-resin mini cowboy boot figurines and for my bachelorette party, gave us all little amazing rustic gift bags, where one of the cool items were these cowboy boots.
I was kind of in love with them and ever since that day, all I could think, is I have to find a way to turn this into a mini succulent cowboy boot planter.
Video For How To Make A Latex Rubber Mold For A Concrete Planter
Please click the button to subscribe to my YouTube channel and be notified when I have a new video tutorial!
I found a large version of these poly-resin boots and turned that into a non-concrete, repurposed cowboy boot planter.
As soon as I learned how to make things with concrete, I made sure to keep the idea of making a mini concrete cowboy boot planter in my head.
But there’s always a challenge to these things, right? I mean if you make a silicone mold of a boot, you may never get it out, as silicone tends to be too rigid.
You would be able to demold it if you cut a zig zag line down the back. However, you will be left with a line down the back of a boot.
This line may or may not go away with sanding.
Besides, a silicone mold isn’t going to pick up the fine detail as well.
I knew of liquid latex rubber, but didn’t have experience with it. I also didn’t know if it would be the right choice for this.
Liquid latex rubber mold is as the name implies, a liquid form of latex rubber.
This type of mold material works by brushing it onto an object. You then build up the layers instead of being poured onto an object.
I always assumed a brush on type of mold would tear easily and not be durable. It needs to be durable enough to hold up to concrete castings, especially multiple castings.
While liquid latex rubber may not withstand 100’s of concrete castings, as it turns out, you can get many castings before it starts to wear down.
It does require adding a layer of gauze or cheesecloth to help support the soft mold material.
Latex rubber is probably your best bet for making concrete crafts if you want fine detail, and the object you want to replicate has gaps, grooves or ledges.

The mix you use also plays an important factor in obtaining fine details.
Your best bet for getting the best details to shows using the Cement All mix I have in the materials.
If you don’t have access to this particular mix, then I recommend Portland cement and sand at a ratio of 2:1 (Cement to Sand).
I was also a little concerned about price. If you’ve ever purchased silicone to make a mold, you know it can be pricey.
Liquid latex rubber is kind of a pricey material, but a little goes a long way.
A little material went a long way though. I did have enough material left that I could probably have made about 8-10 more molds.
If you’re interesting in learning how to make a large concrete silicone mold, then check out this tutorial.
And here’s where you can find your best options for buying pre-made silicone molds, and this article has concrete mold buying advice.
Some of the links on this page have been provided as a convenience for finding materials. These links may also be affiliate links. As an Amazon Associate I earn from qualifying purchases, at no extra cost to you.
I only recommend products I’ve used and loved, unless otherwise stated. Click here to read my full disclosure policy.
DIY Difficulty Level | Easy
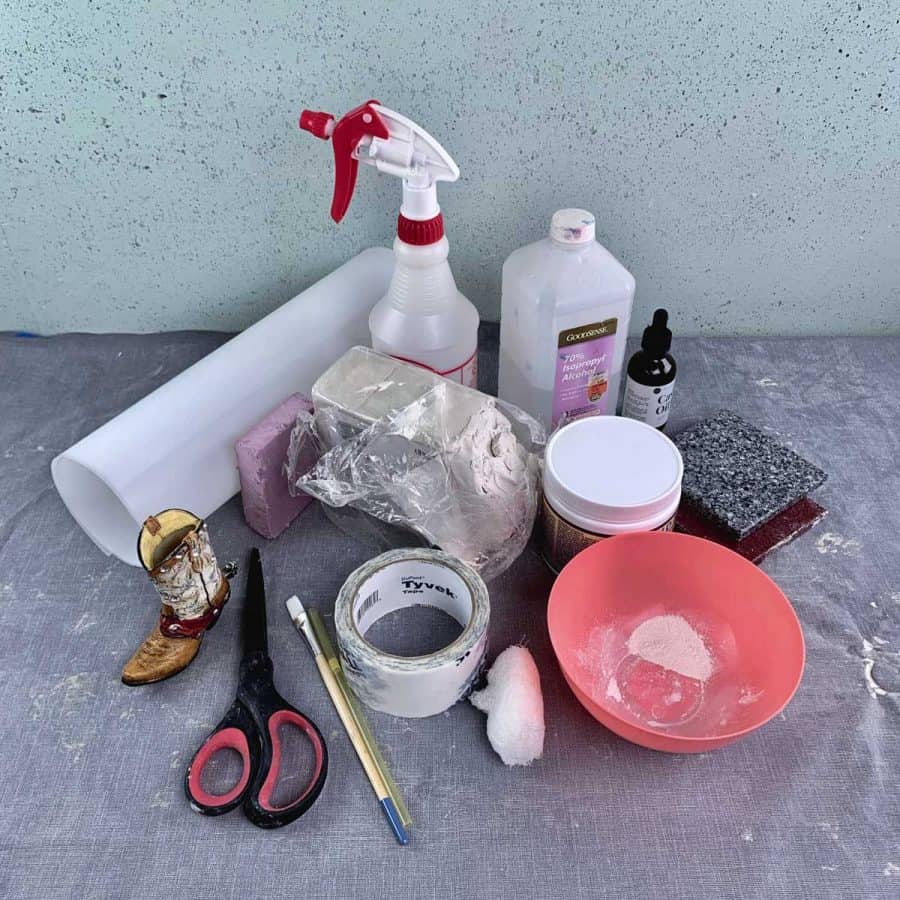
Materials For How To Make A Latex Concrete Mold For Making A Cowboy Boot Planter
- Rapid set cement
- Disposable bowl
- Disposable cup
- Durable nitrile gloves
- Safety glasses
- Safety mask– rated for silica dust
- Polyresin mini cowboy boot
- Latex rubber mold material (Hobby Lobby sells this pretty cheap, especially if you can find a coupon)
- Paint brush
- Talcum/baby powder
- Gauze or cheesecloth
- Plasticine clay
- Sand
- (2) Tiles approx 4×4 or other hard flat, non porous surface
- Castor oil (NOT Castrol Oil – this is for motors, Castor oil is clear)
- Rubbing alcohol
- Spray bottle
- Plastic shelf liner or acetate sheet (for the inner mold- both will work)
- Packing tape
- Drinking straw
- Scissors
- X-acto knife
- Permanent marker
- Acrylic paint (optional)

Part 1: Tutorial Steps For Making A Latex Concrete Mold From A Cowboy Boot For A Planter
I learned a few lessons since this was the first time working with this type of mold making material and I missed a couple of things.
This caused some minor issues that I was able to resolve, but I have adjusted the steps to avoid my mishaps.
*The YouTube video above shows the earlier steps in a slightly different order. I have changed the order of steps in this written part to make the process more efficient.
Before starting the tutorial, it may be helpful to read my article comparing the different concrete mixes and sealers– Cement & Concrete Crafts Tests!
Another important article is Making Cement Crafts Techniques & Tips with info on cement materials, mixture consistencies, demolding, safety and clean up!
Step 1. Prep The Cowboy Boot

You’ll need to remove the spur from the back. This is so you avoid running into a problem when demolding the latex rubber from finished cowboy boot mold.
You should be able to remove the spur using pliers to bend it away from the boot, and then it should snap off. Wear safety glasses for this in case it flies up toward you.
Note: I know it’s a little disheartening, but leaving it on will create an extreme undercut protrusion.
When you cast the concrete, the spur would be near impossible to demold and it could break off anyway.
You will have to work around the spur if you are determined to not remove it.
However, doing so will create a hole where the spur is and will need to be filled in with gauze and liquid rubber.
I had forgotten about removing the spur until it was too late.
This was unfortunate because I actually had another boot where it had dropped on the floor. When it fell, the spur broke off which I could have used instead.
You’ll see in the photos that the spur remained.
To see how I filled the spur hole, please watch the video at ))) asdf minutes.
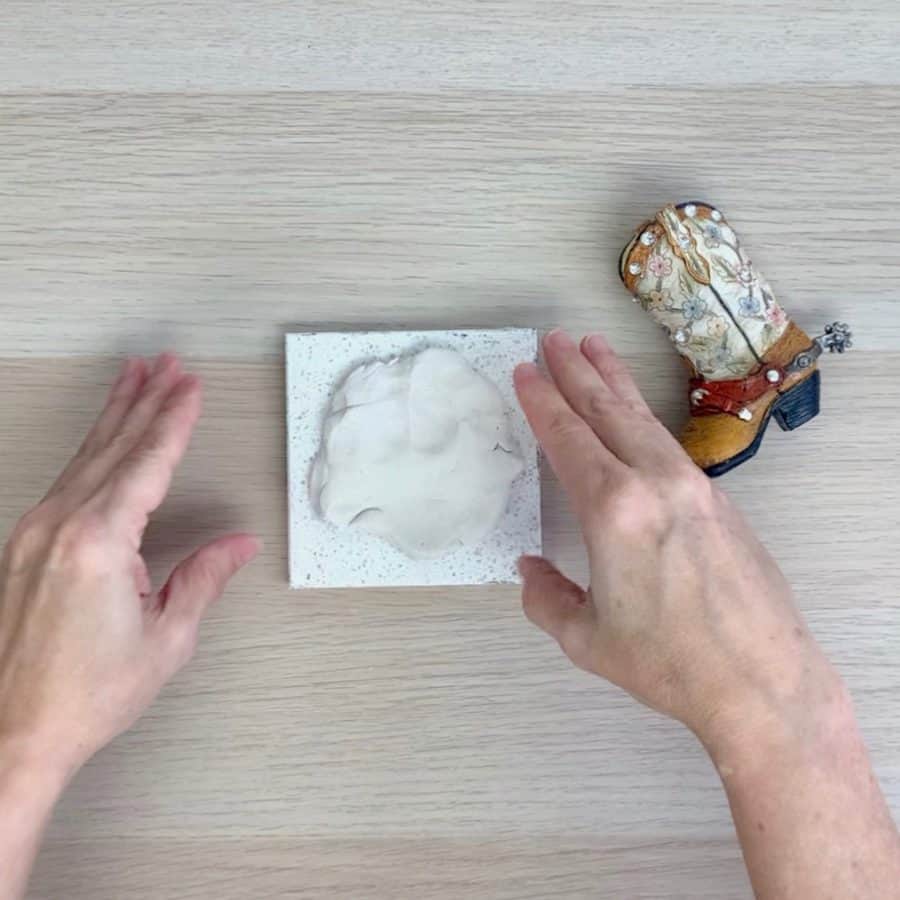
Next, roll a piece of clay into a ball and then press it into a patty shape to about ¼ thick.
Try to get the clay a little more even than mine shows in the photo and also just a little wider in diameter.

Now wash your hands before you insert the boot since there’s oil in the clay.
This may transfer to the boot which could cause problems getting the latex rubber to adhere to the boot in that area.
To insert the boot, just press the it onto the tile. This will help hold the boot in place while you are working on it but.
Make sure the boot is standing up straight. It should only be recessed into the clay enough that if you tip it upside down, it doesn’t fall off.
If you do find an area where the latex doesn’t want to adhere, don’t worry.
This can usually be remedied with further layers of rubber, but it’s easier if you just avoid it.
Step 2. Brush On The First Latex Concrete Mold Layer For The Boot

Dip the brush into the mold builder and brush a layer onto the cowboy boot.
Be sure to make the first two coats very thin to avoid creating air bubbles in the mold.
Your first two coats need to be thin, the rest of the layers will be thicker.
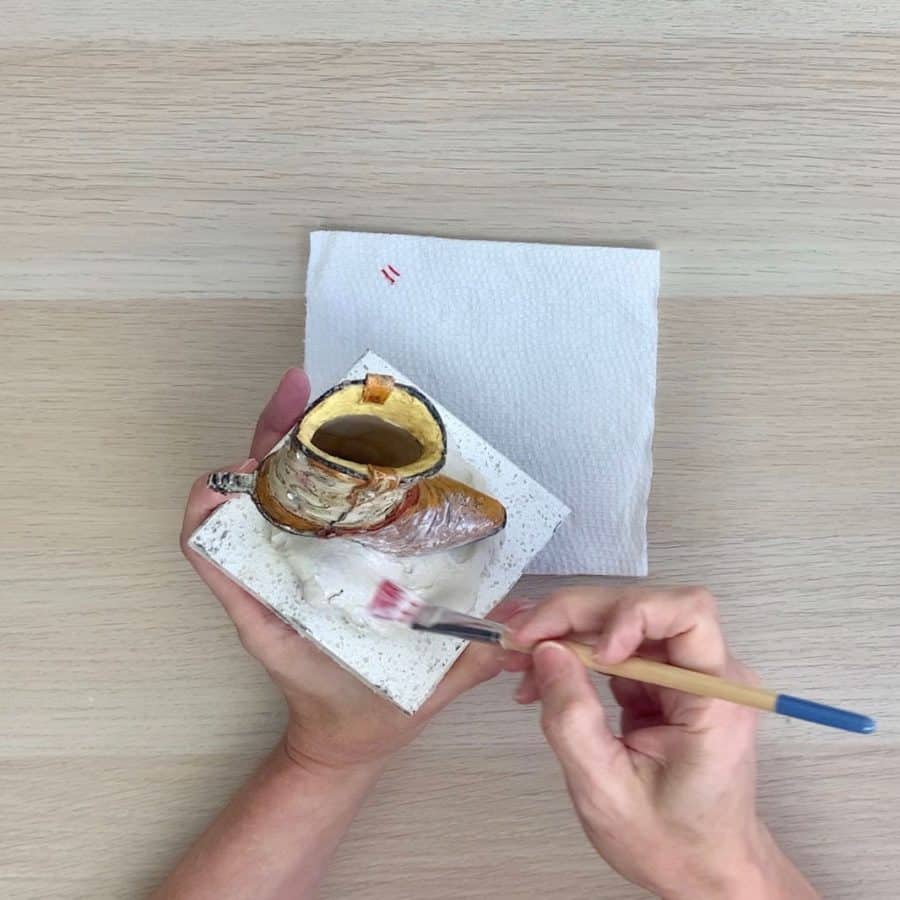
The clay also needs to be coated. Soalso brush the latex rubber onto the clay, as well as past the sides, to meet the tile.
Please note, the boot has lots of undercuts and openings. Take care to get the latex into all the nooks and crannies.
Try to prevent extra latex material from piling up in those areas for the first couple of coats. Do this by brushing any mounded up areas and thinning it out.
Another thing to try to avoid is re-brushing latex over the area that you have already brushed. Otherwise, this may end up lifting the rubber off.
If this does happen, leave it alone. You’ll be able to mend this on the next layer or two.

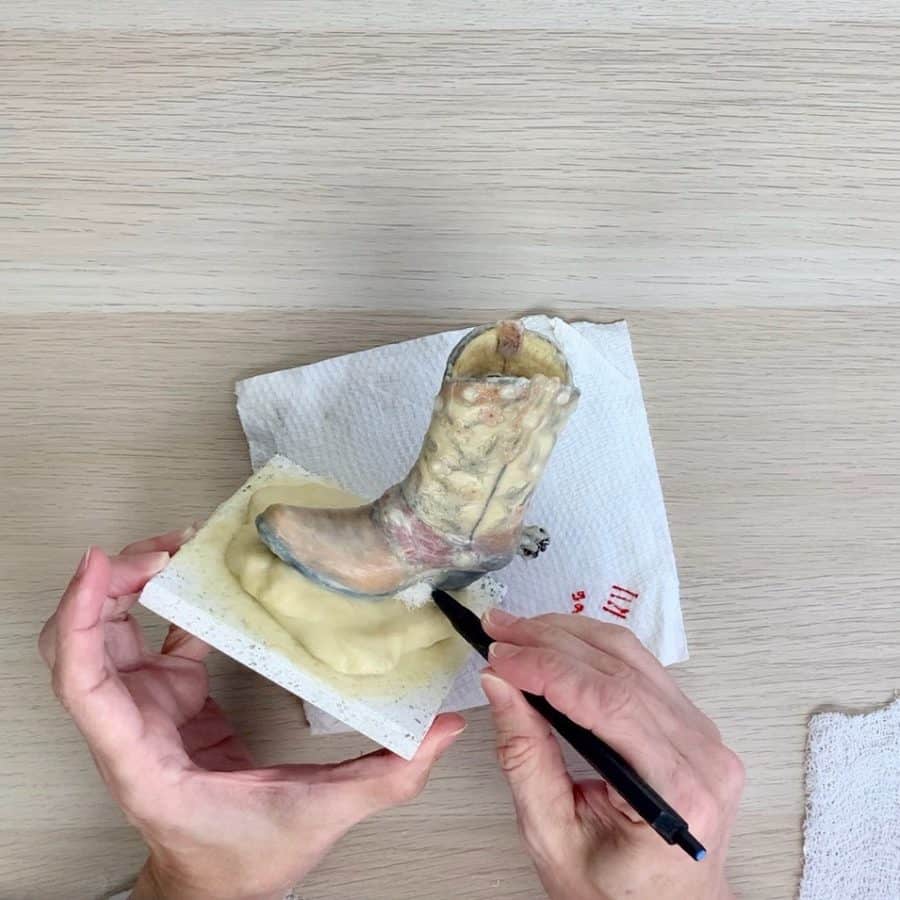
When you are brushing the inside lip where the pull straps attach, you only want to brush the builder onto the yellow part shown here.
You can’t really see it in the photo, but there’s a ledge where it stops (underneath) that meets the shaft of the boot.
Keeping this open will allow the concrete to fill into that spot, which is what we want.
If the latex does cover the underneath edge, it can be trimmed after the mold is done.
But you’ll save yourself the trouble if you don’t brush the material on past that.
Here’s a diagram of cowboy boot anatomy and terms.
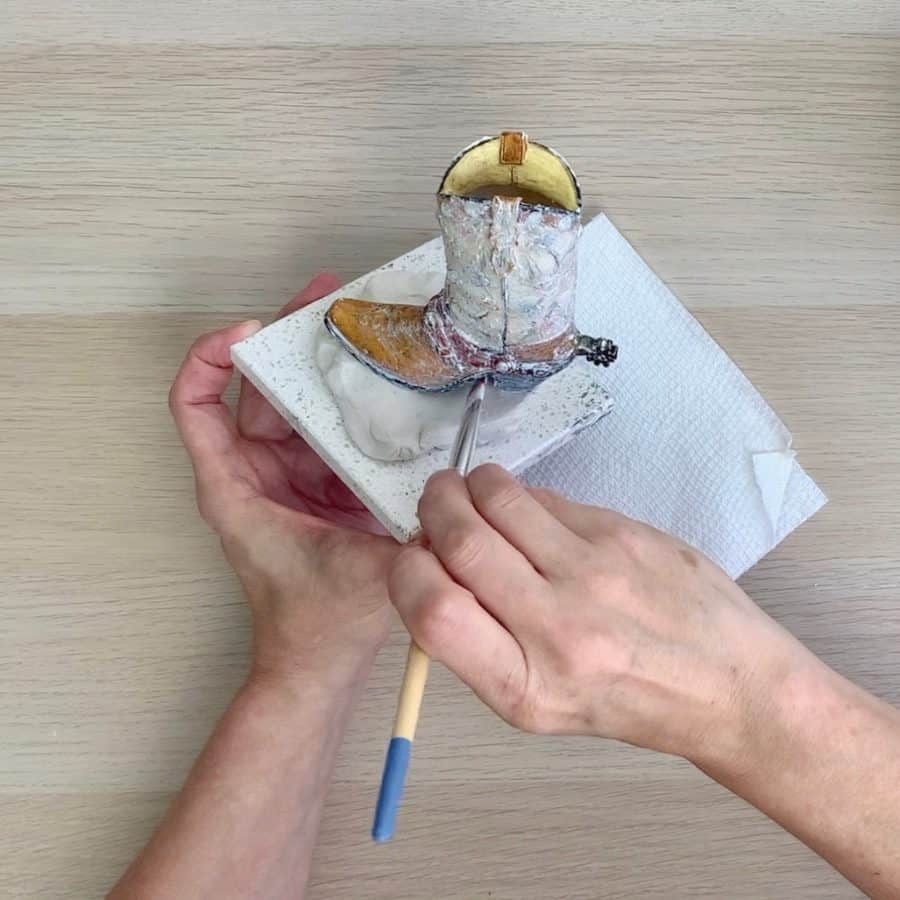
There is a gap between the heel of the boot and the sole of the future cowboy boot planter.
Go ahead and brush in between there. You may need to brush it from both sides to get it fully covered.
Also, brush the area underneath the toe.
Note: These first two layers are the most time consuming and require brushing the strokes carefully, this will start moving a little faster after these first two layers.
Let this layer dry completely, then move onto the second layer.
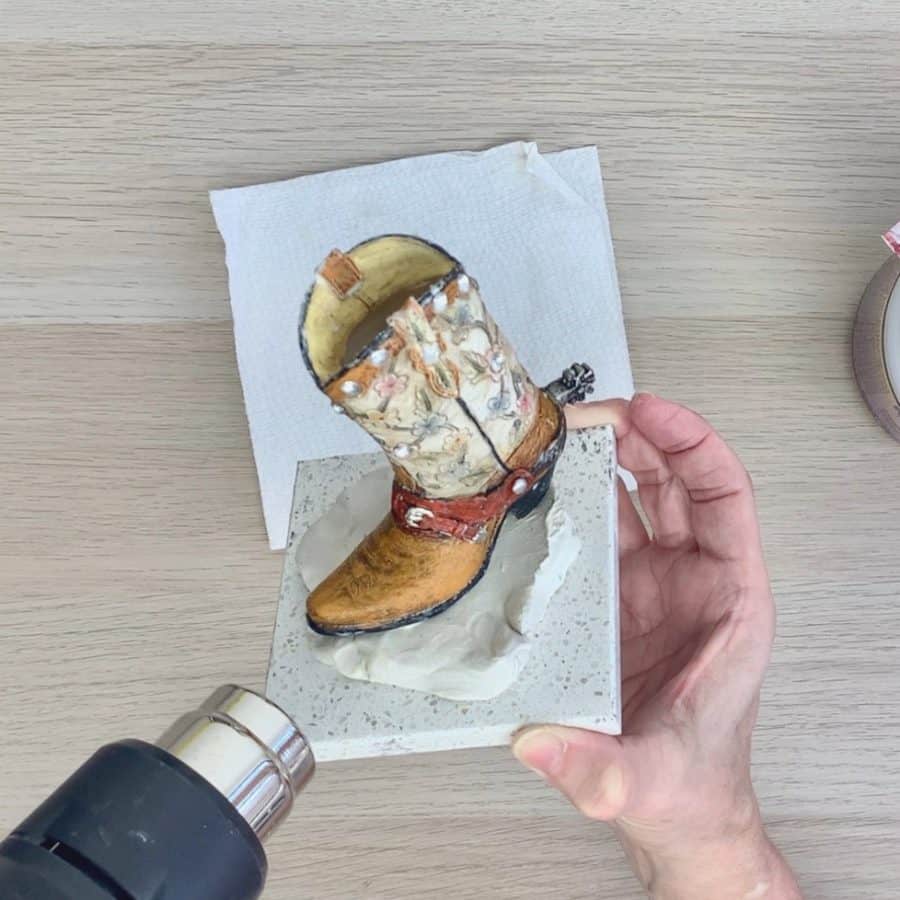
To speed up the drying time use a heat gun on low or medium and run it back and forth over the cowboy boot.
Don’t let it get too hot or the rubber latex may bubble and lift.
When drying the mold, just keep moving the heat gun back and forth. You will know the rubber mold is dry when it becomes translucent.
I spent about 10-15 minutes drying the first two layers before applying the third.
Alternatively, you can use a space heater to speed up drying times.
Use cold water to wash off the paintbrush between layers.
You can also use liquid soap with cold water if you need to. I found just the cold water alone to be enough.
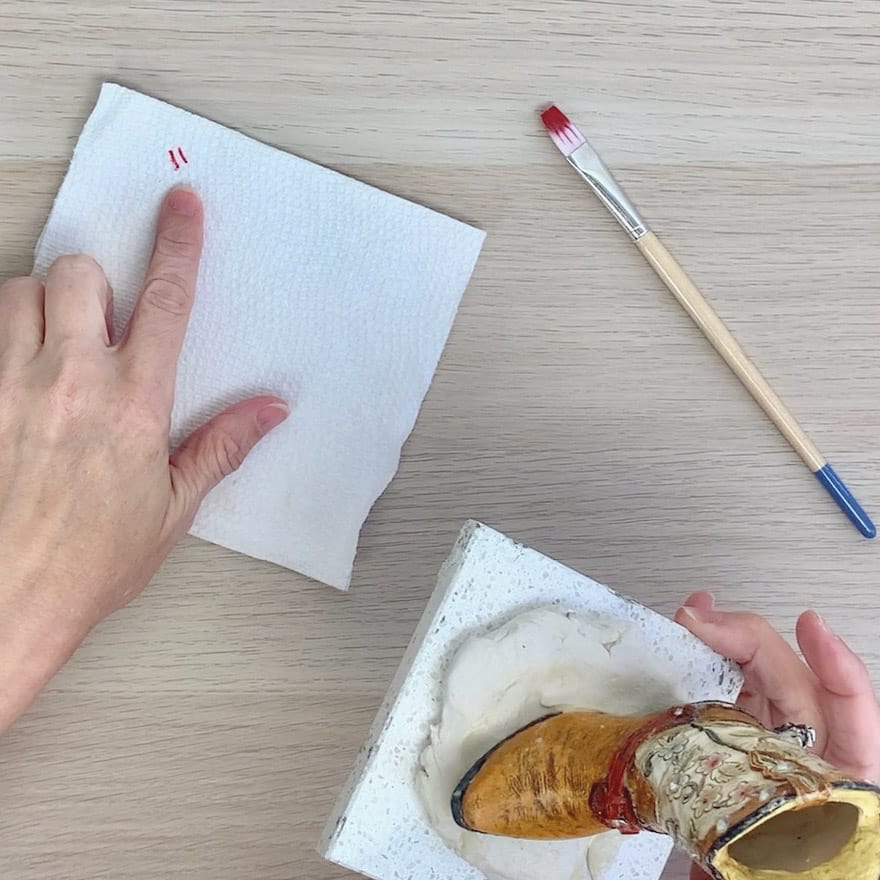
Keep track of how many layers you are adding, by making hatch marks to help count for each layer you add.
Step 3. Create The Form For The Insert Mold Piece
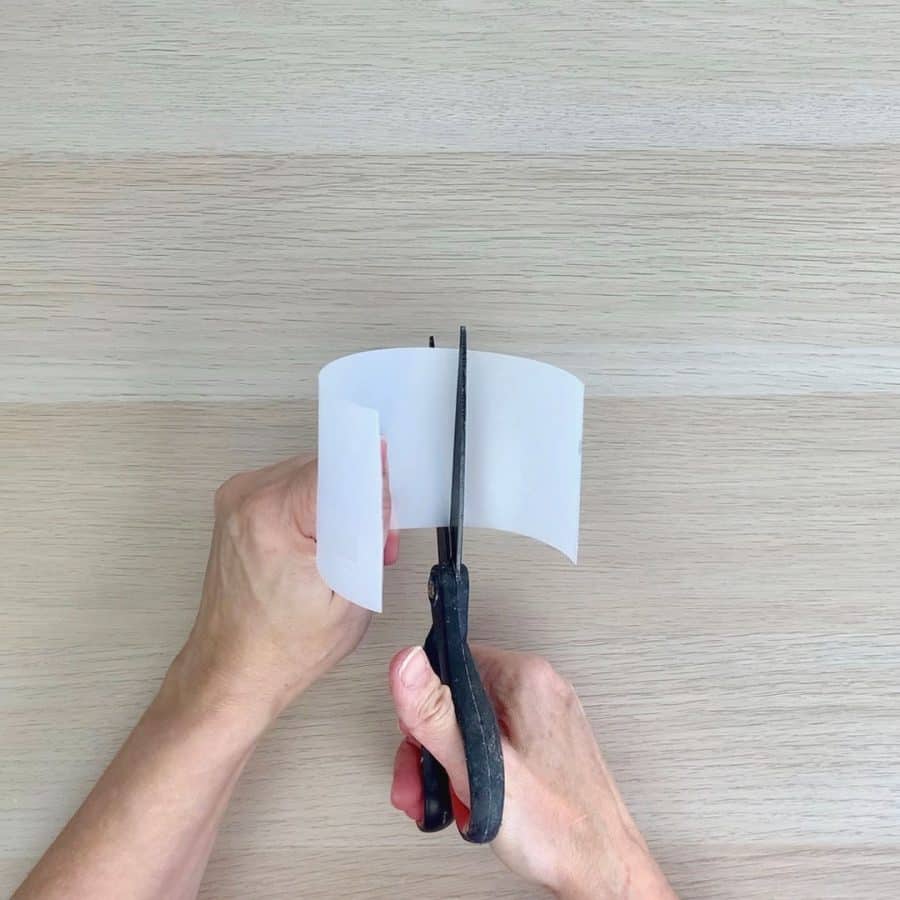
Take a piece of plastic shelf liner or an acetate sheet and cut it to 3 ⅛” by 3” wide and roll it into an oval shape with the 3 ⅛” as the height (length).
Make sure the width is less than ½” at its widest and the length is ⅞”.

If you have a different model of the cowboy boot, then just take care that you make the opening a fair amount narrower than the opening.
This is important because you will end up with a thicker insert. This is because you are building eight layers of latex and a piece of gauze to it.

Test that the liner/acetate insert fits with just a little bit of wiggle room.
Step 4. Build Up The Insert With Mold Material

First, set up the insert to prepare for building the mold.
Like you did with the cowboy boot, take a piece of clay and roll it into a ball shape and then press it down flat onto a tile. The clay should be about ¼” thick.
Then take the insert and press it into the clay and make sure it’s standing up straight.
For this, you can press the insert right down so that it’s fully submerged into the clay and touching the tile.
I have accounted for losing the ¼” of height of the insert in the dimensions I wrote in Step 3 for making the insert. So this will be the correct height to fit inside of the boot.
Next, add a small piece of gauze to the top of the insert.

Now follow the cowboy boot instructions for applying the mold builder layers to the insert.
For the top area closed by the gauze, just dab mold builder onto that. Brush it on and over the edge.
If it’s not fully covered on the first pass, it’s okay, it will be easier to cover on the following layers.
To save time, you should alternate the mold building between pieces to help with drying times.
So after brushing on the first layer onto the insert, use the heat gun to get it mostly dry. After it’s dry, set it aside and move onto building the next layer of the cowboy boot.
By the time you finish adding that layer to the boot and have dried it most of the way, the insert will be fully dry.
Then you can brush on its next layer and so on.
See the next step for adding the second layers.
Step 5. Apply The Second Layer Of Mold Material
Once the first layer is dry, apply the second layer just the same as you did the first.
After these first two thin layers, you can brush the rubber mold material on thicker for the rest of the layers.
If it helps, it seemed like each layer dried more quickly than the previous layer.
Continue brushing on layers of the liquid latex rubber and let each dry completely.
Remember to alternate with brushing on the layers for the boot insert.
Once you finish the 8th layer for both, move onto the next step to see how to apply the gauze layer.
Step 6. Apply Gauze To Fill The Boot Gaps
First, we need to fill in the gaps at the bottom of the boot, so cut a little piece of gauze and ball it up, and then press it into the gap into the foot arch between the heel and sole.
Since this gap is fairly big, it’s easier if you place a small piece of gauze on each side and then use something like a pen to make it easier to nudge the gauze inside.
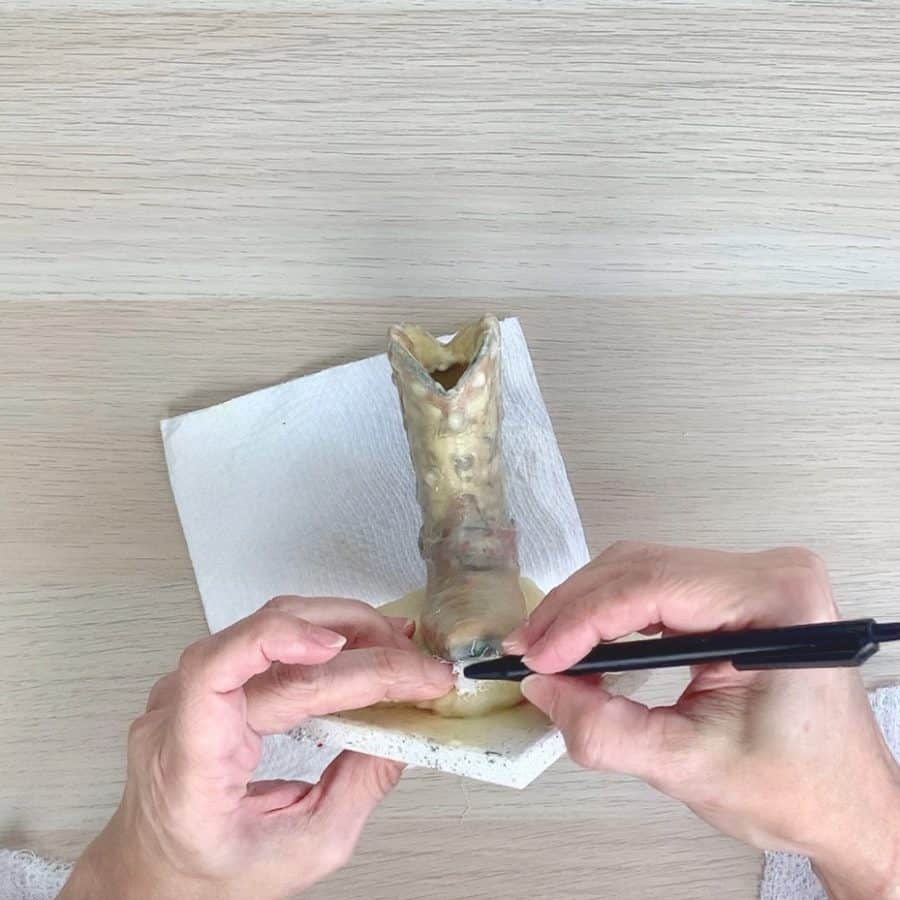
Also, add gauze where the toe tips up away from the base. The gauze placed in these locations will be important to help to prevent the mold from ripping.
The initial coats of rubber were needed to create the nice boot shape at the bottom. This is why we didn’t add the gauze to the gaps in the very beginning.
If we added it in the beginning you’d be left with a blocky boot foot.
Now that the gaps are filled, place a dab of the mold builder onto the gauze to act as glue to keep the gauze into place.
Step 7. Apply Gauze To Support The Cowboy Boot Mold

Cut the gauze into strips that will fit the boot and also cover the flange.
Note: I recommend cutting these as close to size as you can, rather than allowing too much overlapping. I ended up with some bumps on my finished concrete boot planter because I didn’t make it smooth enough.
The gauze will stick better if you dab a little bit of the mold builder onto each area just before you lay and position the gauze.

After the gauze is positioned, go ahead and brush the mold builder over the gauze and try to keep it as smooth as you can, taking care that the gauze is completely covered.
This gauze layer does use up a good amount of the liquid rubber material.
I found it’s a little easier to apply this if you use the brush to scoop up a chunk of it from the container, and then apply the chunk to one spot and smooth it out from there.
I placed it in front of a space heater on a low setting since this layer takes the longest to dry. This was easier than holding a heat gun.
It was also faster because even with the space heater, that layer probably took about 45 minutes before it was dry and ready for its final two coats.
If you utilize a space heater, then remember to rotate the boot a few times while drying.
While the concrete boot mold is drying, apply the gauze layer to the insert, following the same instructions for the boot.
Step 8. Brush On The Final Layers
Since this latex mold is for casting concrete, I recommend applying two layers on top of the gauze instead of one. For some materials, just one extra layer is enough.
Once the gauze layers are dry, brush on two more layers each to the cowboy boot and the insert.
These can be the same thickness as the layers you applied before the gauze.
Once these layers are dry, you will be done with building up the mold.
Step 9. Create A Drainage Hole For The Planter
Don’t forget whenever making a concrete planter mold to create a way for the planter to have a drainage hole. For this planter, we will use a straw.
Once the insert piece has the gauze layer, plus one additional layer and is dry, go ahead and insert a straw into this and gauze around one end of the insert.
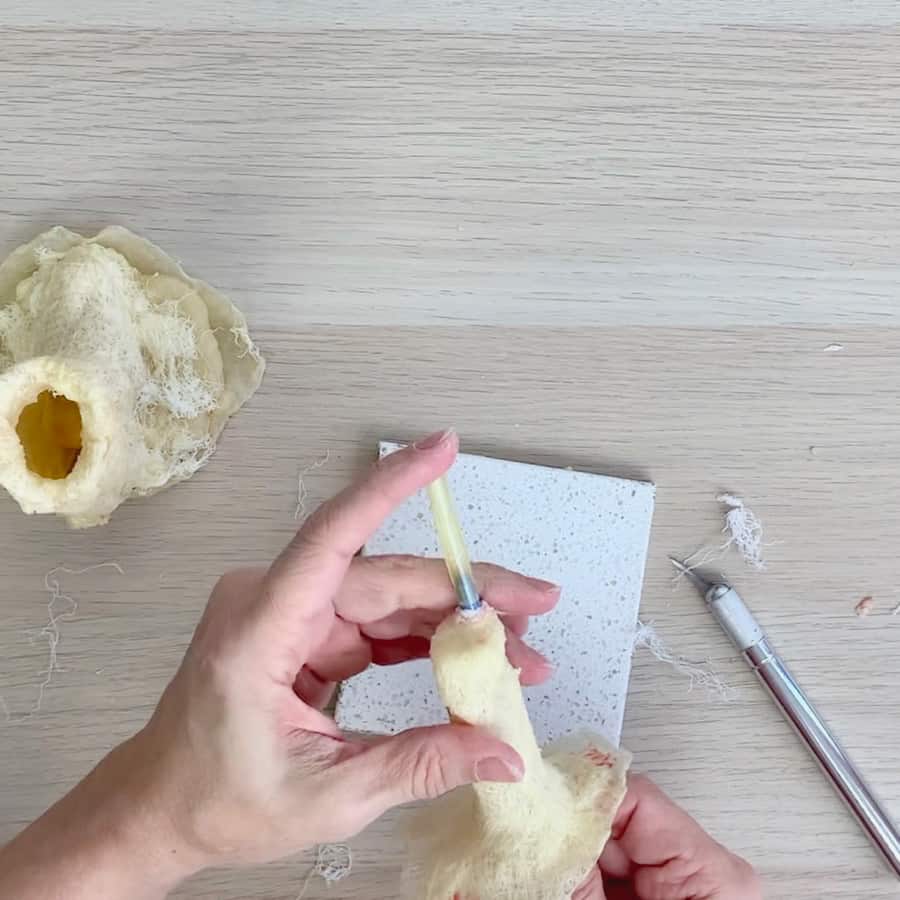
For creating the cowboy boot planter drainage hole, use an X-acto knife and cut a hole in the top of the insert by making an x-shaped or star-shaped cut through the top center.
This is where the drinking straw will be inserted. If your straw is a bendy straw, cut that part off.
You may struggle like I did to get the straw into the hole because the straw is too flexible and the gauze is in the way.
I used the end of a small paint brush to get it inserted, and then placed the straw over the end like a sleeve. This helped thread the straw through the hole.
I found it easier to press the paint brush-threaded straw up through the insert, from inside rather than down from the outside.
You can also try trimming away some of the gauze from inside. The gauze not covered with mold builder doesn’t need to remain there.
Once inserted, let the straw stick out a couple of inches and trim the excess if there is any.
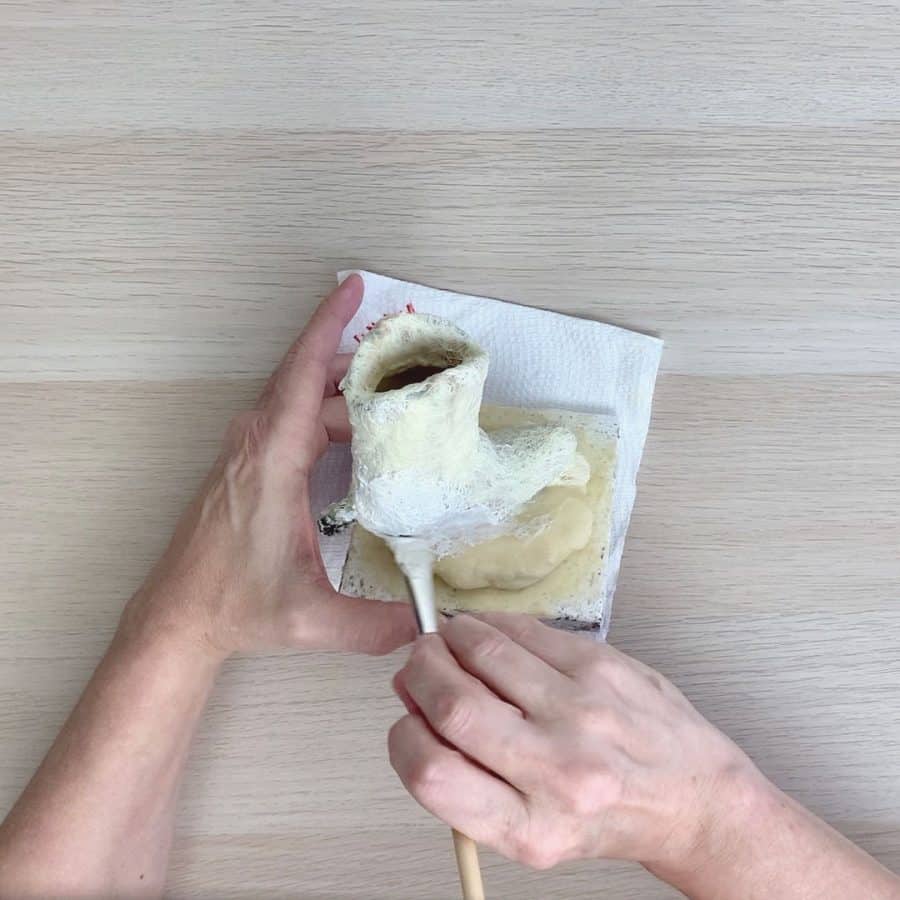
Step 10. Remove The Cowboy Boot From The Rubber
Once the cowboy boot is fully dry, you can remove the rubber.
Unfortunately, I didn’t get photos of this, but to get the mold off of the boot, carefully peel it by starting at the bottom.
Just use your fingernails to lift the flange area up and peel it back starting from the bottom and off of the heel or toe and then work your way up the boot.
The rubber is a pretty tight fit, so it might take a bit of elbow grease to get it off.
It took extra work for mine because I had accidentally left the spur on.

Once the insert mold is dry, remove the rubber. This should come off pretty easily.
Insert the inner mold into the top of the boot to make sure it fits.
I found that placing it in one direction (front to back) was a better fit than the other.
To check this, remove the insert and place it inside from the other direction (front to back) to see which direction provides the best fit.
The goal is to find which direction the insert fits without touching the sides or at least minimally.
* If the insert is touching the side in an area, take note of where that is and I’ll explain in the casting step how to help deal with this.
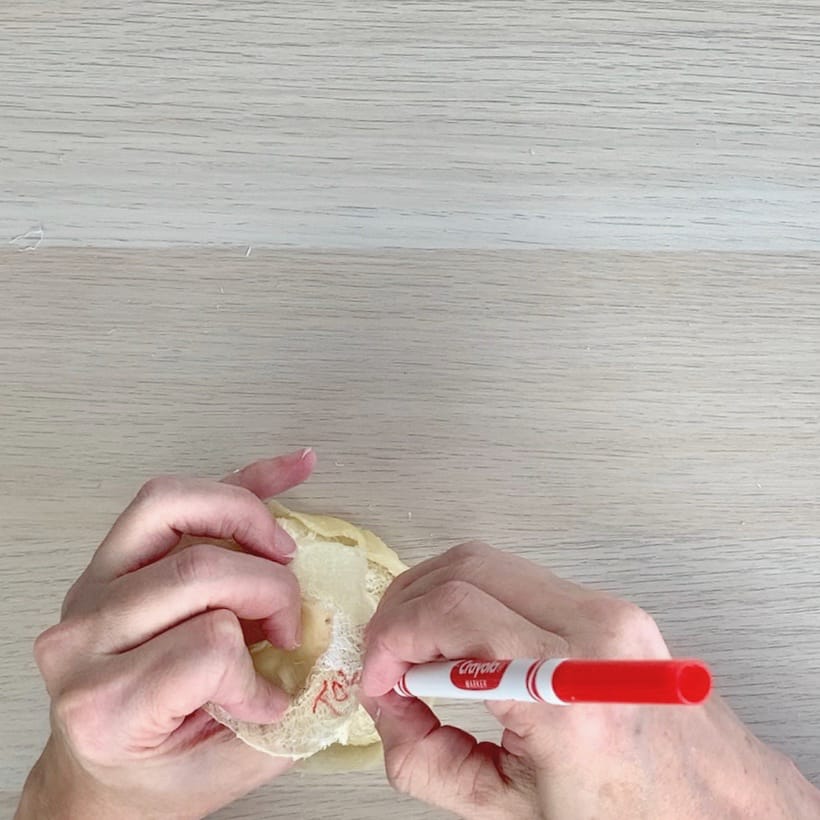
Once you know which direction fits best, take a permanent marker and mark on the bottom of the flange which end faces the heel and which faces the toe.
Part II: Making A Cowboy Boot Planter From The DIY Latex Concrete Mold
Step 11. Make The Homemade Mold Release

Take the empty spray bottle and pour two caps full of castor oil into the bottle.

Then pour eight caps full of rubbing alcohol and shake this for a good minute.
Now spray the inside and outside of the boot mold, as well as the outside of the insert.
The reason for spraying the outside of the boot is because this can get messy and this will help prevent cement from sticking to the outside, making demolding more difficult.
Step 12. Mix The Concrete And Cast The Cowboy Boot Concrete Mold

Mix the cement to a thick milkshake consistency.
Ideally, the consistency would be thinner for this tight and tiny mold, but since we have such thin walls, going too thin on the mix will cause it to crack.

To cast the latex concrete mold, fill the boot from the foot and use your fingers to pull the rubber away from the top of the boot opening so that cement can get inside the lip.
When the boot is full of cement, take the insert and insert it into the top opening and facing the direction you marked.
If your insert touched the side in Step 10 when you checked for fit, it’s here that you just want to make sure you fill this space with cement.
Take care that there is a minimum of ⅛” of cement that gets into the spot where the molds touch. I had to squeeze the boot a bit to get this to work.
Make sure when inserting this that you hold onto the straw so it doesn’t come out and that it protrudes from the bottom.
You may need to angle the straw so that it’s not in the way of the rubber flap that’s at the arch of the foot.
Double check that the insert fits straight and is aligned properly.
If the boot looks slouchy, then place an object at the toe to hold it up.
I placed a piece of foam board that was the correct height to keep the boot supported.
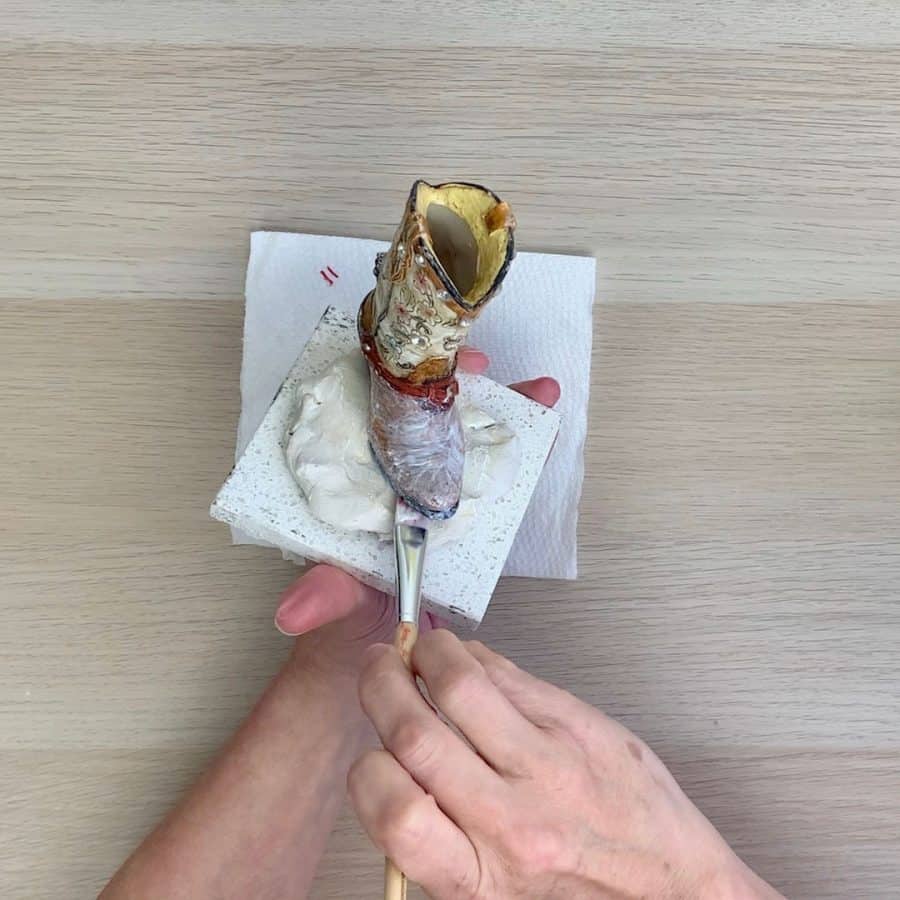
If cement spills onto the outside of the boot, try to wipe it down with a wet paper towel.
Step 13. Demold The Concrete Cowboy Boot Planter
Let the cowboy boot cure for 1-2 hours and then you can demold. Note: Don’t let this cure in the sun. The sun will break down the latex concrete mold and it will stick together.

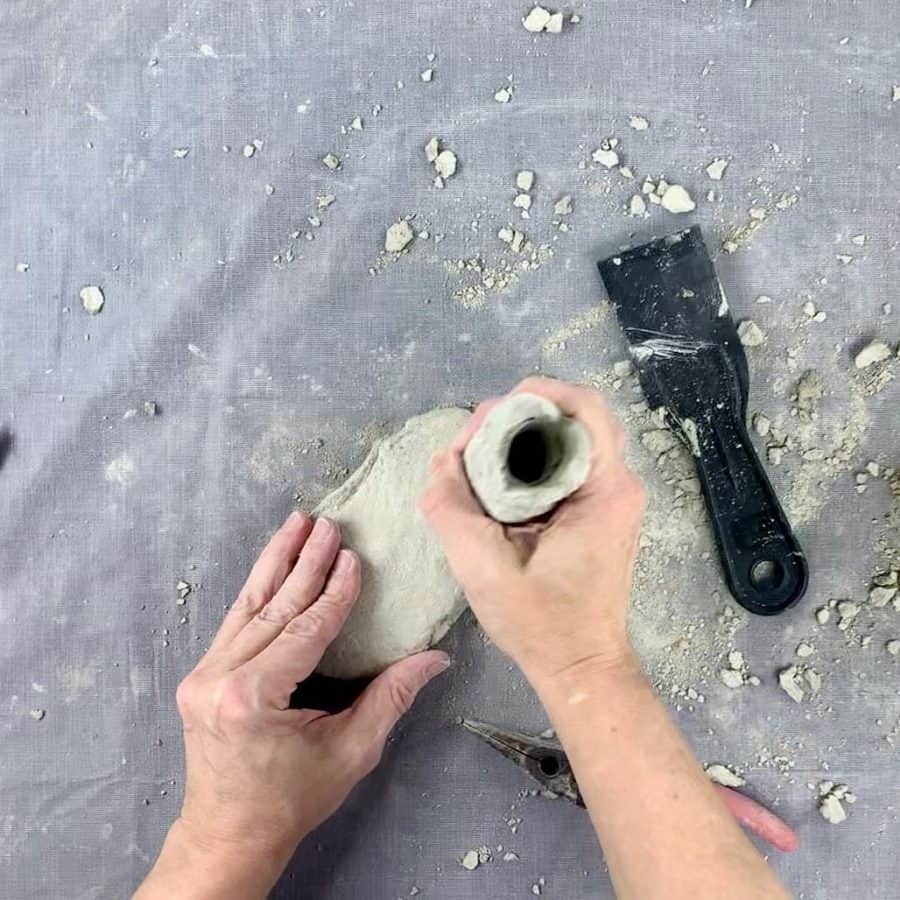
Once the concrete boot has cured, you can remove it from the mold.
Just pull out the insert and then flip the cowboy boot over and carefully peel the rubber back from the toe area and then from the bottom of the boot.

Keep working your way up the boot. Also, check the top of the boot to make sure cement isn’t sticking to the outside and if it is, then scrape it off.
I had to use the edge of the pliers to knock some of the cement off, I also used the pliers to squeeze some of the cement off by basically chipping away at it.
Step 14. Sand The Concrete Cowboy Boot Planter And Clean The Mold
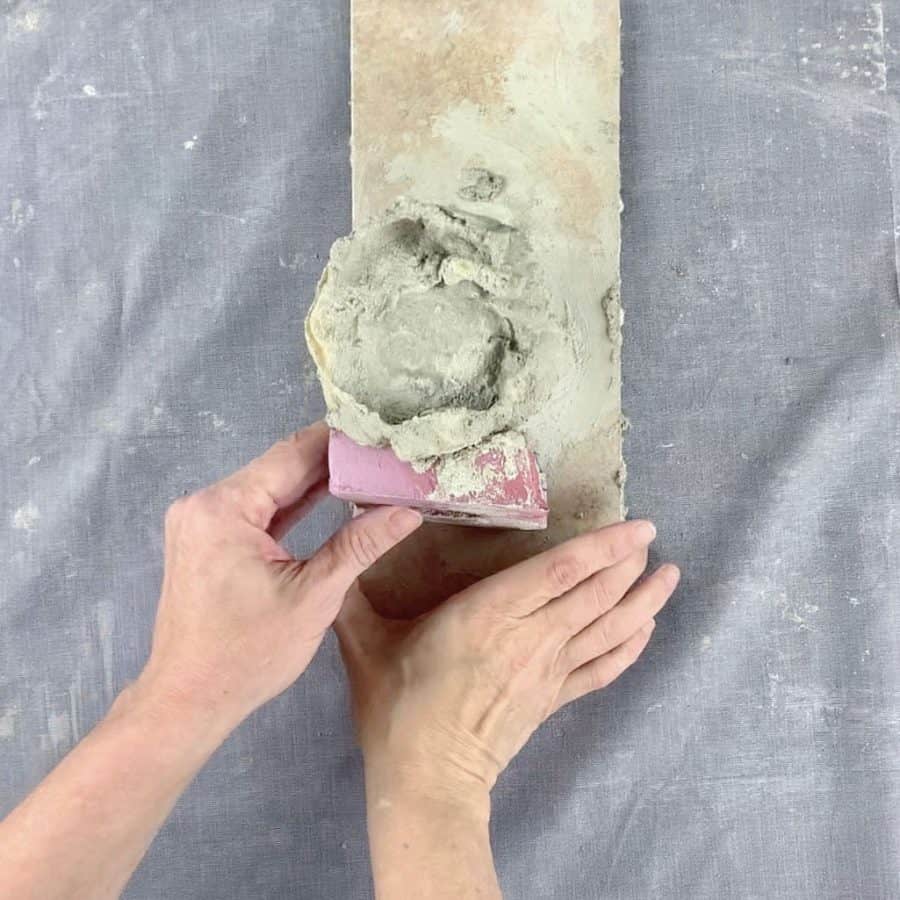
Sand the bottom of the boot if needed with either a cement sanding block or a 60 grit diamond sanding sponge.
To care for your latex concrete mold so you can reuse it, wash it with cold soapy water and then let it dry.
Once it’s dry, brush on a little bit of talcum powder both inside and out. This will keep the mold from sticking to itself while being stored.
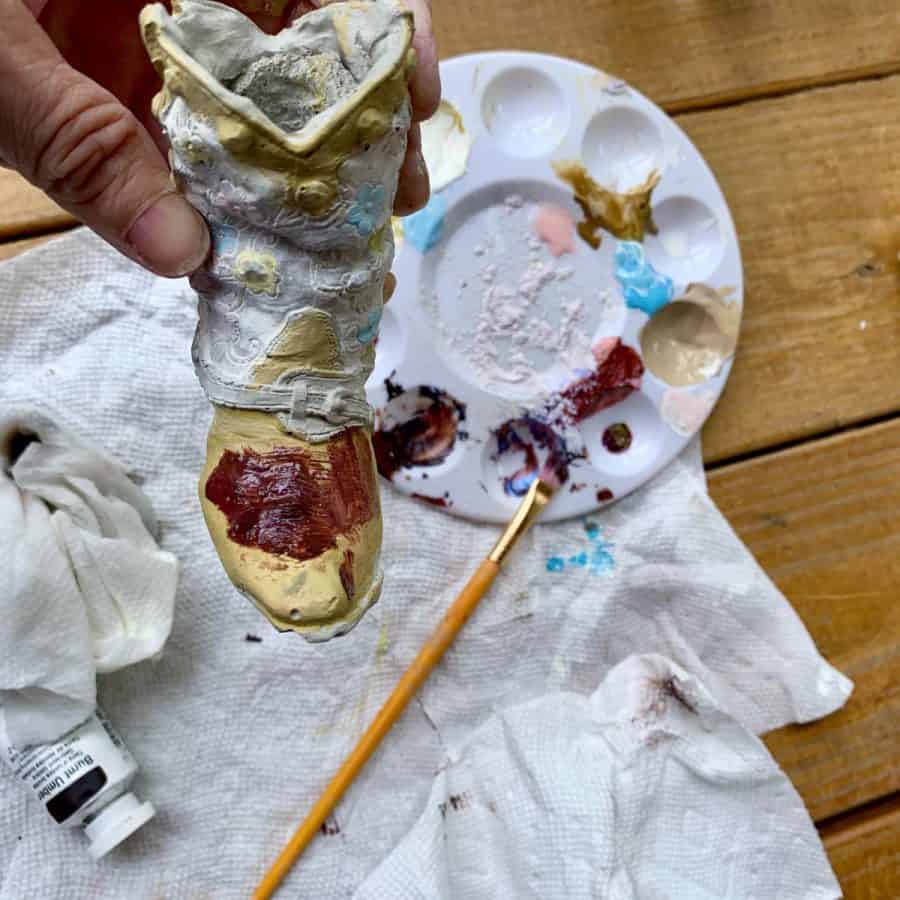
Step 15. Paint the Concrete The Cowboy Boot Planter
Painted Brown Boot Option

To paint the brown version, just use a little bit of black paint and water it down to a very light grey and brush it on.
In the photo, I went darker than I would have liked and so I needed to use a wet paper towel to pull some of the black off.
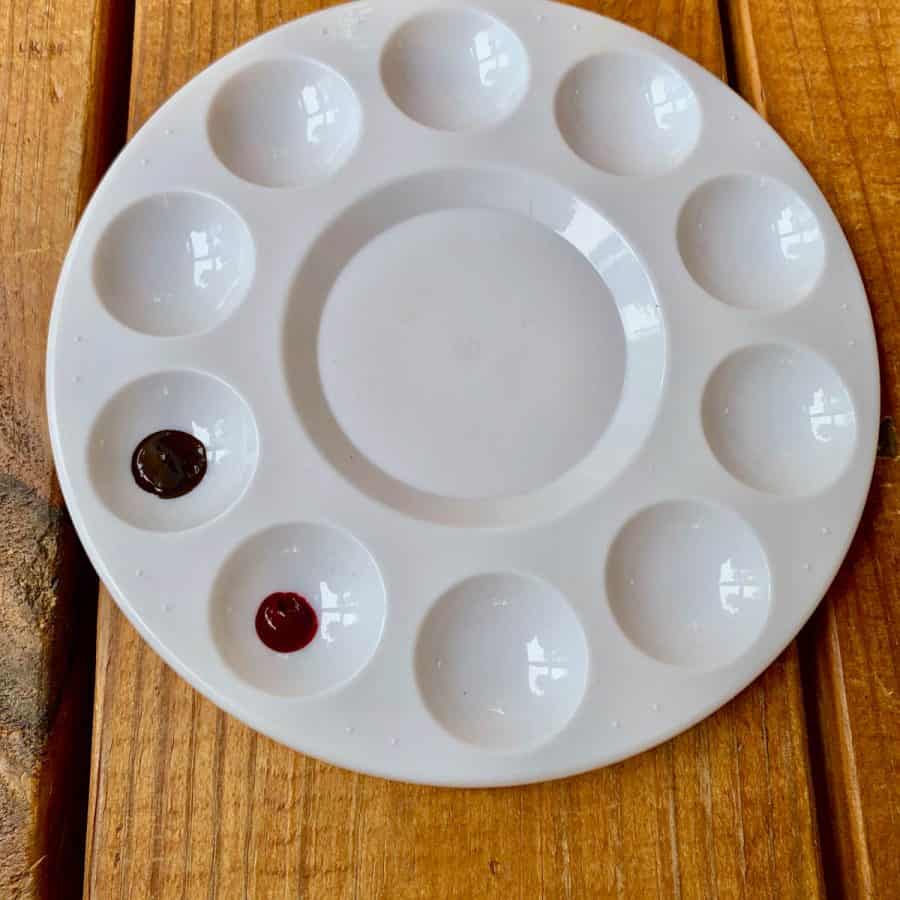
Next, use a little bit of red and brown to get a reddish brown color. I used only a teeny, tiny bit of the red paint shown in the photo. I also watered this down slightly.

Now mix a little more red with the brown (undiluted) to do the ankle strap and pull straps. And finally, when these are dry, paint the metal parts and the gems gold.
Painted Pearl Boot Option
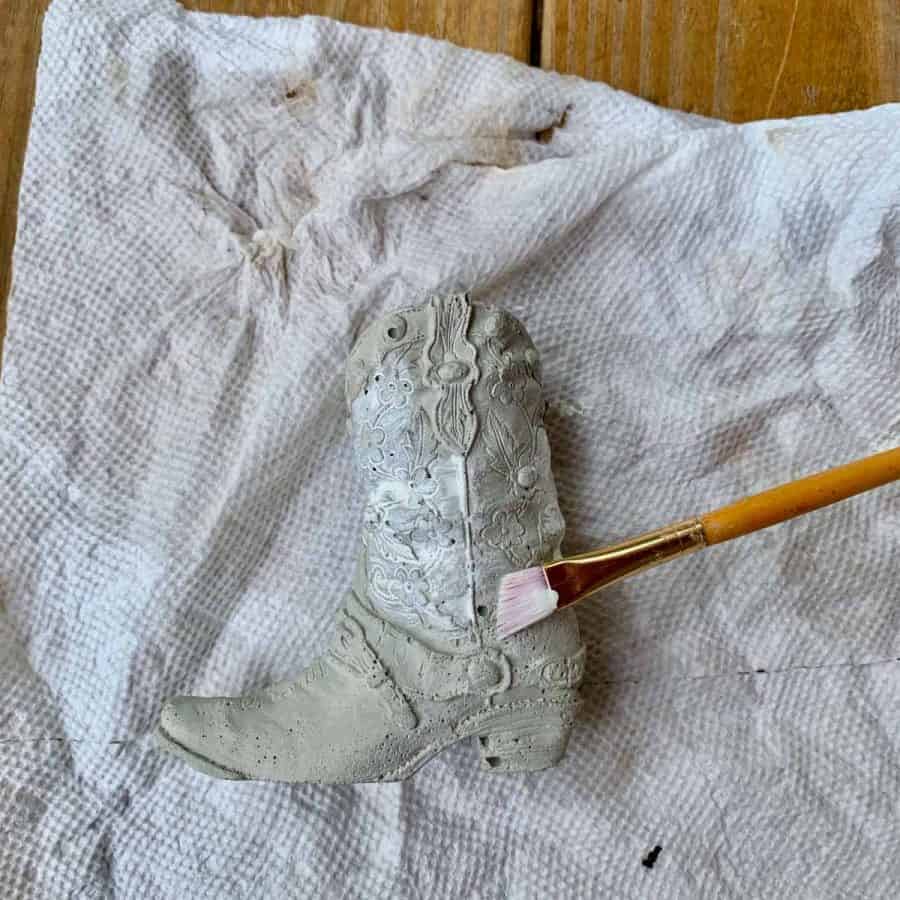
To paint your concrete cowboy boot the pearl and tan colors, first start with the shaft. I painted it a cream color by mixing a tiny bit of yellow with white and diluting it with water.
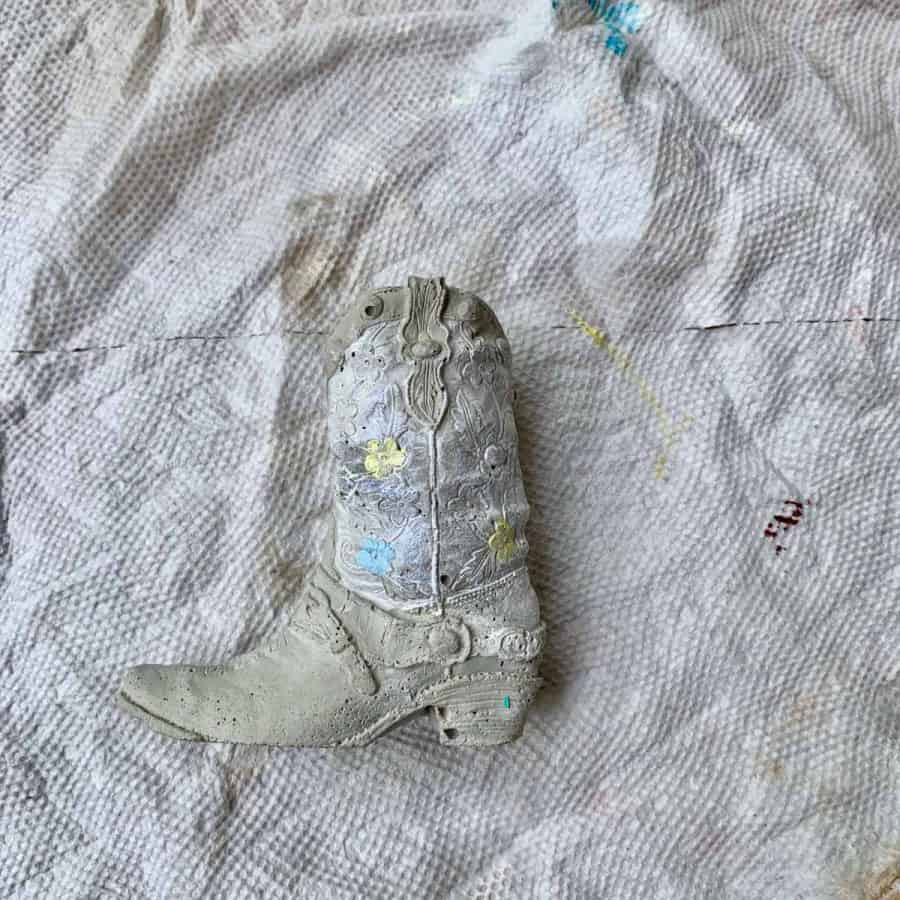
Then paint the flowers and stems. Be sure to let each dry before moving on to the next area or you’ll just end up smearing the colors onto other parts.
For the foot of the boot and the upper shaft, I had a hard time mixing the right color and realized that layering the colors was the way to go.
First I created a tan/maize yellow color by mixing yellow, brown, white and possibly a very small amount of red- I can’t recall now.
You can see the color in the paint tray in the photo above. It’s the color on the right.
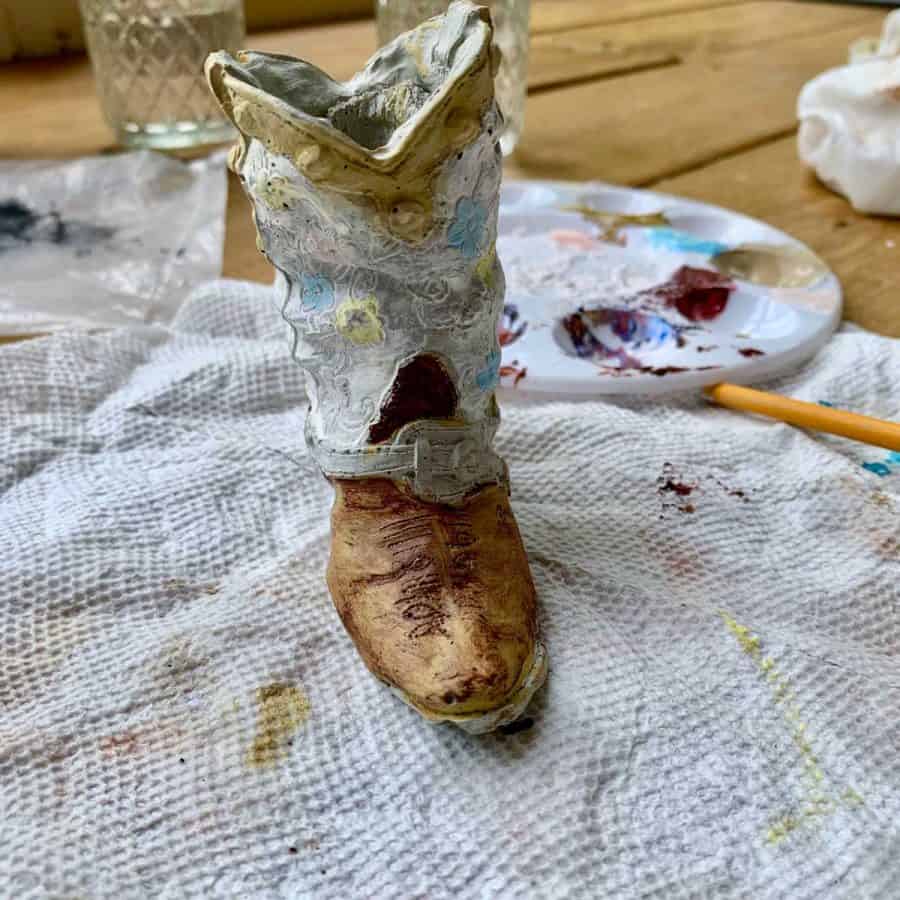
Then I let that dry completely and mixed red and brown together. I brushed that on and used a dry paper towel to wipe it off.
This allowed a layer of the color to remain and it highlighted the detailed lines of the top of the boot. It came out nearly the same color as the original boot.
One thing I should have done but didn’t realize until after I took the final photos was I should have gone over the shaft area with a diluted version of the tan maize to give it a vintage look.
I had misplaced my original and didn’t notice the shaft had that look too. It will also help pull more details through. Just besure the shaft is completely dry.
I would do this now at this step, after the boot and upper shaft are painted.
And last, paint the metal in silver and the gems also in silver.
For other unique concrete planters you can make, take a look at the tutorials for cement egg planters and DIY cement balloon planter.
Don’t forget to Pin it for later!


DIY Latex Concrete Mold For A Cowboy Boot Planter
How to make a latex concrete mold so that you can cast a DIY cowboy boot planter and make multiple copies.
Materials
- Cement, rapid set
- Cowboy boot mini figurine
- Liquid latex mold material
Tools
- Please see the full materials list above the tutorial for details and links.
Instructions
- Prep The Cowboy Boot For Starting The Latex Concrete Mold Process
- Brush On The First Latex Layer Onto The Mini Cowboy Boot
- Create The Form For The Piece That Will Be The Inner Mold Creating A Planting Cavity
- Build Up The Insert With Liquid Latex Mold Material
- Apply The Second, Thin Layer Of Mold Material Onto The Boot
- Apply Gauze To Fill The Boot Gaps To Avoid Creating Undercuts In The Mold
- Apply Gauze As A Layer To Strengthen The Cowboy Boot Mold
- Brush On The Final Layers After The Gauze Is Applied
- Create A Drainage Hole For The Planter Using A Straw
- Remove The Cowboy Boot From The Rubber Mold
- Make The Homemade Mold Release Which Won't Harm The Rubber Material
- Mix The Concrete To A Thick Shake Consistency And Cast The Cowboy Boot Concrete Mold
- Demold The Concrete Cowboy Boot Planter From The Latex Rubber Mold
- Sand The Concrete Cowboy Boot Planter And Clean Up The Mold
- Optional: Paint The Concrete Boot With Acrylic Paints

SO cool! Enjoy your vacation time!
Will this technique work for a plastic/vinyl doll head to make a planter?
If not how would you recommend making a cement planter out of a doll head?
Thanks for any help!
Hi,
I had considered doing this project a while back and was just going to use the doll’s head straight up as the mold. That would require using a utility knife to cut open the head of the doll after the concrete has cured. This would be easy to do. But if you are trying to salvage the head, then yes, the latex mold material is your best option. Otherwise, just skip it and directly pour the mix into the head.
Thank you! I appreciate the info. I’m going to try the latex mold method. Fingers crossed!