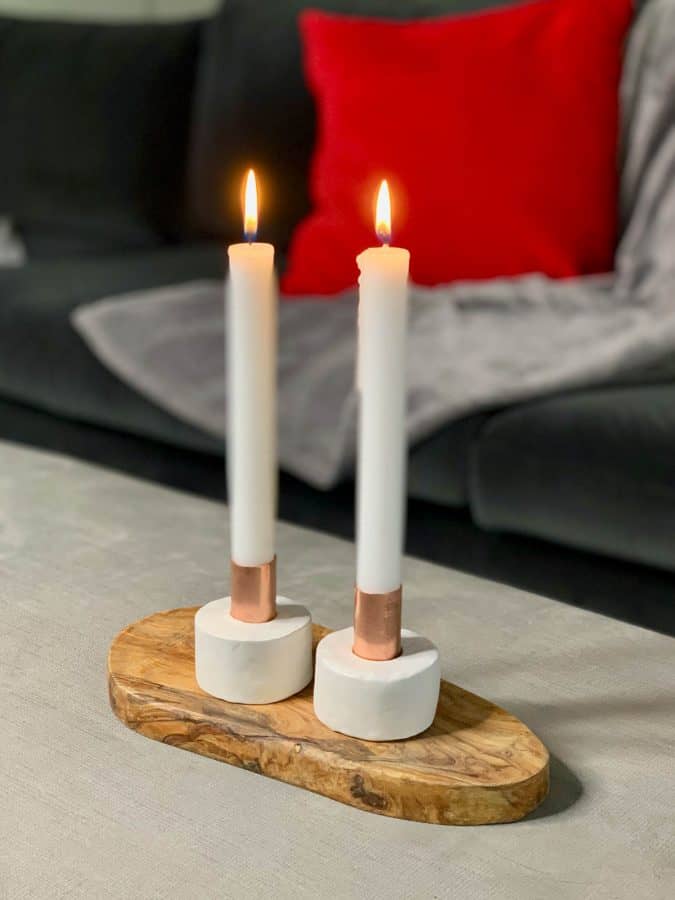
DIY Clay Candlestick Holders (Fun Tutorial)
Make your own DIY air dry clay candlestick holders with this detailed, step by step tutorial.
Candles are a great way to add a little ambiance and light to any room, but why buy this home decor from a store?
They’re fun, easy and make nice gifts that are handmade for the upcoming holidays!
Each time I make a new air dry clay project, I pick up a new trick. This time it was for using artist sponges for removing blemishes and smoothing seams.
Too bad, I didn’t figure that one out until toward the end of the second candlestick holder. More about this in the Materials Notes and tutorial steps below.
My first time making an air dry clay candle holder was this clay tealight holder with a pressed leaf imprint.
It was quite similar in how it was made, I basically applied the same techniques here.
For other air-dry clay projects, here are 55 ideas for making things with air dry clay, including this round clay planter, Christmas plant pot and nature imprint ornaments.
Some of the links on this page have been provided as a convenience for finding materials. These links may also be affiliate links. As an Amazon Associate I earn from qualifying purchases, at no extra cost to you.
I only recommend products I’ve used and loved, unless otherwise stated. Click here to read my full disclosure policy.
DIY DIFFICULTY LEVEL | Easy
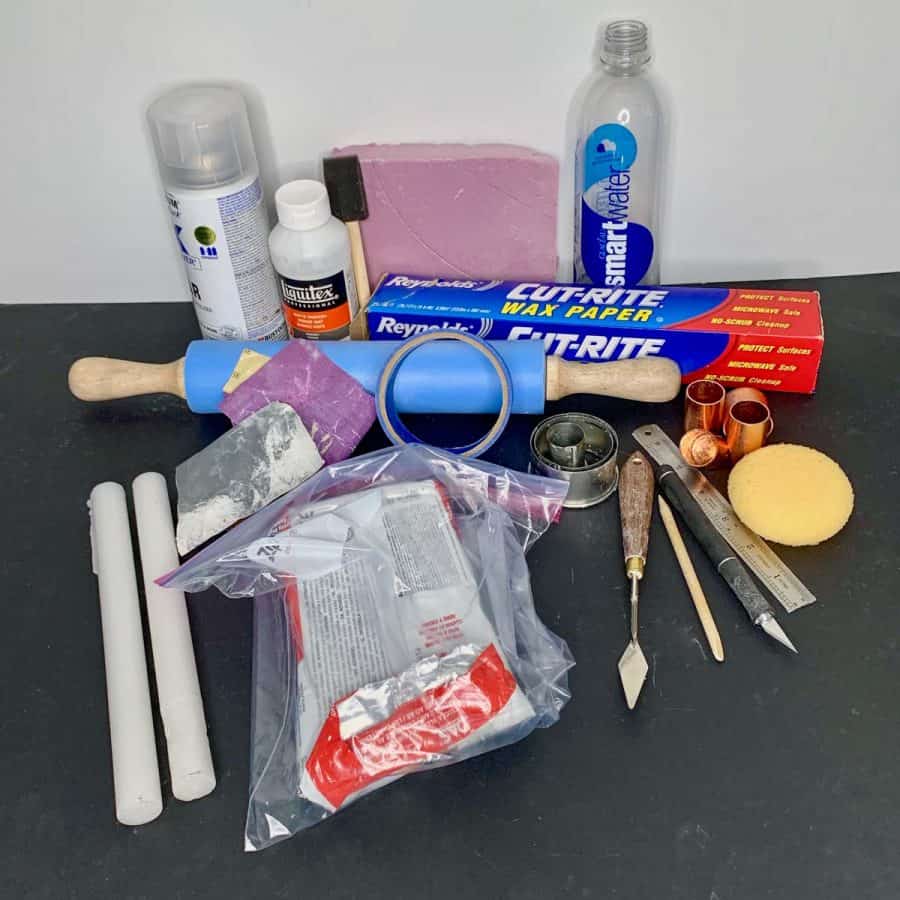
Materials For Making DIY Clay Candlestick Holders
- Air dry clay
- (2) copper tube cap fittings ¾”
- (2) copper stop couplings x ¾”
- Small bowl
- Wax paper
- Blue tape
- Clay roller or rolling pin
- Ruler
- Round cookie cutter set*
- Flexible palette knife
- Misc. wooden tools for clay, like –extended thumb joining tool*
- Craft knife
- Straight edge
- Artist sponges*
- Foam insulation board– scrap pieces
- Sandpaper- #150 grit
- Wet/dry sandpaper- #320 grit
- Foam brush
- Varnish
- Top coat acrylic spray
- Smartwater plastic bottle -20oz – recommended
Materials Notes :
Many of the items for these DIY clay candle holders can be found at any craft store, but I have linked to Amazon for most so you can see what I used.
You also can use everyday simple items in place of some of these- like a plastic knife and any pointed tool, but my two absolute favorite ‘must have’ actual clay tools are the wood thumb joining tool and flexible palette knife.
I used these for almost every step of this project, as well as for most of the other air hardening clay tutorials I have.
Artist sponges: Before using the sponges I was spending a lot of my time smoothing seams and stray marks with my finger, just to create more in the process.
The sponges very quickly smoothed the blemishes, much better than my finger.
Copper end cap and fitting: The reason for these, other than decorative, is because when the candle burns down to the end of the wick, the base of the candle will be hot and there will be oily waxy residue.
Because of this, you need something to contain it so it doesn’t get on the air dry clay. The copper metal will act as the actual holder, much like a tea light holder or votive candle holder.
Cookie cutter set: You will really need these. You can cut your own circles by hand, but these already come in the sizes needed.
If you don’t use these, you will need a bottle or can that is 2” in diameter for wrapping the clay around to create the candle holder collar.
Smartwater bottle: this is used to act as an outer mold. The Smartwater bottles that are 20oz are the right size diameter and they are straight so work perfectly for this purpose.
You can skip using this, but it’s not recommended
I went back and forth between using a bottle, cookie cutter and this plastic bottle collar made from the Smartwater bottle to help keep the shape of my candlestick holder ring.
The instructions are below, before Step 1.
Steps For Making A Straight Cut Around A Plastic Bottle
I tried to make this a simple project, but often, simple doesn’t equate to a nice well-crafted piece, at least not when I’m making it. :0}
So you can try this without the plastic bottle, but it is so much easier if you use the bottle to help hold the clay ring/collar to act as an outer mold. It’s one extra step upfront but will save time and frustration further along.
Here are the steps to cutting the bottle and getting a straight edge. It’s important that at least one edge is straight if you want the air dry clay candlestick holder to stand straight.
If you follow my concrete tutorials, then you may already have one of these made so you’re in luck, just use that as the straightedge to make the straight cut.
Materials:
- Aluminum flashing- minimum 14” long
- Utility knife with fresh razor blade
- Blue tape

- Take a piece of aluminum flashing and use a utility knife to trim it to 14” x 2”.
Be sure to use a straight edge when cutting and be sure to cut the long way so that the factory cut edge is the 14” piece. One side of the 14” is what you cut, the other is how it came from the store.
- Now take a piece of blue tape and tape the bottom half of the aluminum, but place it along the edge that you cut.
- Next, mark a line in 3 locations around the plastic bottle. These should be at least an inch up from the bottom of the bottle. You just want to make sure you are at the straight part of the bottle and not where it bevels.

- Now line up the aluminum straight edge with those marks and wrap this around the bottle. Take care that it is securely taped in place.
Next, use a utility knife with a fresh blade and cut around the bottle. Keep the blade parallel to the edge of the bottle when cutting.
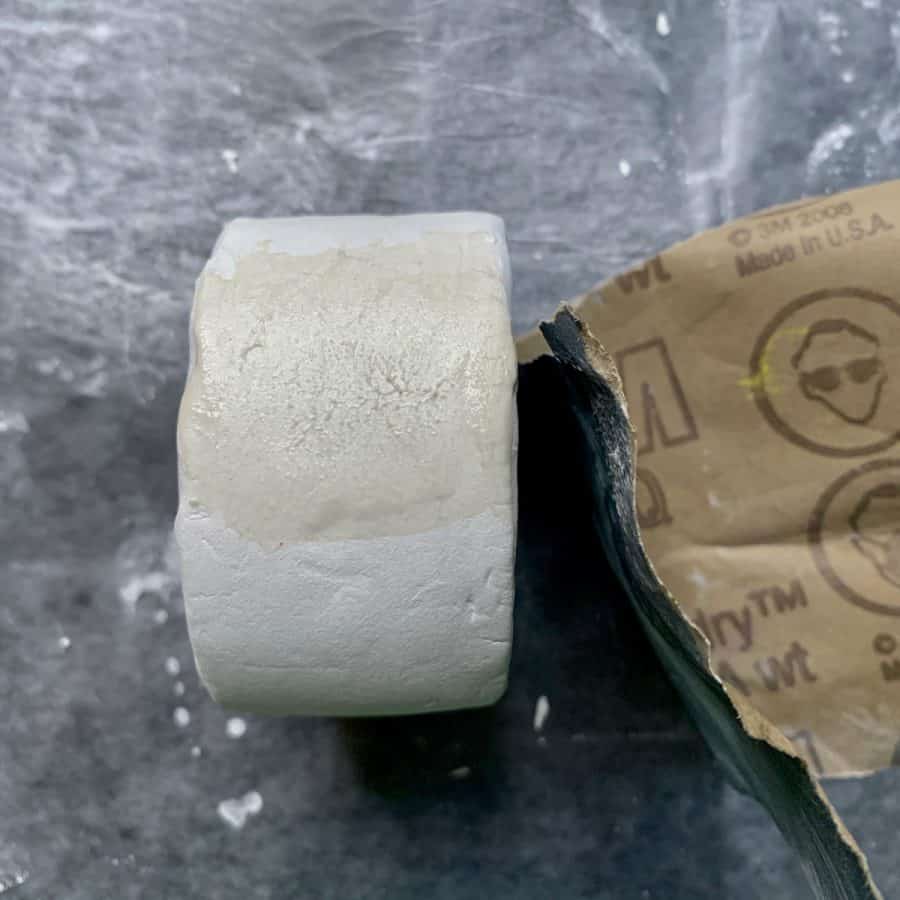
- Once the first edge is cut, go ahead and prepare to cut the second edge. This one you will mark at 1 ¾” at 3 locations around the bottle.
Tape the straightedge around the bottle and make sure the taped section is below the marks so that if you make a mistake, (like the photo above) the blade will cut into the section of the bottle you aren’t using.
Once you have the bottle cut, you can move on to Step 1 for making the clay candlestick holder.
How To Make DIY Clay Candlestick Holders Tutorial Steps
Step 1. Prep Your Work Space For Making The Clay Candlestick Holders
The first step is to get your work space ready. So first, place a sheet of wax paper on a flat surface and tape it with blue tape.
Alternatively, you can use a silicone baking mat that doesn’t need to be taped.
Set a small bowl of water next to that, along with your clay tools and paper towels.
Step 2. Roll The Air Dry Clay

First condition the clay. Grab a chunk of clay and roll it around in your hands and knead it to warm it up. Once it softens, press it together into an oval shape that’s about 5” long.

Then lightly press this onto the wax paper, just so it sticks, and then use the clay roller to roll it out to 7” x 1 ½” long and ¼” thick.
Next, to make a long rectangular shape, just take the straight edge and trim one side.
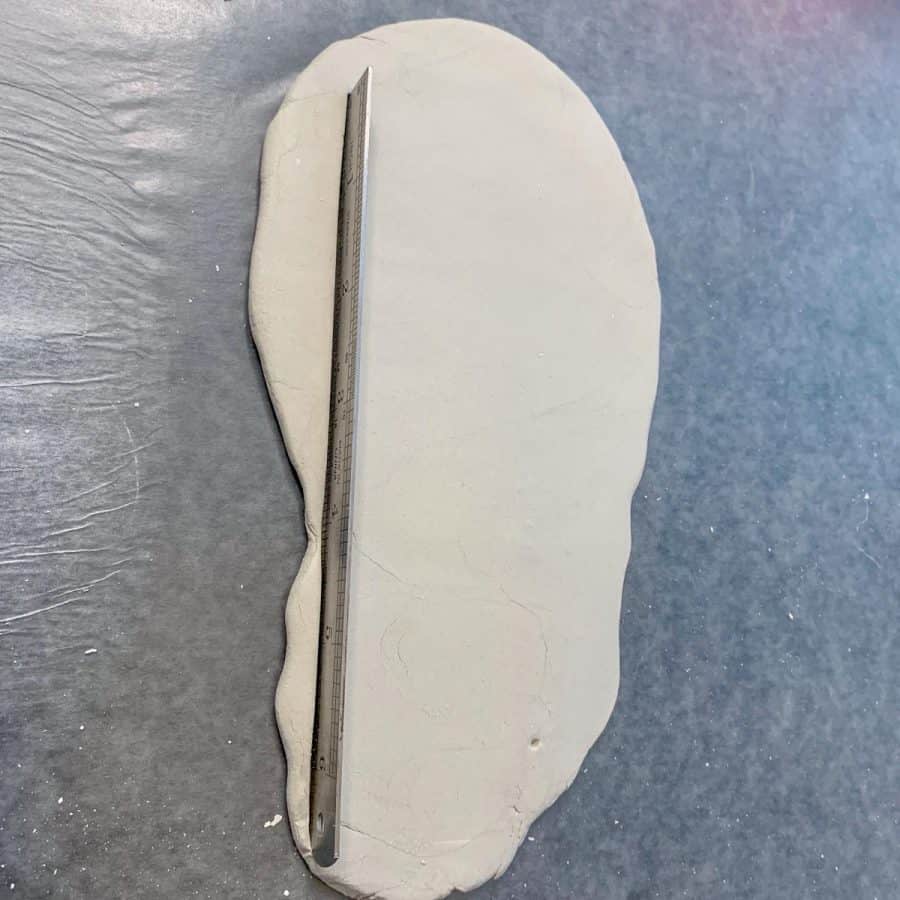
Now mark 1 ½” from the straight edge, onto the clay. Then use either the actual straight edge to chop through the clay to cut the other side, or use the straight edge as an actual straight edge and trim it with the craft knife.
Step 3. Make The Outer Ring For The Clay Candlestick Holder

Trim the ends of the clay strip so they are straight. Wrap it around the item you are using as the inner mold (cookie cutter or bottle). The strip will probably be about ½” longer than the bottle or cookie cutter.
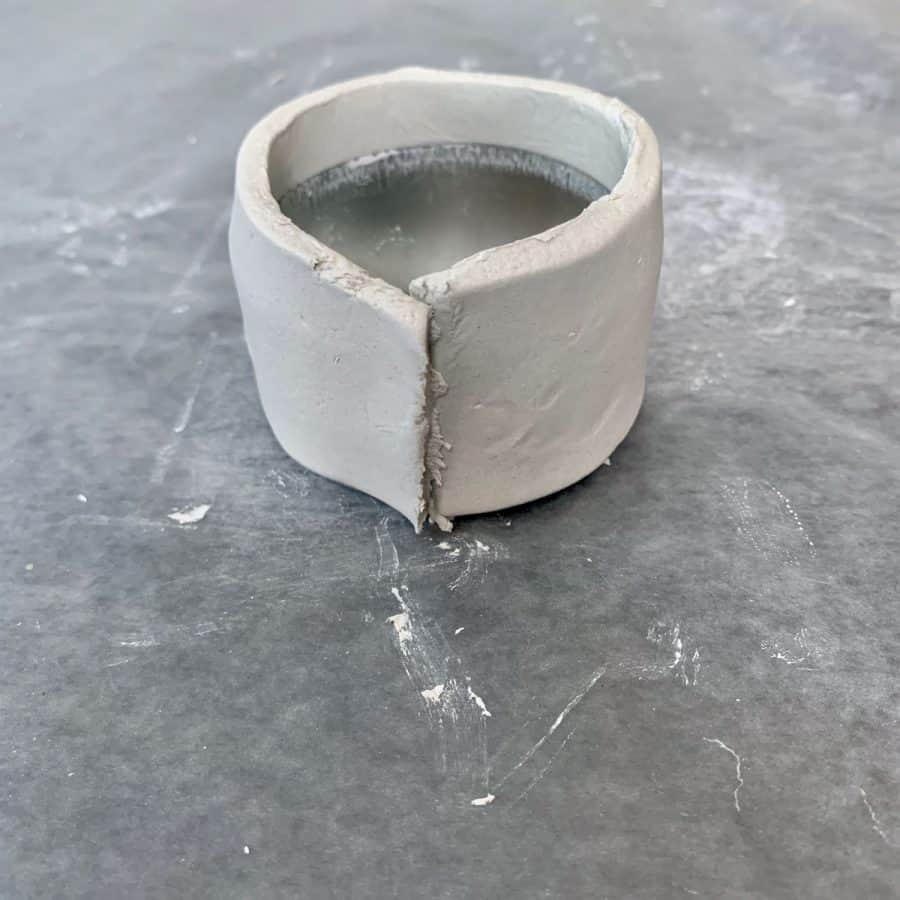
Go ahead and trim off most of the excess overlap, and leave only the slightest overlap.


Now make hatch marks across both ends and wet your fingers in the bowl of water and then press the pieces together to seam them.
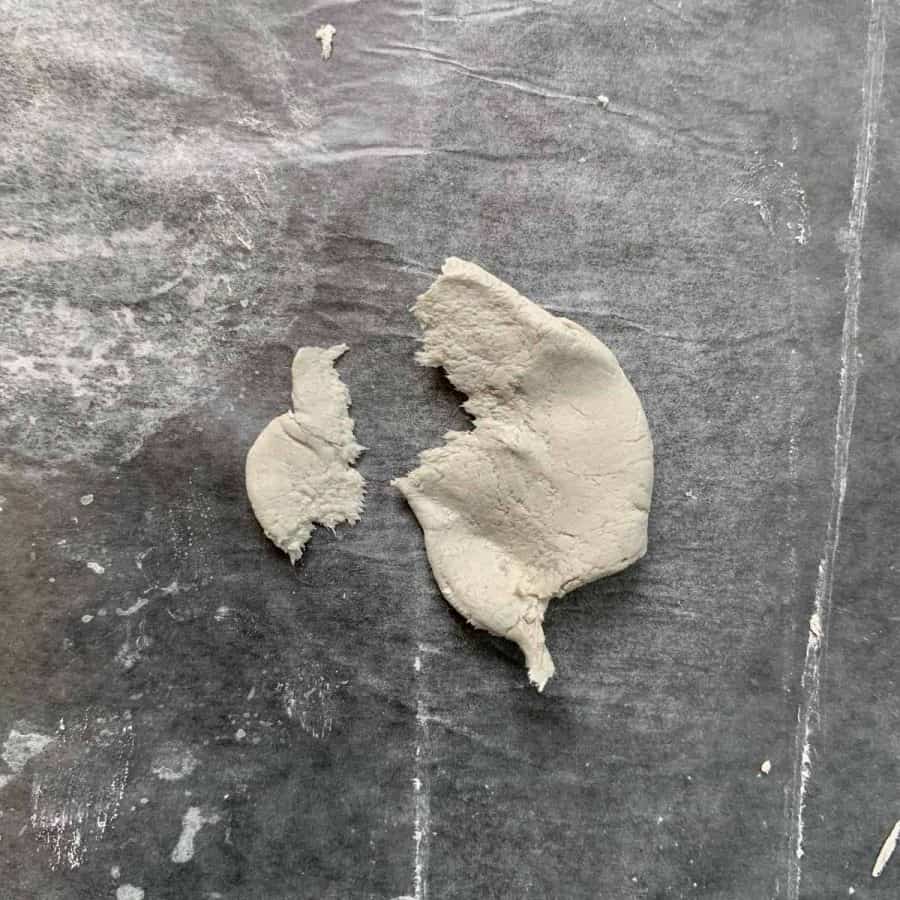
This area tends to become thin from the seams being pressed. The way to help thicken and reinforce the seam is to tear off a small piece of clay and then tear that into thin pieces.

Place these over the seam, then add a little water and then use your fingernail to pull the top layer across the seam. The fine pieces of wet clay create a clay paste which helps glue things together.
Rub the seam to smooth it. I find it difficult to smooth the seams so they are invisible with my finger. So instead, I recommend using the artist’s sponge.

Whether it’s for the seams or any stray marks that get made on the clay, a great way to smooth the clay is to use a small artist’s sponge.
Dip that into a little water, squeeze it so it’s just slightly damp, and use that to rub away any bumps or stray marks.

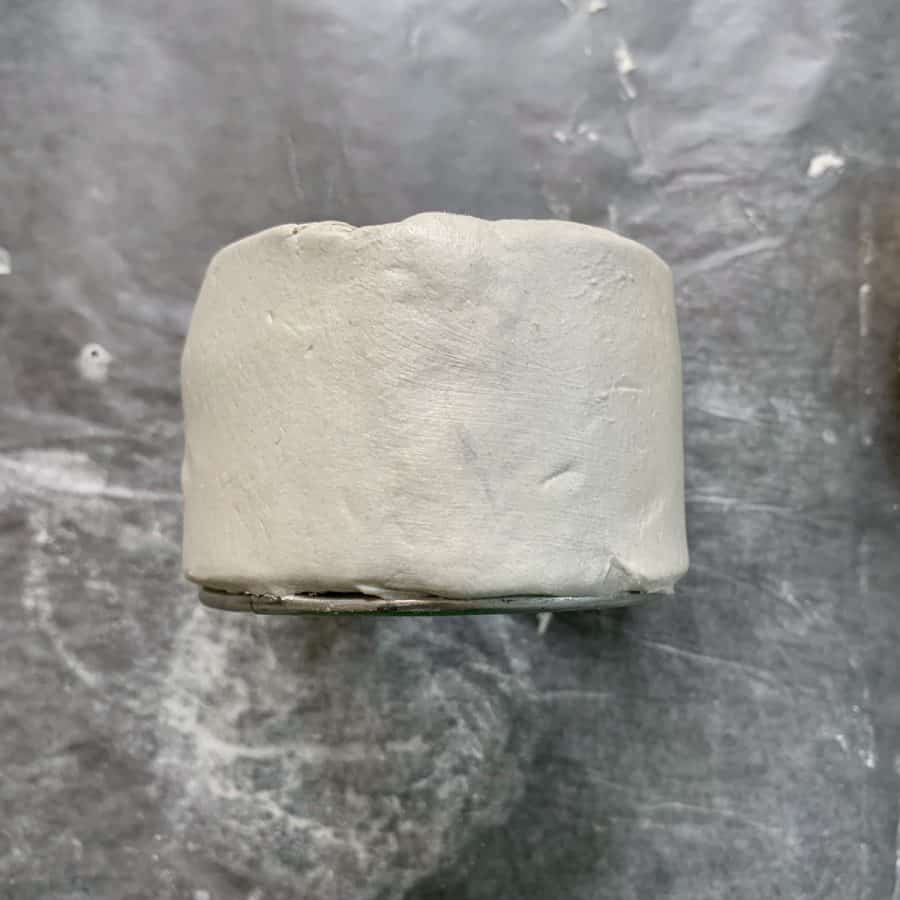
Now remove the bottle or cookie cutter and if you have the plastic bottle ring to help act as an outer mold, then now is when you will place it over the clay ring to support it so you can seal the inside.
First, make hatch marks across the seam. Then tear off thin bits of clay and place them over the seam and blend them into the clay, like you did the outside seam.
When the seams are finished, leave the clay collar inside the plastic mold
If you didn’t make the plastic bottle outer mold, then you may want to leave the clay wrapped wound the cookie cutter or bottle to dry.
It will dry more quickly without anything touching it, but when the clay is wet, it is vulnerable to losing its round shape.
I opted for leaving the plastic bottle around the clay collar while drying.
I am always short on time for these projects and so I sped up the drying time using a space heater.
The quickest way to do this is to add a little heat and air, but you must go with low and slow heat. My space heater is not very powerful and I kept the setting on low.
I also was diligent about turning the pieces every 20-40 minutes. Too much heat too fast can cause it to crack. The heat causes the clay to contract which is what causes the cracking.
Regardless of whether you use a heater to speed up drying times, I recommend flipping the clay collar over several times during the first couple of hours.
This will help prevent it from flaring at the bottom due to the weight of the clay settling.
Once the clay feels semi-rigid, you can proceed to the next step. It doesn’t need to be completely dry for this, but it helps if it’s not still mushy.
If you leave it to air dry without help from a space heater, this will probably be 2-4 hours. You can always wait longer though.
In the meantime, repeat these first steps for the second clay candlestick holder.
Step 4. Make The Bottom Of The Air Dry Clay Candlestick Holder
Take a ball of clay and press this with the palm of your hand onto the wax paper and roll it into a circle.
Use the cookie cutter to cut a piece for the bottom that’s just larger than the inside diameter of the clay collar.

The clay will have shrunk to a certain degree, so the diameter will have decreased slightly.
If you don’t have a cookie cutter that is the right size, then go to the closest (yet bigger) size than the inside and trim it with one of the clay tools. It doesn’t need to be a perfect circle.

Place this inside the bottom of the clay candlestick collar. My base was a bit big and would have been better if I had trimmed it a little before placing it inside.
Since this base piece is oversized, you can just press the excess edges of the circle base into the corners.
You don’t want too much excess because you don’t want to increase the thickness of the bottom and you want it flat inside. So if you need to, remove a little bit of the excess clay.
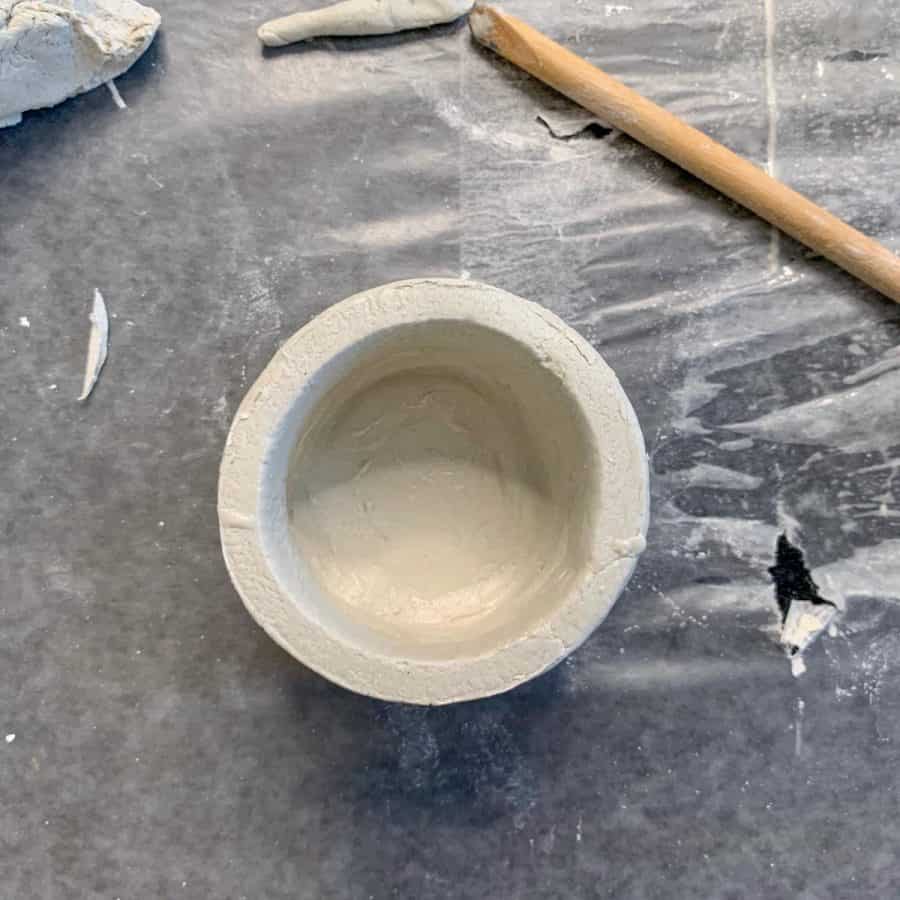
Smooth the corners using your wet finger or the thumb joining tool and smooth the bottom. Once that looks good, turn the candle holder upside down and work on the bottom.

For the bottom, I found the easiest way to first do this was to roll a thin long piece method, and either wet my fingers or the rolled piece and then press it in between the seam.
Then I tore off thin pieces of clay and pressed them over the seam and pulled the clay across the bottom with my fingernails, toward the outside edges.
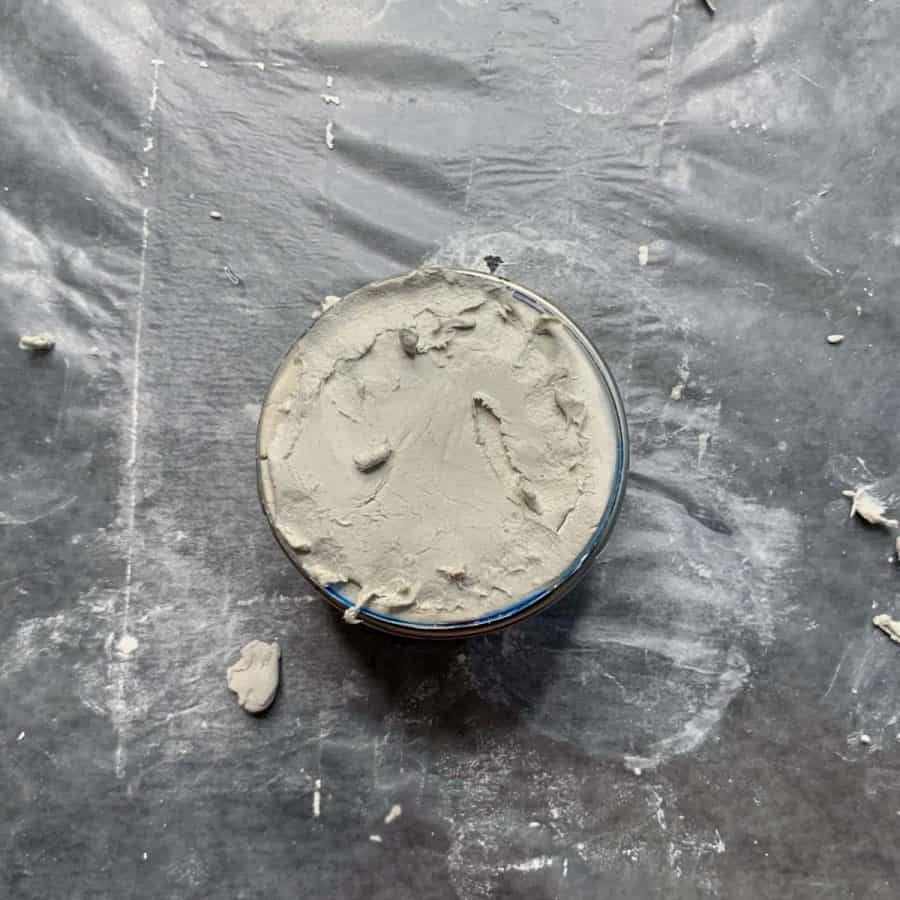
My bottom had become slightly recessed so I built it up slightly using more thin, flat torn pieces.

Once the outside of the bottom base piece is done, turn it back over. The bottom of the copper cap isn’t flat, it is slightly extruded.
So to keep it sitting flat, press the bottom of the copper cap into the bottom just so that the extruded end creates a divot to help the candle stand straight. Then you can remove it while the clay is drying.
Let the clay dry a minimum of 2-4 hours, before moving on to finish the top piece. The clay should be semi-rigid when you do this, which will make it much easier.
Step 5. Create An Inner Collar Support To Hold The Candlestick In Place

Take a piece of scrap insulation board and use the 2” cookie cutter and press it into the board so you have an outline.
Now use the craft knife, or a craft knife with a long blade if you have one, to cut the hole out.
This piece will go inside the clay collar to support the copper cap for the candlestick and help keep it straight.
This also gives us the ability to replace burned out candlesticks with new ones.

Now do the same with the smallest (1”) cutter.
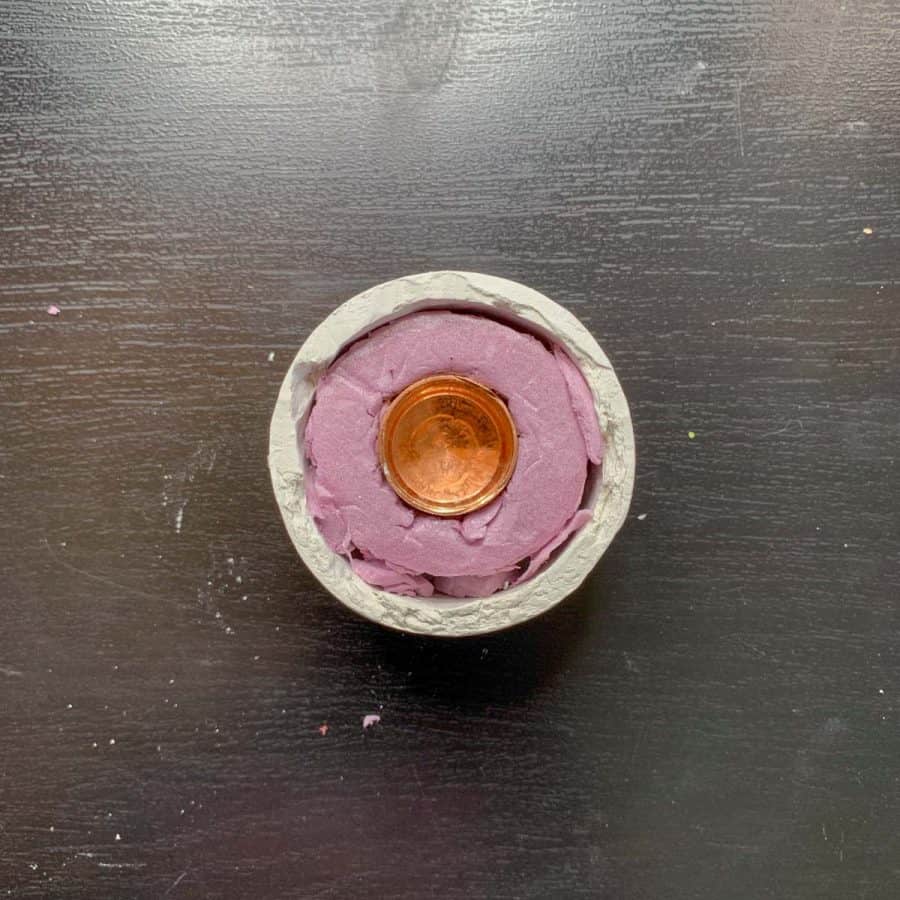
Next, place the copper cap in the hole and put them inside of the clay collar. Use little pieces of foam to shimmy the sides so the foam isn’t loose inside.

Now, if you have any dried, broken bits of clay left over, put those in here. Then fill in the remaining gaps with fresh clay.
If you don’t have extra dried pieces, just fill this all in with fresh clay.
Step 6. Make The Top Of The Candlestick Cover

Roll and cut the clay, this time to less than ¼”, to just thicker than ⅛”. Use the 2 ½” cutter to cut the top piece. Then use the 1” cutter to cut a hole in the center of that.
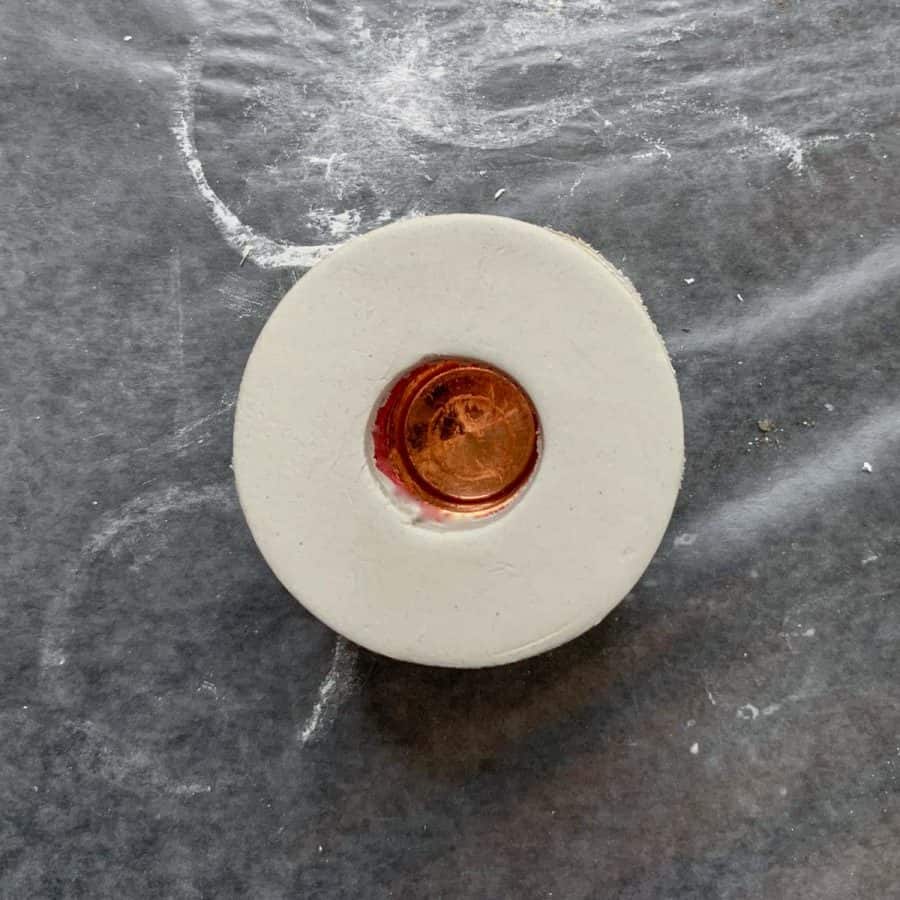
Place this on top of the candle base and work your way around the base, pulling part of the top over the edge of the base to close the seam.
Use wet fingers to close it, and add bits of torn, thin clay as needed to cover the lines.

Also, place the copper coupling in the hole to help you maintain a proper circle, while you continue seaming the two pieces.

To get a final smoothing, dip the sponge in water and use that to get everything even.
Let this dry.
Step 7. Sand Rough Spots And Blemishes In The Air Dry Clay
Once the clay candlestick holders are completely dry, the can be sealed. But first, if you have any remaining stray marks you want to fix, you can do that now.
First, if your two holders ended up being slightly different heights, you can use a low grit sandpaper, I used #150 grit to sand down the edges to get them to the same size.
I also used the craft knife to shave a little bit of the top wavy edge you can see in this photo above.
Take a piece of wet/dry sandpaper and dip it lightly into the dish of water, then lightly sand out any marks.
This works much like the sponge did when the clay was still wet. The sandpaper will pull fine clay dust into the indents and basically fill them in, giving you a nice, professional finish.
Step 8. Seal The Clay
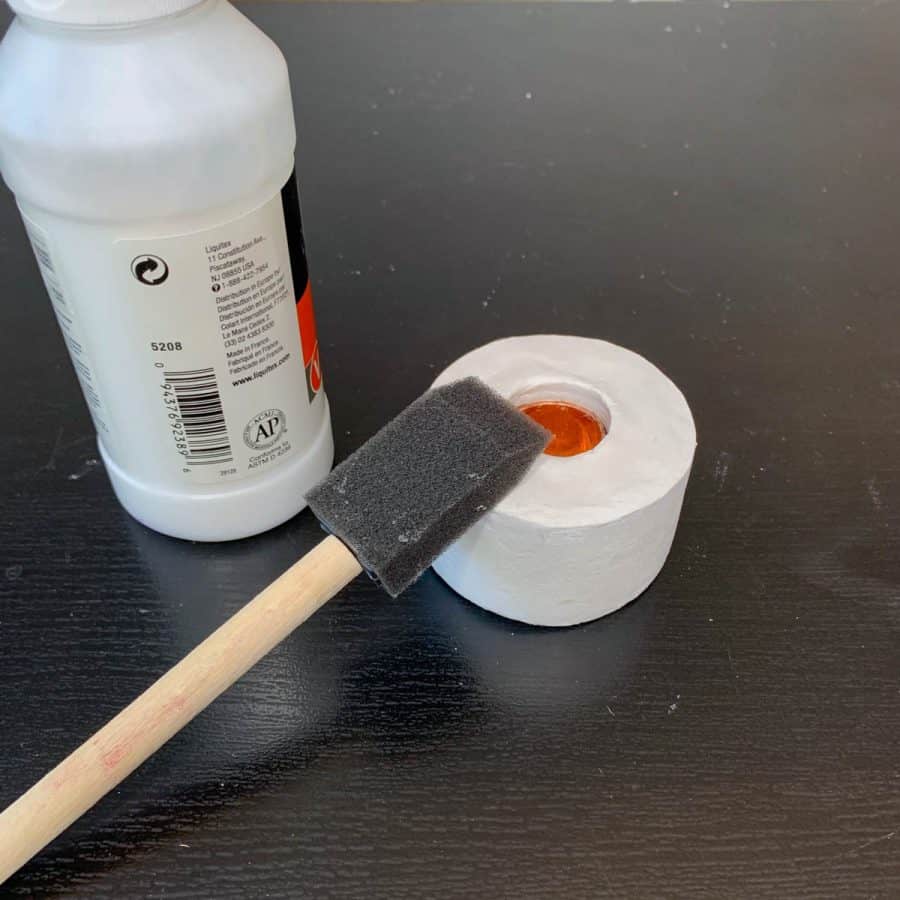
Once that has completely dried, it’s a good idea to go ahead and seal the candlestick holder.
Candlesticks have a tendency to drip more candle wax than other types, so I recommend double sealing it.
First coat the whole piece with a water based varnish, using a foam brush. After the varnish has completely dried, use a top coat spray sealer to act as a second layer of sealer for the holder.
When the sealer has dried, the air dry clay candlestick holders are ready to be used. Set them out for a romantic dinner, or gift them to a friend.
If you’re looking for more candle holder DIY project inspiration, here are fall gold DIY candlestick holders made from concrete.
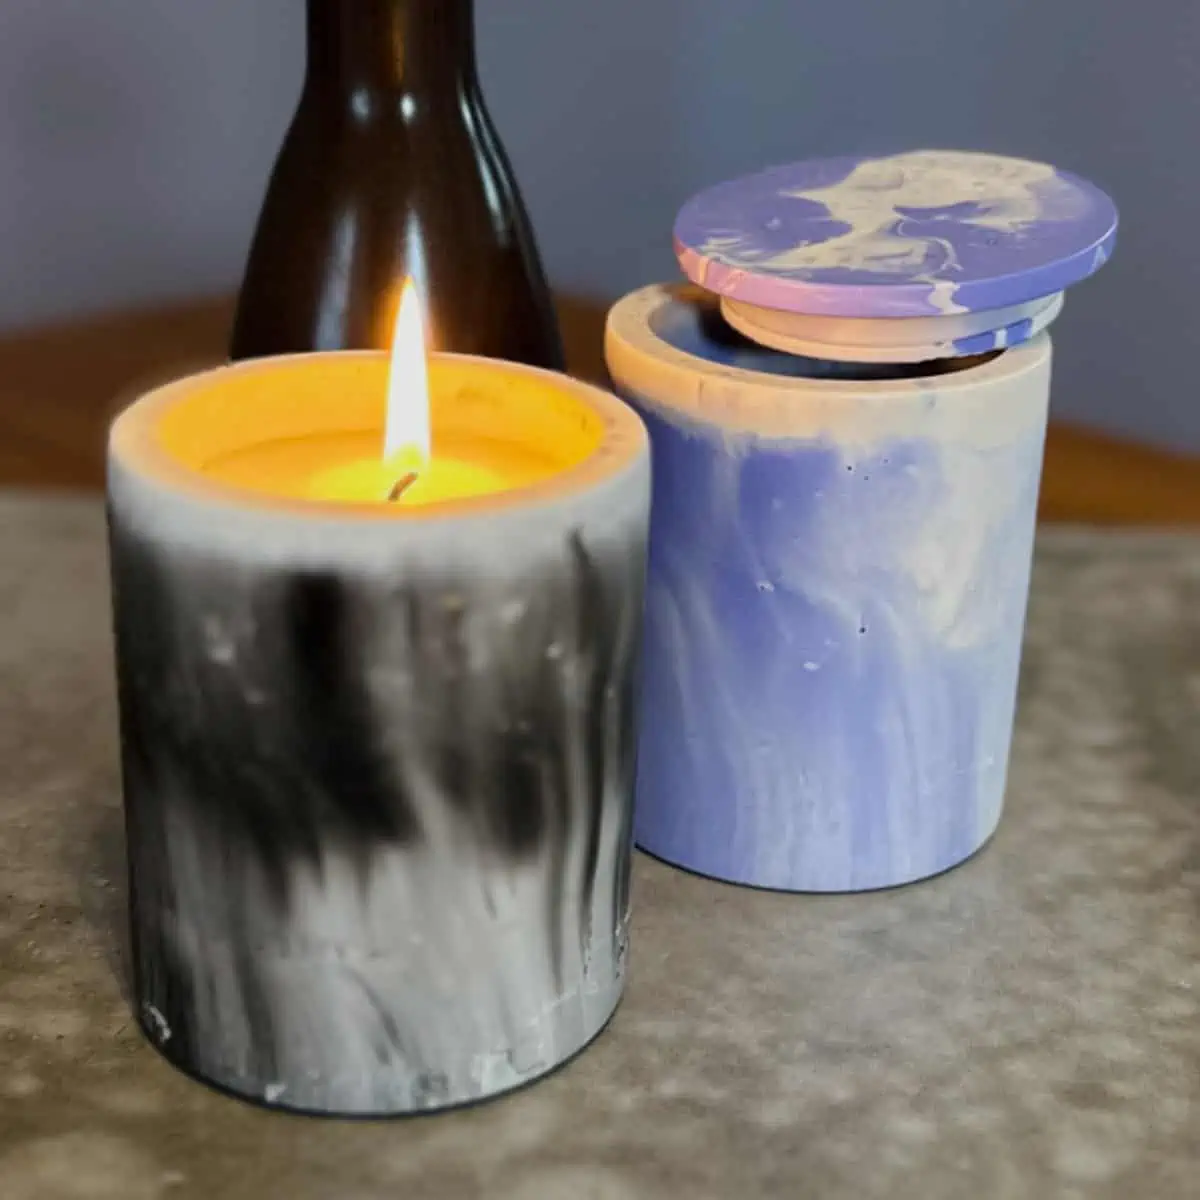
And a DIY candle holder for Christmas made from white concrete and beautiful sage colored, and marbled concrete tealight candle holders.
For a full list of candle holders you can make, check out this post for candle holder ideas.
Don’t forget to Pin it for later!

DIY Clay Candlestick Holders With Copper
How to make your own candlestick holders with clay. These air dry clay candlestick holders make the perfect home decorations. These also make wonderful gifts during the holidays or for any special occasion.
Materials
- air dry clay
- copper pipe fittings
- clay tools
- foam insulation board
Tools
- Please see the full materials list above the tutorial for details and links.
Instructions
- Prep Your Work Space For Making The Clay Candlestick Holders
- Roll The Air Dry Clay Into An Oblong Shape
- Make The Outer Ring/ Collar For The Candlestick Holder Using A cCookie Cutter To Wrap The Clay Around
- Make The Bottom Of The Air Dry Clay Candlestick Holder Using The Cookie Cutter And Clay Slip Pieces
- Create An Inner Collar Support To Hold The Candlestick In Place With Foam Insulation
- Make The Top Of The Candlestick Cover With Clay Slip
- Sand Rough Spots And Blemishes In The Air Dry Clay With The Wet/Dry Sandpaper
- Seal The Clay Using a Two Step Method To Protect The Clay From Candle Wax