The Best Concrete Mold To Use For Your Crafts: How To Choose
I’m going to explain what the different concrete mold material options are and for which projects they are best suited, as well as some of the techniques for creating your own concrete molds.
The world of concrete crafts-making can be complicated, so it’s important to understand which projects require certain concrete mold materials.
You see, the are countless amounts of different items you can use as molds for concrete crafts.
However, choosing the right material for your mold is going to make all the difference in whether or not your cement craft project is successful.

I know when I first started, it was frustrating trying to understand which materials would cause concrete to stick.
Which would cause it to get stuck when you were ready to remove it from the mold? And which would cause it to have a rougher appearance that I cared for.
Well, I’m here to to make it easy for you and breaking it all down in this article.
-By the way, if you are just getting started then I recommend bookmarking this very important article on the Concrete and Cement Mixes Tests where I compare six different types of concrete mixes, as well as my experiments with lubricants, effects of vibrating, etc.
Types Of Concrete Molds
The most common type is a silicone mold for concrete. However, there are several considerations when choosing a mold for cement and concrete.
The best concrete mold material to use will be something that it won’t stick to. Concrete won’t stick to silicone, rubber, or plastic.
There isn’t an ideal material for choosing a mold for concrete crafts because, aside from size and shape, there will be a few other factors to consider. So let’s discuss features.
Two other great articles are the Making Cement Crafts | Getting Started & Advanced Techniques & Tips, and also Concrete Crafts Pigment Tests – How To Color Concrete & Cement.
Mold Texture
The texture won’t affect whether or not your project is successful from a functional standpoint, but it does affect the aesthetics.
You will need a smooth mold if you want a smooth look. Smoothness can also equate to shininess. The more glass-like the mold is, the shinier your cement craft will be.
Even though silicone is super smooth, it doesn’t have a glass-like feel or any sheen.
Silicone won’t produce a very shiny piece of cement, but it will be super smooth.
Anything with even the slightest bit of a matte feel or appearance will give you a matte result with your concrete/cement.
If you’d like more detailed information, I’ve written a post about how to make concrete shiny.
Concrete Mold Rigidity

*The more flexible the plastic is, the easier it will be to demold, so watch out for plastic containers that are rigid.
I have these plastic half-sphere molds that are made to be for bath bomb soaps.
Demolding isn’t much of a problem because of the shape. The tapering of the sphere allows it to come out easily from the plastic.
Something with straight sides and something deeper will become increasingly more difficult to demold.
For advanced learning about concrete mix strengths (like why mixes with large aggregate make some things stronger and others weaker) and how to know exactly which concrete mix is best for your project, then take a look at The Best Mix For Your Concrete Project.
Shape of a Mold
Tapered molds are good and will help with releasing concrete. The complexity of a shape will matter as well.
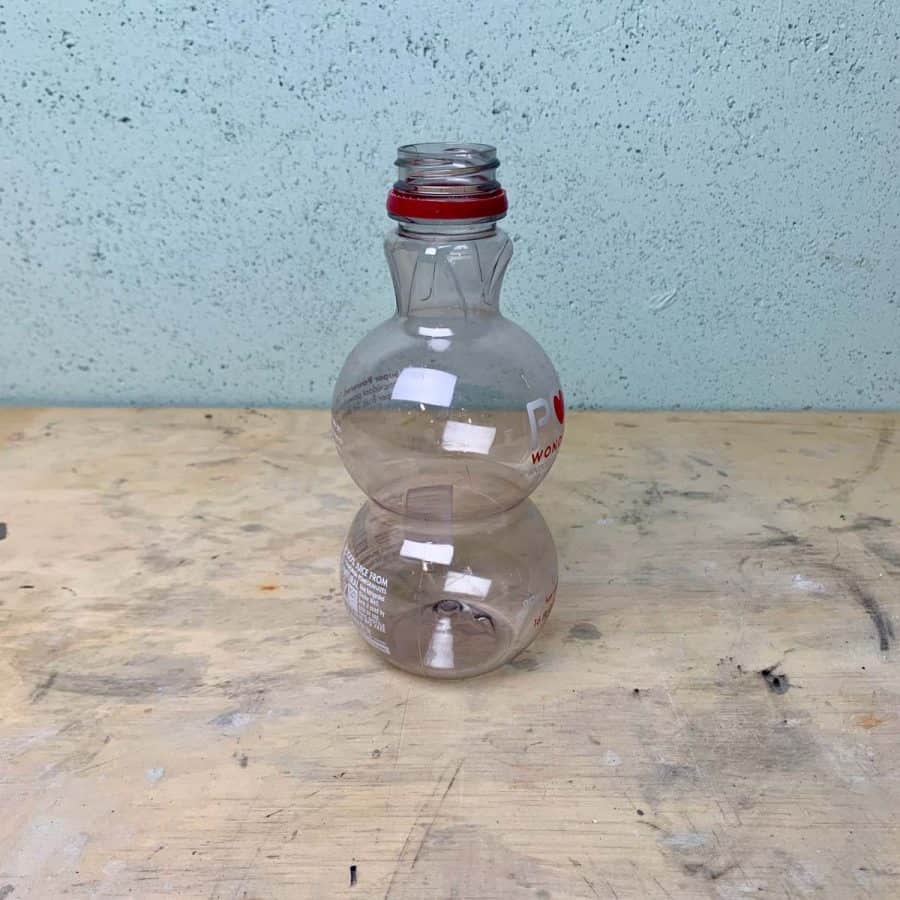
This is because complex shapes tend to have bevels that go in a direction that will cause an undercut.
If the concrete can’t slide out easily because of a pocket within the mold, then you may have an issue.
The photo above is an extreme example. If you were to try to demold this by turning it upside down, it wouldn’t come out.
The only way to get concrete out of this would be to cut it.
Often concrete crafts can still be removed from a mold with an undercut, but you probably will have to cut or break the mold to remove your piece.
This also puts your cement crafts piece at risk of getting broken.
Mold Size
The material to use for the mold will depend on size and in each section I discuss which materials are good for certain sizes.
In addition, another important consideration is finding the proper size inner mold to fit proportionately to the outer mold.
If you are casting planters or dishes, you will need to find two molds that will be sized properly and fit inside of each other.
The thickness of the walls has to be considered.
The two containers should fit together allowing for spacing that is neither too narrow (causing cracking) or too thick (taking up too much space).
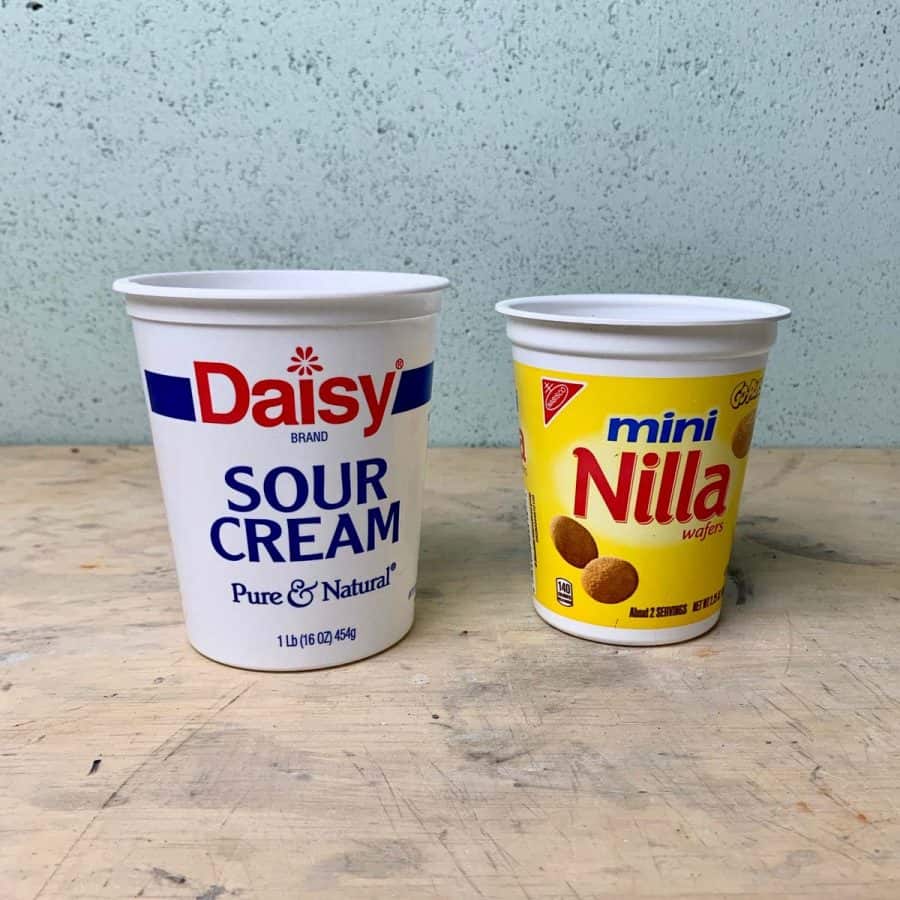
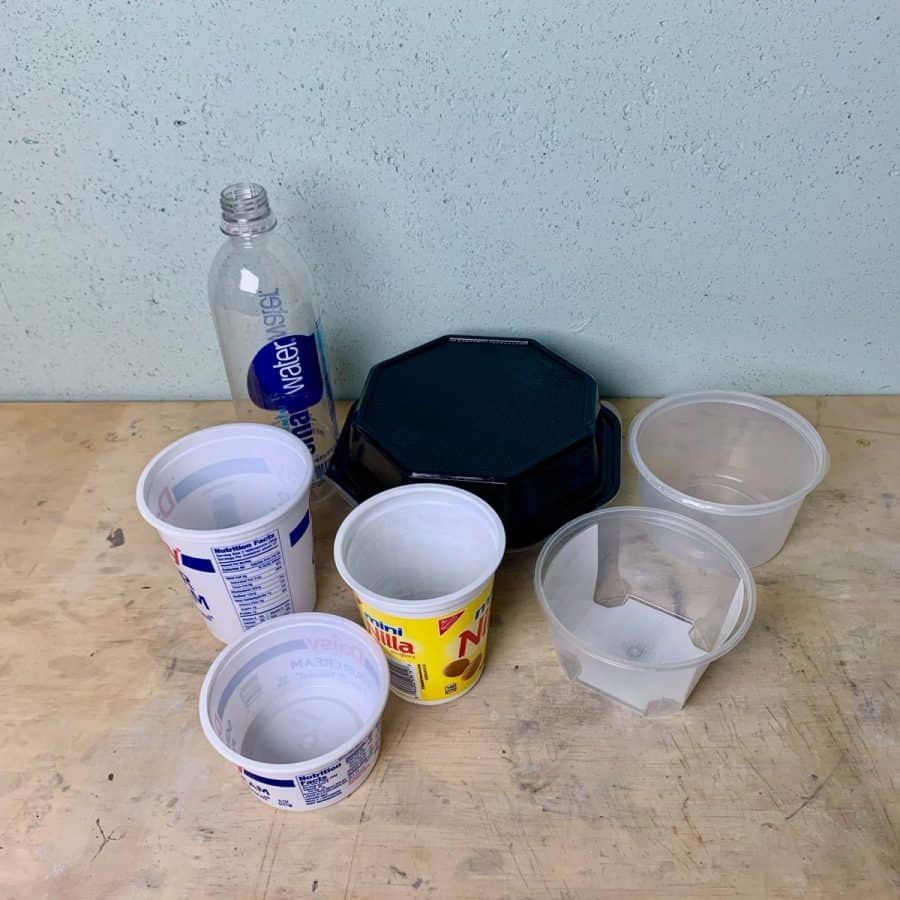
These concrete mold containers are not sized appropriately to fit.

The walls will be too thin, so either the sour cream container needs to be wider or the Nilla wafers container needs to be narrower.
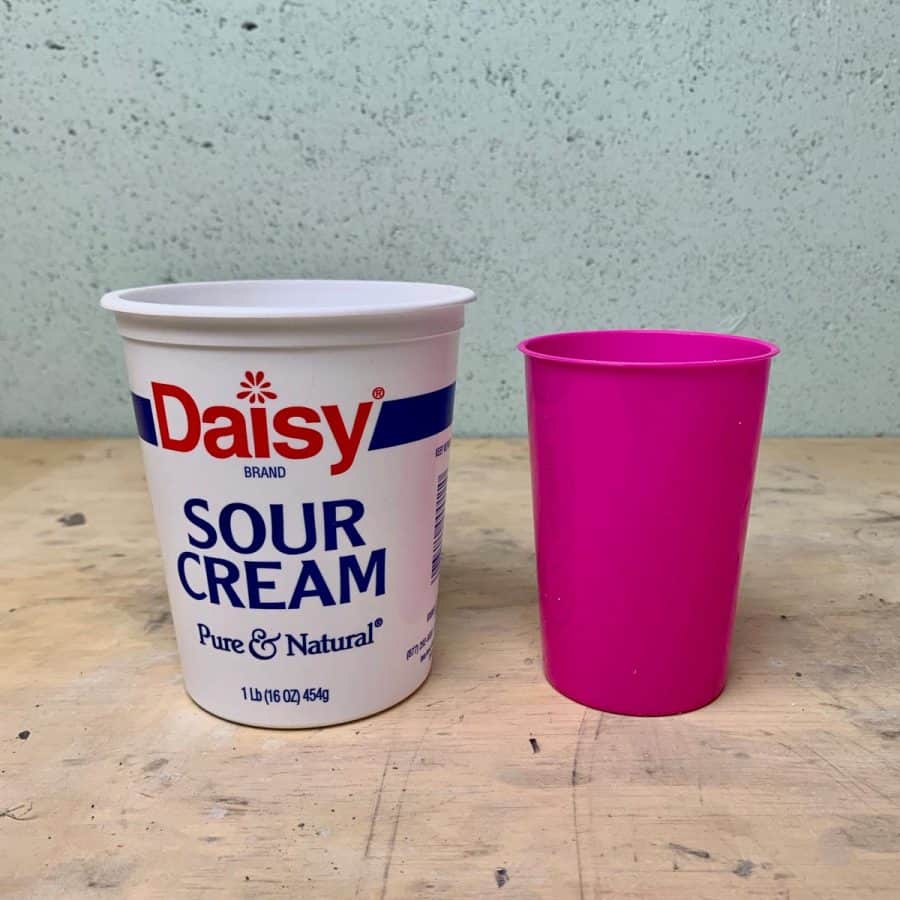
These containers provide a better fit.

They will provide ample thickness for the concrete planter walls.
Scale And Proportion
This is a big one.
You can have a nice smooth plastic mold container with a slight taper to it and another nice smooth container as the inner mold -and still, the inside mold will get stuck.
This is likely because of the proportion of the mold to the concrete.
When you cast something tall and narrow, you put more pressure on that inner mold.
If your mold is wide and shallow, there isn’t much weight from the concrete placing pressure on the inner mold piece, so it releases easily.
Pre-Made Concrete Crafts Molds
You can purchase a pre-made mold that is specifically made for concrete/cement crafts.
These are typically a silicone material and sometimes plastic.
Often, the silicone concrete molds are listed as resin molds, so if you are doing a Google or Amazon search to find one, you may get more results by searching for “resin” molds.
If you are interested in purchasing a mold, check out my article on best concrete mold you can buy.
Benefits Of Pre-Made Concrete Molds
- Rubber and silicone will easily release concrete
- Smooth surface (not usually shiny- more matte)
- Time saving since you don’t have to make anything or set anything up
Drawbacks
- Not easy to modify
- Usually cost more than making your own mold or repurposing existing items
Best Uses For Pre-Made Molds
- For relying on the mold to produce the exact shape you see
- There are no surprises
Here’s an article explaining what’s important to know when looking to buy a pre-made silicone mold and best tips, along with store recommendations.
Pre-made Molds Intended for Other Purposes
There are several types of pre-made molds that work perfectly as forms for concrete crafts.
Baking Molds
This mold was used for a ring-shaped cement candleholder that I made for the Ugly Duckling House.
The molds that are made from silicone will function just like a silicone mold made for resin and concrete.
You should be able to count on it being just as good as one specifically made for concrete.
Candy-Making Molds

These are also the same as baking molds. If it’s silicone and it’s labeled for candy or chocolates, but it works for your project- then go for it. I used these for the cement garden labels.
Molds for Candle and Soap-Making
Sometimes these candle and soap molds will be silicone, but more often, I have found them to be plastic.
If you find a candle/soap mold that is the shape you want, take note of whether that plastic is rigid or not.
As discussed above, rigid plastic will be more difficult to demold, but the shape of the mold will either help or hinder the ease of release.
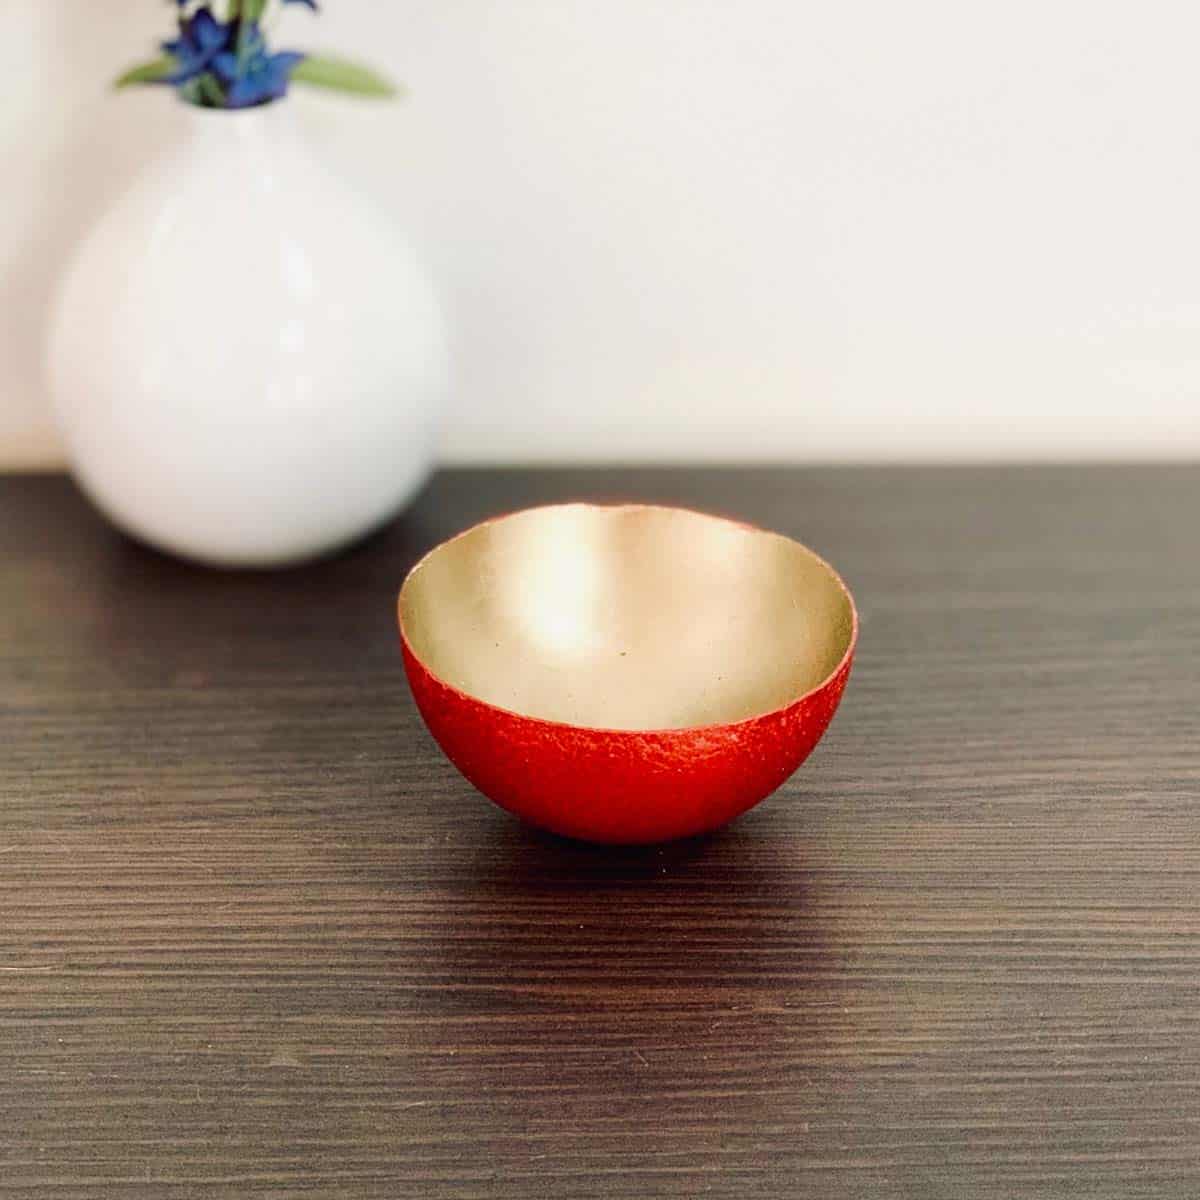
I used bath bomb molds to make these mini DIY concrete bowls.
Benefits Of Pre-Made Molds Not Intended For Concrete
- Release easily
- Smooth surface (not usually shiny- more matte)
- Time saving since you don’t have to make anything or set anything up
Drawbacks
- Not easy to modify
- Usually cost more than making your own mold or repurposing existing items
- You may run into some demolding issues with a rigid plastic
Best Uses For Molds Not Intended For Concrete
- What you see is what you’ll get, so any cement craft you need to make quickly or one that doesn’t lend itself to being made easily using a different method.
Utilize Existing Items- Repurpose Concrete Forms
–Disposable Items
Disposable items are some best concrete mold materials to use when it comes to value.
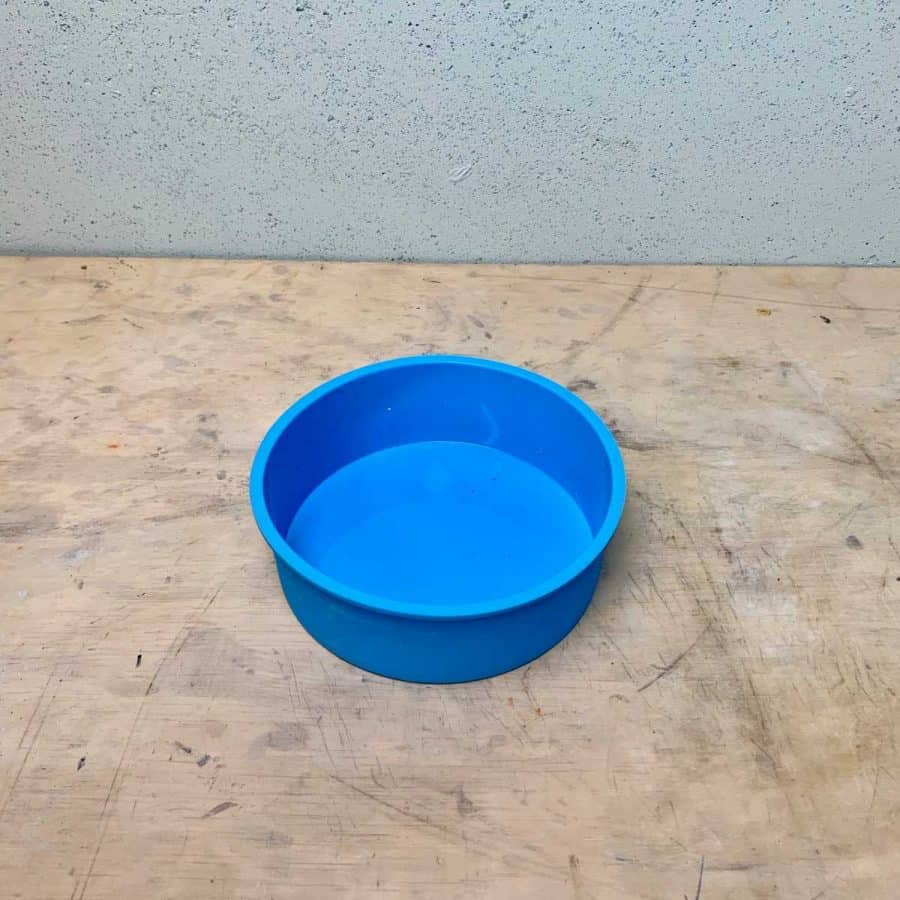
Plastic Containers as Molds for Cement
Any leftover container from food or beverages. Bowls, cups, Tupperware, sour cream, yogurt, leftover takeout containers from restaurants.
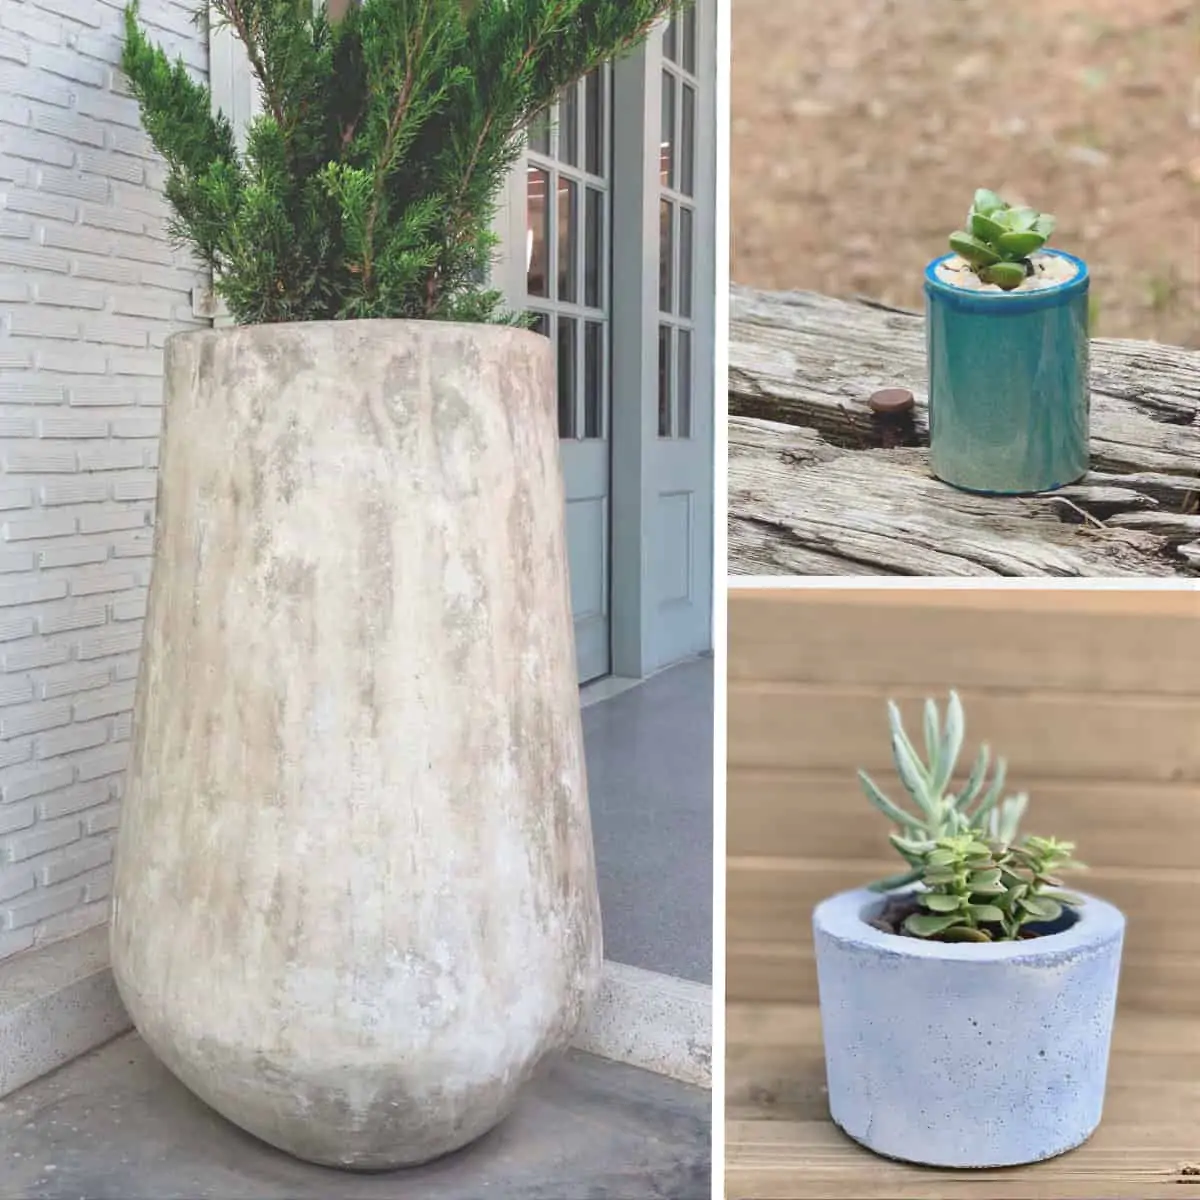
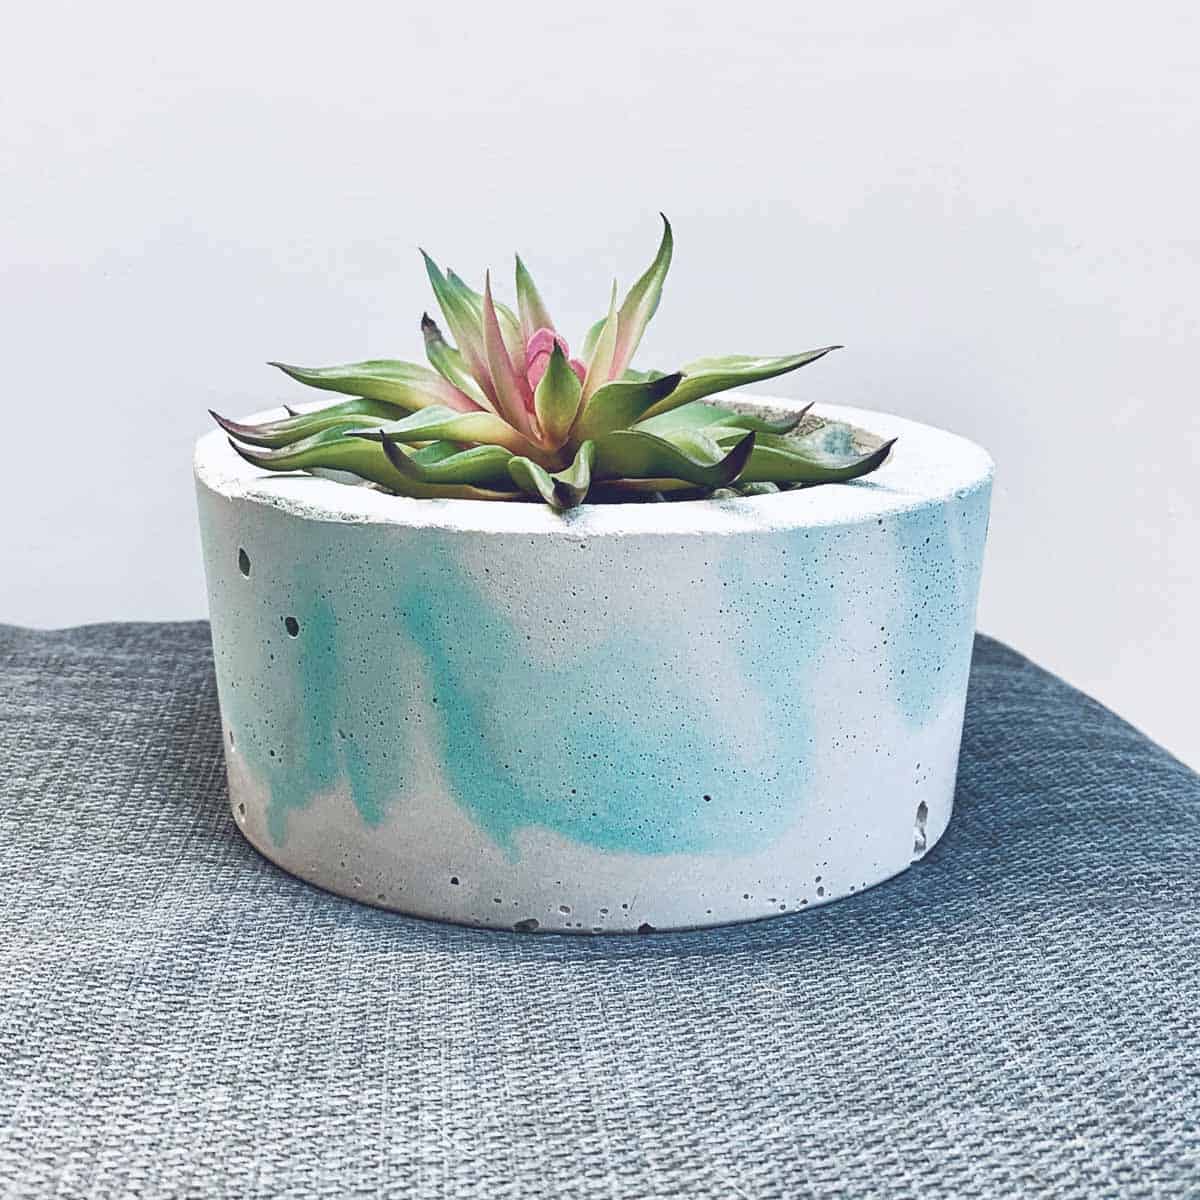
I used these types of containers for a marbled concrete planter and modern concrete planter.
Benefits Of Disposable Containers For Concrete Molds
- Extremely budget friendly, come in multitudes of shapes and sizes
- It’s easy to find containers that aren’t too rigid, and provide the flexibility needed to allow for easy demolding
Drawbacks
- Finding the proper size inner mold to fit proportionately to the outer mold
- Watch out for containers that have bevels that will cause undercuts
Best Uses
- Any small cement craft project. These containers are ideal molds for planters, clocks, dishes, etc.
Atypical Items Used For Concrete Molds
Balloons as Molds
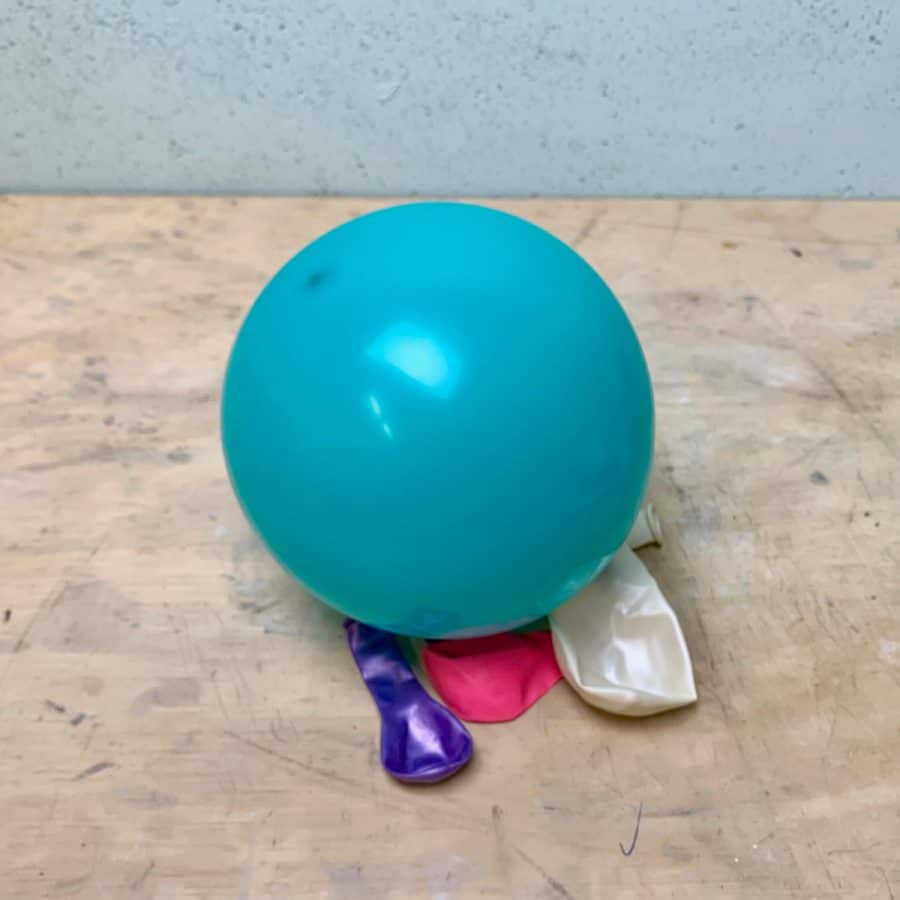
Balloons are an incredible tool to use as a cement mold.
You can use it to sculpt with, like you see here in the cement balloon planter.
Plastic Balls as Molds

You can cut open just about any type of plastic ball and use it as mold as I did with this sphere-shaped cement Christmas candle and these cute little DIY Magnetic Cement planters with magnets.
Stockings Used for Molds

Nylon stockings work well as mold because they will help hold the shape of your concrete piece and give you lots of flexibility in the shapes you make.
And to demold, all you do is pull the panty hose off. Here’s an example of how I utilized pantyhose for the concrete mold with this Concrete garden owl statue.
Fabric Hats

Though I haven’t tried this one yet, you can use things like knit hats as molds. These work similarly to the way stockings do.
You can see how someone used a hat to make a planter on YouTube.
Concrete Sand Molds
It’s true, you can use sand as mold to cast concrete in.
There’s plenty of youTube videos out there showing this, but no matter how many times I watch them, I can’t seem to get the same results as the people in the videos.

Here was my initial attempt at casting a cement planter in the sand- don’t laugh!
And my second attempt at casting a concrete planter in a sand mold.

This was a concrete bowl molded over a mound of sand.
Benefits Of Using Unusual Items
- Interesting options and flexibility- can be super creative with your ideas
- Low cost
Drawbacks
- May require a little bit of skill and patience
Best Uses For Unusual Items As Cement Crafts Molds
- Planters and rounded statues
How To Make Your Own Concrete Molds
When you make your own cement and concrete mold, the sky’s the limit, you just need to use the proper material for your design.
Materials For Building A Concrete Mold
When it comes to larger concrete projects, ones that have thicker walls or right angles, the best concrete mold material to use is often wood.
Melamine Boards as Molds Forms
A melamine board is a composite wood coated with a type of plastic resin. The resin is helpful because concrete won’t stick to it.
When using melamine as your concrete mold, you will want to use silicone caulk to seal the inside edges.
Assembly
For large forms, you will want to use screws, along with silicone caulk at the seams. To demold, you will just simply unscrew the sides and the concrete should lift out.
For smaller forms, I have gotten away with using only caulk. A medium form you can use brad nails and caulk, which will be quicker than screws.
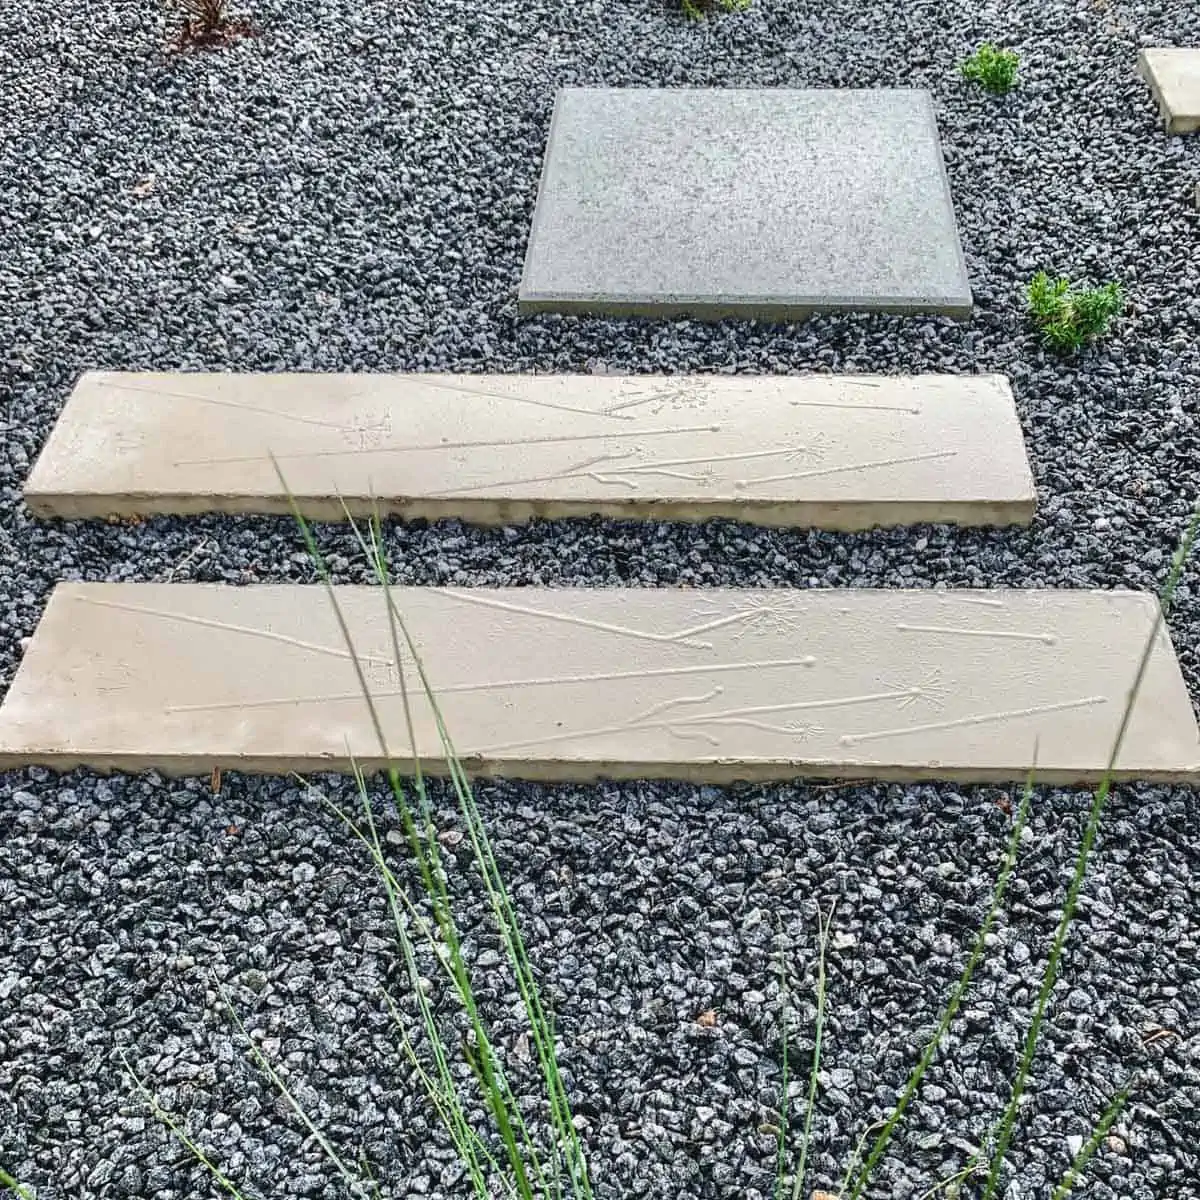
You can see how I assembled these two projects. I used screws for the forms for the tiles in the 3D cement tile planter box and just a few nails for the outdoor concrete wall tile.
Benefits Of Melamine For Molds
- Relatively inexpensive
- Great strength
- You won’t have to fight with anything to demold it because it will be easily removable, as you will just disassemble the boards
Drawbacks
- May require tools for assembly
- Edges need to be caulked
Best Uses For Melamine Forms For Concrete MOldS
- Excellent for large concrete molds like large planter boxes
- A project needing clean, square or slightly rounded edges
- Tiles
- Countertops
- Tabletops (side tables, coffee tables)
- Sinks
Whiteboard
Whiteboard -aka- marker board is a composite board that can come in a thickness of under ¼”.
It is the same basic material as a clipboard but has a super glossy finish that people use as writable marker boards.
Assembly
- Can be secured with hot glue, tape or caulk
- Reusable as long as the marker board coating doesn’t tear
Benefits
- Easy to cut without using power tools
- Inexpensive
- Easy disassembly with a utility knife
Drawbacks Of Using Whiteboard as a Concrete Mold
- May not be rigid enough for larger projects without reinforcement
- Edges should be caulked
Best Uses
- Medium sized or small molds
Acetate Sheets to Line Molds
Acetate sheets are a plastic film and can come glossy or matte.
They aren’t rigid enough to be used on their own for concrete molds, but are perfect for coating mold materials like aluminum flashing, cardboard and corrugated plastic.
Assembly
- Spray adhesive, tape
Benefits
- Extremely smooth, glossy sheets will result in a shiny surface
- Inexpensive
Drawbacks
- An extra step in the making process
Best Uses For Acetate Sheets
- Coating any surface that has a texture
- Coating surfaces that would otherwise stick to the concrete
Corrugated Plastic Sheets as Pieces for Molds
These are a plastic version of corrugated cardboard. They are easily found at Home Depot and Art/Craft stores like Michaels.
Assembly
- Holds together well with tape and/or hot glue
Benefits Of Corrugated Plastic For Concrete Molds
- Easy to work with
- Inexpensive
- Easy to demold
Drawbacks
- Corrugated grooves do show up on finished product- acetate sheets recommended to combat this
Best Uses For Corrugated Plastic Concrete Molds
- Any small cement craft project
- A cavity for a silicone mold to be poured into
Here are two projects where I used corrugated plastic- a triangle concrete planter mold, and this one where I made a vessel from it to contain the silicone for the concrete mold.
Cardboard for Mold Pieces
This comes as either raw cardboard or can have a waxed coating.
For my twig lights with a floating concrete base, the form tube I used was pre-waxed but I still needed to use an acetate sheet to coat the inside.
This is because the lines from the wrapped layers of the cardboard would have transferred onto the concrete.
More importantly, the size of it was so large that the amount of water in the mix would have either caused the tube to warp or collapse.
I did the same thing for the concrete side table.
Assembly
- Tape or hot glue
Benefits
- Inexpensive
- Demolds easily if the cardboard is pre-waxed or a waxy lubricant is added to un-waxed cardboard
Drawbacks Of Corrugated Cardboard For Molds
- Needs to be coated with wax to not stick to the concrete
- Unwaxed cardboard will absorb water from the concrete and larger projects will require additional help with an acetate sheet layer added
Best Uses
- Excellent as molds for making round cement crafts like these concrete coasters (lubricated with wax)
Aluminum Flashing as a Concrete Mold Material
Aluminum flashing is a fantastic material because it’s bendable.
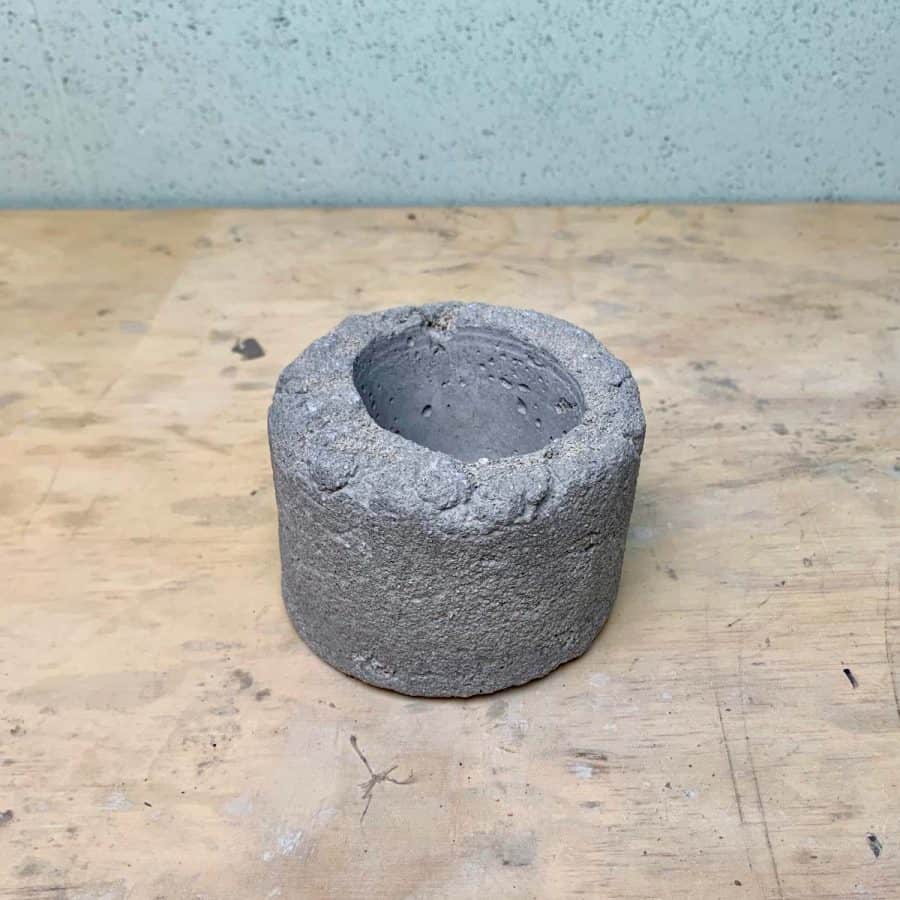
You will want to coat it with another material to use for molds because aluminum chemically reacts with cement and concrete mixes and causes an unappealing appearance.

When I first attempted my triangle Planter using aluminum as the mold, this was the result.
It looks like a loofah stone. This can actually be a cool look, depending on your project, but just be aware that by not coating it, you will have this effect.
What’s the best way to coat the aluminum? I like coating it with acetate sheets. The sheets are thick enough to eliminate the sponging effect.
I have also tried with contact paper, but it’s not quite thick enough.

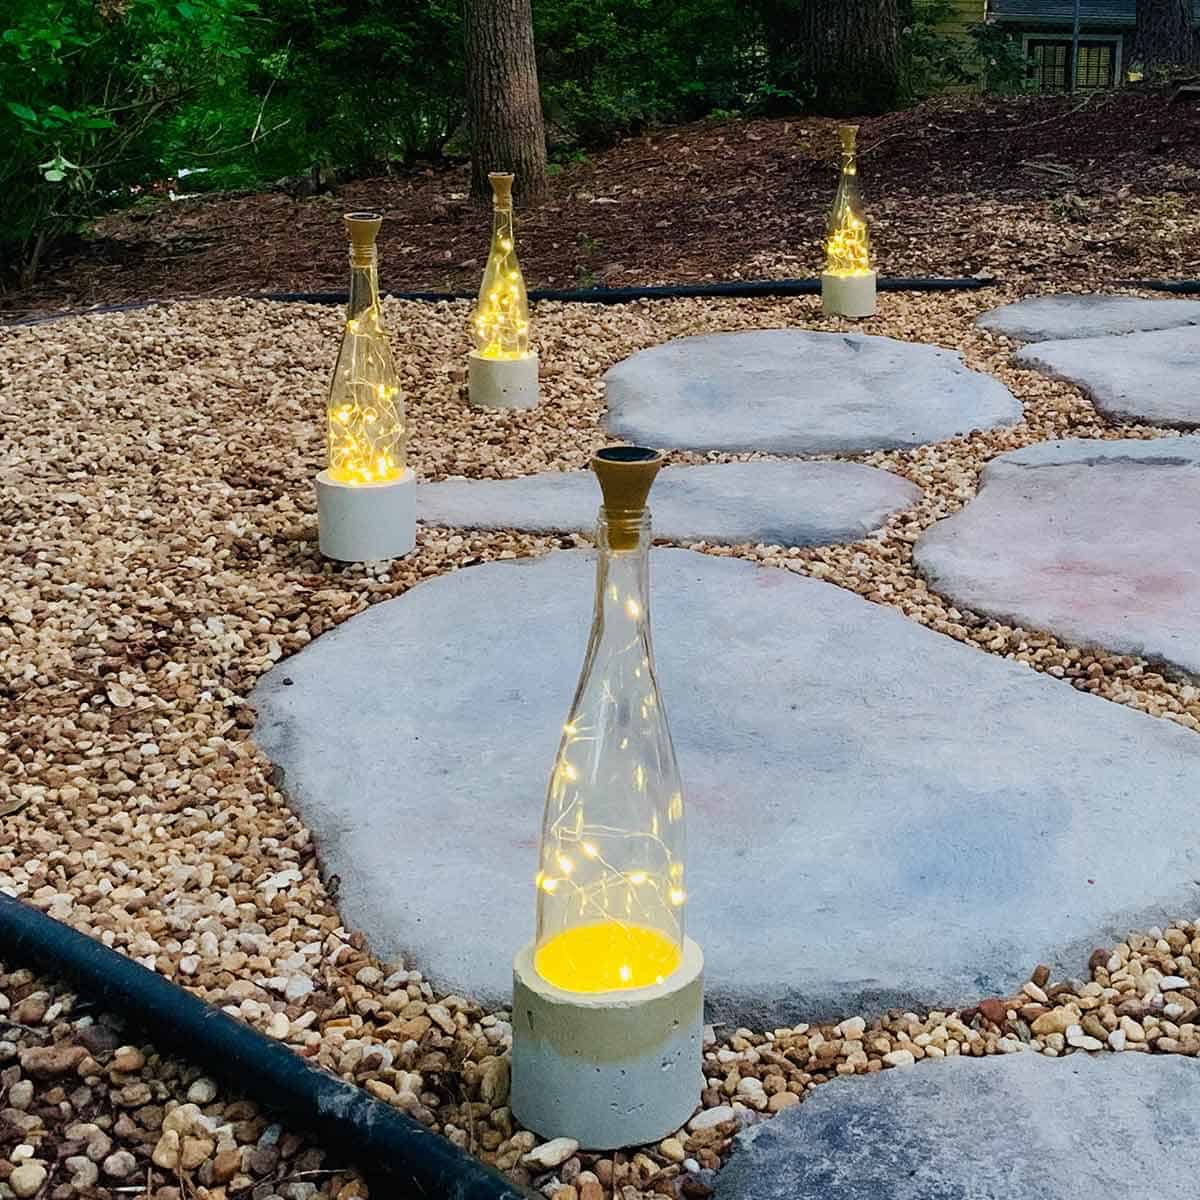
I used the flashing for the molds in these DIY wine bottle path lights.
Assembly
- Tape or staples
Benefits
- Smooth
- Flexible -can create any shape, especially helpful for curved shapes
Drawbacks
- Chemical reaction causes spongy look
- Coating the aluminum is an extra step
- May require additional support
Best Uses
- Concrete crafts that you want to be round or have curves
Glass
I recommend that you don’t use glass as a concrete form. This is because it doesn’t allow the concrete to release.
The only way to release it is to break the glass, but breaking it without cracking the cement is tough to do.
Best Uses
None
Silicone Molds For Concrete Crafts
A handmade silicone mold is about as good of a concrete crafts mold as you can get. Requires mixing 2 parts at a 1:1 ratio.
Benefits Of Using Handmade Silicone Molds
- Reusable allowing for many multiples of copies
- Provide a consistent and even surface
- Many pieces may not require any sanding.
- Typically easy to demold
Drawbacks
- Silicone is not very budget friendly
Best Uses
- Making exact replicas of an object
- Making multiple copies of a cement craft
- Planters, dishes, bowls
Here are some tutorials where I made silicone molds for planters:
- large concrete silicone mold for a planter
- a round sphere planter from a silicone mold
- a silicone concrete planter mold using PVC pipes
- silicone mold for a cement planter with texture (and video)
Make A Brush-On Rubber Latex Mold
A latex rubber mold material that is applied by brushing it on in many layers.
Benefits Of Using Rubber Latex Brush-On Molds
- Reusable allowing for a fair amount of copies
- Provide a consistent and even surface
- Pieces may not require very much sanding
- Flexible and allows pretty much any object to be easily demolded
Drawbacks
- Latex rubber is not very budget friendly, but it is less expensive than silicone
Best Uses
- Making exact replicas of an object
- Making objects with intricate shapes or undercuts
- Replicating objects that have very fine, intricate details
I used a latex rubber mold to make this cowboy boot planter.
The Best Concrete Mix For Molds
The good news is that the type of mold material you use isn’t really much of a factor in choosing a cement mix.
The bad news is that the determining factors will be the size, shape and texture you intend on having for your concrete piece.
I go into a great deal of detail in this article for six types of concrete craft mixes. But I can tell you that the smaller the space you are casting concrete into, the easier it will be if you choose a smooth concrete/cement mix.
Using a mix like Cement All, Quick Setting Cement or Portland cement at a 3:1 or 2:1 ratio with sand is going to be your best bet.
Chances are if you are building a large form, and using melamine, then you can use a low aggregate mix or a higher aggregate mix. You will need to base this decision on the size of the form.
The long and short is that the material type really isn’t going to come into play, so let’s celebrate the fact that you can cross that off your worries list.
Methods for Demolding Concrete
Release Agents Like Lubricants
You can use just about any kind of oil for helping cement release from a mold.
Many times, my decision on what to use is based on what I have on hand.
Your mold may not require a lubricant, and you may want to refrain from using one.
Lubricants can cause discoloration of concrete and an increased potential for pin holes.
If you need to use a concrete lubricant, then a clear oil shouldn’t discolor the concrete, but an oil with a tint to it like vegetable oil/spray or motor oil, can change the color.
For details, please see my Cement Tests where I did experiments on both discoloration and texture effects from using lubricants.
- Vaseline
- Vegetable or other oil spray
- Johnson’s paste wax
- Baby oil
- Mineral oil
- Motor oil
I rarely use a release agent for my cement crafts molds, but sometimes it is necessary.
If the material you are using as mold is porous, then it is recommended to use a lubricant.
Wood is an example of a porous material that may require a release agent.
When I made the tile for my outdoor wall decor flower tile, I used paste wax on the wood that I used to create the frame of the mold.
Hot Water
I have had some success with releasing molds from plastic by heating the inside with very hot water.
To do this, put a pot of water and the stove and get it hot- not boiling, but a bit before it boils.
Then carefully pour it into the inner mold. Wait a few seconds, and take care to not burn yourself, then pour it out.
Use pliers to pull it out. You can also do this with an outer mold by placing it in a larger bowl of the hot water for a few seconds.
The water will soften the plastic, enabling it to let go of its hold. It also may contract when it cools, which will also allow it to be removed.
This doesn’t always work but it is worth a try.
A heat gun works for many plastic molds much in the same way the hot water method does, but it is more convenient, safer and less messy.
Just wave the heat gun back and forth over and around the plastic. Sometimes the cement crafts piece will even drop right out.
Craft Knife or Utility Knife
Most plastic molds will come out just by simply cutting the plastic off.
Between the heat gun and utility knife, I can always get concrete out of a plastic mold.
This is one of the first methods I tried for removing a plastic mold from concrete.
A heat tool takes a little bit of patience and the smell of burnt plastic isn’t pleasant, but this will work.
Take care not to burn yourself, and don’t hold it in one spot for too long or you risk charring the concrete.
Needle-nose pliers are definitely necessary for many molds because they can grip surfaces that are too small for your fingers to grip, and they aren’t likely to slip.
Sometimes I can remove a mold with these alone, but usually these are used in conjunction with a utility knife or heat gun.
As you can see the options really are practically limitless for what you can use as a concrete crafts mold.
Hopefully now you’ve got solutions for all those cement projects you’ve been brainstorming.
Here’s the full list of supplies you’ll need for concrete crafts and why you’ll need them.
Don’t forget to Pin it for later!

What are some of your favorite pieces that you have made?
Hi Lori,
My favorite pieces are the Cement Balloon Planter, the DIY Concrete Pillar Candle Holders and the Triangle Planter. Thanks for asking!
Hi! I found this post by googling for help with making DIY concrete molds. I really love how thorough this post is, and it’s giving me some good ideas for starting points.
I’m trying to figure out how to make my own concrete barbells… because… the ongoing-ness of the pandemic and because proper ones are scarce or sold at a high premium. I’ve seen a couple of good tutorials on YouTube (ex 1: https://www.youtube.com/watch?v=9fH_J3O2LlY&t=239s and ex 2: https://www.youtube.com/watch?v=JUPWRiTRR5Y), but my minor critiques of what I’ve seen is that the proportions are way more than what I’m thinking (i.e. 10, 15, 20, 25…) or I’m just trying to figure out better aesthetics with form and function. I like when things can be both beautiful and useful.
I’m also wanting to make sure I do a build that’s not going to fall apart. One thing that I’d like to do is to make slightly larger in diameter ones as the weight goes up in a metered way (like what you would get with store bought). I also would prefer flatter discs, rather than what one would get with the slight grade or slant one would get with buckets that are wider at the top. I’ve been thinking of trying to figure out a way to use silicone sheets that you can make into bigger and bigger circles, but I’m not 100% sure how it would hold its shape while holding cement and drying without spilling out (maybe caulking it to a board to stay upright and with a seal) and cutting it after it’s dried?
Lastly, one thing I am tempted to try is to make geometric ones inspired by concrete planters that I’ve seen (such as this one: https://youtu.be/ZiBSeFuplrY) but I know I’d be finicky enough to want to get the math just right so that they would be like hex dumbbells (https://www.roguefitness.com/rogue-dumbbells). I’m someone who embodies analysis paralysis, so any advice is welcome.
It’s probably too much to ask you for your own tutorial, but I’d love to know your two cents about best practices or what you might do.
Hi,
In terms of the geometric barbells, it’s hard for me to say because although I know the video you are referencing, I would end up having to make them a few times to get my proportions right, but since it’s also an aesthetic thing, what is in my head, may not be what you are looking for.
For the round ones, that’s a bit easier. Take a look at my Wine Bottle Fairy Lights tutorial where I used aluminum flashing to get a round shape. You will definitely need to use a silicone sheet to coat the inside of the aluminum so as not to get a chemical reaction, which will make it a ruddy texture and risk cracking.
The nice thing about the flashing is that you can size it any dimension you want. Sometimes getting it perfectly round can be a challenge, but if you wrap the flashing around several times, it will be rigid enough that it should stay round. Although I don’t know if you can get it 100% round.
Another thing you could do, is decide what circumference you want and find a hole saw blade (like the kind used for making corn hole boards), then get some 1″ thick pink foam insulation from a store like Home Depot and you can cut perfect circles in the foam to use as your template. Does that make sense?
dear manager
may i know do you using RTV-2 silicone rubber for your products please ?
Looking forward to hear from your early reply!
jack.
Hi,
I don’t make products, I just teach people how to make things. I haven’t used that type of silicone.
Hi love all your posts…. I have a silicone mold very similar to the dark blue in your photo for this post…. I have tried a lot of times and can’t get the mold off… the bottom is perfect (have some lovely coasters) yet the walls of the pot just crumble…. help please….
Hi Anita,
Thanks! It’s probably the type of mix you are using. When I use that mold with Cement All I have never had it crumble. Cement All is extremely dense and hard and has never crumbled once in any project. When I tried it with a white mortar mix it crumbles. If your is like mine, the walls are thin and the mold itself is taller than wide which makes it more difficult to remove from the mold. That can cause too much stress on your cement. I too struggle with demolding this one, but lubricant does help.
In 20 years of browsing the internet on various hobbies, this is one of the most detailed and informative how-to’s that I have ever read. Incredible job! Thank you so much for the time you spent on this.
Hi Dave,
Thank you, that means a lot to hear that. I hope you’ll feel the same with most of my informational-type of articles. I have spent way too much time on the internet being frustrated with a lack of details. So when I started this site, I fully intended on giving as much detail as I could, whenever possible.
Hi. Love all your advice on making concrete crafts. I was wanting to use those plastic pumpkins that kids use for trick or treating to make a concrete pumpkin. Will I need a lube to release it? I don’t want to destroy the pumpkins, ( I have 2)I want to reuse again. I have caster oil that I read from a YouTube tutorial. He saidmix it with rubbing alcohol & spray inside a latex mold, then turn mold upside down to drain out the excess. I was wondering if beeswax would work? I could melt some & brush into the pumpkin as a release. Would that work? Just trying to find the best way to do this. Hope you can help!
Hi Becky,
Unfortunately you won’t be able to reuse a plastic pumpkin pail. The shape and rigidity of the material won’t allow for you to get the concrete out without cutting into it. Here’s a tutorial where I made one, but it will be impossible to demold that type of shape without fully cutting it, and no amount of oil or beeswax will help. https://artsyprettyplants.com/cement-jack-o-lantern/
Castor oil and alcohol is specific to helping demold a “latex” mold and unrelated to what you’re trying to do. I think if you look at the tutorial linked above, you’ll see why you won’t be able to release something from a rigid plastic that’s bigger when cured than the actual opening it went into. Only a silicone or latex material will allow for that. Sorry, I wish I could give you the answer you want here.
ıs this polyurethane or silicone?
Can ı use polyurethane rubber instead of silicone?
Thanks
Hi,
I would not use polyurethane rubber with concrete because it much more difficult to demold. It tends to stick a lot to concrete. It also, I believe, will break down quicker with concrete. Silicone is by far the best mold making material for concrete- platinum cured silicone.
Hi Ellen,
Do you have any experience making molds with PVC foam boards (10mm thick so that they are a bit sturdier) or acrylic sheets (kind of like a mirror but can be joined and drilled through)? I need to make a a lot of large tiles (800 cm x 800 cm) with GFRC concrete. The objective is to reuse the mold as many times as possible to get consistent sizing (and save money) so melamine is probably not ideal due to risk of swelling. I wonder if concrete will react weirdly or stick to these materials. Thanks!
Hi Edd,
For concrete projects other than your big tiles, I recommend using pink rigid foam insulation board. It’s fantastic for making molds. I have never tried with 10mm foam because wet concrete is so heavy, I’m quite sure it will cause the middle of the board to bow. IHere’s a project where I used the pink foam boards:https://artsyprettyplants.com/large-hypertufa-planter-trough-diy/
The 10mm board will get wet and soak up the water from the wet concrete as well, and will likely stick.
Now, for your 30” -ish sized tiles, I truly think you should use melamine. If you get the coated white melamine, you won’t have trouble with swelling. Since you’re talking in metric units, I’m guessing you aren’t in the US? I love, love using PVC molding for my side mold pieces. I’m not sure if you have that where you are located. Here it’s called PVC casing mold. I just used it here: https://artsyprettyplants.com/diy-concrete-tray/.
You’ll never have to worry about any of the above mentioned issues. It’s just an easy-to-cut plastic piece of “wood”. Best thing ever for mold making. To avoid swelling, fasten the sides to the top of the melamine so you stay away from the exposed particle board edges- that’s where the swelling comes in.
Acrylic could work, but will likely scratch with multiple uses. You may run into this with melamine as well though. One potential workaround is using acetate film sheets and changing them out as they get scratched. It does come in rolls big enough for your project. It may not be the cheapest way to go, but you may not need a lot, it just depends on how many times you can cast the melamine before its surface is compromised. Note: The glossy acetate will make your tiles mirror-like glossy. Get the matte kind, it will also help hide flaws.
I hope this helps!
Hi Ellen, thanks a lot this truly helps!! Yep, I’m from the UK 🙂 I didn’t think about the scratches – that could be an issue… I’ll try to get my hands on some of those sheets you mentioned! Thanks again, keep up the good work!