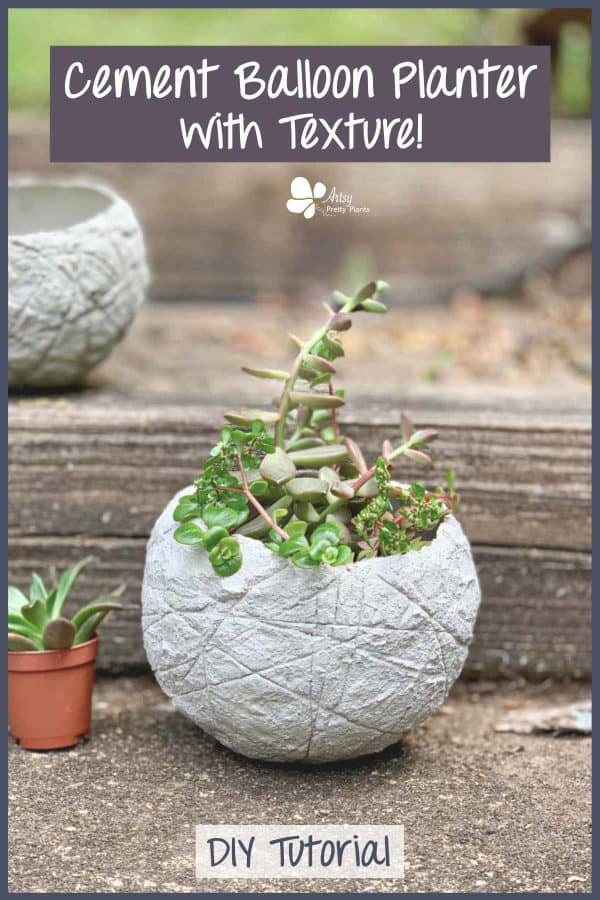
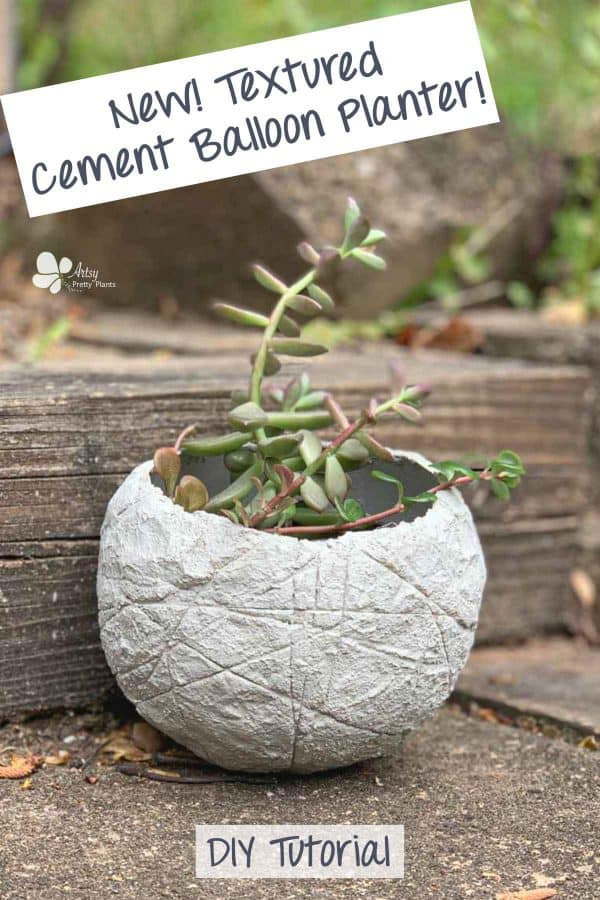
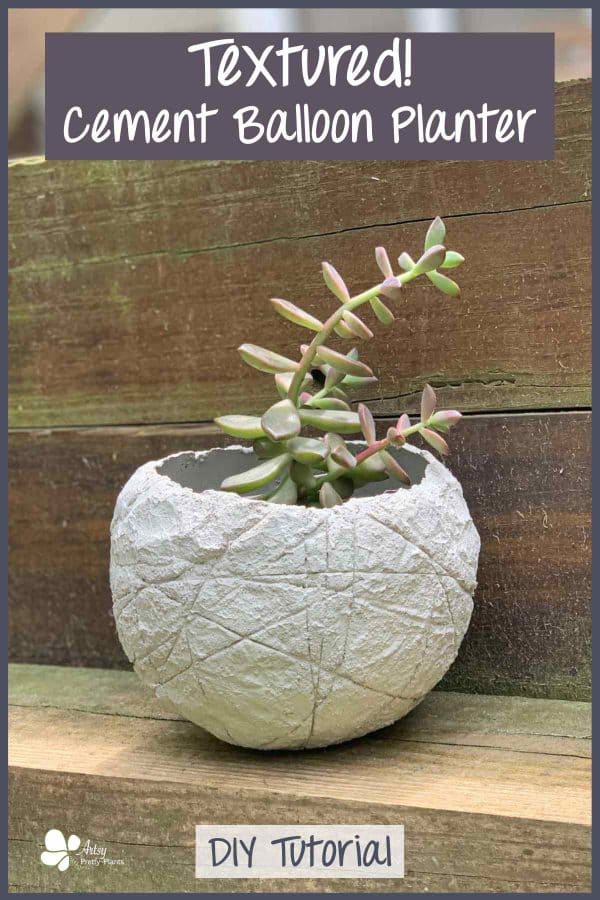
Textured Cement Balloon Bowl Planter
Making a textured cement balloon bowl planter is easy! And in this tutorial, I will show you how.
I don’t know what it is about sculpting cement over a balloon, but man is it fun.
I had experimented with getting the texture for this balloon bowl planter a while back using yarn, but it wasn’t easy to remove. Nor was it easy to work with.
Part of the issue was that I was stuck on making it totally round like the balloon planter.
And the problem that presented was that with a round form, you need to make it in two halves.

One side needs to cure separately and that makes it tricky when you want a continuous wrap around the object.
So I wondered, how round could I make it without having to do it in two halves?
I did a test and was surprised that you can actually go more than halfway around the balloon.
Well, this was fantastic news for me. As long as I could get something rounder than a half-moon, I was good with that.
I get stuck on the visual aspect of things, ya know.
So the good news is that you can complete the cement form in one pass. But to get the cool texture, you’ll still need to make a second pass at it after it cures.
This project is very similar to the original cement balloon planter, my all-time favorite project.
It was the one that really had me bitten by the concrete bug.
Kind of like being bitten by a vampire, I was transformed- no going back. A concrete junkie forever.
Give the textured balloon bowl planter a whirl!
And if you haven’t tried the original Cement Balloon Planter yet, give that one a try too!
Some of the links on this page have been provided as a convenience for finding materials. These links may also be affiliate links. As an Amazon Associate I earn from qualifying purchases, at no extra cost to you.
I only recommend products I’ve used and loved, unless otherwise stated. Click here to read my full disclosure policy.
DIY Difficulty Level | Easy
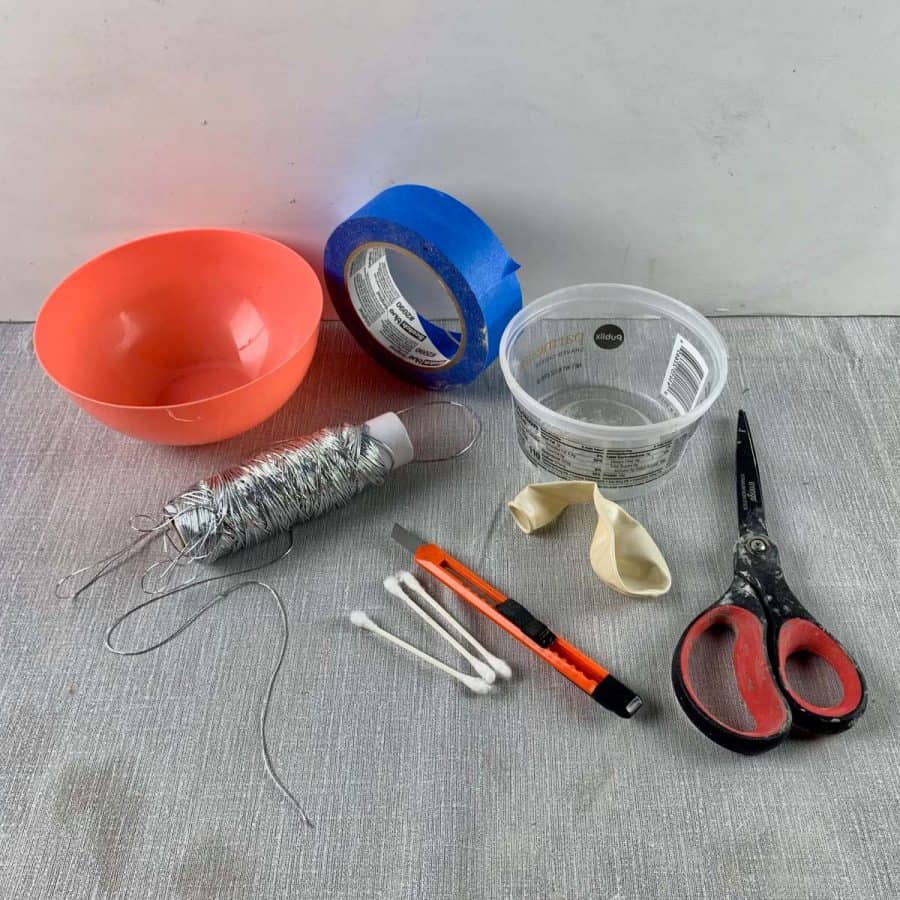
Materials For A Cement Balloon Bowl Planter With Texture
- Rapid set cement
- Disposable bowl
- Disposable cup
- Durable nitrile gloves– I like these because they are so durable, you can rinse and reuse them
- Safety glasses
- Safety mask– rated for silica dust
- 12″ balloon – thickened
- Elastic cord– (1 mm thickness), min 25 feet (8-9 yards)
- Wide-mouthed container ( I used a shredded cheese container)
- Cotton swabs (3-5)
- Scissors
- Blue tape
- Craft knife
- Extra dish or cup for dipping water
Tutorial Steps For Making A Textured Cement Balloon Bowl Planter
Before starting the tutorial, it may be helpful to read my article comparing the different concrete mixes and sealers– Cement & Concrete Crafts Tests!
Another important article is Making Cement Crafts Techniques & Tips with info on cement materials, mixture consistencies, demolding, safety and clean up!
Step 1. Prep The Balloon And Your Workspace
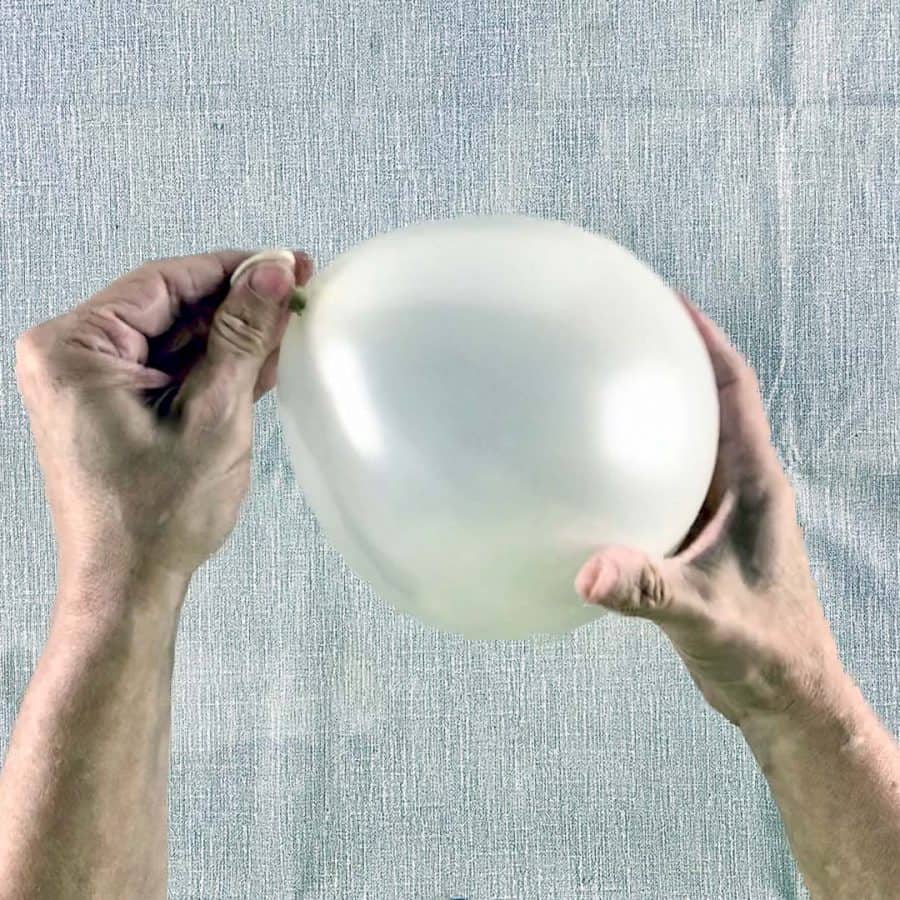
Inflate the balloon to your desired size. Keep in mind that the planter bowl will be a little larger than the balloon so you may want to make the balloon slightly smaller to compensate.
I made mine 6” at its widest point, which resulted in a 6 ½” wide cement bowl.
Also, underinflating the 12” size balloons will cause the open end to be a little elongated which will help the balloon hold more stead in the container.
This will help even more in a later step where you will need to hold it in one hand while wrapping it with the elastic cord.

Next, take the wide mouthed container and tear off pieces of blue tape to cover the edges.
The plastic edges may be sharp in points. Taping them will help prevent the balloon from popping on those edges, as you will be placing a fair amount of pressure on it.
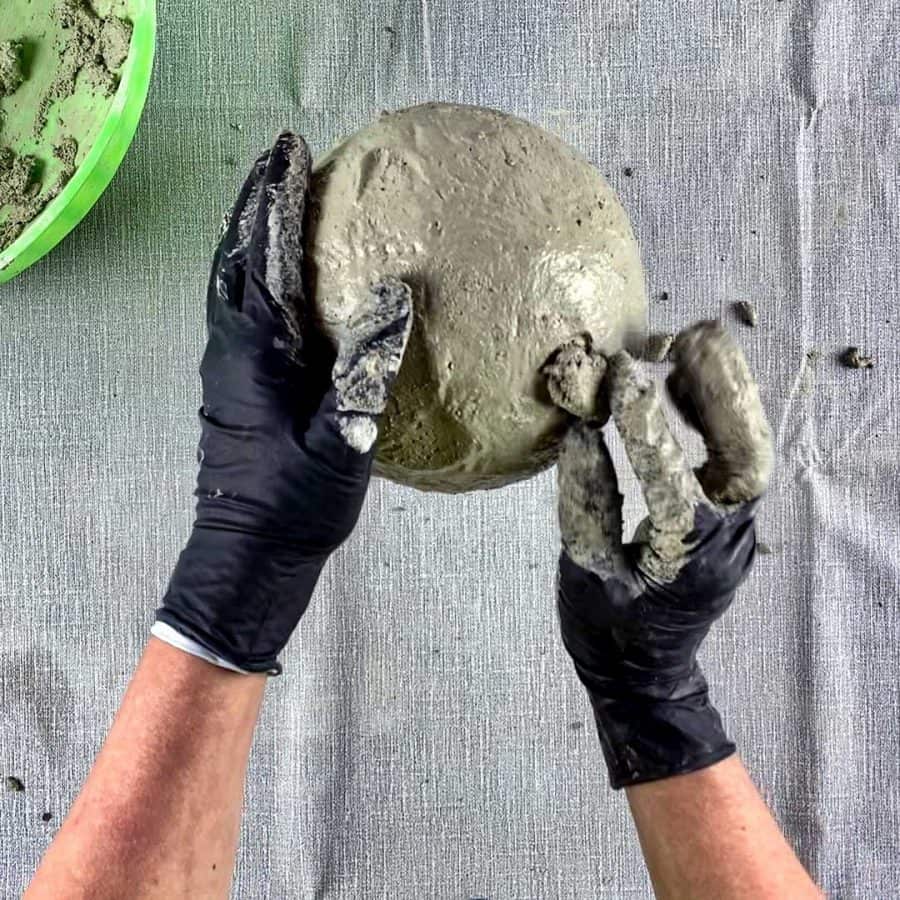
Step 2. Mold The Cement Around The Balloon

Mix the cement to a mud pie-like consistency so that it has some form.
To check for the proper consistency, when you pick up the cement and drop it, it should fall down more in globs. Not in a continuous fluid piece.
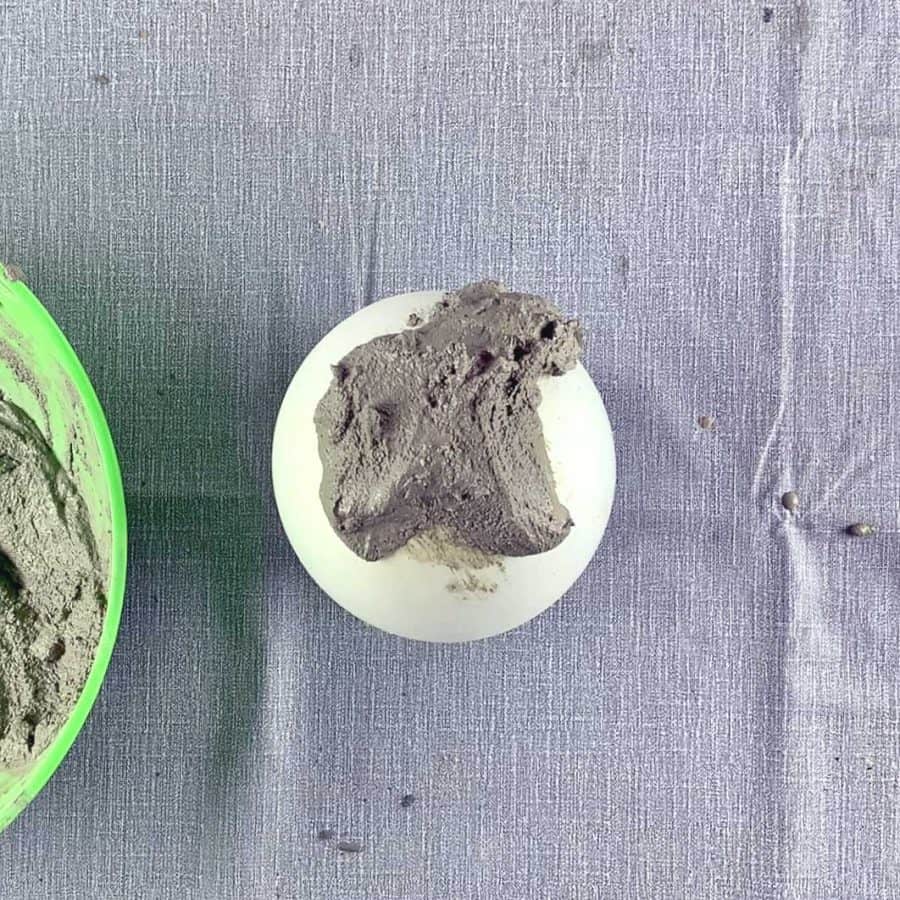
Place a gob of the cement onto the balloon and spread it over the balloon. You should be able to go past the midway point without the cement falling off.
The cement doesn’t need to be too thick and it will actually be a little easier if it’s spread out on the thinner side.
If it’s thick, it will add more weight and gravity will keep pulling the cement downward, past where you want it to go.

Just take care that it’s not thinner than ⅛” and that if any holes show up that you patch them with wet cement.
If you end up with a hole, just add a small piece of cement to patch it.
Then dip your fingers into the dish or cup of water and smooth it over, or add a little bit of cement to that spot and blend it in.
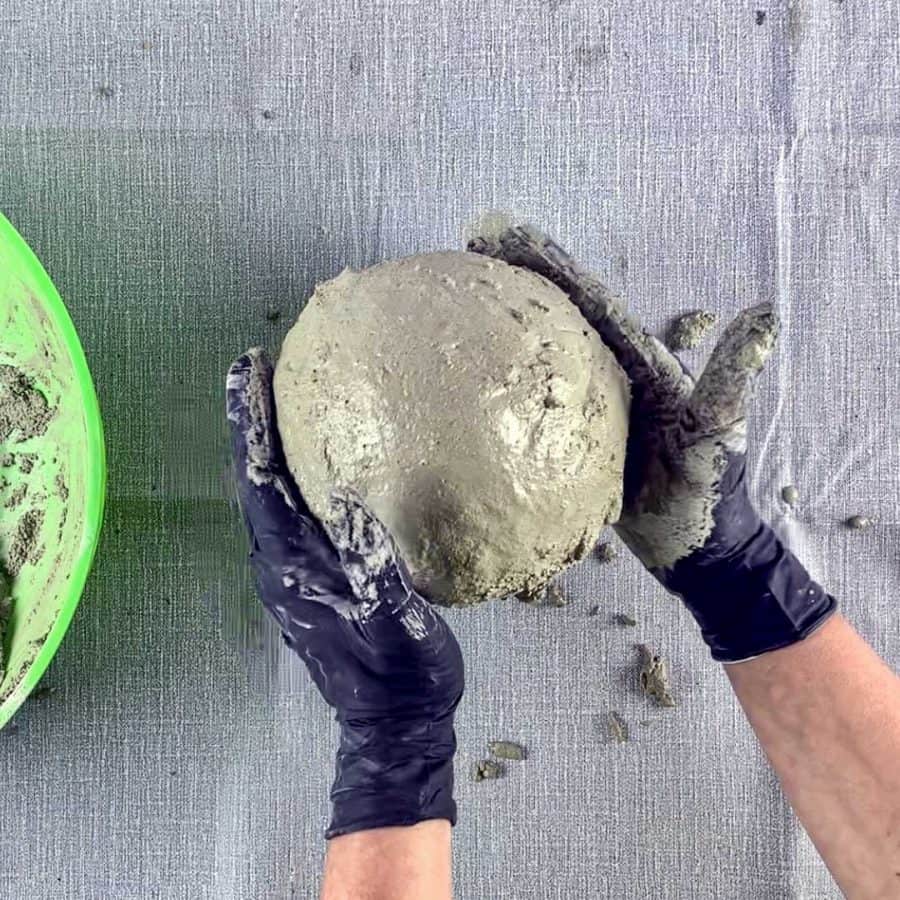
Keep working your way around the balloon, smoothing as you go.
Though the cement doesn’t need to be perfectly smooth, you do want it smooth enough that it doesn’t look lumpy.
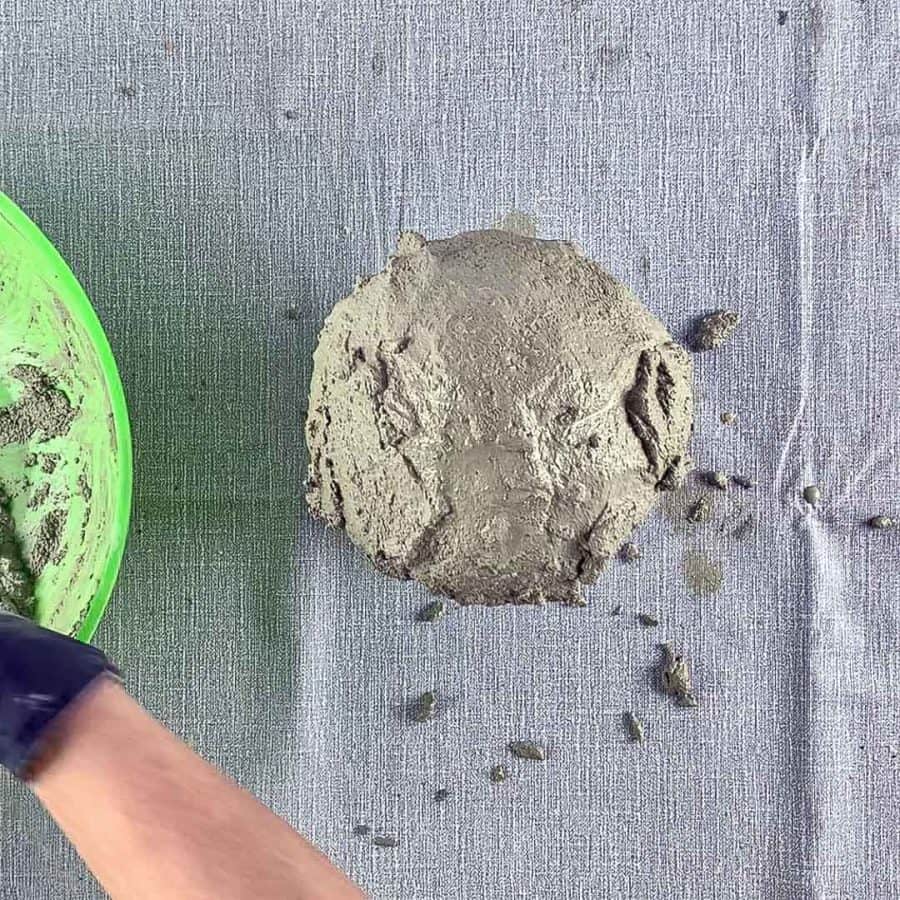
Once you get to the midpoint of the balloon the cement may not hold and instead slide off.
If this happens, wait a few minutes to give the cement a little bit of time to set, so that it gets more rigid and will stick better.
You may need to wait longer than a few minutes but it will depend on many factors, such as how cold your water is, the temperature you are working in, humidity, etc.
Once it is sticking to the balloon, mold the cement around the balloon until it is a couple of inches below the midpoint.

For my planter bowl, this ended up being about an inch above the mouth of the container. This will depend on the size of your container and size and shape of your balloon.
The goal is just to be sure you have a nice bowl shape that also allows a good wide space for potting your plants.
Again, if your cement was sliding or was a bit thick, it may be sliding right to the edges of the container- and likely will.
So just pinch the cement at the bottom with your fingers and trim it off that way.
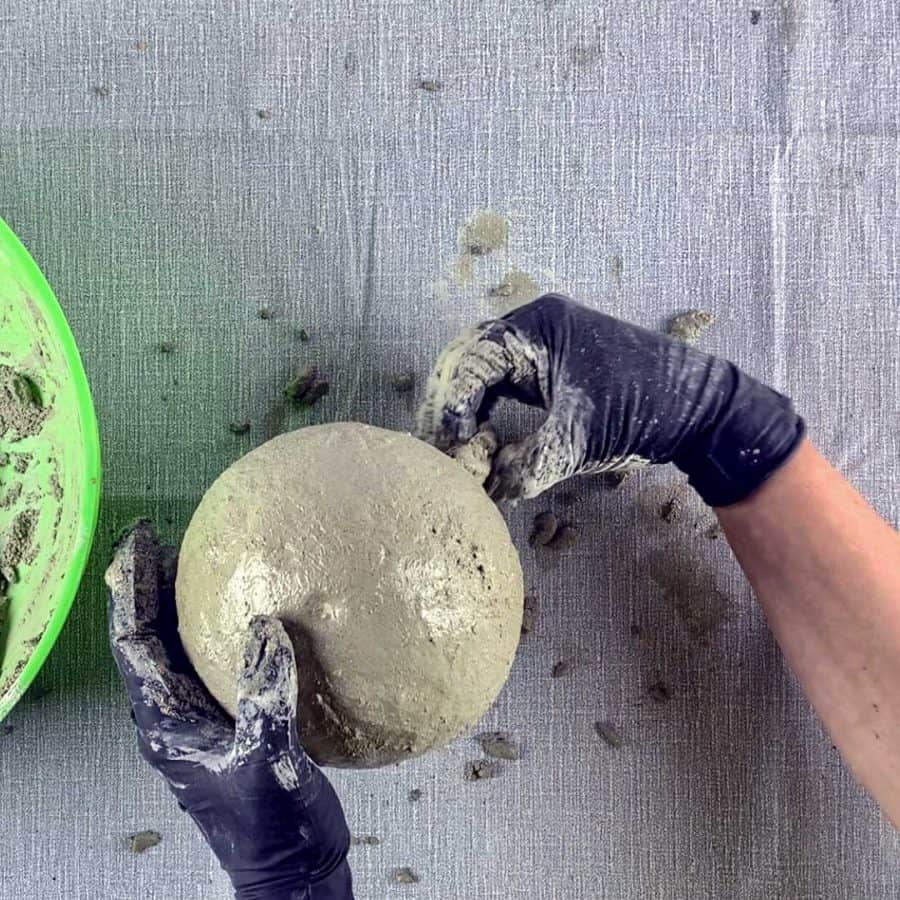
I had to do this a couple of times. Double check that the cement didn’t pull any thin spots near the top. If it did, just add some wet cement and smooth it over.
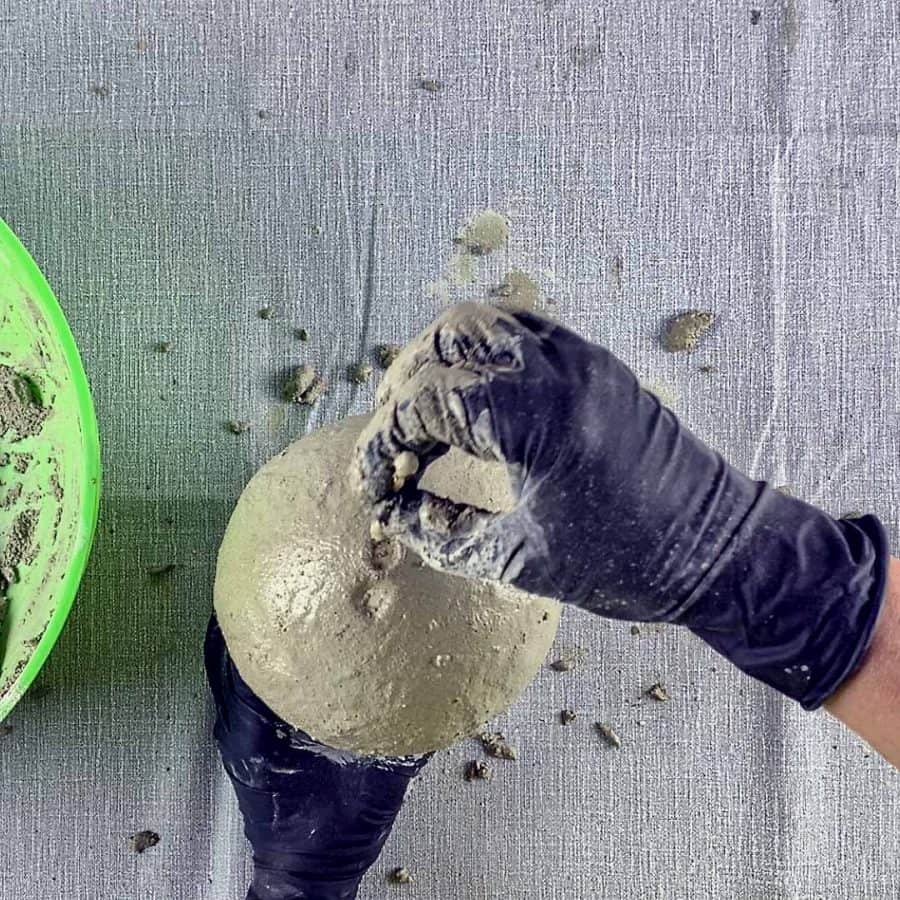
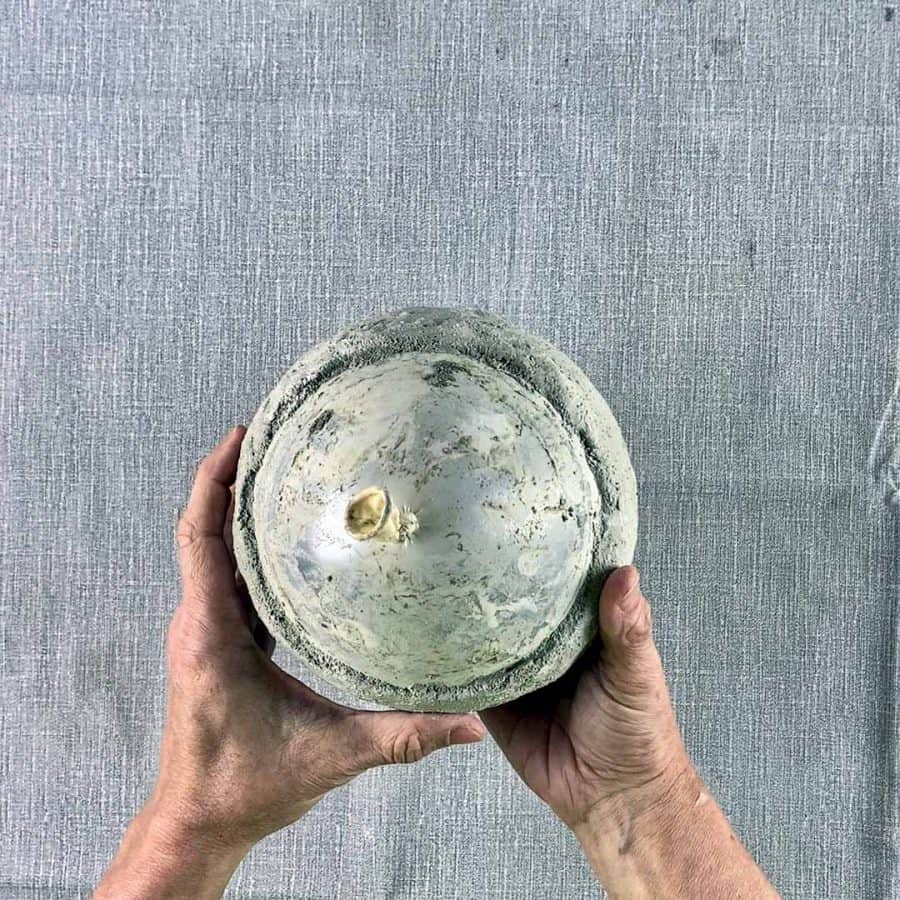
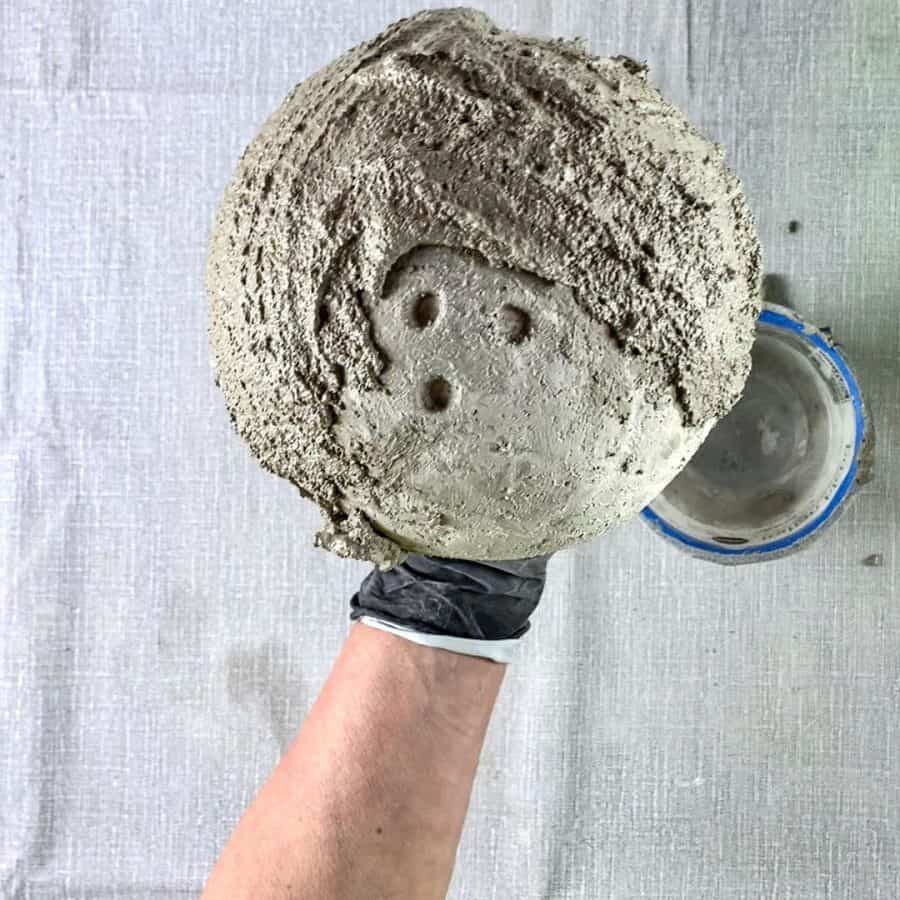
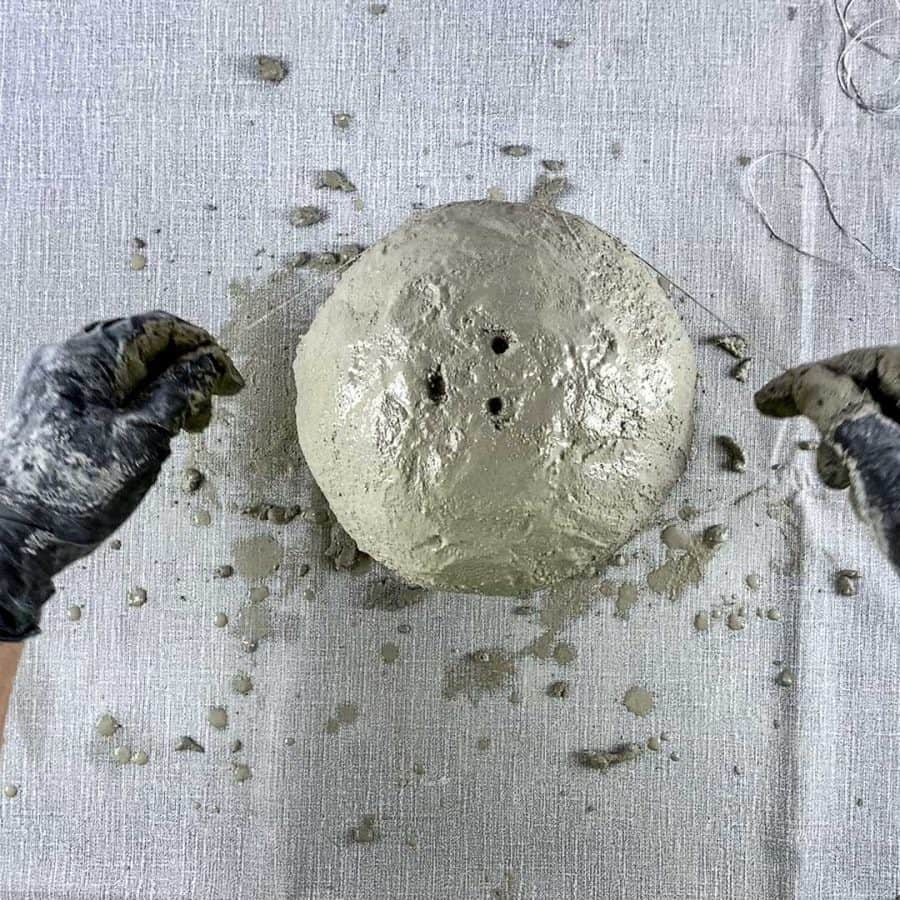
Once you have finished, you’ll create the drainage holes by dipping a cotton swab into water and pressing it through the cement until it touches the balloon.
Do this in two or three locations near the top.
Let this cure for about an hour.
Step 3. Add The Texture Layer To The Cement Balloon Bowl
In the original Cement Balloon Planter tutorial, I added a skim coat to the inside of the planter to thicken it to make it stronger.
But for this bowl planter, we will instead add the skim coat to the outside which is how we will create the texture.
This will also reinforce the cement, and provide us with a nice hard stable surface so that we can easily hold the planter while wrapping it with the elastic cord.
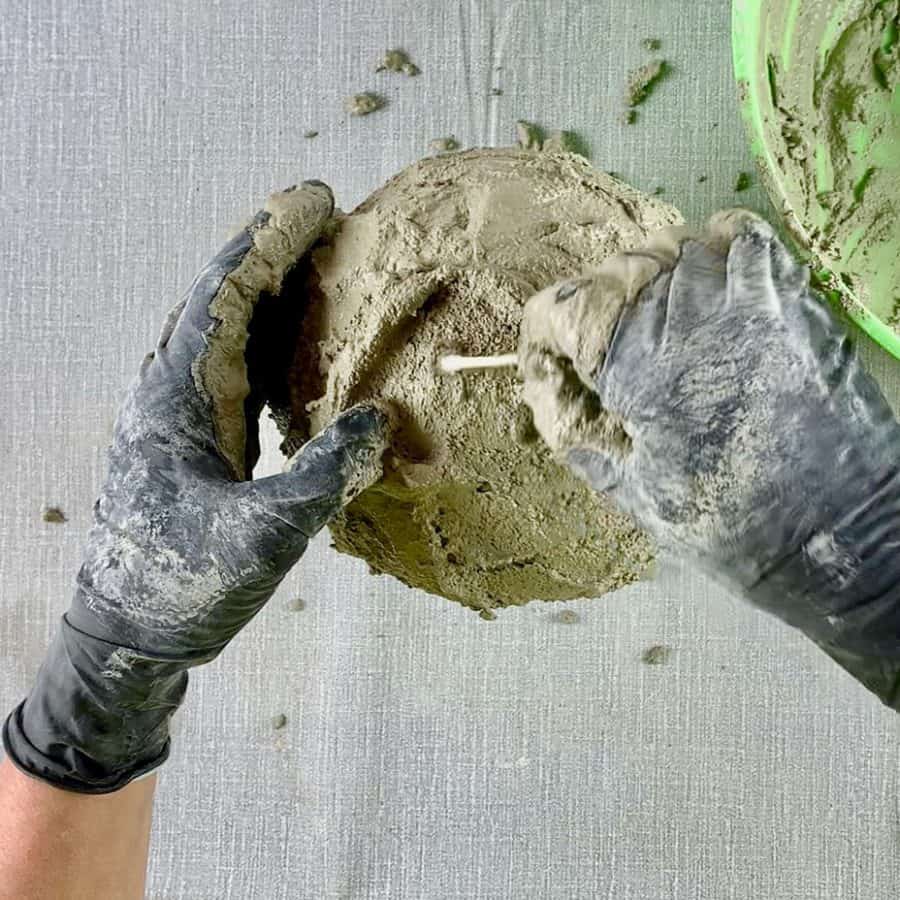
Note: You can see here that there was a line where the cement wasn’t seamed together and when it cured, it contracted, leaving a split.
This was super easy to fix. I just mixed up a little bit of cement and water into a paste-like consistency and smoothed it over the line on the inside and outside.
I waited for that to dry before moving on.
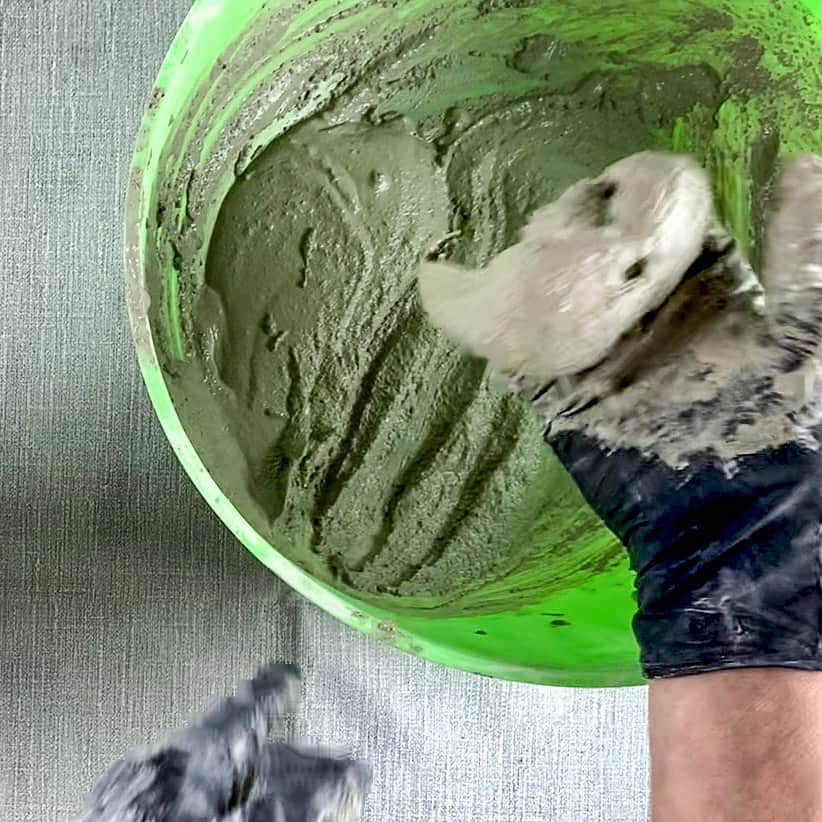
Now, mix up a second batch of cement and this time make the consistency a little thinner, more like a wet mud pie.
Spread this on top of the existing cement, keeping it smooth. This layer will also only be about ⅛” of an inch thick.
While spreading this layer on, do the drain hole area last.
Once the layer has been spread smoothly all around, then go back to the drain area and add the cement there too.
Make note of where the holes are and re-open them with a cotton swab.

If necessary, you can make the cement a little smoother by lightly dipping your fingertips in water and patting the cement with them.
Don’t do this too much or it will pull the sandy part of the cement to the surface, making it look rougher.
Step 4. Create The Balloon Bowl Planter’s Texture
First, take the cord and wrap it horizontally around the middle and tie it in a knot. Then while applying some pressure, wrap the remaining cord around the balloon.

I found the easiest way to do this was after the initial middle wrap, to pick up the balloon with my left (non-dominant hand) and use my right to wrap the cord around the planter.
I started vertically, wrapping up and around the balloon in different sections so I had about 10 times.
They were spaced apart vertically, and evenly, at different angles for a balanced look.
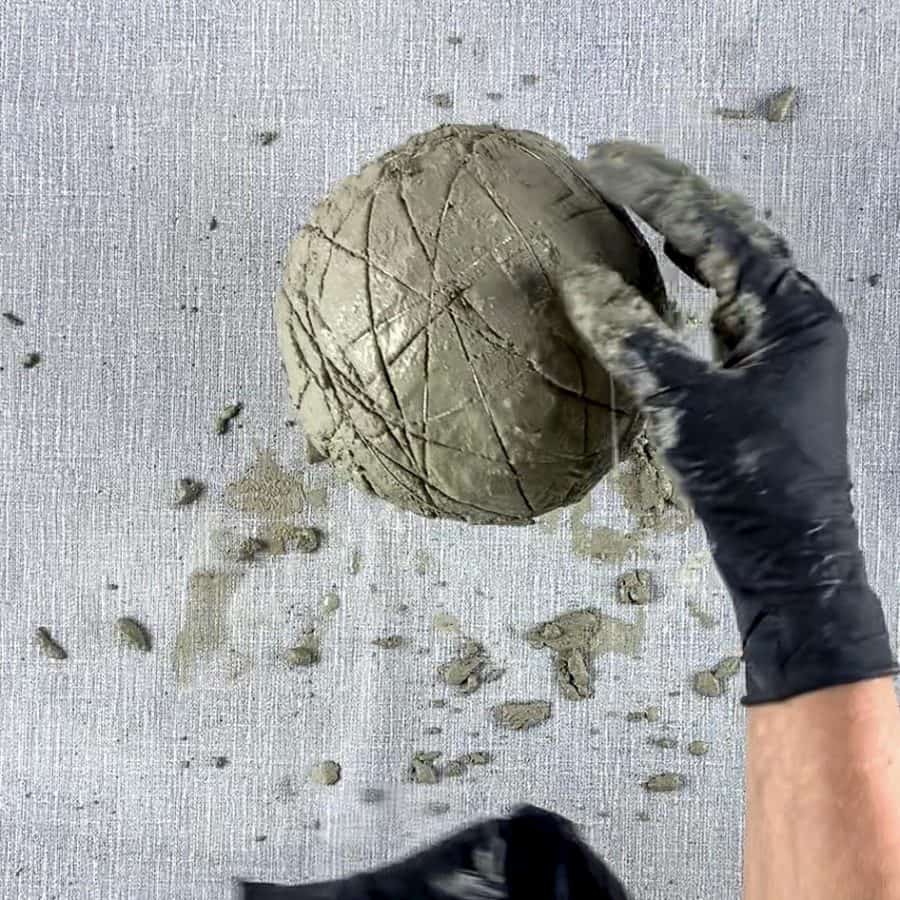
Then I set the balloon back down in the container and went back to wrapping horizontally from different angles for another 10 to 15 wraps.
While wrapping, just pull the cord tight enough that it creates an indent, but not so tight that it goes all the way through to the balloon.
Once you are happy with the number of wraps you have, just let the end of the elastic dangle.
The cement should be firm enough to hold it in place at this point. It will be from this end that you will unwind it from later.
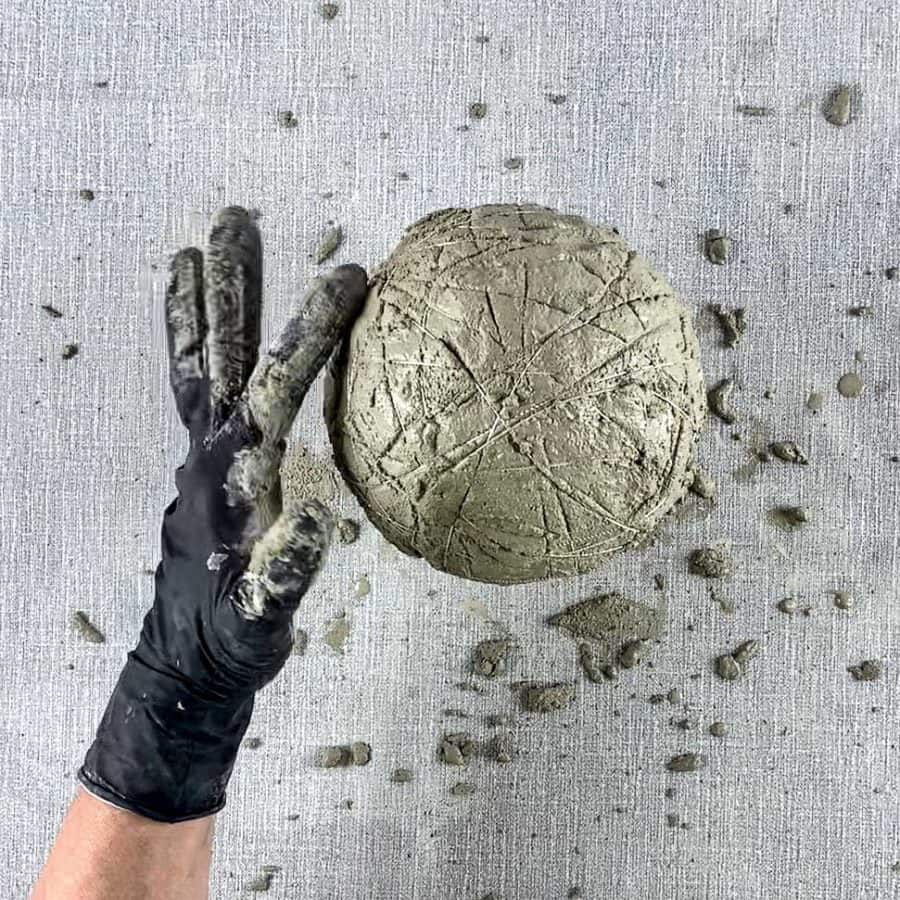
Note: It will be tough to do this without touching parts of the cement that you have already wrapped and this will likely cause the cement to seal together over the string.
Plus you may have some areas where the elastic created a groove that you needed to smooth. Go ahead and smooth it.
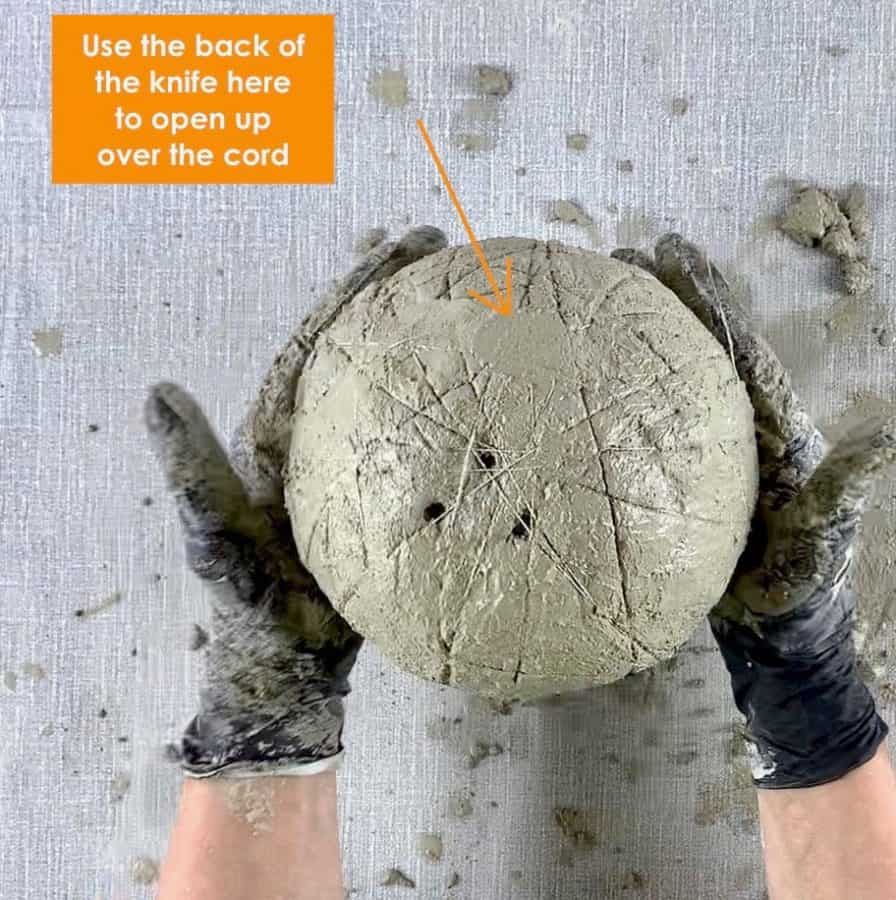
In either case, once you have finished wrapping, use the craft knife and with the back edge, retrace over any cement that is sealed over the elastic to open it back up. Otherwise, the string will get stuck.
The cement balloon bowl will need to cure for anywhere between 50 minutes to 1 ½ hours, depending on conditions.
However, you will need to unwrap the cord before the cement has fully cured, otherwise, it will be difficult to remove.
I made these twice and the first time it was about 40 minutes that it was ready for unraveling and the second time it was almost an hour.
The cement should be hard to the touch, but still quite moist. I recommend after you have finished wrapping the cement with the cord to set a timer for 30 minutes to check on it.
If the cement is very soft, then check again in 15 minutes. If it feels fairly hard, then pull back on one of the strings.
As long as no large chunks pull off with it, then you can remove the cord- see the next step.
Otherwise check again in 10 minutes.
Step 5. Demold The Cord And Balloon

Be sure to wear safety glasses for this because the pieces fly everywhere- really, everywhere. It’s best to do this part outside.
First, cut the tied area of the cord, but don’t unwind from here.
Instead, start from the piece you left dangling since it is the piece that is layered on top.
Keep unraveling in order and don’t cut multiple pieces at once or it will be more difficult.
If you just start from where you ended, you should be able to get it off in one piece.
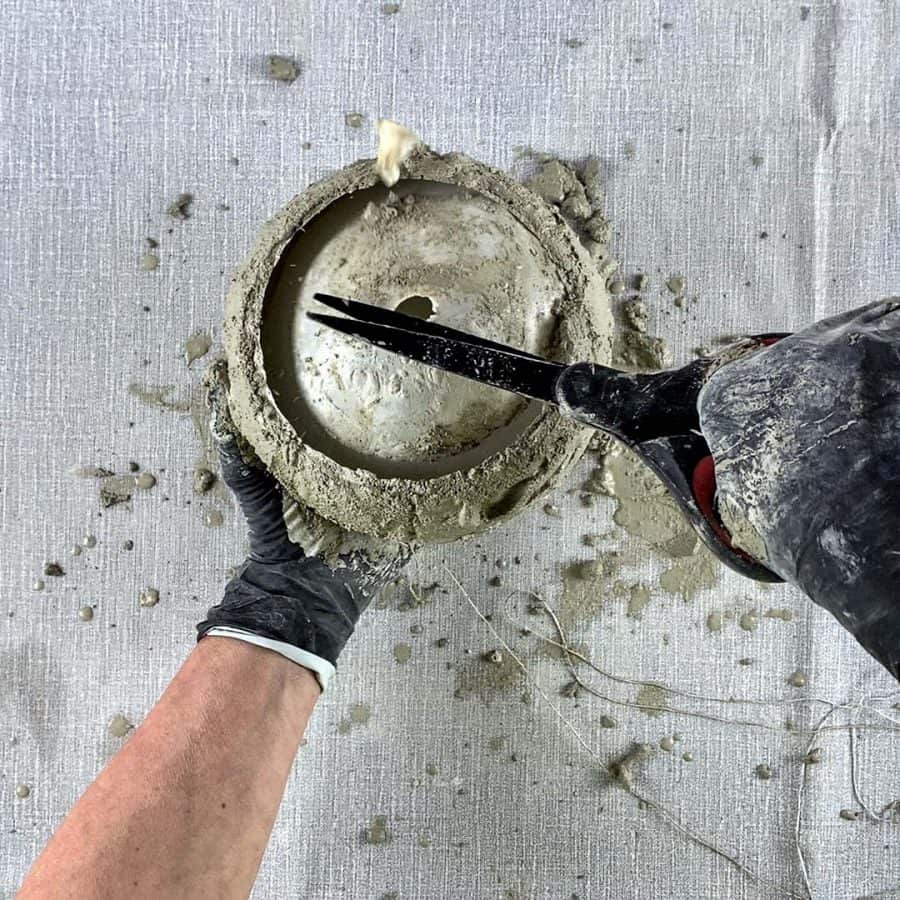
My favorite part! After you have removed the cording, you can pop the balloon. Just use scissors and snip the tied end off.
Remove the balloon and then let the cement continue to cure, so give the cement balloon bowl planter another 15-45 minutes, depending on conditions.
Step 6. Pot Your Textured Cement Balloon Bowl Planter
Plant this with your favorite succulents- they flourish in an alkaline environment.
If you choose to plant this with a non-succulent plant, then I recommend reading this post about how to prepare your cement and concrete planters to be safe for plants.
And to see another type of balloon planter, check out my clay balloon planter tutorial!
Don’t forget to Pin it for later!