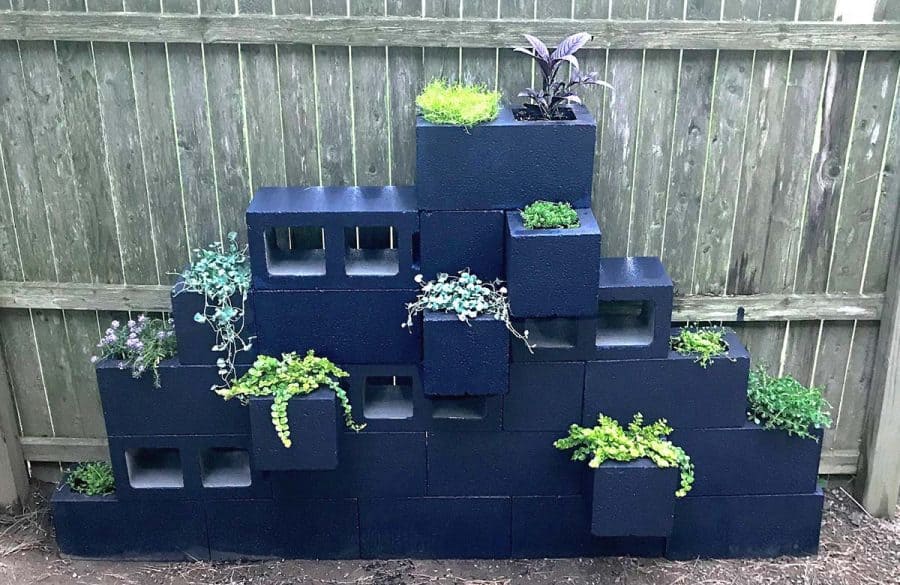
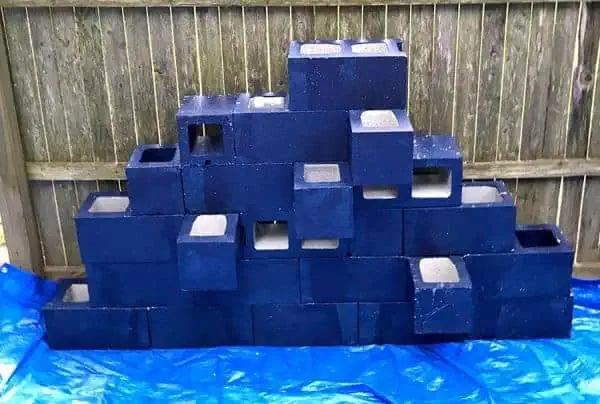
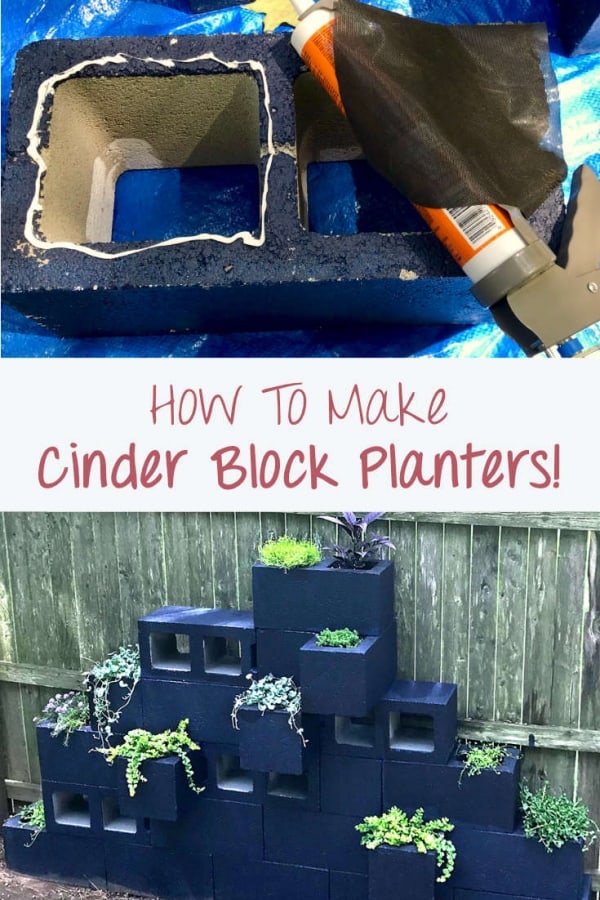
Make DIY Cinder Block Planters
Here is a tutorial for how to paint and stack cinder blocks, then add plants to make a fantastic vertical cinder block planter wall.
DIY DIFFICULTY LEVEL | Moderate
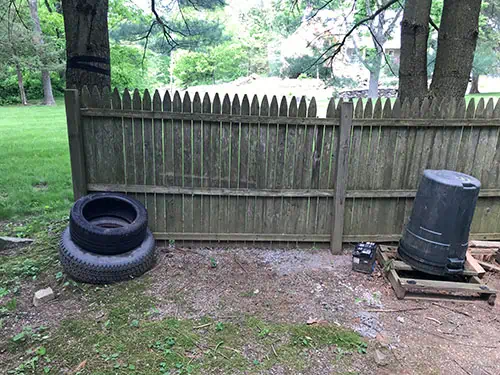
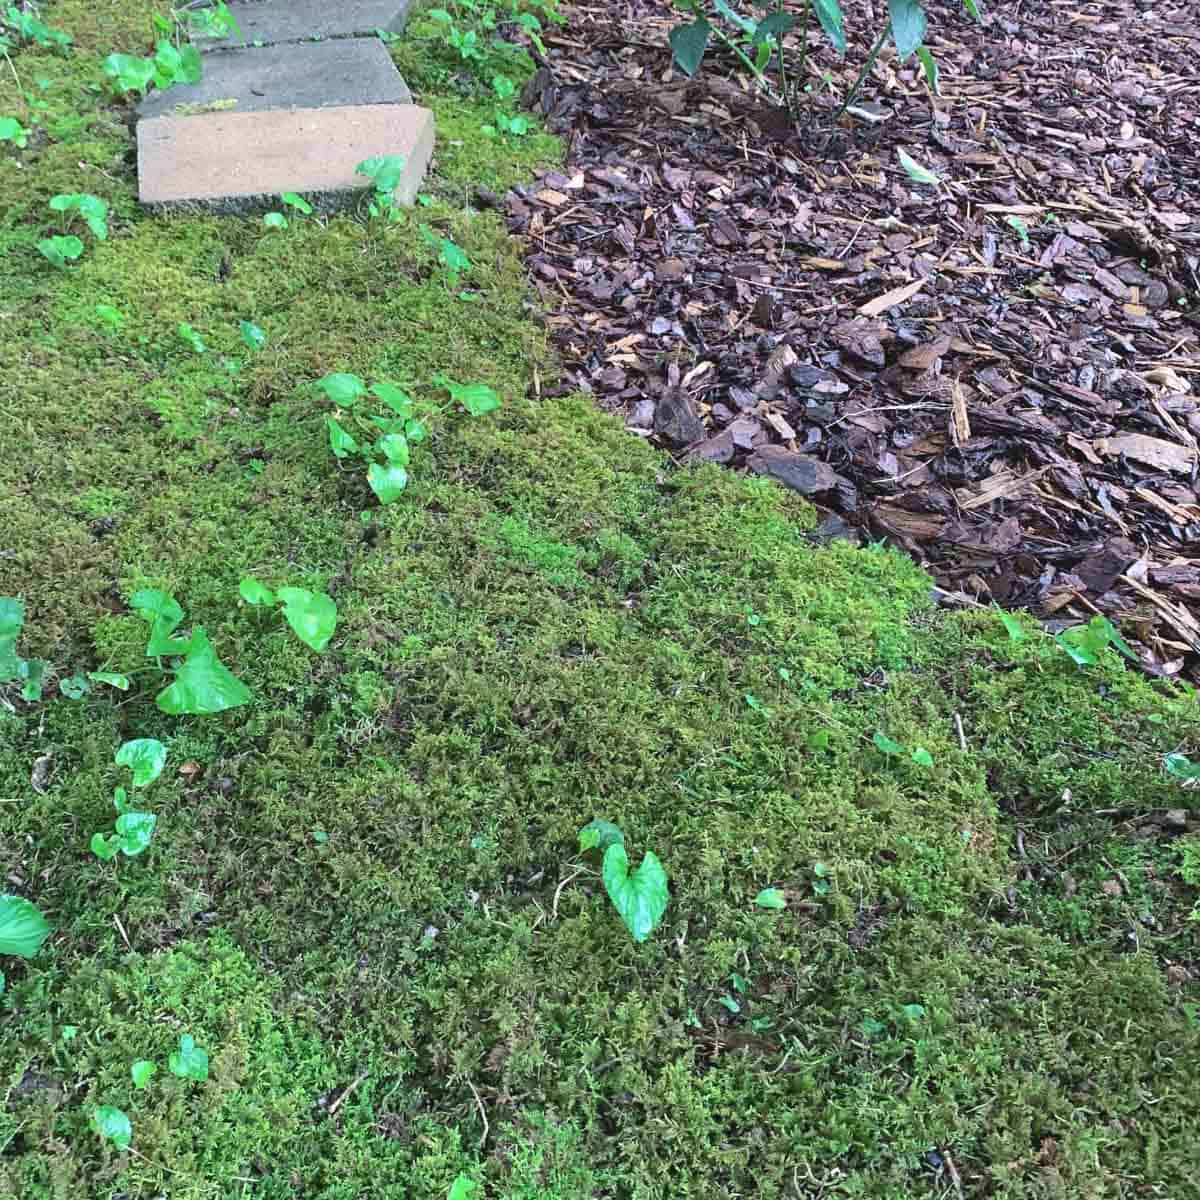
I really needed a way to spruce up this bare spot in front of a fence in my yard. This home is a rental, so painting the fence wasn’t an option and still leaves me with a bare space.
I have a bunch of plants and not enough room on my deck for all of them, so I decided to make a set of vertical cinder block planters, or planter sculpture.
Is It Safe To Put Plants In Cinder Block Planters?
If you are wondering whether it’s safe to pot plants in cinder blocks, the answer is yes, it is.
Though these blocks are made of concrete and concrete leaches alkalinity. Alkaline soil can damage many plants as most prefer acidic soil, unlike succulents which prefer alkaline soil.
However, concrete only leaches the alkalinity for a short period after it has been poured and cured.
Since cinder blocks are typically stored outside, most of the alkalinity will be gone before you bring them home from a store or landscape yard.
Additionally, the masonry primer would also provide protection from this.
You can read more about how to keep plants safe in concrete here.
Growing Healthy Plants In Cinder Blocks
Plants can grow well in cinder block planters. But just like with any garden and any plant, you do need to take a few things into consideration- like the amount of sun they will get and the type of plants being planted.
The best way to plant a cinder block plant is to use landscape fabric. This will ensure that your plant soil retains plenty of moisture.
When I planned out the tutorial, I didn’t realize just how much water would be retained using the fabric. I ended up having to cut back on watering, or I would have drowned the plants.
Cinder blocks are very porous and can dry out the soil quickly. This is one reason you often see succulents planted inside, because they do great with dry soil.
With my non-succulent plants being potted in this vertical planter wall, the plants thrived.
It also may have helped that the location of the cinder block wall was only part sun. It received a couple of hours of direct sunlight. But most of the day, it was in the shade with filtered sunlight.
By the way, a vertical planter structure like this, also makes a great privacy screen, like on a patio.
Here are other easy patio ideas.
I also got fancy and turned cinder blocks into outdoor furniture with this cinder block bench and these concrete block planter boxes as accent pieces!
Garden Planner!
Printable PDF Download
$2.99
Everything you need to plan your garden.


This will subscribe you to my newsletter where you’ll get updated when I have a new post, or tips and tricks. You are free unsubscribe at anytime.
Length Of Time To Make A Cinder Block Planters Wall
This project will take a minimum of 3 days in perfect weather. This is due to the length of drying times that are needed after washing, priming, painting and gluing, so plan accordingly.
If you can, wash the blocks ahead of time. It will save you a full 24 hours or more.
Now if I end up making another cinder block planter wall, it would be much easier after going through a few mistakes.
The parts of the project where I didn’t end up taking two steps back, were really fun. I had read other tutorials while researching how to make these planters, and they were missing a lot of details.
However, I was able to fill in some blanks, and learned a few lessons during this project. So I believe I have the kinks worked out for you, so let me know how it goes!
If you like this project, then you might want to check a couple of my other planter project like the cement balloon planter and the 27 DIY wood planter tutorials.
And for other great yard projects, check out the natural-looking DIY concrete stepping stones and my fabulous DIY twig branch lights with a floating base.
What Not To Do:
You can skip TSP for washing (often recommended on the inter webs), you can use just water with a little dish soap in it.
Don’t forget to set up your block layout before you do anything else
Don’t start painting before the blocks are 100% dry
Some of the links on this page have been provided as a convenience for finding materials. These links may also be affiliate links. As an Amazon Associate I earn from qualifying purchases, at no extra cost to you.
I only recommend products I’ve used and loved, unless otherwise stated. Click here to read my full disclosure policy.
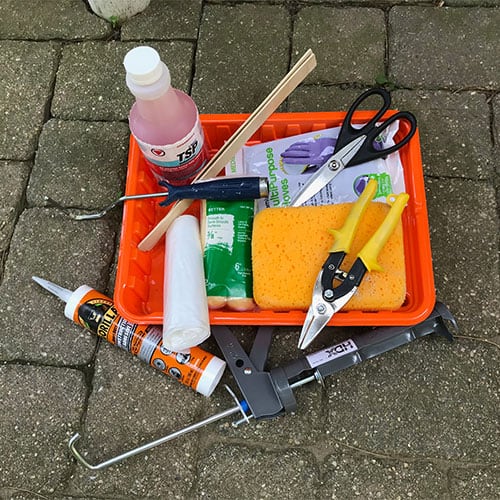
Materials For Making Cinder Block Planters
- Cinder Blocks (20) 8″x8″x16″ and (3) 8″x8″x8″
- Work gloves
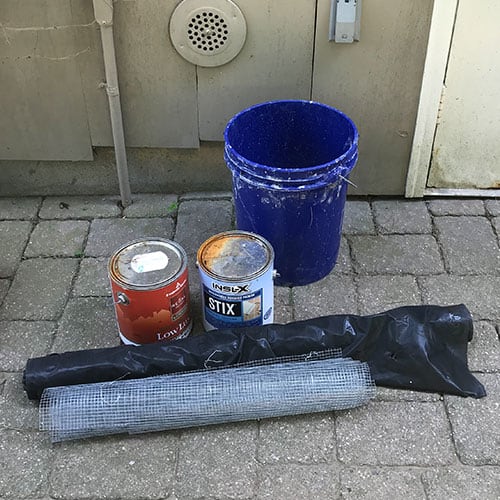
- Landscape fabric- woven
- Scissors
- Tin Snips
- 1/4″ or 1/2″ mesh wire- aka chicken wire
- Caulk gun
- Construction adhesive for a caulk gun
- Primer- 1 gallon
– Stix Waterborne Bonding Primer, or primer made for masonry. Have this tinted if you are painting these a dark color to avoid having to apply extra coats - Paint- 1 gallon
-Benjamin Moore Acrylic exterior finish - Large nylon scrubbing brush
- Dish soap
- Bucket
- Two 9×12′ drop cloths
- (2) High nap roller- 9″ (standard)
- (2) 3″ Foam brush– If your cinder block has grooves on the sides
- Soil- 10lb bag
- Plants
Cinder Block Planters Tutorial Steps
Step 1. Design The Layout
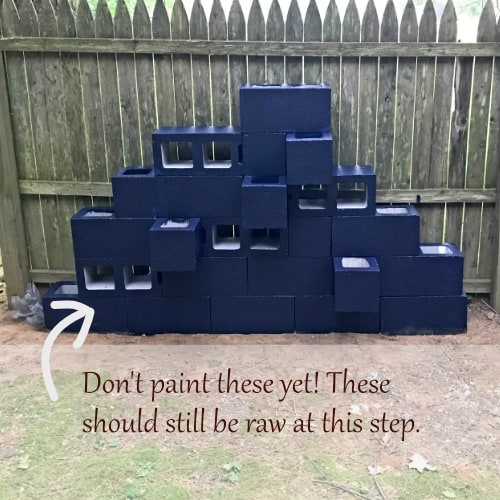
First, set up your cinder blocks in the arrangement you want your final planter layout to be- make sure to take a photo of your layout!
Now count how many of the block holes will require plants and plan for one piece of landscape fabric and chicken wire per hole, as well as soil and the plant.
If you are placing your blocks in your yard, make sure they are on a level spot, otherwise, you will need to make it level.
Hint: Make sure you do this step first. I set up my layout after painting them and the paint hadn’t fully cured so I had to repaint many spots.
You will avoid having to add extra time if you decide on your layout first.
Step 2. Clean The Cinder Blocks
The blocks need to be washed. You can spray off most of the dust with a hose, but you will need to spot wash, using the nylon scrub brush where you see dirt.
If you have a pressure washer then use it and skip the hand washing.
Wash the blocks on a driveway or paved surface, not on grass or you will end up doing extra work.
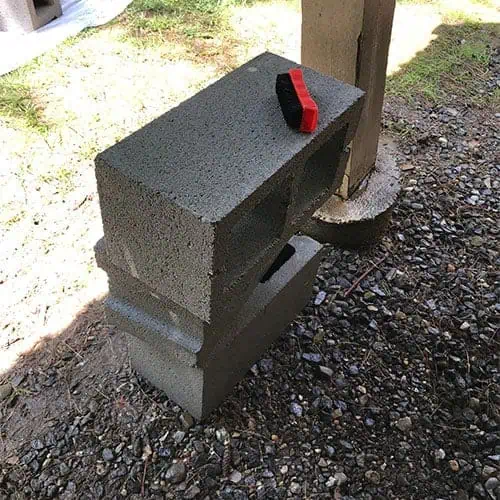
Make it easier on yourself and stack a few blocks to use as a table so you aren’t bending down the whole time.
The cinder blocks will be wet when you put them on the drop cloth so don’t let them sit in a pool of water and move them around if necessary or they will take much longer to dry.
If it’s sunny, stick them in the sun for speedier drying.
Don’t start priming and painting these if it will rain before you are completely finished unless you are working in a covered area.
This is because moisture will get in and make it very difficult to paint, therefore the tackiness may not go away for quite a while.
Step 3. Prime The Blocks
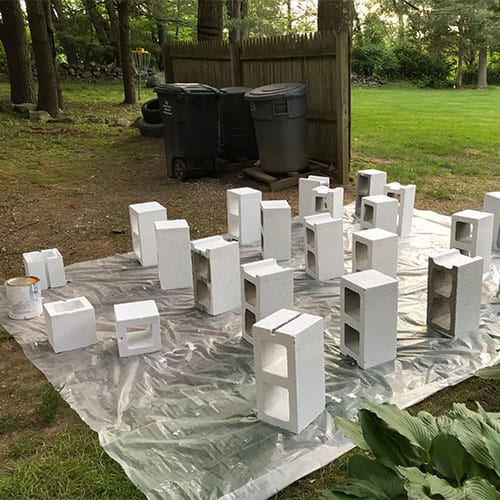
For priming, make sure the blocks are completely dry otherwise, the paint will peel off from the moisture leftover in the blocks.
Apply the primer with one of the 9″ rollers. I used the second roller for applying the paint since it’s so difficult to get primer out of rollers.
Then, after about an hour when the primer is no longer tacky, flip the blocks over and paint the remaining edges and sides.
If your cinder blocks have grooves on the sides, then use the foam brush to get between them.
Hint: It’s not necessary to prime or paint any of the bottoms or insides. I primed and painted the insides of the ones that would be visible, but didn’t like the way it looks.
You are welcome to do so, but you will likely need more than 1 gallon of primer and paint.
Step 4. Paint The Blocks
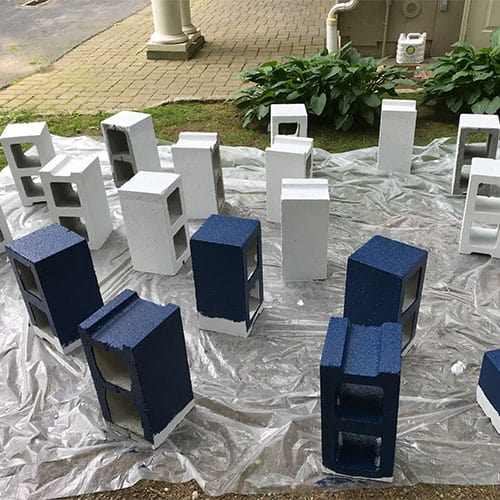
After 4 hours, your primer should be dry enough for your blocks to be painted (check the manufacturer’s instructions).
Painting will require at least two coats. I did two coats and then painted a third because I didn’t have the forethought at the time to get my primer tinted.
ended up doing the third coat after the planters were in place, just before planting –and that worked out fine.
Step 5. Apply Adhesive

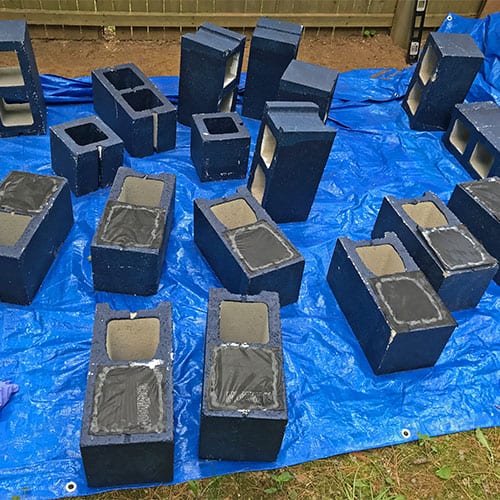
Once the paint is dry, you are ready for the landscape fabric. Go ahead and flip over all the blocks that you counted that are being planted.
I had 10 actual blocks that were getting plants, but 11 holes since the top block was getting plants in both holes.
Cut out the landscape fabric so that it covers the hole and goes up to about 1/4- 1/8″ from the outside edges.
** I didn’t do this- I cut my fabric pieces a little too short which made them difficult to glue.
Measure the size of that piece you just cut. This will tell you what size to cut the bottoms for the rest of the cinder block planters to.
Next, apply the glue to the bottom. It should be about 1/4″ wide strip all the way around.
Construction adhesive takes 24 hours to cure, but after a few hours, you should be safe to position your blocks again.
*However, it’s important to wait a day before you actually plant your plants.
Step 6. Support The Bottom
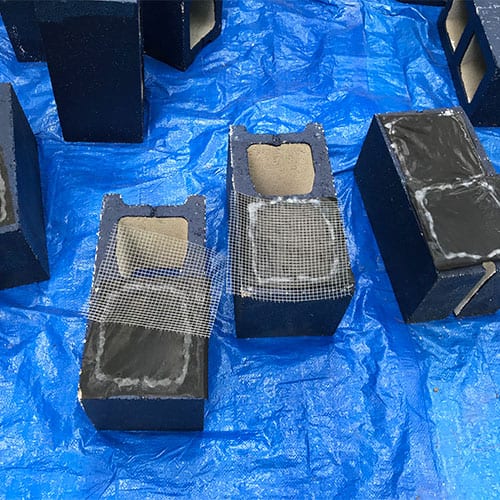
The weight of the soil when wet can be quite heavy and may be too much weight for the landscape fabric. To combat this, reduce some of the weight using the wire mesh.
Cut the chicken wire to about the size of the hole in the block and then cut a split into each corner do it folds more easily.
Wearing work gloves, fold over the edges so that when the mesh is inserted it doesn’t pierce the fabric.
The goal is to get the wire mesh to basically catch on the sides of the cinder block.
Step 7. Add Plants To The Cinder Block Planters

Add soil, then fill in with your plants!
For something creative to do on a rainy day, check out these coloring pages for gardens and plants!
Don’t forget to Pin it for later!

Vertical Cinder Block Planter Wall
How to build a vertical cinder block planters wall. Take advantage of vertical space to create a beautiful wall of planters. An inexpensive way to decorate your patio or garden.
Materials
- cinder blocks
- outdoor paint
- lanscape material
- wire mesh
Tools
- Please see the full, detailed materials list above the tutorial.
Instructions
- Design The Layout For The Placement Of The Cinder Blocks
- Wash The Cinder Blocks To Prepare For Painting
- Prime The Cinder Block Planters - Use A Grey Primer If You Are Painting Them A Dark Color
- Paint The Blocks
- Apply Adhesive To The Fabric Bottom
- Support The Bottom With Wire Mesh
- Add Plants To The Cinder Block Planters

Great project. Thanks so much for the way to do it. Looks marvelous. I have an area in my backyard it would be perfect for. How much does each cinder block cost and where do you buy them? Thanks very much.
Hi,
I got them at Home Depot. I think they were less than a couple of dollars each.
could you also cut the mesh and glue that on the bottom of the cinder block after putting the landscape fabric under the mesh? This really looks like a terrific idea.
Hi Martha,
I’m not sure. I felt like the glue wouldn’t be able to hold the metal mesh, but it’s possible I’m wrong. It’s worth a try.
I would think if you glue the mesh on the bottom you wouldn’t get a flush support.
This looks really awesome I think I really may want to try this! Thanks for sharing
Thanks Stephanie! Let me know if you do try making the planters. I’d love to see how they come out.
I have an open air carport. I love this idea and even think I may make the ones that just out the front without the the bottoms and use to stand up long handled tools, such as rakes and shovels. But leave the planters on the sides and top . Thank you!
Hi Doug,
Cool idea! If you end up making these, upload a pic so I can see.
You’re missing pictures.
Instructions are incomplete without them.
Hi, which pics am I missing?
Landscape fabric & possibly a mesh. Your description is well written without them, though. Thank you!!
The pics of the landscape fabric and mesh are in steps 5 and 6, and in the materials pics. Maybe they are easy to miss on the dark colored blocks.
I’ve seen projects similar to this before with plain cinder blocks. I always thought they were interesting but lacked something. I love the addition of color and thank you so much for the details! I’m sure that will save a bunch of time and frustration. Definitely a ‘to do’!
Thank you Susan!
Wire mesh is not the same thing as chicken wire. Chicken wire would not work for this project. Chicken wire is very thin and flexible with larger openings that would not hold the weight of the plants and soil.
Good to know!
Could you spray paint the primer and the paint so it gets in the grooves better.
Hi Margaret,
Yes, you could, but it will take a lot of cans.
I wasn’t thing of cans. My husband has a spray gun that we used to paint our house. This is used for big projects.
Nice! I just got one of those. I wish I had it when I made these.
Awesome looking! I have a great place to try this out! Thanks for sharing.
Thanks Lynn. Let me know how it turns out!
Some ppl call that Rabbit wire instead of wire mesh. Well is country folk do anyways. But excellent idea. And would work great as an eye sore blocker too & Not just in front of a fence. So thx for the idea. This I’m gonna try.
Hi Michelle,
Right now I’m using it to keep the Carolina Wrens out of my herbs. They keep digging all the dirt out. :0|
They are so cute. Im going to do this. My garden needs color. Thank you.
:0}
Thank you! I’ve seen these wonderful ideas for using cinder blocks as decorative planters but nowhere did I see how the work was actually done. *face palm*. Just ask! This as the first one I opened with the explanation on how to get these ideas to really work. Thanks for the easy to understand irections ND the photos!
Thank you! I’ve seen these wonderful ideas for using cinder blocks as decorative planters but nowhere did I see how the work was actually done. *face palm*. Just ask! This as the first one I opened with the explanation on how to get these ideas to really work. Thanks for the easy to understand directions and the photos!
Hi Chuck,
Thank you so much for this comment, it means a lot to me. Your story of finding a lack of detailed instructions, or instructions at all is exactly why I started this website. I constantly ran into the same thing and it was so frustrating.
You made my day and have helped validate what I’m trying to do. If you try making these, let me know how they turn out!
Hello,
I like your idea and want to do this but higher. How high is your planter? How high can you go without having to glue the cinder blocks together?
I want to make a planter wall that’s 2 m high on one side and 1m on the other side, so I have to go downward 1m in a lenght of 3m.. The glue (already ready to use, mixed and all) will that be enough to glue them together and on the concrete of my patio or do I have to make ciment? It can be windy here and the wall will face most of the time the wind…
Thanks.
Lisette
Hi Lisette,
I am so sorry for the late reply, I didn’t see the notification for your question. My planter is 4 feet or approximately 120cm.
I didn’t glue any of them together. I only used the construction adhesive to hold together the fabric and mesh to keep the soil from falling through, not to keep the blocks together. I had the advantage of having the fence behind it, so I never questioned needing more stability. I’m not an engineer, but as long as you are sure no one will climb on it, then you may not need to glue them. You wouldn’t believe how stable these are. One thing to keep in mind is that you will need to cantilever them properly, so where you see the ones I have protruding forward (instead of placed sideways) you can see I always have either 2 cinder blocks above it to anchor it, or one that is filled with soil above it. The ones with soil really weigh the cinder blocks down.
I think if you start laying out the cinder blocks from the beginning, before doing anything else, you will be able to tell how stable they are going up that high and with the wind. If you do feel they need to be glued together, then what I’m not sure about is whether you can get away with construction adhesive or if you would need to cement them. The place you get your cinder blocks from should be able to help you answer that.
I hope that helps.
Concrete has some harsh chemicals and it can kill plants. It usually needs to be leeched and sealed before planting. Did all of your plants live? Maybe cinder blocks have already been leached?
Hi Jeanne,
Yep, they did live. I washed them so thoroughly, I think that basically leached them.
What kind of plants did you use? Did some fair better than others being planted in the blocks?
Hi Kalon,
Actually just about everything did well in the cinder blocks. The one thing that didn’t was Irish Moss- but it had no chance because it was way too shady where it was. The creeping jenny thrived and looked amazing as it cascaded out of the tops of the blocks. I often take photos of the plant tags when I get them, but I can’t find the photo for these. I wish I could remember what the string silvery plants were because they looked so nice.
One thing I experienced was that the soil often got really wet and I was concerned the plants would be over watered, but they all made it through the season, looking good straight through. Unfortunately we moved in the winter so I have no way to follow up on them. If I do this again, I would use a better draining soil to be safe. I also wouldn’t hesitate to use succulents with a better draining soil.
I just don’t recommend herbs or anything eatable. I have no issues doing that with regular concrete or cement, but I would be concerned with whatever chemicals are in cinder blocks.
Hi Kelsey,
The pointy side is the bottom, but you can make it the top too. It’s just easier to plant with the pointy side down. You can put cement on the outside but your texture won’t be smooth and will be more like my cement balloon planters. https://artsyprettyplants.com/cement-balloon-planter/
I actually have one that I made where the cement is inside and not outside and I left the shell on. It’s actually beautiful. The shell is in perfect shape and very white. I made it 2 years ago.
?THANK YOU SO VERY MUCH ?
I love this idea and am using it to make a smaller “ramp” in the dog /pet agility course I have on my property. I shall place (weighted?) pots of wheat grass and catnip in the “holes “. Maybe leave the bottoms open if I can find the right sized pots. It’ll be for cats and small dogs/pets only. I am thinking of layering two shorter teirs on each side for stability. Will ask my Ace Guy about the cement vs adhesive debate after choosing layout. Any thoughts on what to look out for or ???
I know that my friends and customers will ask about it. So if you don’t mind, I will paint a “plaque” on one of the bricks dedicated to you… what’s your favorite Color & Animal?
Thanks again from ?The Animal Lady ?
Hi Tammy,
Oooh, this sounds cool, I’m dying to see how it turns out.
You could get the square shaped cinder blocks too, with just the single hole. Instead of worrying about finding the right height pots, maybe just place gravel or stones about 1″ diameter inside and build it up to the height you need for the pots. This will also make them more stable. For the bottom, you could probably pour an inch layer of Cement All in the bottom, then add the gravel. Cement All is made to stick to existing cement/concrete, so this should work. Just make sure the blocks are clean and free of dust.
I’m a cat person and I love blue!
Thank you for responding so quickly, Ellen. I am hoping terra cotta pots will have enough lip to hold & “hang” them in the empty holes (water-drainage unimpeded). If not, I will try your idea. I love cats and blue, too. I will send pix for your website when it’s done, mostly depends on the weather, so I don’t know when.
Thanks again for the great idea!
Hey thanks for posting this useful tip here cinder block planters, I really hope it will be helpful to many. Appreciative content!! This is really Wonderful information, thanks a lot for sharing kind of content with us.Do check out this Qualitymasonry.co.nz, it has some great and nice ideas to look for.