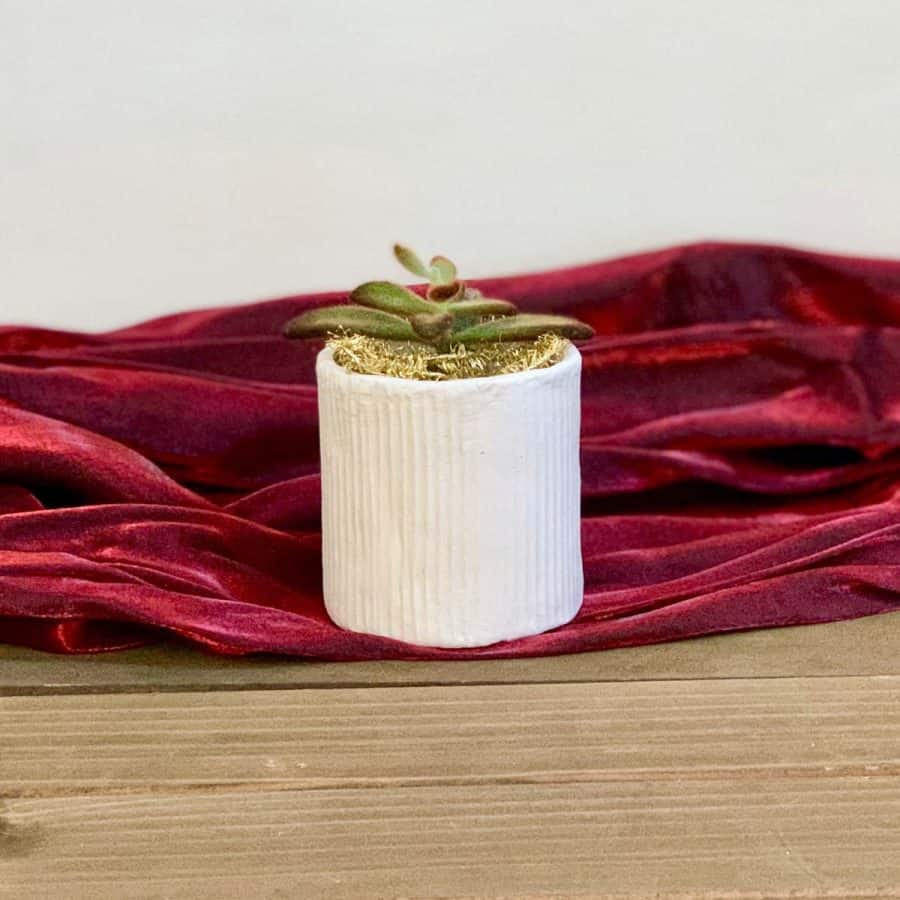
Easy Ribbed Air Dry Clay Planter
Here is how you can make a lightweight ribbed air dry clay planter. It’s easy to ship, and makes the perfect gift!
Baby, it’s cold outside! At least it is for half the world, so getting outside to make something with concrete can be challenging. I thought I would experiment with a cousin of cement and try my hand at air dry clay.
In my opinion, it’s just as fun a cement and has some overlap in technique and skills.
What I’m loving about it, is the ability to hand build. It uses additive and subtractive techniques, so you can make part of one piece and then add on another piece or remove it by sculpting it away.
Please click the button to subscribe to my YouTube channel and be notified when I have a new video tutorial!
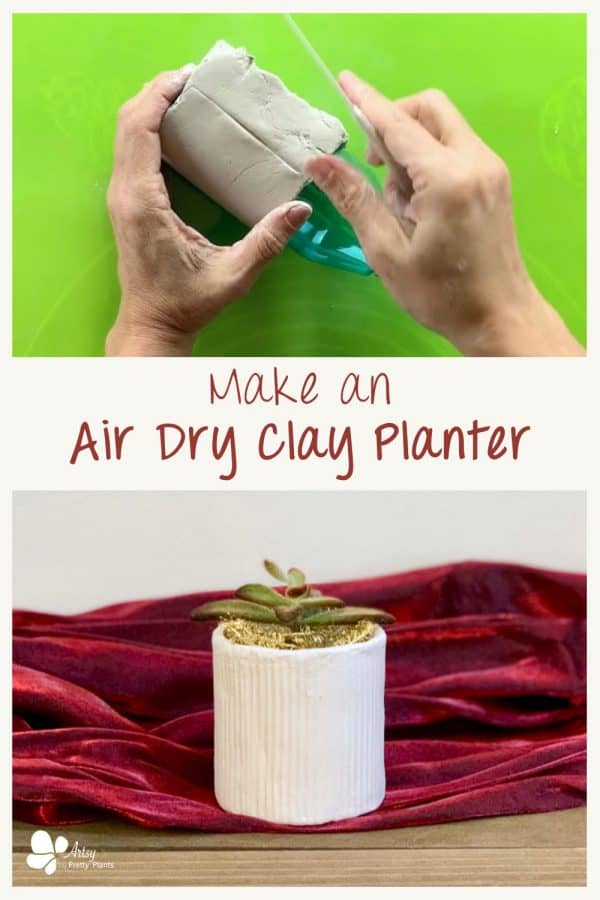
For this ribbed air dry clay planter, I made the sides first, then let it cure and then went back and added the bottom. It was surprisingly smooth sailing considering it was my first adventure.
I will admit though, I made some rookie mistakes, which I discuss at the beginning of the tutorial. So be sure you read that first, before getting started.
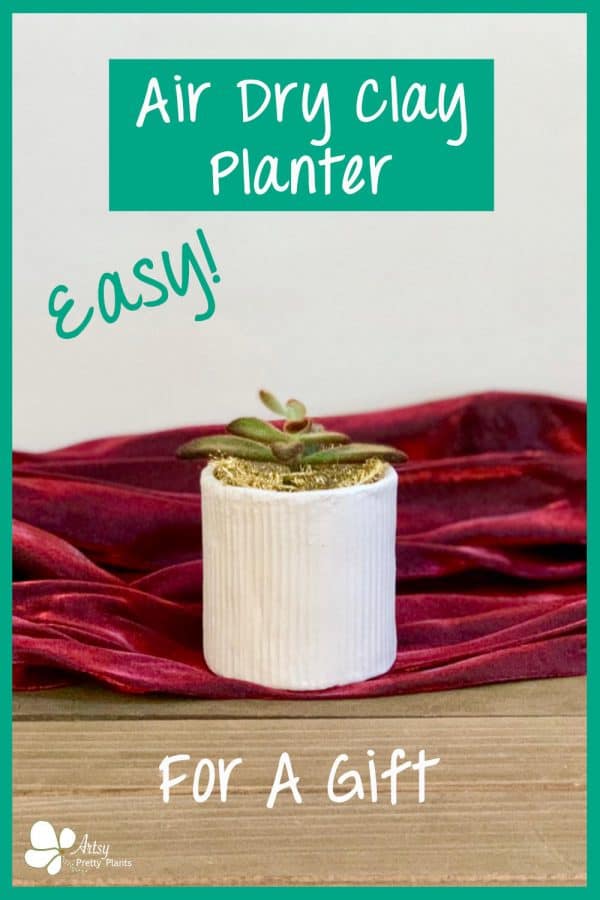
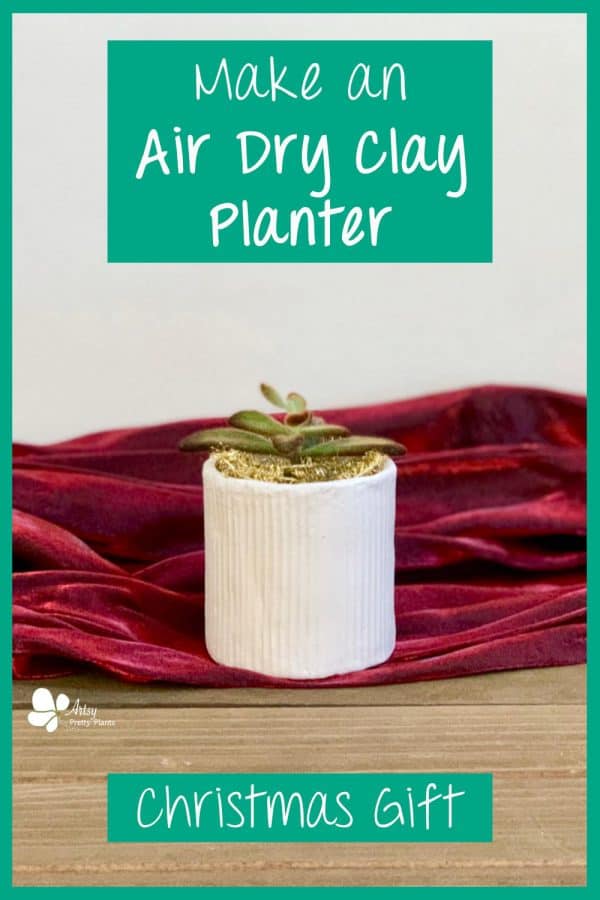
This handmade clay planter makes such a great Christmas gift. What’s especially amazing about it, is that it’s very lightweight –so you can ship it to someone without paying a premium because of weight.
But can an air dry clay actually be used as a planter? According to my research –yes! It does need some serious sealing though. Will it last forever like concrete? Probably not –time will tell.
Are you ready to jump into the world of clay? Let’s do this!
If you’re interested in making the same ribbed planter, but with concrete, you can see that tutorial here.
Also, if you are looking for clay projects that are ornaments, then take a look at the easy DIY Grinch ornament and the nature ornaments from clay. Or how about candle holders? Here is an air dry clay tea light holder and copper and clay candlestick holders.
What else can you make with air dry clay? Well, here’s a list of 55 unique air dry clay ideas!
Some of the links on this page have been provided as a convenience for finding materials. These links may also be affiliate links. As an Amazon Associate I earn from qualifying purchases, at no extra cost to you.
I only recommend products I’ve used and loved, unless otherwise stated. Click here to read my full disclosure policy.
DIY Difficulty Level | Easy
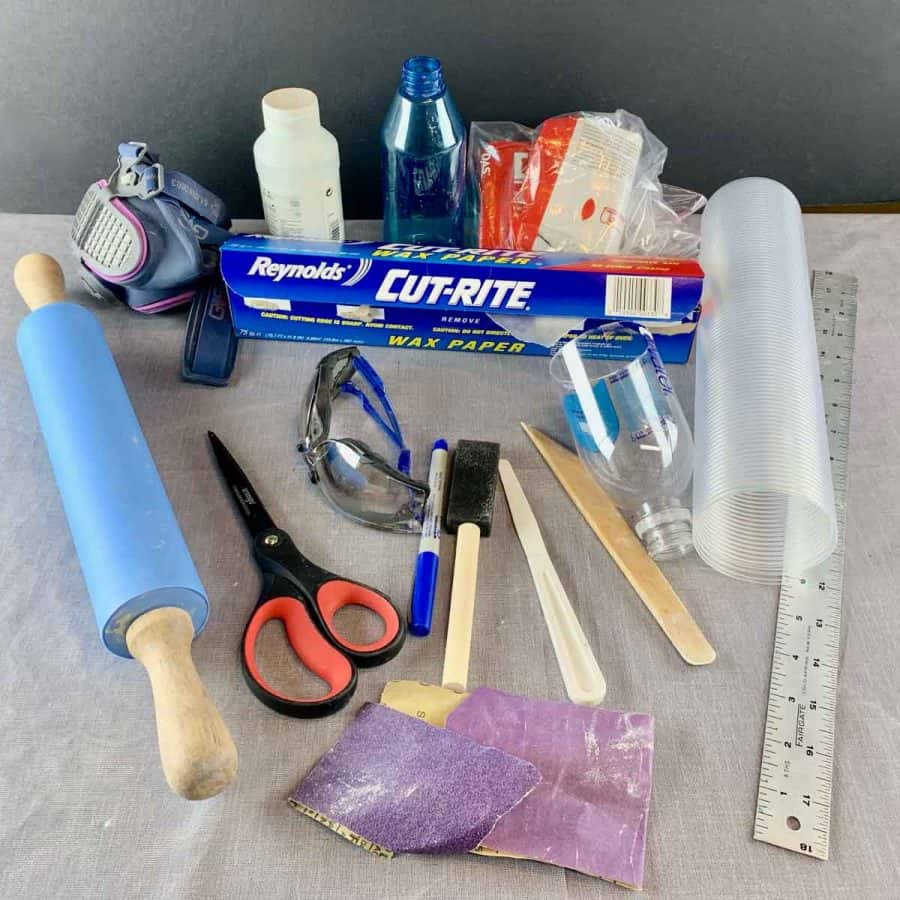
Materials For A Ribbed Air Dry Clay Planter
- Safety glasses
- Safety mask– rated for silica dust
- Air dry clay
- Clay roller or rolling pin
- Textured/ribbed plastic shelf liner
- Rigid plastic bottle (mine was 3” wide)
- Plastic bottle (same width as the glass bottle)
- Scissors
- Ruler
- Permanent marker
- Wax paper
- Flexible palette knife
- Extended thumb for joining
- Sandpaper- #80 grit, #220 grit
- Foam brush
- Varnish
- Space heater- optional
Materials Notes:
For the bottle the clay will wrap around, I’m recommending a plastic bottle that is a little bit rigid.
If you try to use a regular plastic water bottle, it will be a bit too soft and smush in on you.The palette knife needs to be flexible and not have teeth.
And the joining “thumb-like” wood tool is so helpful, but you can probably make do with the eraser end of a pencil.
Tutorial Steps For Making A DIY Ribbed Air Dry Clay Planter
Things I Wish I Knew Before Making This Air Dry Clay Planter
This was my first adventure with air dry clay and learned a few tips and tricks after- some of which are not reflected in what you see in the video, but I have described in the video.
Here’s what I learned about how to work with air dry clay.
Wax paper seems to work better with air dry clay as it seems to stick less to it than a silicone mat, and you can just throw it away when you’re done.
Knead the clay for a little while to warm it up, this will make it softer and easier to roll. It will also stick less to your tools, and rollout smoother.
Don’t roll the clay back and forth, just roll it forward in each direction. This also gives you a smoother finish.
Regardless of the shape, the rolled clay piece will ultimately be (in this case -a rectangle). Just roll it out like a pie crust and from there, trim it to the size and shape you need.
When merging two pieces of clay, it will grip better if you score the areas where the two pieces will join.
You can do this backing little lines or X’s in that location. I didn’t do this, but the pieces seemed to join easily anyway.
Plan ahead! Air dry clay needs a fairly long time to cure (1-3 days), so plan for it. You can speed up the curing time by following the details in Step 6.
Take a look here for other air dry clay tips.
Step 1. Knead And Roll Out The Air Dry Clay
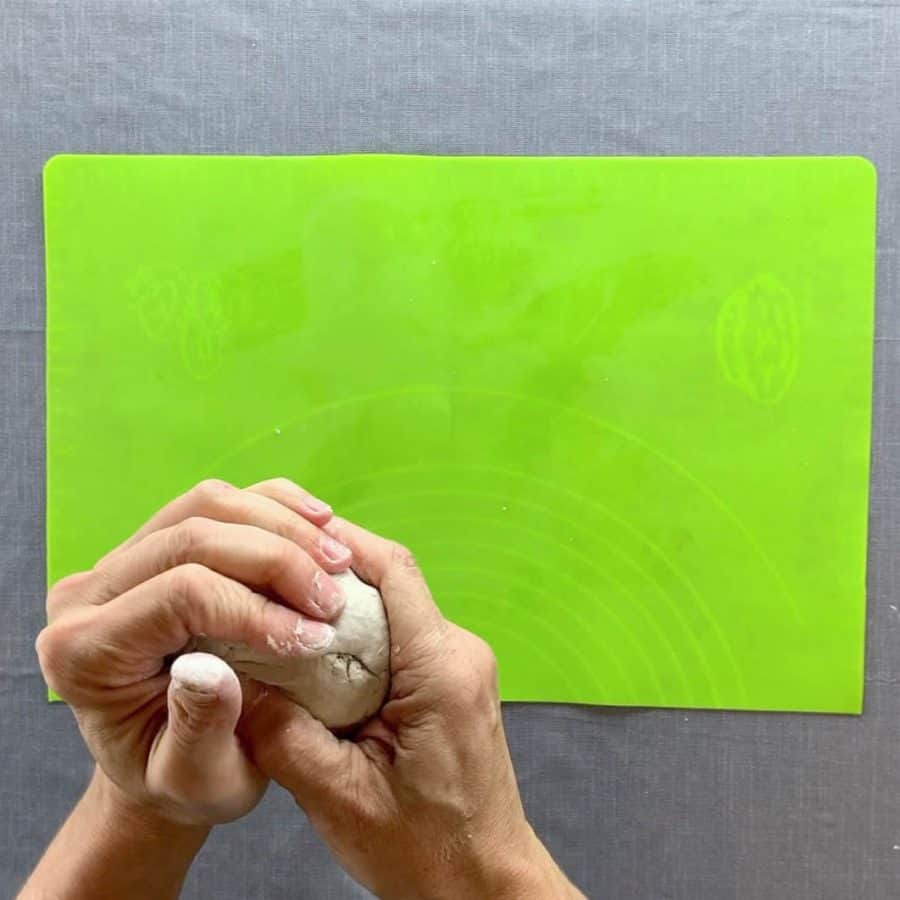
Break off a chunk of clay. Mine was probably the size of a tennis ball.
It’s better to overestimate how much you’ll need and no harm in doing so. You can put the excess air dry clay back.
Knead the clay to warm it up before rolling it out. It’s easier to knead if you do it in smaller pieces.
So divide the air dry clay in half and work on each piece separately.
The clay should soften a bit and feel a little warmer. Once softened, combine them together and knead the two pieces together.
Now press the ball onto the silicone mat or wax paper and flatten it a bit with your hand.

Take the roller and roll it only in one direction instead of back and forth. Then roll across the clay, again only in one direction.
There are tricks to getting the clay even, like laying a paint mixing stick on each side and using those to support the roller.
I didn’t worry about the thickness too much, because it was fairly easy to tell just by getting eye level with the clay.
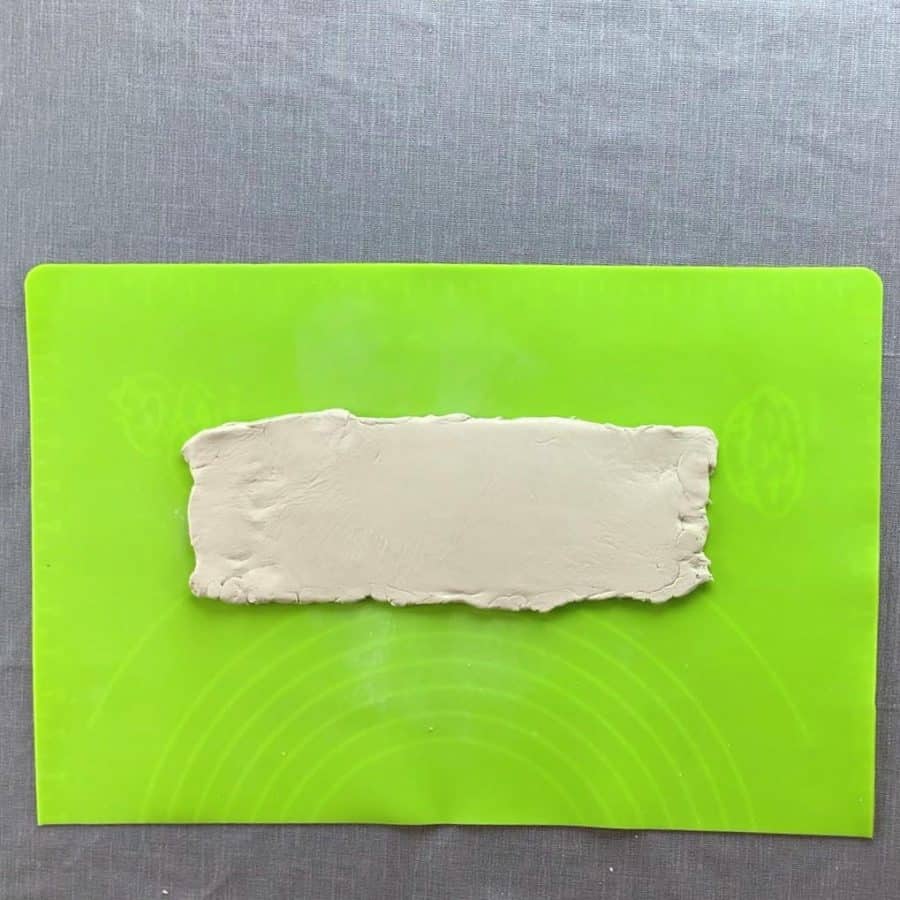
Trim the air dry clay to the size you need for the planter- mine was 3” tall.
Then check the length you need by either test rolling the bottle and the clay, or use a piece of string to measure the length.
To check the length using string, cut a piece about 15” long and wrap it around the bottle.
Mark where the ends overlap and measure this. That’s how long of a piece of clay you will need.
In the video, I overlapped my pieces, but it would have been better if I had them meet together.
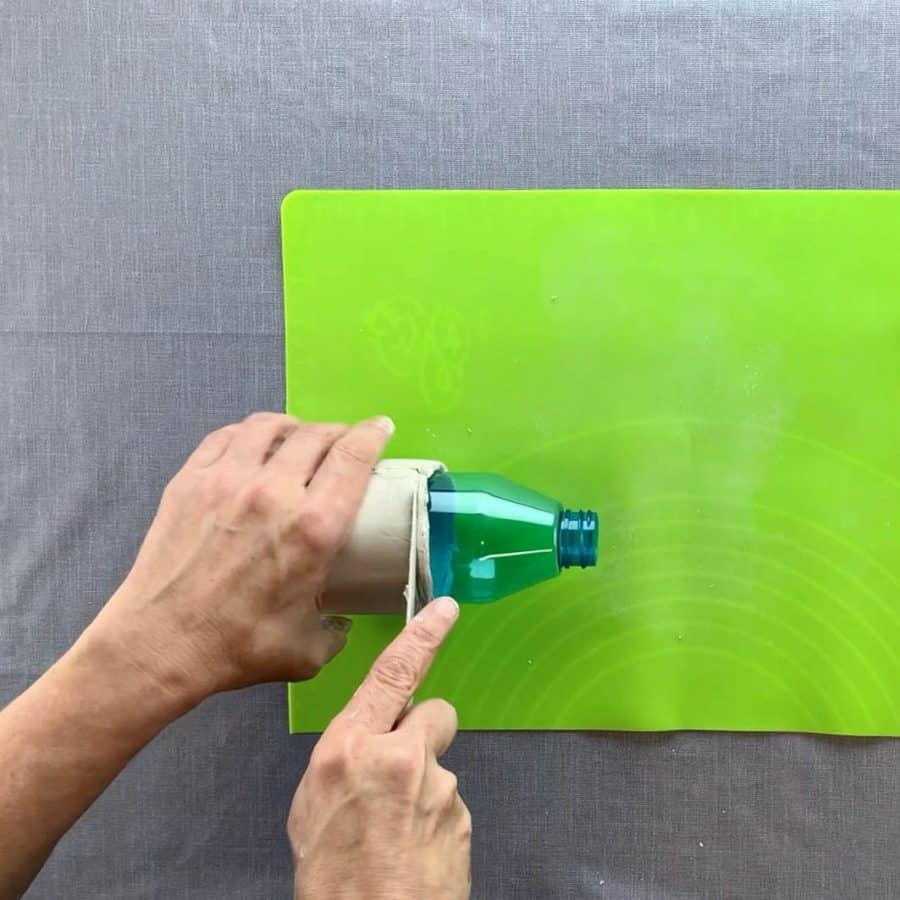
Step 2. Wrap The Clay Around The Bottle

Lay the bottle onto the air dry clay and line up the clay with the bottom so it is even.
If the bottle rounds over at the bottom, then I recommend lining the bottom of the clay up just above the bevel.
You will be adding the bottom of the planter separately after this cures, so it’s not going to be important that the clay go all the way down- you just want to make sure it’s even.
Step 3. Join The Air Dry Clay Planter Sides

Once the clay is wrapped, the two ends should meet.
Roll up a very thin piece of clay between your hands that is about the thickness of a toothpick.
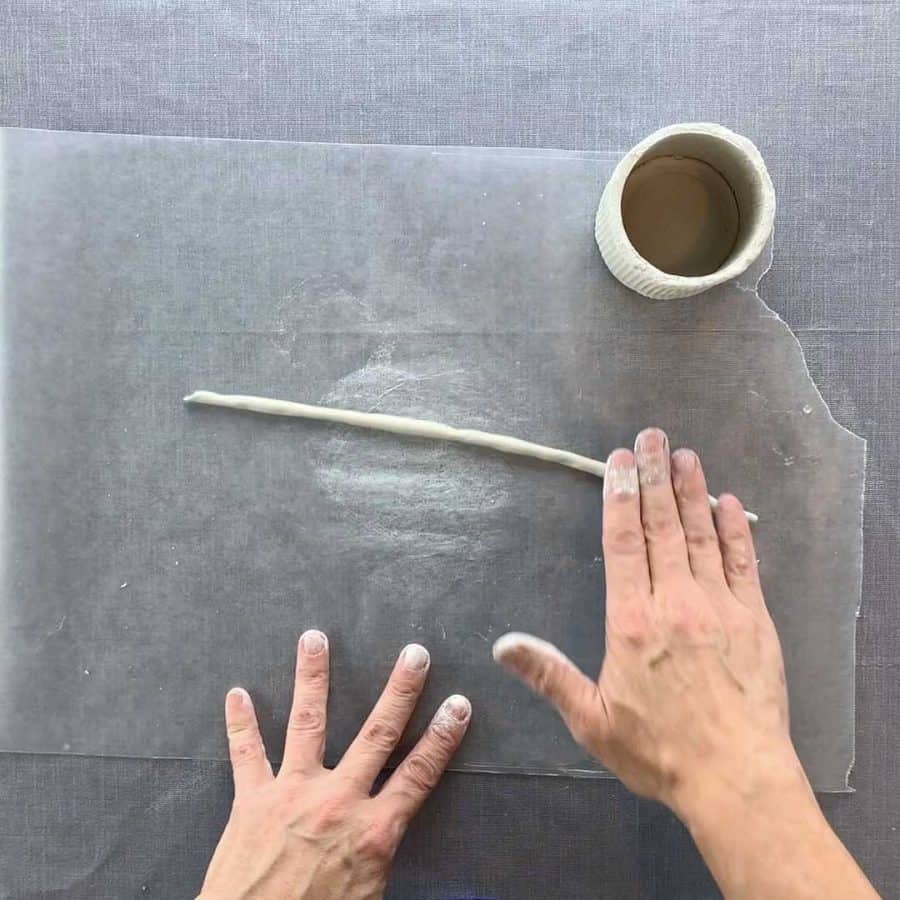
Place it between the seam. Now wet your fingers and join these pieces together and continue smoothing them.
I had overlapped my pieces instead, but you can see this technique used when I made the bottom of the planter –in the video at 6:15.
Step 4. Trim The Air Dry Clay Planter Top And Bottom Edges
If you weren’t able to trim the size of the rolled out clay perfectly, go ahead and trim it to clean up the top and bottom edges so they are even.
Step 5. Wrap The Ribbed Liner
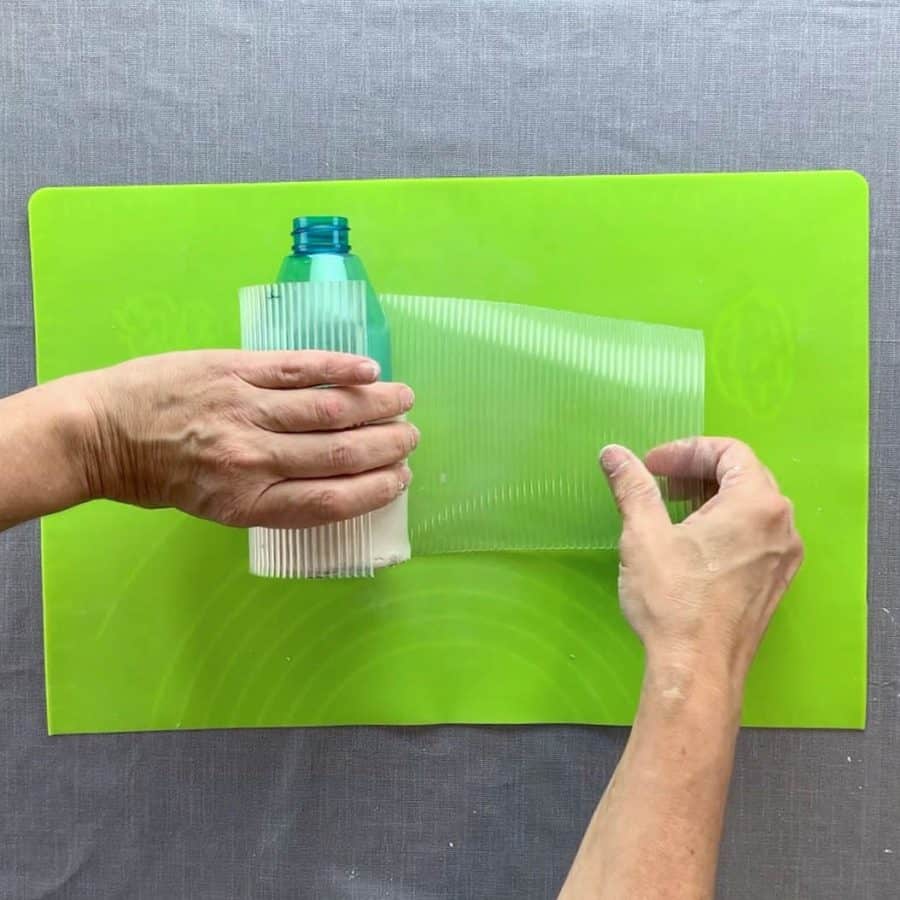
The grooves of the liner are likely different on each side, so check to see which side of the liner you want to use for the planter.
Just take two small pieces of clay and press them against each side of the liner.
Lay the ribbed liner so the side that has the ribs that you want to match the planter, is facing up.
Now take the bottle with the clay wrapped around it and place it on the liner. Make sure the lines are straight and then wrap the liner around the clay.
Press it in and check to see if you are satisfied with how defined the grooves are.
If it’s not enough, or not consistent on the whole planter, then continue pressing and light squeezing.
Step 6. Let The Air Dry Clay Harden
Air dry clay takes quite a bit of time to dry.
It will probably take a couple of days to harden on its own- especially since it’s up against plastic and air flow is only coming from one side.
Otherwise, it may only take a day to harden.

You can speed up the process by using a space heater or even your oven.
I used a space heater. To use a space heater, place the clay about 6-10” in front.
I would let mine sit for 30 mins-1 hour and then would turn it so all sides were exposed to the heat.
I did this off and on for probably 3-5 hours and then let it sit without the heater overnight.
Be sure to keep checking on the clay because if it heats up too quickly, it can crack.
In the morning, it was dry enough to work on the bottom piece.
As long as when you hold it, you aren’t transferring any hand marks or flattening the ribs, you are okay.
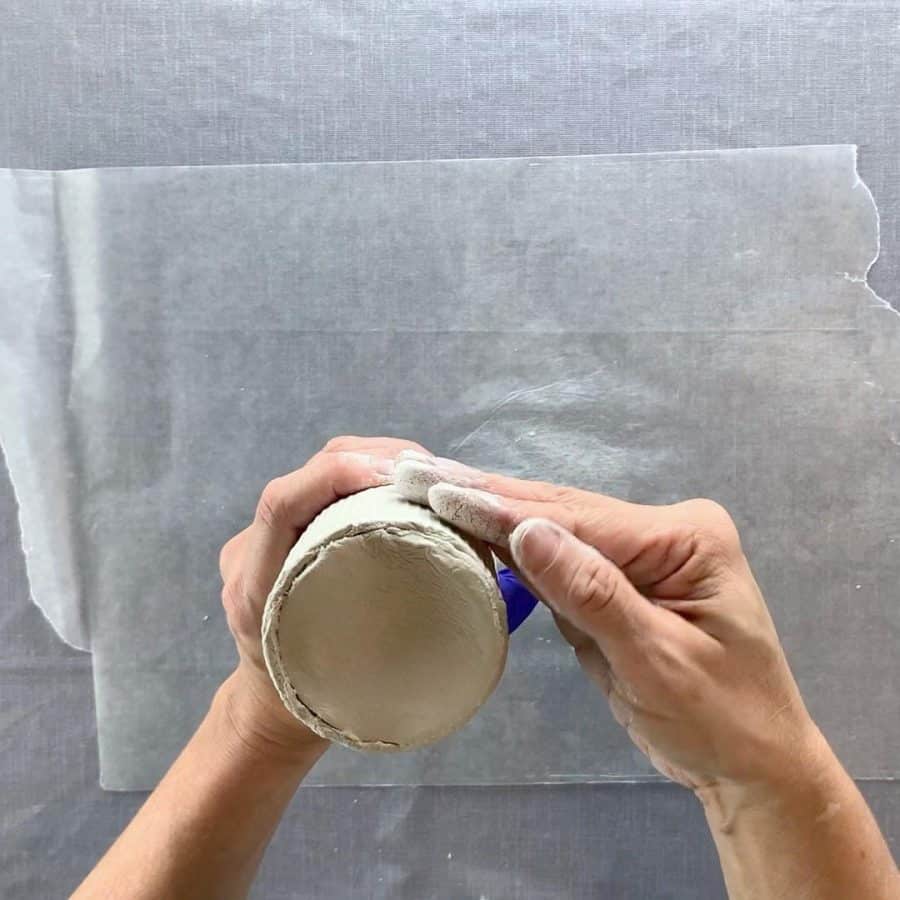
Also, as you are curing this planter collar, it should start loosening itself from the bottle.
Keep the bottle attached because if it still needs to cure a bit, it will have better support and not start to slouch.
You can also use an oven for this. I didn’t try this, but I have done this with paper mache clay.
Place it on a cookie sheet with foil on it and put it in the oven for its lowest setting- mine was 180.
Check on the air dry clay with the same frequency as I mention above for the space heater.
Step 7. Create The Bottom Of The Planter
To make the bottom, you’ll need to slide the planter collar down the bottle about ¼”.
If the clay is sticking to the bottle and you are unable to easily slide it then take the paint palette knife and ease it in between the clay and the bottle.

Take care to not pull up on the clay and instead, just slide it in between to separate it from the bottle.

Now go ahead and slide that clay down.

Next, roll out another piece of clay to ¼” and cut out a circle. You can do this by tracing the bottle.
I happened to have a plastic bottle where I had cut the bottom off and was able to use it as a cookie cutter.
Take the circle and place it on the bottom of the bottle and then lightly seam this to the sides by dipping your fingers in water and rubbing the seam to join it together.
It doesn’t need to be perfect right now because you will actually secure the seams from the inside.
Step 8. Join The Sides And Bottom
Roll out the clay into a long skinny piece. This piece is called a slip. Trim it so it fits curled up at the inside bottom of the planter.
If your fingers can reach, then gently press this into the corners where the bottom and sides meet.
I used a wooden “extended thumb” joiner, but the eraser end of a pencil should do a pretty good job.

Dip the wooden joiner into water and smooth and blend the slip piece until it is fairly, seamlessly joined together.
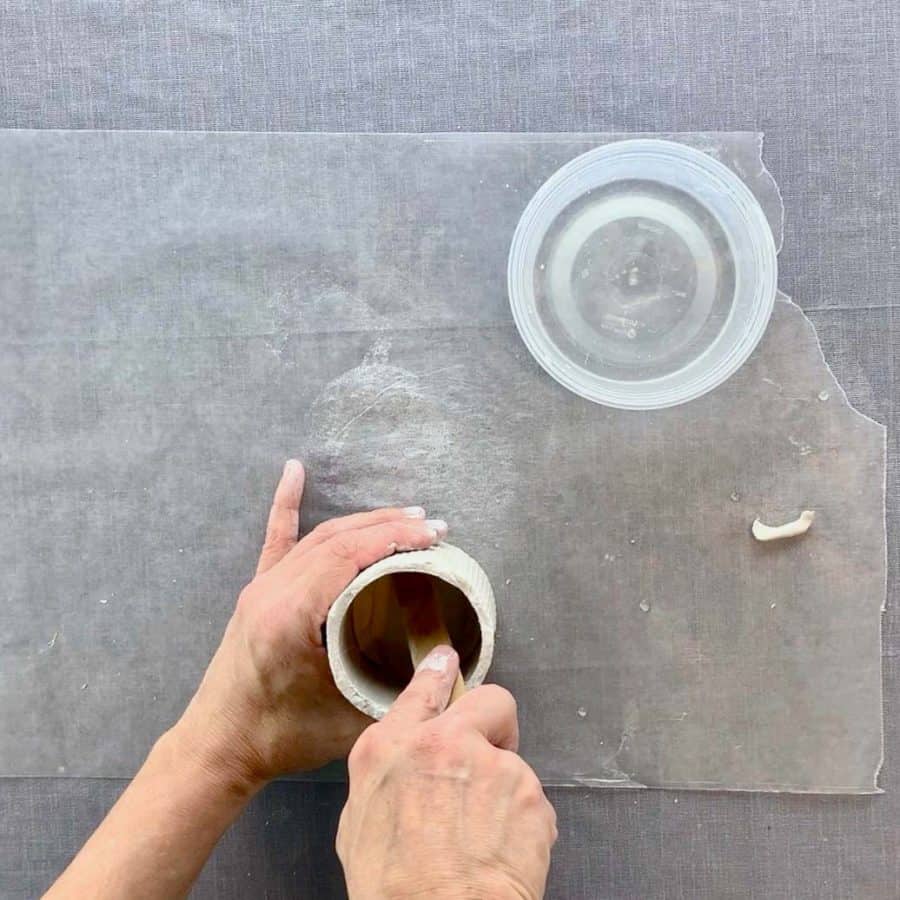
Step 9. Make The Planter’s Drainage Hole
First flip the planter over to make sure the seams on the outside bottom look joined and smooth, if not, use water and join and smooth them.
Now remove the clay from the bottle. Use the palette knife if it is still sticking.
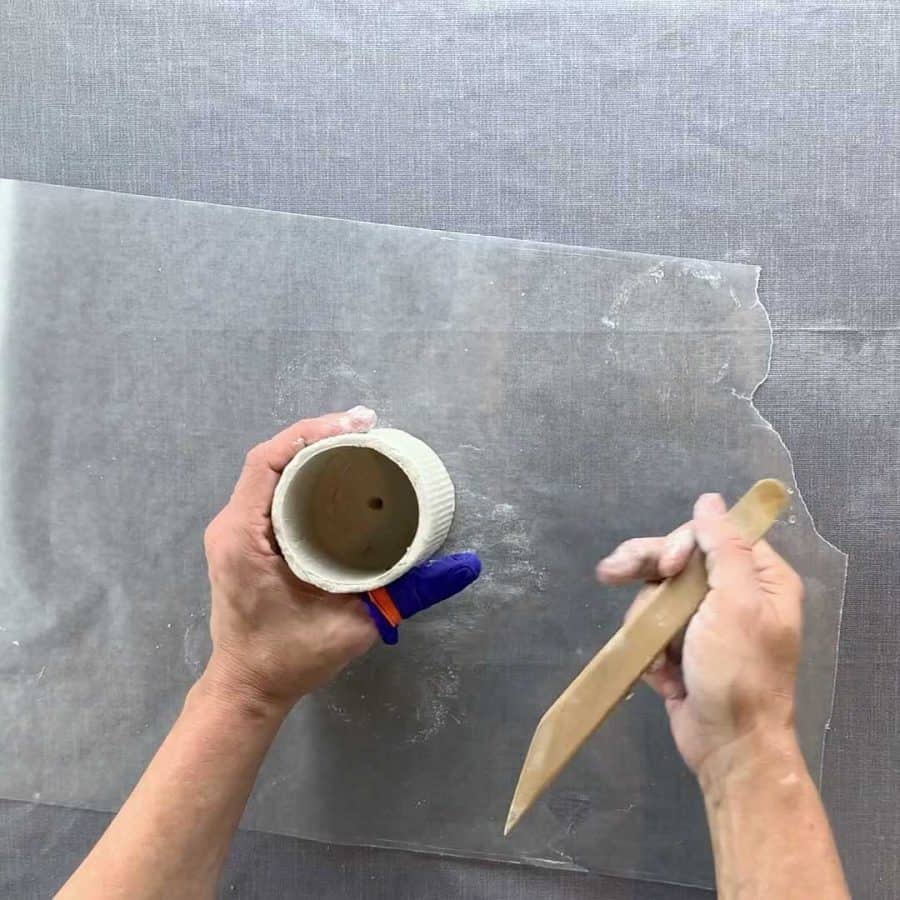
Take the joiner (or a pencil) and clear out a hole in the center.
Now let this cure for a couple of days, or fast forward with the heat method described in Step 6.
If you have any cracks, they can be filled in by taking a small amount of clay and moistening it and then mixing the water in to create a paste.
Just press this paste into any cracks and smooth over.
Step 10. Clean And Finish The Clay Planter

Once the air dry clay has fully cured, you can sand it.
If you have any major flaws or bumps, you can use an #80 or #150 grit sandpaper to file them down. For minor abrasions or marks, use #220 grit or higher.
Please note, a low grit sandpaper like #80 will be quite aggressive, so take it easy when sanding with that.
Step 11. Seal The Ribbed Air Dry Clay Planter
Air dry clay isn’t waterproof. It’s not even water resistant. How do you waterproof air dry clay? You seal it in in one way or another. It can be sealed with acrylic paint, varnish or even an acrylic concrete sealer. It can even be coated with epoxy resin.
There’s a lot of different information on the internet on what can or can’t be done to make this suitable as a planter, but there’s no consensus.
After my experiments with concrete, I feel comfortable using this as a planter if an actual varnish is used on the inside.
The soil mixing with water is where you will have the most potential for discoloration, not to mention, wet air dry clay will just dissipate eventually.
For the outside, you should be safe to use paint or concrete sealer. Not all concrete sealers are alike, but you should be fine using this sealer.
Since I just made this ribbed air dry clay planter, I can’t give you any feedback yet, but I will update in about a month. If you paint it inside and out, as well as seal it, you should definitely be fine.
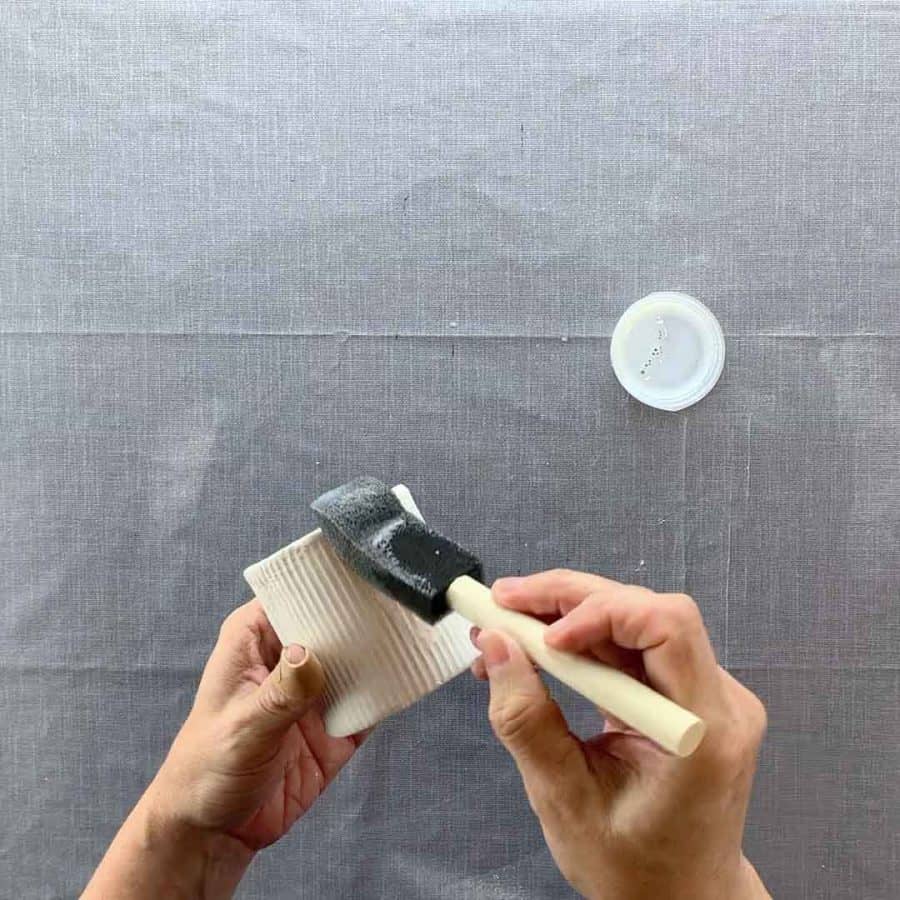
First I used a soft cloth to wipe off the clay dust that was stuck to the planter after sanding it. Then I used a foam brush to brush on varnish both inside and outside the planter.
Please be sure you get every little nook and cranny. I ended up double coating mine to be safe.
For other ideas on what to make for Christmas gifts, take a look at the 29 Handmade Concrete Gift Ideas, as well as this neat Burlap Bag Concrete Planter and Clay Balloon Planter.
Don’t forget to Pin it for later!

Sealing the inside of the planter is a good idea but I would create the planter big enough that a plastic pot will fit inside to protect the inside of the clay planter.