Easy, DIY Stamped Concrete Pavers For Cheap!
DIY stamped concrete pavers are an easy way to improve your outdoor space, for cheap – and I’ll show you how to make them!
Forget the expensive rubber molds, because with this patio idea, you can make your own for a few dollars–and have full flexibility in the design.
If you’re wondering where this idea came from, well it came from a failed experiment.
Shortly after I first started working with concrete, I carved a flower design into the foam insulation, with the hope that I could make a tile in low relief with it.
The trouble is, I carved it way too deep and it just didn’t look right.
It was darn-right goofy looking and it went into the pile of failed experiments and it became a thought that I forgot to revisit–until now!
Make DIY Stamped Pavers
Why Make Your Own Stamped Pavers Instead Of Buying
Now here’s why handmade stamped concrete pavers turns out to be such a great material to use for a new patio area.
One of the main reasons is cost. Your options for stamped concrete are either a full stamped concrete patio from poured concrete slabs, or using stamped paving stones.
A poured concrete patio cost is relatively inexpensive, depending on labor costs in your area.
And it’s durable, in fact, concrete is one of the most durable patio materials.
However, to make it more decorative, like a stamped concrete patio, then it’s likely going to be a fairly expensive option.
A concrete patio with purchased pavers will cost a little more than a poured concrete slab.
Especially if you want stamped pavers, though they certainly will add visual interest and increase curb appeal.
But buying pre-made stamped pavers is an expensive option.
A cheaper option is to buy your own pre-made stamps to stamp your own slab or DIY pavers are still a little bit pricey.
So ultimately, making stamped concrete pavers with cheap foam insulation board as the mold is a great idea and a thrifty solution!
I go into a lot of detail about this in my guide for buying vs making your own stepping stones, but here’s a quick summary.
Types Of Purchased Stamped Concrete And Pavers
Stamped Concrete Patio (Professionally installed)
Pros:
- Suited for large projects
- Can save some money if you have an existing concrete slab, that can be surface recoated and then stamped
- Concrete slabs are prone to cracking
Cons:
- Installation of the concrete patio stamping the concrete slabs and is dependent upon weather conditions
- Comes with higher costs
Pre-made Concrete Stamps –Rubber or Silicone (DIY)
Pros:
- Less expensive than a stamped patio
- Can make many castings, should be enough to an entire area (reasonably sized) with one stamp mold
Cons:
- High initial cost
- Limited design options
Types Of DIY Stamped Pavers
Homemade Concrete Pavers Stamp from Foam (DIY)
Pros:
- Good for small areas
- Unlimited designs
- Very economical
Cons:
- Limited amount of castings per foam board
- Not suited for large projects
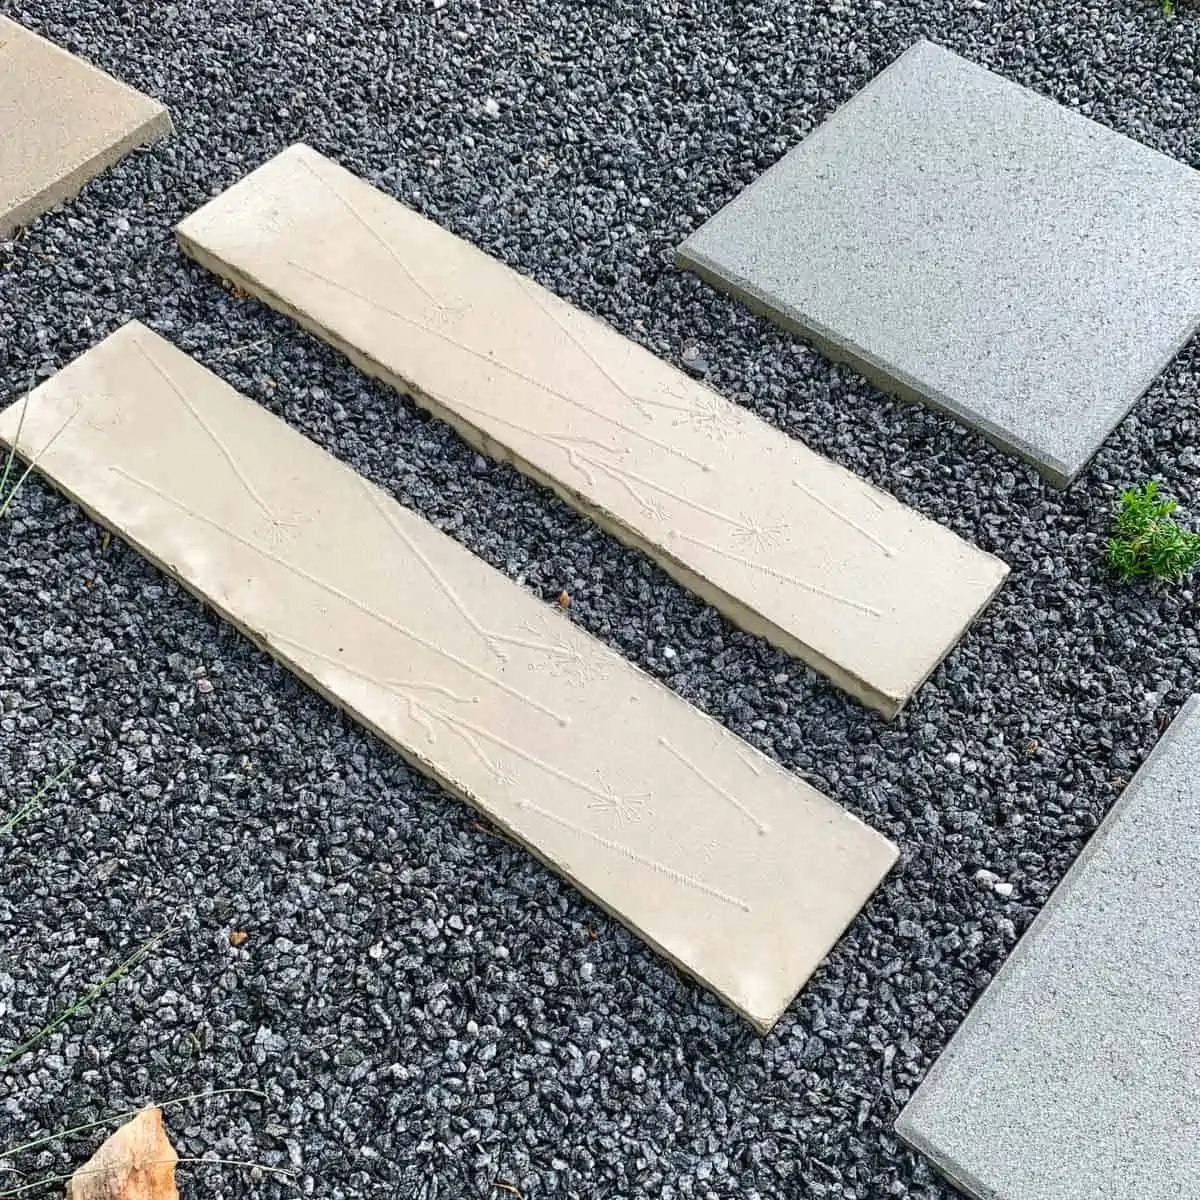
By the way, you should know that these stamped pavers are part of the garden path in my gravel garden that I just finished.
I used premade square concrete patio pavers combined with these handmade ones. It’s a continuation of the attached paver patio I re-built last year.
Another great idea for making your own pavers are these DIY concrete bricks.
Some of the links on this page have been provided as a convenience for finding materials. These links may also be affiliate links. As an Amazon Associate I earn from qualifying purchases, at no extra cost to you.
I only recommend products I’ve used and loved, unless otherwise stated. Click here to read my full disclosure policy.
DIY DIFFICULTY LEVEL | Easy
How To Make Stamped Concrete Pavers For Cheap
- Rapid set concrete or Sand Topping Mix*
- Large mixing bin
- Garden hand spade
- Finishing trowel
- Durable nitrile gloves
- Safety glasses
- Safety mask– rated for silica dust
- Melamine board 48×24”
- Wood screws, 1 ½”
- Power drill
- Table saw or circular saw
- Miter saw
- Pink foam insulation board (96×48″)
- Craft knife with long blade
- T-square
- Packing tape- Tyvek or good quality*
- Chisel or spackle knife
- Diamond sanding pad– 60 and 200 grit
Materials Note*
Concrete Mix- The type of concrete I used was a rapid setting mix that had small to medium-sized gravel in it.
I was short on time so I chose this mix over the Sand Topping Mix listed above, which is what I used for making these DIY concrete stepping stones with a natural look.
Both will work, but the Sand Topping Mix will take 2-3 days to cure.
However, the benefit is that it doesn’t contain gravel. This means the stamped pavers should have nice clean edges, as well as fewer pit marks.
The pit marks are barely noticeable but were created in the foam from the pressure of the gravel during each casting.
Also, please note that the Sand Topping mix is a light grey instead of off-white like the mix I used.
If you decide to make a different size paving stone, you’ll need to know how much mix to use.
This can be calculated by the square foot, or just use online calculators on the Quikrete or CTS Rapid Set websites.
I purchased 2 bags of concrete mix that were 60 lb each. This left me with a little more than ¼ of a bag left for the 4 stamped pavers.
The concrete pavers will be 2” thick so that they are durable enough to resist cracking. 2” is the minimum required thickness.
Packing Tape- A release agent isn’t necessary because the packing tape will provide enough release and the concrete will release easily from the melamine.
Using a release agent may leave you with discoloration marks, which is why I avoid it when possible.
Also, you may find this article helpful after, about how to clean pavers, including how to clean this type of concrete paver.
Step by Step Guide for Making DIY Stamped Concrete Pavers
Before starting the tutorial, it may be helpful to read my article comparing the different concrete mixes and sealers– Cement & Concrete Crafts Tests!
Another important article is Making Cement Crafts Techniques & Tips with info on cement materials, mixture consistencies, demolding, safety and clean up!
Step 1. Cut The Boards For The Stamped Pavers Mold
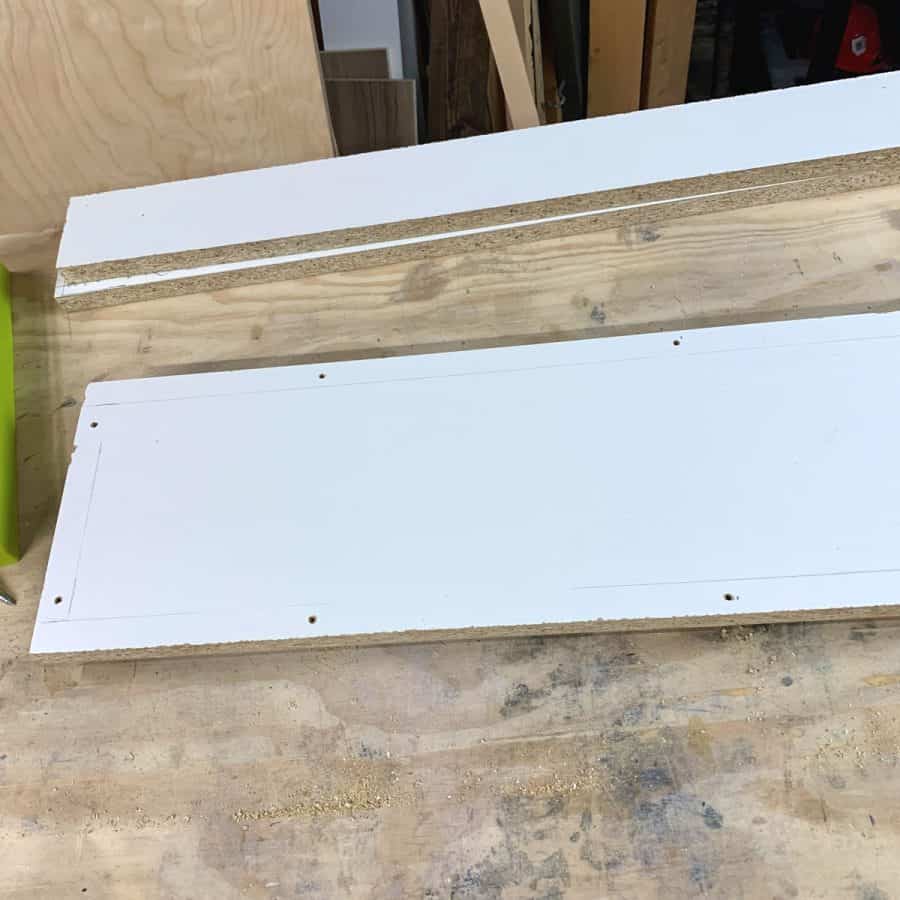
Use a table saw to cut the 48×24” board into the following pieces:
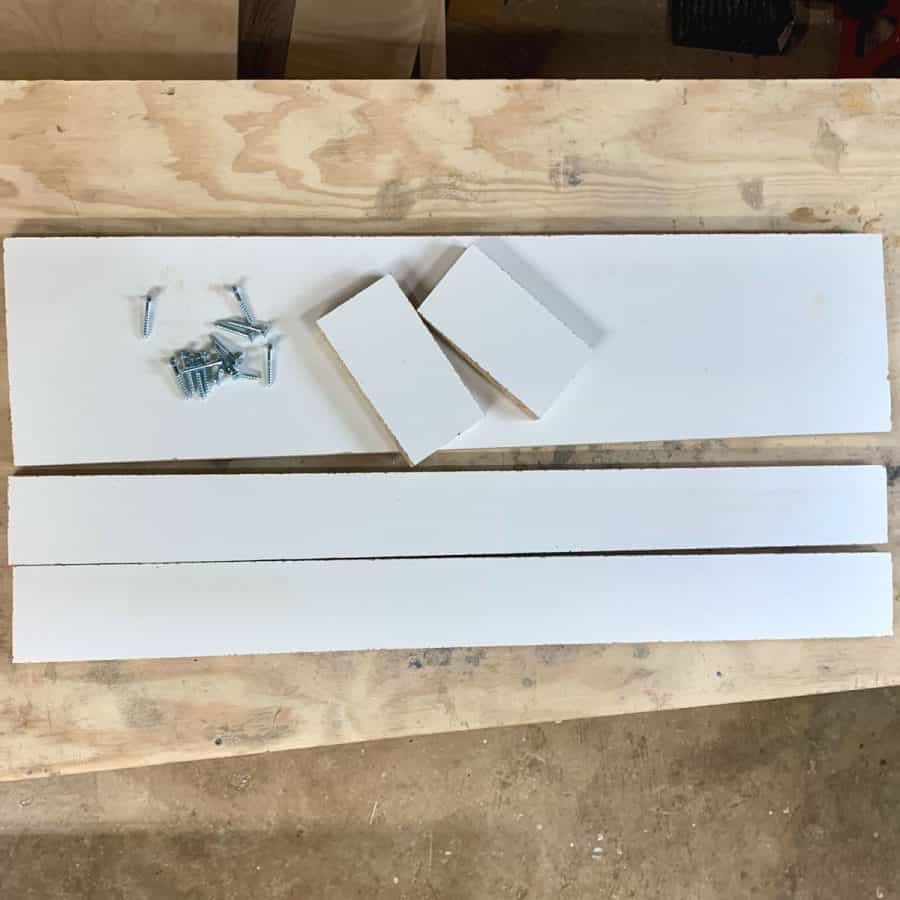
(1) 32×3”
(2) 32×3”
(2) 6×3”
Step 2. Pre-drill the Screw Holes
The screw holes must be pre-drilled because the melamine will crack if you don’t.
I found the easiest way was to first drill the holes around the base of the mold box.
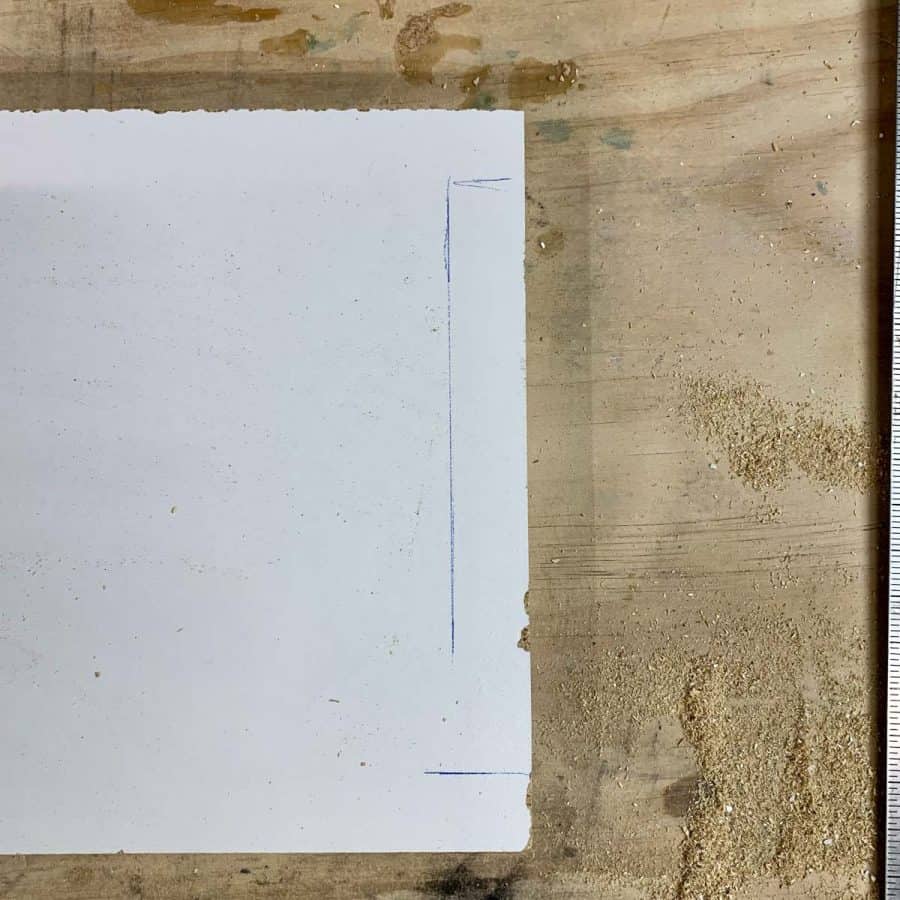
I recommend tracing the edges on the base piece first so that you know where to drill and you don’t end up drilling too close to the edges.
Make two holes at each end and three holes along the long edges.

Now the holes in the base will need to be drilled into the sides of the box. These holes will have to match the locations you drilled on the base.
Start with the long sides. Place the base piece at the edge of your table, standing on its side, and then butt a long side piece up to it.
Hold the pieces carefully together and insert the drill with the drill bit, into one of the base pre-drilled holes and go through the raw edge of the side.
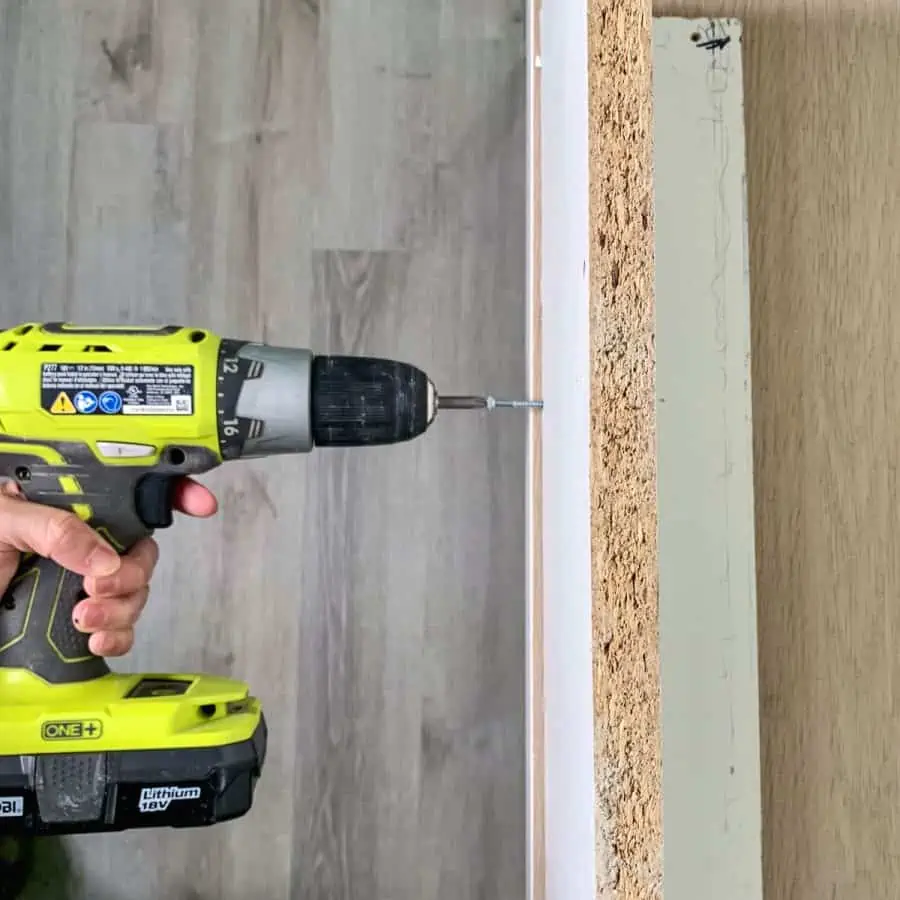
Do this for each hole and screw these together. Then repeat with the other long side, and then finally with the short ends.

Once all the sides are secured to the base, you can screw the long sides to the short end pieces.

Step 3. Dry-fit The Paver Stones Mold Piece
Here is a step I skipped which made demolding difficult for me. I figured out what I should have done after my first casting, and took photos afterward to show you how to do this.
A tight fit with the foam and box is necessary to prevent the concrete from leaking down between the foam and the sides of the box
If this happens, you’ll end up having to chip away at the sides of the paver where the excess dripped.
To avoid this, first, unscrew both one long side and one short side of the box.
You’ll need a piece of foam insulation board that is manageable to work with.
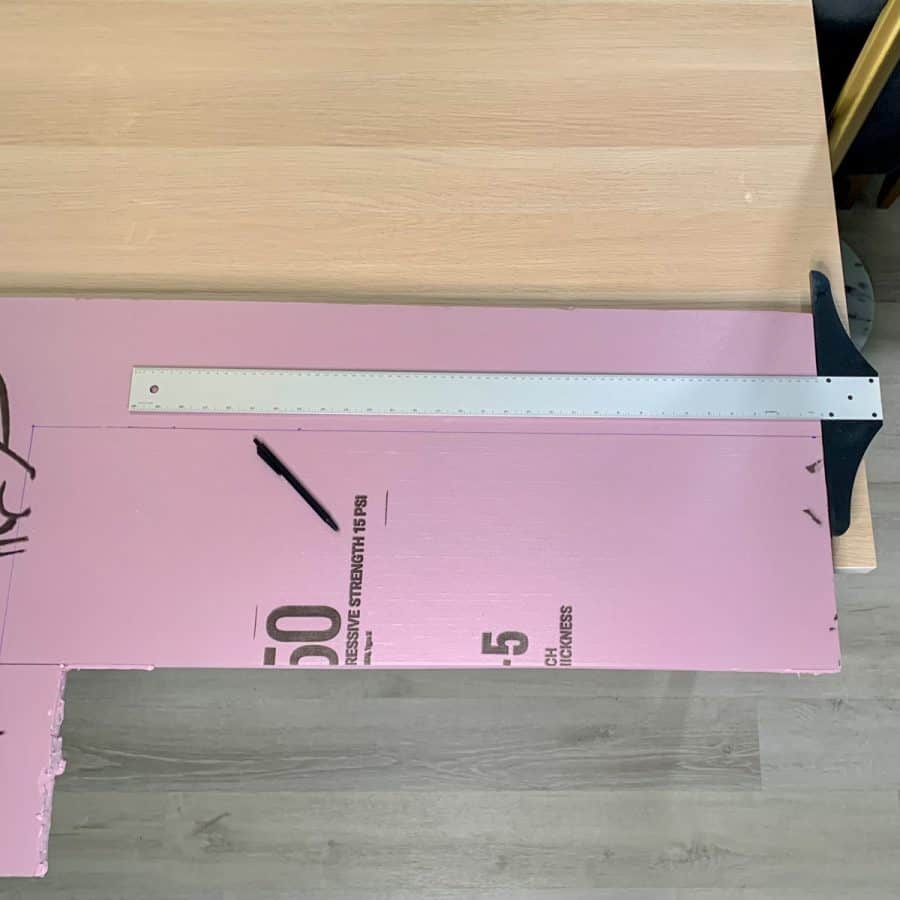
The foam mold will end up being approximately 30×6”, but you’ll need some working room.
So make it a little bigger and mark out a piece that is 10” x 34” using a t-square.
*Make sure that one short side and one long side remain the factory cut edge.

Now cut that piece out of the foam board using the craft knife.
When cutting, keep the craft knife straight (not angled inward or outward), and be sure to use a t-square.
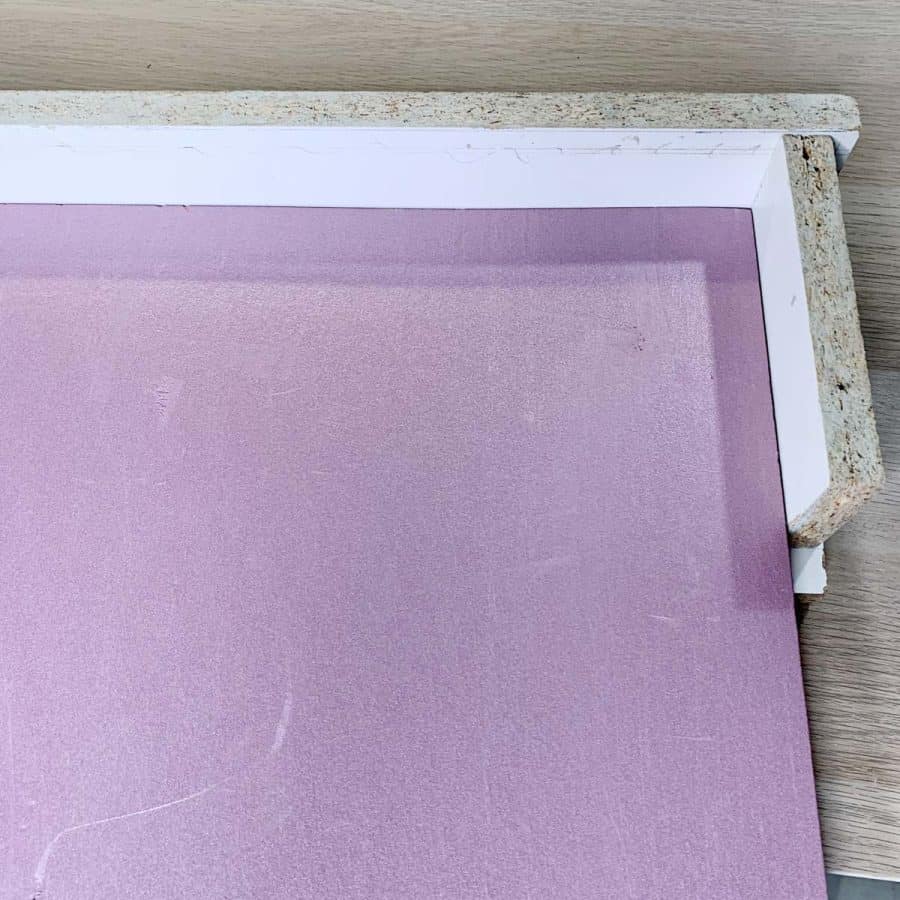
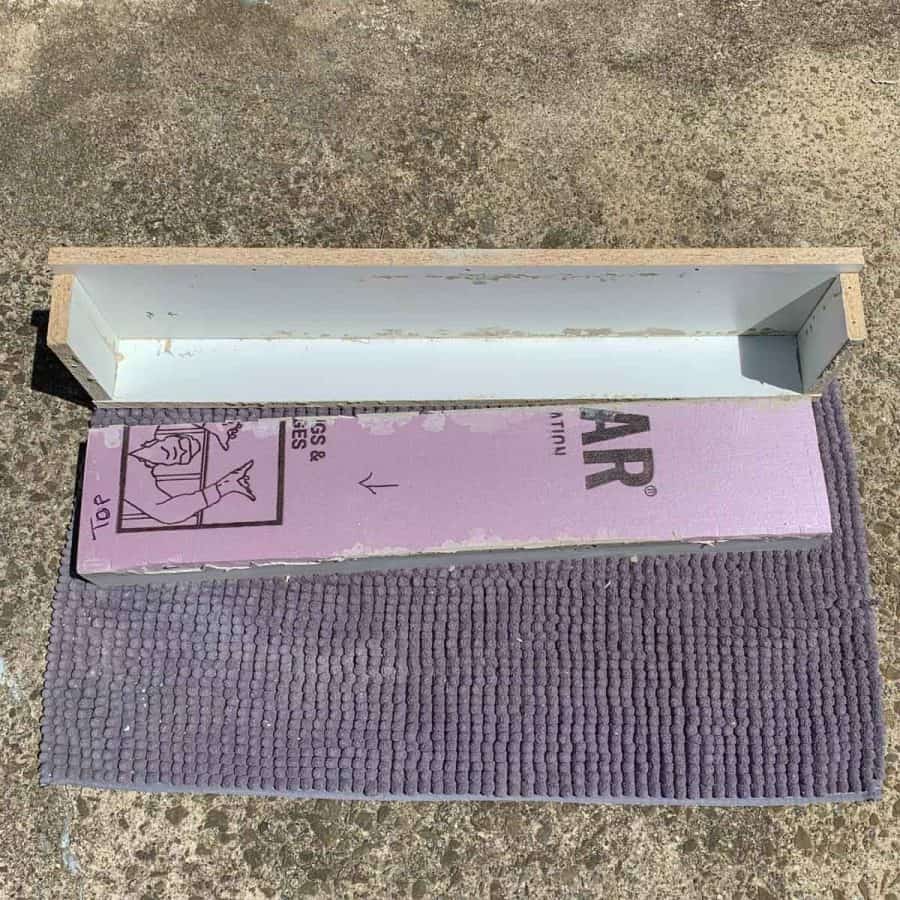
Next, slide the board inside the box and into the corner with the factory edges touching the sides that are still assembled.

Place the long side on top so that it meets the assembled short end and then place the other short end on top so everything meets.

Quickly mark where the long end on top meets the short end on top and then put the short end down.
Now trace where the long end meets the foam board.
Now put the long side back down and place the short one back on top to trace that.
Ensure that it lines up where you marked the meeting point with the long side.
These will be your new cut lines. Once you have a good tracing line, go ahead and cut along this line.
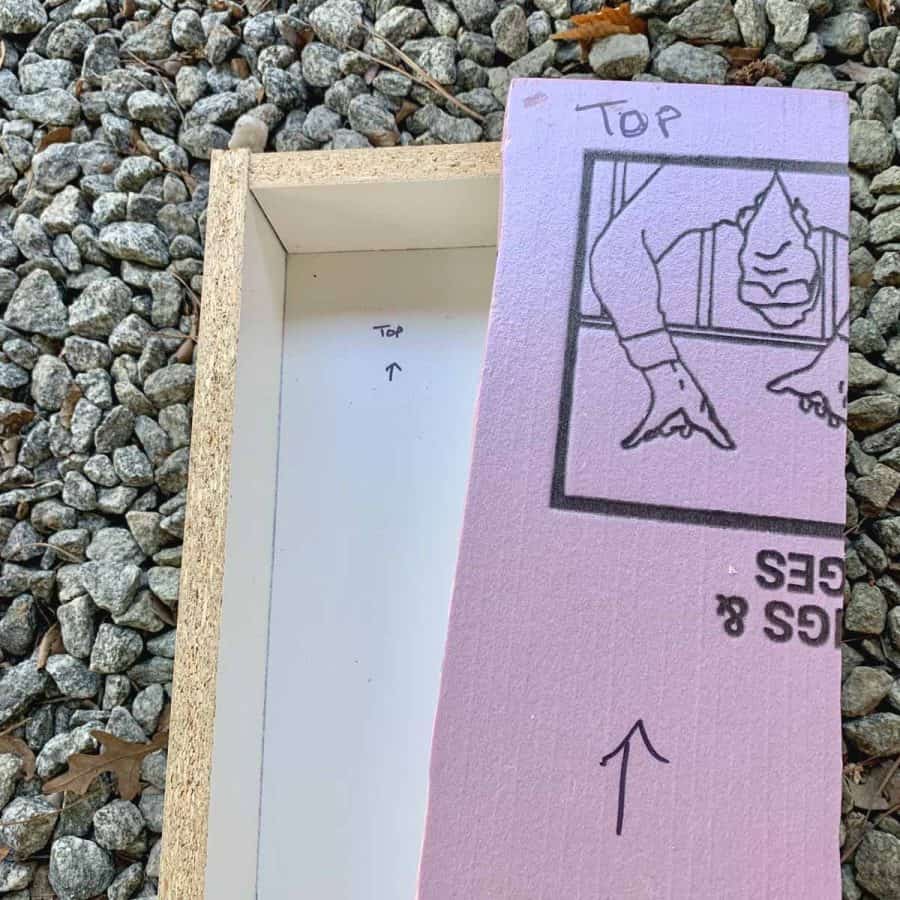
Double-check that the foam mold piece fits and then mark the direction the board needs to face since it will only fit one way.
I marked arrows and wrote “top” on both the board and the box.
At this point, you should also label all your side pieces A-D and label where they meet on the box because you will be disassembling this in a later step.
Step 4. Make the Concrete Paver Stamped Pattern Design
Before making what will be your final stamp design, it’s a good idea to do a test run using a small amount of concrete.
This will give you a good idea of how the finished product will look.
And whether you want to make deeper or less deep lines, or thicker or thinner lines with your carving. And you’ll know how much pressure you can apply.
To do the test piece, cut a small piece of foam from your big leftover piece and follow the concrete mixing instructions and just use a small amount.
You can just place it on top of your test piece, without the mold box, just like a paddy cake.
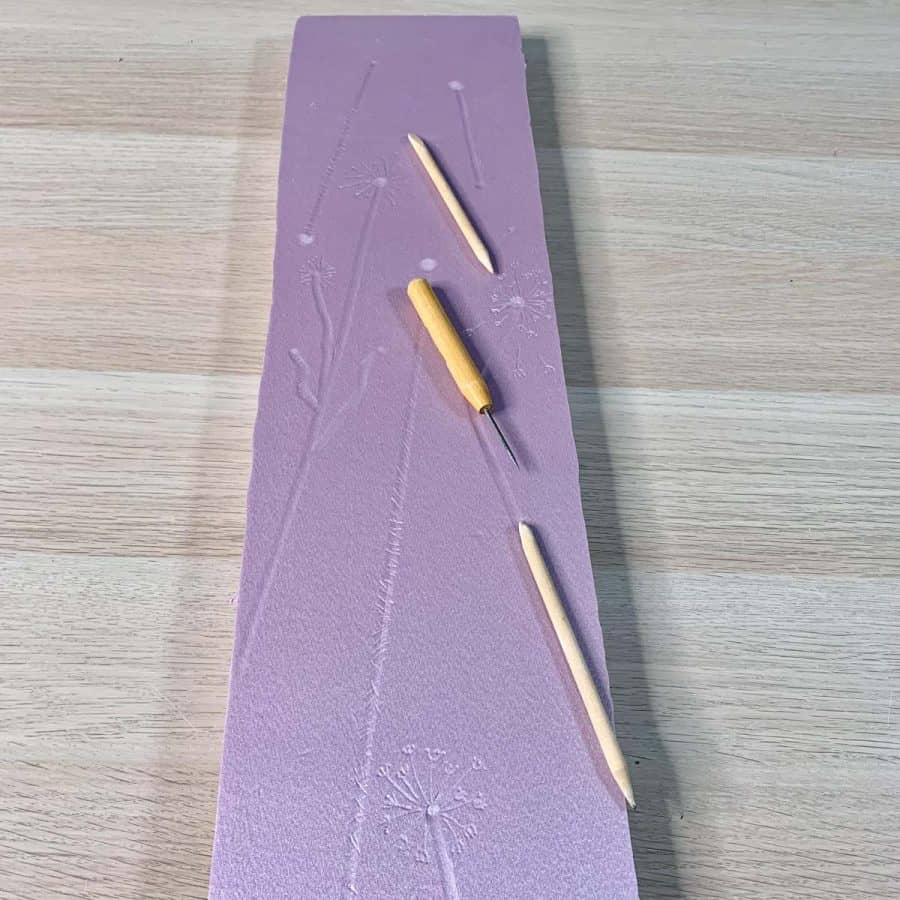
Now, to create the stamp patterns, Use the blending tools and awl to create the design elements. You should press firmly, but not hard.
These seemingly shallow lines do create quite a bit of texture on the concrete surface.
You will start to hear the foam crack when you’re going deep enough that it’s going to create a raised line, or start to tear.
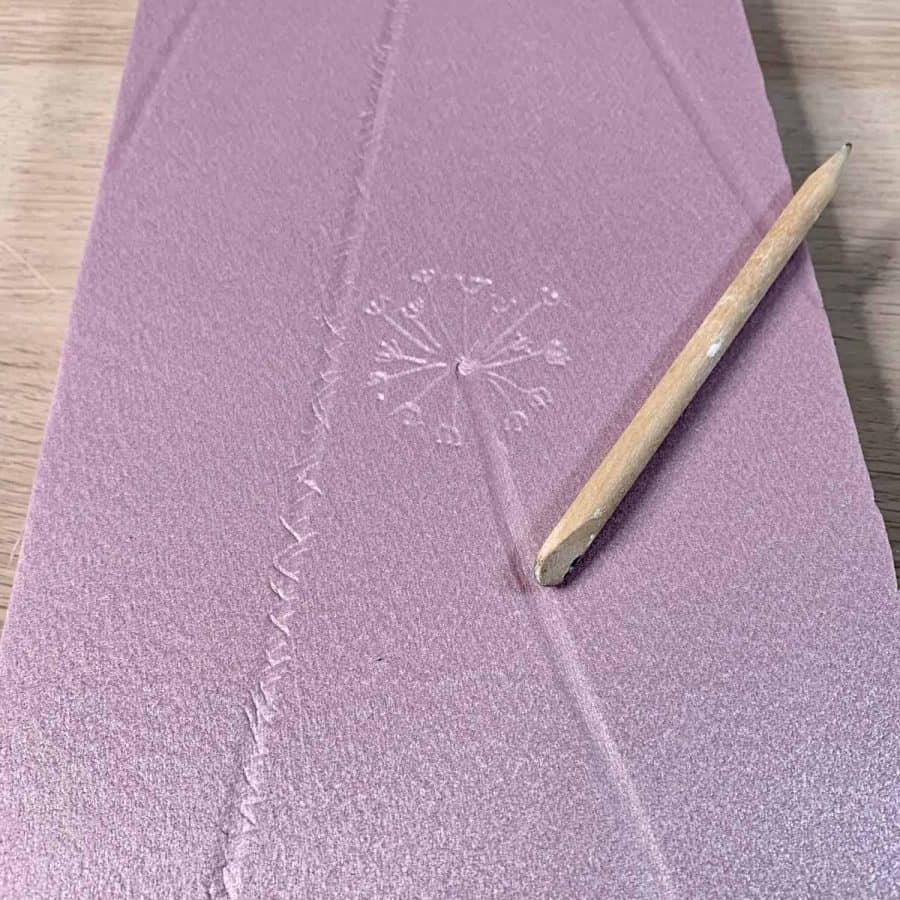
I used the semi-rounded end of the pencil blending tool to create the smaller circles.
The end of the awl is what made the larger rounded circles.
The point on the pencil blending tool was perfect for drawing lines and making the small dots at the tips of the dandelion.
Just these two tools allowed me to create a diverse amount of unique textures.
Feel free to make a complex pattern if you’d like, the foam will grab all the detail and the concrete will in return pick up the fine detail.
If you want to create a second stamp, you can create another design on the back.
But your ability to see the design will be a little hindered by the logo that’s printed on it.
Once you are satisfied with the design, place the foam board in the box.
Step 5. Mix the Concrete and Cast The Stamped Concrete Paver Mold
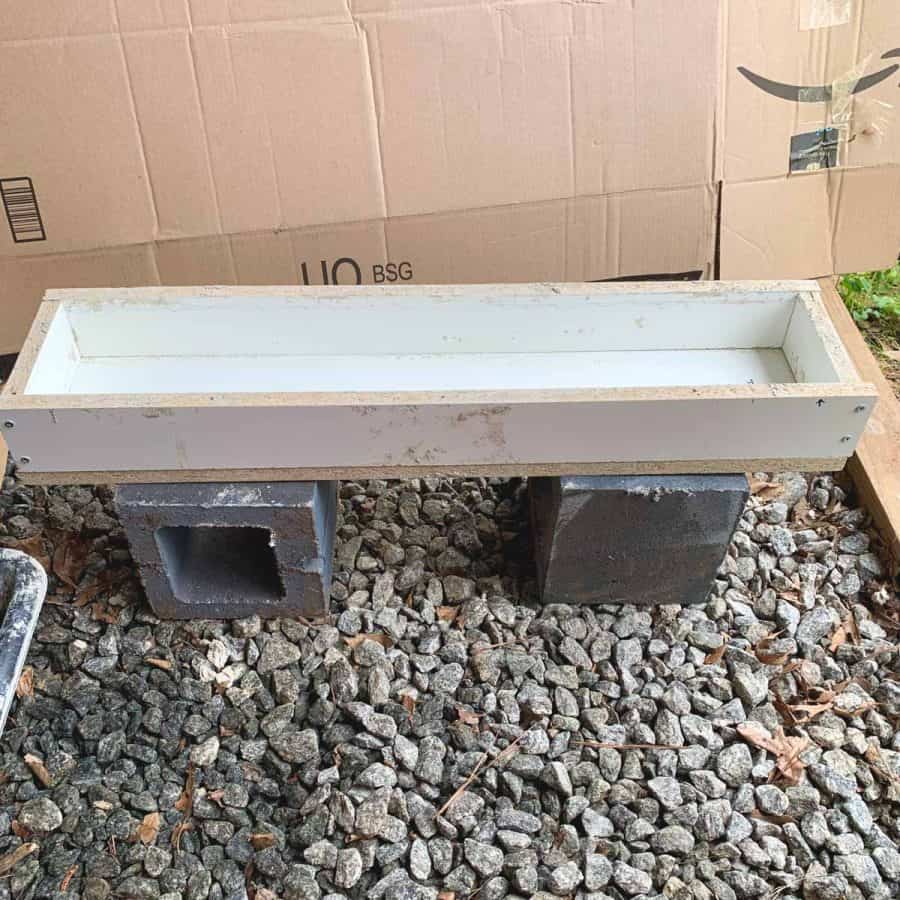
Before mixing the concrete, I recommend setting up the melamine box on something a little higher off the ground, to assist with vibrating the concrete.
I used two cinder blocks to raise it, and also let the box overhang the ends.
This is because the best way to vibrate is by lifting and tapping it on a work surface.
The overlap allows me to get my hands underneath the box with enough clearance to vibrate without smashing them.
To mix the concrete, first, add some water to the large bin first to cut down on the amount of dust.
Just an inch or so to cover the bottom is good. Then add a little less than half the bag of concrete.

Use the garden spade to mix the concrete, it should be the consistency of peanut butter or a wet mud pie with rocks in it.
Once the concrete is somewhat mixed, I found it easier to use my gloved hands to do the final mixing.
This is because there’s usually a fair amount of concrete powder still stuck at the bottom.
By the way, I recommend double layering your gloves if you hand mix, especially if the mix you use has gravel in it.
Scoop the mix and gently lay it on top of the foam mold. Don’t rub it in or spread it over the foam with any pressure or you’ll risk scratching it.
Before you finish filling the box, you should vibrate it. This is because, at this size, the mix is too heavy to vibrate it sufficiently at the full 2” thickness.
I added just one layer (about an inch) and vibrated it, by shaking and tapping the box on the work surface.
To picture how you should vibrate this, think of using a strainer in the kitchen sink and how you would tap it several times pretty hard against the bottom of the sink if you really need to get a lot of water out.
This is how you should vibrate the box, but harder. I vibrated this for 30-45 seconds.
Now place the rest of the mix on top of the first layer and spread it over and vibrate again for about another 30 seconds. You can use the trowel to help smooth the top.
If you’re using the rapid setting mix you may need to add just a touch of water to the rest of the mix still in the mixing bin.
It’s best if the consistency of the second batch is the same as the first.
I found that I needed to add a small spritz of water each time after the first layer was vibrated.
The cure time for the rapid setting mix is 1 hour 45 minutes- 2 hours. The concrete should be no warmer than lukewarm when you demold.
The cure time with the Sand Topping Mix will vary, but it will be at least 2 days, and 3 is probably better.
Step 6. Demold The Paver

Remove the screws from one of the long sides. Then gently press the other sides of the box away from the foam.
You should hear or feel the foam and concrete paver separate from the melamine.
Now place a soft cloth on the work surface and turn the box over to slide the paver and foam out of the box.
Depending on how close of a fit you had with the foam and the box, you may have a little bit of work to do to free the foam from the stamped paver.
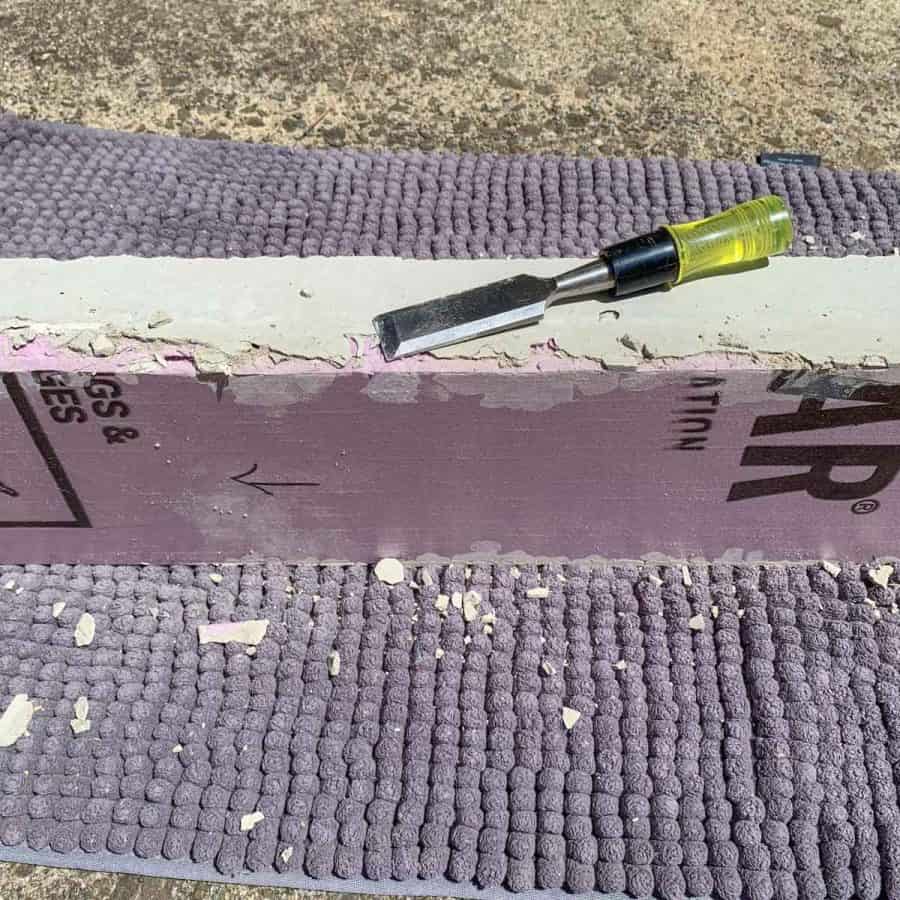
Start at one of the short ends, the one with the cleanest edge and gently pry it up away from the foam.
If it doesn’t release, you may need to chisel away any concrete that has dripped over the sides of the long edges.
If you did have leakage, then probably better to tap at the concrete with the blunt end of the chisel or even a rubber mallet.
Once you have the short end freed slightly, then continue lifting from one of the long edges.
Don’t bend the foam, just lift. It will make a sound like it’s cracking, but it’s probably just the sound of the concrete releasing from the foam.
With the dry-fit step that I added, your demolded foam and concrete probably don’t look like this, and the foam probably released from the concrete within a couple of minutes.
After you have the foam freed from the paver, sand the rough edges.
I sanded both the top and bottom so I wouldn’t accidentally cut my hands while working with the paving stones.
Step 7. Clean The Stamped Concrete Paver Mold For The Next Casting
First, check carefully that none of the screws have loosened and that no concrete has leaked down between any of the boards.
If it has, then you will need to disassemble the boards and scrape off the leaked concrete, otherwise, it will cause the box to bow and the concrete mix will leak down the sides causing the demolding issue you’ve hopefully been able to avoid.
This happened to me, but I didn’t realize it until after my last paver was made. So my last two stepping stones had very rough edges in certain parts.
If there’s nothing in between the boards, then just wipe down the melamine box with a dry cloth and fasten it back together.
When screwing it back together screw the long edge from the bottom first, and then do the short ends.
Be sure to clean the foam mold to keep it in good condition. Use the hose sprayer to gently spray the dust and grit off of the foam and gently wipe it down with a soft cloth to remove any dirt.
The dirt will show up on the surface of the stamped paver on following castings, so try to get off what you can.
But, just a heads up, they will get naturally dirty over time just from being out in the elements.
You may notice after the second casting that the foam insulation mold has lost some of its detail and the design has become less recessed.
If so, it’s an easy fix. Just go right back over it with the same tools and deepen the grooves, lines and dots again.
I needed to do this after my second casting and it only took about 5 minutes.
Now you’re ready to repeat the process with each of the remaining individual pavers.
For more DIY patio inspiration, check out this round-up of 15 cheap patio ideas and tutorials.
Don’t forget to Pin it for later!


DIY Stamped Concrete Pavers
How to easily make stamped concrete pavers from an inexpensive and easy to find material. Make them any design, add to your garden or patio and instantly improve your curb appeal.
Materials
- Concrete mix
- Melamine boards
- Wood screws
- Power drill
- Tabel saw
Tools
- Please see the full materials list above the tutorial for details and links.
Instructions
- Cut The Boards For The Stamped Pavers Mold To Size
- Pre-drill The Screw Holes In The Melamine
- Dry-fit The Paver Stones Mold Piece Carefully With a Craft Knife
- Make the Concrete Paver Stamped Pattern Design Using Pencil Blending Tools And An Awl
- Mix the Concrete and Cast The Mold, Mix The Concrete To A Peanut Butter Consistency
- Demold The Paver By Unscrewing The Long Side And Flipping Over The Box
- Clean Up For The Next Casting By Wiping Down The BOx And The Mold Piece