Large DIY Concrete Mushroom Garden Art
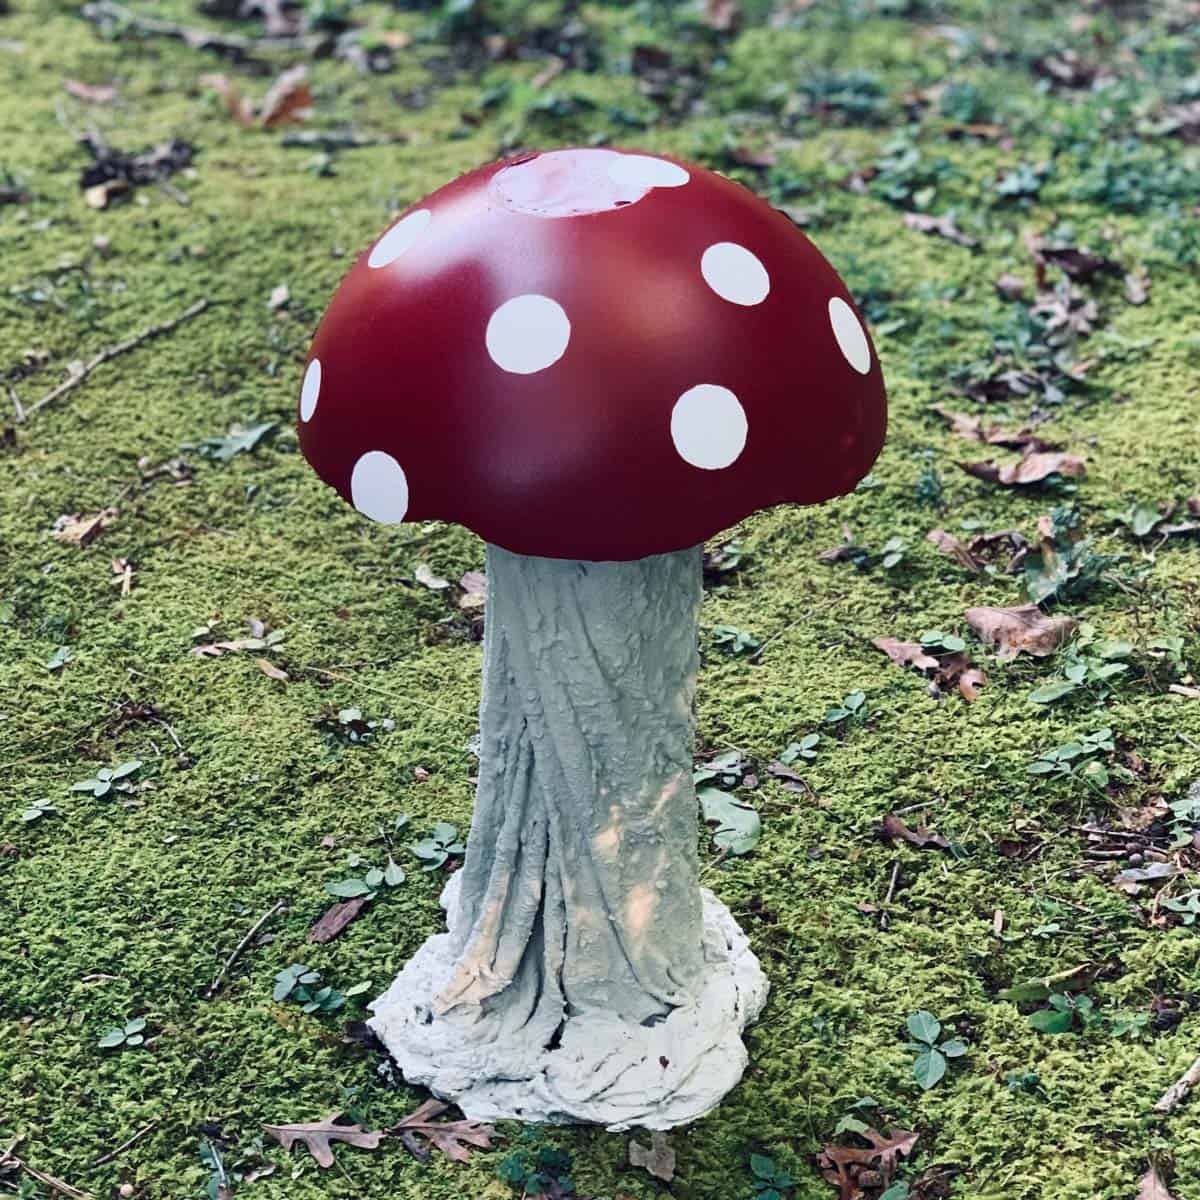
Here’s a tutorial for a large, magical DIY concrete mushroom for your garden or yard.
If you’ve ever shopped for a big (2 foot high) concrete mushroom, you’ve probably seen prices of at least $200!
Well, I have good news, you can make your own for under $50.
I’ve wanted to make concrete mushrooms for years.
It’s been on my list but always gets pushed back because of two problems.
One is that I was hoping for some hints from other tutorials on making one, and the other was size.
All I could find were tutorials for making small mushrooms, and that just wouldn’t do as I already had my mind set on a big one.
Once my mind is set, it is so stubborn it just won’t give.
Well, I couldn’t find any helpful hints on making a large concrete mushroom.
But the second problem was the bigger problem, which was not being able to find a large enough mold for the cap, that would be to scale. It seems finding the right mold is often a challenge in concrete-making.
So at least once a year for the past three years, I have taken a deep dive into an internet search, scouring sites for a bowl mold with a nice convex cap shape that would be big enough for a 2 foot stem.
I finally found the elusive mushroom cap mold I had been searching for. And with cool weather starting to arrive, it was now or never.
Once I had my stem and cap mold materials, the rest was pretty easy to figure out.
Finally! On my way to the whimsical DIY concrete mushroom of my dreams.
Now, one word of warning about making this mushroom. It is heavy. My best guess is that it’s a bit over 50lbs.
I’m able to carry it, but if you have to bring it up a hill or walk a longer distance to place it in its final location, be prepared or use a wheelbarrow or garden cart.
You will also need to lift it a couple of times while making it.
For this reason, and because it requires four different sessions of making batches of concrete mix, I’m rating this one a moderate difficulty level.
Try not to let the difficulty level deter you. I’m so glad now that I went ahead with this. It turned out gorgeous –in my humble opinion :0).
However, if you want a really easy mushroom project, check out this one for making air dry clay.
And are you a mushroom junkie? Then check out these whimsical coloring sheets of mushrooms!
Some of the links on this page have been provided as a convenience for finding materials. These links may also be affiliate links. As an Amazon Associate I earn from qualifying purchases, at no extra cost to you.
I only recommend products I’ve used and loved, unless otherwise stated. Click here to read my full disclosure policy.
DIY DIFFICULTY LEVEL | Moderate
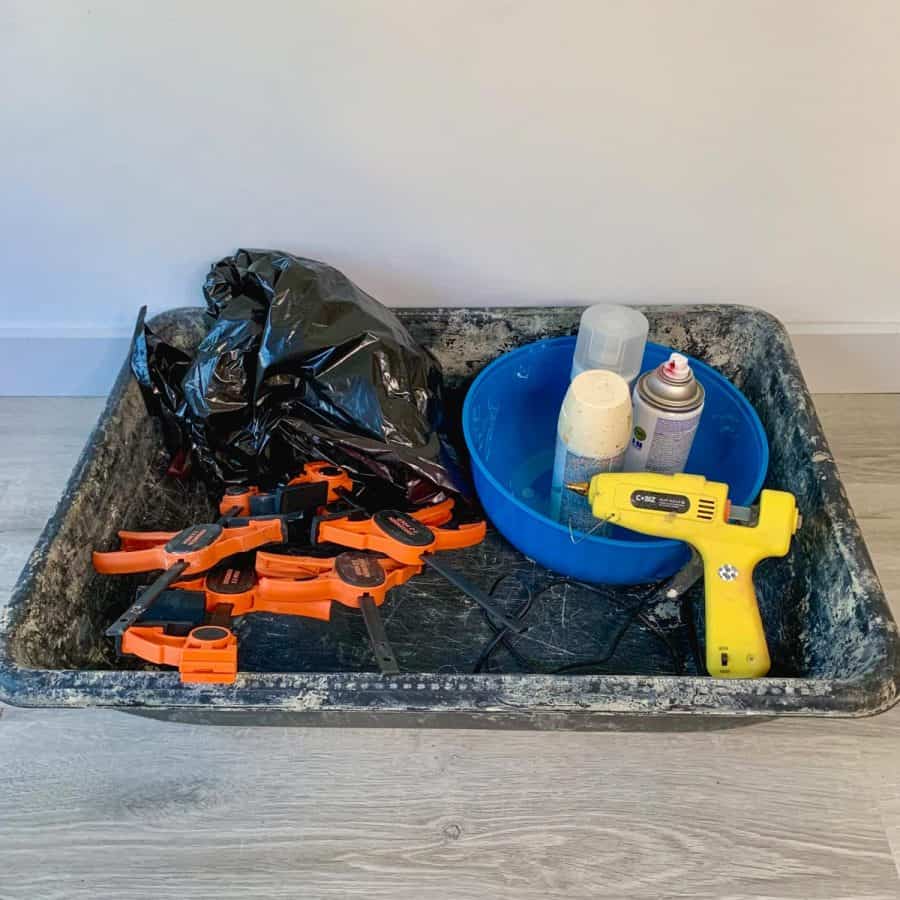
DIY Concrete Mushroom Materials List
- Disposable cup
- Durable nitrile gloves
- Safety glasses
- Safety mask– rated for silica dust
- Permanent marker
- Blue tape
Mushroom Stem Materials
- Concrete mix
- Large mixing bin
- 4 x 24” cardboard mailing tube
- Duct tape
- Crafts sticks
- 6×6” tile or very flat board
- Hot glue gun
- Plastic wrap
- Rubber band
- Large bowl for mixing cement (fabric strips)
- (3 or 4) Strips of jersey or cotton material (10×28” each)
- Nylon stockings
Mushroom Cap Materials
- Cement, rapid set cement (1 full box, possibly a little more)
- 14” Large plastic bowl* (outer mold)
- Large plastic bowl (inner mold)
- Oil-based clay
- Scissors
- Piece of acetate film
- 60 grit diamond sanding sponge
Paint For The Mushroom
- Outdoor acrylic spray paint- red satin, off-white matte
- White indoor latex paint (cap’s spots)
- Medium-sized paintbrush
- Circle template
- Clear matte topcoat spray
Optional Support For Making The Stem Design
- 4 clamps
- 4 square cinder blocks (or 2 rectangular)
- (2) 2×2” boards about 2 feet long
- (2) melamine boards about 18” (or any ¾” board)
- Several paint sticks
- Kitchen garbage bag
Materials Notes
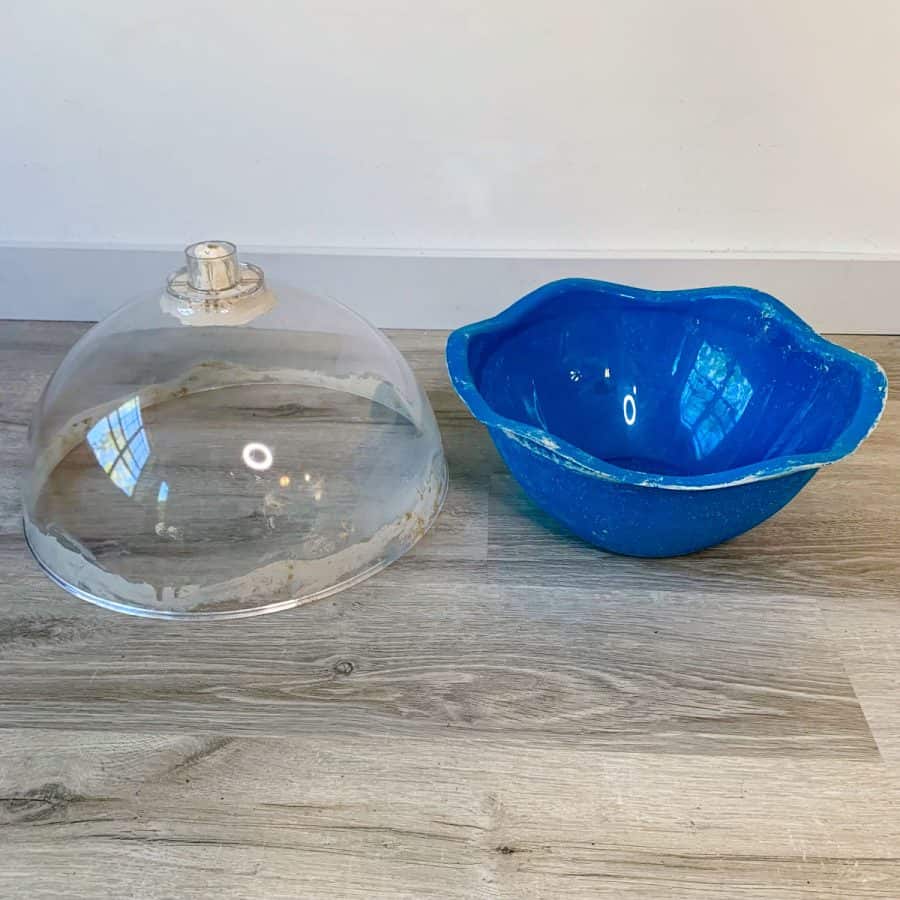
Cap mold
I did an exhaustive search to find a mushroom cap mold that had a convex mushroom shape and was also bigger than 12″ in diameter.
For a mushroom that’s 2 feet tall, a cap narrower than 12″ would look out of proportion.
I finally found the 14 inch “bowl” used for a different purpose than an actual bowl because it has holes at the top.
However, it was perfect in size, and the plastic was surprisingly flexible, making it a cinch to work with and for demolding.
Stem mold
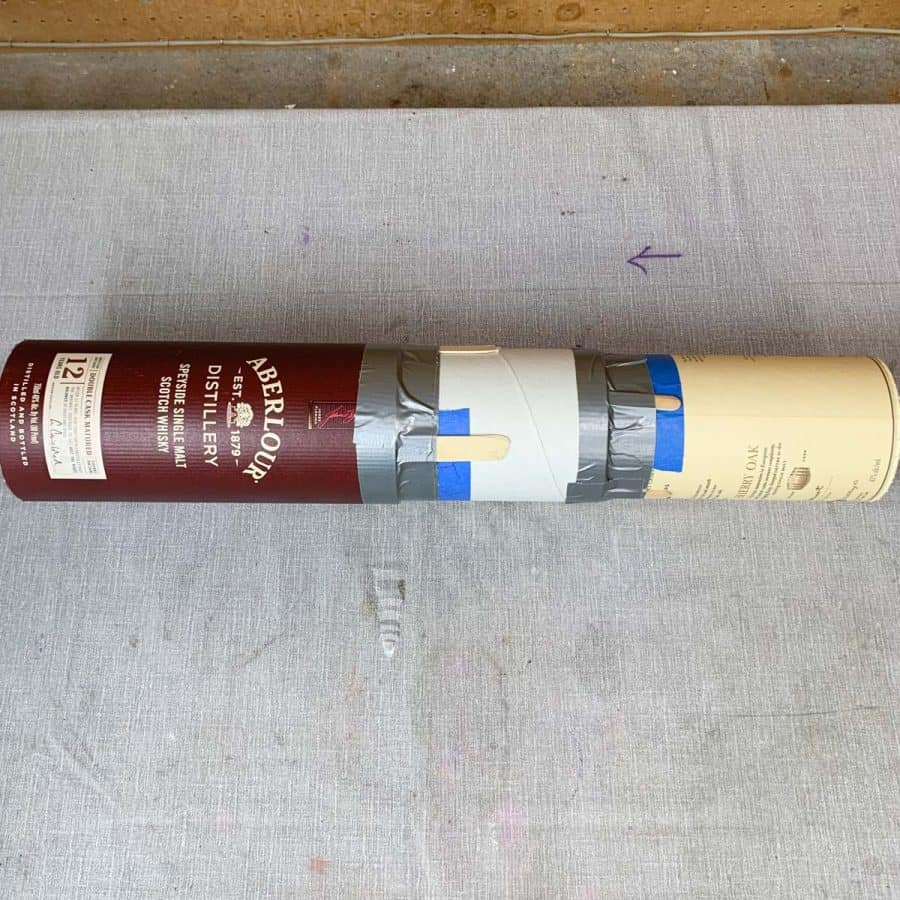
A mailing tube is the best option for the stem. I was on a time crunch and couldn’t wait for the 24″ tube to arrive so I used multiple tubes that I had on hand to make up the 24″. This will save a step using the single 24″ tube linked above.
Also, If you’re considering PVC pipe, please don’t. Although it comes in the perfect size and shape, it is not a good choice because you won’t be able to demold the concrete without cutting the PVC off.
Concrete mix for the stem post
I didn’t like the mix I used because it had too much gravel for this narrow 4″ opening. I have linked to a mix made for posts, but it has less gravel.
You may still wish to sift out a small amount of the gravel.
Paint
The spray paints I linked to have stood up to the test of time and proved durable in all weather conditions.
However, regular acrylic paints will fade quickly, even with the protective clear coat.
Inner mold for the cap
If your inner mold has a lip on the bottom, it will make removing it difficult.
However, if it’s a softer plastic, you may be able to shave it off. I was able to do that easily with my inner mold bowl.

By the way, mosaic stepping stones are another fun choice for a whimsical garden, as well as this concrete gnome, which is also supposed to be good luck.
Tutorial Steps For Making a DIY Concrete Mushroom
If you haven’t read this article yet, this is a good time to read up about how be safe when working with concrete.
Before starting the tutorial, it may be helpful to read my article comparing the different concrete mixes and sealers– Cement & Concrete Crafts Tests!
Another important article is Making Cement Crafts Techniques & Tips with info on cement materials, mixture consistencies, demolding, safety and clean up!
Step 1. Prep The Tubes For The Base Of The Mushroom
You can skip this step if you have a single mailing tube that’s already the correct length.
If you have a scenario where I did, and you don’t have a single tube as long as 24″, and yours are a few different widths and lengths, then follow these steps.
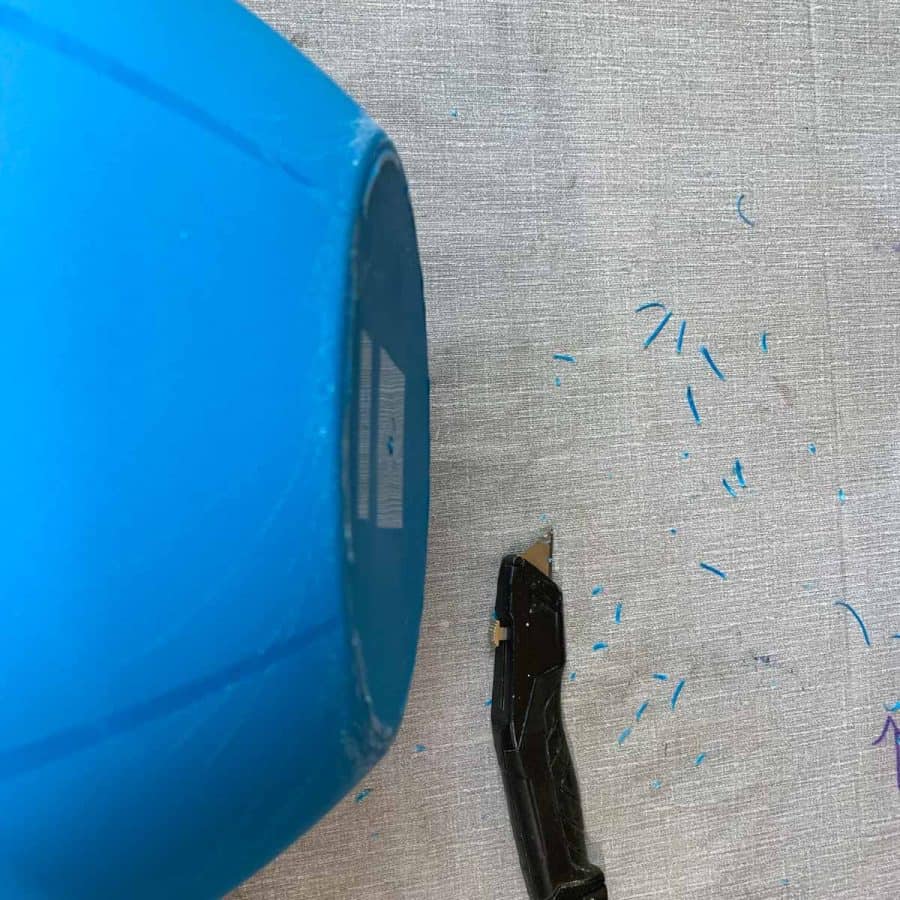
First, if there’s an attached bottom, remove it.
For one tube, I could easily push it out from the inside.

For the other tube, I needed to cut it off with a utility knife.
Next, fit the tubes together and position them, so they measure 24″.
Mark the location on each tube where they meet to make 24″. You don’t need them to overlap by much; ½” or more will do.
Please note when you cast the concrete in the tubes, the tubes will tend to slide down into each other just a bit.
You might lose about an inch of height, so the 24″ will probably drop it to 23″, but this keeps it to scale. A stem between 22-24″ is good.
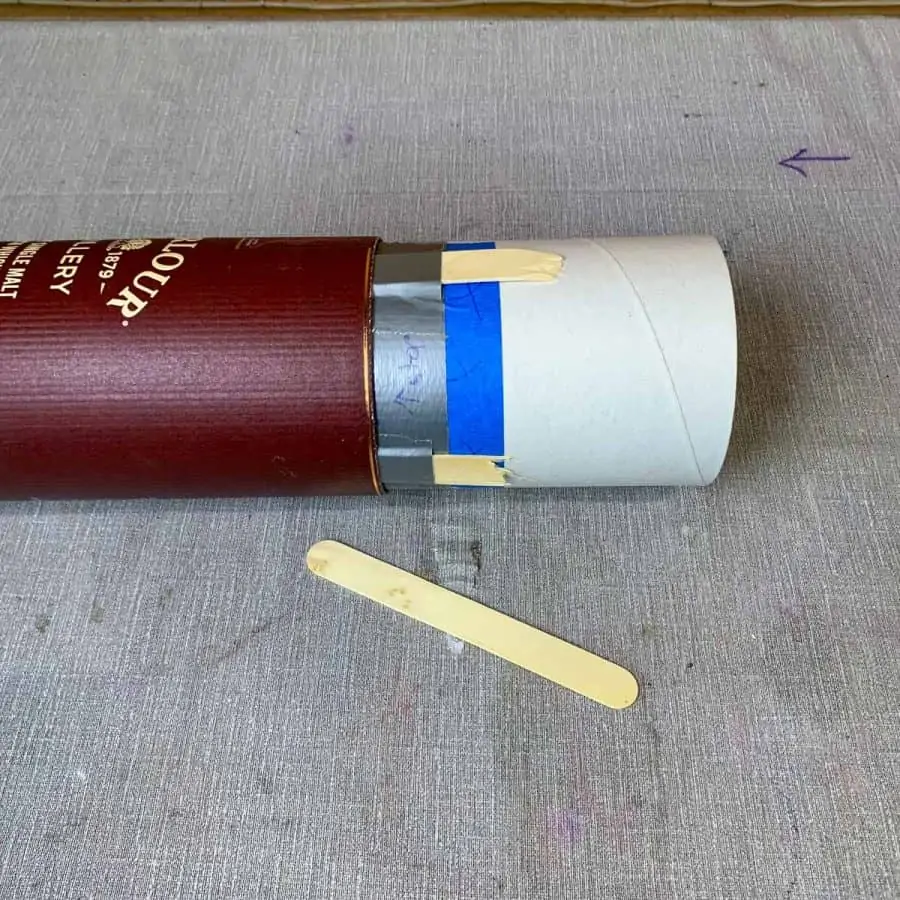
Now, since the tubes are different diameters, you will need to shim the spaces between them. I found that using craft sticks worked perfectly for this.
So take a craft stick, or break them in half and tape them to the narrower tube(s) where it joins with the wider one.
Step 2. Secure The Cardboard Tubes

Glue the tube to a base. I used a tile because it is flat and easy to demold. Unfortunately, my tile was too big (12×12), making vibrating difficult).
Heat a glue gun and then run a thick bead of glue around the tube to secure it.
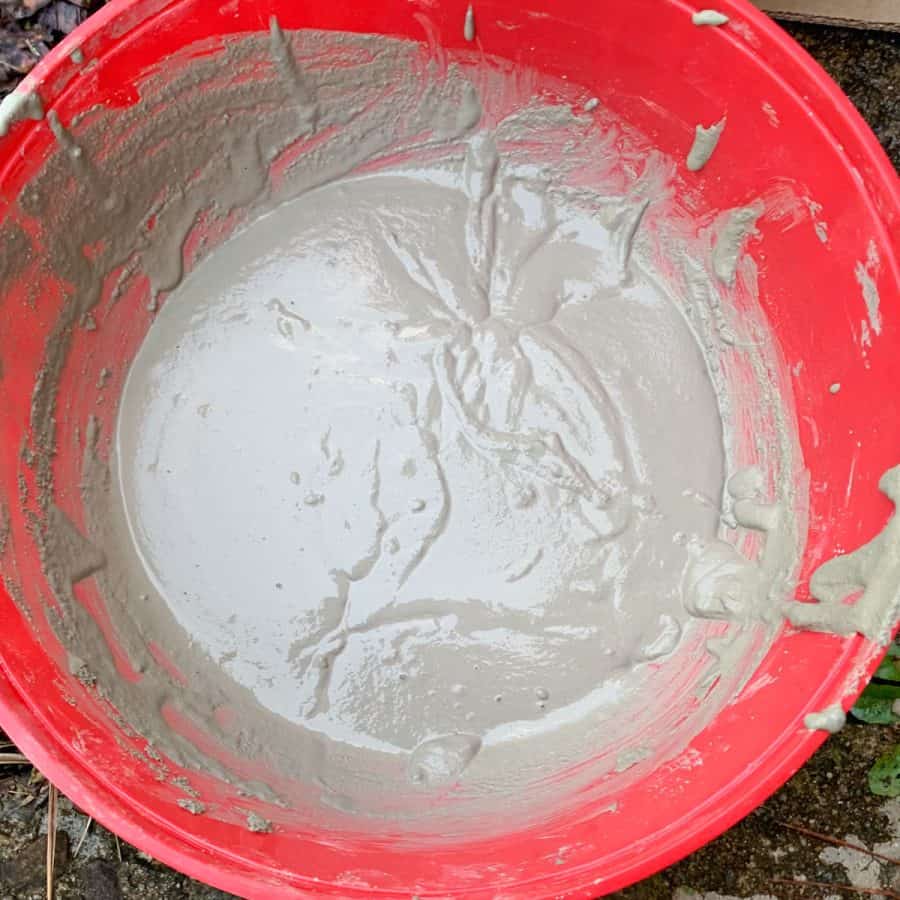
Step 3. Mix The Concrete For The Mushroom Base
Use a large mixing bin to mix the concrete.
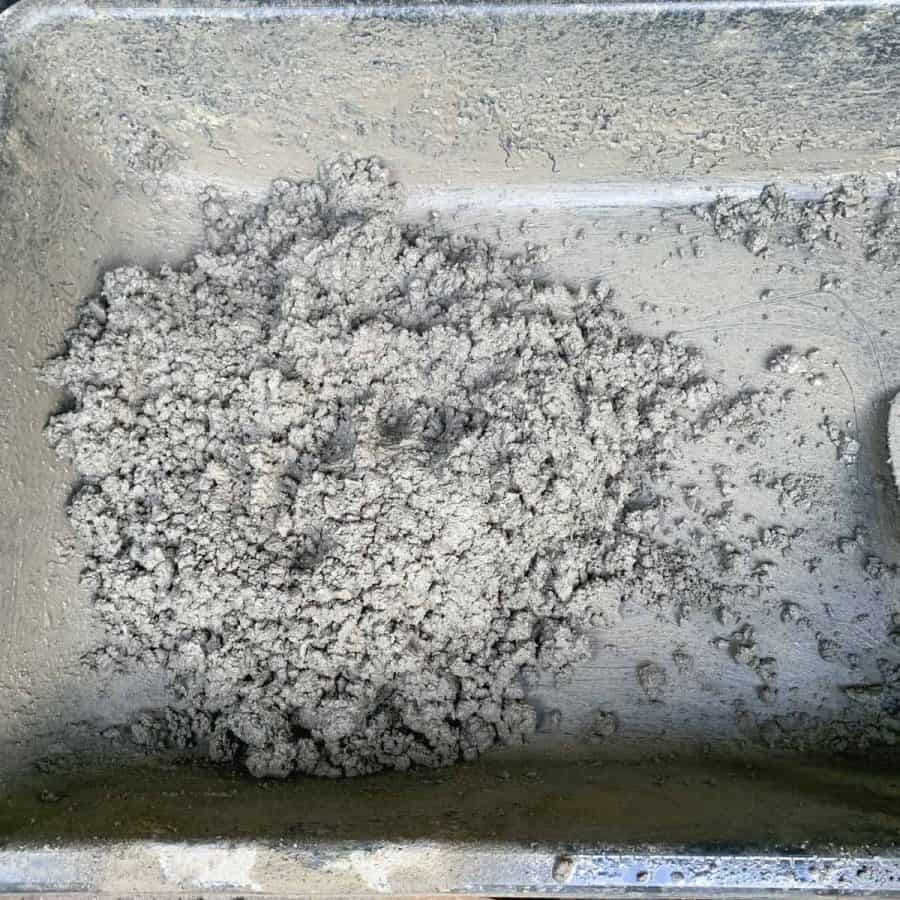
The amount shown in the photo ended up being a near-perfect amount of concrete to fill the tube, with only about a handful left over.
The consistency of the mix should be like crunchy peanut butter, with a lot of extra peanuts added.
Alternatively, you can mix this in small batches using a large bowl. Still, the single batch in this mixing bin will be easier.
At this gravelly consistency, “pouring” into the tube isn’t possible. So I used my gloved hands to scoop it in.
While adding the mix, carefully shake the tube several times and press down on the mix each time you add some.
This will help prevent large air gaps. If the tube is too narrow for your hand, use a 2×2″ piece of wood or something similar to help press the concrete mix down inside.
I didn’t vibrate this enough due to the cumbersome large tile base, which resulted in some gaps.
So I recommend doing your best to shake and vibrate thoroughly.

Once it’s full, make sure the top is flat. Then cover the wet concrete at the top with a piece of plastic wrap and use a rubber band to secure it.
Let this cure at least a full day. My stem took closer to 36 hours to cure.
When it has cured, the top will look dry and not have any remaining visible condensation.
Step 4 . Prep The Mold For The Cap Of the Mushroom
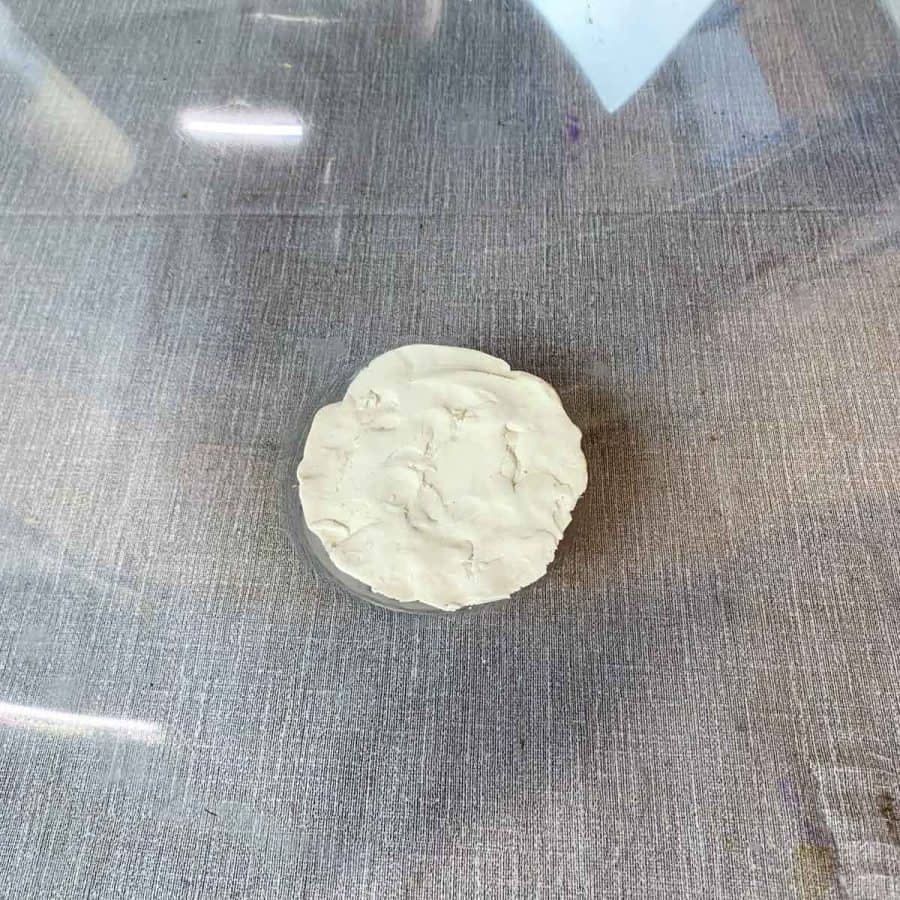
First, add the oil-based clay to the holes in the plastic bowl/dome.
The opening where the holes start is a little recessed from the bottom. So take care to press it firmly until it’s even with the inside bottom of the dome.


If you look closely at the clay in the first photo, you can see I didn’t quite get the clay high enough to avoid creating a lip (2nd photo) in the top of my mushroom cap.
So press the clay higher up the sides for a smoother transition.
If this happens, you can sand the ridges to make them less noticeable before painting the cap.
Next, place a piece of acetate approximately the size of the pressed clay over it.
Then take a permanent marker, roughly outline the area, and cut it to size with scissors.
Now place the acetate over the clay and press and rub it onto the clay so that it adheres snuggly to it.
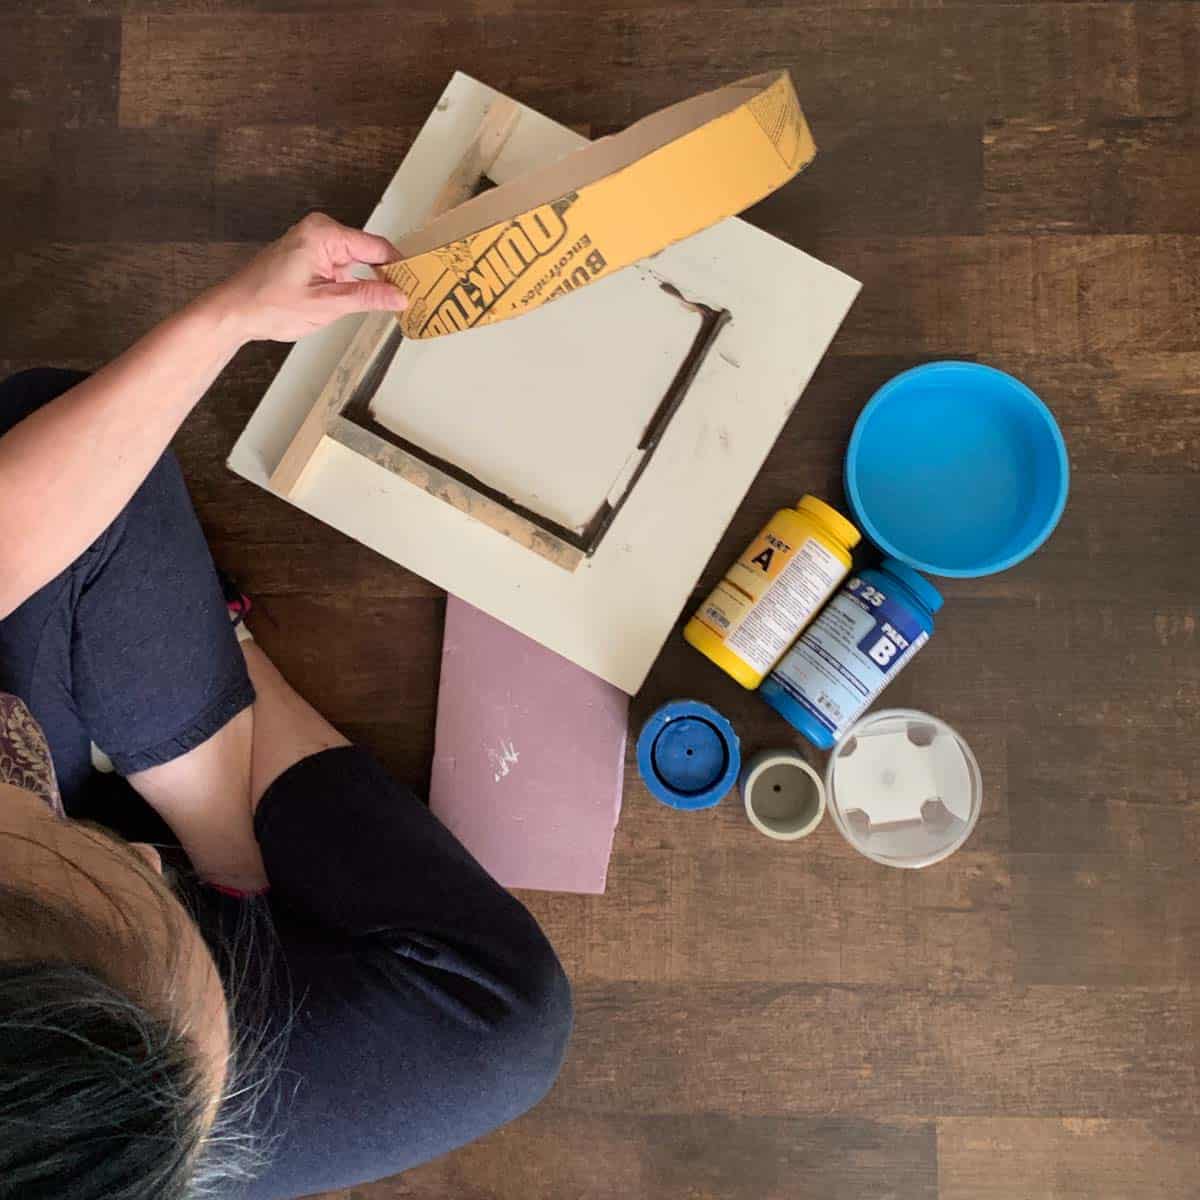
Step 5. Mix The Cement For The Cap
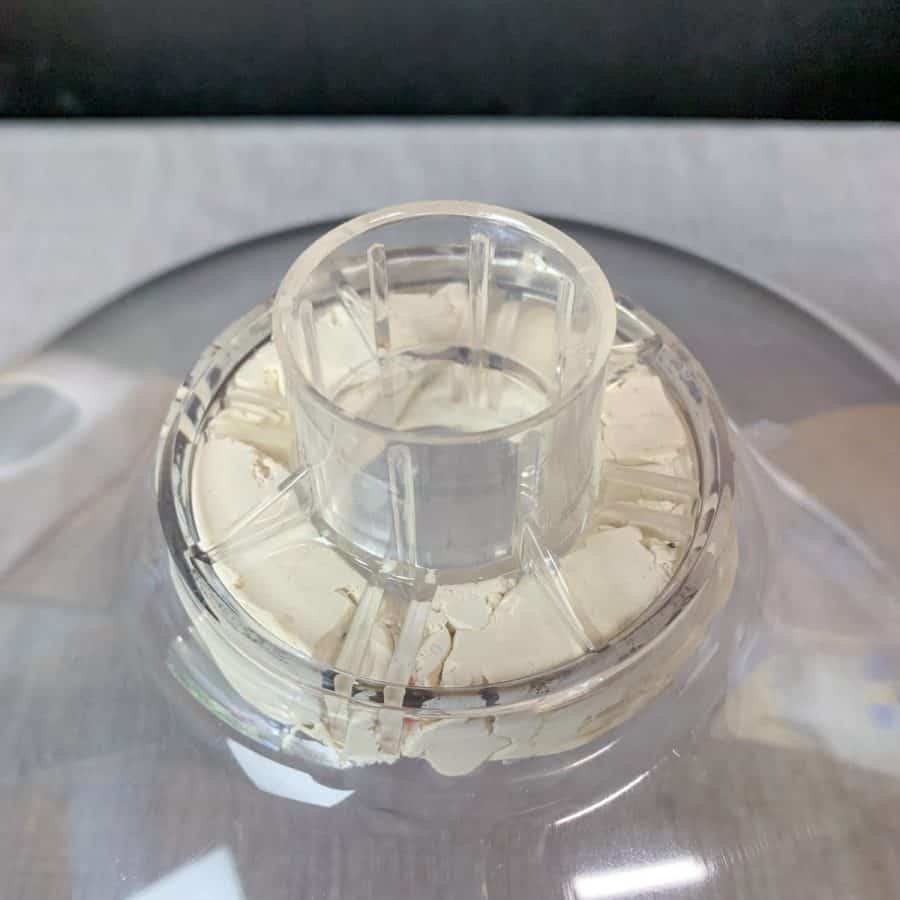
First, prepare the inner mold by filling it with damp sand.
This will help prevent it from rising to the surface while you cast the cement for the cap.
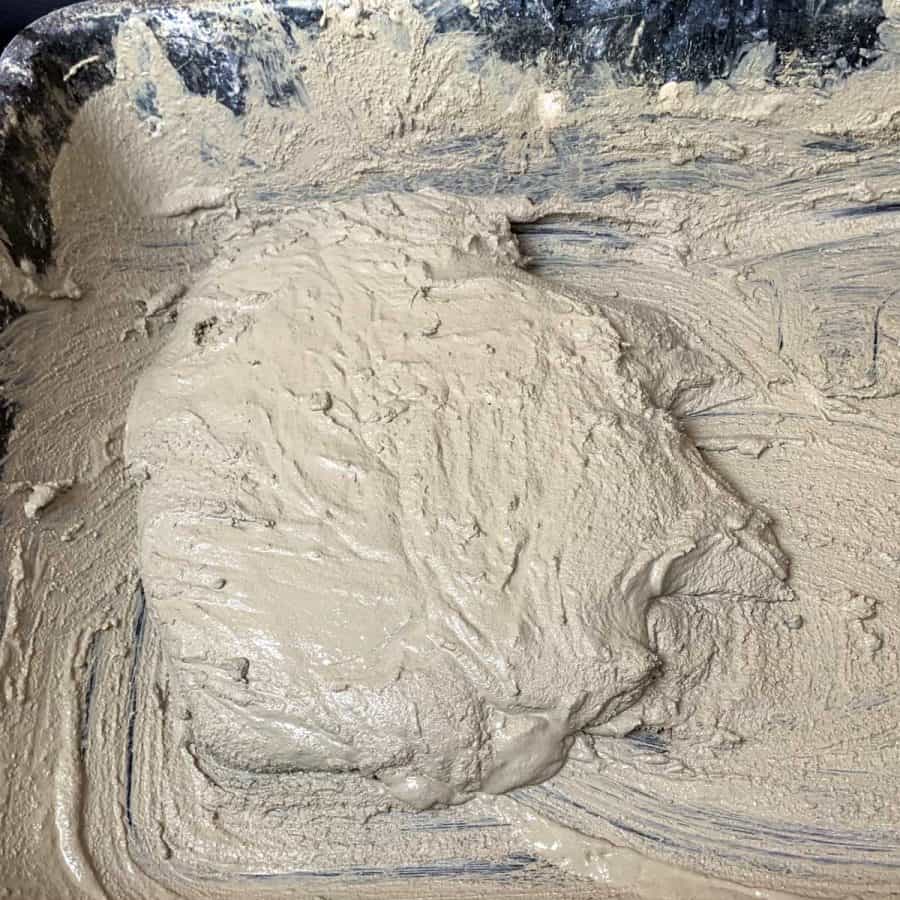
Mix the cement in the large mixing bin or large mixing bowl. The mix should be a thick milkshake batter consistency.
Then pour it into the mushroom mold. You need enough mixture to fill it about ⅔ of the way.
Note: When it comes to rapid-setting cement, it’s better to mix more than you think you need so that you don’t have one batch curing while mixing a second one because you ran short. This usually results in two different colors and textures in the finished product.
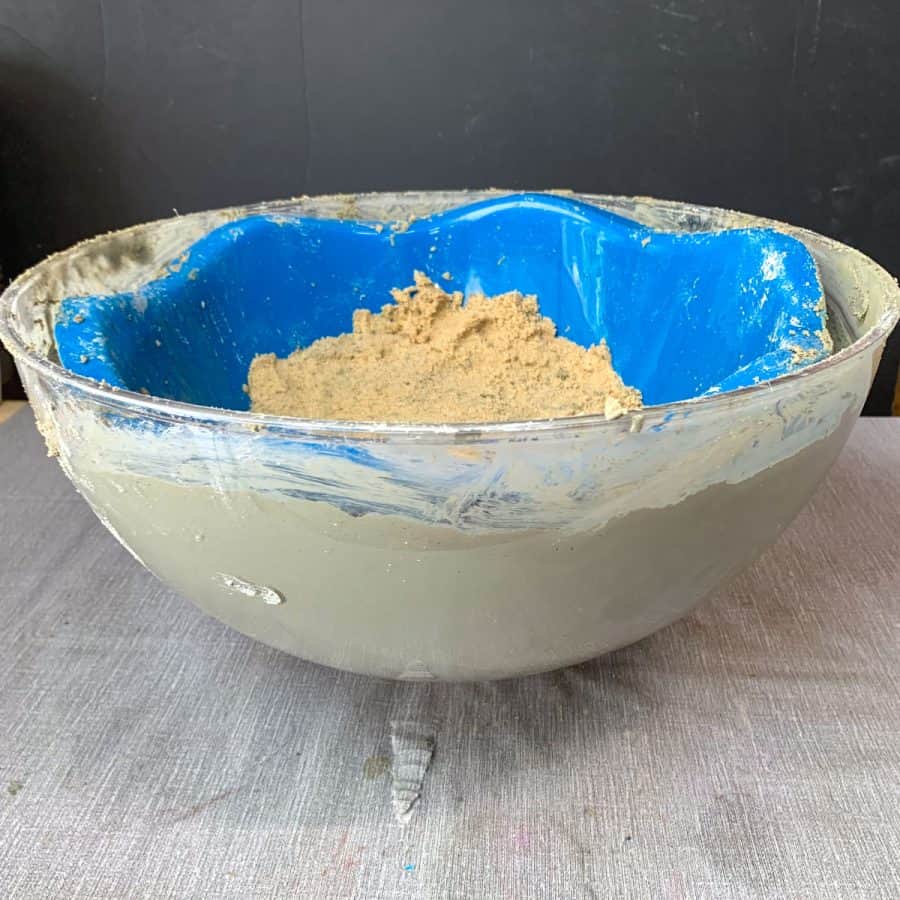
Now center the inner mold, press down, and leave about 1″ of space (or slightly more) on the bottom and sides.
I wanted the sides of my mushroom to have some waviness, much like how the scalloped inner mold looks.
Unfortunately, I was a little short on the mix to have been able to utilize the scallops well. This is because some of the mix didn’t quite reach the scallops.
So I did my best to use my finger to mimic the scallops as I sculpted around the sides, at the top edge of my mold.
Let this cure for about 2 hours or more. Though the rapid set mix has a 1 hour cure time, this mushroom’s thickness will be closer to two hours.
If the cement feels warm and not room temperature, then it’s too soon to demold.
Step 6. Connect The Mushroom Top To The Stem
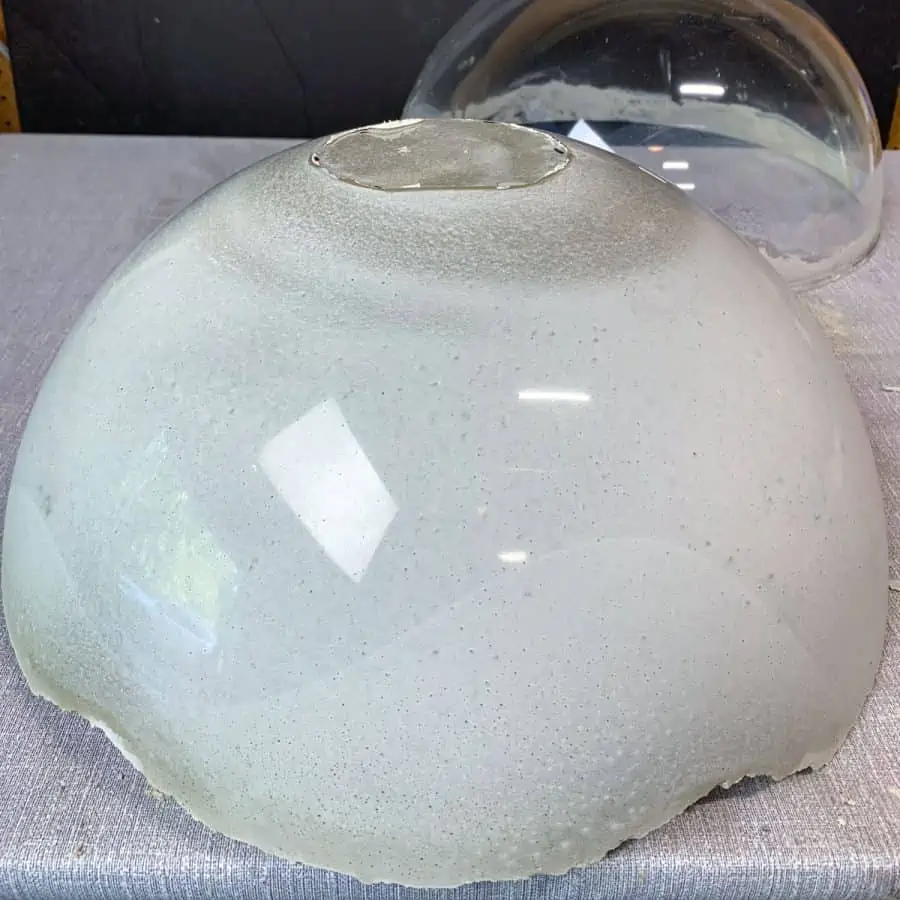
Once the cap has cured, demold it. If you have any rough edges, sand them now.
I find it easiest to sand these with a 60-grit diamond sanding sponge, but a low-grit regular piece of sandpaper will also do.
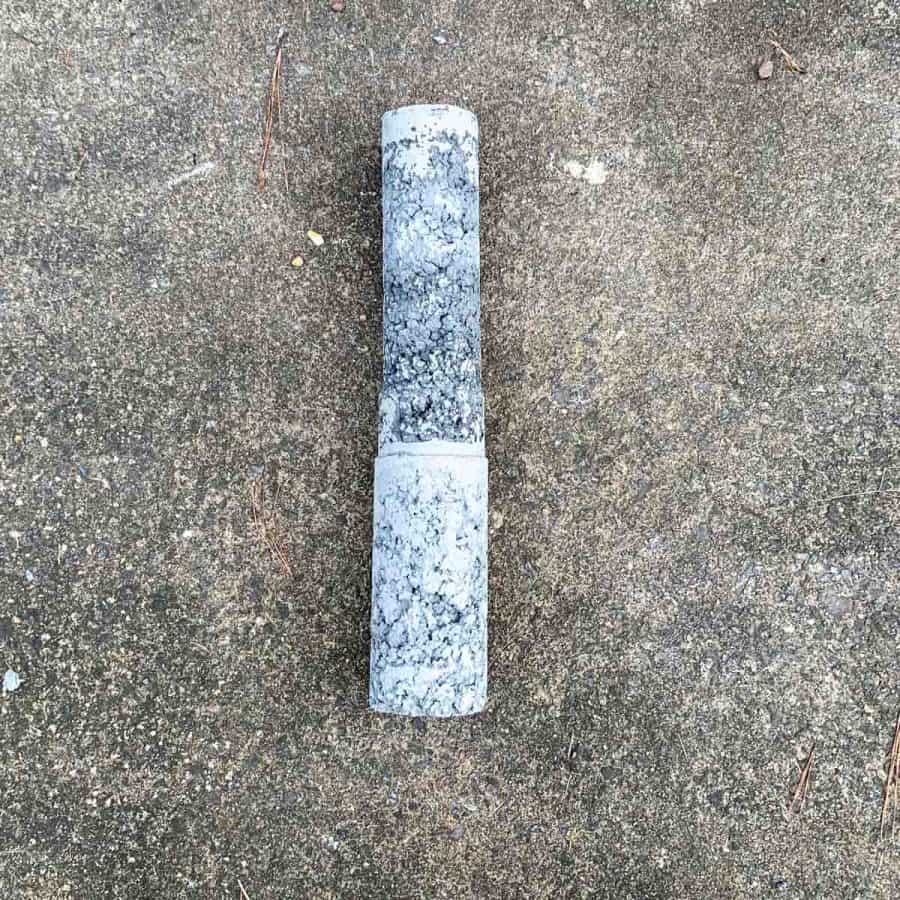
And once the mushroom’s stem has cured, remove the cardboard.
Ideally, your stem is solid and doesn’t have gaps from air pockets from excess gravel.
If it does, make a batch of rapid set mix at a milkshake consistency, rub it into the gaps, and coat the base.
This rapid-set mix bonds to most cured concrete (many others don’t). Then let it cure.
Also, if your sides of the mushroom cap are thinner than 1″, this is a good time to roll some of that mix onto the sides where it’s thinner.
Make sure you still have a 1″ minimum on the bottom.

Place the mushroom upside down on your work surface and put the base in the center.
Check if it’s level, left to right, and front to back. If it’s not, then shim underneath the cap. I just used pieces of cardboard.
Mark a line in a few different locations inside the cap that measures 1 ½” from the bottom.
This is the amount of mix you will need to secure the stem to the cap.
The marks are the stopping point for adding the wet cement.

Mix more rapid-setting cement and pour or scoop it into the bottom until you reach your marked lines.
You may need to hold the stem in place until it sets (up to 15 minutes).
I cast my concrete on a warm day, so the cement mix started setting right away, and I didn’t need to hold it in place.
Be sure the stem is stable before you let it go, or you’ll end up with a crooked mushroom stem.
Let it cure for at least 2 hours.
Step 7. Make The Design Of The Concrete Mushroom Stem
This next step will add some stability to the stem and some whimsy.
The stem is solid concrete, but the weight and size of the cap make it very top-heavy, so a little more girth helps.
Mushroom stems are somewhat curved and sometimes wavy.
And they will bulge at the bottom if they are club-shaped or have a volva, so the fabric will help add some natural shapes.
Note: I strongly recommend a second set of hands for this next part since the cap is top-heavy.
The top-heavy concrete mushroom may tip over on your table and break. If it tips, this could also hurt you, so please be very cautious.
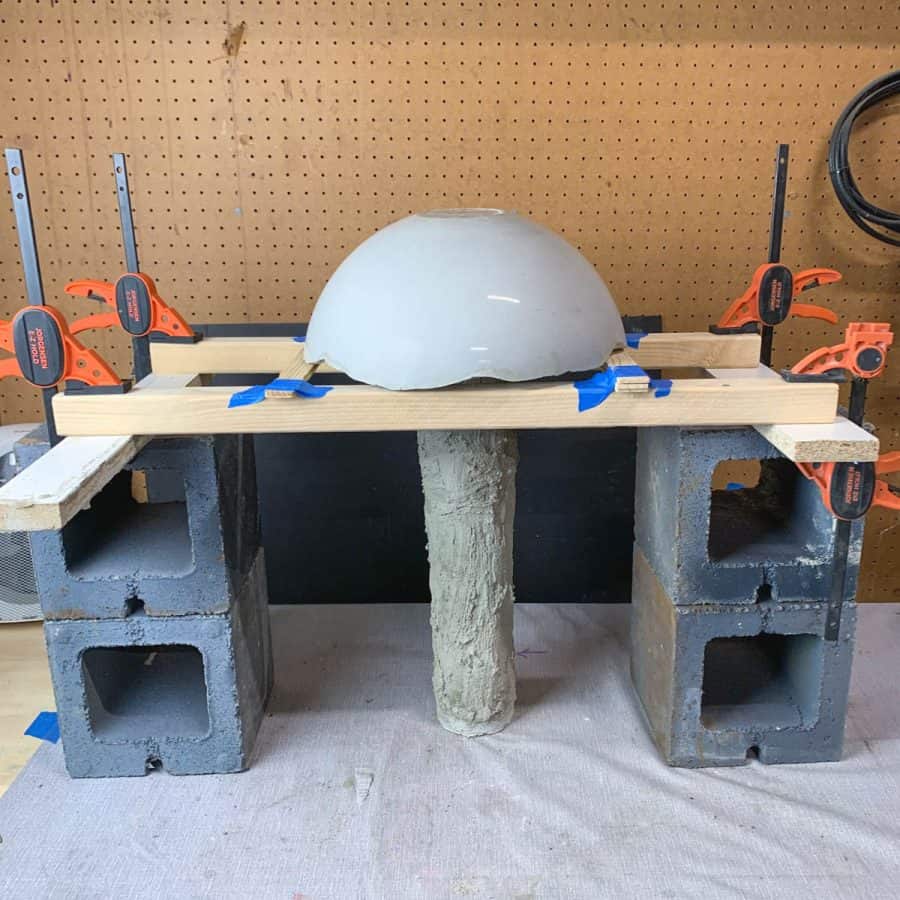
If you don’t have a second pair of hands, you can rig something like I did.
You may need different wood thicknesses to get the exact height needed to support the cap since my stem was slightly shorter.
I took 4 square cinder blocks (2 rectangular ones would work the same) and stacked two on each side of the mushroom.
Then I laid a 2×2″ across the cinder blocks, in front and back.
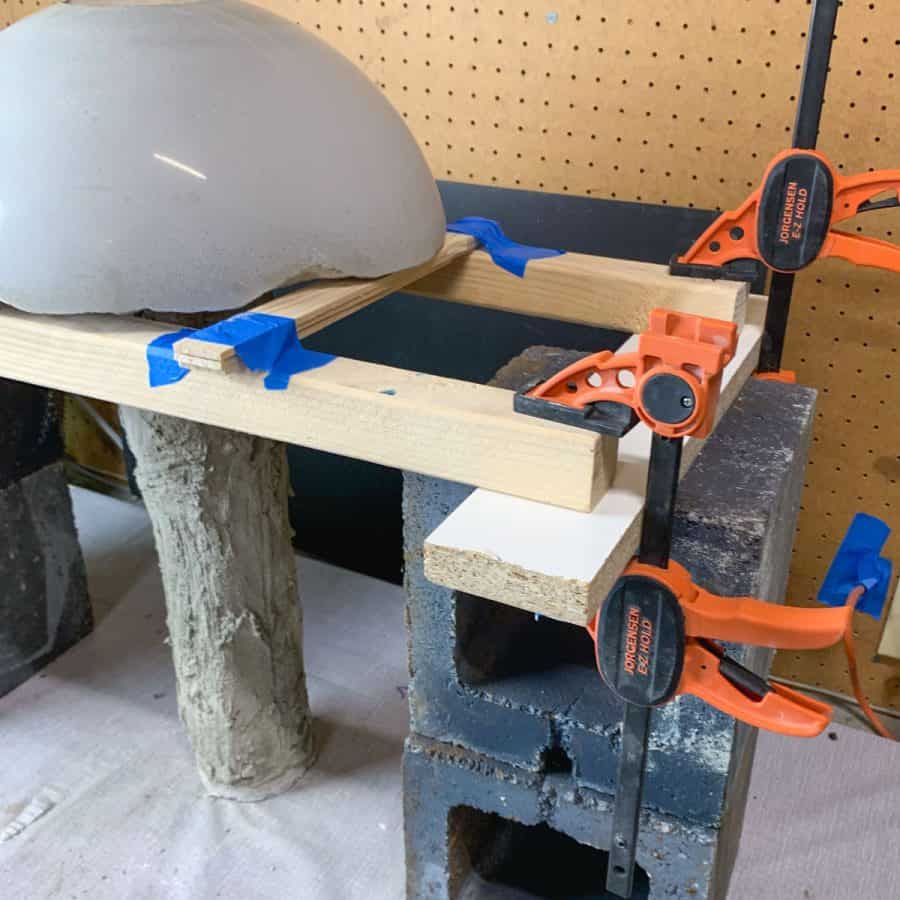
To meet the 18″ height I needed (from the table to the cap’s lip), I added a piece of ¾ melamine on each side, going front to back.
Then I clamped the wood pieces together. This made for a sturdy holder.
If you use a rectangular cinder block standing tall, it can’t tip over. My two square ones are more stable than a single rectangular one.
Once the mushroom is secured, cut 3 or 4 pieces of jersey material about 28″ long x 10″ wide, then temporarily attach them at the top.
Use the pieces of nylon stockings to tie around each one and leave 1-2″ of extra at the top.
Play with the placement to see how you want them to wrap or drape around the stem.
You’ll use the nylon stockings to secure each piece once you have the fabric soaked in cement.
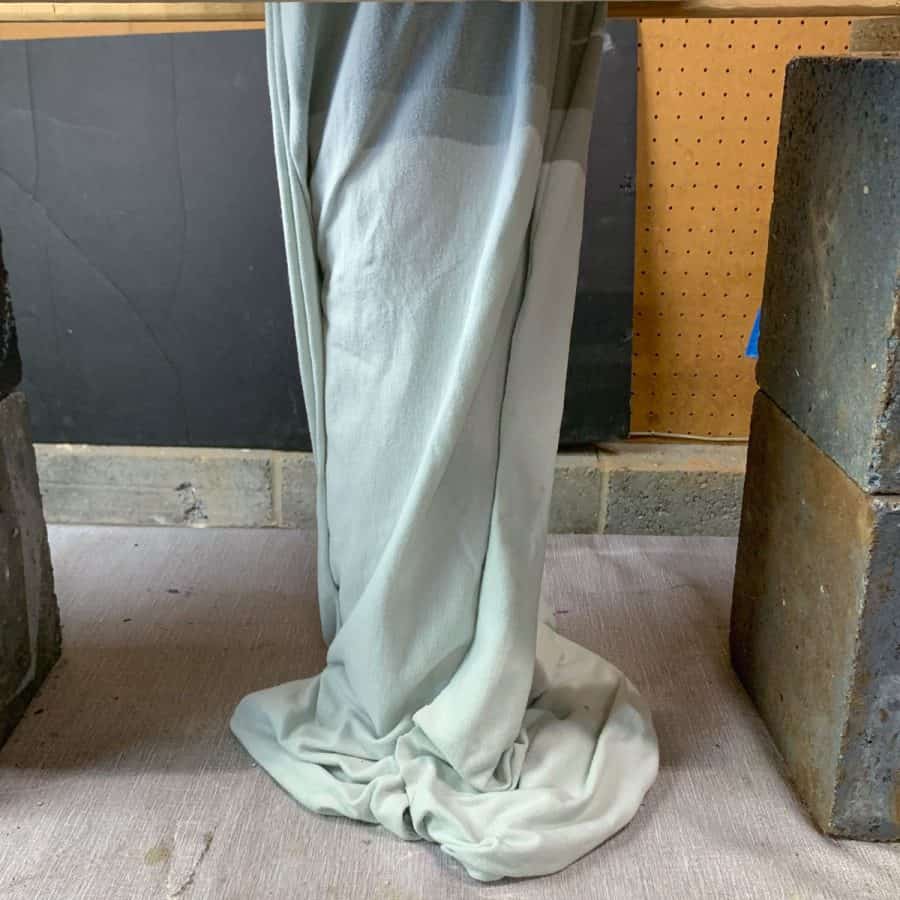
When shaping the stem, the bottoms should flare slightly to add a bit of stability.
You can make the fabric stem pieces wrinkly and wavy or keep them relatively straight. It’s up to you.
Once you have a good idea of how you want the stem to look (you may even want to take a quick pic to remember), remove the fabric pieces.
Now get a bowl large enough to fit the fabric strips and fill it with water.
Then wring out the extra water and set them next to your cement mixing bowl.
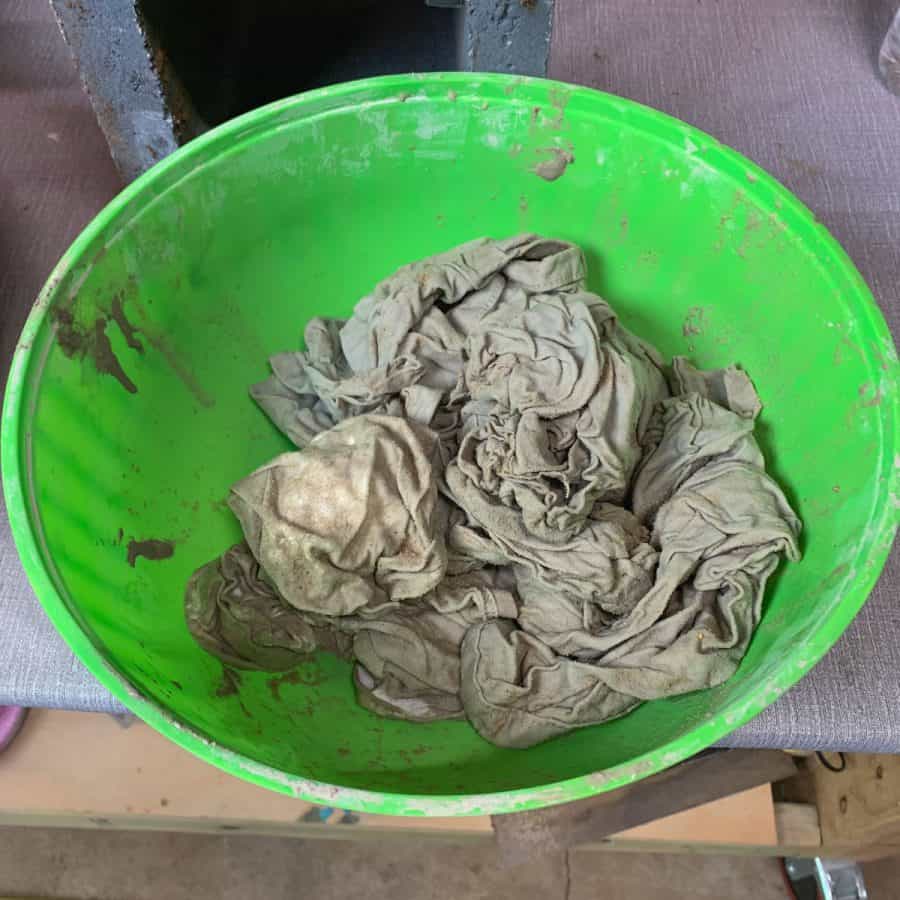
I forgot to soak mine in water before dipping them in the cement, but I remembered quickly and removed them.
That’s why the fabric looks like it was mixed with cement water in this photo.
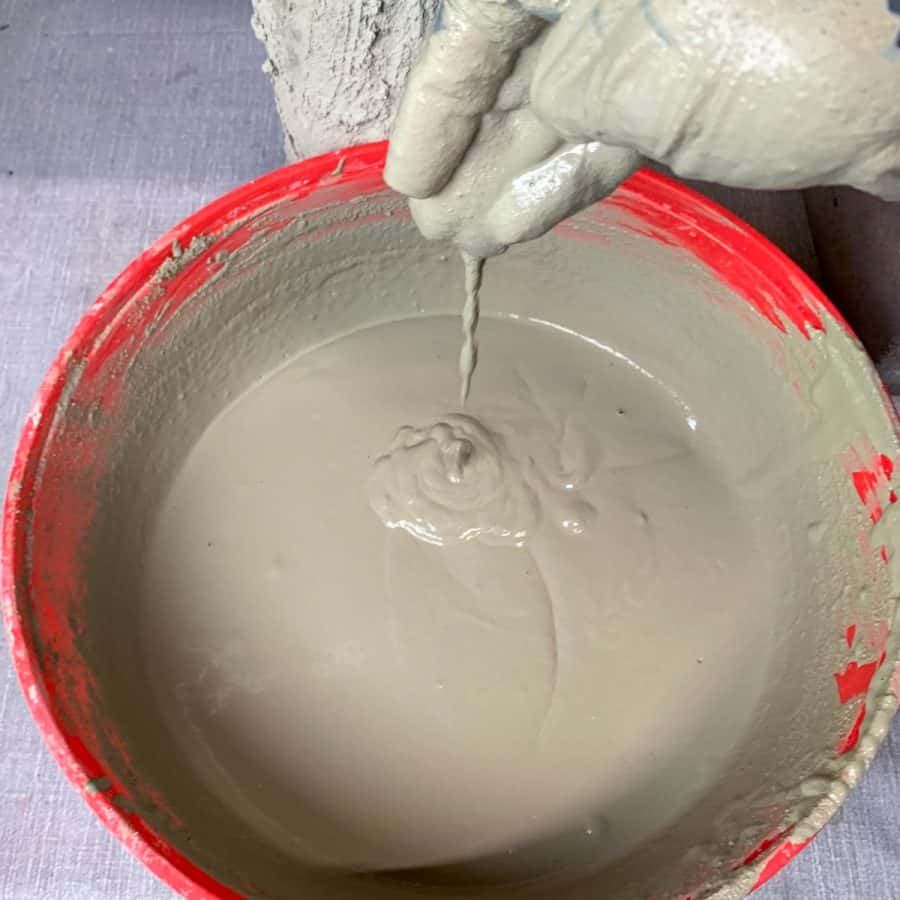
Now mix the last batch of rapid-set cement. This batch should be a very thin brownie batter consistency. It should be pretty drippy.

Take the strips of fabric and dip them into the mix to saturate them.
Then, one by one, hold a piece at the top with one hand and tie a stocking around it.
The weight of the fabric will be very heavy, so tie it tight. If nylon is in the way of your ability to work, snip the excess off now.
Otherwise, do this after all the pieces are cast.

Arrange that piece the way you did before casting it, then continue with the other 2 or 3 pieces of fabric, tying nylon around each piece.
Let this cure for a full day before painting. The cement mix will have cured within an hour, but you need the concrete not to have any moisture remaining when you paint it.
Step 8. Paint The Mushroom Cap And Stem
Take care when moving the mushroom. First, it is heavy.
Also, although the cemented fabric is strong, it’s not strong enough to be carried from there and may crack.
To carry the mushroom, place one hand under the cap and one under the solid part of the stem base.
Also, set it down, so it’s level and not tilted. This is so you don’t put too much weight on your flared bottom.
Wipe the top of the mushroom down, so there isn’t any cement dust.
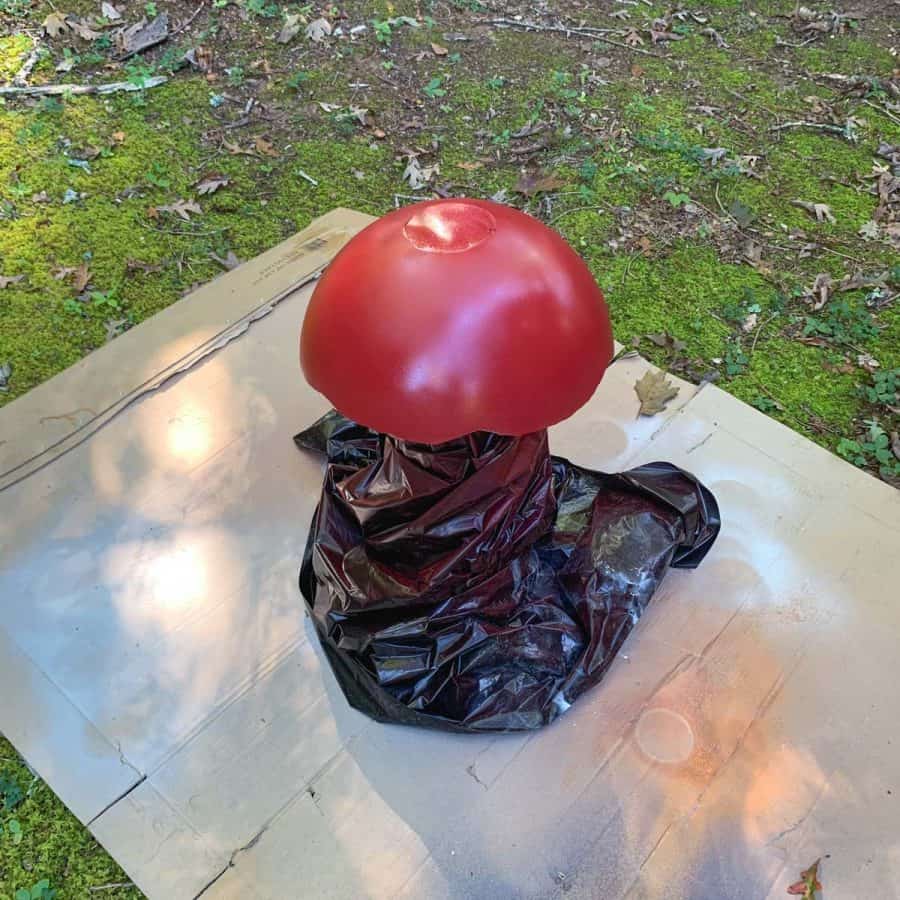
Next, you’ll start with painting the stem of the mushroom, so first, cover the cap with a plastic bag and secure it with blue tape.

Now follow the instructions on the label to spray paint the stem.
After spraying, remove the bag from the mushroom cap and let it dry for about an hour.
Note: If you’re wondering why I painted the stem, it will make it more durable and less prone to cracking.
Also, the cemented fabric is somewhat prone to mildew, so the paint will help prevent that. It’s a layer of protection in addition to using a top coat.
Additionally, the concrete tends to take on a greenish-brown tint when dipped with fabric.
Once the stem has dried, wrap it with the bag and tape it. Next, spray the red paint onto the mushroom cap.
Be sure to apply it evenly and at the distance instructed on the label. The distance with the red spray paint I linked to in the materials is 10-18″.
Also, remember to spray the lip and under the cap. Additionally, this will help protect it from moisture penetrating the concrete and affecting the paint finish from inside.
If you still see cement coming through in a few spots, paint, then apply a second coat an hour later.
Step 9. Paint The Spots

Wait a couple of hours to ensure the paint on the cap is fully dry and then paint the white spots with the latex paint.
First, use 2×2″ pieces of blue tape to get an idea of where to place the spots.
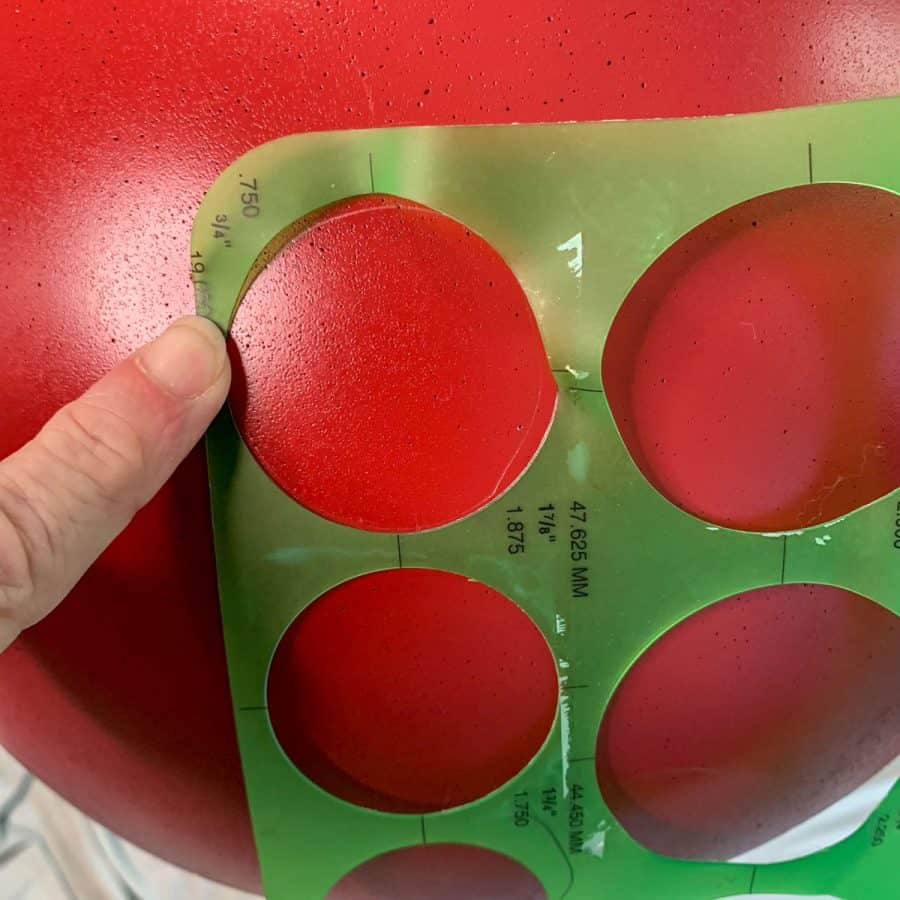
Then pull off the tape one at a time and use a circle template to draw a circle in each place you marked with the tape.
I used the ⅞” size circle for most spots and the ⅝” for a couple of spots.
Once you have your spot locations drawn, paint the spots using the medium-sized artist brush.
I recommend keeping a dry and damp paper towel next to you, just in case.

The easiest way to get nice clean lines was to carefully push the brush with the paint right up to the line, rather than using actual paint strokes.
This helped me maintain control, and I rarely needed to use the wet paper towel to clean up a line.

Let this dry for at least an hour, and apply a second coat if needed.
Step 10. Add A Clear Coat To The Concrete Mushroom
Once all paint has dried thoroughly (I recommend waiting a full day), apply the clear protective topcoat.
To be sure the mushroom’s finish would hold up under all weather conditions, I applied two coats to the top and three coats to the stem to ensure I got inside all the fabric folds.
Now place your gorgeous concrete mushroom in your garden, pathway, or yard!
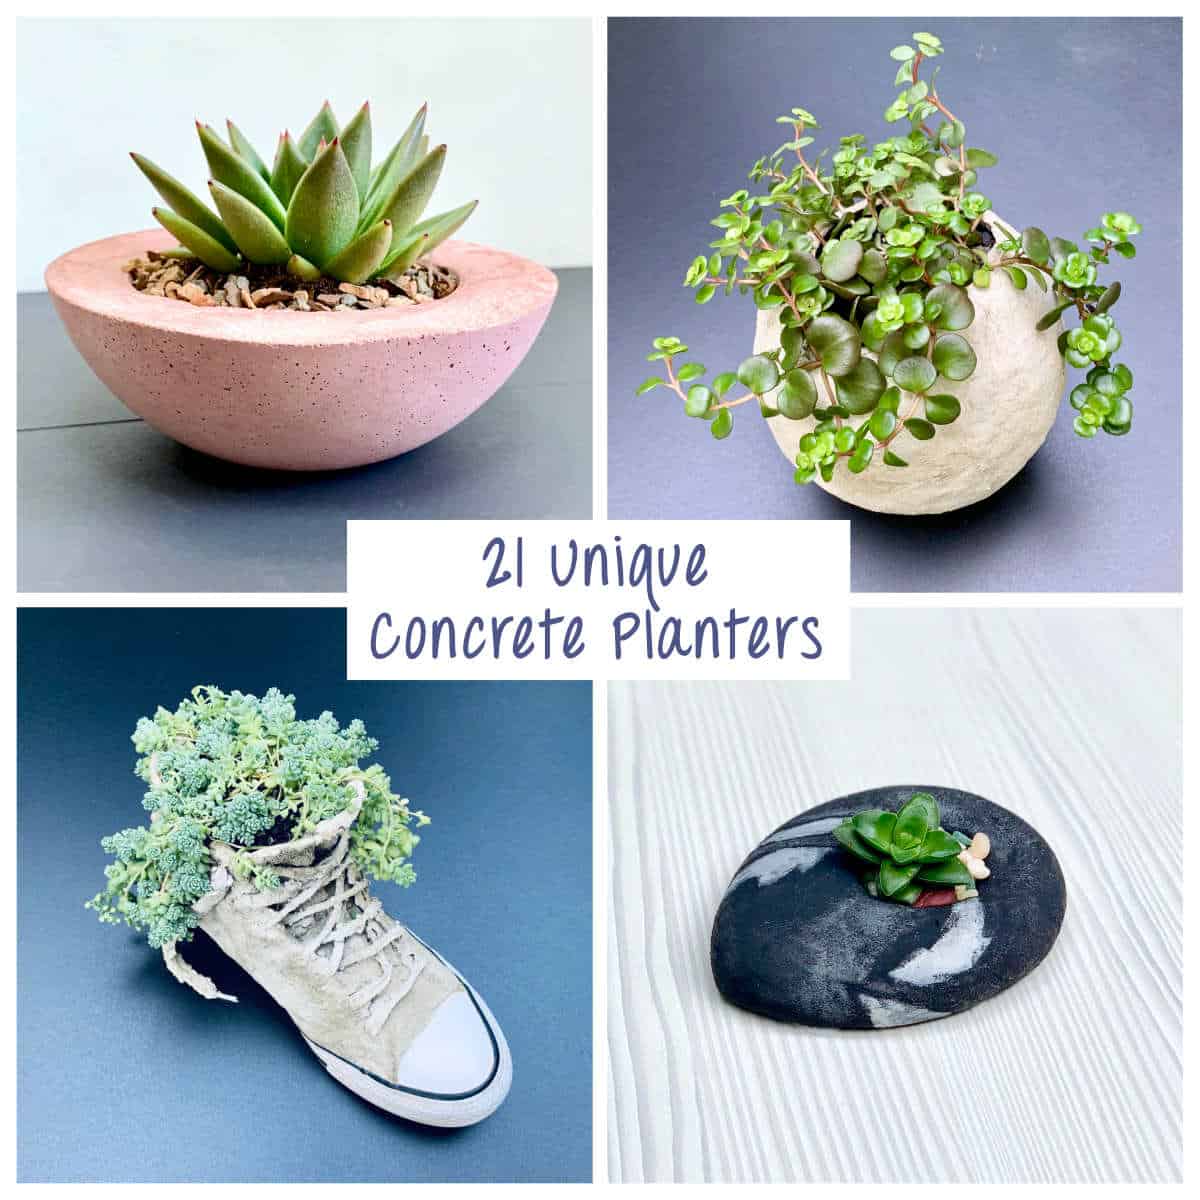
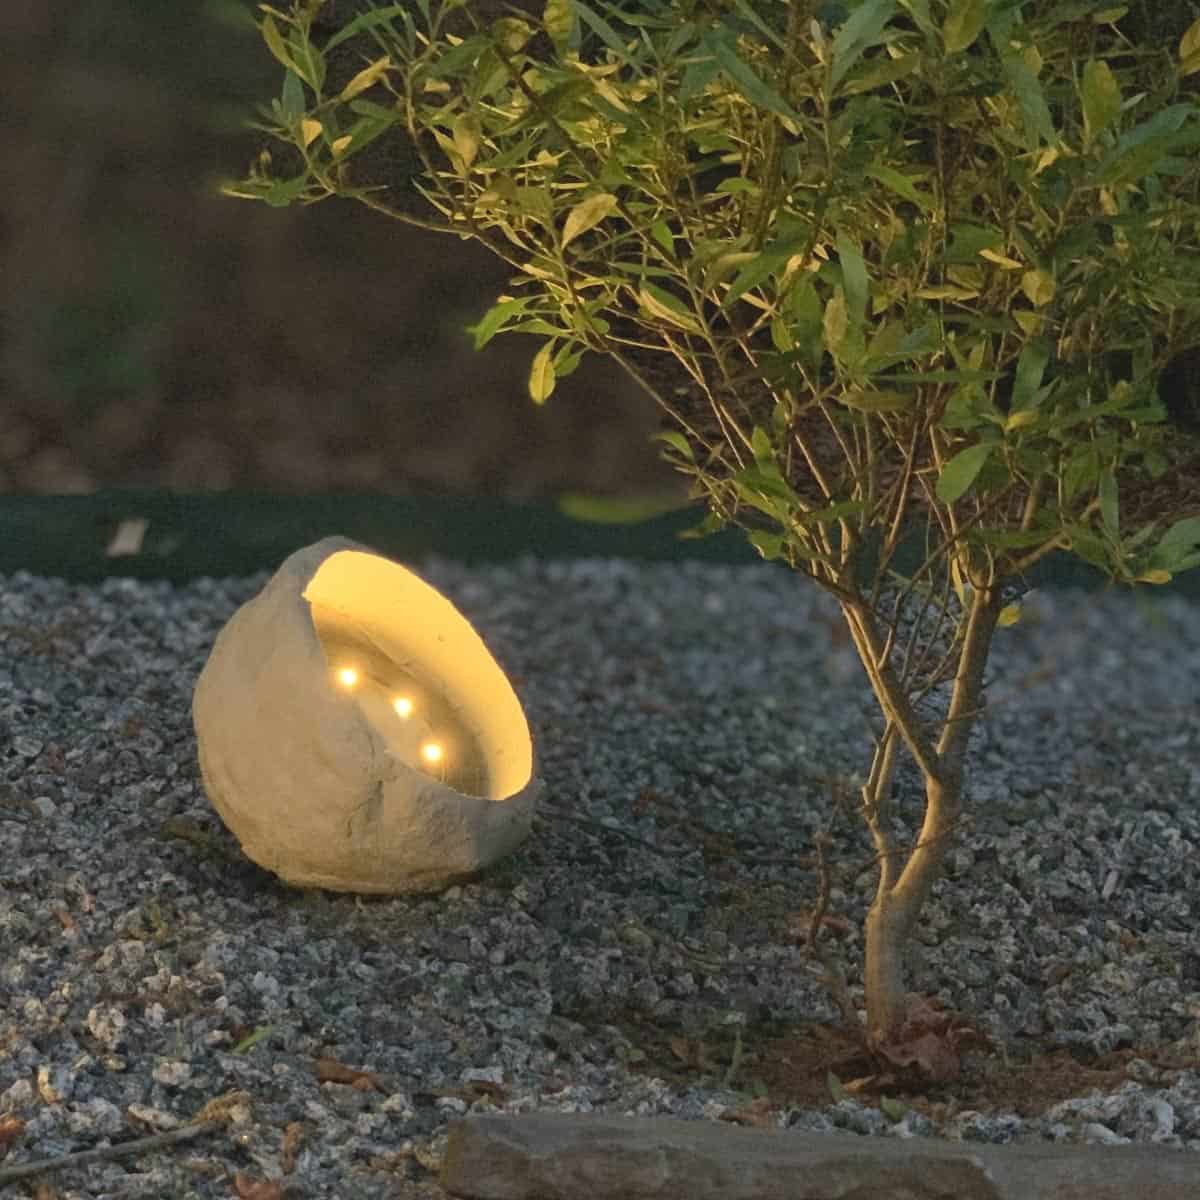
Here are a few other garden art projects you may be interested in, a concrete owl, frog painted rock, and a concrete rock cover for a solar light and this small concrete garden sphere.
Don’t forget to Pin it for later!


DIY Concrete Mushroom For Your Garden
A tutorial for how to make a DIY concrete mushroom. This gorgeous garden art is two feet high adn will look amazing in any yard or garden path.
Materials
- Cement
- Red spray paint
- 14" bowl
- Smaller bowl
- Fabric strips
- Mailing tube
Tools
- Please see the full materials list above the tutorial for details and links.
Instructions
- Prep The Tubes For The Base Of The Mushroom
- Secure The Cardboard Tubes With Duct Tape And Shim If Necessary
- Mix The Concrete For The Mushroom Base To A Peanut Butter Consistency
- Prep The Mold For The Cap Of the Mushroom WIth Clay
- Mix The Cement For The Cap To The Consistency Of A Thick Milkshake
- Connect The Mushroom Top To The Stem With A New Layer Of Cement
- Make The Design Of The Concrete Mushroom Stem With Draped Fabric, Soaked In Cement
- Paint The Mushroom Cap And Stem With Red And Off-White Spray Paint
- Paint The Spots WIth Latex Paint and Use A Circle Template
- Add A Clear Coat And Apply Additional Coats If Necessary

Love all your ideas, and I especially love mushrooms. I have made several with dollar store and thrift shop finds, but, can’t wait to try this next spring. Wish we were neighbours… lol
Hi!
Could you give the instructions for smaller mushrooms, p;ease?
Thank you.
Hi Linda,
That would require a whole new tutorial. I haven’t made those yet. I hope to some day.